I’m Stella Eve Louise, and I enjoy projects that begin with ordinary packaging rather than a long shopping list. Paper-pulp egg cartons are particularly satisfying to work with because they can be cut, painted, folded, layered, and glued without needing specialist craft equipment.
Some cartons can stay almost completely intact, while others work better when every cup and raised divider is separated. The condition of the carton should decide what it becomes. A clean, firm carton can support a wreath or organiser, while softer offcuts may still provide petals for flowers.
The most useful approach is to begin with one manageable idea, make only the cuts that project needs, and save the remaining sections. Egg-carton scraps have a habit of becoming exactly the shape you need five minutes after you nearly throw them away.
Before You Start
Use only cartons that are clean, dry, and free from visible egg residue, grease, mould, or unpleasant odours. A carton that has absorbed liquid or become badly stained is not a good craft material, no matter how promising its shape looks.
Paper-pulp and cardboard cartons are usually the easiest to cut and paint. Plastic and foam cartons behave differently and may not suit projects involving hot glue, absorbent paint, soil, or composting. Check the material before choosing the project.
Cut the lid away only when necessary. The flat lid can become a backing panel, label, leaf template, paint palette, or support for another craft. The tall centre dividers are useful too, particularly for pointed petals, noses, ears, leaves, and textured decorative pieces.
Useful Materials and Tools
- Clean paper egg cartons
- Craft scissors
- Pencil
- Acrylic or poster paint
- Paintbrushes
- White craft glue
- Hot glue and a low-temperature glue gun, when appropriate
- Cardboard scraps
- Floral wire or wooden stems
- Coloured paper
- String or lightweight cord
- Hole punch
- Potting mix and seeds
- Labels or wooden plant markers
- Decorative scraps such as ribbon, buttons, yarn, or fabric
Adults should handle hot glue and supervise children using scissors, wire, small decorations, or pointed tools. Protect the table before painting, and let every carton section dry completely before assembling it.
Turn Egg Carton Cups Into a Flower Bouquet

Each cup in a paper egg carton already resembles the centre of a flower. By trimming the rim into petals, adding colour, and attaching a stem, the packaging becomes a decorative bloom rather than remaining recognisable as kitchen waste. The original project creates daisy-like flowers using shaped carton petals, coloured centres, wired stems, and handmade leaves.
The strongest flowers usually come from firm cups that have not been crushed. The raised centre dividers can provide narrower inner petals, while the flatter lid can be cut into leaves or backing circles.
The petals do not need to match exactly. Slight differences in width and curve can make the bouquet feel more natural, particularly when several flower shapes are arranged together.
Materials and Tools
- Paper egg carton cups
- Craft scissors
- Acrylic or poster paint
- Small and medium paintbrushes
- Floral wire, paper-covered wire, or wooden stems
- Coloured paper for centres and leaves
- Craft glue or low-temperature hot glue
- Pencil
- Vase, jar, or bottle for displaying the flowers
Make the Flowers in Four Steps
- Separate and shape the cups. Cut the carton into individual sections, then trim each rim into four, six, or eight rounded petals. Round the corners gradually rather than trying to create the final flower with one large cut.
- Paint both sides of each flower. Apply light coats so the paper carton does not become saturated and lose its shape. Let the first side dry before turning the flower over, then add a contrasting centre or a softer colour around the petal edges.
- Attach the centre and stem. Cut a small paper circle for the middle or reuse a pointed carton divider as a raised centre. Make a careful opening beneath the flower, insert the stem, and secure it without leaving a large lump of glue.
- Add leaves and arrange the bouquet. Cut leaves from paper or flat carton pieces and attach them lower on the stems. Vary the flower heights in the vase so every bloom remains visible rather than forming one crowded row.
I’d paint a few flowers in quieter shades as well as brighter colours. A bouquet made entirely from strong colours can feel busy, while cream, pale pink, muted yellow, or soft green gives the eye somewhere to rest.
You could make roses by nesting several increasingly smaller cups together. A single large flower can decorate a gift box, while several blooms could be added to a mirror frame or wall panel.
Create a Hanging Flower Mobile

A flower mobile uses the same basic petal shapes as a bouquet, but the movement changes the result completely. Instead of stems, the flowers are suspended on string and arranged at different heights. The original project turns carton flowers into a lightweight hanging decoration using simple recycled materials.
Because the carton is light, you do not need a heavy support. An embroidery hoop, sturdy twig, cardboard ring, or reused wooden frame can hold several flowers when the weight is distributed evenly.
Balance matters more than exact symmetry. The mobile should hang without leaning sharply towards one side, but the individual flowers can vary in shape, colour, and length.
Materials and Tools
- Painted egg carton flowers
- Strong thread or lightweight cord
- Needle or hole punch
- Embroidery hoop, twig, or cardboard support ring
- Scissors
- Craft glue
- Paper leaves or beads, if desired
- Secure ceiling hook suitable for the finished weight
Assemble the Mobile in Four Steps
- Prepare the hanging support. Paint or wrap the hoop, twig, or cardboard ring if you want it to coordinate with the flowers. Add the main suspension cords first and check that the empty support hangs level.
- Make small hanging holes in the flowers. Pierce each piece through a strong central area rather than a thin petal edge. Thread the cord through and secure it with a knot, paper tab, or small amount of glue.
- Arrange the flowers at different heights. Begin with the longest central strand, then add shorter pieces around it. Lift the mobile after every few flowers so you can correct the balance before the design becomes crowded.
- Secure and test the decoration. Trim loose threads, reinforce every knot, and hang the mobile away from flames, heaters, and damp areas. Make sure it is positioned where children or pets cannot pull the strands.
For me, empty space is part of the design. I know it can feel tempting to use every flower you have cut, but a mobile moves more freely when the pieces are not constantly colliding.
A seasonal version could use autumn leaves, white winter flowers, or bright spring colours. You could also add lightweight paper butterflies, moons, or stars between the carton shapes.
Build a Flower-and-Leaf Wreath

The wreath begins with a simple cardboard ring and builds its texture from individual egg-carton flowers and leaves. The original project cuts a circular base, shapes the carton pieces, paints them, and arranges them around the ring.
This is a useful project for mixed offcuts because the pieces do not need to come from one carton. Large cups can become the main flowers, narrow dividers can form pointed leaves, and smaller scraps can fill spaces between them.
Plan the arrangement before gluing. Once several raised flowers are fixed in place, it becomes difficult to slide another leaf underneath without bending something.
Materials and Tools
- Egg carton cups and divider pieces
- Strong recycled cardboard
- Plate or circular object for tracing
- Pencil
- Craft scissors
- Paint and brushes
- Strong craft glue or low-temperature hot glue
- Ribbon or cord for hanging
- Optional paper leaves or small fabric scraps
Make the Wreath in Five Steps
- Cut the base ring. Trace two circles on strong cardboard and cut away the centre to create a firm ring. Keep the width consistent enough to support the flowers without remaining too visible around the edges.
- Prepare several flower shapes. Cut rounded, pointed, and layered petals from the carton cups. Make a mixture of large and small pieces so the wreath develops depth rather than appearing as one row of identical flowers.
- Paint the pieces separately. Colour the flowers, leaves, and ring before assembly. Let everything dry fully, especially inside folded petals where damp paint can remain hidden.
- Arrange before attaching. Place the largest flowers around the ring first, then add smaller blooms and leaves between them. Move the pieces until the colour and visual weight feel balanced.
- Glue and add the hanger. Lift one piece at a time, attach it securely, and return it to the planned position. Reinforce the hanging ribbon at the back and let the glue set before placing the wreath on a wall or door.
The first arrangement rarely becomes the final one. I’d photograph the layout before gluing so you have a reference after the pieces inevitably shift across the table.
A half-wreath can feel lighter and requires fewer flowers. You could also leave part of the cardboard ring wrapped in fabric, yarn, or brown paper and cluster the carton blooms on one side.
Turn the Carton Into an Animal-Themed Storage Box

A carton with its lid still attached already functions as a divided box. Decorating the outside as an animal gives the container a clear identity while keeping the inside compartments available for crayons, beads, buttons, erasers, paper shapes, or other small craft items. The original project transforms simple paper boxes into animal-themed storage containers for imaginative play and organisation.
This idea is most practical for lightweight, dry items. Paper cartons are not suitable for wet materials, heavy hardware, food storage after painting, or very small objects when young children are likely to open the box unsupervised.
The raised points and curved lid can suggest ears, noses, eyes, and faces without requiring complicated construction.
Materials and Tools
- Small lidded egg carton
- Acrylic or poster paint
- Paintbrushes
- Coloured card
- Pencil
- Scissors
- Craft glue
- Marker
- Optional yarn, fabric scraps, or large buttons
- Paper labels
Decorate the Storage Box in Four Steps
- Decide which animal suits the carton shape. A rounded lid may work for a bear, pig, frog, cat, or owl. Sketch the face lightly before painting and choose where the ears, nose, or wings will attach.
- Paint the carton with controlled layers. Apply a thin base coat and let it dry before adding the face. Avoid loading the hinge with wet paint because repeated opening may cause thick layers to crack.
- Add lightweight features. Cut ears, wings, horns, or a nose from coloured card or spare carton pieces. Glue them onto strong areas and keep decorations away from the closure so the box still opens properly.
- Organise and label the inside. Use the cups for different colours or categories of supplies. Add a simple label beneath the lid if the animal face makes the outside purpose less obvious.
I’d test the lid several times before the glue dries. An ear placed a little too close to the hinge can turn an otherwise cheerful animal into a box that refuses to open.
A larger carton could organise embroidery thread, jewellery, small toy pieces, or office supplies. For an adult craft room, skip the animal face and cover the lid with paper, fabric, or a painted geometric pattern.
Make a Small Farmyard of Egg Carton Animals

Separated carton sections can become more than flowers. The rounded cups suggest animal heads and bodies, while the centre points can form snouts, ears, beaks, horns, or tails. The original craft creates a cow, pig, goat, and turkey and arranges them together inside a small farm scene.
This project is more interesting when the carton’s existing shapes guide the animals. A protruding divider might already resemble a beak, while two adjacent cups could become a body and head without needing to build both from scratch.
For children’s crafts, use large paper features and drawn eyes rather than loose tiny decorations. That keeps the process simpler and reduces the number of small pieces rolling under the table.
Materials and Tools
- Egg carton cups and dividers
- Paint and brushes
- Coloured paper or card
- Marker
- Craft glue
- Scissors
- Cardboard for the farm base
- Craft sticks or carton strips for fences
- Yarn or paper scraps for tails and details
Create the Animal Scene in Five Steps
- Sort the carton shapes before choosing the animals. Place cups, double-cup sections, and pointed dividers on the table and turn them in different directions. Decide which shape naturally suggests each head, body, beak, or snout.
- Trim only what interferes with the design. Remove rough torn edges and create flat bases where the figures need to stand. Keep useful bumps and points rather than cutting every section into a smooth cup.
- Paint the main animal colours. Apply light coats and let them dry between layers. Add spots, feathers, hooves, or facial markings after the base colour has settled.
- Attach the paper details. Add ears, wings, horns, tails, and faces with glue or marker. Keep the features broad and simple so the animal remains recognisable without becoming overloaded.
- Build a small setting. Use the carton lid or another piece of cardboard as the ground. Add a lightweight fence, painted grass, paper hay, or a small barn backdrop, then arrange the animals once every glued section is secure.
For me, the slightly uneven carton texture suits animals rather well. There’s no need to cover every bump, because those rough areas can suggest feathers, wool, fur, or a wonderfully muddy farmyard resident.
The same method could produce ocean creatures, insects, woodland animals, or birds. A row of joined cups can become a caterpillar, while a single pointed section can form an owl or fox face.
Common Mistakes to Avoid
Using a Dirty or Damp Carton
Paint and glue will not improve a carton that still contains residue or moisture. Discard unsuitable packaging and begin with a clean, dry piece.
Cutting Every Cup Apart Immediately
Some projects need joined compartments, an intact hinge, or the flat lid. Choose the project first, then make only the cuts it requires.
Applying Too Much Wet Paint
Paper pulp absorbs moisture and may soften or lose its shape. Use light coats and let each side dry before adding more colour.
Adding Heavy Decorations
Large stones, thick clay pieces, or too much hot glue can pull the carton apart. Choose paper, yarn, lightweight buttons, fabric scraps, and small amounts of adhesive.
Gluing Before Planning the Layout
Wreaths, mobiles, bouquets, and wall decorations need balance. Arrange the pieces first and photograph their positions before making the design permanent.
Making Seed Cartons Too Wet
The cells are shallow and absorbent. Water gently, use a waterproof tray, and move seedlings when the carton begins weakening or the plants need more room.
Forgetting the Carton Hinge
Thick paint and glued decorations can prevent a storage box from opening properly. Keep the hinge flexible and test the lid throughout the project.
Treating Painted Cartons as Food-Safe
Once a carton has been painted, glued, or decorated, use it for crafts and dry storage rather than direct food contact.
Frequently Asked Questions
Which type of egg carton is easiest to repurpose?
Paper-pulp and cardboard cartons are usually easiest to cut, paint, and glue. Foam and plastic versions behave differently and may not suit the same techniques.
Do egg cartons need to be washed?
Avoid soaking paper cartons because they may weaken or lose their shape. Use only cartons that are already clean and dry, and discard any with visible residue, odour, mould, or absorbed liquid.
Can children make these projects?
Many egg-carton crafts are suitable for children with age-appropriate supervision. Adults should handle hot glue, wire, sharp scissors, pointed tools, and any small pieces that could present a hazard.
Which paint works on paper egg cartons?
Acrylic, poster, or tempera-style craft paints may work well when applied lightly. Test the paint on an offcut first and avoid saturating the carton.
Can I plant the egg-carton cups directly into the garden?
The best method depends on the carton material, plant, local conditions, and how quickly the carton breaks down. Removing or opening the bottom before transplanting may reduce restriction around the young roots.
How can I make an egg-carton craft last longer?
Keep decorative projects dry, use only enough glue to secure the pieces, and store them where they will not be crushed. A suitable craft sealer may help some painted decorations, but test it first because added moisture can affect the carton.
What can I do with the leftover scraps?
Small pieces can become leaves, flower centres, ears, noses, feathers, labels, mosaic shapes, or filler details. Sort the scraps by shape before discarding anything useful.
Let the Carton Shape Suggest Its Next Purpose
Learning how to repurpose egg cartons becomes much easier once you stop seeing only the original packaging. Each cup can become a flower or animal, the full tray can start seeds, the lid can support a miniature scene, and the entire lidded carton can organise small supplies.
Begin with the project that needs the least alteration. A seed tray uses the carton almost exactly as it is, while a bouquet or wreath gives you more room to practise cutting and painting individual sections. Then keep the sound offcuts nearby, because small carton pieces are often more useful than they first appear.
Which empty carton would you try first: a practical seed starter, a painted flower bouquet, or a small animal storage box?
]]>I’m Stella Eve Louise, and I prefer checking whether outdoor furniture can be repaired before replacing it. Metal frames are often worth keeping because their main structure is already built, proportioned, and suited to the space. The work may involve cleaning and repainting, but some pieces need more specific attention, such as repaired welds, replacement straps, fresh outdoor cushions, or professional powder coating.
The condition of the frame should guide the makeover. Light surface rust can often be handled at home, while widespread corrosion or structural damage deserves professional assessment. I don’t think a bright new coating should hide a weak joint or rusted-through leg. Refurbishing works best when appearance, comfort, and safe function are treated as parts of the same project.
Before You Start Refurbishing Metal Patio Furniture
Remove cushions, glass tops, umbrellas, loose straps, and detachable accessories before cleaning the frame. Keep bolts, caps, clips, and other hardware in labelled containers so the pieces do not quietly migrate across the garden while you work.
Inspect every chair and table carefully. Look underneath seats, around welds, inside decorative scrollwork, near bolts, and along feet that have remained in contact with damp paving. Surface rust usually appears rough or discoloured, while more serious corrosion may create holes, thinning metal, cracked joints, or areas that flex unexpectedly.
Do not continue using furniture with broken welds, rusted-through supports, unstable legs, or cracked load-bearing parts. Have damaged frames repaired professionally or remove them from use.
Useful Materials and Tools
- Work gloves
- Safety glasses
- Dust protection suitable for the work
- Mild detergent or suitable degreaser
- Bucket, sponge, and scrub brush
- Garden hose
- Wire brush
- Paint scraper
- Sandpaper or sanding sponge
- Clean cloths
- Exterior metal primer
- Exterior paint intended for metal furniture
- Spray paint or brush-on coating, depending on the project
- Painter’s tape
- Drop cloths
- Replacement bolts, feet, straps, or glides when required
- Outdoor fabric and cushion filling for seating updates
Restore a Rusted Vintage Wrought-Iron Patio Set

This vintage set includes elongated wrought-iron seating and a central glass-top table. The makeover retains the original mid-century form while addressing the rusted and tired finish through cleaning, rust treatment, priming, and spraying.
Mesh, scrollwork, and narrow metal bars create plenty of places for rust and dirt to hide. A quick spray across the visible front will not protect the underside, leg joints, or inner curves. Turning each piece several times during preparation makes the difference between a surface update and a more complete refurbishment.
Materials and Tools
- Wrought-iron furniture
- Mild cleaner or degreaser
- Stiff brush
- Wire brush and sandpaper
- Rust-removal or conversion product suitable for the metal
- Exterior metal primer
- Exterior metal spray paint
- Painter’s tape
- Drop cloth
- Replacement furniture feet, if necessary
- Glass cleaner for the detached tabletop
Restore the Set in Five Steps
- Remove the glass and inspect the frames. Lift the tabletop out with help when it is large or heavy, then store it safely away from the work area. Check every weld, support, and mesh section before spending time on cosmetic preparation.
- Clean the furniture from several directions. Scrub the frames with an appropriate cleaner, working underneath the seats and around narrow joints. Rinse away residue and allow the metal to dry completely before brushing or sanding rust.
- Remove loose paint and unstable rust. Work with a wire brush and sandpaper until flaking material no longer lifts from the surface. Rust-Oleum advises that metal furniture should be clean and dry and that loose paint should be removed before repainting.
- Prime exposed and prepared metal. Apply a compatible exterior metal primer, reaching the undersides and inner curves as well as the obvious areas. Keep each coat controlled so primer does not collect in the mesh or form drips beneath decorative bars.
- Apply the finish and reassemble carefully. Spray or brush on thin coats according to the product instructions, rotating the furniture as required. Let the coating harden before replacing the glass and dragging the furniture across the patio.
The part I would check twice is the underside. It is quite easy to admire the freshly painted seat and then discover an untouched rusty crossbar when the chair is moved.
A classic black finish preserves the traditional wrought-iron look, while deep green, muted blue, warm white, or bronze can change the character without altering the frame.
Use Professional Powder Coating for a Severely Failing Finish

Some furniture has moved beyond a practical hand-sanding project. This wrought-iron set was stripped to bare metal and professionally powder coated, allowing the original frame to remain in use after the failing surface was removed.
Powder coating is particularly worth considering for a well-made vintage set, intricate furniture with many inaccessible corners, or frames covered in several layers of peeling paint. It is a professional process rather than a simple substitute for a can of outdoor spray paint.
Before requesting the work, decide which components need to be removed and whether the furniture requires welding, replacement bolts, new feet, straps, slings, or cushions after coating.
What to Discuss With a Restoration Specialist
- The type and condition of the metal
- Rust-through or cracked welds
- Removal of old paint and corrosion
- Whether the furniture can be disassembled safely
- Protection of threads, holes, and moving joints
- Available outdoor coating colours and textures
- Replacement feet or glides
- Reinstallation of straps, slings, glass, or cushions
- Care instructions for the completed finish
Prepare for Professional Restoration in Four Steps
- Decide whether the frame justifies professional work. Consider the furniture’s construction, comfort, size, and replacement difficulty. A strong vintage set with surface deterioration may be a better candidate than thin metal already weakened by corrosion.
- Inspect and document the damage. Photograph rust, broken welds, missing hardware, and bent areas before delivery. Ask whether repairs will be completed before the new coating is applied.
- Remove non-metal components as instructed. Cushions, glass, plastic feet, straps, and some fasteners may need separate treatment. Label anything that must be returned to a specific chair or location.
- Reassemble without damaging the coating. Follow the specialist’s curing and care instructions. Use suitable protective tools around bolts and add glides before placing the furniture back on rough paving.
I’d ask to see a physical colour sample rather than choosing from a phone screen. Outdoor light can make a dark bronze, charcoal, and black finish appear surprisingly different.
Powder coating does not have to mean plain glossy black. Textured dark finishes, soft neutrals, muted greens, or brighter colours can preserve the original design while changing how it sits in the garden.
Give Decorative Metal Chairs a Textured Black Finish

These decorative chairs were restored through rust and old-coating removal, priming, and a textured black finish. The slight surface texture suits detailed metalwork because it creates a consistent appearance without demanding a mirror-smooth result across every curve.
A textured finish may visually soften minor pitting that remains after stable rust has been removed. It should not be used to conceal loose scale, active corrosion, or structural thinning.
Materials and Tools
- Decorative metal chairs
- Cleaner
- Small wire brushes
- Abrasive pads
- Exterior metal primer
- Textured exterior metal coating
- Small detail brush, if brush application is permitted
- Spray protection and drop cloths
- Replacement feet
Refinish Detailed Chairs in Four Steps
- Clean between every decorative element. Use narrow brushes to reach scrolls, intersections, and patterned backs. Dirt trapped in those areas may loosen later and take the fresh coating with it.
- Remove loose corrosion without flattening the design. Work with smaller brushes and folded abrasive pads rather than forcing a large power tool into narrow curves. Stop and seek repair when a decorative section feels thin or begins breaking.
- Prime from several angles. Turn the chair upside down and sideways so the underside of each curve receives coverage. Thin, repeated passes usually reach intricate shapes more evenly than one heavy coat.
- Apply the textured finish consistently. Keep the application distance and movement controlled so some sections do not become much rougher than others. Let the finish harden before stacking or placing cushions on the chairs.
I know textured paint can feel as though it will forgive everything underneath, but preparation still matters. Texture can soften small visual imperfections; it cannot glue unstable rust back onto the chair.
Deep bronze, graphite, or muted green can provide a similar effect. A slight texture can also help traditional furniture feel less stark than a high-gloss black coating.
Replace Cracked Vinyl Straps on Metal Patio Chairs

A strong frame does not need to be discarded because its vinyl straps have cracked, stretched, or faded. This project replaces the worn support material, restoring both the chair’s comfort and its appearance.
Strap replacement requires accurate sizing and the correct fastening method. Different furniture designs use clips, rivets, pegs, or hidden attachments, so record the original construction before removing everything.
Materials and Tools
- Metal chair frame
- Replacement outdoor vinyl straps compatible with the chair
- Correct replacement fasteners
- Screwdriver or fastening tools
- Measuring tape
- Pliers
- Gloves
- Cleaner
- Container for old hardware
- Manufacturer’s installation instructions
Replace the Straps in Five Steps
- Photograph the existing pattern. Record how every strap crosses, wraps, overlaps, and attaches beneath the frame. Measure several intact sections before removing them because badly stretched straps may no longer represent the original size.
- Remove the old material carefully. Release the fasteners without bending the frame or enlarging attachment holes. Clean the exposed rails and inspect them for corrosion hidden beneath the straps.
- Refinish the frame before installing new straps. Remove rust, prime exposed metal, and apply the selected finish while the frame is unobstructed. Let the coating harden fully so the new straps do not cut into soft paint.
- Install the replacement system as directed. Use the correct strap dimensions and approved fasteners for the furniture design. Maintain even tension from one section to the next rather than pulling individual straps as tightly as possible.
- Test the chair gradually. Check every connection and press the seat by hand before sitting. Stop using the chair if a rail, fastener hole, or structural part shows movement or damage.
The part I would not guess is the strap length. A small measuring mistake repeated across a whole chair can create a seat that is either loose or extremely difficult to assemble.
You can reproduce the original colour or introduce contrast against the newly painted frame. Alternating two compatible strap colours can create a more graphic finish without changing the chair’s structure.
Update the Cushions on a Restored Wrought-Iron Set

Once the metal frame is sound and freshly finished, worn cushions can still make the set look unfinished. This vintage wrought-iron makeover pairs the restored furniture with new outdoor fabric, keeping the original set while improving its softness and colour.
Outdoor cushions need fabric and internal materials appropriate for the environment where they will be used. Ordinary indoor fabric may fade quickly or hold moisture, while old filling may remain compressed or carry odours even after the cover is changed.
Materials and Tools
- Existing cushions or correctly sized replacements
- Outdoor upholstery fabric
- Outdoor-suitable thread
- Sewing machine or upholstery service
- Fabric scissors
- Measuring tape
- Pins or clips
- Replacement foam or filling when necessary
- Zips, hook-and-loop tape, or ties
- Paper for pattern pieces
Refresh the Cushions in Four Steps
- Evaluate the complete cushion, not only the cover. Check the filling for compression, crumbling, moisture damage, and odour. Reuse it only when it remains clean, supportive, and suitable for outdoor seating.
- Measure before taking the old cover apart. Record the length, width, depth, seam positions, ties, and closure. The existing cover can become a pattern, but allow for distortion if it has stretched over time.
- Cut and sew the new covers. Position the pattern carefully when using stripes or large motifs. Use strong seams, reinforce the ties, and include a closure so the covers can be removed for cleaning when practical.
- Fit and secure the cushions. Insert the filling evenly, close the cover, and attach the cushion to the chair without wrapping ties around sharp or rusty areas. Store or protect the cushions according to the fabric’s care requirements.
For me, fabric is where the personality of the finished set becomes clearest. A black frame can support florals, stripes, warm neutrals, or strong solid colours without needing another decorative treatment.
A lower-cost variation is to make simple removable slipcovers for sound cushions. You could also keep neutral seat cushions and add smaller patterned back cushions that are easier to replace later.
A Practical Five-Step Refurbishing Method
The individual projects require different repairs, but most metal patio-furniture refurbishments follow the same overall order.
- Inspect the structure and separate the components. Remove cushions, glass, straps, slings, feet, and hardware where appropriate. Repair broken welds, rust-through, and unstable joints before preparing the finish.
- Clean and dry the metal. Remove outdoor grime, oils, pollen, and loose dirt using a suitable cleaner. Rinse thoroughly and wait until water has left the joints, tubes, and decorative recesses.
- Remove unstable paint and rust. Use a wire brush, scraper, or sandpaper to reach a firm surface. Official metal-furniture instructions from Rust-Oleum and Krylon both emphasise cleaning, drying, and removing flaking paint or rust before recoating.
- Prime and paint with compatible exterior products. Protect threaded sections and moving parts, then apply controlled coats from several angles. Read the product label for application distance, weather limits, recoating, safety precautions, and curing requirements.
- Replace the comfort and finishing components. Reinstall glass, straps, slings, cushions, glides, and hardware only after the coating is ready. Inspect the finished furniture carefully before returning it to regular use.
Common Mistakes to Avoid
Painting Over Active Rust
Paint may temporarily hide rust, but loose corrosion can continue lifting the new finish. Remove unstable material and use a preparation and primer system intended for exterior metal.
Skipping the Structural Inspection
A fresh coating does not repair broken welds, weakened legs, or rusted-through supports. Test the stability before beginning and again before using the furniture.
Sanding Unknown Old Paint Without Testing
Older or unidentified coatings may create hazardous dust. Determine whether lead paint may be present and follow appropriate lead-safe methods before scraping or sanding.
Painting Damp Metal
Water can remain inside joints, tubing, mesh, and decorative details after the visible surface looks dry. Give the furniture enough time to dry before priming.
Applying Heavy Spray Coats
Heavy paint may run, collect beneath rails, and remain soft around joints. Apply several controlled passes rather than trying to create complete coverage immediately.
Forgetting the Underside
Rust commonly develops beneath seats, table edges, feet, and lower supports. Turn the furniture during cleaning, preparation, priming, and painting.
Reassembling Too Early
Straps, glass, cushions, and hardware can mark a coating that has not hardened sufficiently. Follow the curing instructions for the selected products.
Using Indoor Fabric Outdoors
Indoor upholstery fabric and filling may not cope well with moisture and sunlight. Choose materials intended for the furniture’s actual location and storage conditions.
Replacing Straps Without Recording the Pattern
Once all the old straps have been removed, the original crossing and attachment sequence may be difficult to reconstruct. Photograph and measure first.
Frequently Asked Questions
Can badly rusted metal patio furniture be saved?
Surface rust can often be removed and refinished. Furniture with deep corrosion, holes, fractured welds, or weakened load-bearing parts needs professional repair or replacement rather than cosmetic painting.
Do I need to remove all the old paint?
Remove paint that is loose, flaking, poorly bonded, or incompatible with the planned coating. Sound existing paint may remain when the selected primer or finish permits it, but glossy areas may require preparation for adhesion.
Should I use spray paint or brush-on paint?
Spray paint can reach narrow bars, mesh, and decorative metal evenly, while brush-on products may offer more control in some settings. Choose an exterior metal coating suitable for the furniture and follow its application instructions.
Is primer necessary on metal patio furniture?
Bare metal, rust-treated sections, repairs, and major finish changes commonly benefit from a compatible metal primer. Some all-in-one products may have different requirements, so rely on the selected system’s directions.
Can aluminium patio furniture rust?
Aluminium does not develop the same red iron rust seen on steel or wrought iron, but its surface can still oxidise, corrode, stain, or lose coating adhesion. Identify the metal and select preparation products made for it.
Is powder coating better than ordinary paint?
Powder coating may be useful for valuable furniture with widespread finish failure or intricate frames that are difficult to prepare by hand. It requires professional equipment, so the decision depends on the furniture’s condition, value, and intended use.
Can I reuse the original cushions?
Yes, when the filling remains clean, supportive, dry, and undamaged. Replace it when it has broken down, remained wet, developed odours, or no longer supports the user comfortably.
How should I care for refurbished patio furniture?
Clean it gently, repair chips before rust spreads, and avoid leaving feet in standing water. Protect or store cushions during unsuitable weather and follow the coating manufacturer’s maintenance advice.
Keep the Strong Frame and Renew What Has Worn Out
Learning how to refurbish metal patio furniture begins with separating surface wear from structural failure. Faded paint, light rust, cracked straps, and tired cushions can often be addressed. Weak welds, rusted-through supports, and unstable frames need proper repair before appearance becomes the priority.
Begin with one chair rather than dismantling the complete patio at once. Clean it, inspect it, test the preparation method, and see how the chosen coating behaves across the curves and joints. Then you can approach the remaining pieces with a clearer process.
The finished furniture does not need to copy its original appearance. A vintage wrought-iron set can become charcoal, green, cream, or bronze. Old straps can introduce colour, and new cushions can connect the frames to the rest of the outdoor space.
Which part of your patio set needs attention first: the rusted metal frame, the straps, or the cushions?
]]>I’m Stella Eve Louise, and I like laminate furniture because its plain shapes leave plenty of room for change. A basic dresser can gain an open shelf, a flat cabinet can take fluted trim, and a damaged top can be given a painted faux-wood finish instead of pretending it is solid timber.
The important part is recognising what you are working with. Laminate is a decorative surface bonded to another material, often particleboard, fibreboard, or a similar manufactured panel. It should not be treated exactly like solid wood. You can paint laminate successfully, but ordinary wood stain will not soak into it as it would into real timber.
I don’t think every makeover needs complicated building work. Sometimes thorough cleaning, the right bonding primer, restrained colour, and better hardware are enough. In other cases, changing one damaged section can make the whole piece useful again.
Identify the Surface and Test the Furniture
Remove drawers, shelves, doors, and hardware where practical. Label each part so it returns to the correct position, especially when older furniture has slightly uneven openings.
Inspect the piece for:
- Peeling or lifting laminate
- Swollen particleboard
- Chipped corners
- Loose edge banding
- Scratches and dents
- Grease or furniture-polish residue
- Wobbly legs
- Loose hinges
- Damaged drawer runners
- Missing screws
- Water marks
- An unstable back panel
- Areas that rub when drawers or doors move
A small chip can often be filled and painted. A broad area of swollen or crumbling substrate is more serious because paint cannot restore material that has lost its strength.
Check whether the finish is laminate, veneer, melamine, painted wood, or plastic-coated board. Veneer is a thin layer of real wood and may allow limited wood-finishing methods. Laminate is a non-porous decorative layer, so direct staining is not the correct approach.
Clean the furniture thoroughly before sanding or priming. Grease, polish, dust, and cleaning-product residue can prevent the new coating from bonding.
Whether you need to sand depends on the exact primer and paint system. Some bonding primers are designed for dense glossy surfaces and may reduce or eliminate sanding, while other systems still require light scuffing. Follow the instructions supplied with the products you choose rather than mixing advice from several unrelated systems.
When scuffing is required, sand lightly. The aim is usually to dull the slick finish, not remove the entire laminate layer. Heavy sanding can expose the weaker board underneath.
Useful Materials and Tools
- Screwdrivers
- Labelled containers for hardware
- Suitable cleaner or degreaser
- Clean lint-free cloths
- Fine sanding sponge
- Dust mask and eye protection
- Filler compatible with the damaged area
- Filling knife
- Strong adhesive for loose edge banding
- Clamps
- Bonding primer suitable for laminate
- Furniture or cabinet paint
- Fine-finish roller
- Synthetic paintbrush
- Small detail brush
- Painter’s tape
- Moulding, fluted trim, bamboo strips, or other decorative material
- Mitre shears, hand saw, or suitable cutting tool
- Wood glue or construction adhesive suited to both surfaces
- Furniture legs or a replacement base
- New handles or knobs
- Protective topcoat when required by the paint system
Work with good ventilation and follow the safety instructions for cleaners, primers, paints, adhesives, and fillers. Wear eye protection when cutting trim or drilling hardware holes, and secure tall furniture to the wall when tip-over could be a risk.
Paint a Plain Laminate Cabinet With a Bonding Primer

Painting is the most direct way to change laminate furniture, but the visible colour is only the final layer. The selected cabinet makeover emphasises thorough degreasing and an adhesion primer designed for slick surfaces.
A bonding primer creates an anchor between the non-porous laminate and the decorative paint. Paint manufacturers also recommend specialised primers for laminate furniture and other difficult glossy surfaces.
Materials and Tools
- Laminate cabinet or dresser
- Degreasing cleaner
- Fine sanding sponge, when required
- Bonding primer
- Furniture or cabinet paint
- Fine-finish roller
- Synthetic brush
- Painter’s tape
- New hardware, if desired
Repaint the Cabinet in Five Steps
- Take the furniture apart where practical. Remove doors, drawers, shelves, handles, and hinges. Label every component and keep the screws together so reassembly does not become a small furniture-themed mystery.
- Clean the surface carefully. Remove dust first, then clean away grease, polish, and residue. Rinse or wipe the surface as directed by the cleaner and allow it to dry fully.
- Prepare for the chosen primer. Lightly scuff the laminate only when the coating instructions require it. Remove every trace of sanding dust, then test the primer on a hidden section.
- Prime and paint in controlled layers. Apply the bonding primer evenly and allow it to cure according to its directions. Follow with thin coats of furniture paint, using a small brush around corners and a fine roller across larger panels.
- Reassemble without rushing. Let the finish reach the handling or curing stage stated by the manufacturer. Refit the hardware carefully and avoid dragging doors or drawers across freshly coated edges.
The part I would watch closely is the paint around the door and drawer openings. A finish can look smooth across the front but still chip where two newly painted surfaces rub against each other.
For a quieter makeover, paint only the doors and leave the outer frame unchanged. You could also use one colour outside and a softer contrasting shade inside the cabinet.
Turn a Broken Bottom Drawer Into an Open Shelf

A broken drawer does not always mean the complete dresser has failed. This makeover removes the damaged bottom drawer and turns the empty space into an open shelf, allowing the remaining storage to continue working.
The opening needs a finished base and clean side edges. You may also need to remove unused runners, fill screw holes, or add a panel so the new compartment looks intentional.
Materials and Tools
- Laminate dresser with one damaged drawer
- Screwdriver
- Pliers
- Measuring tape
- Shelf panel or reclaimed board
- Fine sanding sponge
- Filler
- Bonding primer
- Paint
- Edge banding or decorative trim
- Suitable screws or adhesive
- Optional storage basket
Create the Open Shelf in Five Steps
- Remove the damaged drawer and its hardware. Take out runners, stops, and loose screws that no longer serve a purpose. Check that removing the drawer does not weaken the cabinet frame.
- Measure the opening accurately. Record the width and depth at several points rather than assuming the cabinet is perfectly square. Decide whether the existing base can remain visible or needs a new shelf panel.
- Repair the interior. Fill unwanted holes, secure loose edges, and add the shelf or base panel. Cover exposed raw board with edge banding, trim, or a properly prepared painted finish.
- Coordinate the new compartment with the dresser. Prime and paint the opening to match the exterior or choose a contrasting colour. Keep coating away from moving runners belonging to the remaining drawers.
- Test the new use. Place light items inside first and watch for sagging or movement. A fitted basket can hide smaller objects and make the open section easier to keep tidy.

For me, the shelf should look like a design decision, not simply the space where a drawer disappeared. Finishing the interior corners and exposed edges makes the largest difference.
The same idea could turn two failed drawers into a taller compartment for books, shoes, baskets, or folded blankets.
Add Fluted Detail to a Flat Laminate Cabinet

Flat laminate doors make a useful base for applied texture. The selected makeover combines two simple cabinets and adds a high-end fluted design across their fronts.
The narrow strips need consistent spacing and secure attachment. A small measuring error repeated across an entire cabinet can make the final section noticeably narrower than the first.
Materials and Tools
- Plain laminate cabinet
- Wooden half-rounds, narrow moulding, or fluted panels
- Measuring tape
- Straightedge
- Pencil
- Mitre shears or suitable saw
- Fine sandpaper
- Adhesive suitable for laminate and trim
- Clamps or painter’s tape
- Filler or caulk suited to the project
- Bonding primer
- Paint
Build the Fluted Front in Five Steps
- Plan the complete arrangement. Measure each door and lay several strips across it without glue. Calculate the spacing so the first and last pieces finish evenly.
- Cut and label the trim. Prepare the strips for one door at a time and lightly smooth rough ends. Keep them organised in order when the door edges or measurements vary.
- Prepare the laminate and attach the pieces. Clean the surface and follow the adhesive manufacturer’s preparation instructions. Secure each strip with consistent spacing and keep it from sliding while the adhesive sets.
- Refine the applied design. Fill only the gaps that should disappear and remove excess adhesive. Prime both the laminate and added trim with products suited to their different surfaces.
- Paint and rehang the doors. Build the finish with light coats and inspect the grooves for drips. Reinstall the doors only after the surface can tolerate handling.

I know it can feel tempting to add narrow fluting everywhere, but doors still need to open comfortably. Keep the trim clear of hinges, meeting edges, and areas where fingers regularly grip the cabinet.
Wider battens create a simpler panelled look. You could also add fluting only to the centre of each door and leave a plain border around it.
Create a Faux-Wood Finish Over Damaged Laminate

You cannot stain laminate in the same way as bare wood because the surface is not real timber. A faux-wood treatment solves that problem by applying colour over a painted base instead of expecting stain to soak into the laminate.
The selected project uses gel stain over light-coloured paint to create a wood-like finish when the underlying surface cannot be restored naturally.
Materials and Tools
- Laminate furniture
- Cleaner
- Repair filler
- Bonding primer
- Light-coloured base paint
- Gel stain, glaze, or faux-finish product
- Flat brush
- Soft blending brush
- Wood-graining tool, if desired
- Clean cloths
- Compatible protective coating
Build the Faux Grain in Five Steps
- Repair the underlying surface. Fill chips and level damaged edges before applying colour. A faux grain may disguise colour differences, but it will not conceal deep dents or raised laminate.
- Prime and paint the base. Use a bonding primer and an opaque base colour suited to the wood tone you want to imitate. Let the paint reach the stage required before applying another decorative product over it.
- Practise on a sample. Apply the gel stain or glaze to a spare board painted with the same base colour. Test brush pressure, wiping, and a graining tool until the marks look natural rather than repetitive.
- Work across one panel at a time. Apply the decorative colour in the direction that a real board might run. Vary the lines slightly, then soften harsh marks before the product begins setting.
- Protect the final effect. Let the faux finish cure according to its instructions and add a compatible topcoat when needed. Test the protective product first because it may deepen or alter the colour.

The grain does not need to be perfectly identical across every drawer. Real wood contains variation, and a little controlled difference usually makes the finish more believable.
A beginner can use a simple paint wash instead of a detailed grain. Another option is to create a wood effect only on the top while painting the rest of the furniture in a solid colour.
Add Reclaimed Bamboo Texture to a Charity-Shop Cabinet

A plain laminate cabinet does not need to rely on paint alone. This charity-shop IKEA piece uses old bamboo bindings to add a warmer, more tactile surface to the simple form.
The bamboo should be treated as applied decoration rather than structural reinforcement. Loose bindings, splinters, and rough ends need attention before they are placed on furniture that will be handled regularly.
Materials and Tools
- Laminate cabinet
- Reclaimed bamboo strips or bindings
- Soft brush and cloth
- Measuring tape
- Cutting tool suited to bamboo
- Fine sandpaper
- Adhesive compatible with both materials
- Painter’s tape or clamps
- Bonding primer and paint for uncovered areas
- Clear finish suited to bamboo, if needed
Add the Textured Surface in Four Steps
- Clean and sort the reclaimed bamboo. Remove dust, damaged sections, and loose fibres. Arrange the pieces by colour and width so the finished pattern feels balanced.
- Plan the placement on the cabinet. Test vertical, horizontal, or framed arrangements before cutting. Keep the bamboo clear of hinges, door edges, handles, and ventilation openings.
- Cut and attach each section. Smooth sharp ends and apply an adhesive suited to the laminate and bamboo. Hold the pieces securely while they set, checking frequently that the pattern has not drifted.
- Finish the surrounding surfaces. Paint or repair any exposed laminate as needed, then protect the bamboo only with a product appropriate for it. Test every door and drawer after the added thickness is in place.
For me, the reclaimed material should remain recognisable. Slight variations in tone can make the cabinet more interesting, while painting every bamboo strip may remove the reason for using it.
Cane webbing, wooden blinds, narrow cork strips, fabric-covered panels, or leftover timber battens could create a related textured finish.
Why Laminate Makeovers Peel, Chip, or Look Uneven
Confusing Laminate With Solid Wood
Laminate does not absorb stain like timber. Use paint, a coating designed for laminate, or a decorative faux-wood system instead of applying ordinary stain directly.
Painting Over Grease or Polish
Furniture sprays and hand oils can leave invisible residue. Clean the surface thoroughly before any sanding, primer, or adhesive is applied.
Using an Unsuitable Primer
Ordinary primer may not grip a slick non-porous surface. Choose a bonding primer that lists laminate, Formica, glossy finishes, or similar difficult surfaces among its intended uses.
Sanding Through the Laminate
Aggressive sanding can expose particleboard or fibreboard beneath the decorative layer. Scuff lightly only when required and repair exposed edges before painting.
Ignoring Swollen Substrate
Paint cannot restore board that has expanded and crumbled after water damage. Replace or reinforce severely damaged sections rather than covering them cosmetically.
Applying Thick Paint Around Moving Parts
Heavy coating on drawer edges, door edges, and cabinet openings can cause rubbing and chips. Keep these areas smooth and test the movement between coats.
Attaching Trim With the Wrong Adhesive
An adhesive may hold wood well but fail on laminate, or vice versa. Select a product compatible with both surfaces and test it before covering the full cabinet.
Reassembling the Piece Too Soon
Paint may feel dry while remaining soft underneath. Follow the coating’s handling and curing instructions before tightening hardware or loading shelves.
Mounting New Legs to Weak Board
Thin particleboard may split around screws. Add reinforcement or a supporting base so the furniture’s weight is spread safely.
Frequently Asked Questions
Can laminate furniture really be painted?
Yes. The surface needs to be clean and prepared with a system intended for slick or laminate surfaces. Bonding primer is often the most important layer.
Must I sand laminate furniture?
Not always. Some specialised bonding primers are formulated for glossy surfaces without sanding, while other paint systems require light scuffing. Follow the exact instructions for your selected products.
Can I stain laminate to make it look like wood?
Ordinary stain will not penetrate laminate like real wood. You can create a faux-wood finish by applying decorative glaze or gel stain over a properly prepared painted base.
How can I repair chipped laminate corners?
Secure any loose surface first, fill the missing area with a suitable repair compound, and shape it carefully after curing. Prime the repaired section before painting.
Can I add wooden moulding to laminate?
Yes, provided the laminate is clean and sound and the adhesive is compatible with both materials. Avoid placing trim where it prevents drawers or doors from opening.
Which paint finish is suitable for frequently used furniture?
Choose a furniture, cabinet, or trim paint intended to tolerate regular handling. Follow its primer, recoat, and curing instructions rather than judging durability only by sheen.
Should I apply a separate topcoat?
That depends on the paint system and expected use. Some furniture paints are designed as complete finishes, while others recommend a compatible protective coating.
Keep the Cabinet and Change What Is Not Working
Learning how to refurbish laminate furniture begins with separating the useful structure from the tired surface. A cabinet can remain sturdy even when its colour, handles, doors, or drawer arrangement no longer suit the room.
Paint offers the simplest visual change, while fluted trim and reclaimed bamboo add texture. A broken drawer can become open storage, added legs can lighten a heavy dresser, and a decorative faux grain can give damaged laminate a warmer appearance without falsely treating it as bare wood.
Begin by solving the practical problem first. Repair the edge, strengthen the base, or remove the failed drawer. Then clean, prime, paint, and decorate with materials suited to the actual surface.
Which laminate piece would you update first: a flat IKEA cabinet, a damaged dresser, a plain bookshelf, or a tired bedside table?
]]>Instead of tossing those gorgeous crystals away, why not breathe new life into them? Repurposing chandelier crystals can not only help you save money but also add a unique, personal touch to your home decor.
In this blog post, I’ll share a variety of creative ways you can reuse chandelier crystals, from turning them into jewelry to crafting beautiful home accessories.
Let’s dive into the art of giving your old chandelier crystals a new purpose!
Why Repurpose Chandelier Crystals?
Before we jump into the fun part, let’s explore why repurposing chandelier crystals is a smart choice:
- Sustainability: By repurposing crystals, you contribute to reducing waste and helping the environment.
- Cost-Effective: Buying new home decor or accessories can get expensive. Repurposing your chandelier crystals saves you money while adding personalized charm to your space.
- Creative Outlet: It’s a fun, rewarding process that lets you tap into your creativity, from crafting custom jewelry to designing elegant home decorations.
Now that we’ve got the reasons in mind, let’s get started with how you can repurpose those chandelier crystals!
Fun and Fabulous Ways to Repurpose Chandelier Crystals
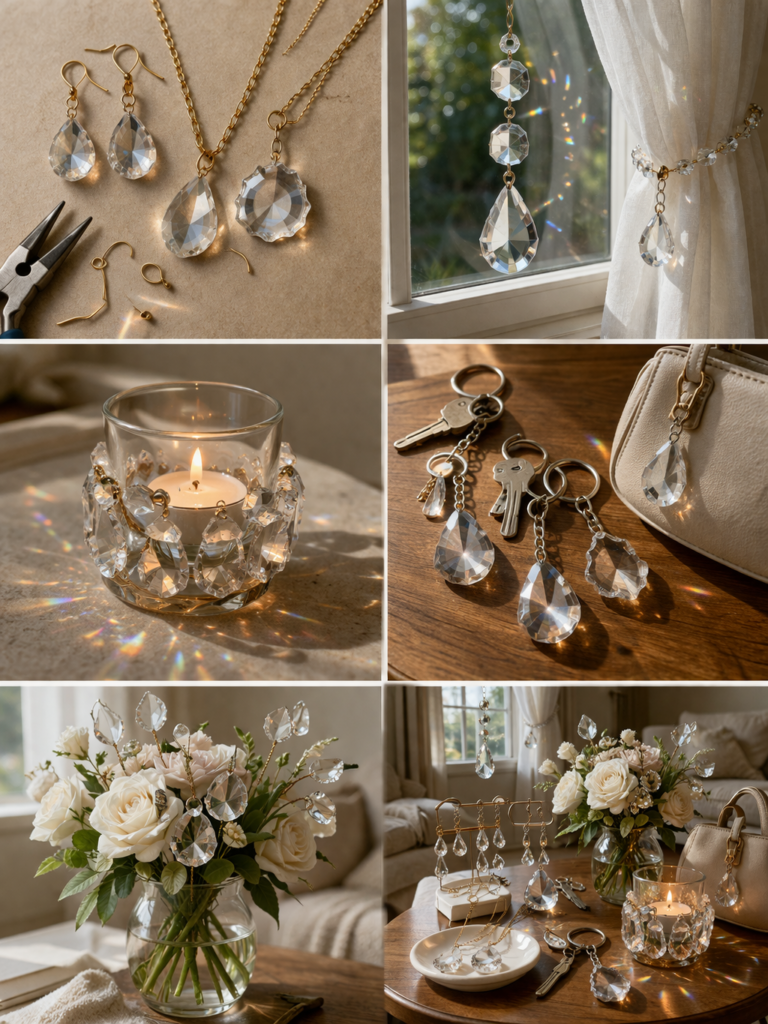
1. Chandelier Crystal Jewelry
One of the easiest and most fashionable ways to repurpose chandelier crystals is by turning them into unique jewelry pieces. They can make stunning earrings, necklaces, bracelets, or even hair accessories.
Step-by-Step Instructions for Making Earrings:
Materials Needed:
- Chandelier crystals (you can use single crystals or clusters)
- Earring hooks
- Small jump rings
- Pliers
- Jewelry wire (optional)
Instructions:
- Start by removing the crystals from the chandelier, making sure to detach them carefully without damaging them.
- Choose a crystal (or a group of smaller ones) and use a jump ring to connect it to the earring hook.
- For added flair, you can wrap the crystal in some jewelry wire, securing it neatly around the base.
- Attach the completed crystal to the hook using the jump ring.
- Repeat the process for the second earring and you’ve got yourself a unique set of chandelier crystal earrings!
These earrings can add an extra touch of elegance to any outfit. You can also create necklaces and bracelets by using similar techniques, making them the perfect gifts or items to sell at craft fairs!
2. Crystal Home Decor
Chandelier crystals can be used to enhance your home decor in many ways. From chandeliers to window hangings, these beautiful crystals catch the light and add an extra sparkle to any room.
Example 1: Crystal Suncatcher
Materials Needed:
- Chandelier crystals
- Strong thread or wire
- Small beads (optional)
- A hook for hanging
Instructions:
- Take a piece of thread or wire and string your chandelier crystals onto it.
- You can alternate between crystals and beads for added variety.
- Once you’ve strung enough crystals, tie a knot to secure them in place.
- Attach a hook to the top and hang your crystal suncatcher in front of a window.
- As sunlight hits the crystals, you’ll see beautiful rainbows dance around the room.
This is an excellent way to add some color and elegance to your living space, and it’s incredibly easy to make.
Example 2: Crystal Curtain Tiebacks
Another stunning idea is to turn your chandelier crystals into curtain tiebacks. Simply attach a few crystals to a sturdy string or ribbon and wrap them around your curtains to keep them in place. These tiebacks add a glamorous touch to any room, especially when paired with sheer or luxurious fabric.
3. Chandelier Crystal Candles
Chandelier crystals are a fantastic way to create unique candle holders that will make your home glow in a whole new way.
Materials Needed:
- Chandelier crystals (choose crystals with a flat side for stability)
- Hot glue gun
- Candles (tea lights or pillar candles)
- A sturdy base (wooden base or a candle holder)
Instructions:
- Begin by securing the base of your candle holder. This could be a small wooden platform, a metal ring, or even a sturdy tray.
- Use the hot glue gun to attach the chandelier crystals around the base, making sure they’re evenly spaced.
- Once the glue has dried, place a candle in the center of the holder.
- Light the candle and enjoy the shimmering glow that the crystals cast around the room.
These chandelier crystal candle holders are perfect for creating an elegant atmosphere for any occasion.
4. Crystal Keychains or Bag Charms
If you’re looking for a simple project, making keychains or bag charms from chandelier crystals is a fun and functional way to repurpose them.
Materials Needed:
- Small chandelier crystals
- Keychain rings
- Jump rings
- Pliers
Instructions:
- Use pliers to attach the chandelier crystals to a jump ring.
- Then, connect the jump ring to a keychain ring.
- Secure everything tightly and you have a beautiful, sparkling keychain or bag charm!
These can be great little gifts, and they’re easy to make in a variety of colors and styles.
5. Crystal Flower Arrangements
If you’re into floral arrangements, chandelier crystals can be used to create beautiful, sparkling accents for your flowers.
Materials Needed:
- Chandelier crystals
- Floral wire
- Faux flowers or real flowers
- Flower pot or vase
Instructions:
- Begin by assembling your floral arrangement in a vase or pot.
- Attach the chandelier crystals to the stems of the flowers using floral wire.
- Distribute the crystals evenly to create a balanced, shimmering effect.
- Place your arrangement in a prominent spot in your home for a dazzling display.
This project can make a lovely centerpiece for any occasion and adds a touch of elegance to your space.
Mistakes to Avoid When Repurposing Chandelier Crystals
While repurposing chandelier crystals can be a fun and rewarding process, there are a few common mistakes that you should avoid to ensure the best results.
- Not Cleaning the Crystals: Before starting any project, make sure to thoroughly clean your chandelier crystals to remove dust and grime. Clean crystals will not only look better but also reflect light more beautifully.
- Using Too Much Glue: It can be tempting to use large amounts of glue, but this can be messy and detract from the beauty of the crystals. Instead, use a hot glue gun sparingly to secure the crystals in place.
- Not Considering Weight Distribution: When repurposing chandelier crystals into jewelry or decor items, make sure to balance the weight properly. Too many heavy crystals can cause your creations to fall apart.
- Ignoring Safety: If you’re working with hot glue or other adhesives, be cautious of burns. Always work in a well-ventilated space when using adhesives, especially for large projects.
Conclusion: Unleash the Potential of Your Chandelier Crystals
Repurposing chandelier crystals is a fun, creative way to breathe new life into old, outdated decor. Whether you choose to turn them into jewelry, home decor, or functional items, the possibilities are endless!
With just a little imagination and some basic crafting supplies, you can transform your chandelier crystals into unique pieces that will shine for years to come.
Don’t be afraid to get creative with your chandelier crystals experiment with different projects and see where your creativity takes you!
FAQ
Can I use broken chandelier crystals?
Yes! Even broken crystals can be repurposed into smaller items like keychains or added to other projects, such as mosaic art.
How can I make chandelier crystals last longer?
To maintain the brilliance of your chandelier crystals, clean them regularly and store them properly when not in use. Avoid direct sunlight to prevent fading over time.
What are some other creative uses for chandelier crystals?
You can use chandelier crystals to decorate picture frames, create Christmas tree ornaments, or even add sparkle to handmade cards or scrapbooks.
But what if I told you that you can use everyday items you already have at home to create a clutter-free, functional workspace? It’s not only a great way to keep your office organized, but it’s also a creative way to reduce waste and make the most out of what you already own.
This article will walk you through a variety of simple and creative methods to organize your home office using items you probably already have lying around your house.
From repurposing old jars for pen holders to creating makeshift file organizers, we’ll cover it all, with step-by-step instructions and real-life examples.
Whether you’re looking to clear up your desk, tidy your storage space, or just add a bit of personality to your office, you’ll find practical solutions here that won’t break the bank.

Why Should You Repurpose Items for Your Home Office?
Before we dive into the how-tos, let’s briefly touch on why repurposing is such a fantastic option for your home office.
- Cost-Effective: We all know office supplies can add up quickly. Repurposing items you already have is a budget-friendly way to solve your organizational problems.
- Eco-Friendly: Repurposing reduces waste by giving new life to items that might otherwise be discarded. It’s a small yet impactful way to be more environmentally conscious.
- Personalized Touch: Creating DIY office organization tools lets you inject your personality into your space. Plus, it’s a fun and creative project to take on!
1. Repurposing Glass Jars for Storage
If you have old glass jars from sauces, jams, or other food products, don’t toss them out! These little containers can be transformed into practical storage for office supplies like pens, pencils, paper clips, rubber bands, and more.
How To Repurpose:
- Step 1: Clean out the jars thoroughly and remove any labels. You can soak them in warm water and use a sponge to scrub off the sticky residue.
- Step 2: Decorate the jars if you want to add a personal touch. You can paint them, add washi tape, or glue on fabric or decorative paper. This is optional but can help match the jars with your office decor.
- Step 3: Use them to store small office supplies. You can place them on your desk or even attach them to the underside of shelves for easy access. If you’re using multiple jars, consider labeling each one to easily identify what’s inside.
Example: I repurposed a few old jam jars to store my various pens and highlighters. It not only helped clear up the clutter but added a charming touch to my desk. I also used a slightly bigger jar for storing paper clips and another for rubber bands.
2. Cardboard Boxes as File Organizers
Cardboard boxes are another item most of us have lying around. Instead of throwing them out, repurpose them into functional file organizers.
How To Repurpose:
- Step 1: Take any sturdy cardboard box and cut it into sections, depending on the size of your files or documents.
- Step 2: Decorate the exterior of the box with contact paper, fabric, or even old magazine clippings to give it a more polished, stylish look.
- Step 3: Label the boxes to categorize different types of documents (e.g., “Tax Records,” “Project Files,” “Receipts”). This will help you stay organized and find documents easily.
- Step 4: Store your newly-created file organizers on a shelf or in a drawer for easy access.
Personal Insight: When I first started working from home, I didn’t want to spend a lot of money on filing cabinets. Instead, I started using old cereal boxes and decorating them with patterned paper. They worked wonders! They fit perfectly on my bookshelves and kept my papers neat and easily accessible.
3. Old Coffee Mugs as Desk Organizers
Got a collection of mismatched coffee mugs from past gifts or old office cups? These can make excellent desk organizers for things like pens, markers, scissors, or even makeup brushes if you’re into that.
How To Repurpose:
- Step 1: Choose a mug that’s sturdy enough to hold a few items without tipping over.
- Step 2: Fill the mug with office supplies. I use one to store my pens and another for my makeup brushes two birds with one stone!
- Step 3: If you’re feeling crafty, you can paint or decorate the mug to make it match your office style.
Example: One of my favorite mugs, given to me by a friend, now stores my highlighters and sharpies. It’s not only functional but reminds me of good times with friends. It’s a win-win!
4. Repurposing Magazine Holders as Drawer Organizers
Instead of buying expensive drawer dividers or organizers, you can repurpose old magazine holders to organize things in your drawers.
How To Repurpose:
- Step 1: Grab some old magazine holders (cardboard ones work best).
- Step 2: Cut the holders into smaller sections that can fit inside your drawer.
- Step 3: Use these mini dividers to store smaller items like sticky notes, business cards, or charging cables.
- Step 4: You can also decorate them with contact paper or fabric if you want them to look more stylish.
Case Study: A couple of months ago, I needed a quick and easy solution for organizing all my cables and charging accessories. I took some old magazine holders, cut them to fit inside my desk drawer, and now I have a neat little cable section in my drawer. It has made such a difference!
5. Repurposing Wooden Crates for Desk Shelves
If you have old wooden crates or even wine boxes lying around, these can be used as makeshift shelves in your office. They add a rustic touch and are perfect for holding books, files, or decorative items.
How To Repurpose:
- Step 1: Find a wooden crate or wine box that’s sturdy enough to hold items.
- Step 2: If you want, you can sand and stain the wood to give it a more polished look.
- Step 3: Mount the crate to the wall, or use it as a stackable shelf on your desk or in your office.
- Step 4: Use the crates to store books, files, plants, or even a printer.
Personal Insight: I’ve used an old wine crate as a shelf for my printer and books. It’s not only functional but also a conversation starter when guests come over. It brings some character to the room!
Common Mistakes to Avoid
While repurposing is an excellent way to organize your office, there are a few common mistakes you should avoid:
- Overcrowding Your Desk: It’s tempting to fill every little nook and cranny with storage, but make sure you don’t clutter your desk with too many items. Less is more.
- Ignoring Functionality for Style: While decorating your repurposed items is fun, don’t forget the purpose. Make sure that the item you’re using is functional and can hold what you intend to store in it.
- Not Labeling Your Storage: It’s easy to forget what’s inside those beautifully repurposed containers. Label them! It’ll save you time when looking for things.
Conclusion
Repurposing everyday items for home office organization is not only creative but also a sustainable and cost-effective way to enhance your workspace.
Whether it’s turning glass jars into pen holders, using old boxes as file organizers, or repurposing coffee mugs to store office supplies, there are endless possibilities to get organized without breaking the bank.
Now that you have all these ideas, it’s time to get started! Don’t be afraid to get creative and make your office a reflection of your personality. What repurposed item will you start with? Let me know in the comments below or share your results with me on social media. I’d love to see how you transform your home office!
FAQs
Can I use any type of jar for organizing my office?
Yes! Any sturdy glass jar can be repurposed for organizing supplies. Just make sure it’s big enough for what you plan to store and that it has a secure lid if needed.
Are repurposed office supplies durable enough for everyday use?
Absolutely. As long as you ensure the items are sturdy (e.g., strong cardboard boxes, solid wood crates), they can hold up just fine for regular use.
What are some quick ways to decorate repurposed items?
Try using washi tape, fabric, or even old magazines for a quick and stylish update. You can also paint jars or boxes for a more custom look.
What’s the most important thing to keep in mind when organizing a home office with repurposed items?
Functionality should always come first. Ensure that the items you’re repurposing are useful and that they fit the organizational needs of your space.
I’m Stella Eve Louise, and I enjoy finding sensible second uses for old household pieces before deciding they belong in a skip. With sinks, the condition has to lead the idea. A cracked bowl may suit a dry display but not a water-filled project, while a sound basin can become a planter, potting station, outdoor cooler, or working vanity.
The character is already there. Faded enamel, old tap holes, and a worn edge can make the finished piece feel settled rather than newly bought. What matters is choosing a new job that suits the material, supporting the weight properly, and keeping drainage, sharp edges, and hygiene in mind.
Check the Sink Before Choosing Its New Job
Vintage sinks can be extremely heavy even before they are filled with soil, water, ice, or bottles. Move one with help and use a trolley when possible. Do not lift it by old taps, a narrow back panel, or a damaged rim.
Clean the sink first, then inspect it in bright light. Look for deep cracks, loose enamel, rust around fittings, sharp chips, unstable repairs, and damage around the plughole. A small flaw that seems decorative can become structural when the bowl is drilled, moved, or loaded.
Identify the material before cutting or drilling. Cast iron, steel, porcelain, fireclay, stone, and ceramic need different tools and support. When you are uncertain, choose a no-drill method or ask someone experienced to make the opening.
Any project involving permanent water connections, bathroom plumbing, or altered waste pipes needs suitable professional input. Decorative upcycling should never hide a weak connection or make a leak difficult to reach.
Basic Materials and Safety Equipment
• Protective gloves
• Eye protection
• Soft cleaning brush
• Mild cleaner suited to the surface
• Clean cloths
• Tape measure and pencil
• Stable supports or a trolley for moving
• Tools matched to the sink material
• Help from a plumber or experienced craftsperson when needed
Turn a Vintage Sink Into a Garden Planter

An old sink already has the shape of a generous planting bowl, so this is one of the most natural ways to reuse it. A deep Belfast, porcelain, enamel, or metal basin can hold herbs, flowers, grasses, or a mixture of trailing plants. The original plughole may even help with drainage, although it still needs checking before any soil goes in.
What I like here is that the sink does not need to look newly restored. Light staining, worn enamel, and small marks can sit comfortably in a garden. The important part is making sure the basin is stable, the edges are safe, and water can escape. Once those basics are sorted, the plants can do most of the decorating.
Materials and Tools
• Structurally sound vintage sink
• Strong base, bricks, reclaimed frame, or garden stand
• Potting mix suited to the chosen plants
• Small stones or mesh for the plughole
• Compact herbs, flowers, or trailing plants
• Gardening gloves
• Soft brush and mild cleaner
• Eye protection if drilling is required
How to Make It
1. Inspect and clean the sink. Check the bowl, rim, back, plughole, and any old tap openings. Remove loose dirt with a soft brush, then wash the surface with a mild cleaner. I don’t think every stain needs to disappear, but sharp chips and unstable rust need attention before the sink becomes a planter.
2. Create safe drainage. Test the plughole by pouring in a small amount of water. If it drains freely, place mesh or a few stones over the opening so compost cannot block it. When there is no usable outlet, ask someone experienced to drill the correct material rather than forcing an unsuitable bit through old enamel or ceramic.
3. Build a stable support. Set the sink on a level base that can hold its weight after wet soil is added. A reclaimed timber frame, brick supports, or a strong metal stand can work, but the bowl should not rock when you press lightly on the rim. Then check that the drainage outlet is not pressed flat against the ground.
4. Fill and arrange the planting. Add potting mix gradually and stop below the rim. Place taller plants towards the back or centre, then use smaller plants to fill the middle and trailing plants near the front edge. The old taps or tap holes can remain visible because they help the finished planter keep its sink character.
5. Water and watch the first few weeks. Water slowly and confirm that moisture leaves through the plughole. After that, check the compost according to the plants rather than following a fixed timetable. A deep old sink can hold moisture longer than a shallow pot, especially when it sits in shade.
For me, the best sink planters still look unmistakably like sinks. I’d keep at least part of the rim, taps, or back visible instead of covering every inch with foliage.
Ways to Adapt the Idea
• Use only culinary herbs near an outdoor cooking area.
• Create a soft cottage mix with trailing flowers and small ferns.
• Place nursery pots inside the sink for a removable, lower-mess version.
• Use artificial greenery when the sink sits in a very dark covered space.
Build a Potting Bench Around an Old Sink

A vintage sink can do more than hold plants. Fitted into a strong bench, it becomes a useful place for mixing compost, washing pots, catching loose soil, or rinsing garden tools. The bowl contains the mess, while the bench gives you space for pots, labels, gloves, and watering equipment.
This version needs more planning than a simple planter because the sink is heavy and the bench must support it safely. Still, the construction does not need to look like a fitted kitchen. Reclaimed timber, an old workbench, or a sturdy table can provide the base. The slightly mismatched look often suits a garden better than a perfectly new unit would.
Materials and Tools
• Vintage sink with a sound bowl and rim
• Strong reclaimed workbench, table, or timber frame
• Exterior-grade screws and suitable brackets
• Tape measure and pencil
• Jigsaw or suitable cutting tool
• Drill and driver
• Eye and hearing protection
• Exterior wood finish when needed
• Bucket or safe drainage connection
• Hooks, shelf boards, and storage containers
How to Make It
1. Measure the sink before cutting. Measure the widest and deepest parts of the sink, including any lip that will rest on the bench. Mark the opening carefully and check it twice. I know it can feel tempting to follow the bowl shape exactly, but the supporting rim needs enough timber beneath it to stay secure.
2. Strengthen the bench. Inspect the legs, joints, top, and lower braces before making the opening. Repair loose sections and add support rails beneath the future sink position. Once that’s done, place the empty sink on top to check height, reach, and balance before you cut anything.
3. Cut and fit the opening. Drill a starter hole inside the marked area, then cut slowly with a suitable jigsaw blade. Wear eye protection and support the cut section so it does not tear away. Lower the sink into position and make small adjustments rather than enlarging the opening too quickly.
4. Secure the bowl and organise drainage. Use brackets or another method suited to the sink and frame so the bowl cannot shift. For a dry potting bench, place a removable bucket beneath the plughole to catch water and soil. A permanently plumbed outdoor sink needs proper water and waste planning by someone who understands local requirements.
5. Add useful storage. Fit a shelf, hooks, or a lower rack only after the main structure feels solid. Keep heavy compost low and lighter tools within easy reach. Then protect exposed timber with a finish suited to outdoor conditions, following the product directions.
The part I would keep simple is the storage. A few strong hooks and one open shelf are often more useful than lots of tiny compartments that immediately fill with damp soil.
Ways to Adapt the Idea
• Use the sink dry as a compost-mixing bowl.
• Add a removable worktop that covers the bowl when extra space is needed.
• Fit wheels only when they are rated for the full loaded weight and can lock securely.
• Place the bench under a roof or lean-to when the timber is not suited to full weather exposure.
Details That Can Let a Vintage Sink Project Down
Choosing the idea before checking the sink. A damaged sink may look suitable in a photograph but fail once it carries wet soil or water. Inspect the material, rim, base, and outlet first, then choose a job that matches its real condition.
Ignoring the loaded weight. Soil, ice, water, bottles, and timber supports add far more weight than many people expect. Build the base for the finished load, not for the empty sink sitting in the workshop.
Blocking the plughole. A planter or drinks station needs a clear route for water. Cover the hole with mesh when necessary, but do not pack it tightly with compost or leave a bucket beneath it until the bucket overflows.
Relying on sealant as a structural support. Sealant can close a small gap, but it should not be the only thing holding a heavy basin in a vanity or bench. Use proper framing, brackets, or supports suited to the material.
Leaving sharp enamel exposed. A chipped edge can cut hands, snag clothing, or worsen during use. Smooth or protect the area appropriately, and reject the sink when the damage cannot be made safe.
Using an unknown old surface for loose food. Vintage coatings, repairs, and residue are not always suitable for direct food contact. Keep drinks sealed or use a clean removable food-safe container inside the sink.
Hiding plumbing completely. A boxed-in connection may look neat until it needs repair. Leave practical access to traps, valves, and joins, especially inside a repurposed cabinet.
Adding decoration before solving function. Flowers, paint, hooks, and old taps can all improve the look, but they cannot correct poor drainage or an unstable frame. Get the structure right first, then add only the details that help the final use.
Frequently Asked Questions
What is the easiest way to repurpose a vintage sink?
Using it as a garden planter is usually the simplest choice when the bowl is structurally sound and already has a working plughole. A removable arrangement of nursery pots makes the project even easier because you do not need to fill the entire sink with compost.
Can a cracked vintage sink still be reused?
A lightly marked sink may suit a dry decorative display, but a structural crack makes water-filled, hanging, or heavily loaded uses risky. Do not assume paint, grout, or adhesive has restored the original strength.
Do I need to drill drainage holes in a sink planter?
Not always. Many sinks already have a plughole that works as drainage. Test it first and keep it clear with mesh or stones; drill only when the material and method are understood.
Can I use an old sink as a working outdoor sink?
Yes, when the basin is sound and the water supply, waste route, support, and local requirements are handled correctly. A simple dry potting bench or bucket-fed setup may be easier than permanent plumbing.
Is old enamel safe for a drinks station?
Use the sink only for sealed bottles and cans, or place removable food-safe tubs inside it. Avoid putting loose food directly on an unknown vintage surface, especially when it has chips, repairs, or old coatings.
Can I paint a vintage sink?
Some materials can be refinished, but preparation and coating choice depend on the surface and intended use. Paint used on a decorative garden piece is not automatically suitable for a working basin or a surface exposed to constant water.
How do I move a heavy sink safely?
Empty it completely, remove loose fittings, protect fragile edges, and ask for help. Use a trolley or lifting equipment when needed, and never carry the weight by old taps or a narrow decorative back.
Give an Old Sink a Useful Place Again
The best way to repurpose vintage sinks is to work with the shape and condition already in front of you. A deep bowl naturally suits planting, a broad rim can support a potting area, a clear plughole makes temporary cooling practical, and a decorative basin may deserve another working life indoors.
I’d begin with the least complicated version that suits your sink. Clean it, check the damage, test the drainage, and make the support dependable before adding plants, storage, ice, or plumbing. Once those practical parts are ready, the age and wear stop looking like faults and start becoming the reason the piece feels worth keeping.
Which forgotten sink would you rescue first: one for the garden, the potting bench, an outdoor gathering, or a small bathroom?
]]>That simple construction is what makes solar lights useful for upcycling. A thrifted vase can become a miniature table lamp, two clear serving bowls can form a glowing garden globe, and an ordinary porch container can hold a softer frosted light. The finished pieces still need direct daylight, drainage awareness, and a secure base, but the decorative part can come from objects already at home.
I’m Stella Eve Louise, and I don’t think the light needs to disappear completely inside every project. The solar panel has a job to do. Covering it with fabric, paint, or a solid shade may create a lovely object that never charges, which is rather less useful once evening arrives.
Begin with a working light and one manageable container. Test the components before adding glue or paint, then keep the light removable whenever possible. That small decision makes cleaning, battery replacement, and future repairs much easier.
Check the Solar Light Before Changing Its Purpose
Wipe dirt from the panel and place the light in full daylight before assuming that it has stopped working. Make sure the switch is in the on position, then cover the panel after charging to see whether the lamp turns on. A cloudy panel may simply need cleaning, while a damaged housing or swollen battery needs more careful disposal.
Inspect these parts before beginning:
· The solar panel for cracks, deep scratches, or a cloudy coating
· The lamp housing for gaps that may admit water
· The stake connection for splits or looseness
· The rechargeable battery compartment for corrosion or swelling
· The on-and-off switch for stiffness or damage
· The LED cover for cracks
· Any wires exposed by previous repairs
· The container that will support the light
· The charging position once the project is assembled
· The way rainwater will drain or escape
Do not open, puncture, crush, or glue over a swollen rechargeable battery. Take damaged batteries and electronic parts to an appropriate local collection point.
Remove the long ground stake only when the project does not need it. Many lights twist or pull apart, but forcing a fixed component may crack the weather-resistant housing. Keep every removed piece until the new design is complete; the original stake may still be useful for charging or testing.
Outdoor adhesive should match the materials and expected weather. Hot glue may help with temporary positioning, but heat, cold, and moisture can weaken it. A mechanical fit, removable insert, or outdoor-rated adhesive is usually more dependable for a project that will stay outside.
Turn a Small Vase Into a Solar Table Lamp

A small vase already provides the weight and shape needed for a compact lamp base. Once the stake is removed, the solar light can stand inside the opening while pebbles hold it upright. A miniature shade softens the appearance without requiring wiring.
The most important detail is the top of the shade. The solar panel must still receive daylight, so a closed or heavily lined shade may prevent charging. A light, open shade with a suitable upper fitting gives the panel a clearer path to the sun.
Materials and Tools
· Working solar stake light
· Small ceramic, metal, or weather-resistant vase
· Clean pebbles or decorative stones
· Miniature lampshade with an open top
· Small rubber pads for the vase base
· Optional outdoor-rated removable putty
· Soft cloth and mild soapy water
· Measuring tape
Assemble the Solar Table Lamp
1. Test the proportions. Place the light head above the vase and hold the shade in position before adding stones. Check that the panel remains visible from above and that the shade does not make the narrow base top-heavy.
2. Prepare the vase. Wash and dry the vase, then inspect the rim for chips or rough edges. Add small rubber pads underneath when the base could scratch an outdoor table or slide on a smooth surface.
3. Support the light. Remove the stake only if it separates without damage. Place the light in the vase and add pebbles gradually around it, keeping the panel level and the lamp head centred.
4. Fit the shade. Slide or clip the shade onto the lamp head without pressing the solar panel. Then turn the lamp from several angles and make sure the shade cannot fall against the panel or trap rainwater.
5. Charge and test it. Place the complete lamp in direct daylight, then move it to the table after dark. If it glows weakly, test the bare light again to see whether the shade or location is blocking the panel.
For me, the vase should look substantial enough to support the shade before any decoration is added. A light plastic pot may need so many stones that the simple project becomes surprisingly heavy.
A beginner can skip the lampshade and use a translucent vase around the light head instead. That version is easier to charge and has fewer parts to loosen in the wind.
Make a Solar Garden Globe From Clear Bowls

Two lightweight bowls can create the shape of a decorative globe without glass cutting or electrical work. Clear ridges scatter the LED light, while a light frosting on the inside can soften the view of the lamp unit.
The challenge is access. Permanently sealing the bowls may make it impossible to reach the switch, battery, or light when something needs cleaning. I would plan a removable join rather than gluing the entire rim closed.
Materials and Tools
· Two matching clear plastic serving bowls
· Compact solar light with an exposed panel
· Clear outdoor-rated tape or removable clips
· Optional frosted-effect spray suitable for plastic
· Mild detergent and soft cloth
· Marker
· Small clear spacers or adhesive pads
· Eye protection and gloves if drilling ventilation holes
Build the Garden Globe
1. Clean and match the bowls. Remove stickers and wash away adhesive before placing the rims together. Rotate one bowl until the ridges or decorative pattern align in a way that looks balanced.
2. Test the light position. Place the light inside the lower bowl and check that the solar panel can still face daylight. A stair light or puck-style solar unit may sit more naturally than a tall stake light inside this shape.
3. Soften the plastic if desired. Apply a light frosted finish to the inside only, following the coating instructions and working in a ventilated area. Keep the solar panel, switch, and lamp unit completely separate from the spray.
4. Create a serviceable join. Use clear outdoor tape around part of the rim, small removable clips, or another method that allows the globe to reopen. Avoid sealing moisture inside; add discreet drainage or ventilation only when the bowl material can be drilled safely.
5. Choose a stable position. Set the globe where it cannot roll into a path, pond, or planting bed. Charge it in strong daylight and check the inside after rain for condensation or trapped water.
I know it can feel tempting to glue the two rims together for a perfectly neat seam, but a replaceable light is more useful than an ornament that has to be broken open later.
For a simpler version, use one patterned bowl as a shade over a solar puck light placed on a flat stone. Keep enough space beneath the edge for drainage and air movement.
Build a Frosted Solar Lantern for the Porch

A tall vase gives a solar light more room to glow, while a small planter or metal container can create a raised base. Frosting diffuses the light and hides the plastic lamp body, and stones keep the centre upright.
This project benefits from keeping the vase removable. A loose but stable fit lets you lift it for cleaning and move the solar light into full sun when the porch itself remains shaded during the day.
Materials and Tools
· Working solar stake light
· Glass or plastic vase in sound condition
· Small metal planter, bucket, or stable base
· Pebbles or clean decorative stones
· Frosted-effect coating suitable for the vase material
· Outdoor-rated adhesive or removable mounting method
· Optional twine, burlap, or faux greenery
· Gloves and eye protection
Put the Porch Lantern Together
1. Plan the stack. Turn the base over or place it upright according to its shape, then centre the empty vase on top. Check the contact area and make sure the combined lantern does not rock before adding weight.
2. Prepare the diffuser. Clean and dry the vase. Apply a frosted finish only where it will not cover the solar panel, and keep the coating light enough for the LED glow to pass through.
3. Secure the base. Attach the vase with an outdoor-suitable method or use a fitted removable ring. Let the bond cure fully before filling the vase, even when patience suddenly feels like the least exciting tool on the table.
4. Position the solar light. Add stones to the vase, then settle the light among them with the panel facing upward. Keep the switch accessible and avoid packing stones tightly against a thin plastic housing.
5. Add restrained decoration. Wrap a small amount of twine around the base or attach lightweight faux greenery away from the panel. Then place the lantern where it can charge or move it into sunlight during the day.
The part I would check most carefully is the join between the vase and the base. Decorative stones add useful weight, but they also make a weak connection more dangerous if someone lifts the lantern by the top.
A no-glue option uses a vase that nests securely inside a heavy planter. Fill the gap with stones so every piece remains removable for cleaning and winter storage.
Match the Project to the Light You Already Have
Stake Lights
Stake lights are useful when the stem can be removed and the lamp head remains intact. They suit vases, planters, lanterns, and raised outdoor lamps. Keep the original stake if you may return the light to the garden later.
Puck and Stair Lights
Compact lights fit inside bowls, jars, and shallow lanterns. Their flat panels often need to face upward, so test the final angle before fixing them in place.
String and Rope Solar Lights
These work better in baskets, wire frames, and larger transparent containers. Do not pinch or cut the cable, and keep the separate solar panel where it receives daylight.
Old Lights That No Longer Work
A failed light may still provide a useful globe, stake, or outer shell, but remove the battery and electronic parts responsibly before using the housing as an ordinary craft material. Do not place dead electronic components inside soil or water features.
Where Solar-Light Upcycles Usually Go Wrong
Covering the Solar Panel
A solid shade, thick paint, fabric, or dense decoration may stop the panel from charging. View the project from above before finishing it and keep the complete panel exposed to daylight.
Testing the Light Only After Gluing
A switch may be off, the battery may be exhausted, or the charging location may be too shaded. Test the bare light first, then test it again inside the unfinished container.
Sealing the Battery Inside
A permanently closed globe may prevent cleaning and battery replacement. Use clips, tape, screws, or a fitted insert that allows the project to reopen.
Depending on Hot Glue Outdoors
Heat and rain may weaken a bond that felt strong indoors. Use a mechanical fit or adhesive rated for the actual materials and outdoor conditions.
Creating a Top-Heavy Lamp
A shade or tall vase can make a small base unstable. Add weight low in the design and test it on a level surface before placing it near a path or table edge.
Trapping Water Around the Electronics
Bowls and vases can collect rain or condensation. Plan drainage, ventilation, or a covered location without drilling through the light housing itself.
Painting the Wrong Surface
Spray can block the panel, switch, seams, and transparent LED cover. Remove the light before painting the container and mask any functional areas that must stay clear.
Using Cracked Glass Outdoors
Small chips can worsen with handling and temperature changes. Retire damaged glass rather than building a weighted or hanging project around it.
Forgetting the Charging Route
A lantern placed on a shaded porch may look ideal but receive too little daylight. Keep the light removable so it can charge elsewhere, or choose a sunnier location.
Ignoring End-of-Life Batteries
Rechargeable cells do not belong in ordinary craft waste or garden soil. Remove damaged batteries safely and follow local electronic-waste guidance.
Frequently Asked Questions
Can I paint a solar light?
You can paint the non-functional outer parts when the paint suits the material. Keep the solar panel, LED cover, switch, seams, and battery access free from paint.
Why does my repurposed solar light glow weakly?
The panel may be shaded, dirty, covered by the design, or receiving too little charging time. Test the bare light in direct daylight before changing the container.
Can I use an indoor vase outside?
Only in a covered area when the material and finish are not intended for weather. Bring the piece indoors during strong wind, frost, or heavy rain, and check the glass for cracks.
What adhesive works for outdoor solar projects?
Choose an outdoor-rated product compatible with both materials being joined. A removable mechanical fit is often better because it allows cleaning and battery access.
Can I replace the rechargeable battery?
Some solar lights have accessible replaceable cells, while others are sealed. Follow the light manufacturer’s instructions and use the correct battery type rather than substituting an ordinary disposable cell.
How do I stop water collecting inside a solar globe?
Use a serviceable join, discreet ventilation, and a position protected from direct rain. Check the globe after wet weather and reopen it to dry whenever condensation appears.
Should I throw away a solar light that has stopped working?
Test the switch, clean the panel, and check whether the approved rechargeable battery can be replaced. If the electronics are damaged, separate reusable outer parts and take the battery or electronic unit to an appropriate collection point.
Let the Solar Panel Stay Part of the Design
Creative ways to repurpose solar lights work best when the lighting unit remains accessible, chargeable, and easy to remove. The vase, bowls, stones, and shades provide the new appearance, but the panel still needs clear daylight and the housing still needs protection from trapped water.
Start with the project that requires the fewest permanent changes. A weighted vase lamp can come apart in minutes, while a garden globe needs more thought about access and condensation. The frosted porch lantern sits somewhere between the two and adapts easily to containers you may already own.
I’d rather see one dependable solar lamp used every evening than several sealed ornaments that stop working after the first wet week. Test first, decorate second, and keep future cleaning in mind.
Which solar light would you repurpose first: the small stake waiting for a vase, the flat light suited to a garden globe, or the porch light that needs a softer frosted cover?
]]>Kids are naturally curious, so why not tap into that curiosity by showing them fun and simple ways to reuse materials instead of throwing them away?
We’ve all heard the saying “One man’s trash is another man’s treasure,” but when it comes to toddlers, those “treasures” are not just things that can be recycled, but opportunities for learning.
The challenge is to make recycling not just a lesson, but an engaging and enjoyable activity for your little one.
If you’re a parent, grandparent, or teacher, you know how tough it can be to keep toddlers engaged while teaching them valuable life skills.
That’s why I’m sharing these 11 ideas to help make recycling a fun, hands-on learning experience that toddlers will love.
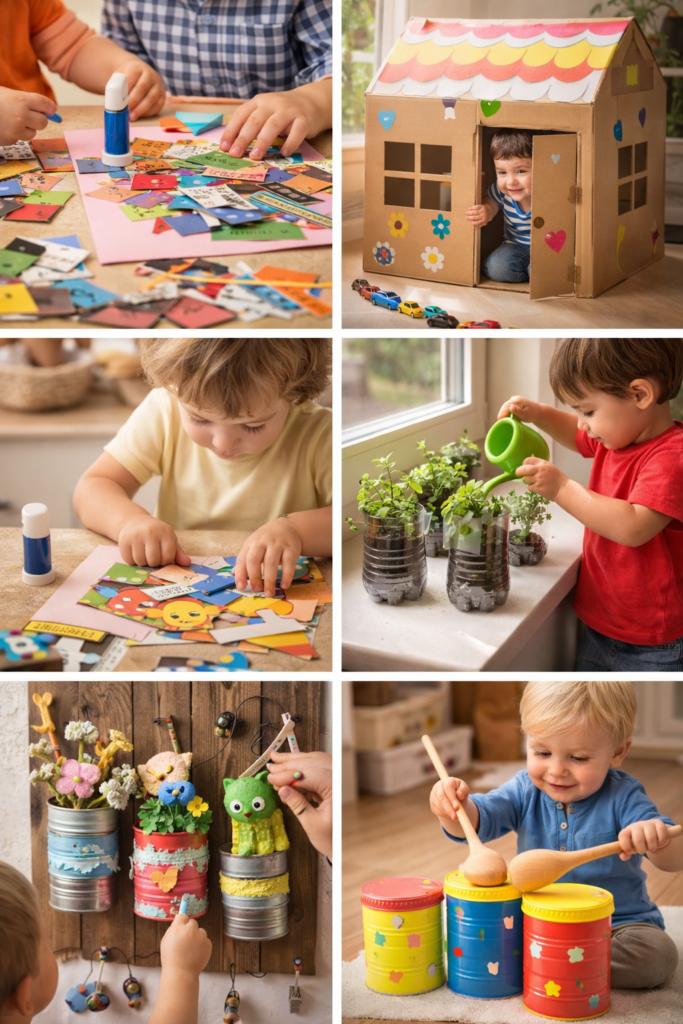
1. Upcycled Paper Collage Art
Recycling doesn’t have to be complicated. One of the simplest ways to get your toddler involved in recycling is through upcycled paper art.
Grab some old magazines, newspapers, or scrap paper and cut them into various shapes and sizes.
Encourage your toddler to glue the pieces onto a larger piece of paper to create their own masterpiece. This activity not only promotes recycling but also enhances their fine motor skills and creativity.
Step-by-Step Instructions:
- Gather old newspapers, magazines, and scrap paper.
- Cut the paper into small pieces, ensuring the edges are toddler-friendly.
- Provide a glue stick or non-toxic glue and a large sheet of construction paper.
- Let your toddler stick the pieces of paper onto the sheet to create a fun collage.
Personal Insight: I’ve found that toddlers love this activity because it taps into their need to explore different textures and shapes. It’s also a great way to recycle paper that would otherwise go to waste!
2. Cardboard Box Playhouse
When you finish up a large package or have some old cardboard lying around, why not transform it into a playhouse for your toddler?
A cardboard box playhouse offers endless possibilities for imaginative play. You can even encourage your little one to decorate it using old markers, paint, or leftover stickers.
Step-by-Step Instructions:
- Find a large cardboard box (make sure it’s sturdy).
- Cut out windows and a door for your toddler to enter and exit.
- Decorate the outside with paint, markers, or stickers.
- Set up the box in a play area and let your toddler enjoy their new space.
Common Mistakes to Avoid: Be sure to check for sharp edges in the cardboard before letting your toddler play in it. Using child-safe scissors is a great way to avoid any mishaps.
3. Plastic Bottle Planters
Turning plastic bottles into planters is a simple and eco-friendly way to teach toddlers about sustainability. You can use the bottles to plant flowers, herbs, or even small vegetables. Not only will this teach them about recycling, but it will also help them learn about how plants grow and the importance of taking care of them.
Step-by-Step Instructions:
- Gather empty plastic bottles (cut them in half if necessary).
- Punch a few holes in the bottom for drainage.
- Add some soil and plant a small flower or herb.
- Water the plant and watch it grow.
Personal Insight: My toddler loved this activity because it gave them a sense of responsibility. They were excited to water their plants every day, and it was amazing to watch their interest in gardening grow.
4. Cereal Box Puzzle
Upcycled cereal boxes make fantastic materials for creating homemade puzzles. Not only does this project recycle cardboard, but it also helps toddlers with problem-solving and cognitive skills. It’s a great way to repurpose packaging while providing an educational experience.
Step-by-Step Instructions:
- Use an empty cereal box (or any sturdy cardboard box).
- Cut the box into a large square or rectangle.
- Draw or paste an image onto the cardboard to make it visually appealing.
- Cut the cardboard into pieces of various shapes to create a puzzle.
- Challenge your toddler to put the pieces back together.
Common Mistakes to Avoid: Don’t make the puzzle pieces too small or complex for toddlers. Simple shapes and larger pieces are more appropriate for their developmental stage.
5. Egg Carton Animals
Egg cartons are perfect for creating animals and other imaginative creatures. By cutting up the individual sections of the egg carton, you can make everything from spiders to birds.
This activity encourages creativity and helps your toddler understand how everyday items can be transformed into something new.
Step-by-Step Instructions:
- Collect several empty egg cartons.
- Cut the sections of the egg carton into smaller pieces.
- Use paint, markers, or glue to add eyes, legs, and other features.
- Let your toddler use their imagination to create different animals.
Personal Insight: This is one of my favorite activities because it allows toddlers to explore shapes and colors while creating something fun out of what would be considered trash.
6. Tin Can Drums
Instead of throwing away old tin cans, why not turn them into a fun musical instrument? Tin can drums are not only fun to make, but they also introduce toddlers to rhythm and sound.
Step-by-Step Instructions:
- Gather a few empty tin cans.
- Use non-toxic paint to decorate them with your toddler’s favorite colors.
- Place a balloon over the top of each can to create a drum surface.
- Give your toddler a pair of wooden sticks or spoons to tap on the cans.
Common Mistakes to Avoid: Be sure the cans are free of sharp edges. If needed, use sandpaper to smooth them out before allowing your toddler to play.
7. Milk Jug Watering Can
A milk jug is a simple item to recycle, but when turned into a watering can, it can be a wonderful tool for toddlers to help out with gardening. They’ll have fun watering plants while learning about the importance of caring for nature.
Step-by-Step Instructions:
- Take an empty plastic milk jug.
- Use a nail or sharp object to make small holes in the cap.
- Fill the jug with water.
- Let your toddler water your plants or flowers using the new watering can.
Personal Insight: This activity became a regular ritual in our home. My toddler loved “helping” me with the garden, and it taught them about responsibility and nature.
8. Newspaper Rockets
Recycling newspapers into rockets is a fun activity that sparks imaginative play. Not only will your toddler love the idea of launching their own rocket, but they’ll also practice using scissors, glue, and other tools in the process.
Step-by-Step Instructions:
- Take several sheets of newspaper and roll them into tubes.
- Shape the tubes into a cone and glue them to form the rocket’s body.
- Use a straw or rolled paper as the rocket’s nose cone.
- Decorate the rocket with stickers or markers.
Common Mistakes to Avoid: If your toddler is younger, it’s best to do the cutting and shaping yourself and let them handle the decorating. Safety is key.
9. Button Sorting and Recycling Game
This activity uses an assortment of old buttons to teach toddlers about sorting and organization. Not only is it a great way to recycle, but it also boosts their problem-solving and categorization skills.
Step-by-Step Instructions:
- Gather a collection of old buttons in various colors and sizes.
- Create different categories, such as color, shape, or size.
- Let your toddler sort the buttons into the categories.
- Once the sorting is done, let them use the buttons for other crafts.
Personal Insight: This activity is a simple yet effective way to keep toddlers occupied while also teaching them how to organize and categorize objects.
10. Toilet Paper Roll Binoculars
Toilet paper rolls are one of the most versatile materials for recycling projects. You can transform them into a pair of binoculars, a perfect tool for your toddler’s next nature walk or treasure hunt.
Step-by-Step Instructions:
- Grab two empty toilet paper rolls.
- Paint them with your toddler’s favorite colors.
- Attach the two rolls together with glue or tape.
- Add a string so your toddler can wear the binoculars around their neck.
Common Mistakes to Avoid: Avoid using too much glue or tape, which could make it hard for your toddler to handle the binoculars. Keep the design simple.
11. Recycled Art Stamps
If you have some leftover bottle caps or other small plastic items, you can turn them into stamps for creating fun artwork. By dipping them in paint and pressing them onto paper, toddlers can create beautiful prints.
Step-by-Step Instructions:
- Find bottle caps or any small, round plastic objects.
- Dip the caps into non-toxic paint.
- Let your toddler stamp the objects onto a sheet of paper to create prints.
Personal Insight: This project is a huge hit because it’s simple, fast, and incredibly fun for toddlers. Plus, it teaches them how everyday objects can have multiple uses.
Conclusion
By incorporating these recycling activities into your toddler’s routine, not only are you teaching them the importance of reusing and repurposing, but you’re also nurturing their creativity and critical thinking.
The beauty of these projects lies in their simplicity and the materials we often overlook as waste. Recycling can be fun, educational, and environmentally impactful something every toddler can enjoy!
I hope these recycling activities inspire you to get creative with your little one. Share this article with your friends and family and try out a few of these activities today! Let me know which one your toddler enjoyed the most in the comments below. Happy recycling!
]]>That emotional value is exactly why cutting a veil without a plan can feel wrong. Tulle can stretch, fine lace can unravel, and beaded sections may depend on hidden threads that are not obvious until one snip loosens several details at once. A thoughtful second use should preserve the part of the veil that matters most rather than simply turning it into another craft material.
I’m Stella Eve Louise, and I don’t think repurposing always means changing the entire piece. Sometimes the most respectful option is to modernise the veil so it can be worn again. In other cases, a small lace section can become a hair accessory or a family keepsake while the remaining fabric stays safely stored.
The three projects below are closely connected to real bridal heirloom transformations. Each one asks for a different level of commitment, so begin with the option that suits the condition of your veil and how comfortable you feel altering it.
Examine the Veil Before Cutting or Restyling It
Lay the veil on a clean white sheet or large table where the full edge can be seen. Avoid placing delicate tulle directly on rough timber, carpet, or a surface with splinters. Natural light makes it easier to notice yellowing, loose beads, tiny holes, and repairs from the wedding day.
Check the veil for:
· Brittle or yellowed tulle
· Loose lace motifs and lifting appliqués
· Missing beads, pearls, or sequins
· Rust or tarnish around the comb
· Hairspray residue near the top edge
· Small tears close to the gathering stitches
· A hem that has begun to unravel
· Glue that has hardened or changed colour
· Different layers that can be separated safely
· A meaningful embroidered section worth preserving intact
Do not cut an antique, handmade, or heavily beaded veil before a textile or bridal-restoration specialist has examined it. One decorative motif may be connected to several others by the same thread.
If the veil needs cleaning, begin with professional advice rather than assuming ordinary dry cleaning is suitable. Some synthetic tulles, silk nets, glues, trims, and older beads react differently to water, heat, and solvents. A veil that looks slightly dull may still be structurally strong, while a very white vintage veil may have brittle fibres hidden beneath the surface.
Photograph the veil from the front, back, and side before making changes. Include close-ups of the comb, lace placement, gathering, and edge finish. Those pictures will help you restore the original arrangement if the project pauses halfway through.
Decide What Must Stay Intact
Mark the most meaningful elements with loose paper labels placed beside the fabric rather than pins pushed through it. You may care most about the lace border, an embroidered date, a section visible in a favourite photograph, or the original comb worn during the ceremony.
Once you know what cannot be sacrificed, the remaining design becomes much easier. I know it can feel tempting to save every centimetre, but a project usually works better when one feature is treated as the focal point and the rest supports it.
Use Veil Tulle or Lace in a Christening Keepsake

@marusyagrace
The Reel inspiration uses wedding-gown fabric for a christening garment, but the same heirloom approach can include suitable sections of a veil. Soft lace may trim a bonnet, line a collar, cover a sash, or form a removable overlay without requiring the entire veil to be cut apart.
This project should be planned around the child’s comfort. Beads, stiff lace, scratchy edges, and loose threads do not belong near a baby’s face or hands. Decorative veil material works best as an outer detail backed with soft new fabric.
Materials and Tools
· Clean, sound section of wedding veil
· Soft new fabric suitable for the main garment
· Christening gown, bonnet, or shawl pattern
· Fine lining fabric
· Matching sewing thread
· Sharp fabric scissors
· Hand-sewing needle or sewing machine
· Pattern paper
· Soft ribbon or fabric-covered fasteners
· Professional dressmaker for valuable or fragile veils
Plan the Christening Piece
1. Select the safest veil section. Choose soft lace or undecorated tulle away from brittle edges, old glue, and loose beads. Keep heavily embellished areas for display rather than placing them on a baby garment.
2. Make the garment from new fabric first. Cut and assemble the main gown, bonnet, or shawl in a comfortable washable fabric. Treat the veil as decoration rather than relying on delicate tulle for the garment’s structure.
3. Test the placement with paper. Use tissue-paper shapes to plan a collar, hem panel, bonnet crown, or sash. This step shows how little heirloom fabric may actually be needed and prevents unnecessary cutting.
4. Back and attach the veil detail. Support lace with lining or fine net, then sew it with small removable-looking stitches where practical. Keep seams smooth and place all knots away from the child’s skin.
5. Check comfort and future storage. Remove loose threads, test every trim, and make sure the piece allows easy movement. Store the finished keepsake with a note explaining which wedding veil supplied the lace.
The part I would keep simple is the amount of decoration. A narrow lace panel often carries more meaning than covering the entire garment, and it leaves enough veil for another family keepsake later.
A less permanent alternative is a removable christening sash, bonnet flower, or small lace wrap for a keepsake Bible. These use very little material and can be taken off before washing the main garment.
Choose a Repurpose That Matches the Veil’s Condition
Keep the Veil Whole
Choose restoration or a new comb when the veil is structurally sound, contains valuable handwork, or may be worn by another bride. A removable change preserves the greatest number of future options.
Use Only the Decorative Details
Choose hair accessories when the lace and beading remain strong but the tulle is torn, stained, or difficult to modernise. Back every motif before cutting so the original threads stay controlled.
Use a Small Section in a Family Keepsake
Choose a christening sash, bonnet detail, handkerchief, or framed panel when you want a clear connection to the wedding without changing the whole veil. Small projects are easier to reverse and share among relatives.
Preserve It Without Alteration
There is nothing wasteful about keeping a meaningful textile intact. Wrap the clean veil in acid-free tissue, store it in a breathable archival box, and add photographs and written history so it does not become an unidentified bundle in the next generation’s cupboard.
Veil Repurposing Choices That Deserve Extra Care
Cutting Before Identifying the Construction
A lace motif may be attached across several areas with one continuous thread. Examine the front and back, photograph the stitching, and stabilise the chosen section before cutting.
Assuming the Veil Can Be Dry-Cleaned Normally
Tulle, silk net, old glue, metal combs, and decorative beads may react differently to cleaning. Ask a bridal-textile specialist to assess valuable or vintage pieces.
Using Old Tulle as Structural Fabric
Aged tulle may look sound while tearing under tension. Use new fabric for the body of a garment or accessory and treat the veil as a supported decorative layer.
Attaching Heavy Hardware to Fine Lace
A clip or comb can pull through delicate motifs. Add a stable backing and distribute the stitches across several strong points.
Removing Too Much Volume at Once
A bulky veil can change dramatically after only one layer or stiff frame is removed. Baste and try the new shape before shortening or discarding additional fabric.
Placing Beads on a Baby Keepsake
Loose pearls, sequins, and stiff trims create snagging and choking concerns. Keep christening details soft, securely sewn, and away from the child’s face and hands.
Using Permanent Glue on an Heirloom
Glue may discolour, stiffen, or become difficult to remove. Fine hand stitching is usually easier to repair and kinder to valuable lace.
Throwing Away the Removed Pieces
Original combs, spare lace, and discarded layers help explain the history and construction of the veil. Store them together with photographs and labels.
Frequently Asked Questions
Can I repurpose a wedding veil without cutting it?
Yes. You can replace the comb, remove a detachable pouf, shorten a separate layer, rewear it for an anniversary shoot, or preserve it as an heirloom. Begin with reversible changes when the veil has family or financial value.
Can ordinary tulle be sewn on a home sewing machine?
It can, but fine tulle may stretch, gather, or disappear into the needle plate. Test scraps first, use a fine needle, and support the fabric with tissue paper or a suitable stabiliser when needed.
How do I know whether my veil is too fragile to alter?
Gently support a hidden area rather than pulling it. Brittle fibres, powdery residue, cracking glue, widening holes, and threads that snap with very light handling are signs that the veil needs professional assessment.
Can veil lace become a hair comb?
Yes, provided the motif is sound and attached to a new stable backing. The comb should be sewn through reinforced areas instead of glued directly to fragile lace.
Can a wedding veil be used for a christening gown?
Suitable lace or tulle can be used as an outer detail, trim, sash, bonnet panel, or removable overlay. Build the main garment from soft new fabric and avoid loose beads or scratchy decoration.
What should I do with the remaining veil after a small project?
Wrap it in acid-free tissue and store it in a breathable archival box. Include the wedding date, names, photographs, and a note describing which section was removed.
Should I add the creator’s original tutorial to my project?
Use the Reel for visual inspiration, then plan the method around your own veil’s material and condition. Valuable heirlooms often need a bridal-restoration specialist rather than a general craft technique.
Let the Veil Carry One Memory Forward
Creative ways to repurpose your wedding veil do not need to begin with scissors. A new comb can return an inherited veil to the aisle, a supported lace motif can become a hair clip, and a small piece of tulle can connect a christening keepsake to an earlier family ceremony.
The most useful decision is often choosing what not to change. Protect the strongest lace, keep meaningful embroidery intact, and save every removed section with clear labels. That care leaves room for another person to understand and use the veil later.
Begin with one reversible step. Photograph the veil, identify its construction, and test a temporary arrangement before making a permanent cut. Then the finished project can feel like a continuation of the veil’s story rather than the end of it.
Which idea feels right for your veil: a modern restyle, a small set of bridal hair accessories, or a family christening keepsake made from one carefully chosen section?
]]>I’m Stella Eve Louise, and I think the weave should guide the refurbishment. A basket with a sound structure may need only cleaning and a light stain. One with an attractive shape but tired colour can take paint, while a damaged handle may be wrapped or rewoven instead of removed completely.
Refurbishing wicker baskets is not about covering every mark until the basket looks factory-made. A repaired section can remain visible, and small colour variations often suit natural woven materials. The important part is checking that the base, rim, handles, and main weave can still support the basket’s intended use.
I don’t think decoration should come before repair. A floral liner or painted finish may look cheerful, but it cannot make a loose handle safe enough to carry a heavy load.
Read the Weave and Check the Basket’s Strength
Empty the basket completely and take it into good natural light. Turn it upside down, look inside the corners, and move the handle gently without forcing it.
Check for:
- Broken or missing wicker strands
- Loose ends sticking into the basket
- Splits around the rim
- A weakened or sagging base
- Mould, mildew, or musty odours
- Flaking paint or varnish
- Rusty staples, nails, or wire
- Loose handle wrapping
- Cracked wooden supports
- Sharp edges
- Insect damage
- Stains from damp storage
Decide how the basket will be used after refurbishment. A decorative basket holding dried flowers does not need to withstand the same strain as a laundry hamper, shopping basket, or log holder.
Remove loose dust with a soft brush or a vacuum fitted with a gentle attachment. Work along the weave rather than dragging the brush aggressively across it.
Use only enough moisture to clean the surface. Wicker and natural plant fibres may soften, swell, or lose their shape if they become saturated. Wipe with a lightly damp cloth and mild cleaner, then allow the basket to dry thoroughly in a well-ventilated place away from intense direct heat.
Never paint, stain, glue, or line a basket while the weave still feels damp. Trapped moisture can interfere with the new finish and may encourage unwanted odours or surface growth.
Useful Materials and Tools
- Soft brush
- Vacuum with a brush attachment
- Mild cleaner
- Clean cloths
- Small detail brush
- Fine sandpaper
- Replacement cane, reed, willow, or suitable binding material
- Wood glue or adhesive suited to the basket material
- Small clamps or clips
- Primer suitable for wicker
- Brush-on or spray paint
- Wood stain suitable for the material
- Clear protective finish
- Fabric for a liner
- Pattern paper
- Sewing machine or hand-sewing needle
- Strong thread
- Leather, canvas, or webbing for replacement straps
- Rivets, screws, or other appropriate fasteners
- Gloves
- Eye protection
- Dust mask or suitable respiratory protection when required
- Drop cloth
Work in a ventilated area when using paint, stain, spray products, or strong adhesive. Wear eye protection when cutting old wire, drilling strap holes, or trimming stiff replacement material.
Restore a Faded Basket With a Warm Stained Finish

Stain suits a basket that remains structurally sound but has become pale, patchy, or visually dry. The selected project refreshes a tired wicker basket with colour while allowing the woven surface to remain visible.
Unlike opaque paint, stain does not disguise repairs, colour differences, or every mark. That can be an advantage when you want the basket to retain a natural character, but it also means the cleaning and preparation need to be fairly even.
Materials and Tools
- Clean, sound wicker basket
- Fine brush
- Soft cloths
- Fine sandpaper
- Stain compatible with the basket material
- Small natural-bristle or suitable synthetic brush
- Gloves
- Drop cloth
- Compatible protective finish, if required
Refresh the Colour in Four Steps
- Clean and examine the existing surface. Remove dust from the crevices and wipe away dirt or residue. If the basket has an old glossy coating, test whether the chosen stain can penetrate it before working across the whole piece.
- Smooth only the rough areas. Use fine sandpaper carefully on splinters, raised fibres, or obvious worn patches. Avoid flattening the weave or sanding so heavily that thin strands become weaker.
- Apply the stain gradually. Work in small sections and brush along the direction of the weave. Use a second small brush to reach recessed areas, then remove excess product so it does not collect in dark sticky patches.
- Review the basket after the finish settles. Check the underside, rim, and handle for missed areas. Add another controlled layer only if the colour remains too uneven and the product instructions allow it.
For me, a stained basket should still look like woven material. If every groove fills with a heavy dark coating, the texture begins to disappear.
A very light tinted finish can warm pale wicker without changing it dramatically. You could also stain only the base and handle, leaving the main body closer to its original colour.
Give a Thrifted Basket a Colourful Painted Makeover

A painted basket can work as gift packaging, toy storage, craft organisation, or a decorative container. The selected thrift flip uses colour to transform an inexpensive wicker basket into a brighter reusable piece.
Wicker contains many narrow surfaces and recessed gaps, so paint application requires patience. One thick coat may bridge across the openings, form drips, or leave the visible surface painted while the deeper weave remains patchy.
Materials and Tools
- Thrifted wicker basket
- Cleaner and soft brush
- Fine sandpaper
- Wicker-compatible primer
- Brush-on or spray paint
- Small detail brush
- Painter’s tape
- Drop cloth
- Gloves and appropriate respiratory protection
- Compatible sealer, if needed
Paint the Basket in Five Steps
- Repair the structure first. Secure loose strands, correct any sharp ends, and test the handle. Paint should be the final surface treatment rather than the material holding a damaged basket together.
- Prepare the surface for adhesion. Clean away dust and greasy residue, then dull any slick coating lightly when appropriate. Remove sanding dust from the weave before priming.
- Apply primer in controlled layers. Turn the basket so you can reach the underside, rim, interior, and handle from several angles. Avoid flooding the gaps or allowing primer to form heavy beads.
- Build the colour slowly. Apply several light passes rather than trying to cover the basket immediately. Let each layer settle, then use a small brush to correct missed recesses instead of adding excessive paint everywhere.
- Check the finish and intended use. Make sure the handle still moves naturally and the weave has not become brittle. Add a compatible protective finish when the paint system and planned use require one.
I know it can feel tempting to keep spraying until every shadow disappears, but the basket’s depth naturally creates darker recessed areas. A little variation often makes the weave more visible.
Try colour blocking only the lower third of the basket or painting the rim and handle while leaving the main body natural. A stencil can also add simple shapes without covering the full weave.
Update a Laundry Basket With Green Paint and Leather Straps

Large laundry baskets often remain structurally useful even after their finish and straps become tired. This makeover uses green spray paint and handmade leather straps to update an old basket for blanket storage.
A large basket needs careful inspection because the lid, hinges, base, and handles may all receive regular strain. Replacement straps should be attached to sound structural points rather than weak decorative strands.
Materials and Tools
- Lidded wicker laundry basket
- Cleaner and brush
- Fine sandpaper
- Wicker-compatible primer
- Paint
- Leather or strong alternative strap material
- Leather punch or suitable drill
- Rivets, bolts, or appropriate fasteners
- Measuring tape
- Cutting mat and suitable knife
- Gloves and eye protection
- Optional fabric liner
Complete the Laundry-Basket Makeover in Five Steps
- Test the basket and lid. Check the base, corners, hinges, and original strap attachment points. Repair loose framework before adding the extra weight and tension of new hardware.
- Clean and prepare the weave. Remove dust from inside and outside, then smooth any sharp fibres. Protect hinges or fittings that should not be painted.
- Apply the new colour. Prime when required and build the paint in light layers from several angles. Open and close the lid during the process so hidden contact areas do not become sealed together.
- Measure and make the straps. Cut matching leather sections and soften any sharp corners. Mark the fixing holes accurately and use hardware suitable for both the strap and the basket’s supporting structure.
- Attach and test the finished basket. Fasten the straps without crushing the wicker. Add blankets or laundry gradually and stop if the attachment points bend or separate.
The leather and green paint already create a strong contrast, so I would keep any additional decoration quiet. This is still a working storage basket, not a place where every remaining craft supply needs to find a home.
Canvas, cotton webbing, or reclaimed belt sections can replace leather when they are strong enough for the intended use. A plain washable liner can also protect blankets from the rough interior.
Problems That Can Spoil a Wicker Basket Refurbishment
Soaking the Basket During Cleaning
Too much water can soften natural fibres, loosen joints, and distort the shape. Use controlled moisture and allow the basket to dry fully before continuing.
Decorating an Unstable Basket
Paint, fabric, and ribbon cannot correct a weak base or broken handle. Repair the structure first and change the basket’s purpose when it is no longer suitable for carrying weight.
Applying One Heavy Paint Coat
Thick paint can bridge the weave, form drips, and dry unevenly in the recesses. Several light layers usually preserve more texture.
Using Stain Over a Sealed Surface
Stain may sit unevenly on top of varnish, paint, or a non-porous coating. Test the surface and choose a compatible finish rather than assuming every wicker basket is unfinished wood.
Hiding Sharp Ends Under a Liner
A fabric liner may conceal broken wicker without making it safe. Trim, smooth, tuck, or repair sharp strands before fitting the fabric.
Wrapping a Structurally Broken Handle
A decorative cover does not restore a cracked handle core. Repair or replace the supporting structure before adding new wrapping.
Attaching Heavy Straps to Weak Weaving
New hardware may tear through fragile strands. Fix straps through sound supports or add appropriate reinforcement.
Using the Same Repair for Every Basket
Willow, cane, rattan, reed, paper fibre, and synthetic wicker do not behave identically. Match the cleaning, adhesive, paint, and replacement material to the basket you have.
Returning Damp Items to Storage
Laundry, towels, plants, and outdoor equipment may carry moisture into the weave. Use a washable liner and let damp items dry before storing them in a refurbished natural-fibre basket.
Frequently Asked Questions
Can every wicker basket be refurbished?
No. A basket with widespread rot, severe mould, crumbling fibres, a collapsed base, or major structural failure may not remain safe for practical use. Small sound sections could still be saved for decorative crafts.
Should I paint or stain my basket?
Choose stain when you want to preserve the natural woven appearance and the surface can accept it. Paint is more suitable when you want stronger colour or need to visually unify repaired areas.
Can I wash a wicker basket with water?
Use only limited moisture unless you know the material and repair method can tolerate more. Avoid leaving the basket soaked, and dry it thoroughly with good airflow.
What is the easiest refurbishment for a beginner?
Cleaning, adding a removable liner, or applying a restrained painted accent is usually easier than replacing woven strands. Begin with a structurally sound basket.
Can I repair wicker with fabric?
Fabric can create a useful visible patch for light storage or decoration. It may not restore the original structural strength, so do not assume a fabric repair makes the basket suitable for heavy carrying.
How do I stop paint from missing the gaps?
Apply light coats from several angles and rotate the basket as you work. Use a small brush for missed recesses rather than flooding the full surface with more paint.
Can refurbished wicker baskets be used outdoors?
Only when the material, finish, and construction suit outdoor conditions. Even protected baskets should not be left where water can collect inside the weave.
Let the Weave Decide the Next Chapter
Learning how to refurbish wicker baskets begins with looking beyond faded colour. The condition of the base, rim, weave, and handle tells you whether the basket needs a light refresh, a visible repair, or a completely different purpose.
A warm stain can preserve the natural surface. Paint can update an ordinary thrifted find, while willow wrapping or linen weaving can address specific damaged areas. Fabric lining and replacement straps make larger baskets more comfortable to use without hiding their woven structure.
Begin with the repair that affects function most. Clean the basket, secure the loose strands, and test its strength before choosing the decorative finish. Then the colour, liner, or new handles can support the basket rather than distract from unresolved damage.
Which wicker basket would you refurbish first: a faded storage basket, a damaged shopping basket, or a large laundry hamper?
]]>