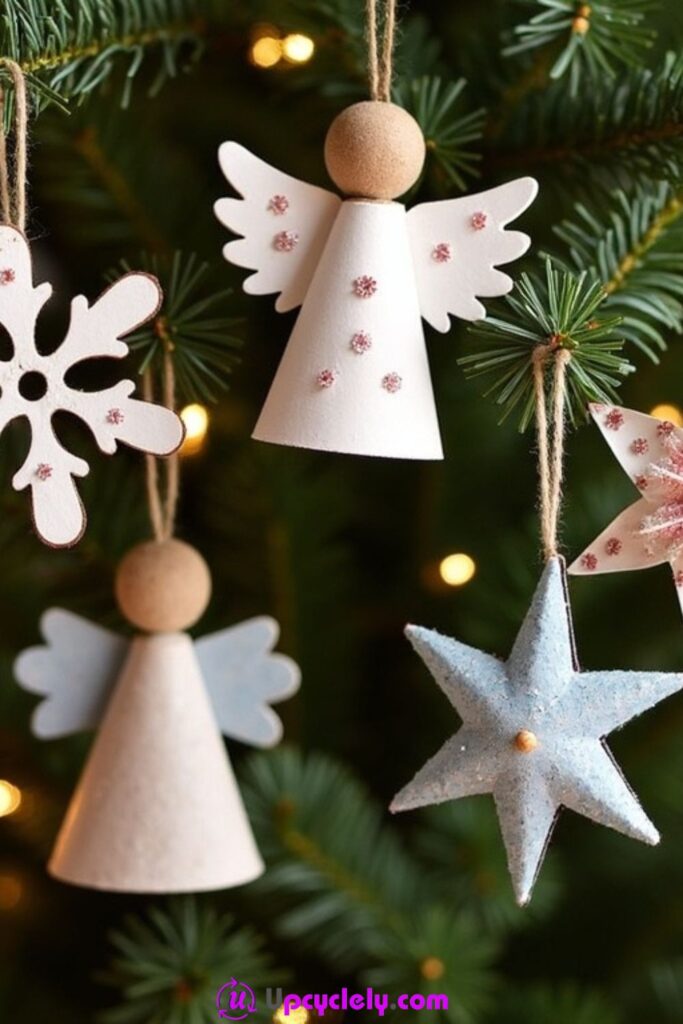
Christmas Ornaments
Materials Needed
- Empty toilet paper rolls
- Wooden beads
- Glitter in pink, white, and light blue
- White twine or string
- Craft paper in white, light blue, and pink
- Glue
- Scissors
- Small hole punch
Step-by-Step Instructions
- Create the Angel Shapes
I start by cutting the toilet paper rolls into cone shapes for the angel bodies. Then, I glue wooden beads on top of each cone to act as the heads. Using my craft paper, I cut out wings and glue them onto the back of each angel. Dusting the wings with glitter gives them a sparkling, festive look. - Craft the Stars
I use the leftover roll to cut out star shapes. Depending on the size you want, trace the stars with a stenciled design. I coat one in pink glitter and the other in blue. Once they dry, they’re solid enough to hang. - Design the Snowflake
For the intricate snowflake, I draw and cut a design from white craft paper before decorating the edges with glitter. I make small holes with the hole punch along key points for an extra delicate appearance. - Attach the Twine
Finally, I punch holes at the top of each shape and feed through some white twine to hang them. Adjusting the length of the string allows them to dangle evenly off the tree.
Pro Tip
Use a paintbrush to apply glue for the glitter, which makes it much easier to control and ensures you don’t end up with clumps.
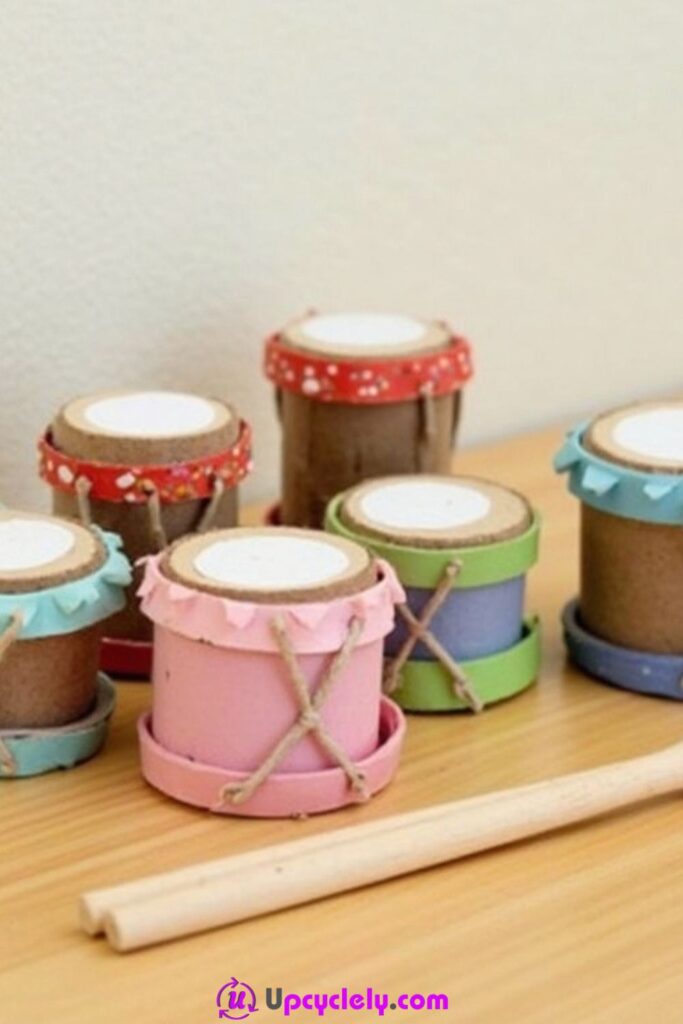
Mini Drum Set
Materials Needed
- Toilet paper rolls
- Colored paper (red, blue, pink, green)
- String
- Wooden stick or skewers for drumsticks
- White craft paper
- Scissors and glue
Step-by-Step Instructions
- Shape the Drum Bases
I cut the toilet paper rolls into small, equal-sized cylinders. Wrapping them in colored paper instantly gives the vibrant drum-like effect. Each roll gets a different color for variety. - Add the Crisscross Strings
For that drum texture, I run a few strands of string crisscrossed around each roll’s exterior, gluing them in place. This not only reinforces the design but adds an authentic touch. - Finish the Drumheads
To create the top drum surfaces, I cut out circles from white craft paper large enough to cover one end of each roll. Gently gluing them down secures the top, forming a tight drumhead effect. - Craft the Drumstick
I use a skewer as a drumstick. Cutting it down to size and adding a rounded drop of glue at the tip mimics the traditional stick. Painting it beige or white completes its look and adds a polished finish.
Pro Tip
You can use leftover gift wrap for the sides of the drums to make them even more eye-catching and repurpose materials.
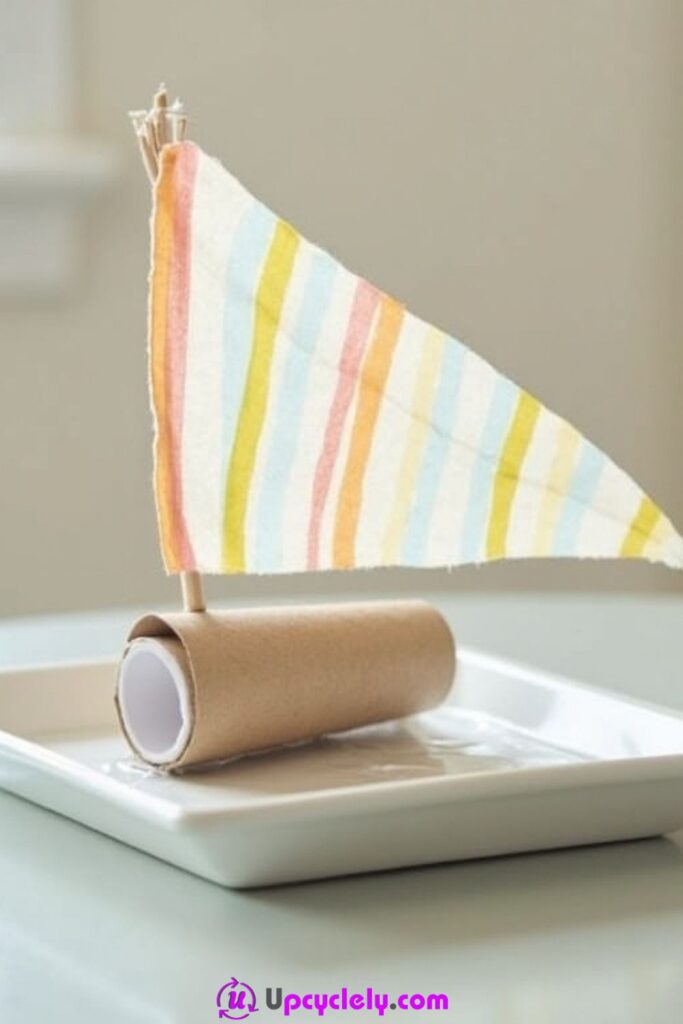
Toilet Paper Roll Boat
Materials Needed
- Toilet paper roll
- Colorful fabric with stripes
- A small wooden stick (for the mast)
- A star accessory (optional)
- Scissors
- Glue
- A shallow dish for display
Step-by-Step Instructions
- Prepare the Boat Hull
I cut the toilet paper roll lengthwise, then pinch it slightly to create a boat shape. It’s then painted or left as is for a natural look. - Attach the Sail
A piece of fabric is cut into a triangle. I glue it to a small wooden stick that serves as the mast. Attaching the mast vertically in the center of the roll completes the hull’s essential structure. - Add a Star Accessory
To give it some personality, I top the mast with a small wooden piece cut into a star. Painting this in vibrant colors makes the design pop. - Display the Boat
I place the completed boat on a small, shallow dish for display. The dish can even be filled with sand or small stones for an added nautical aesthetic.
Pro Tip
A hot glue gun is great for securing the mast quickly and firmly, especially if kids will handle the piece.
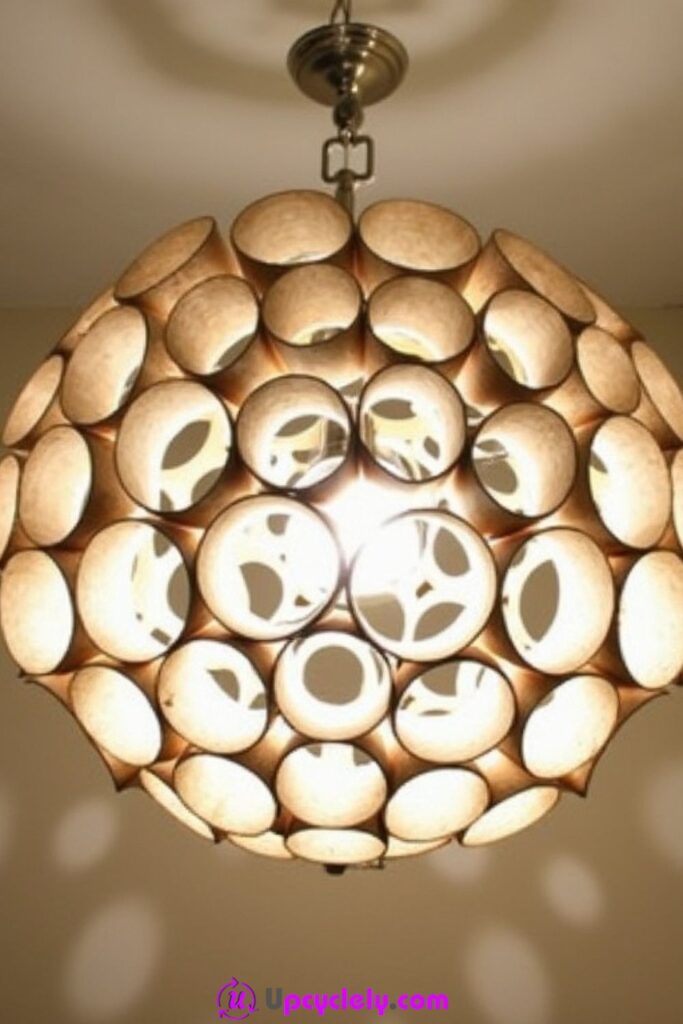
Toilet Paper Roll Chandelier
Materials Needed
- Toilet paper rolls
- Glue gun
- Scissors
- Spray paint (optional, for color)
- Light source (pendant bulb)
Step-by-Step Instructions
- Prepare the Rings
I cut the toilet paper rolls into evenly sized rings, making sure the edges are smooth. You’ll need a large number of these for the chandelier structure. - Arrange the Framework
I start gluing the rings together in a circular pattern, one layer at a time. Each layer builds on the last, forming a spherical design. - Paint and Style
Once my design is complete, I spray paint the chandelier in a neutral or metallic color to make it match most interior décor. Adding glitter or texture is optional but can enhance the effect. - Install the Light
I insert a small pendant light bulb into the center of the sphere and secure it through the top opening. A strong string or chain is used to hang it safely from the ceiling.
Pro Tip
To get clean and consistent rings, flatten the rolls slightly before cutting, then reshape them into circles when assembling.
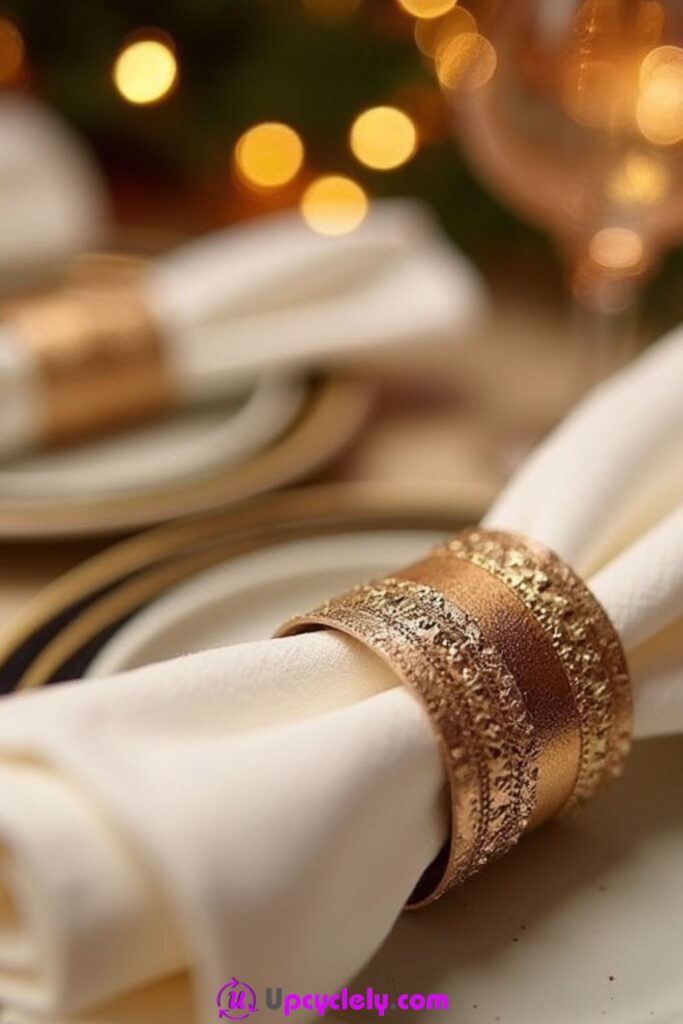
Elegant Napkin Rings
Materials Needed
- Empty toilet paper rolls
- Gold spray paint or metallic paint
- Glitter (optional)
- Decorative stickers or jewels
- Scissors
- Clear glue
Step-by-Step Instructions
- Prepare the Rolls
First, I cut the toilet paper rolls into smaller rings, about an inch wide. It’s helpful to flatten the rolls slightly while cutting to get even edges, then reshape them into perfect circles. - Base Coloring
Next, I spray-paint all the rings with a gold color, making sure to cover the edges as well as the inside for a seamless finish. If I’m using brush-on paint, I do two thin coats for better coverage. - Decorate the Rings
Once the paint dries completely, I get creative with decorations. I add a strip of glitter around the center of each ring for a festive look and stick on small jewels or metallic stickers to make the design pop. - Seal the Look
To ensure durability, I coat the entire surface of the rings with a layer of clear glue or a clear spray sealant. This locks in the glitter and decorations and prevents chipping over time.
Pro Tip
Use a slightly stiff cardboard tube (like a paper towel roll) if you want sturdier rings, especially for heavy napkins.
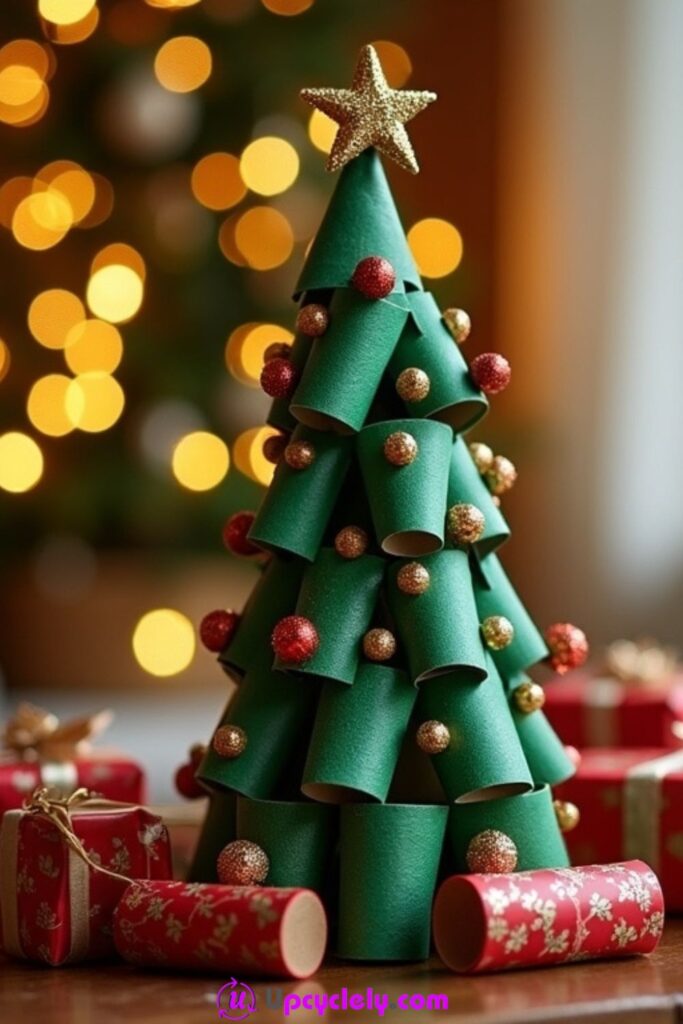
Toilet Paper Roll Christmas Tree
Materials Needed
- Toilet paper rolls (for the base and structure)
- Green construction paper
- Glittery gold paper (for the star)
- Small red and gold beads or pom-poms (for ornaments)
- Scissors
- Glue or a hot glue gun
Step-by-Step Instructions
- Make the Cone Shape
I start by rolling a piece of green construction paper into a cone shape and cutting the bottom edge to make it flat. The cone will act as the tree’s body. Then, I secure the shape with glue and reinforce it by inserting a toilet paper roll into the base of the cone for added stability. - Add the Branch Layers
I cut extra green construction paper into strips and snip them to create fringe along one side. Wrapping these strips around the cone from the bottom up, I overlap them slightly to mimic layered tree branches. - Decorate with Ornaments
Using small red and gold beads or tiny pom-poms, I glue ornaments all over the tree. This instantly gives it a festive vibe. - Top It Off with a Star
Finally, I cut out a star shape from glittery gold paper and glue it to the top of the cone. It’s the finishing touch that makes the tree look polished and holiday-ready.
Pro Tip
For a snowy effect, dry-brush white paint or glue onto the tips of the fringes, then sprinkle them with glitter.
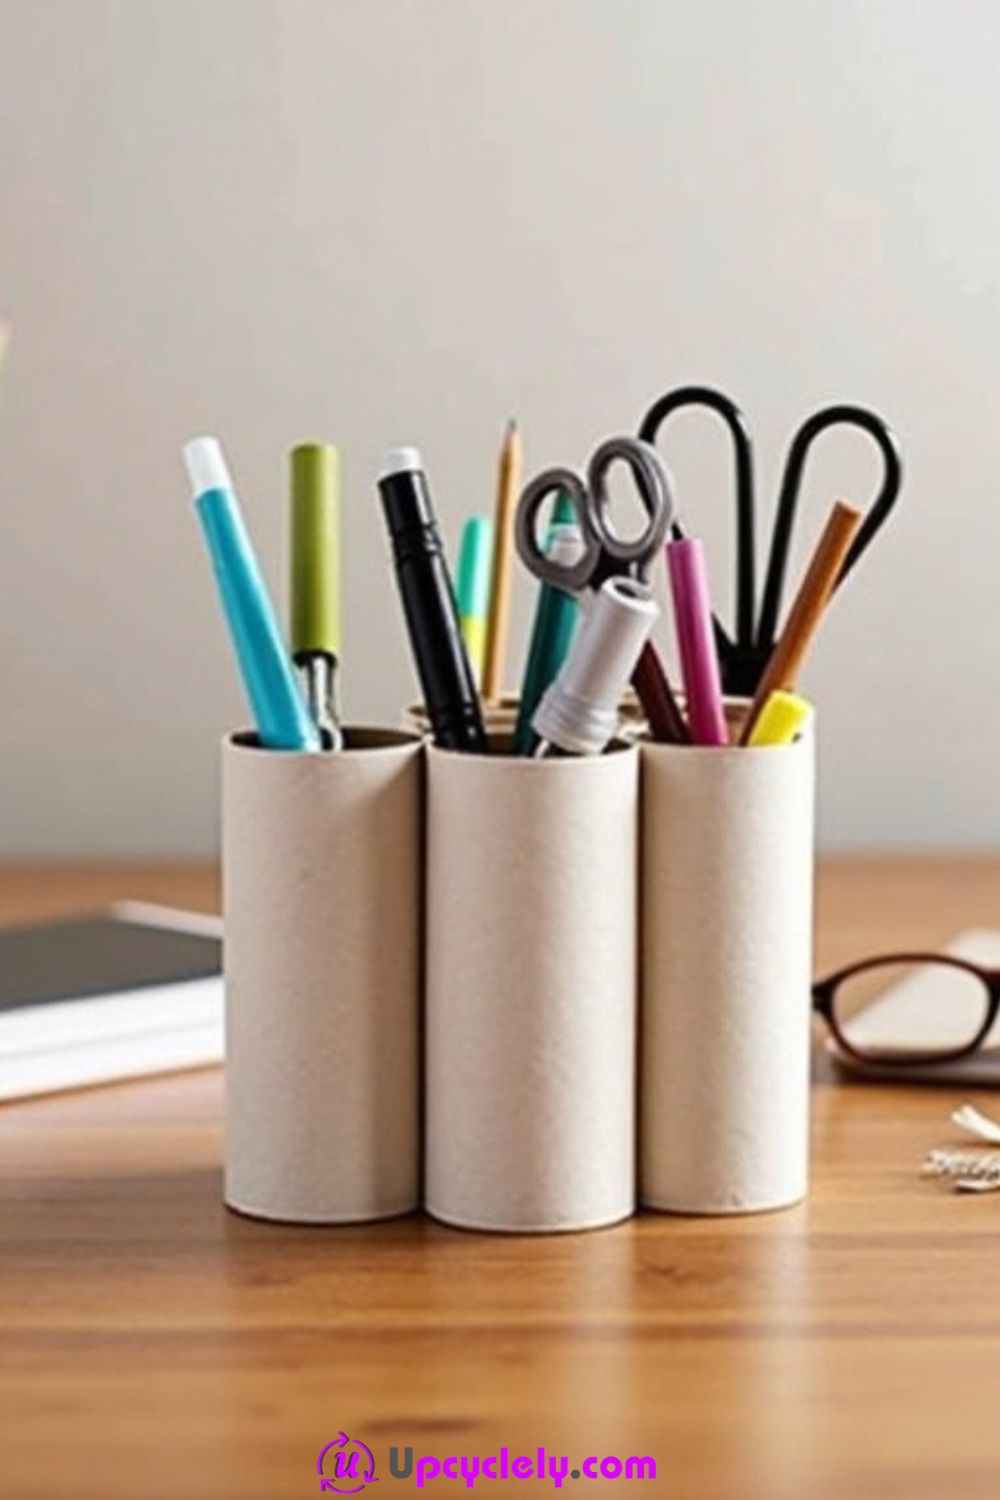
Desk Organizer
Materials Needed
- Toilet paper rolls
- Wrapping paper or colorful craft paper
- A sturdy cardboard base
- Glue
- Scissors
- Tape (optional)
Step-by-Step Instructions
- Prepare the Rolls
The first step is cutting the rolls to different heights. I leave some tall for pens and scissors, while others are shorter for paper clips or small items. - Add Color to the Rolls
To make the desk organizer visually appealing, I wrap each toilet paper roll in colorful or patterned craft paper. I use glue or tape to secure the paper neatly. - Attach Rolls to the Base
I take a sturdy piece of cardboard and arrange the rolls in an appealing layout. Once I’m satisfied with the design, I glue each roll securely to the base. - Allow to Dry and Organize
After the glue dries completely, I fill each roll with items like pens, scissors, and markers. It quickly becomes a functional and organized addition to my desk!
Pro Tip
If you want extra durability, use a hot glue gun to attach the rolls to the base. This keeps them firmly in place even with heavy use.
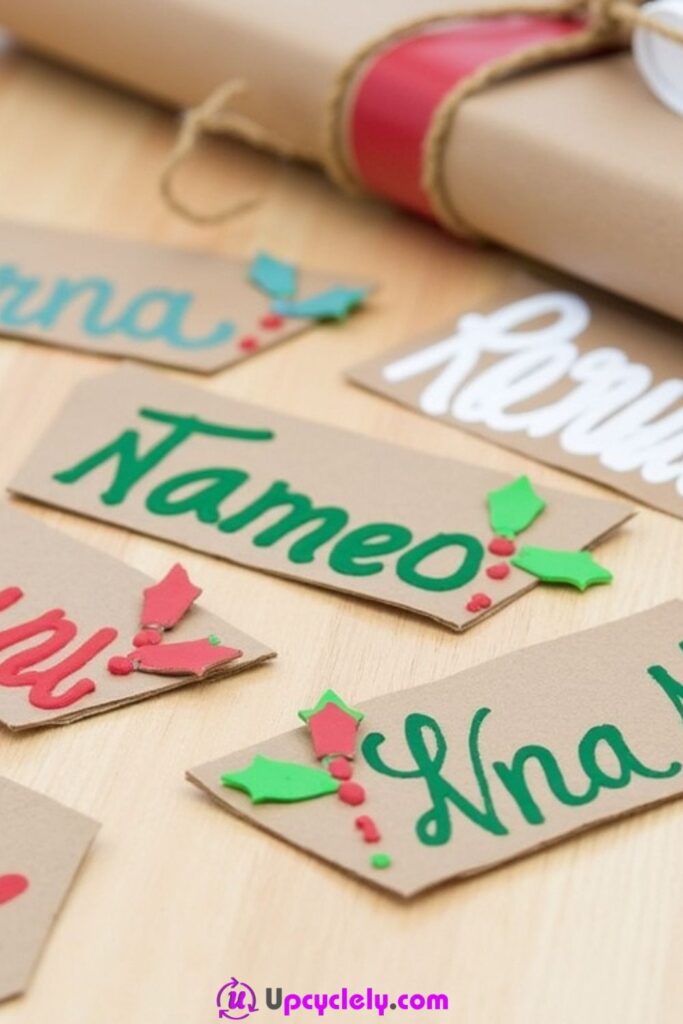
Gift Tags
Materials Needed
- Toilet paper rolls
- Brown craft paper
- Twine or ribbon
- Markers or paint pens (in white, red, green, or blue)
- Decorative stamps
- Scissors
Step-by-Step Instructions
- Create the Tag Shapes
I flatten the toilet paper rolls and cut them into small rectangles. You can also shape the top end by cutting it into a rounded or diagonal edge to give the classic gift tag appearance. - Cover with Craft Paper
Once the shapes are ready, I cover them with brown craft paper for a nice finish. This acts as the base for the designs and makes the tags sturdier. - Design Your Tags
I use markers or paint pens to write the recipient’s name in a fun, festive font. Adding tiny decorations like holly leaves, snowflakes, or stars makes it feel more personalized and holiday-themed. - String the Tags
Finally, I punch a hole near one edge of each tag and thread a piece of twine or ribbon through. This makes it easy to tie the tags onto gift boxes, bags, or even jars.
Pro Tip
Add a small sprig of real holly or a cinnamon stick tied with the twine to elevate your gift presentation even more!
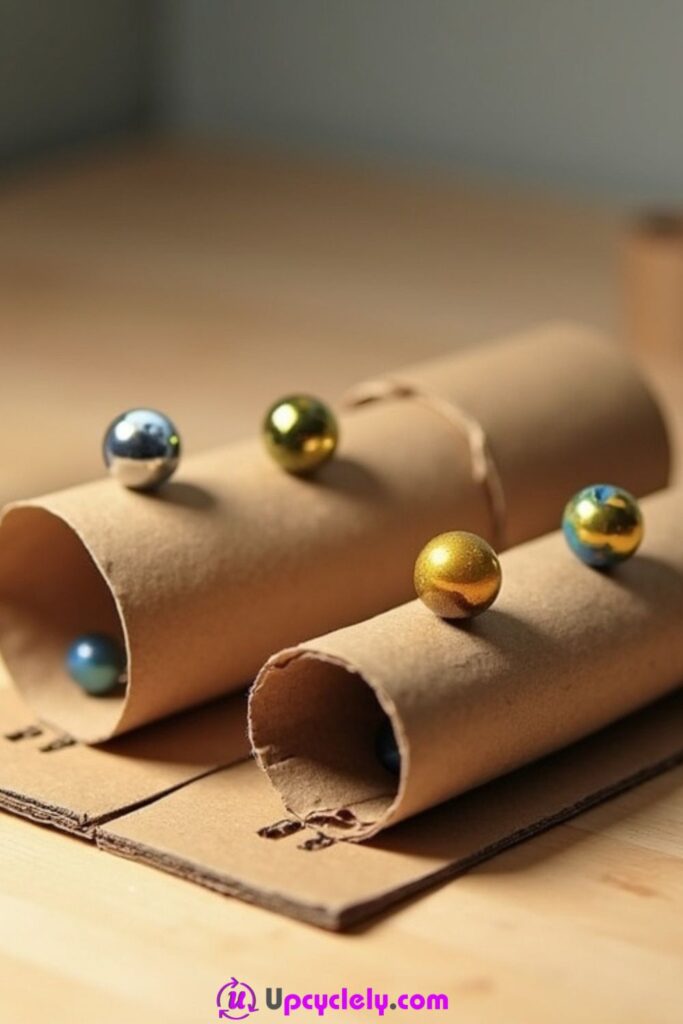
Marble Run
Materials Needed
- Toilet paper rolls
- A cardboard base
- Scissors
- Glue or tape
- A marker
- Marbles
Step-by-Step Instructions
- Cut and Shape the Rolls
I start by cutting the toilet paper rolls lengthwise into halves, creating open channels for the marbles to travel through. For variety, I also cut smaller sections off some rolls to act as connectors. - Plan the Track Layout
Before gluing, I lay out the toilet paper roll sections on a flat piece of cardboard to design a track. I make sure there’s a gentle incline so the marbles can roll smoothly. - Secure and Test the Track
I glue or tape the rolls into place on the cardboard base. Every time I add a new section, I test it with a marble to make sure it flows correctly to the next piece. - Finalize and Add Extras
Once the track is complete, I decorate the base and rolls with paint or colorful markers. Fun themes like a racecourse or jungle adventure can make the marble run even more exciting!
Pro Tip
Add mini barriers or jumps to the track to make the marble’s path more dynamic and challenging for kids to play with.
Pet Tunnel
Materials Needed
- Empty toilet paper rolls (around 6-7)
- Glue gun or strong tape
- A sheet of sturdy cardboard
- Non-toxic paint (optional)
- Small rubber balls or pet-safe toys
Step-by-Step Instructions
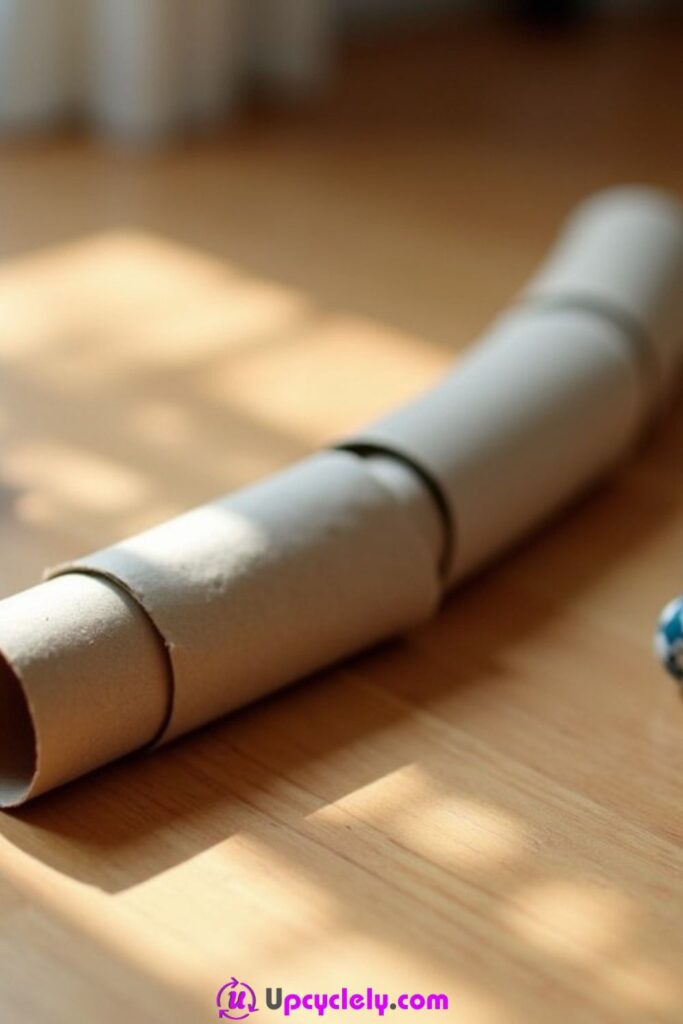
- Prepare the Rolls
I start by cutting one end of each toilet paper roll into small, overlapping slits (about 1 inch long). This allows the rolls to slightly interlock and secure better when attaching them together. - Connect the Rolls
I line up the rolls end-to-end, forming a straight or curved shape. Using a glue gun or strong tape, I secure the ends firmly together to prevent them from shifting when the pet uses the tunnel. - Mount the Tunnel
Once the rolls are connected, I glue or tape the entire structure onto a piece of sturdy cardboard to provide additional stability. This prevents the tunnel from tipping over during play. - Paint and Add Toys
For a fun touch, I paint the entire tunnel with pet-safe, non-toxic paint. Once it’s dry, I place it on the floor along with small pet-safe balls or toys nearby to encourage exploration.
Pro Tip
Ensure there are no sticky glue spots or sharp edges left over that could harm your pet. Smooth out all connections for a safe experience.
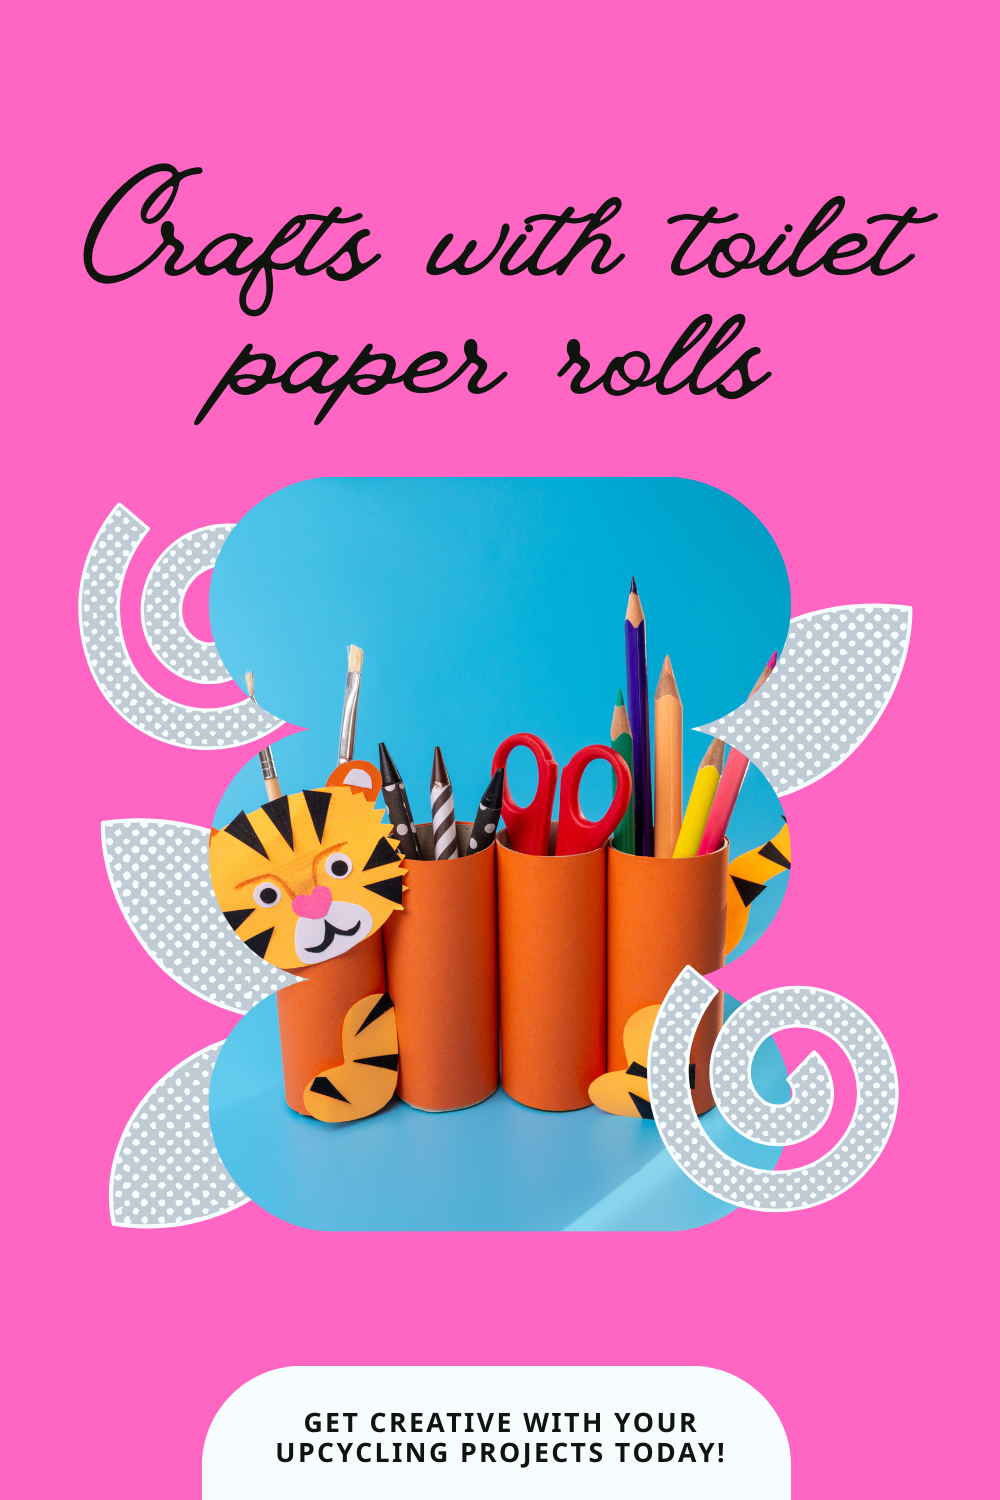
Colorful Pencil Holder
Materials Needed
- One toilet paper roll
- Decorative wrapping or craft paper
- Adhesive (glue stick or hot glue)
- A piece of cardboard for the base
- Scissors
- Paint or markers (optional)
Step-by-Step Instructions
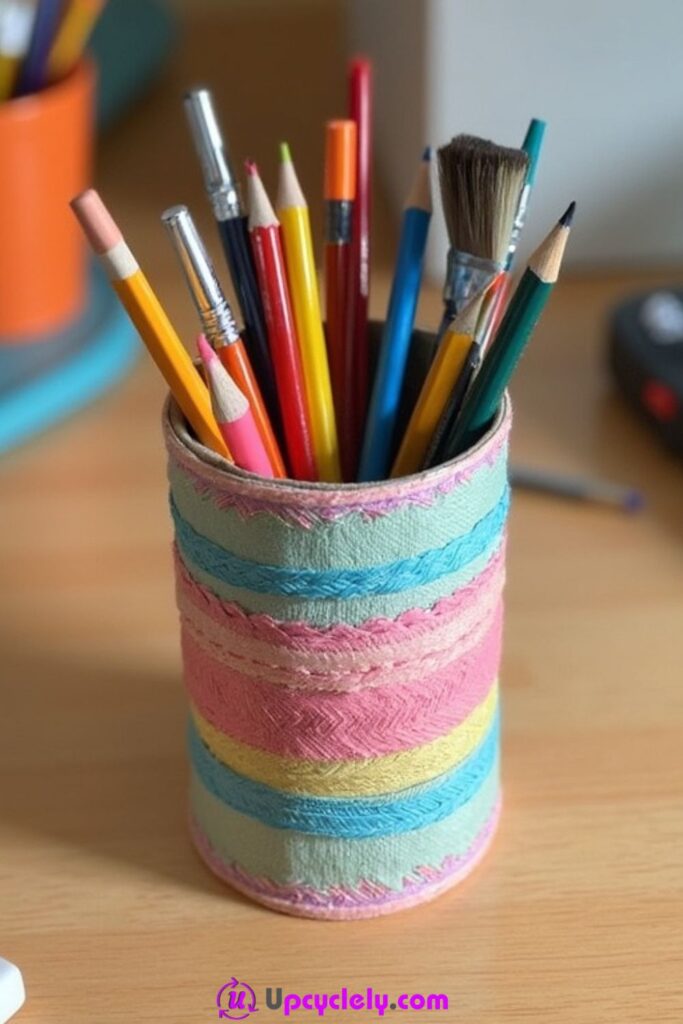
- Create the Base
I trace the bottom of the toilet paper roll onto a piece of cardboard. I then cut out the circle, ensuring it’s slightly larger than the roll’s diameter. This becomes the base for the holder. - Attach the Base
I glue the cardboard circle to the bottom edge of the toilet paper roll, holding it in place for a few seconds until it’s firmly attached. This step is vital to keep the holder stable. - Decorate the Roll
Using colorful wrapping paper, I measure the height and circumference of the roll and cut out a matching piece. I glue it around the roll to add a vibrant touch. Alternatively, I paint or draw designs directly onto the roll for a personalized style. - Organize and Fill It
Once the glue dries completely, I place my pencils, pens, or paintbrushes inside the holder. It’s a quick yet functional addition to any workspace!
Pro Tip
For added flair, glue small gemstones, pom-poms, or stickers to the outside of the holder to give it a whimsical, artistic feel.
Adorable Robots
Materials Needed
- Toilet paper rolls (1-2)
- Pipe cleaners (red and other colors)
- Buttons (various sizes and colors)
- Small pom-poms
- Scissors
- Glue or a hot glue gun
- Paint in bright colors
Step-by-Step Instructions
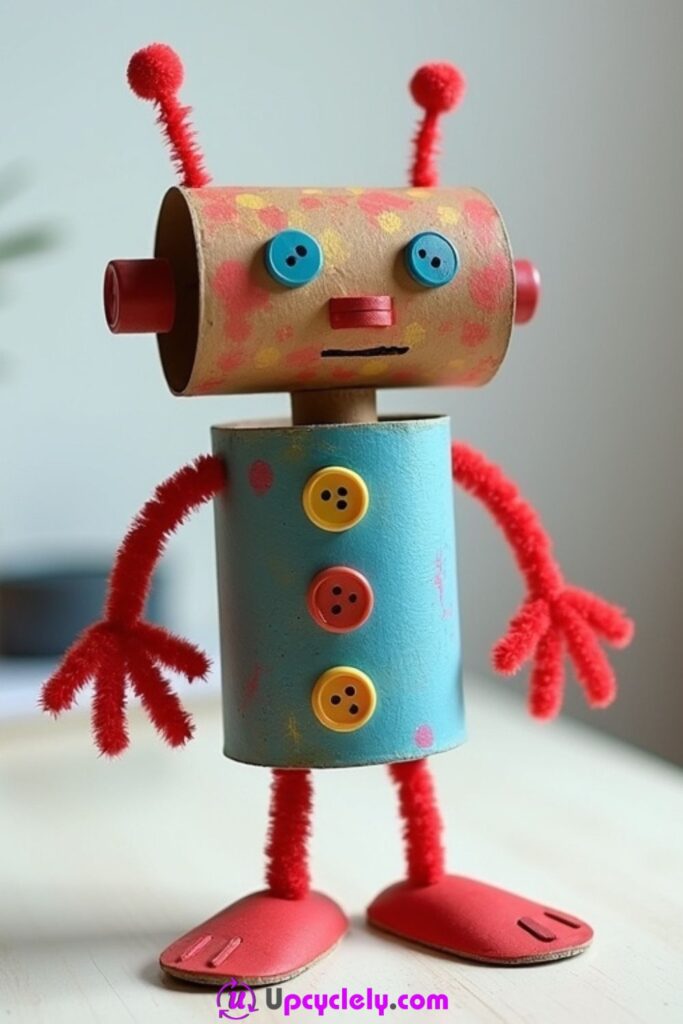
- Build the Robot Body
I paint the toilet paper roll in a bright base color like blue or yellow and allow it to dry fully. For a two-roll robot, I glue the rolls vertically, stacking them one on top of the other to create a taller body. - Attach the Arms and Legs
With pipe cleaners, I shape arms and legs by bending them to resemble limbs. I glue or tape these onto the roll, ensuring they’re secure and positioned evenly. - Add the Robot’s Face
Using buttons for eyes and a small strip of craft paper or paint for a mouth, I create a playful expression. Smaller pom-poms can add extra charm, like at the end of the antennae. - Finish the Details
I glue additional buttons to the body to represent “controls” and bend two pipe cleaners into antenna shapes at the top of the head. Adding pom-poms at the tips gives the antennae a finished, whimsical touch.
Pro Tip
For extra stability, place a small weight (like a rock) inside the toilet paper roll before decorating to prevent the robot from tipping over.
Festive Snowman
Materials Needed
- Two toilet paper rolls
- White paint
- Black and orange buttons (or craft foam)
- Felt or ribbon (for the scarf)
- Twigs (for arms)
- Glue gun or strong adhesive
Step-by-Step Instructions
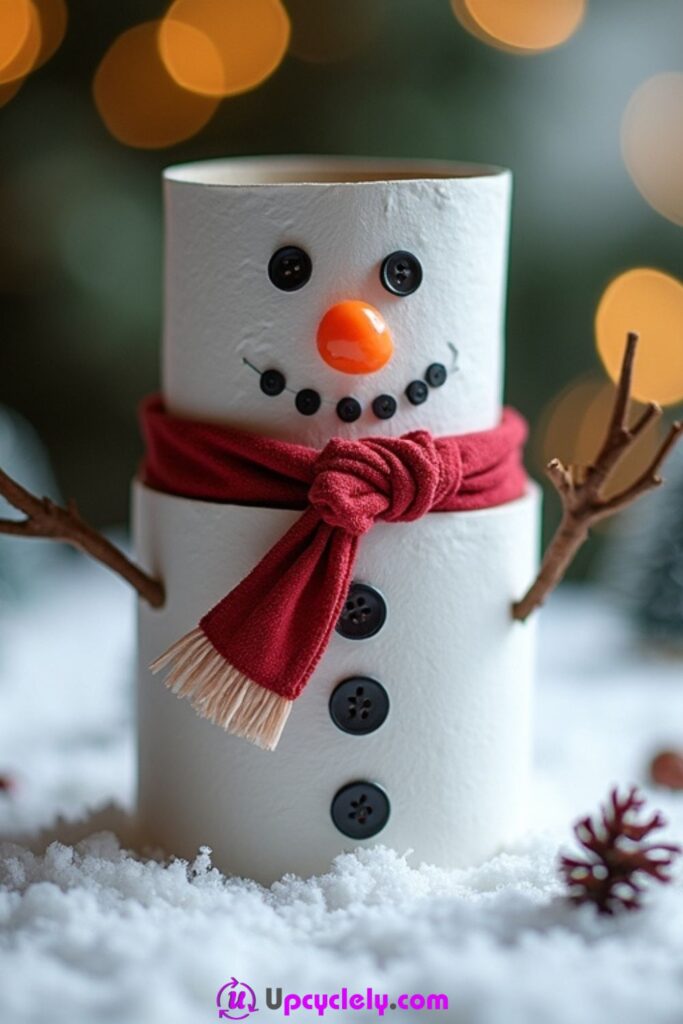
- Paint the Rolls White
I paint two rolls in solid white and make sure they dry completely. These serve as the snowman’s body and head. - Stack the Rolls
Using a glue gun, I attach one roll vertically on top of the other. This creates the stacked snowman structure. - Add Facial and Body Features
I glue black buttons onto the top roll for eyes and an orange button in the middle for a carrot nose. For the mouth, I arrange smaller black buttons in a smiling line. Larger buttons go vertically along the bottom roll as the body details. - Attach the Scarf and Arms
Wrapping a strip of felt or ribbon around where the rolls meet makes a cozy scarf, while the twigs get glued to either side as arms.
Pro Tip
Sprinkle some glitter on the painted rolls before they dry to give the snowman a frosty, snowy effect.
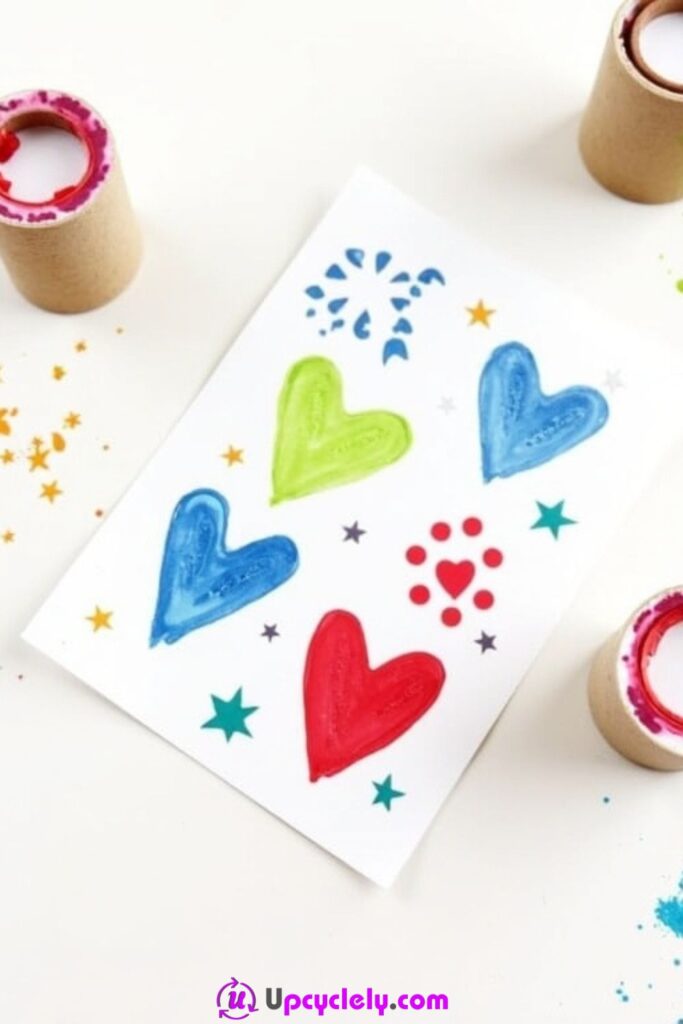
Toilet Paper Roll Stamps
Materials Needed
- Toilet paper rolls
- Paint (various colors)
- A flat surface for stamping (paper or fabric)
- Scissors
- Glue
Step-by-Step Instructions
- Prepare the Stamps
I flatten the roll gently and cut one end into shapes like hearts or stars. Opening it back up and reshaping it creates a sturdy stamp base. - Add Stability
For extra stability, I secure the inside with a little glue or tape to keep the shape solid while stamping. - Dip the Stamp in Paint
I pour paint onto a flat surface (like a plate) and lightly press the shaped edge of the roll into the paint. Dipping evenly ensures a clear stamp design each time. - Start Stamping
I press the paint-coated roll onto paper or fabric to create the desired design. Re-coating with paint as needed keeps the shapes crisp and colorful.
Pro Tip
Use metallic paints for stamping on darker paper or fabric to create bold, shimmering patterns perfect for gift-wrap or holiday projects.
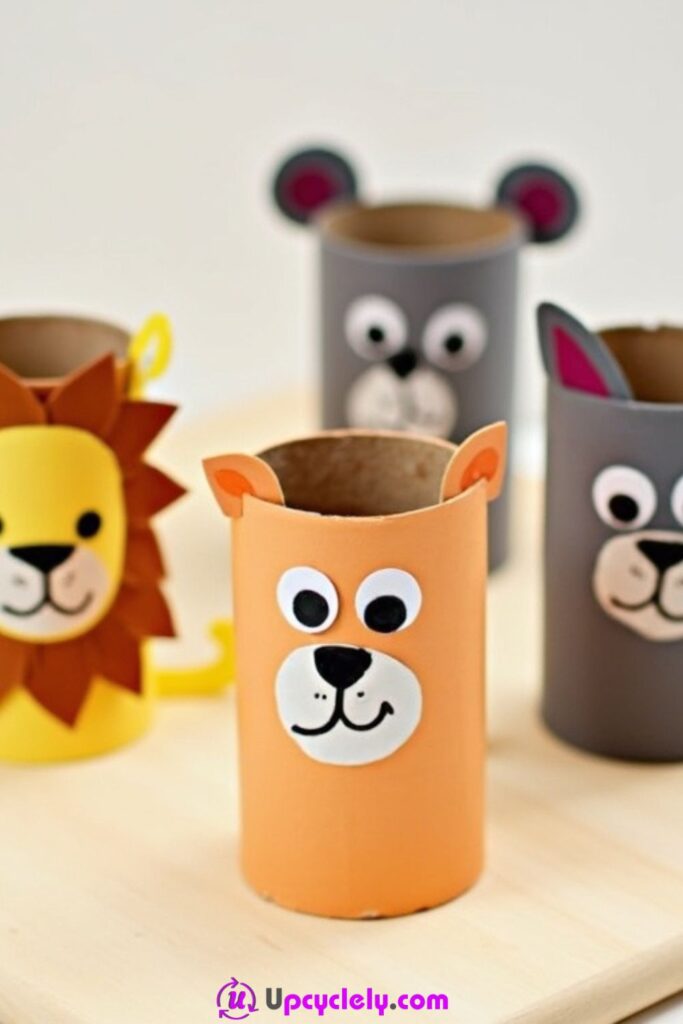
Animal-Themed Toilet Paper Roll Figures
Materials Needed
- Empty toilet paper rolls (one for each animal)
- Colored paper (yellow, orange, gray, brown, pink)
- Googly eyes
- Glue
- Scissors
- Markers or crayons
- Pom-poms (optional for details)
Step-by-Step Instructions
- Prepare the Base
I start by selecting one toilet paper roll for each animal I want to make. Then, I cut colorful paper to the size of each roll and glue it around each one, making sure it fits snugly. This acts as the base coat for the animal figure. For example, yellow paper for the lion or gray for the bunny and mouse. - Design the Faces
Using markers, googly eyes, and leftover paper pieces, I create the facial features for each animal. For the lion, I cut out a round yellow face and add whiskers and a nose, while for the bunny and mouse, I use pink paper for the inside of their ears. Gluing everything neatly together makes the characters come to life. - Add Details like Ears and Feet
I cut out shapes for ears, paws, and tails from matching paper. The bunny and mouse get long ears; the lion gets a spiky orange mane made by snipping small triangles into a strip of orange paper. I glue these features onto the toilet roll at the correct positions. - Finalize the Unique Look for Each Animal
To complete the animals, I add extra elements like a fluffy pom-pom tail for the bunny, small round circles for the mouse’s feet, or a simple brown face for the bear. Using my markers, I can draw additional patterns or highlight features, like fur texture or spots.
Pro Tip
Layer a piece of cardboard under the toilet paper rolls to create a mini animal scene or zoo that kids can play with! It adds an interactive touch to the craft.
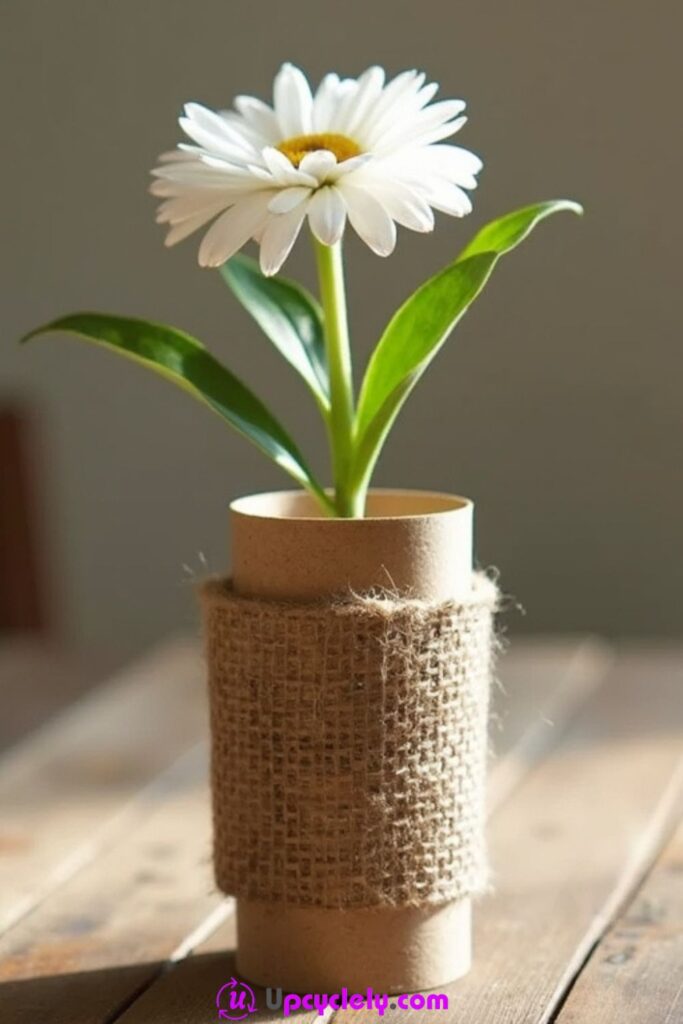
Rustic Vase with Burlap Wrap
Materials Needed
- Empty toilet paper roll
- Cardboard (for the base)
- Paint (optional for coloring the roll)
- Burlap fabric strip
- Glue gun or strong adhesive
- Scissors
- A small artificial flower or lightweight real flower
Step-by-Step Instructions
- Create the Vase Base
I take a piece of sturdy cardboard, trace a circle using the toilet paper roll as a guide, and cut out the circle. I then glue the roll onto this base, ensuring it stands upright and stable. - Paint the Roll (Optional)
Depending on the desired look, I paint the roll in a beige or brown color to complement the rustic theme. If I prefer a natural look, I skip this step and leave the roll as is. The paint needs to dry completely before I move to the next step. - Add the Burlap Wrap
I measure a strip of burlap fabric to fit around the middle section of the toilet paper roll. Once the size is right, I glue it onto the roll using a glue gun, making sure it’s tight and aligned properly for a clean finish. This step instantly gives the vase a rustic, textured appearance. - Insert the Flower
Finally, I place a small artificial flower or a lightweight real flower inside the vase. Adding some decorative elements like pebbles or moss around the flower stem can enhance the overall aesthetic and make the craft even more charming.
Pro Tip
Secure the burlap with a decorative bow or twine for added detail. It elevates the look, making it perfect as a small gift or a table centerpiece!
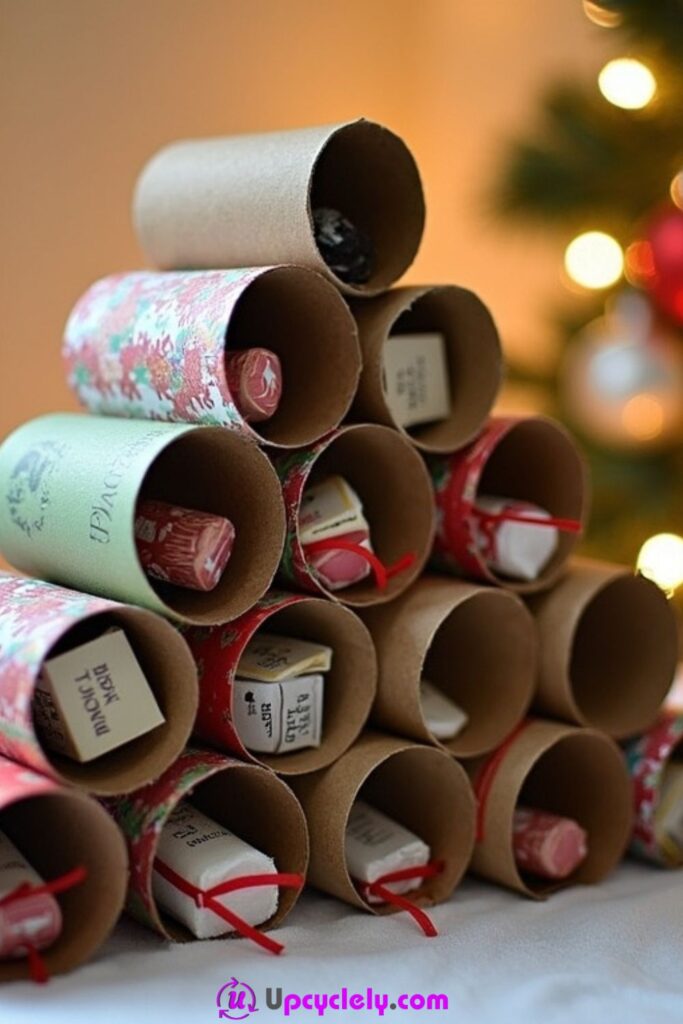
Advent Calendar
Materials Needed
- Toilet paper rolls
- Floral wrapping paper
- Plain brown wrapping paper
- Red string or twine
- Tags with numbers
- Small gifts or candy
- Glue
- Scissors
Step-by-Step Instructions
- Create the Tubes
I start by wrapping some rolls in floral paper and leaving others in their natural brown. These variations add a rustic look. Each roll is then stuffed with candy or small items. - Seal the Rolls
Folding down the edges of each roll on both sides creates a secure closure. You can also tie a small string around each opening for added security while keeping it festive. - Label the Tubes
Each roll gets a hand-cut tag tied with red string. I add numbers (1-25) to make it easy to keep track of the countdown. - Construct the Pyramid
Stack the wrapped rolls in a pyramid shape, gluing them layer by layer so they stay together. I always start with the widest base and gradually reduce the layers until reaching the top tube.
Pro Tip
Place your pyramid on a sturdy tray or base if you plan to move it around. This ensures it doesn’t collapse!