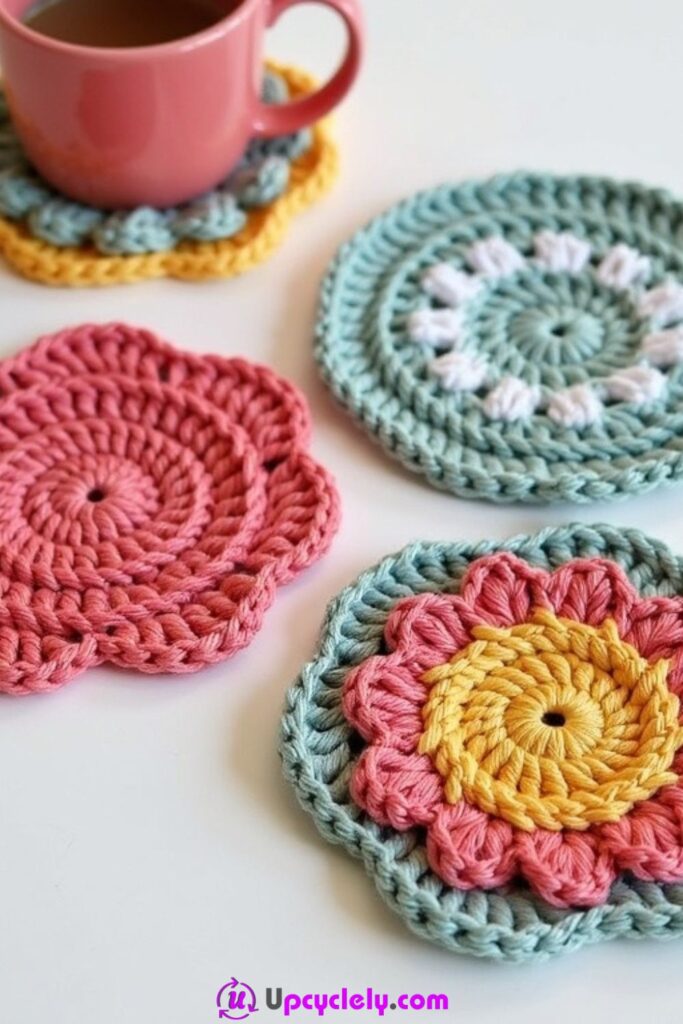
Crocheted Coasters
Materials Needed:
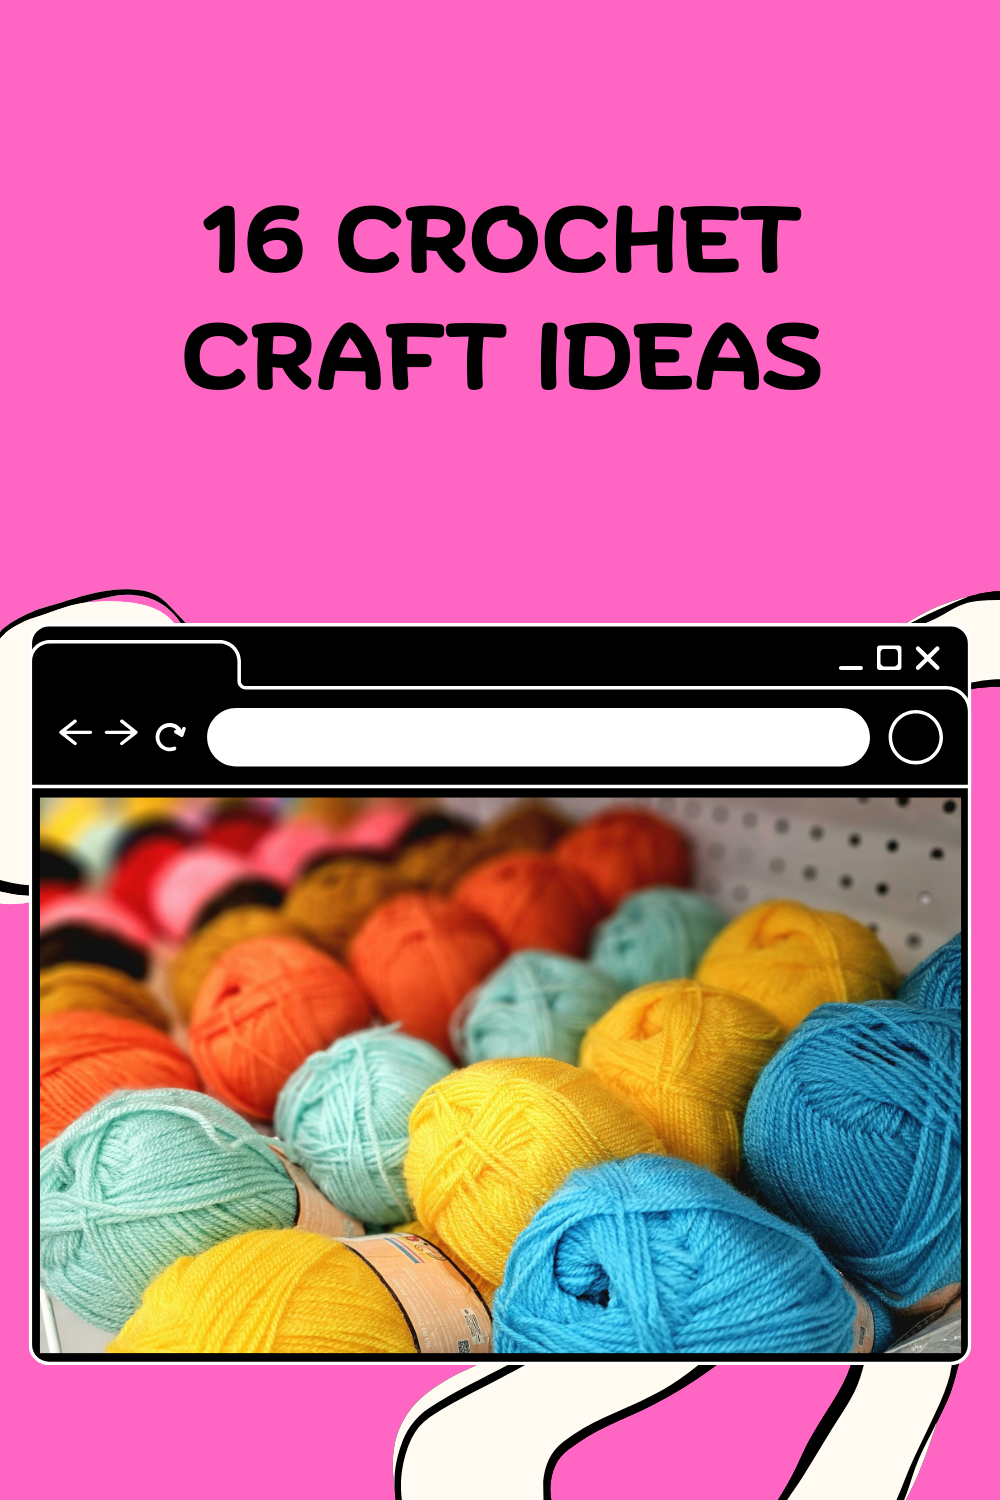
- Yarn in pastel colors (pink, light blue, yellow, white)
- 4.0 mm crochet hook
- Scissors
- Yarn needle
Steps:
- Start the Base Circle
To begin, I make a magic ring with my chosen base color – light blue in this case. I crochet ten single crochets (SC) into the ring. Next, I pull the tail of the yarn to close the circle tightly, creating the foundation for the coaster. I join the last stitch to the first SC with a slip stitch (SL ST), finishing the base round. - Add Pattern Layers
For the next layer, I switch to my second yarn color, maybe pink or yellow, and chain two. I crochet a double crochet (DC) into the next stitch and continue making two DC in each stitch around. This gives the coaster a rounded edge. For a flower shape like the yellow-centered example, I change the technique by adding three DC into every second stitch for a petal-like effect. - Customize Edges
Once the base looks good, I add details to the edges. To create a scalloped or floral pattern similar to the coasters in the image, I alternate between single crochets and triple crochets in each stitch along the edge. This step adds texture and charm. - Secure and Weave Ends
After finishing the final round, I cut the yarn, leaving a tail. I use a yarn needle to weave in all the loose ends on the back of the coaster. This ensures the coaster is sturdy and clean, ready for use.
Pro Tip: Use 100% cotton yarn for coasters. They absorb moisture better and hold their shape even after use.
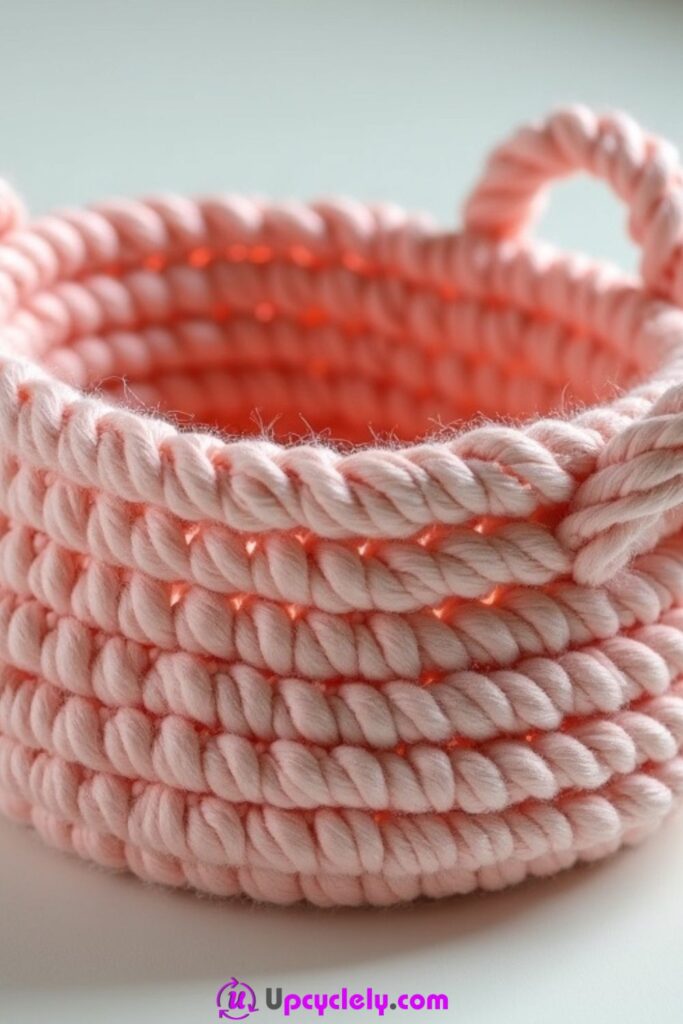
Crochet Basket
Materials Needed:
- Thick cotton rope or yarn (soft pink)
- Large crochet hook (8mm or 10mm)
- Scissors
- Yarn needle
Steps:
- Start with the Base
I make a magic ring and crochet six single crochets using the thick rope. I pull it tight to close the base circle. Then, I crochet in a spiral, increasing the stitches in every round by working two SC into one stitch. This keeps the base flat and even. I continue until I reach the desired basket diameter. - Build the Walls
To give the basket height, I crochet one SC into every stitch around without any increases. I work in the back loops only for the first few rounds to create a sharp edge between the base and the walls. This technique forms the perfect basket base. - Add Handles
Once the wall height is sufficient, I decide where I want the handles. I chain a small loop (five or six chains) and skip the same number of stitches below for the first handle. I continue crocheting around until I come to the opposite side and create a second loop. This step makes carrying the basket easy and functional. - Finish Edges
To secure the handles and give the basket a polished look, I crochet a slip stitch in every stitch around the topmost edge. This reinforces the basket and completes the design.
Pro Tip: Use a sturdy rope or yarn to ensure your basket holds its shape, even when carrying heavier items.
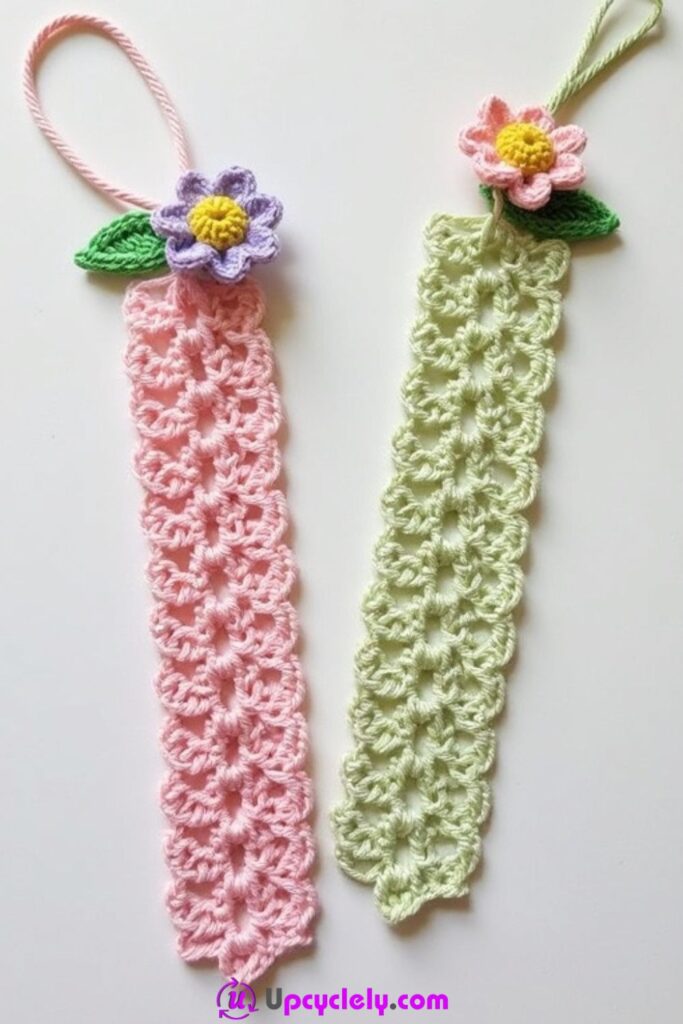
Crocheted Bookmarks
Materials Needed:
- Yarn in light pink, green, purple, and yellow
- 3.0 mm crochet hook
- Scissors
- Yarn needle
Steps:
- Create the Bookmark Base
For the base, I chain about 30 stitches (or longer if I want a longer bookmark). I work a simple lacy design by alternating one DC and a chain stitch across each row. I continue this pattern for 5–6 rows until the bookmark’s width looks perfect. - Make a Crocheted Flower
To make the flower topper, I use purple yarn, creating a magic ring with five petals. Each petal is formed by chaining three, making two treble crochets, and chaining three again before securing to the ring. For the center, I use yellow yarn and create a small round ball by crocheting in a tight spiral. - Attach Leaves to the Flower
I crochet two small green leaves, chaining 7 stitches for each and working stitches (SC, HDC, DC, HDC, SC) symmetrically across the chain. Then, I attach these beneath the flower with a yarn needle. - Combine and Add Loops
Finally, I sew the flower and leaves to the top of the bookmark. I also add a small loop at the top of the flower for easy hanging if needed, using matching yarn.
Pro Tip: Block your bookmark by lightly wetting and pinning it to a flat surface. This helps maintain its shape.
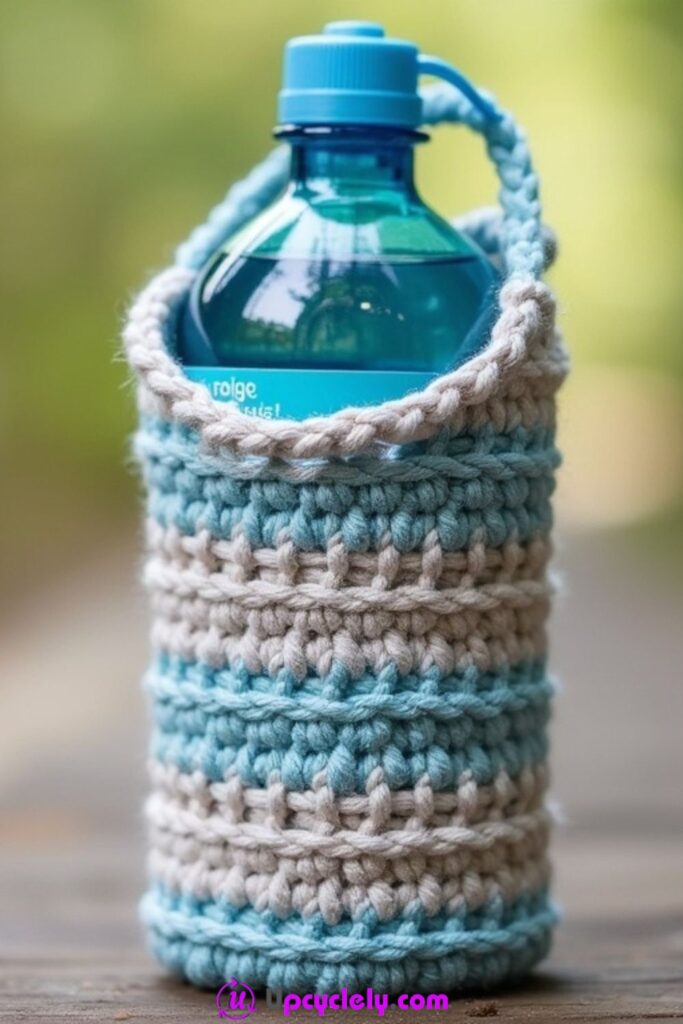
Crochet Bottle Holder
Materials Needed:
- Yarn in light blue and beige
- 5.0 mm crochet hook
- Scissors
- Yarn needle
Steps:
- Create the Bottom Circle
I start with light blue yarn and crochet a tight circle, similar to the coaster base. I ensure that the base is slightly larger than the bottom of the water bottle to allow coverage. I increase the stitches in each round until it fits snugly. - Build the Body
After completing the base, I work up the sides with single crochets. I do this in a repetitive pattern of two rows with light blue and one row with beige to create the striped look. This makes the holder visually appealing while maintaining a strong structure. - Add a Handle
Once the holder covers most of the bottle, I create a loop handle at the top. I chain about 20–25 stitches, skip an equal number below, and attach the chain to form the loop. To reinforce, I crochet a SC row into the chain. - Finishing Touches
I do one last round of SC in the topmost edge to secure everything. Then, I weave in the ends and test the fit with my water bottle.
Pro Tip: Use durable yarn like cotton for practicality and longevity, especially when carrying heavier bottles.
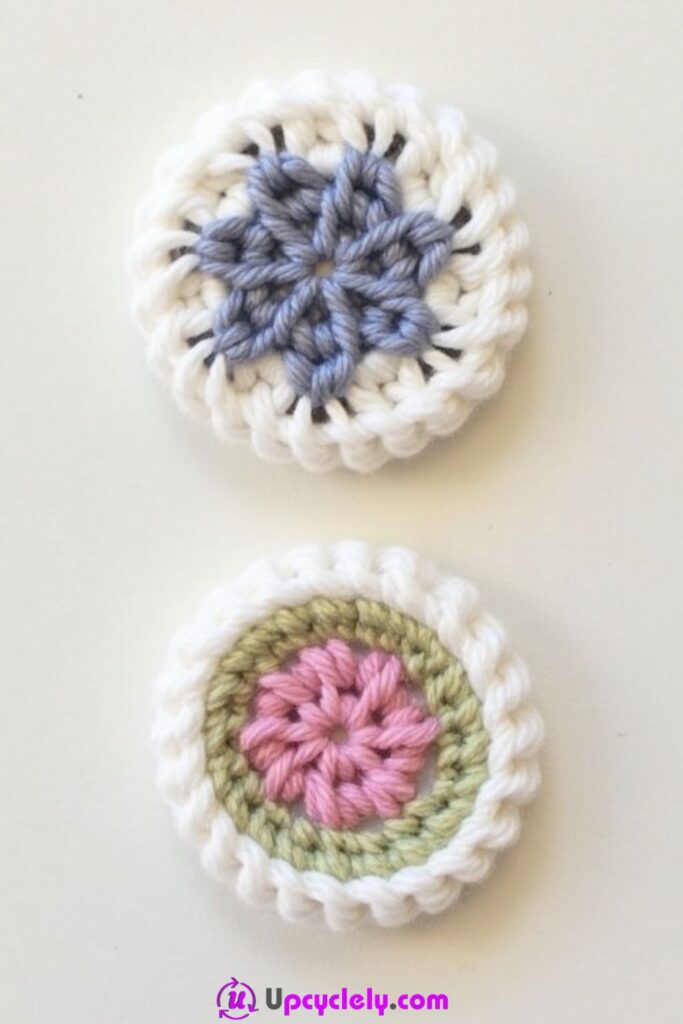
Crochet Button Magnets
Materials Needed:
- Yarn in different colors (pink, green, blue, white)
- Small magnets
- 3.5 mm crochet hook
- Hot glue gun
- Scissors
Steps:
- Create the Circular Base
I start with a magic ring in blue or pink yarn and crochet 10 SC into the ring. I pull it tightly to close the circle, creating a flat round base. - Add Inner Designs
For a floral or star-like design, I use a contrasting color. I work a round of stitches like SC or HDC, alternating increases where necessary to create the desired pattern inside the circle. - Add a Border
With white yarn, I crochet a slightly raised border by starting a new round of single crochets along the edges of the already-made base, adding structure and a polished appearance. - Attach the Magnet
Once the crochet design is complete, I secure a small magnet to the back using a hot glue gun. I ensure the magnet is centered and the glue is dried completely.
Pro Tip: Test your magnet strength before starting. Lightweight designs work best with smaller magnets.
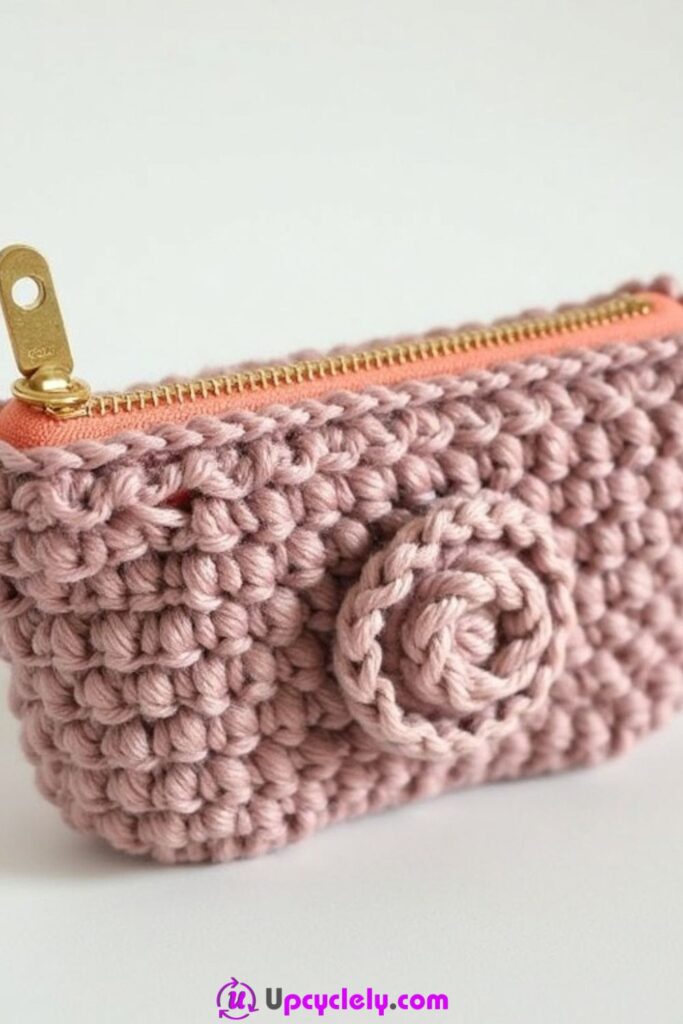
Crocheted Pencil Case
Materials Needed:
- Yarn (light pink or preferred color)
- 4.0 mm crochet hook
- Zipper (gold or matching color, 10–12 inches)
- Scissors
- Yarn needle
- Hot glue or sewing needle and thread
Steps:
- Create the Base Body of the Pencil Case
I begin by chaining stitches until it matches my desired width for the pencil case. I typically work with around 30–35 chains for a moderate-sized case. Next, I crochet in rows using single crochet (SC) stitches to create a rectangular piece. I ensure the length is suitable to fold into a pouch, typically about 20–25 rows. - Add Decorative Spiral Embellishment
For the decorative spiral, I use the same yarn or a contrasting color. I create a tight spiral by crocheting a magic circle with six SC. Then, I increase gradually with two SC in every stitch, working in a spiral until the piece forms a perfect round. I place this on the center of my rectangular base and stitch it securely. - Attach the Zipper
I place the zipper along the top edge of the crocheted rectangle. Using a yarn needle or sewing thread, I attach the zipper by stitching it carefully onto the crochet work. I make sure to pull the zipper tightly for it to align neatly with the edges. - Fold and Secure the Edges
Once the zipper is attached, I fold the rectangle in half with the zipper at the top. Using SC or a whip stitch, I sew along both side edges to close the pencil case. I finish by weaving in any loose ends and testing the zipper for smooth functionality.
Pro Tip: Place a piece of fabric inside the pencil case to act as a lining. This prevents small items from poking through the yarn and adds a polished look.
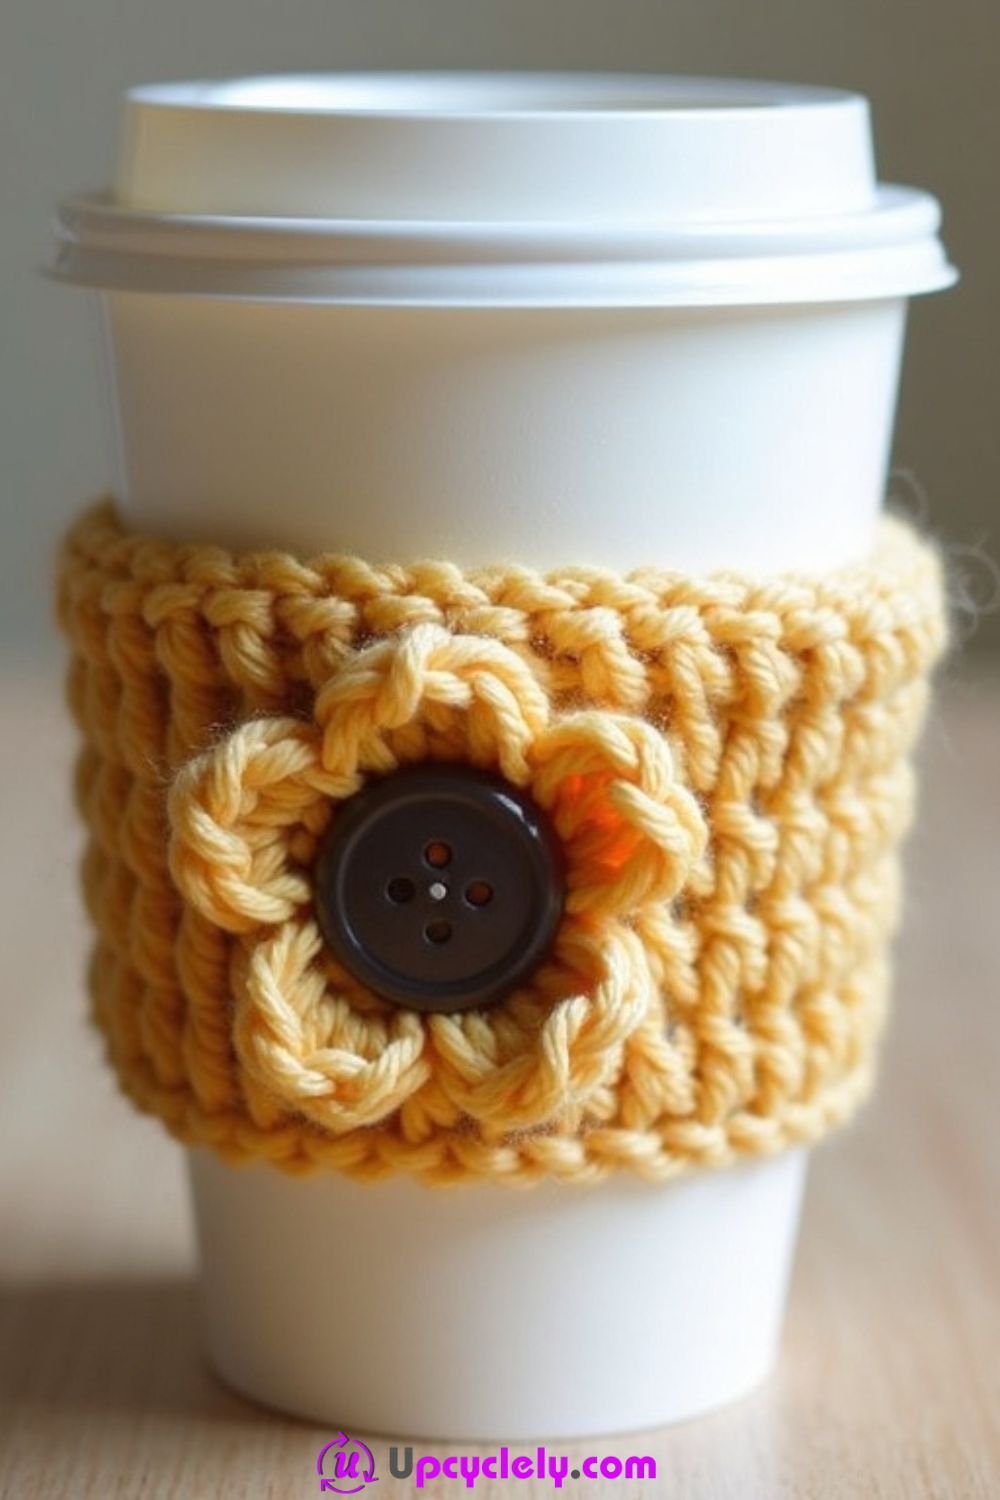
Crochet Cup Sleeve
Materials Needed:
- Yarn (bright yellow or preferred color)
- 4.5 mm crochet hook
- Brown decorative button
- Scissors
- Yarn needle
Steps:
- Create the Sleeve Base
To begin, I measure the circumference of the coffee cup. I chain stitches long enough to match that size, ensuring it fits snugly. Then, I work SC or half double crochet (HDC) stitches in rows to form a rectangular sleeve. Once the width matches the height of the coffee cup’s body, I stop crocheting. - Form a Flower Decoration
I make the flower separately by crocheting a magic circle in a contrasting color (such as white or pink). Six petals can be created by chaining three stitches, making a double crochet (DC), and then chaining three again before attaching it back to the ring. I secure and tie off the flower. - Attach the Flower to the Sleeve
I sew the flower to the center of the crocheted sleeve using leftover yarn. I make sure to stitch it tightly so it stays in place. For added charm, I sew a small brown button at the center of the flower. - Secure the Sleeve Ends
I stitch the two shorter ends of the rectangular sleeve together to form a loop that fits snugly around the coffee cup. I test the fit to make sure it stays put.
Pro Tip: Use washable and durable yarn, like cotton or bamboo blends, so your cup sleeve can handle spills and regular washing.
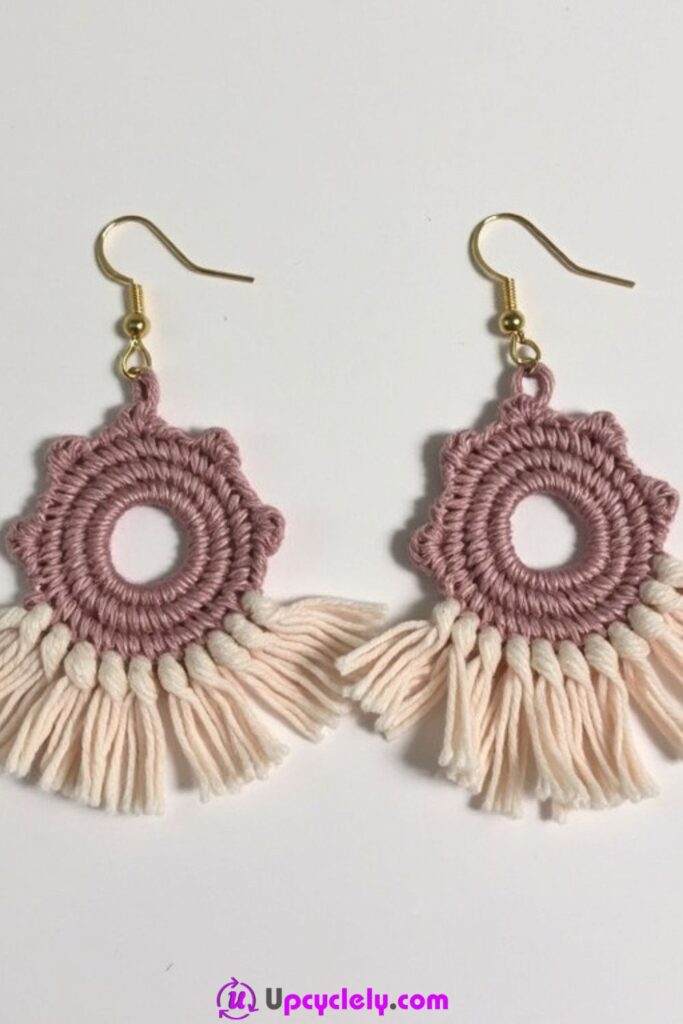
Crochet Earrings
Materials Needed:
- Yarn in pink and cream
- 2.5 mm crochet hook
- Earring hooks (gold or silver)
- Scissors
- Hot glue gun
Steps:
- Make the Circular Base
I start with pink yarn, creating a magic ring and crocheting ten SC into the ring. I continue working in the round, alternating SC and double crochet (DC) stitches to achieve a slightly scalloped edge by the second or third round. - Add Fringe Elements
Using cream yarn, I attach strands to the bottom half of the circle. I cut equal lengths of yarn and fold each piece in half. I slip the folded end through a loop in the base and pull the loose ends through the folded loop to secure the fringe. - Attach the Hook
To secure the earring hook, I find the topmost point of the crocheted circle. I loop the hook through the top stitch of the circle, making sure it is positioned evenly. I tighten the hook clamp with pliers if necessary. - Trim and Secure
I finish by trimming the fringe for a uniform look. Any loose yarn from the base is woven in securely using a yarn needle.
Pro Tip: Use lightweight yarn or thread to prevent the earrings from being too heavy for comfortable wear.
Crochet Flower Crown

Materials Needed:
- Yarn in multiple colors (red, blue, yellow, pink, green)
- 3.5 mm crochet hook
- Elastic headband base
- Hook-and-loop fastener (optional)
- Scissors
- Yarn needle
Steps:
- Create Individual Flowers
I crochet multiple flowers in a variety of colors. Each flower begins with a magic ring, forming the petals by chaining three, making DCs, and chaining three again. Each flower is completed with a contrasting center in yellow or white. - Make Leaves
For each flower, I crochet two green leaves. I chain seven stitches, then work SC, HDC, DC, HDC, and SC across the chain to form leaf shapes. This adds greenery around the flowers. - Assemble the Design
I secure each flower and pair of leaves onto the elastic headband base. Using a yarn needle, I sew them snugly in place, spacing them evenly along the headband. - Adjust for Comfort
If the headband requires extra grip, I attach a small section of hook-and-loop fastener at the ends for an adjustable fit. I finish by trimming all excess yarn.
Pro Tip: Ensure the yarn you use is soft and non-irritating, as the crown will be worn directly on skin.
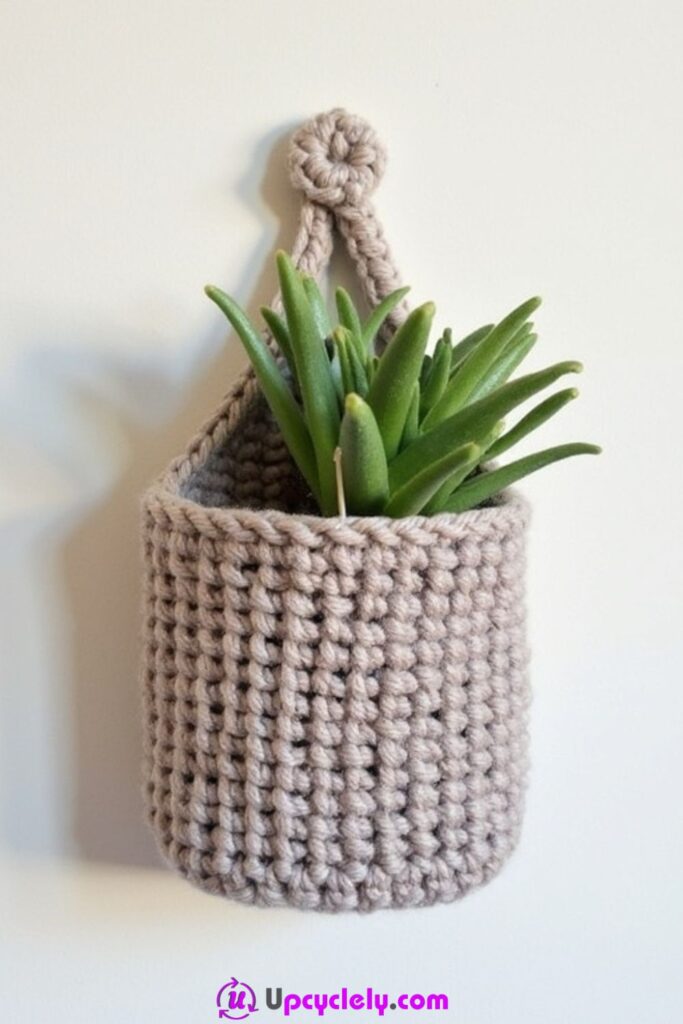
Crocheted Wall Pocket
Materials Needed:
- Thick yarn (light brown or neutral shade)
- 6.5 mm crochet hook
- Scissors
- Yarn needle
- A small wall hook for hanging
Steps:
- Form the Base Circle
I start by making a magic ring with the thick yarn and crocheting six single crochets (SC) into the loop. Pulling the tail tight closes the ring. To expand the base, I work in rounds, increasing evenly by adding two SC in each stitch for the second round, one SC in every other stitch for the third round, and so on. I continue until the bottom is the desired diameter, ensuring it stays flat and fits the size of the item I want it to hold. - Create the Wall Pocket Body
Once the base is complete, I start building the sides without increasing. I work in continuous SC rows around the edge of the circle. This gradually turns the flat piece into a basket-like form. I crochet until the pocket reaches the desired depth, usually about 6–8 inches tall. - Add the Hanging Loop
At the back of the pocket, I create a sturdy loop for hanging it on the wall. I position my hook at the top edge and chain about 8–10 stitches. I secure the chain by joining it back to the edge with a slip stitch (SL ST). Then, I reinforce it by crocheting SC stitches along the chain. - Finishing Touches
Once the looping is done, I cut the yarn, leaving a small tail, and weave in all the loose ends with a yarn needle. To give the pocket a polished look, I can lightly block the shape by spraying it with water and letting it dry in the desired form while it hangs.
Pro Tip: Line the pocket with fabric to give it added strength and prevent items from poking through if storing sharp or small objects.
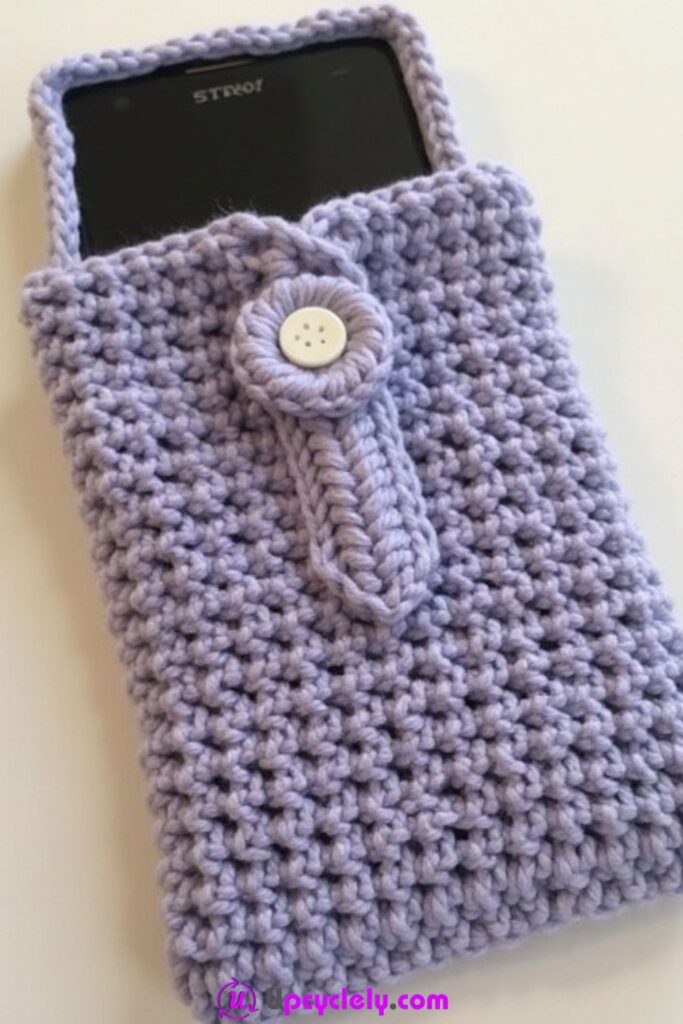
Crochet Phone Case
Materials Needed:
- Soft yarn (lavender or any pastel color)
- 4.0 mm crochet hook
- Button (white or contrasting color)
- Scissors
- Yarn needle
Steps:
- Create the Case Body
I start by chaining a length equal to the width of my phone plus a little extra for comfort. Next, I crochet SC stitches into each chain and turn. I keep crocheting rows until I have a rectangular piece that’s twice the height of my phone. Then, I fold the piece in half, leaving the top open, and secure the sides by crocheting or sewing them together. - Make the Closing Flap
At the open top, I add a flap for securing the phone. I attach my yarn to the middle of the back top edge and chain about 6–8 stitches, or enough to fold over the phone. Then, I crochet SC rows, narrowing the width by skipping the first and last stitch in each row to create a tapered effect. This flap ensures the phone stays snug inside. - Attach the Button
I sew a button onto the front side of the case, positioning it where the flap naturally folds over. Then, I create a button loop by chaining stitches at the tip of the flap and joining them back. I test the size to ensure the button and loop fit securely. - Add Texture or Patterns
To jazz up the phone case, I add texture with simple patterns like popcorn stitches or work in stripes using another color. I use a yarn needle to weave in loose ends and trim any excess for a clean finish.
Pro Tip: Use a soft, washable yarn to protect your phone while maintaining a polished look, especially if you handle your phone often.
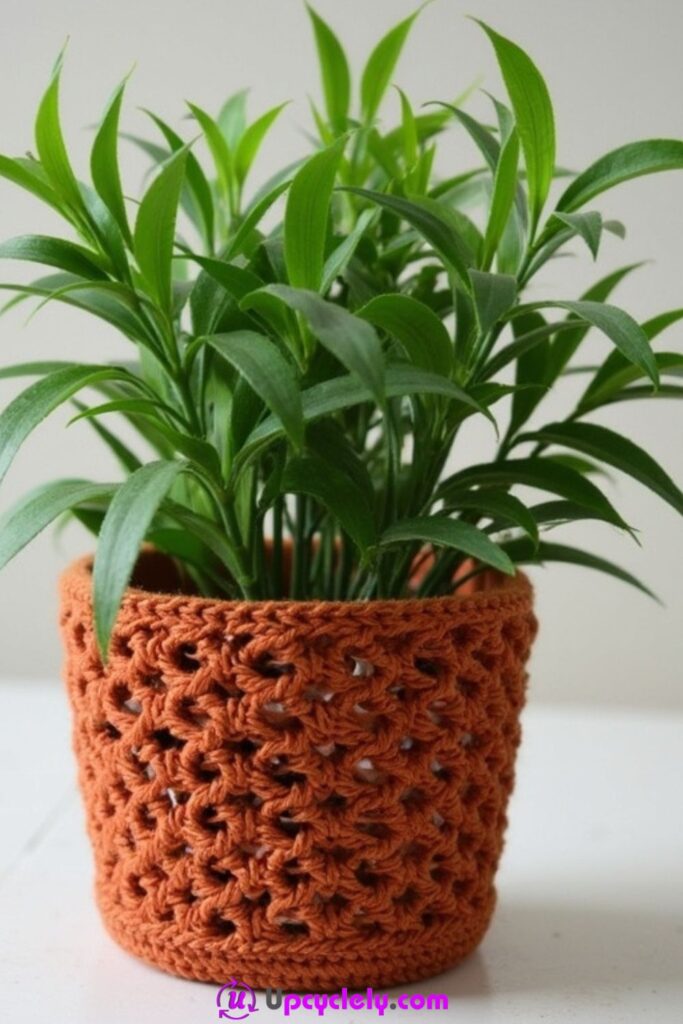
Crochet Plant Pot Cover
Materials Needed:
- Sturdy yarn (orange or any bright color)
- 5.0 mm crochet hook
- Scissors
- Yarn needle
Steps:
- Start the Base
I begin with a magic ring and crochet 10 SC into the loop for the base of the plant cover. To expand the base, I work in rounds, increasing evenly until the base matches the diameter of my plant pot. This usually involves adding two SC in every stitch for the first few rounds, then spacing out the increases in subsequent rounds. - Build the Body of the Cover
Once the base fits snugly, I switch to working the walls by crocheting SC stitches around in a continuous spiral, without any increases. For an airy, decorative look similar to the image, I use an openwork pattern like chaining one, skipping a stitch, and making SC in the next. This pattern creates small openings, adding texture and charm. - Adjust Height
I continue crocheting the walls in the same open pattern until the height of the cover matches the pot. To secure the edge, I finish with a row of solid SC or a simple decorative stitch, like a crab stitch (reverse SC), for a neat border. - Final Adjustments
After the crocheting is complete, I place the cover around the pot and make sure it fits snugly. I finish by weaving in any loose ends with a yarn needle.
Pro Tip: Consider using machine-washable yarn so the cover can be cleaned along with the pot when watering plants.
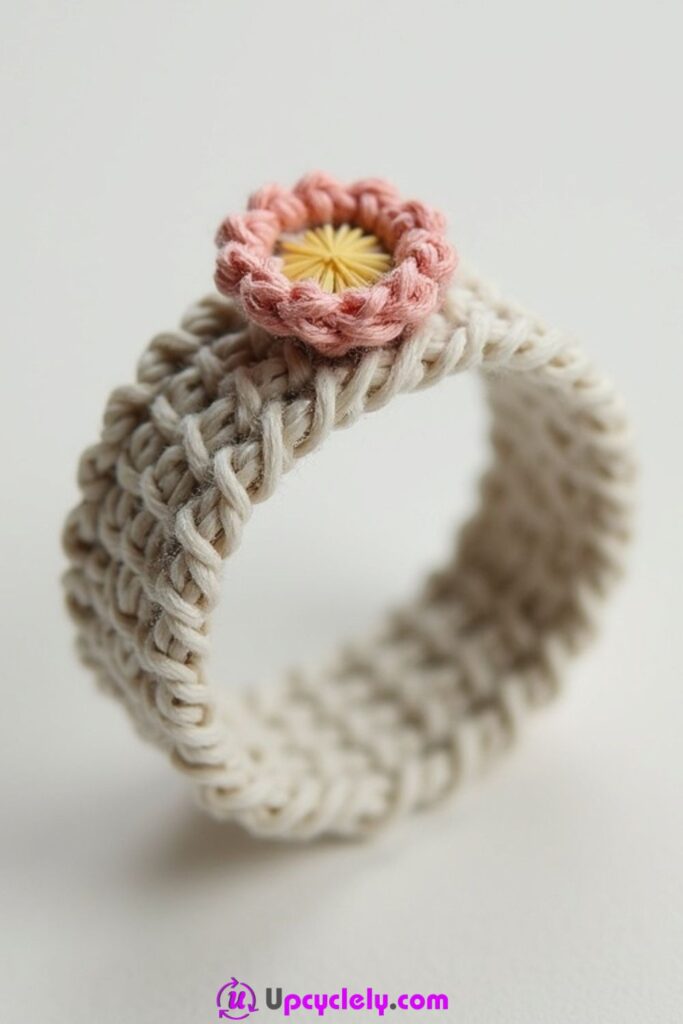
Crochet Ring
Materials Needed:
- Yarn or crochet thread in light beige and pink
- 2.5 mm crochet hook
- Scissors
- Yarn needle
Steps:
- Create the Ring Base
I start by chaining enough stitches to fit around my finger comfortably. This is usually around 8–12 stitches. I join the chain into a loop with a slip stitch (SL ST), ensuring it isn’t twisted. Then, I crochet SC stitches around the loop for 2–3 rows to give the ring a thick, sturdy base. - Add the Flower
To craft the flower, I use pink yarn/thread. I make a magic circle and crochet five single petals by chaining three, making one DC, and chaining three again, securing each petal to the base with a SL ST. This creates a small flower to decorate the ring. - Attach the Flower to the Ring
Using leftover yarn or thread, I sew the flower to the top of the ring. I make sure it’s centered and tight, so it doesn’t wobble during wear. - Trim and Finish
Once I’ve secured the flower, I use a yarn needle to weave in all the loose ends. I trim any excess thread for a neat finish.
Pro Tip: Use crochet thread instead of regular yarn for a more delicate and lightweight ring design.
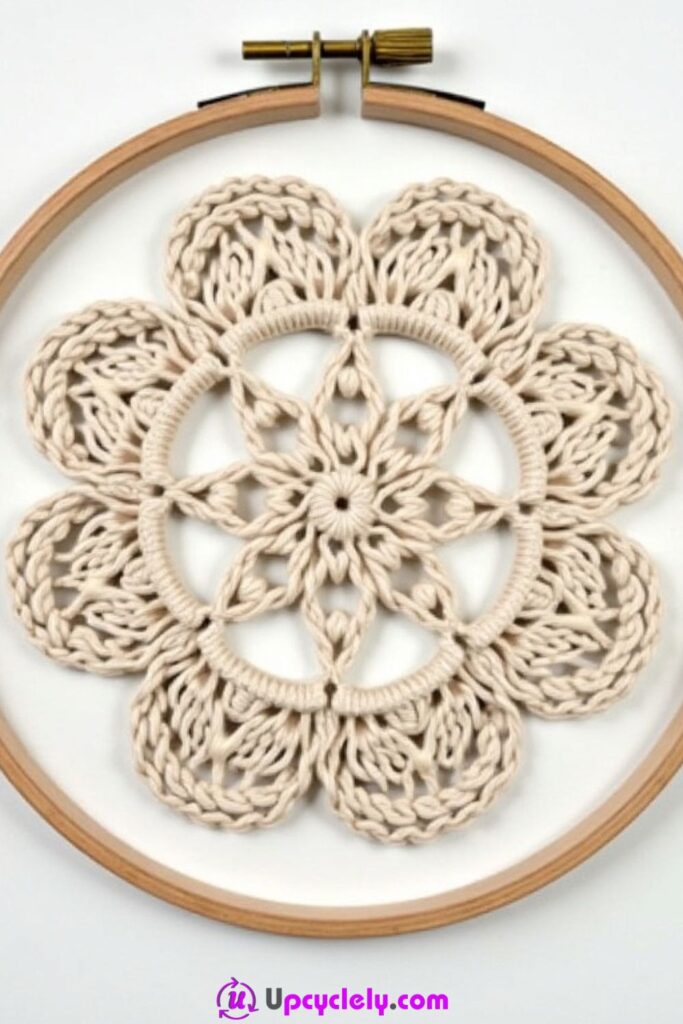
Crochet Wall Art
Materials Needed:
- Crochet thread (off-white)
- Wooden embroidery hoop
- 2.0 mm crochet hook
- Scissors
Steps:
- Create the Center Design
I begin with a magic ring and crochet a star-like center by making SC and chaining between stitches to create radiating lines. This forms the base of the design and acts as the foundation for attaching petals later. - Add Petals
Starting from the edge of the center star, I chain loops to form the basis of the petals. For each petal, I work SC, HDC, DC, and then decrease back down with HDC and SC along the chain. This creates a teardrop-shaped petal. I repeat this around the circle until all petals are connected. - Attach to the Hoop
Once the crocheted design is complete, I stretch it gently and place it inside the embroidery hoop. I secure the excess threads around the inner ring of the hoop before tightening the top screw to hold the design firmly in place. - Trim for a Clean Finish
After attaching the crochet art to the hoop, I trim any protruding threads. If needed, I can also block the piece by lightly wetting and stretching it to smooth out any uneven loops.
Pro Tip: Spray the finished piece lightly with starch to keep the crochet design firm and in place over time.
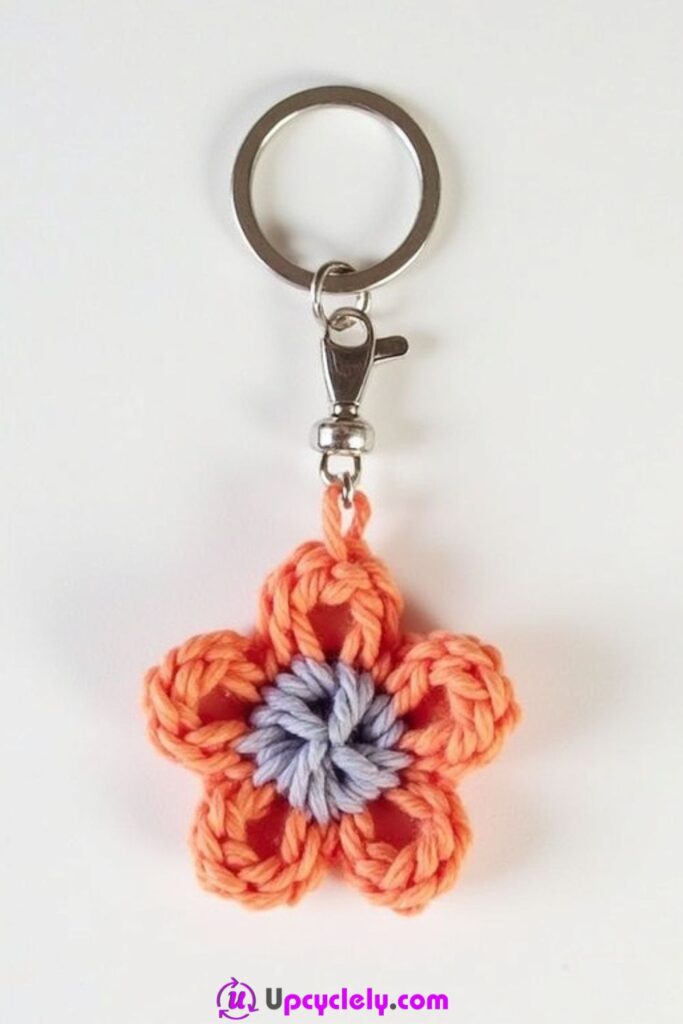
Decorative Crochet Keychain
Materials Needed:
- Yarn (orange for the petals and lavender for the center, or preferred colors)
- 3.0 mm crochet hook
- Scissors
- Yarn needle
- Metal keyring with clasp
Steps:
- Create the Flower Center
I start by using the lavender yarn to form the center of the flower. First, I make a magic ring and crochet 6 single crochets (SC) into the ring. I pull the yarn tail tightly to close the circle and slip stitch (SL ST) into the first SC to complete the round. This creates a small, solid base to anchor the petals. - Add the Flower Petals
Switching to the orange yarn, I attach it to the circle. For each petal, I chain four stitches, then make one double crochet (DC), one treble crochet (TR), and another double crochet into the same SC space. I finish the petal by slip stitching back into the base. I repeat this process for each of the six SC from the center, ensuring the petals are evenly spaced and form a symmetrical flower shape. - Secure Loose Ends
Once the flower is complete, I cut the yarn, leaving a small tail. Using a yarn needle, I weave all loose ends into the back of the flower to keep it neat and tidy. If the flower feels a bit wobbly, I use some extra stitches to secure the petals to the center more firmly. - Attach the Keyring
To attach the flower to the keyring, I use lavender yarn to knot and secure it through the metal ring. I ensure the flower hangs securely, adjusting it so the petals are displayed attractively when the keychain is in use.
Pro Tip: Use sturdy cotton yarn for this project to ensure the flower holds its shape and withstands everyday wear and tear, especially if it will be tossed into bags or used with keys.
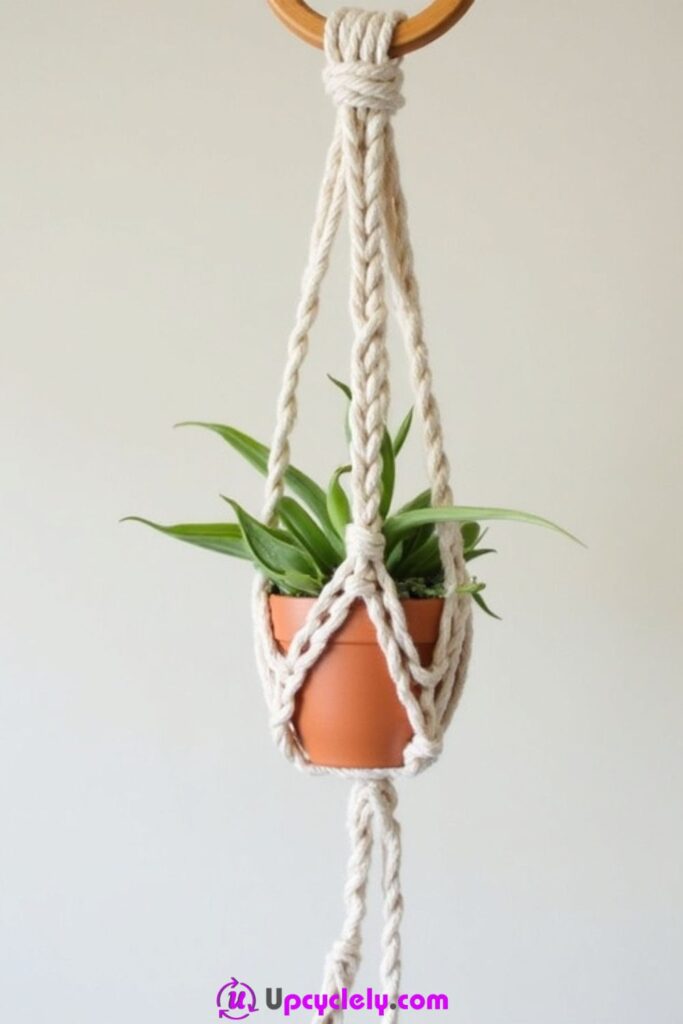
Mini Plant Hanger
Materials Needed:
- Thick crochet yarn or macrame cord (white or cream color)
- 4.5 mm crochet hook
- Small wooden or metal ring
- Scissors
- Yarn needle
- Small terracotta pot
Steps:
- Create the Base for the Pot
Using the thick yarn, I start with a magic ring and crochet 10 single crochets (SC) into the center. I pull the tail tight to close the circle and slip stitch (SL ST) to the first SC to join the round. I work a few more rounds, increasing evenly in each round, to create a flat circle that fits snugly under the base of the terracotta pot. - Form the Hanger Straps
Once the base is complete, I divide the circumference into equal sections (usually four or five, depending on the pot size). I attach the yarn to one section, chain about 20–25 stitches, and secure it to the next section with a SL ST. I repeat this process for all sections, creating long loops that will hold the pot in place. Then, I crochet a second round over these chain loops with single crochets for additional durability. - Join the Straps at the Top
After completing the straps, I gather all the upper loops together and thread them through the wooden or metal ring. Using the same yarn, I tightly crochet around the gathered straps just below the ring to secure them firmly in place. I test to make sure the straps are even and that the pot will hang level when suspended. - Finish and Adjust
I place the terracotta pot into the hanger to ensure a snug fit. If the straps seem uneven or loose, I adjust them by tightening or adding a few extra single crochet stitches before trimming and weaving in all loose ends. Finally, I hang the plant hanger to check balance and alignment.
Pro Tip: Use a wooden ring for a natural, rustic look that complements the plant and terracotta pot. Adding a slight wax coating to the yarn can also make the hanger more durable for use with heavier pots.