Cozy DIY Scarf and Mittens from Upcycled Sweaters
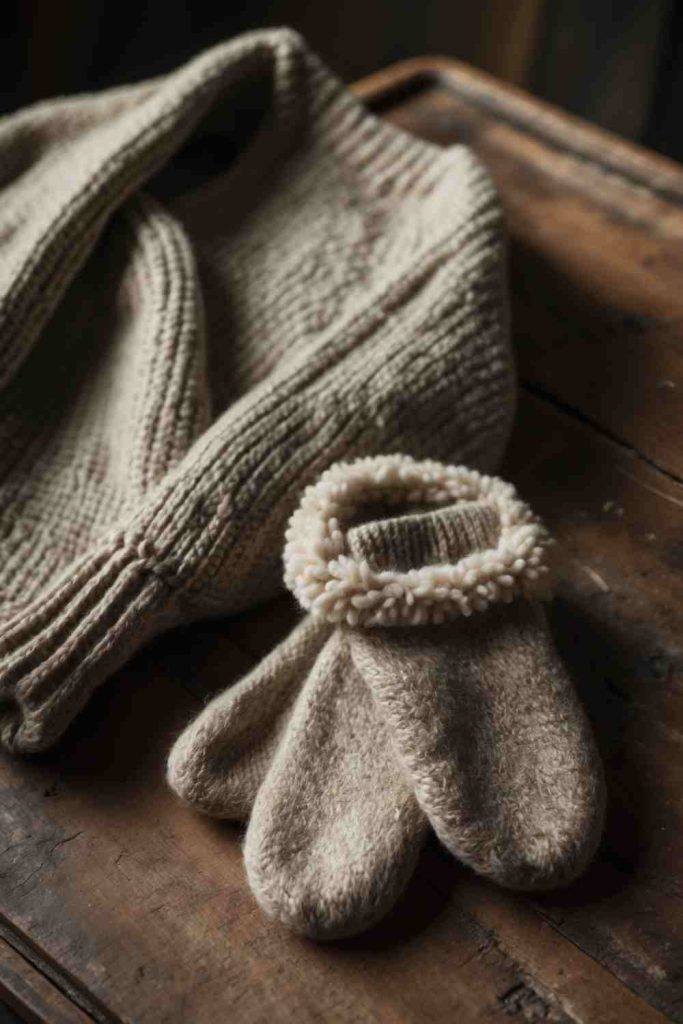
Steps to Create This Cozy DIY Scarf and Mittens from Upcycled Sweaters
- Choose Your Sweater: Pick an old sweater with a soft, warm texture. Look for large sections of fabric that are free of holes or heavy stains.
- Make the Scarf: Cut a long rectangle from the sweater’s body, using the bottom hem as one edge for a neat, finished look. Add embellishments like tassels or fringe for a fun touch.
- Create the Mittens: Trace hand shapes (with extra space for comfort) onto the sweater sleeves. Cut out the shapes and sew along the edges, leaving the wrist area open. Use fluff from an old pillow or another sweater for added padding if needed.
- Add the Finishing Touches: Attach decorative elements like buttons, pompoms, or embroidery to enhance the cozy charm. Pair the scarf and mittens together for a perfectly matched set!
DIY Cozy Sweater and Matching Socks from Upcycled Sweaters
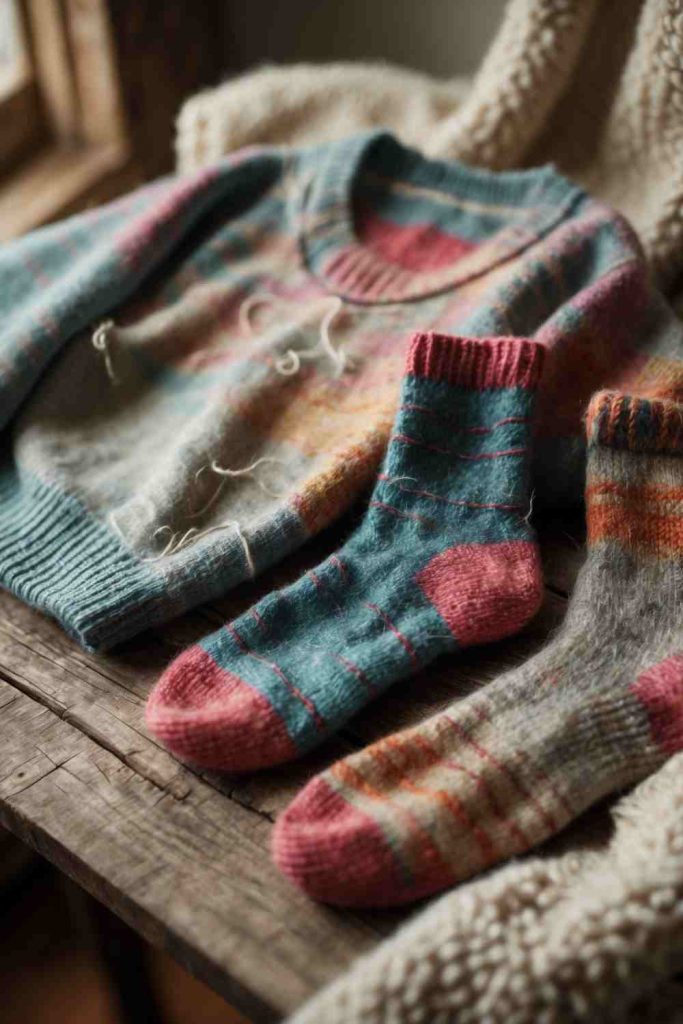
Steps to Create This DIY Cozy Sweater and Matching Socks from Upcycled Sweaters
- Select Your Sweaters: Choose one or two old sweaters with complementary colors and soft, stretchy material. Look for areas with minimal wear, like the lower body or sleeves, for better usability.
- Craft the Sweater: If modifying an existing sweater, crop or tailor it to your desired look. Alternatively, cut large sections from another sweater and sew them together for a patchwork-style custom piece. Reinforce the edges for durability.
- Make the Socks: Use the sleeves of a sweater to measure and create sock shapes. Cut sections long enough to cover your feet and ankles, then sew the edges, leaving an opening for your toes. Add padding for extra warmth if desired.
- Personalize the Set: Add colorful stitches, embroidery, or buttons to the sweater and socks for a cohesive, quirky touch. Showcase your flair and enjoy your new matching set made entirely from upcycled materials!
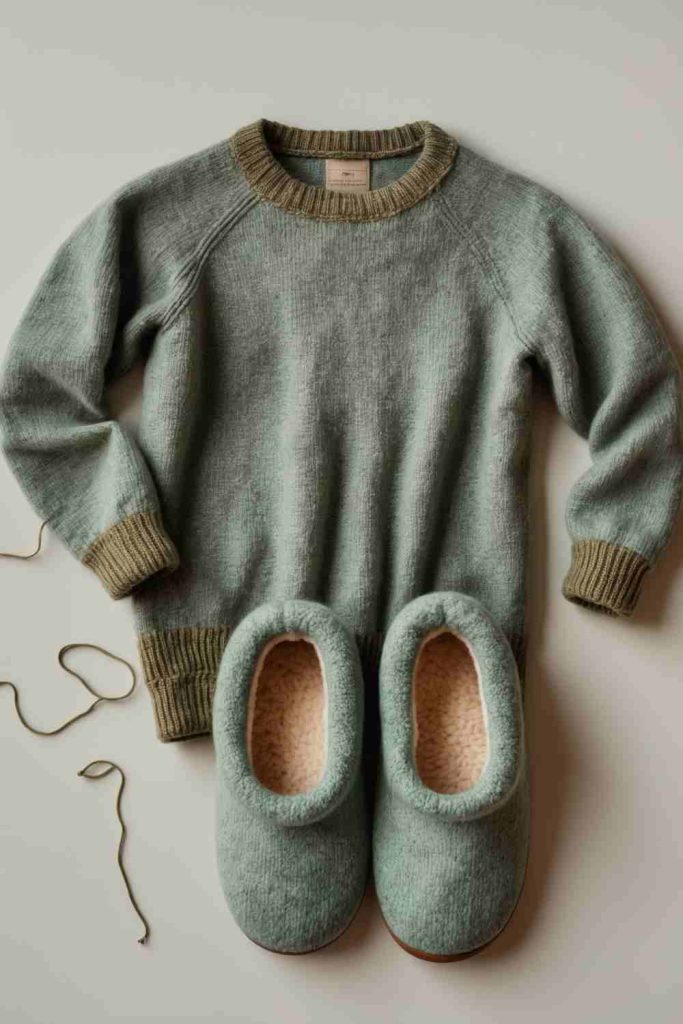
DIY Matching Sweater and Slippers from Upcycled Sweaters
Steps to Create This DIY Matching Sweater and Slippers from Upcycled Sweaters
- Gather Your Sweaters: Pick soft, knitted sweaters in a color you love. Choose one with enough material for both a sweater modification and slippers.
- Modify the Sweater: Tailor the sweater to your liking by cropping, adding decorative stitching, or adjusting the sleeves. Use fabric from another sweater to add patches for a unique, handmade style.
- Make the Slippers: Cut the sweater sleeves or body into slipper shapes, ensuring a snug fit for your feet. Sew the edges together and line the inside with soft fleece or leftover sweater fabric for added warmth and comfort.
- Add Finishing Touches: Use matching yarn, buttons, or embroidered accents to create a coordinated design between your sweater and slippers. Flaunt your one-of-a-kind upcycled creations this season!
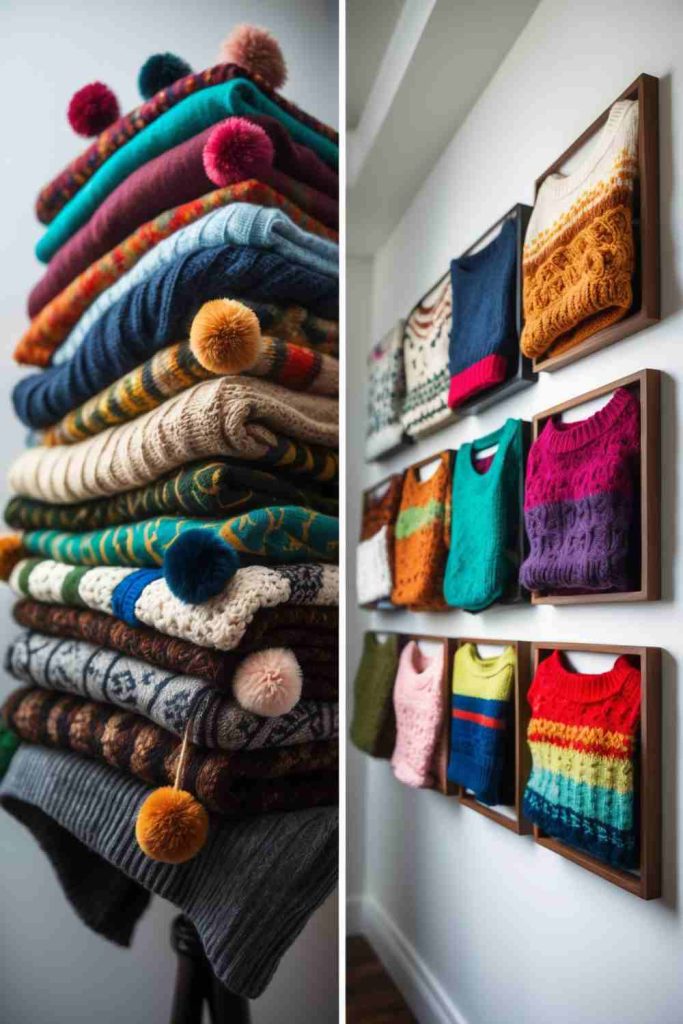
Framed Sweaters and Pom-Pom Stack Display
Steps to Create This Framed Sweaters and Pom-Pom Stack Display
- Select Sweaters for Framing and Stacking: Choose old sweaters in a mix of colors, patterns, and textures. Opt for visually interesting designs for the frames and soft, cozy pieces for the stacked look.
- Create the Framed Sweater Display: Cut a large section of the sweater (front or back), ensuring the design is centered. Stretch the fabric over a wooden frame or canvas and staple it onto the back. Arrange multiple framed sweaters on a wall for a stylish gallery effect.
- Make the Pom-Pom Stack: Cut leftover sweater material into small strips and tie them together to create pom-poms. Attach the pom-poms to the edges of folded sweaters for a whimsical touch. Stack the sweaters in a neat pile on a shelf or table.
- Style Your Space: Arrange the framed sweaters on a feature wall and place the pom-pom stack below for a cohesive yet playful look. Add other cozy accents like candles or plants to complete the display!
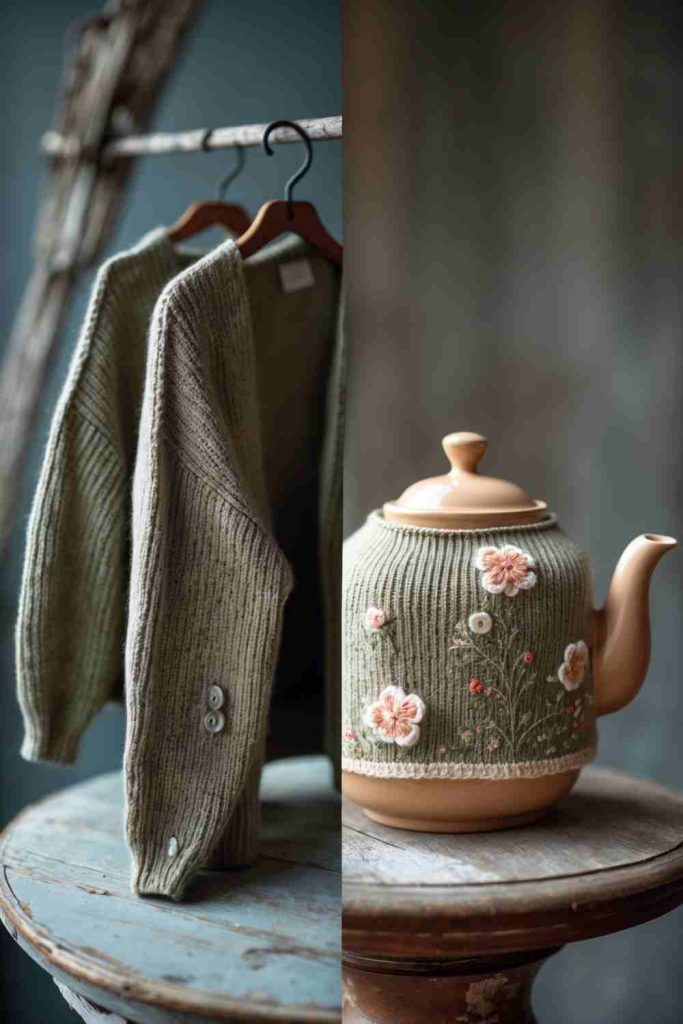
DIY Sweater and Teapot Cozy from Upcycled Sweaters
Steps to Create This DIY Sweater and Teapot Cozy from Upcycled Sweaters
- Choose Your Sweaters: Select an old sweater with enough material to create both the main garment and a teapot cozy. Opt for soft, knit fabrics with textures you love.
- Tailor the Sweater: Adjust the existing sweater’s shape by cropping or adding new buttons. You can also use parts of another sweater to add decorative patches, cuffs, or tailoring for a unique look.
- Craft the Teapot Cozy: Use leftover sweater fabric to measure and cut a piece that wraps snugly around your teapot. Sew the edges together, leaving spaces for the handle and spout. Embellish with embroidery or buttons for a personal touch.
- Style Your Matching Set: Pair your tailored sweater with the coordinated teapot cozy for a cohesive, handmade vibe. Perfect for staying cozy on chilly days while sipping tea in style!
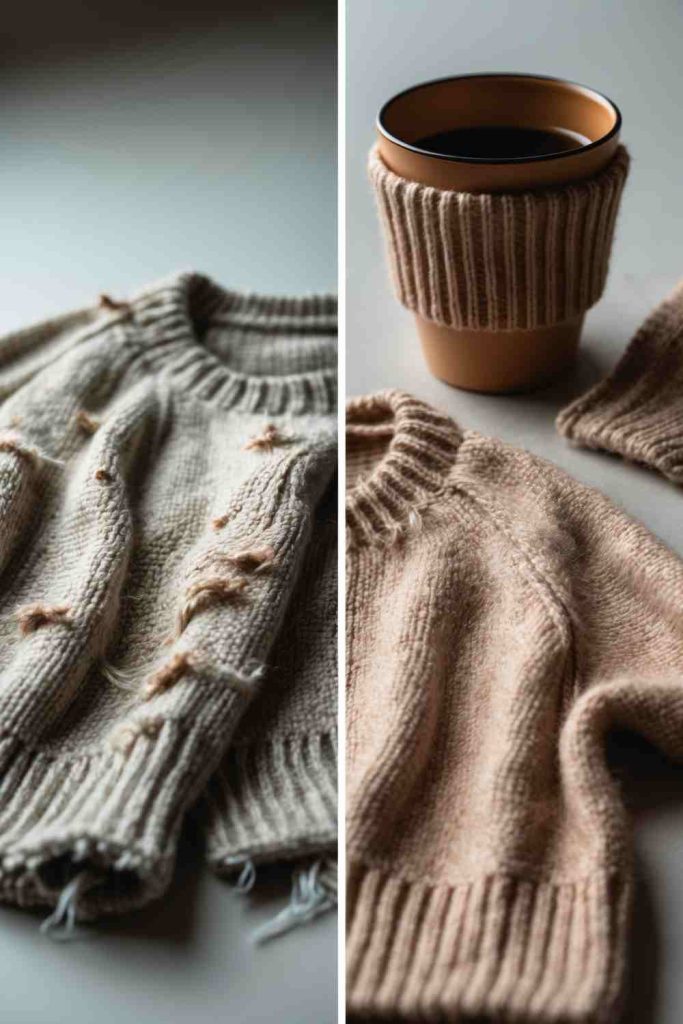
DIY Cozy Sweater and Matching Coffee Sleeve
Steps to Create This DIY Cozy Sweater and Matching Coffee Sleeve
- Pick Your Sweater: Choose an old sweater with enough material for both a cozy sweater refresh and a small section to repurpose for the coffee sleeve. Aim for soft, textured knits in a color you love!
- Update the Sweater: Adjust the sweater by adding cute tufted details, patching it up with fabric from other sweaters, or shortening it for a more modern cropped look. Personalize it with embellishments, like buttons or embroidery, to make it uniquely yours.
- Craft the Coffee Sleeve: Measure and cut a strip from the sleeve or body of the sweater to fit snugly around your cup. Sew or glue the ends together to secure it, and add any decorative touches, like tiny patches or hand-stitching.
- Enjoy Your Matching Set: Pair your cozy sweater with your coffee sleeve for chilly mornings or share them as a perfect handmade gift. Stay stylish, warm, and sustainable all at once!
DIY Cozy Dog Bed from Upcycled Sweaters
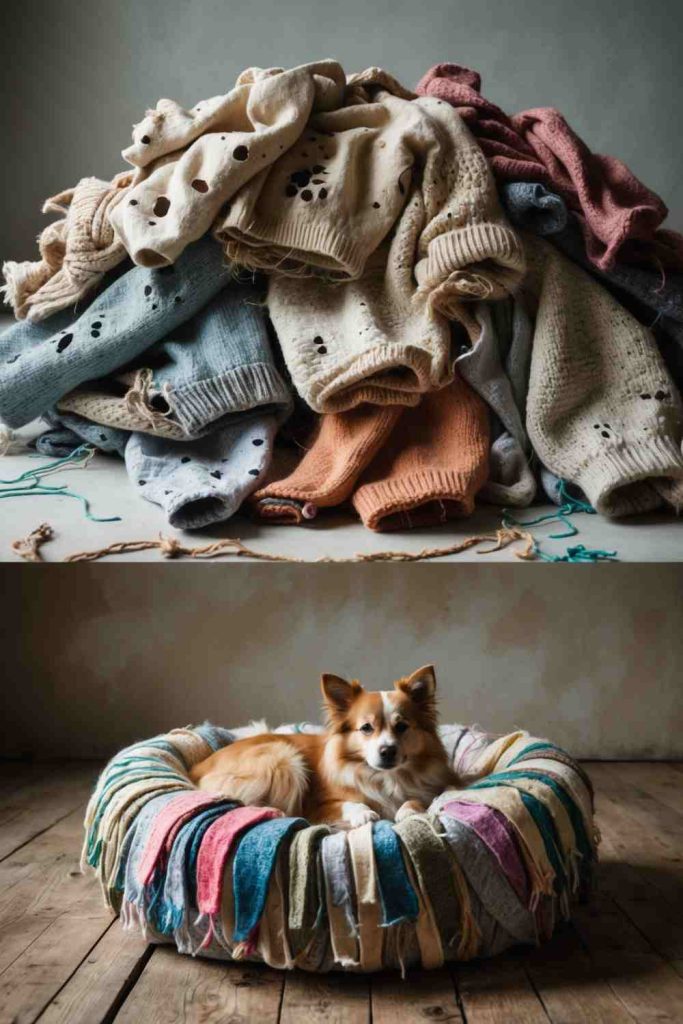
Steps to Create This DIY Cozy Dog Bed from Upcycled Sweaters
- Gather Your Sweaters: Choose old, soft sweaters with lots of fabric to cut into strips. Sweaters with different colors will make a beautifully vibrant dog bed!
- Cut Sweaters into Strips: Using a pair of scissors, cut the sweaters into long fabric strips. Make sure the strips are wide enough to feel sturdy but soft enough for comfort.
- Weave or Sew the Bed Base: Either braid and sew the strips into a circular shape for a woven look, or stitch them together to form a padded, soft base for the bed. Leave edges loose for extra flair if desired.
- Assemble the Bed: Use additional strips to build up the dog bed’s sides, stitching or weaving them together for a snug, cozy perimeter. Once complete, place a small cushion or stuffing inside for added comfort.
DIY Decorative Wall Art from Upcycled Sweaters
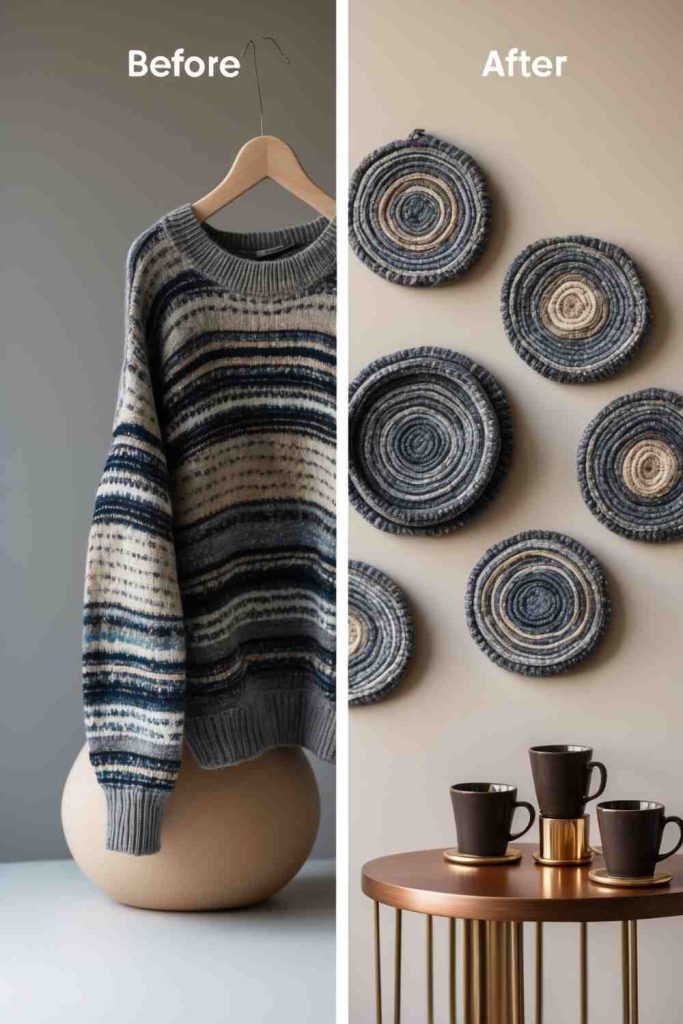
Steps to Create This DIY Decorative Wall Art from Upcycled Sweaters
- Choose Your Sweaters: Pick sweaters with colors and patterns you love. Thin, stretchy knits work best for wrapping into circular designs.
- Cut and Prep Material: Cut the sweater into pieces that can cover circular frames or embroidery hoops. Ensure the fabric has enough stretch to create smooth, taut surfaces.
- Attach to Frames: Stretch the sweater pieces over frames or hoops and secure the fabric at the back using glue, staples, or stitching. Play with different sections of the sweater for varied patterns and textures.
- Arrange and Display: Mount your completed frames on the wall in a playful arrangement. Combine different sizes and hues for visual interest and a cohesive, personalized look.
DIY Cozy Pillows from Upcycled Sweaters
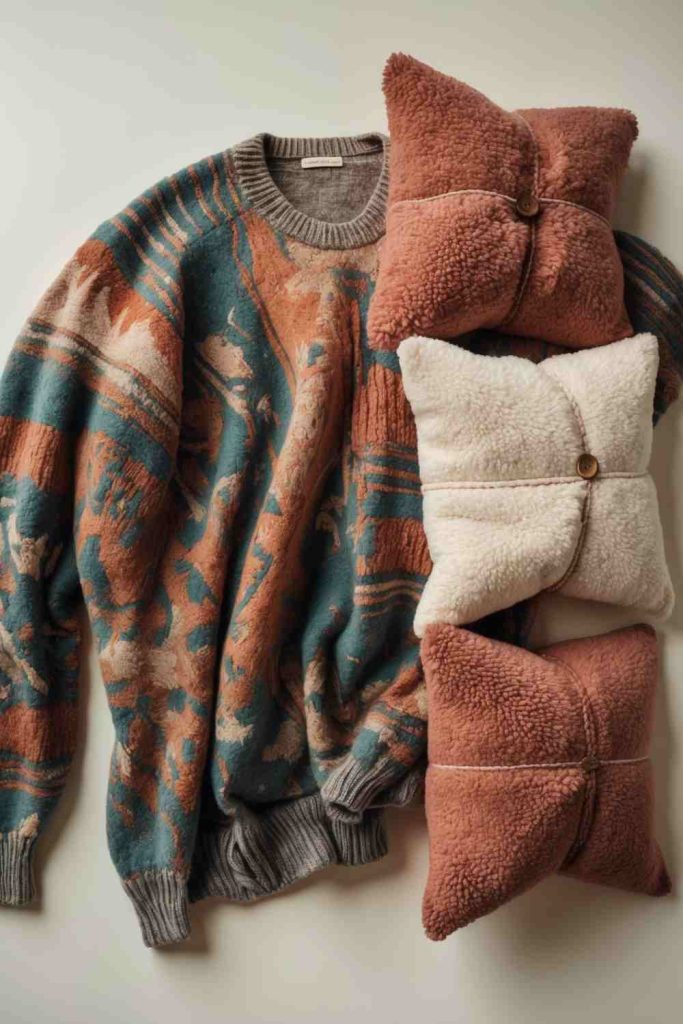
Steps to Create This DIY Cozy Pillows from Upcycled Sweaters
- Select Sweaters: Pick chunky or soft sweaters with patterns and colors you love. Make sure they are clean and free from major damage.
- Cut to Size: Measure and cut the sweater into square or rectangular shapes, leaving an extra inch for seam allowance. Match the size to an existing pillow insert or create your own stuffing.
- Sew or Glue Edges: Place the cut pieces together (pattern side facing in), and sew three sides together. If you prefer no-sew, use fabric glue to secure the edges. Turn the fabric inside out once secured.
- Stuff and Finish: Fill your pillow with stuffing or an insert and sew or glue the final edge closed. Add embellishments like buttons or tassels for extra flair, if desired.
DIY Unique Patchwork Sweater
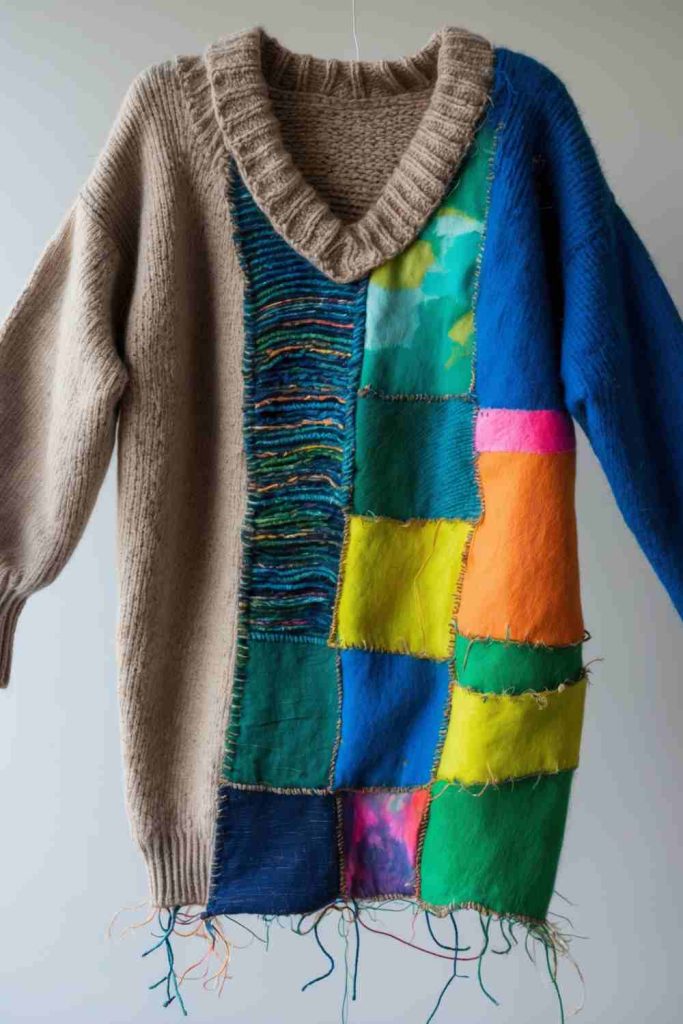
Steps to Create This DIY Unique Patchwork Sweater
- Pick Your Sweaters: Select old sweaters in a mix of vibrant and neutral tones. Look for different textures to create an interesting patchwork effect.
- Cut Your Patches: Use scissors to cut the sweaters into squares or rectangles. Mix and match colors and sizes for a fun, eclectic design.
- Sew Them Together: Arrange your patches on a flat surface to plan your layout. Then, stitch them together piece by piece using a sewing machine or needle and thread. Add a ribbed border if desired.
- Add Final Touches: Sew the patchwork panel onto a base sweater or assemble it into a standalone piece. Secure all edges and add loose threads for a fringe detail if you like.
DIY Colorful Plant Pot Cover
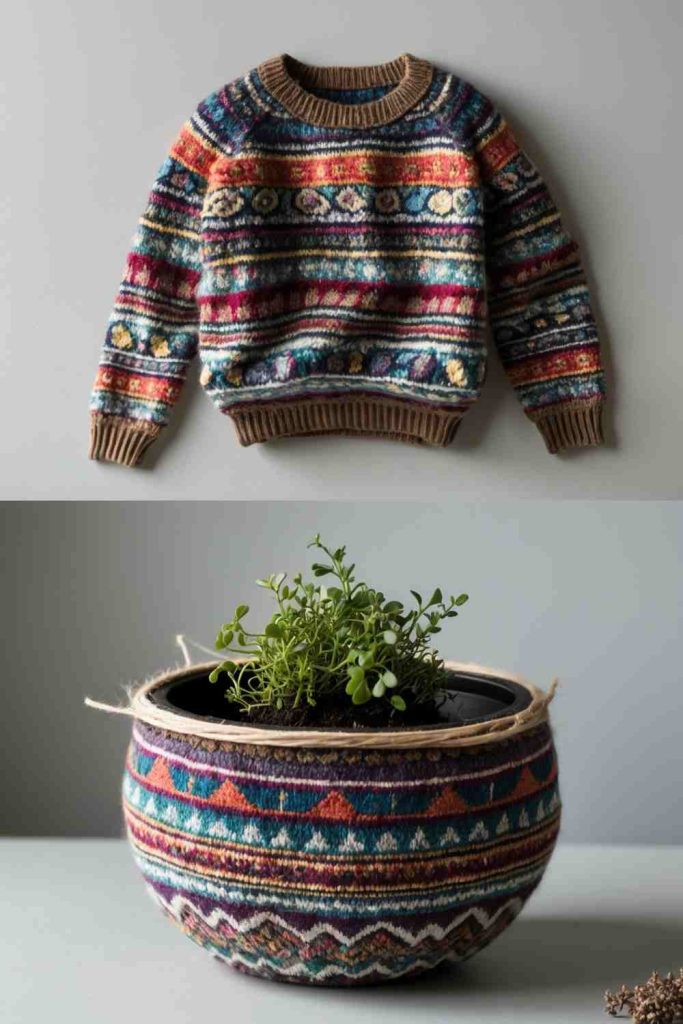
Steps to Create This DIY Colorful Plant Pot Cover
- Choose a Sweater: Pick a sweater with patterns or colors you love. Look for stretchy knits that are easy to work with and fit snugly around a plant pot.
- Cut the Sweater Fabric: Measure the height and circumference of your plant pot. Cut a sweater piece slightly larger than these dimensions to allow room for adjustments.
- Wrap and Secure: Wrap the sweater fabric around the pot, folding and securing the edges with fabric glue, double-sided tape, or a quick stitch. You can add twine or ribbon around the top edge for extra detail.
- Style and Display: Place your plant inside the covered pot, and position it in your living space. Showcase multiple pots with different sweater patterns for a charming, cohesive look.
DIY Patchwork Plant Pot Cover

Steps to Create This DIY Patchwork Plant Pot Cover
- Choose Sweaters: Gather old sweaters with colors and patterns you love. Opt for thicker knit fabrics for a more durable pot cover.
- Cut Patches: Cut the sweaters into small square or rectangular patches. Mix different patterns and colors for a lively patchwork design.
- Sew the Patches: Arrange your patches in a pattern you like and sew them together to form a rectangular piece large enough to wrap around your pot.
- Wrap and Secure: Wrap the patchwork around your plant pot, securing the edges with fabric glue or hand stitching. Adjust to fit snugly and trim any excess fabric.
DIY Matching Beanie Hat
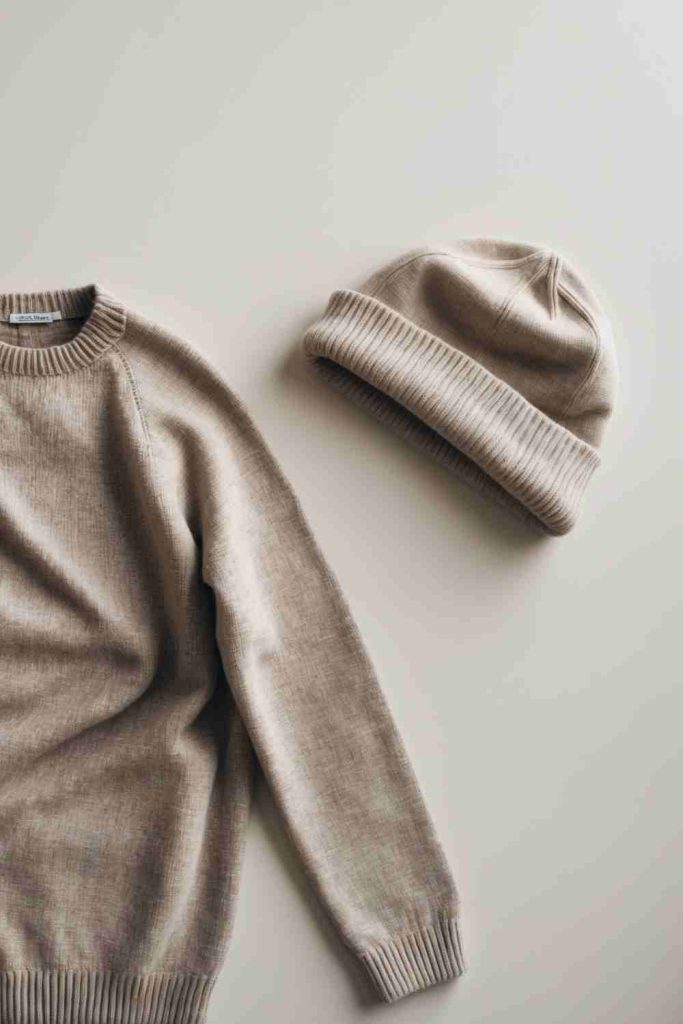
Steps to Create This DIY Matching Beanie Hat
- Pick the Sweater: Choose an old sweater with a soft, stretchy texture—cashmere or knit fabrics work great!
- Cut the Fabric: Measure around your head and cut a rectangular piece from the sweater, adding an inch for seam allowance. Cut along the ribbed hemline if you’d like to use it as the beanie’s fold.
- Sew It Together: Fold the fabric in half, with the right sides facing in, and stitch up the side edges to form a tube. Then, gather and sew the top opening closed.
- Finish and Style: Turn the hat right side out and fold the bottom edge to create a neat cuff. Add embellishments like a pom-pom or keep it minimal for a classic look.
DIY Colorful Patchwork Quilt
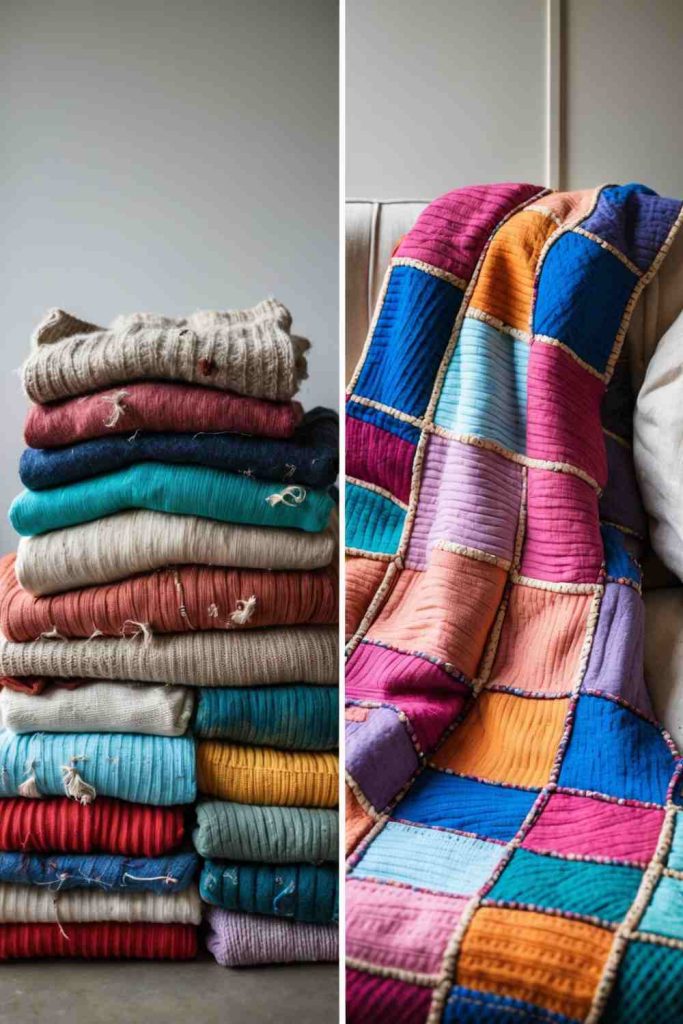
Steps to Create This DIY Colorful Patchwork Quilt
- Gather Sweaters: Collect old sweaters in various colors and textures to create a visually interesting patchwork design. Make sure the fabric is clean and ready to work with.
- Cut the Squares: Cut equal-sized squares from each sweater using a fabric cutter or scissors. Choose a size that suits your quilt’s dimensions and plan your color pattern.
- Sew the Patches: Arrange your sweater squares in a design you like and start sewing them together. Use a sewing machine for quicker assembly or stitch by hand for a personal touch.
- Add Backing & Finish: Attach a soft backing fabric to your quilt for comfort. Secure the layers with stitching or quilting techniques and trim any loose threads for a polished finish.
DIY Decorative Knitted Sphere
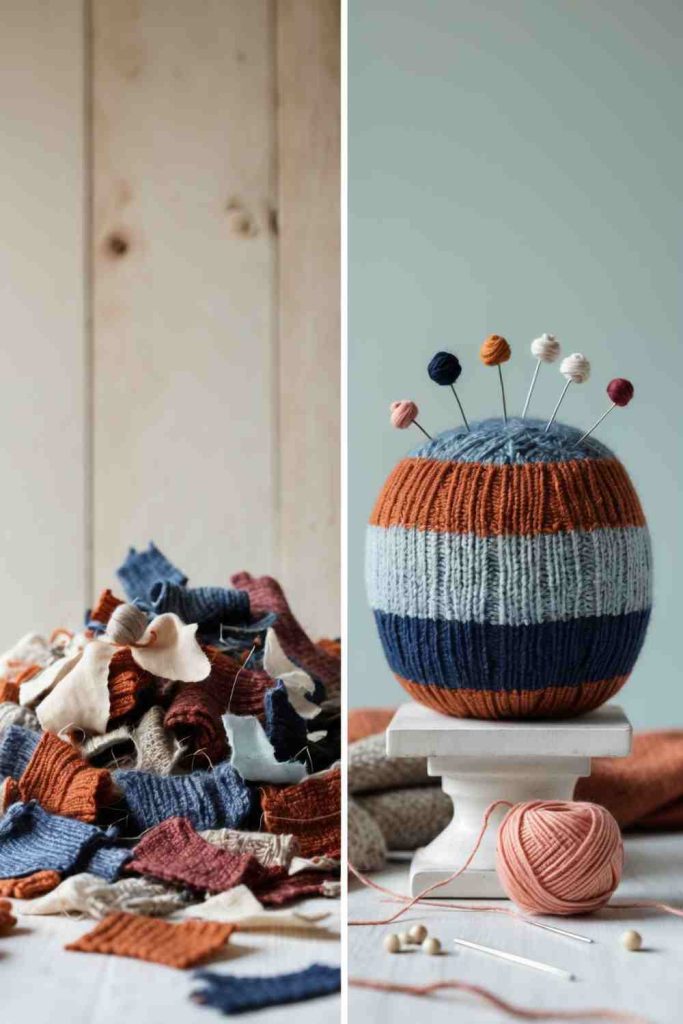
Steps to Create This DIY Decorative Knitted Sphere
- Choose Your Sweater: Pick an old sweater with a color and texture you love. Look for stretchy fabric that will fit snugly over a spherical base.
- Prepare the Base: Use a foam or lightweight plastic ball as the sphere base. Cut a piece of the sweater to fully cover the ball with a little overlap.
- Wrap and Secure: Stretch the sweater fabric over the sphere, trimming any excess material. Secure the edges underneath with fabric glue or small sewing stitches for a clean finish.
Add Yarn Pins: Insert decorative pins with yarn balls on top into the sphere. Experiment with different yarn colors and placements to create a fun, playful look.
DIY Knitted Storage Bag
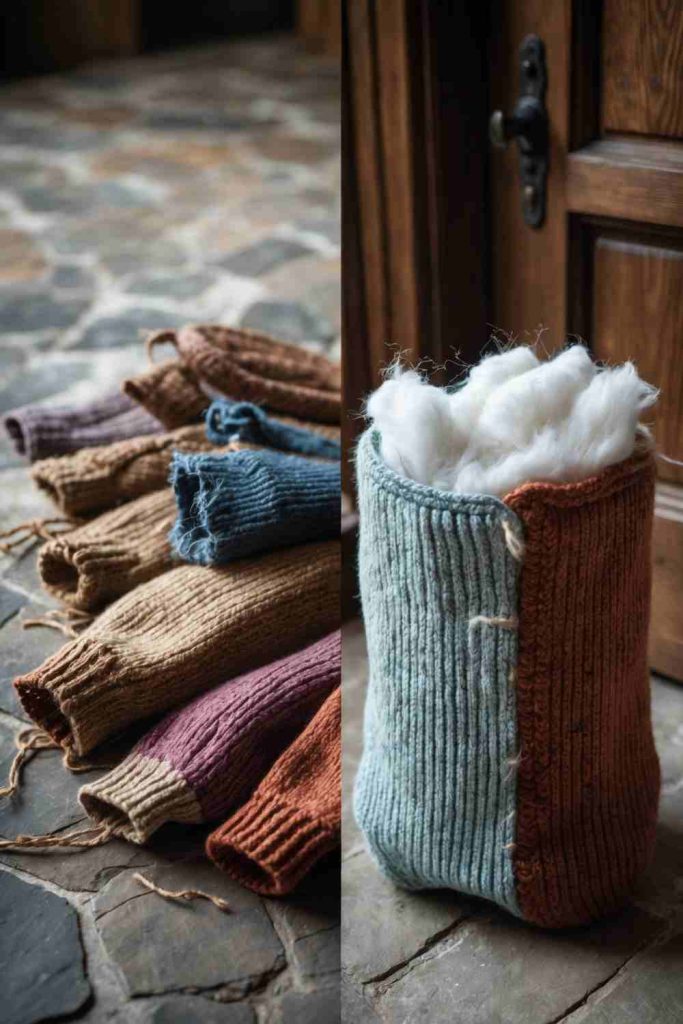
Steps to Create This DIY Knitted Storage Bag
- Select Your Sweater: Choose an old sweater with a sturdy knit texture in the colors you want for your bag. Opt for fabrics that can hold their shape once assembled.
- Cut the Pieces: Measure and cut two rectangular panels from the sweater—these will form the front and back of your bag. If desired, include additional pieces for the sides and bottom for a three-dimensional design.
- Stitch It Together: Sew the panels together along the edges, leaving the top open. Use a sewing machine or hand stitching for a durable finish. Add visible stitches for an artisanal look or keep it concealed for a clean design.
- Add Handles and Stuffing (Optional): Attach knitted loops or repurposed straps for handles. Fill the completed bag with stuffing if you want to use it decoratively or leave it open for storing your belongings.
DIY Cozy Patchwork Quilt
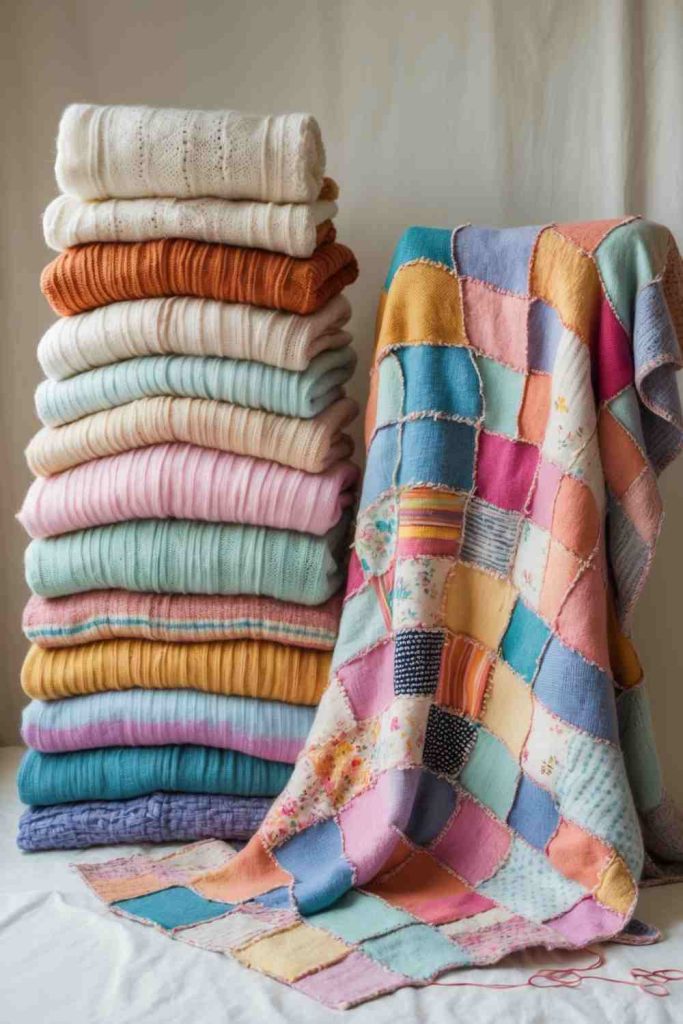
Steps to Create This DIY Cozy Patchwork Quilt
- Pick Your Sweaters: Gather old sweaters in a variety of colors and patterns. Clean them and trim away seams to prepare the fabric for crafting.
- Cut Your Patches: Use scissors or a rotary cutter to create equal-sized squares or rectangles from the sweaters. Aim for uniformity to make sewing easier.
- Plan Your Layout: Arrange your patches on a flat surface to decide your desired quilt pattern. Play with different color combinations and placements for the best look.
- Sew and Finish: Stitch the patches together to form rows, then sew the rows together to complete the quilt top. Add a soft backing fabric and quilt through all layers. Trim any loose threads for a polished final piece.