
Stylish Denim Jacket with Bottle Caps
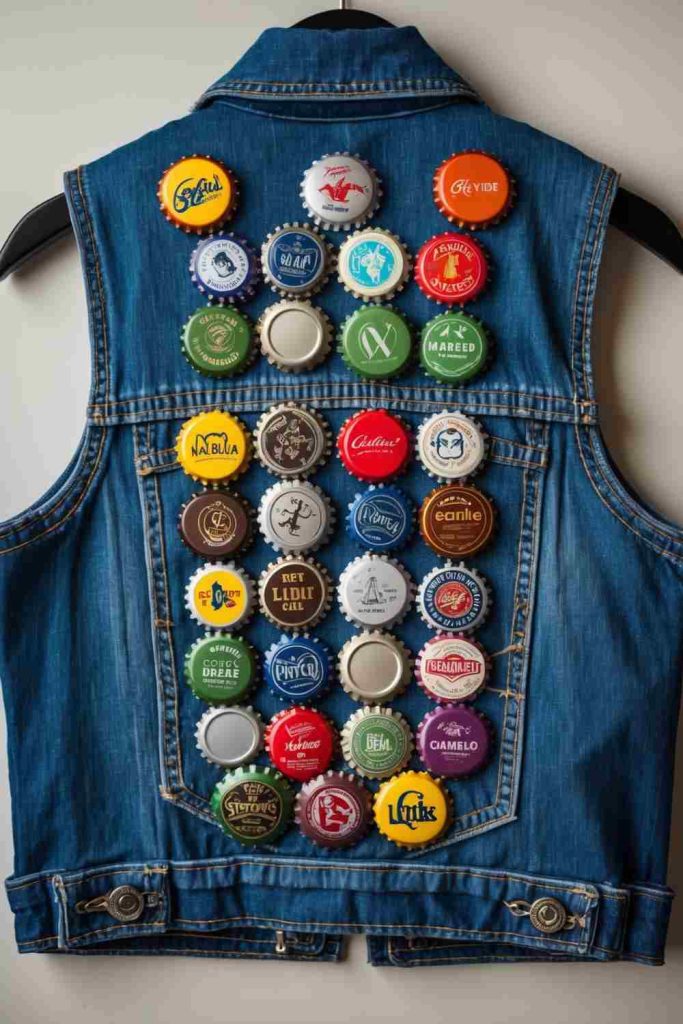
4 Easy Steps to Make This Upcycled Jacket
- Gather Materials
- Grab an old denim jacket, bottle caps (around 30-40), strong adhesive or fabric glue, and a ruler or measuring tape for alignment.
- Design Your Layout
- Plan your bottle cap arrangement. Lay them out in a grid or freestyle pattern on the jacket to decide the placement before attaching them.
- Attach the Bottle Caps
- Apply a small amount of strong adhesive or fabric glue to the back of each cap, pressing them firmly onto the denim. Work systematically from top to bottom.
- Allow Drying Time
Leave the jacket flat to dry for at least 24 hours so all the bottle caps are securely attached. Once sturdy, your upcycled denim jacket is ready to wear!
Elegant White Dress with Mosaic Design

4 Easy Steps to Create This Mosaic-Style Dress
- Gather Materials
- You’ll need a white dress, silver and black reflective materials (use old CDs or decorative craft mirrors), scissors, strong fabric glue, and a layout template if desired.
- Cut and Prepare the Pieces
- Carefully cut the reflective materials into small, mosaic-style shapes (triangles, squares, or irregular pieces work well). Smooth any sharp edges with sandpaper for safety.
- Design and Attach the Mosaic
- Plan your pattern around the neckline or any area you want to decorate. Glue each piece onto the fabric, pressing firmly to secure. Work in sections to maintain the design’s symmetry.
- Dry and Perfect Your Look
- Allow the glue to fully dry for at least 24 hours. Check for any loose pieces, secure them as needed, and voila! Your elegant, upcycled mosaic dress is ready to dazzle!
Transform a Plain T-Shirt with Fabric Paint
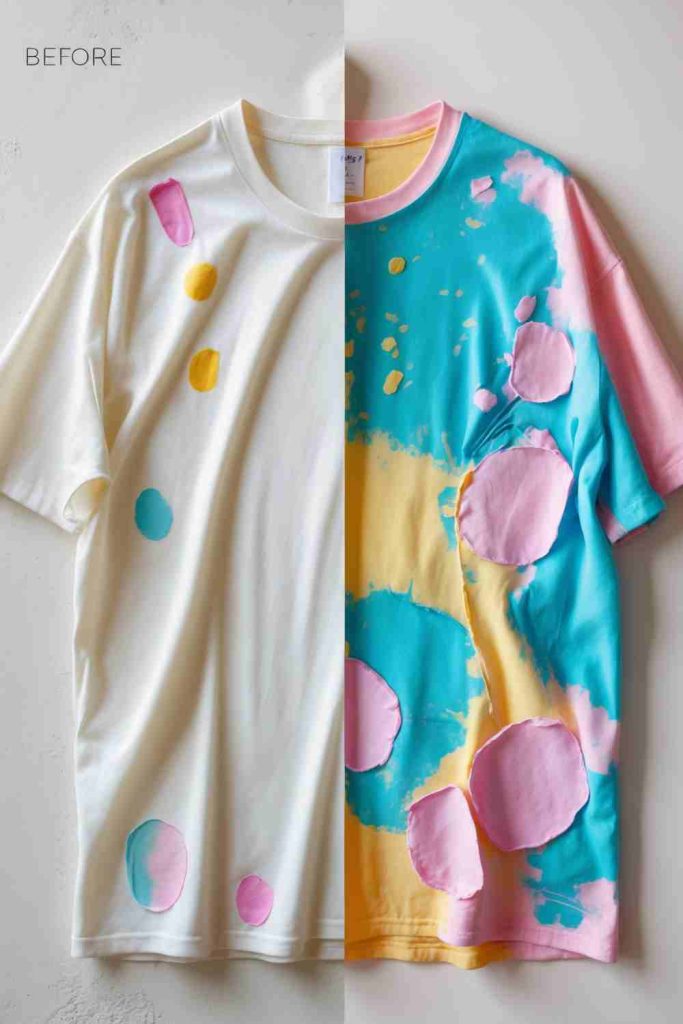
4 Easy Steps to Create This Artistic T-Shirt
- Gather Materials
- Find a plain T-shirt, fabric paints in your favorite colors, brushes or sponges, and some cardboard to place inside the shirt to prevent paint bleeding.
- Plan Your Design
- Decide on your design—whether it’s abstract shapes, colorful patterns, or freestyle. You can sketch it lightly with chalk or pencil for guidance.
- Paint Your T-Shirt
- Use brushes or sponges to apply the fabric paint. Mix colors, layer shapes, or even splatter paint for an artsy vibe. Let your creativity shine!
- Dry and Set the Paint
- Allow the paint to completely dry (follow the drying time on the paint instructions). Then, heat-set the design using an iron or by placing it in the dryer to make the colors permanent. Your upcycled T-shirt is ready to wear and wow!
Transform Old T-Shirts into a Colorful Rug
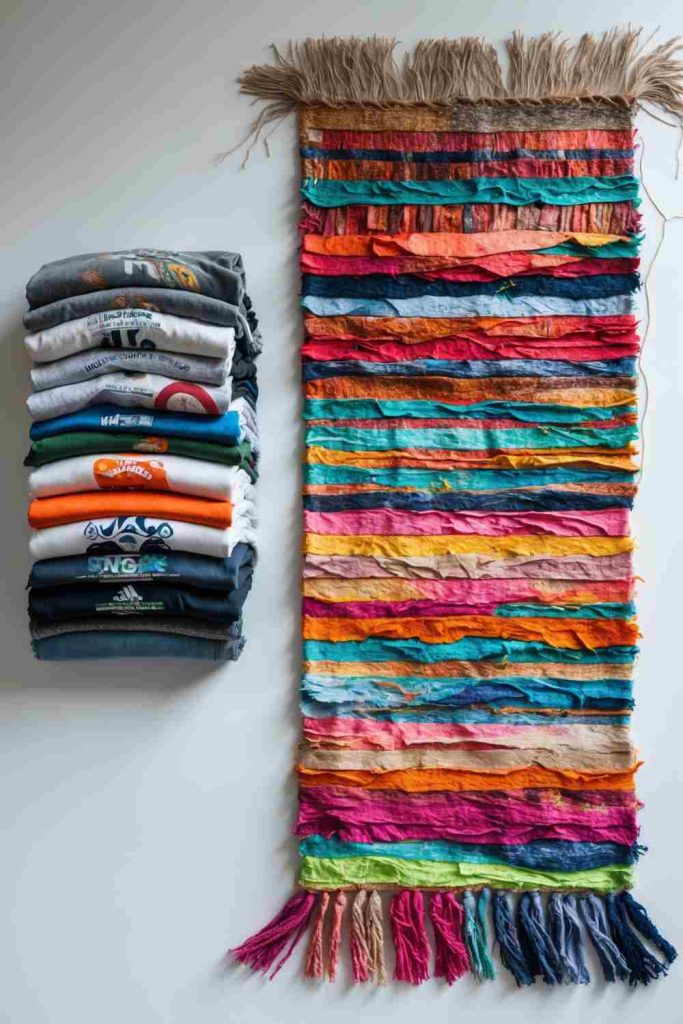
4 Easy Steps to Create an Upcycled T-Shirt Rug
- Gather Materials
- Collect old T-shirts in different colors, scissors, and a non-slip rug pad or fabric backing for stability.
- Cut the T-Shirts into Strips
- Cut each T-shirt into long, even strips (around 1-2 inches wide). Different colors will create a fun striped effect, so the more variety, the better!
- Weave or Tie the Rug
- Weave the strips together to form a braided rug, or tie them onto a mesh fabric backing to create a shag-style rug. Be consistent in spacing for a neat finish.
- Secure and Finish
- Once the rug is complete, sew or glue any loose ends to ensure durability. Place it on your floor to add a splash of color and handmade charm to your space!
Create a Pleated Garment with Floral Embellishments

4 Easy Steps to Create This Upcycled Garment
- Gather Materials
- You’ll need old fabric (cotton or linen works well), needle and thread or a sewing machine, fabric scraps in different colors for the floral embellishments, fabric glue, and scissors.
- Design and Pleat the Garment
- Cut the fabric into the desired shape for your garment (skirt, dress, etc.). Fold and secure pleats along the top edge using pins, then sew them in place to create a structured, elegant look.
- Make Floral Embellishments
- Use fabric scraps to create flowers by cutting circles or petal shapes. Layer the pieces, sew or glue them together at the center, and attach each flower to your garment, arranging them in a cascading or scattered pattern.
- Finishing Touches
- Ensure all embellishments are securely attached, and hem the garment for a polished finish. Once everything is in place, your upcycled pleated garment with floral additions is ready to wear and impress!
Create Metallic-Inspired Outfits with Metallic Accents

4 Simple Steps to Create Metallic-Inspired Outfits
- Gather Materials
- Grab old tops, pants, or skirts, metallic fabric scraps, fabric adhesive, metallic paint, brushes, scissors, and chalk for marking.
- Plan Your Design
- Sketch your vision—whether it’s bold metallic panels, shimmer accents, or abstract patterns—on your clothing using chalk or tape as a guide.
- Add Metallic Accents
- Use fabric paint to create shimmering details or cut metallic fabric scraps into shapes (stripes, geometric designs, etc.), and glue them onto the garment. Mix gold and silver tones for a dynamic look!
- Seal and Finish
- Allow the paint or glue to dry fully, then iron or heat-set the pieces if needed for durability. Clean up any edges or loose fabric, and your upcycled metallic outfit is runway ready!
Transform an Old Dress with Seashell Embellishments
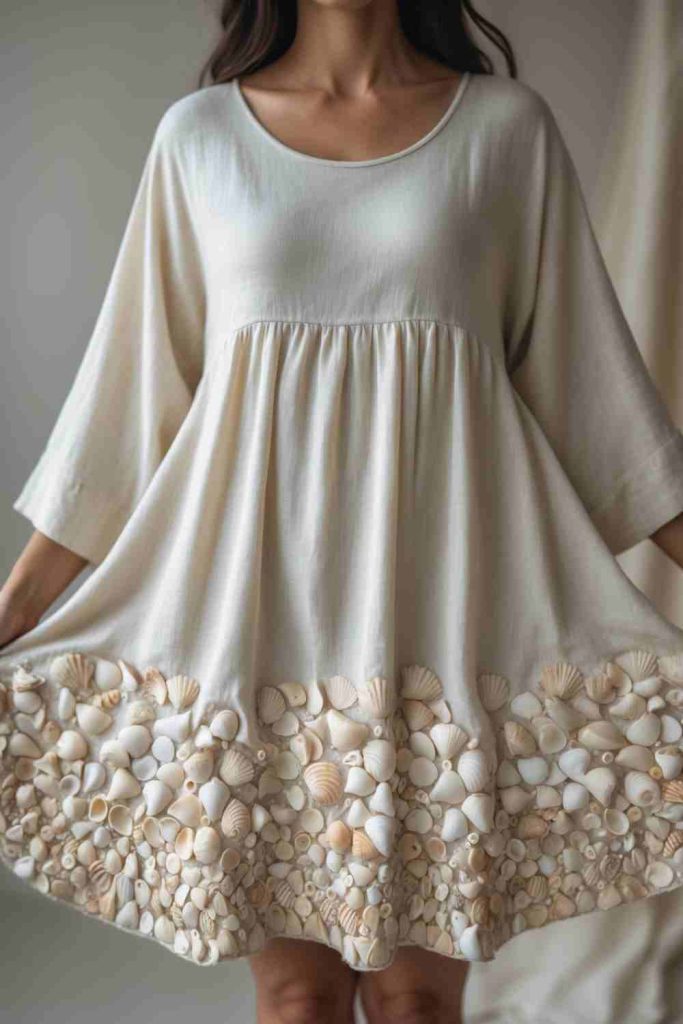
4 Easy Steps to Create a Seashell-Embellished Dress
- Gather Materials
- You’ll need an old dress, small seashells (cleaned and dried), fabric glue, a needle and thread for extra reinforcement, and optional tweezers.
- Plan Your Design
- Lay the dress flat and arrange the seashells along the hemline, neckline, or sleeves. Experiment with patterns and spacing to find the look you love.
- Attach the Seashells
- Use fabric glue to adhere the seashells to the dress. For added durability, sew each shell in place with a needle and thread once the glue dries.
- Finish and Style
- Allow everything to dry completely, then give the dress a gentle shake to ensure all embellishments are secure. Your seashell-embellished dress is ready to make waves—literally!
Create a Stylish Denim Book Cover
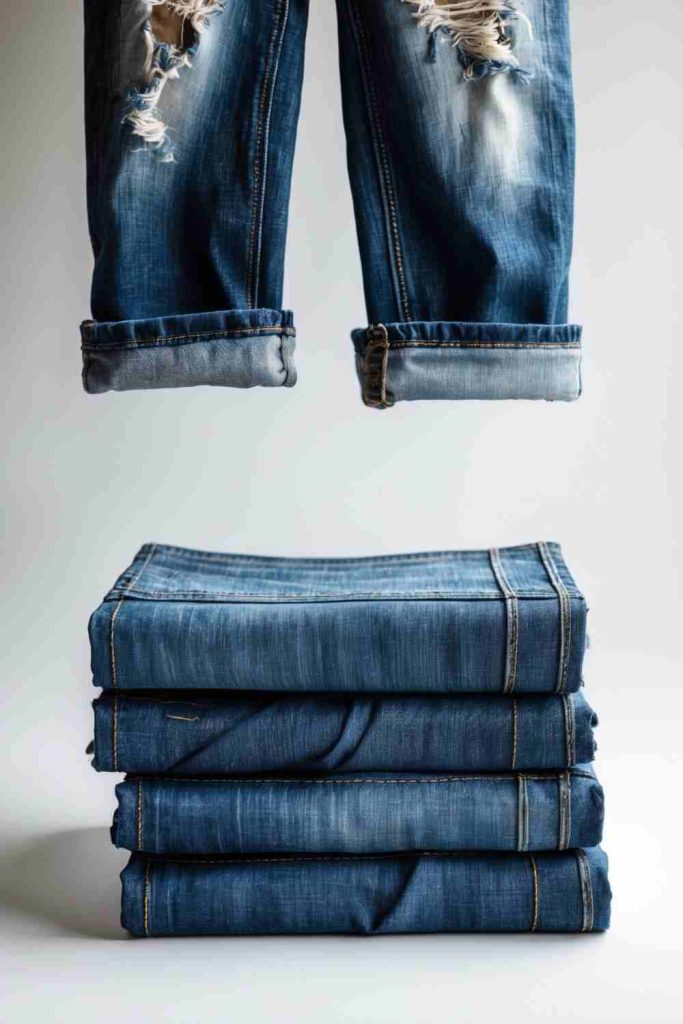
4 Easy Steps to Create a Denim Book Cover
- Gather Materials
- Grab an old pair of jeans, scissors, measuring tape or ruler, strong fabric glue or needle and thread, and the book or journal you want to cover.
- Cut the Denim
- Lay the jeans flat and cut out a rectangular piece of denim, making sure it’s a few inches larger than your book when open (to account for folds and seams).
- Attach the Cover
- Lay the book in the center of the fabric rectangle. Fold the edges of the denim inward to create sleeves for the front and back covers. Use fabric glue or sew along the edges to secure the folds.
- Finish and Customize
- Trim any excess fabric, smooth out wrinkles, and add custom touches like patches, embroidery, or paint. Slip your book into its new upcycled denim cover, and enjoy your handmade creation!
Transform Old Overalls into Vibrant Patchwork Designs
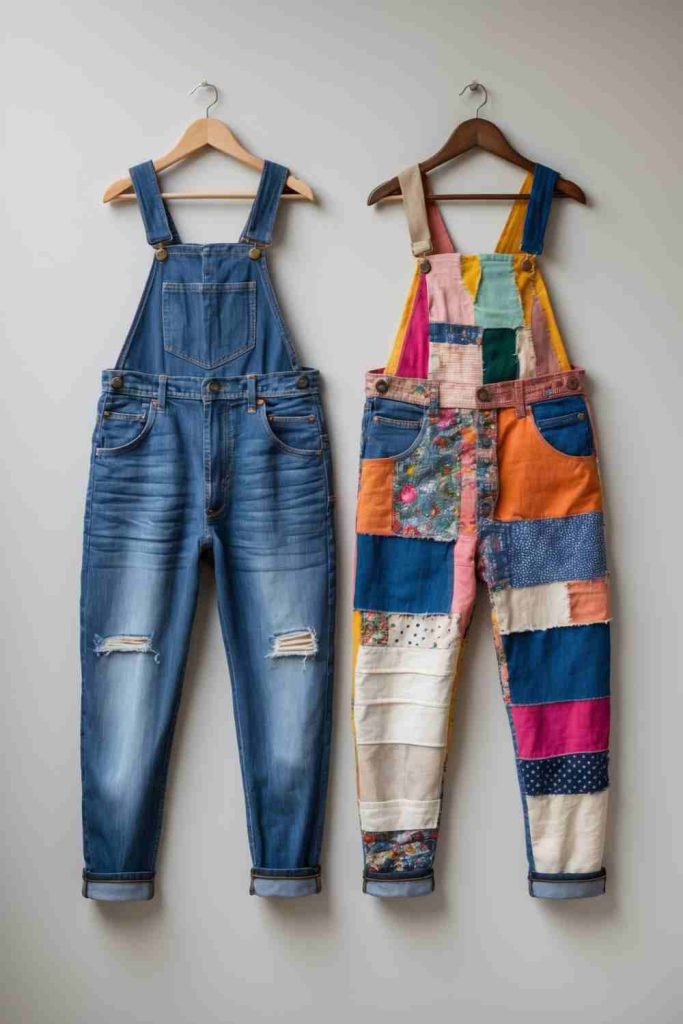
4 Easy Steps to Create Patchwork Overalls
- Gather Your Materials
- You’ll need a pair of old overalls, colorful fabric scraps, scissors, pins, fabric glue or a sewing machine, and optional embroidery thread for detailing.
- Plan Your Design
- Lay your overalls flat and decide where you want to place the fabric patches (on the knees, pockets, or bib). Cut fabric scraps into desired shapes and arrange them for the best look.
- Attach the Patches
- Secure the patches in place with fabric glue or sew them onto the overalls using a sewing machine or needle and thread. Ensure the edges are reinforced for durability.
- Finish and Style
- Trim any loose threads, press the patches with an iron for a smooth finish, and try on your revamped overalls. You now have custom patchwork overalls that are ready to turn heads!
Create Fun and Colorful Zipper Earrings
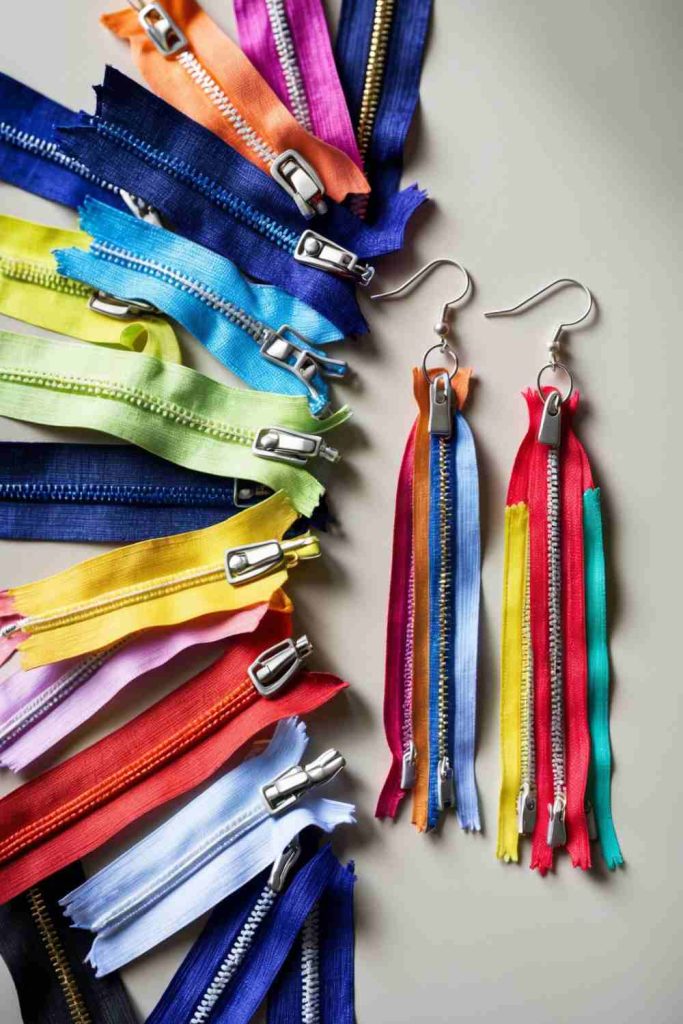
4 Easy Steps to Create Zipper Earrings
- Gather Your Materials
- Collect old zippers in different colors, earring hooks, small jump rings, scissors, and pliers.
- Cut and Prepare Your Zippers
- Trim the zippers into small strips (around 2 to 3 inches each). Use a variety of colors to make a playful, layered design.
- Attach the Zippers
- Punch a small hole at one end of each zipper strip. Use pliers to connect the zipper strips to a jump ring and attach the ring to an earring hook. Layer multiple zippers for a fuller effect.
- Finalize and Wear
- Ensure all connections are secure, trim any stray threads, and smooth out the zipper strips. Try them on and show off your upcycled, colorful zipper earrings with pride!
Craft a Unique Necktie Patchwork Top

4 Easy Steps to Create a Necktie Patchwork Top
- Collect Materials
- Gather old neckties, fabric scissors, pins, a sewing machine or needle and thread, and a plain sleeveless top as a base (optional).
- Prepare the Ties
- Cut the neckties open to remove the lining and create flat fabric pieces. Trim them into rectangular or triangular patches for easy sewing.
- Sew the Patches
- Arrange the tie patches in a fun, overlapping pattern. Begin sewing the patches together, either to form a standalone top or to layer over your plain sleeveless top. Make sure to reinforce the seams for durability.
- Finish and Style
- Adjust the fit, trim any loose threads, and iron the top for a polished look. Pair your new necktie patchwork top with jeans or a skirt, and step out in style while proudly showcasing your upcycled creation!
Create a Gorgeous Fabric Scrap Patchwork Dress
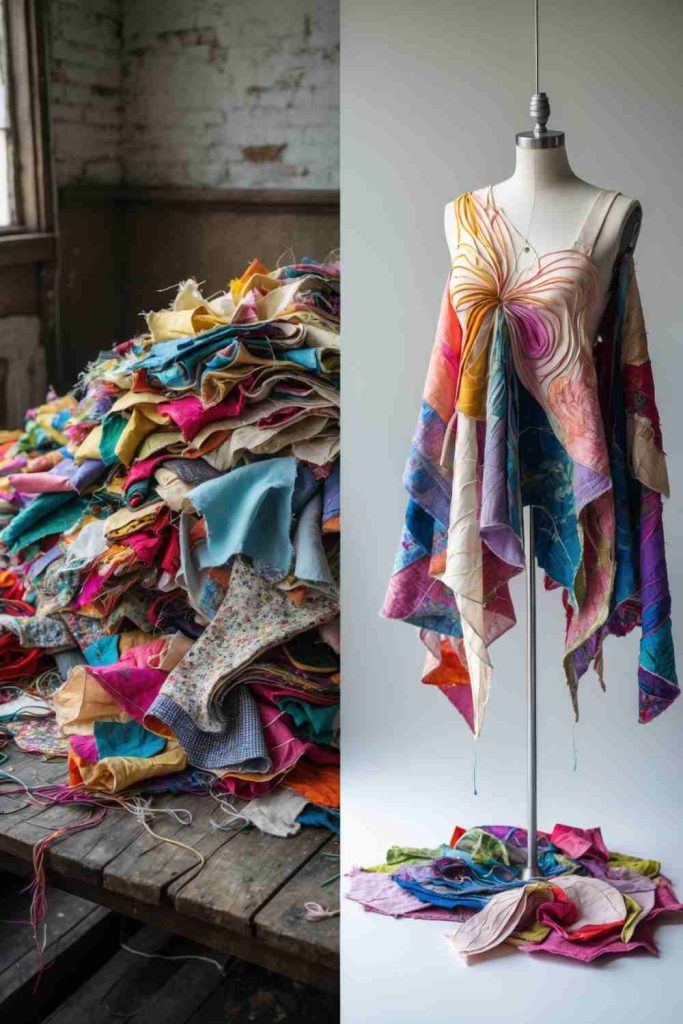
4 Easy Steps to Create a Fabric Scrap Patchwork Dress
- Collect Colorful Fabric Scraps
- Gather fabric leftovers from previous projects, old clothes, or damaged items. Choose colorful and playful pieces to make your dress stand out!
- Design and Cut
- Plan your patchwork design by arranging the fabric pieces into a pattern you love. Trim them into shapes like squares or triangles to fit your layout.
- Sew the Patchwork
- Begin sewing the fabric pieces together to create the main fabric for your dress. Use a sewing machine or stitch by hand, ensuring strong seams for durability.
- Assemble the Dress
- Shape your patchwork fabric into a dress design using a pattern or a simple outline. Attach it to a base, like a slip dress, or sew it as a standalone garment. Trim excess fabric, iron the seams, and admire your unique creation!