A coffee table usually sits in the busiest part of a living room, which is exactly why I think it deserves more thought than simply choosing something that fills the gap in front of the sofa. The right table can make everyday life easier, give old timber or hardware another useful role, and change how open or grounded a room feels. I’m Stella Eve Louise, and I’m especially drawn to coffee table ideas that make practical use of materials we already have, whether that means a pallet, leftover boards, an old metal frame, spare tile, or a piece of glass that can be safely reused.
What matters most is not copying a finished table down to the last screw. A better approach is to study the proportions, materials, storage, and movement that make the design work, then adapt those choices to your own room and the materials available. A low table on wheels solves a different problem from a slim table for a small apartment, while a mosaic top needs very different preparation from a reclaimed-wood surface. I like that variety because it means a useful coffee table can begin with almost anything sturdy enough to earn a second life.
Choose a Coffee Table Idea That Fits the Way You Use the Room
Before cutting wood or buying hardware, look at what actually happens around your sofa. A coffee table that works well for one household may feel awkward in another. I would decide on function first and style second, because a handsome table that blocks movement or never holds what you need quickly becomes more frustrating than useful.
· Measure the open area in front of the sofa and leave comfortable walking space around the table rather than filling every available inch.
· Think about whether you need open shelving, hidden storage, wheels, a lift-top, or simply a clear surface for drinks and books.
· Check the height of nearby seating so the tabletop feels easy to reach without sitting noticeably too high above the seat cushions.
· Notice whether children, pets, or frequent guests move through the room, because rounded corners, stable bases, and lockable casters may matter more than decorative details.
· Choose a visual weight that suits the room: glass and slim frames can feel lighter, while thick reclaimed timber can help anchor a large seating area.
I know it can feel tempting to begin with the most striking design, but function gives you a much better filter. Once the practical needs are clear, it becomes easier to decide whether the best direction is rustic, industrial, geometric, minimalist, or something in between.
Inspect Reclaimed Materials Before You Build
Upcycling furniture starts with being selective about what is worth saving. Old timber, pallets, glass, metal pipe, tile, and hardware can all be useful, but they need to be checked before they become part of a table that will sit close to people every day. I don’t think a project becomes more sustainable if weak or unsafe material forces you to rebuild it a few weeks later.
· Reject timber with serious rot, soft structural areas, active insect damage, or deep splits where fasteners need to hold weight.
· Pull or remove protruding nails, staples, and screws, then inspect the area around each old fixing for cracks.
· Clean reclaimed wood before sanding so dirt and grit do not become ground into the surface.
· Use only sound glass with finished edges and no chips or cracks, and support it properly rather than balancing it on an improvised base.
· Check old metal parts for sharp burrs, heavy corrosion, loose threads, or fittings that cannot be tightened securely.
· For pallets, use boards from a source you trust and avoid pieces with unknown contamination, strong chemical odors, or visible spills.
This inspection stage is where you decide what can remain as character and what needs repair. Scratches and color variation can look wonderful on a rustic surface, but a loose joint or cracked support is not a decorative feature. Keep the patina you like; fix the parts that affect strength.
Plan the Structure, Surface, and Finish Before Assembly
A coffee table is simple furniture, but it still needs a plan. You do not need a complicated drawing. A few measurements and a clear assembly order are usually enough to stop common problems such as twisted frames, uneven legs, or a top that becomes difficult to finish once the base is attached.
· Sketch the top, base, shelf, and any wheels or storage compartments, then write the main measurements beside them.
· Decide how the top will be attached so fasteners remain secure without creating sharp points on the visible surface.
· Dry-fit boards and frame pieces before adding glue or final screws, especially when using reclaimed timber with slight irregularities.
· Sand and finish surfaces that will become difficult to reach after assembly, such as the inside of a lower shelf or the underside of a lift-top.
· Use a square and level during assembly rather than relying only on how the table looks from one angle.
· Choose a finish suitable for a frequently handled tabletop and follow the product instructions for application, ventilation, and curing.
I’d rather spend an extra few minutes checking the frame at this point than try to correct a wobble after everything is finished. Then, once the structure is true and stable, the decorative decisions become much easier.
Coffee Table with Wheels
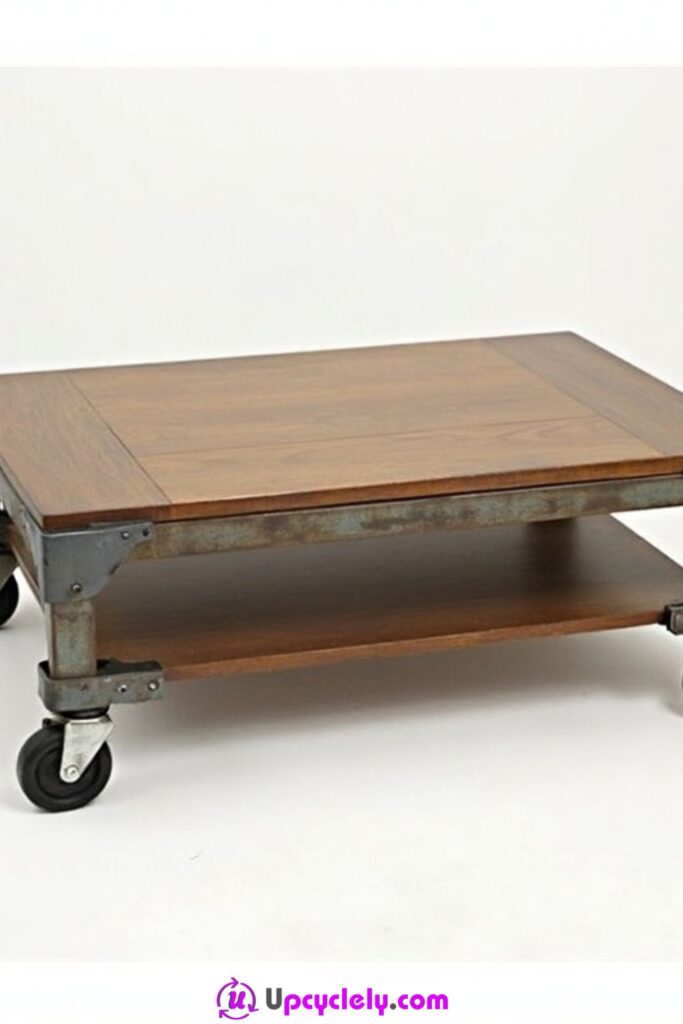
A coffee table on casters makes sense in a room that changes often. The design works especially well when a substantial wooden top or lower shelf might otherwise be difficult to move. Instead of treating the wheels as an afterthought, make them part of the structure and visual style. Black metal casters against warm timber create an industrial contrast, while smaller low-profile wheels can keep the table visually quieter.
The useful part of this idea is flexibility. You can roll the table aside when extra floor space is needed, pull it closer for board games, or reposition it for cleaning. A lower shelf adds another layer of practicality because books, trays, or baskets can stay off the top. For me, that combination of movement and storage is what makes this more than a decorative furniture project.
Materials and Tools
· Sound reclaimed timber or furniture-grade boards for the top and shelf
· Four heavy-duty furniture casters sized for the finished table
· Locking casters for at least two corners if the table will sit on a hard floor
· Wood screws and, where appropriate, wood glue
· Drill/driver with suitable bits
· Measuring tape, square, pencil, and level
· Sandpaper or a sander
· A suitable wood finish and protective equipment
Steps
1. Build a rigid table frame. Cut or prepare the main frame pieces and dry-fit them on a flat surface. Check the diagonals and corners before fastening, because a slightly twisted frame becomes much more obvious once wheels are added. Secure the joints with suitable screws and glue where appropriate, then recheck the frame before moving on.
2. Prepare the top and lower shelf. Arrange reclaimed boards so the most attractive grain and wear remain visible on the faces you want to show. Sand splinters and sharp edges without removing every mark that gives the timber character. Fit the top and shelf to the frame, leaving enough clearance that baskets or books can be placed comfortably below.
3. Reinforce the caster mounting points. Casters concentrate weight at four small areas, so do not screw them into thin or damaged wood. Add solid blocking beneath each corner if needed, mark the mounting holes, and drill pilot holes. Then attach the wheels with fasteners that fit the caster plates without protruding through the timber.
4. Test movement and stability. Set the table upright and roll it across the actual floor where it will be used. Lock the brakes and press gently on each corner to check for rocking. Tighten hardware, confirm the wheels turn freely, and make sure no caster catches the lower shelf or frame during rotation.
One detail I wouldn’t skip is wheel quality. Tiny decorative casters can look right but feel disappointing under a heavy timber table. I’d choose hardware for the actual finished weight first, then worry about matching the finish.
For a lighter version, use a simple plank top with no shelf. If visible industrial hardware feels too strong for your room, recess smaller casters beneath the base so the table still moves but the wheels are less noticeable.
Budget-Friendly Coffee Table
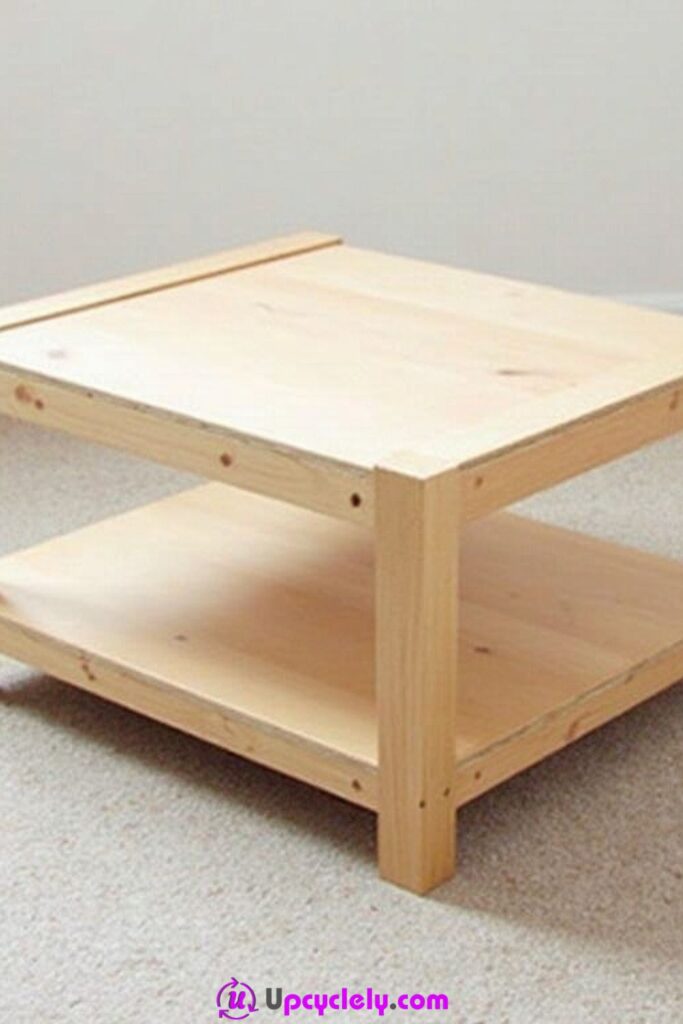
A budget-friendly coffee table does not need to look temporary. The most convincing inexpensive designs keep the form simple and spend their effort on proportion, clean joints, and a good surface. Light-colored boards with a straightforward square or rectangular frame are easy to adapt, and a lower shelf gives the table more usefulness without requiring complicated joinery.
This is also a good place to reuse leftover construction timber or sound boards from another furniture project. If the pieces do not match perfectly in color, arrange them deliberately rather than trying to hide every difference. A consistent sanding and finish can bring mixed boards together while still letting the material history show.
Materials and Tools
· Leftover or reclaimed boards in sound condition
· Simple dimensional timber for the legs and aprons
· Wood screws and optional wood glue
· Drill/driver and pilot bit
· Saw appropriate for the material
· Measuring tape, square, and pencil
· Sandpaper or sanding block
· Optional leftover stain, paint, or clear protective finish
Steps
1. Set a simple size and cut list. Measure the room and decide on a straightforward top size before cutting anything. Keep the design to repeatable parts: four legs, apron pieces, top boards, and shelf boards if you want storage. A short cut list reduces waste and makes it easier to use offcuts efficiently.
2. Assemble the base square. Join the apron pieces to the legs on a flat surface, working one side at a time. Drill pilot holes to reduce splitting, then check each corner with a square before tightening fully. Add any shelf supports while the base is open and easy to reach.
3. Fit the top and shelf. Dry-lay the boards first so knots, grain, and color variation feel balanced. Leave sensible movement gaps if your chosen construction requires them, then fasten from below where possible for a cleaner top. Fit the lower shelf so it sits level and does not rack the base.
4. Finish without overcomplicating it. Sand the edges and commonly touched surfaces until they feel comfortable by hand. Use leftover finish only if it is still in good condition and suitable for furniture, and follow its directions rather than mixing incompatible products. The goal is an even, durable surface, not an expensive-looking effect.
For me, the money-saving part should come from smart material choices, not from skipping structural basics. A square frame, pilot holes, and careful sanding cost very little but make a simple table feel much more considered.
If you have only narrow offcuts, join several across the top and make the pattern part of the design. A painted base can also help unify mixed reclaimed timber while leaving the tabletop natural.
Coffee Table for Small Space
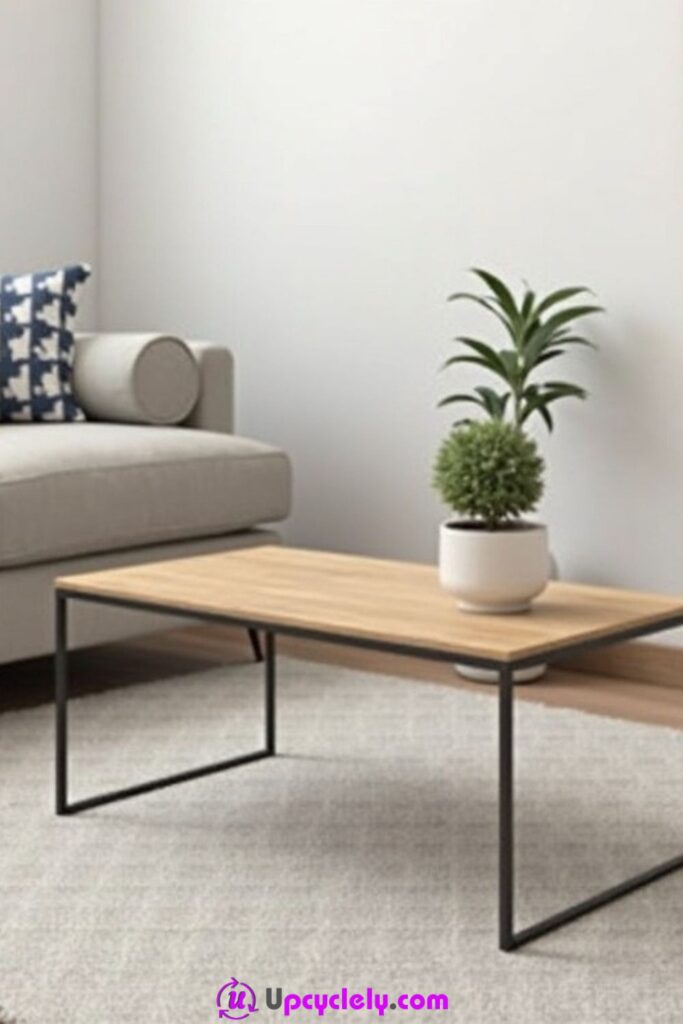
In a small room, the best coffee table often does less visually. A slim timber top on narrow metal or wooden legs can provide a useful surface without blocking sightlines or making the seating area feel crowded. The dimensions matter more than decorative features here, so I would start by protecting the walking route between the sofa, doorway, and other furniture.
A compact table can still be practical. A narrow lower rail, small shelf, or nesting design may hold a few everyday items, but bulky storage is not always the answer. Sometimes keeping the underside open makes the entire room feel calmer, especially when the floor area is already limited.
Materials and Tools
· A compact wood top or reclaimed board panel
· Slim but structurally suitable legs or metal frame
· Appropriate screws or threaded fasteners
· Drill/driver and bits
· Measuring tape and painter’s tape for floor planning
· Square and level
· Sandpaper
· Protective finish suitable for the tabletop
Steps
1. Map the footprint on the floor. Use painter’s tape to mark the proposed table size in front of the sofa. Walk around it, open nearby doors, and sit down to see whether knees and feet have enough room. Reduce the footprint before building if the taped shape already feels intrusive.
2. Prepare a visually light base. Choose legs or a frame that supports the top without creating a heavy block beneath it. Keep the connections strong even if the components are slim. Dry-fit the base and check that it cannot twist easily, because a narrow table still needs lateral stability.
3. Attach the top carefully. Center the top on the base and mark fixing points from below. Drill pilot holes and use fasteners that will not break through the upper surface. Then check the overhang from all sides; even a small unevenness is noticeable on a simple, minimal design.
4. Style for breathing room. Finish the surface and place the table in the taped position you tested earlier. Keep the top relatively clear rather than filling it with large decor. One tray, a small plant, or a few books is usually enough to make the table useful without visually shrinking the space again.
I don’t think small-space furniture needs to be tiny for the sake of it. It simply needs to respect movement. A slightly longer, narrow table can work better than a short, deep one if it leaves the main walking path open.
If floor space is extremely tight, make two smaller nesting tables instead of one fixed piece. They can separate when extra surfaces are needed and tuck together when the room needs more open space.
Coffee Table with Mosaic Tiles
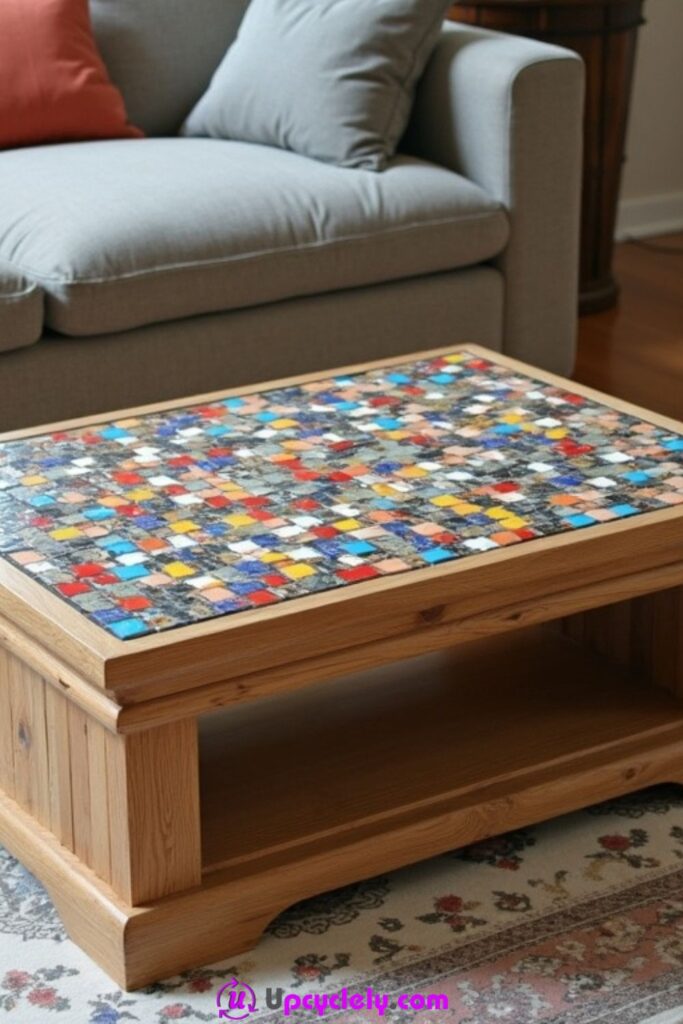
A mosaic top is a practical way to reuse small quantities of leftover tile that are too limited for a wall or floor project. The table becomes more interesting because the surface is built from fragments, color changes, and repeated shapes rather than one uninterrupted material. A simple wooden frame is usually enough underneath; the mosaic already provides plenty of visual detail.
The main challenge is weight and surface preparation. Tile, adhesive, backer, and grout can make a top much heavier than a plain board, so the base must be strong and the surface beneath the tile needs to stay rigid. I would plan the pattern before mixing adhesive, especially if you are working with mismatched offcuts and want the finished arrangement to feel intentional.
Materials and Tools
· A strong existing coffee table or rigid table base
· Suitable tile backer or stable top substrate where needed
· Leftover ceramic or mosaic tiles with sound edges
· Tile nippers or an appropriate tile-cutting tool used with eye protection
· Tile adhesive suitable for the chosen substrate
· Grout and a grout float
· Spacers if the pattern requires consistent gaps
· Sponge, bucket, gloves, and protective eyewear
· Edge trim or a wooden border if needed to contain the mosaic
Steps
1. Strengthen and prepare the tabletop. Check that the table does not wobble and that the top cannot flex under pressure. Repair loose joints before adding weight. Clean the surface and install a suitable rigid substrate if the existing top is not appropriate for tile.
2. Arrange the mosaic dry. Lay out the tiles without adhesive and move colors and shapes around until the composition feels balanced. Keep cut edges away from exposed outer edges unless they will be enclosed by trim. Photograph or lightly mark the arrangement so you have a reference once the pieces are removed.
3. Set the tiles in sections. Apply only as much adhesive as you can cover comfortably before it skins over, following the product directions. Press tiles into place without forcing adhesive up through every joint. Work from a clear reference line so the pattern does not slowly drift across the tabletop.
4. Grout and finish the edges. After the tile assembly has set as directed, fill the joints with suitable grout and clean the tile faces carefully. Pay particular attention to the perimeter, where sharp or uneven edges need to be covered or smoothed with an appropriate border. Let the finished surface cure fully before putting the table back into daily use.
The part I would check carefully is the edge. A mosaic can look wonderful from above but feel unfinished if rough tile corners are exposed where hands and knees can catch them.
Instead of a full mosaic, create a narrow tiled inset down the center of a wooden top. That uses fewer leftover pieces, keeps the table lighter, and still gives the surface a strong handmade focal point.
Coffee Table with Storage
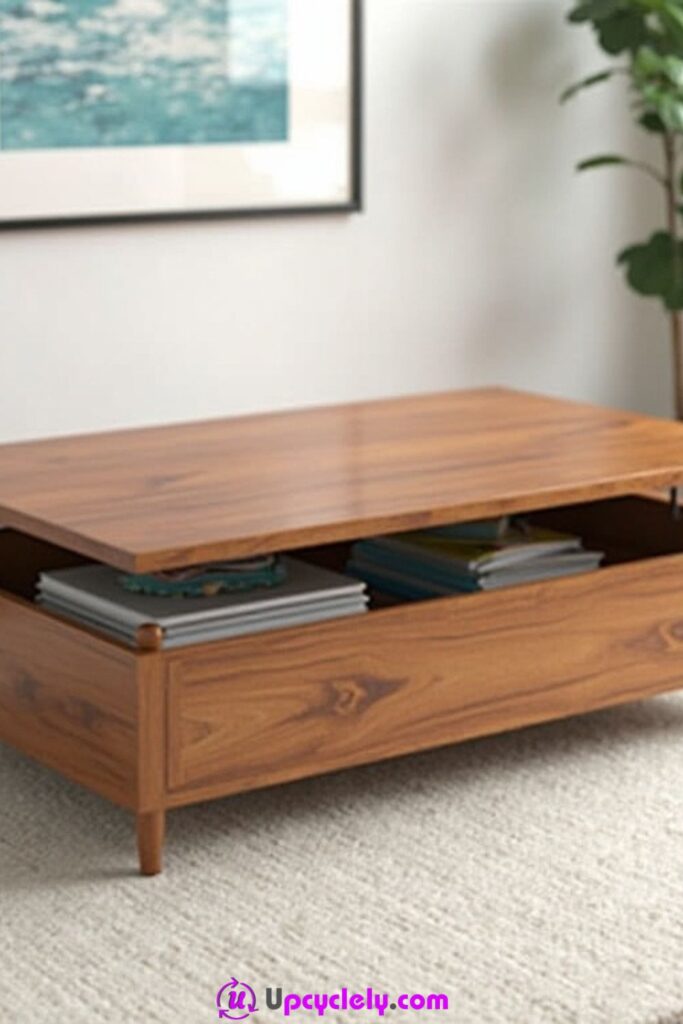
Storage changes a coffee table from a surface into a small piece of room organization. A lift-top compartment is especially useful for remotes, notebooks, chargers, and other objects that tend to spread across the living room. The key is to keep the mechanism and box structure strong enough that the moving top feels controlled rather than loose or awkward.
If a lift-top feels too complex, open shelving or shallow drawers can achieve the same basic goal with simpler construction. What matters is deciding what you actually want to store. A deep compartment may sound useful, but if everything disappears into one large box it can become harder to use than a modest shelf with baskets.
Materials and Tools
· Sound timber or sheet material for the table box and top
· Lift-top hardware or hinges designed for the intended movement, if using a moving top
· Screws suitable for the hardware and material thickness
· Drill/driver and bits
· Measuring tape, square, and pencil
· Optional shelf boards, drawer runners, or storage baskets
· Sandpaper
· Furniture finish
· Safety glasses and any additional protection required by tools used
Steps
1. Decide what the storage must hold. List the objects you want to keep inside and use them to set the compartment depth. Check that the finished table height will still suit your sofa. Planning from real objects prevents building a large box that takes up legroom without offering useful organization.
2. Build a rigid storage body. Construct the table base as a square, well-supported box or frame. Reinforce the areas where hinges, lift mechanisms, or runners will attach because moving hardware places repeated stress on fasteners. Test the base on a flat floor before adding the top.
3. Install the moving or removable top. Follow the hardware manufacturer’s instructions rather than guessing hinge positions. Mark both sides carefully so the mechanism operates evenly, and use a helper for a heavy top. Open and close it slowly during testing, checking for pinch points, interference, and fasteners that loosen under movement.
4. Organize and finish the interior. Sand the compartment so stored items do not catch on rough edges, then apply an appropriate finish where needed. Add shallow trays, dividers, or baskets if one large cavity becomes messy. Finally, load the storage gradually and confirm the table remains stable with the lid open and closed.
For me, hidden storage works best when it stays easy to reach. If opening the top means moving five decorative objects every time, the compartment probably will not get used as often as you expected.
A beginner-friendly version can use a fixed top with an open lower shelf and two matching baskets. You still gain concealed-looking storage, but there is no moving mechanism to install or maintain.
Glass Top Coffee Table
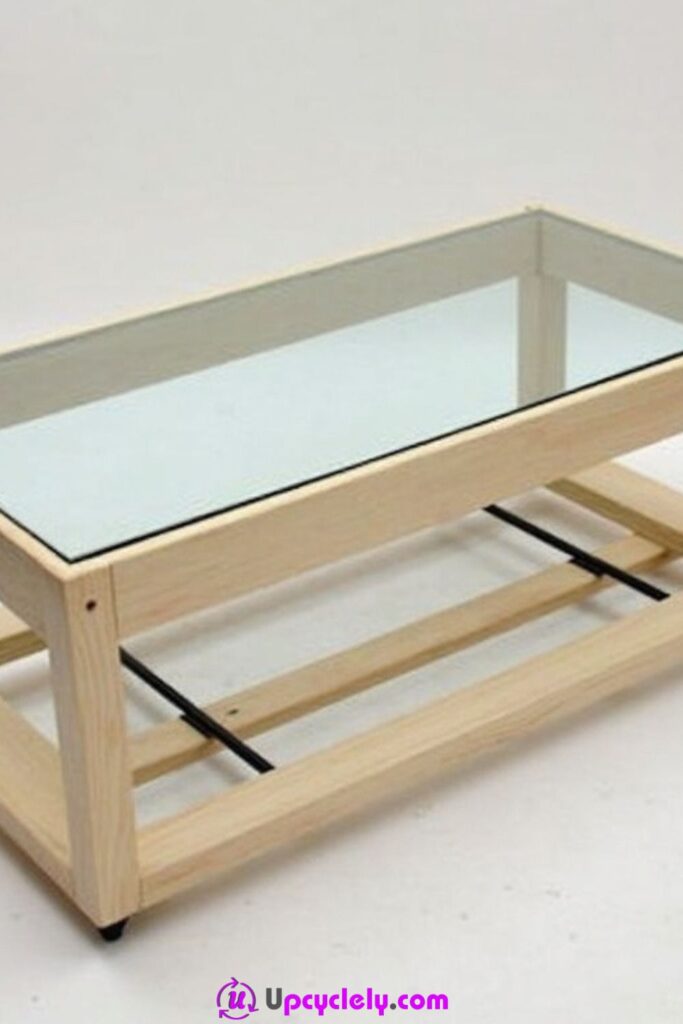
A glass top can make a wooden base feel much lighter, which is useful when you want the structure or reclaimed material underneath to remain visible. It also works well over sculptural bases because the transparent surface does not hide the joinery. The safety of the glass matters far more than the look, so this is one design where I would not improvise with an unknown pane found in a shed.
Use glass that is suitable for furniture and has properly finished edges, and make sure the base supports it in the way the glass supplier recommends. A simple wooden frame with a recessed support ledge can look clean and warm, while small clear pads help prevent hard contact between glass and wood or metal.
Materials and Tools
· Furniture-suitable safety glass with finished edges
· A stable reclaimed or newly built wood base
· Clear setting blocks or non-slip glass supports suitable for furniture
· Measuring tape and square
· Drill/driver and wood fasteners for the base
· Sandpaper
· Wood finish
· Gloves suitable for handling glass and help from another adult for larger panels
Steps
1. Build and level the base first. Complete the wooden frame without the glass in place. Check that all support points sit in the same plane using a straightedge or level. Any twist in the base can place uneven stress on the glass, so correct wobble before the top is introduced.
2. Confirm the glass fit safely. Measure the finished base and use furniture-appropriate glass prepared by a professional supplier if needed. Do not try to grind or alter unknown glass yourself. With help, place the panel temporarily on its supports and check the overhang, edge clearance, and contact points.
3. Add proper support pads. Position suitable pads or setting blocks so the glass does not rest directly on hard, uneven points. Keep the supports symmetrical and secure them if the product is designed to be fixed. The goal is to prevent sliding while still supporting the panel evenly.
4. Set the glass and check daily-use edges. Clean the base and both sides of the glass before final placement so dust is not trapped underneath. Lower the panel carefully with help, then walk around the table and check that no corner projects unexpectedly into a walkway. Recheck the supports after the table has been used for a while.
A transparent top shows everything beneath it, including dust, uneven pads, and rushed joinery. I like that honesty, but it means the base deserves the same finishing care as the tabletop.
If a full glass top does not suit your household, use a smaller glass inset within a solid wooden border. The wood protects the outer edge while the center still keeps the design visually open.
Creative Coffee Table Design
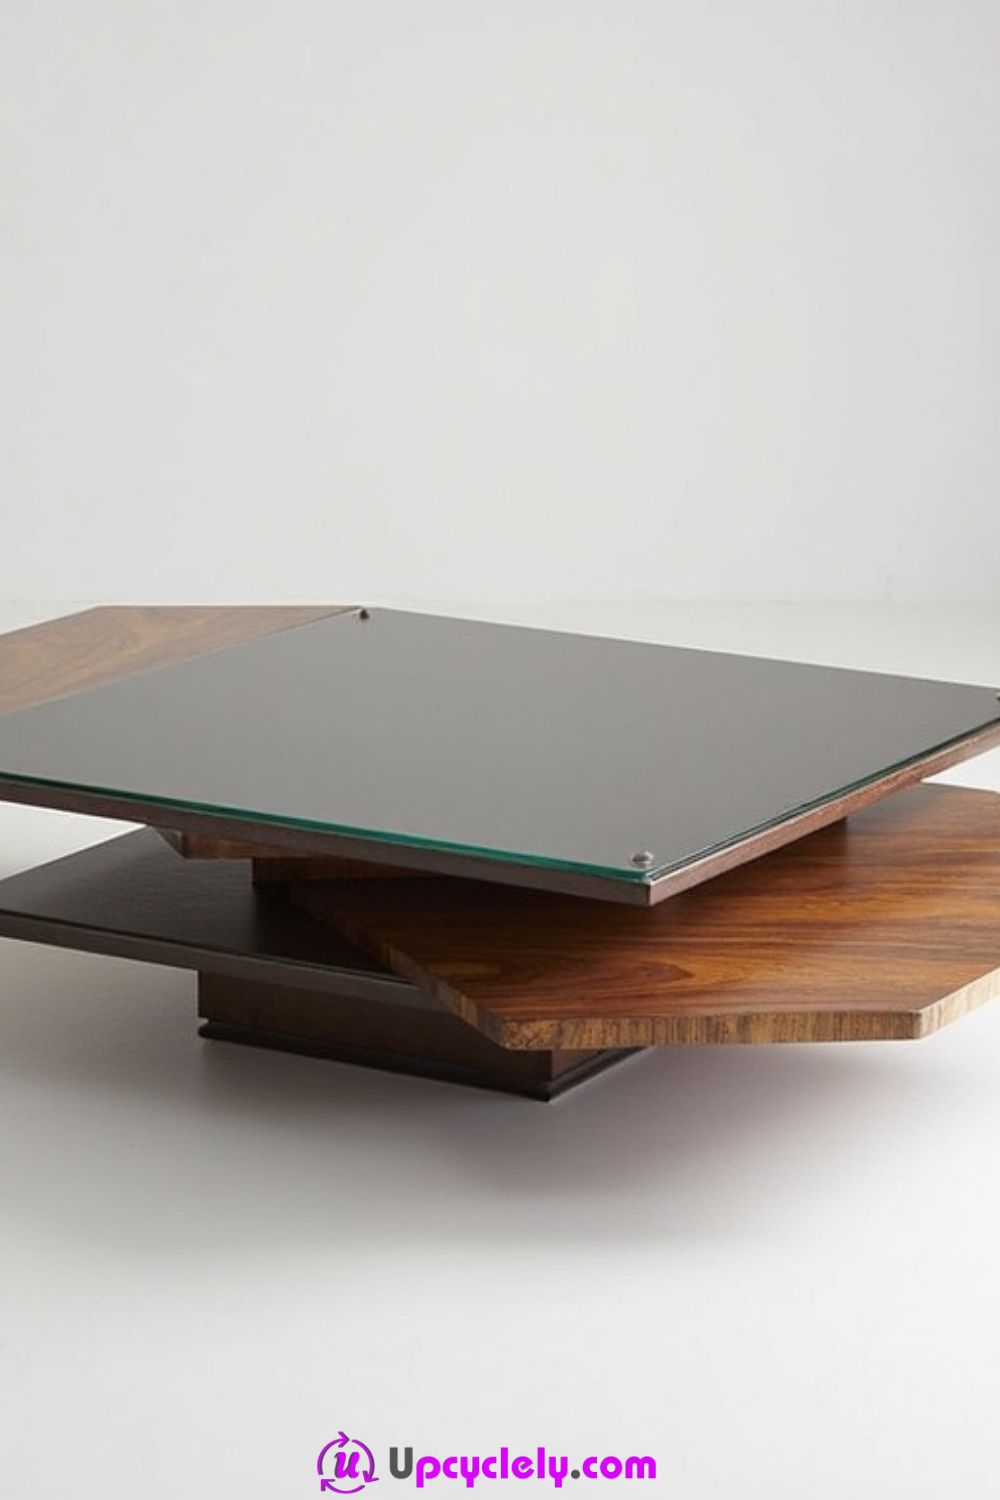
A creative coffee table becomes interesting through form, not just decoration. Layered hexagons, offset levels, contrasting wood tones, or a mix of transparent and solid materials can turn the table into a sculptural focal point. The challenge is keeping the design usable. Cups still need a stable place to sit, and the base still needs to resist tipping even if its shape is unconventional.
I would simplify the geometry before building. One strong repeating shape is easier to execute well than several unrelated ideas competing on the same piece. If you are using reclaimed material, variation in grain and color can provide enough contrast without adding more layers or finishes.
Materials and Tools
· Cardboard or scrap board for full-size shape templates
· Reclaimed timber or sheet material suitable for the planned geometry
· Optional furniture-suitable glass for one layer
· Wood screws, bolts, or concealed fasteners appropriate to the structure
· Drill/driver and bits
· Saw suitable for accurate angled cuts
· Square, bevel gauge, measuring tape, and pencil
· Sandpaper and finish
· Clamps
Steps
1. Prototype the shape at full size. Lay cardboard templates on the floor in the arrangement you want to build. Place them in front of the sofa and walk around the edges. This simple mock-up helps you spot awkward projections, insufficient knee space, or a design that looks balanced on paper but too busy in the room.
2. Build the strongest layer first. Choose the base or central layer that will carry the most load and assemble it square and rigid. Use accurate reference lines for repeated angles rather than measuring each piece independently. Clamp dry assemblies and check symmetry before fixing them permanently.
3. Add contrasting layers deliberately. Attach the secondary wood or glass level only after the first structure is stable. Keep clear spaces between layers consistent so they read as intentional design rather than construction gaps. If a layer projects beyond the base, check the tipping risk before final fastening.
4. Refine the edges and balance. Sand every exposed corner that could meet a hand or knee, then apply the chosen finish. Place the table in the room and view it from several seating positions. Remove unnecessary decorative additions if the geometry already provides enough visual interest.
I know it can feel tempting to keep adding shapes because the project is called creative, but restraint usually makes an unusual design stronger. One clear idea is easier to appreciate than five ideas fighting for attention.
Try the same layered concept with two simple rectangles offset from each other instead of hexagons. It is easier to cut, needs fewer angled joints, and can still create a modern stepped effect.
DIY Pallet Coffee Table
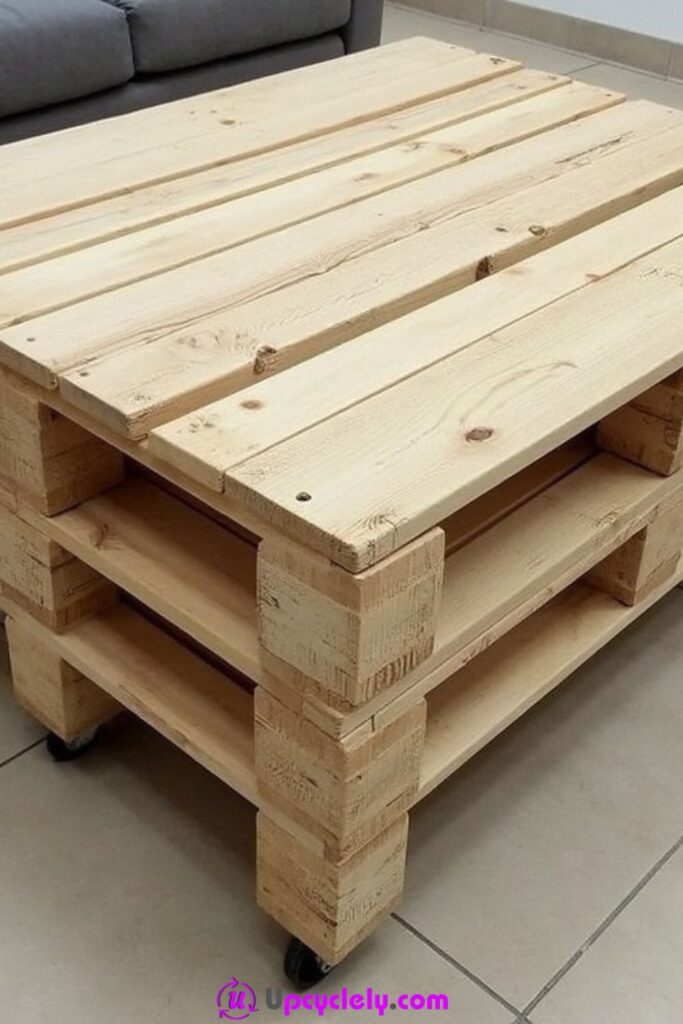
Pallet timber naturally suits a low, casual coffee table because the boards already have a strong linear rhythm. Stacking pallet sections can create built-in openings for magazines or baskets, and casters can make a heavy piece easier to move. The project only works well, though, when the pallet source is appropriate and every surface that people touch has been carefully prepared.
I would treat the pallet as raw material rather than assuming it should remain exactly as found. Remove damaged boards, reset protruding fasteners, and rebuild weak sections. That gives you more control over the final proportions and reduces the chance of carrying dirt, splinters, or questionable hardware into the living room.
Materials and Tools
· Clean pallet timber from a trusted source
· Additional sound boards for repairs or a smoother top if needed
· Pry bar and hammer for careful disassembly where required
· Nail puller or pliers
· Wood screws and optional wood glue
· Drill/driver
· Sander or sanding blocks with dust protection
· Optional casters rated for furniture use
· Suitable wood finish
Steps
1. Select and strip the usable material. Inspect the pallet carefully and reject boards with contamination, rot, or major splitting. Pull unnecessary nails and remove damaged slats rather than trying to hide them. Clean the boards and allow them to dry fully before sanding or cutting.
2. Rebuild the pallet sections into a table form. Decide whether you want one low layer or two stacked layers with storage gaps. Square the sections, replace weak blocks, and screw through solid timber rather than relying on old pallet nails. Check the assembly for twist on a flat floor as you work.
3. Smooth the surfaces that matter. Sand the tabletop, exposed edges, shelf openings, and any place where hands may reach. You can leave saw marks and color variation for character, but remove splinters and sharp corners. Fill only holes that affect comfort or structure rather than erasing every sign of reuse.
4. Add wheels or feet and finish. If using casters, reinforce the mounting corners and fit hardware suitable for the total weight. Otherwise add protective feet to lift the timber slightly from the floor. Apply a furniture-appropriate finish, then test the table with normal objects before loading the storage openings heavily.
The pallet look is strongest when it feels intentional, not simply unfinished. Clean edges, secure joints, and a consistent surface make reclaimed boards feel like furniture rather than something temporarily brought indoors.
For a less bulky version, dismantle the pallet and use only the boards to build a conventional framed coffee table. You still reuse the timber, but the finished piece can suit a smaller or more formal room.
Easy-to-Build Coffee Table
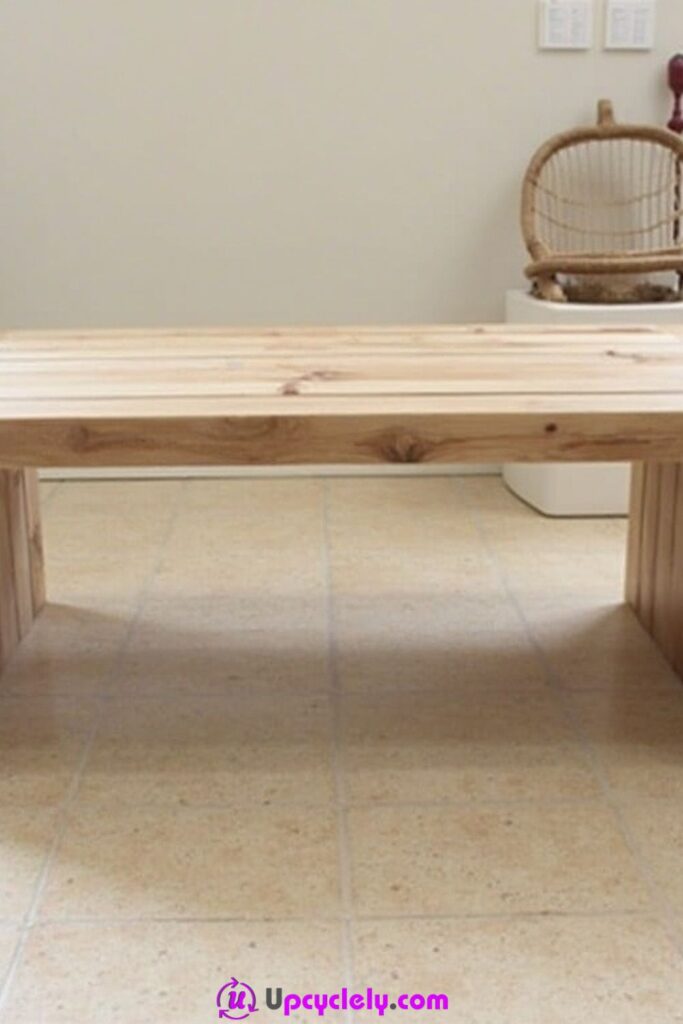
An easy-to-build coffee table is useful when you want a first furniture project that teaches the basics without complicated joints. A rectangular top, four legs, and simple apron rails can be enough. The design becomes successful through accurate cuts, square assembly, and a surface that feels good to touch rather than through decorative complexity.
This is one of the best places to use straight reclaimed boards if you can prepare them to consistent thickness. If the boards are too irregular, use them for the top and choose more uniform material for the structural base. That way, you keep the reused character without making the frame unnecessarily difficult to square.
Materials and Tools
· Straight boards for a rectangular top
· Four legs or sturdy leg stock
· Apron or frame rails
· Wood screws and optional wood glue
· Drill/driver and countersink bit
· Saw
· Square, measuring tape, and pencil
· Clamps
· Sandpaper and protective finish
Steps
1. Prepare repeatable parts. Cut matching legs together and compare them end to end before assembly. Do the same for opposite apron rails. Small length differences are easier to correct now than after the frame is built, so label pairs and keep a clear reference face on each piece.
2. Build two side frames. Join one pair of legs with an apron rail, then repeat for the opposite side. Use a square and clamps to hold each assembly while fastening. Let the glue set as directed if used, then connect the two side frames with the remaining rails.
3. Attach the tabletop from below. Arrange the top boards, checking the grain and edge alignment before fixing. Center the completed base underneath and mark the overhang. Use suitable fasteners through the frame or tabletop connectors that allow the material to behave appropriately, depending on the construction method.
4. Sand, finish, and correct any wobble. Ease sharp corners and sand the surface through the grits appropriate for your finish. Place the table on a known flat floor and check all four legs. Correct the cause of any wobble rather than hiding it with a thick felt pad, then apply the final finish.
This is where patience matters more than buying another tool. If the frame is square and the top sits flat, even a very plain table can look settled and well made.
Add a lower shelf later if you decide you need storage. Building the basic frame first keeps the initial project manageable and lets you see how the table works in the room before adding more material.
Geometric Coffee Table
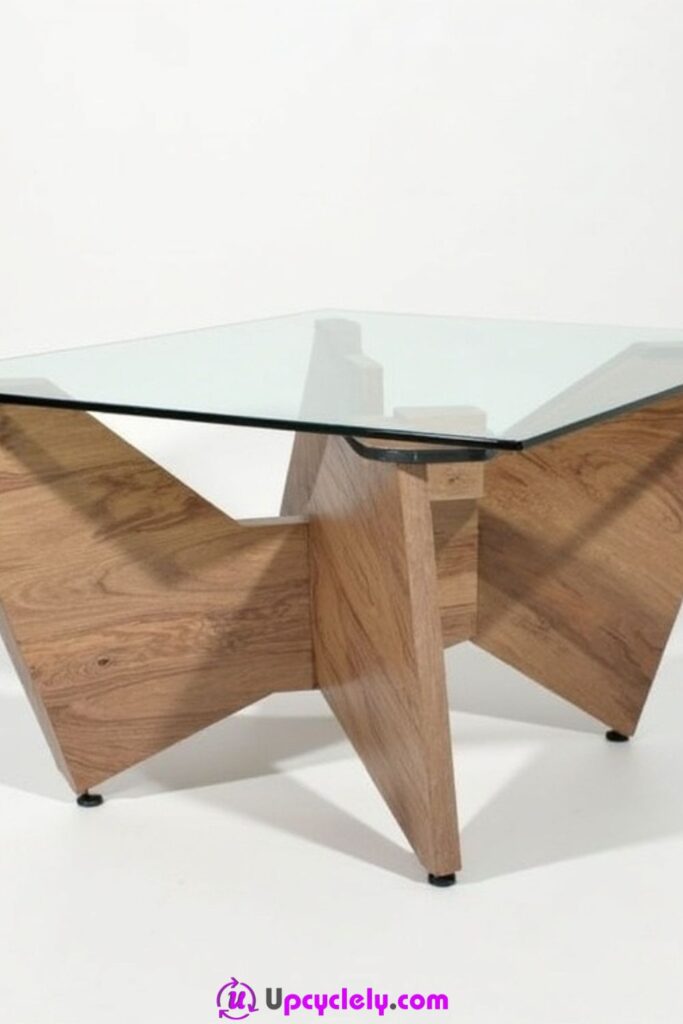
A geometric coffee table relies on accurate angles and negative space. Intersecting timber panels beneath a clear top can create a base that changes appearance as you move around it, which is why the construction deserves careful planning. The most important step is making sure the artistic base still transfers weight safely to the floor.
Rather than cutting expensive or irreplaceable reclaimed boards immediately, I would model the base with cardboard or scrap plywood first. That lets you adjust the angle, width, and overlap until the form feels balanced. Then you can transfer the proven shapes to the material you want to keep.
Materials and Tools
· Cardboard or scrap sheet material for templates
· Stable timber or plywood for the geometric base
· Furniture-suitable glass or a solid top, depending on the design
· Saw capable of accurate angled cuts
· Drill/driver and suitable fasteners
· Wood glue if appropriate
· Measuring tape, bevel gauge, straightedge, and pencil
· Clamps
· Sandpaper and finish
Steps
1. Make the geometry in cheap material first. Create full-size templates for the angled base pieces and slot them together or tape them in place. Set the prototype under a temporary top shape and check stability from several directions. Adjust the angles until the footprint supports the top without looking unnecessarily wide.
2. Transfer and cut accurately. Mark the final pieces from the approved templates so repeated angles match. Use a stable work surface and appropriate eye protection while cutting. Label mating edges immediately because similar geometric parts can become confusing once they are separated.
3. Assemble the base in a controlled sequence. Dry-fit every intersection before adding glue or final fasteners. Clamp the first connection, confirm the base remains centered, then add the next panel. Keep checking the top support points against a flat reference so the finished table does not rock.
4. Fit the top and soften the contact points. For a glass top, use suitable furniture supports and professionally finished glass. For wood, attach with a method appropriate to the material. Sand exposed corners enough to make the base comfortable around knees and feet while preserving the crisp geometry that defines the design.
For me, the layout matters more than making every visible angle dramatic. If the base already has several intersecting planes, a quiet top helps the geometry read clearly.
A solid timber top makes the project easier if you do not want to handle glass. You can also simplify the base to two crossing panels with large cutouts, keeping the geometric feel with fewer joints.
Rustic Coffee Table
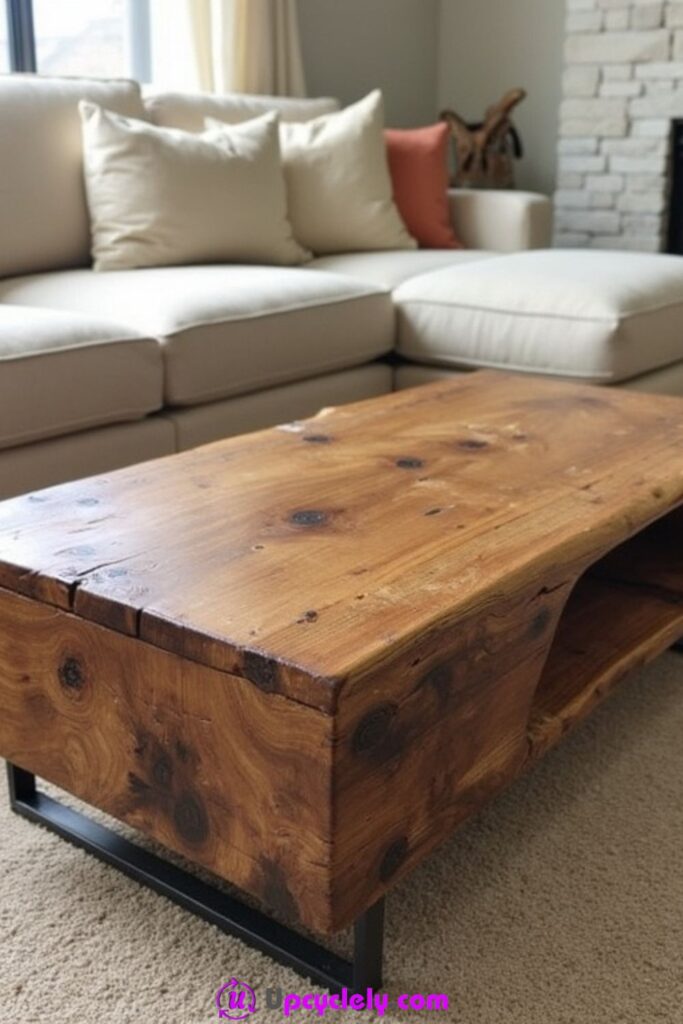
A rustic coffee table lets reclaimed wood keep the marks that make it interesting: knots, saw texture, old nail holes, darker edges, and natural color variation. The trick is deciding which imperfections are visual and which are structural. I would preserve surface history while still making the table smooth enough for daily use and strong enough that nothing moves under load.
Black metal legs work well with a thick timber top because the contrast keeps the table from feeling overly traditional. A lower shelf can repeat the wood and add practical storage. If the boards are especially characterful, keep the base simple so the grain remains the main feature.
Materials and Tools
· Reclaimed timber with attractive grain and sound structure
· Metal legs or a simple wood base
· Optional boards for a lower shelf
· Bolts or screws suitable for attaching the base
· Drill/driver
· Wire brush or scraper for loose debris where appropriate
· Sandpaper or sander
· Square and level
· Clear or tinted furniture finish
Steps
1. Separate character from damage. Inspect the timber and mark cracks, soft spots, loose splinters, and old fasteners. Remove anything that could affect strength or comfort. Keep stable knots, color changes, and old holes if they suit the look, but repair areas where the top could continue splitting.
2. Flatten the important contact areas. The entire board does not need to look machine-new, but the underside where the base attaches should sit reliably and the top should hold objects without severe rocking. Sand high spots and sharp edges while leaving enough texture to preserve the rustic character.
3. Attach a simple, strong base. Position the legs or frame so the heavy top is supported well inside its edges. Drill pilot holes or install threaded hardware suited to the material, then tighten evenly. Add the lower shelf only after the main top sits level and stable.
4. Finish to protect without hiding the wood. Remove sanding dust and apply a finish that suits the intended use, following its instructions. Avoid flooding deep cracks with finish as a substitute for structural repair. Once cured, place the table in the room and check that rough live edges or corners do not intrude into walking paths.
I especially like rustic furniture when it is comfortable to use. A splinter is not patina, and a loose knot is not charm. You can keep the age and still make the surface pleasant to live with.
If a thick reclaimed slab is unavailable, laminate several narrower boards into a wider top and let their different tones create the rustic effect. A painted metal base can unify the mix.
Homemade Coffee Table Design
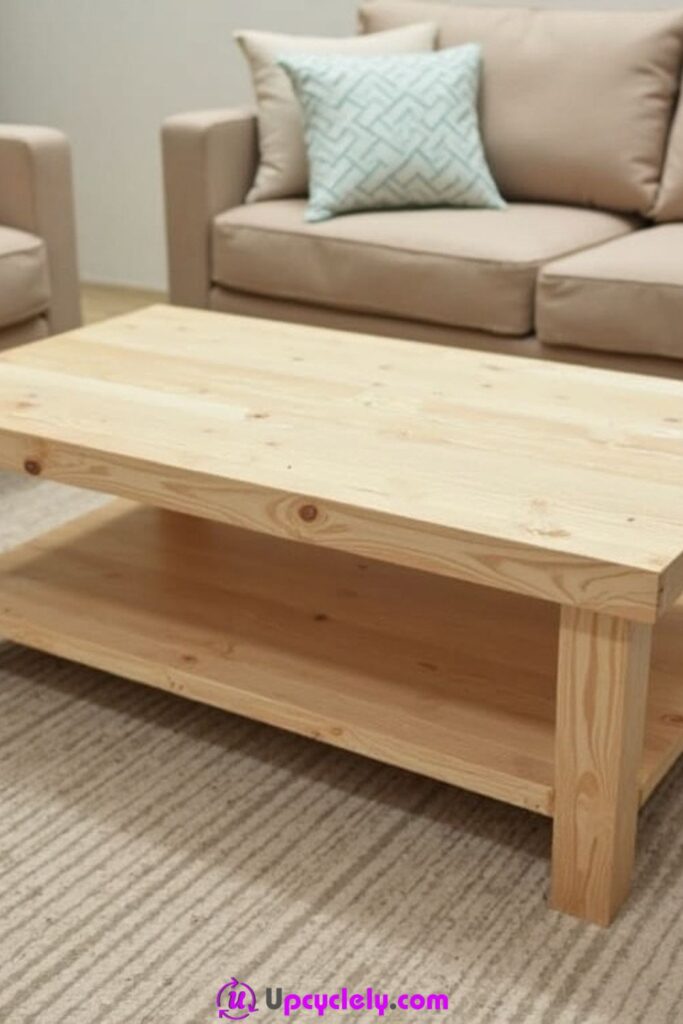
A homemade coffee table can be intentionally straightforward: a light timber top, a strong rectangular frame, and a shelf that keeps everyday clutter under control. What makes it feel personal is not complicated decoration but the ability to adapt the proportions to your room and use material that already has a story.
This is also an easy design to modify over time. You can begin with the basic frame, then add a shelf, paint the base, replace the top, or fit baskets underneath later. I like projects that leave room for change because the furniture can continue working even when the room or your needs shift.
Materials and Tools
· Reclaimed or new boards for the top
· Frame timber and four legs
· Optional shelf boards
· Wood screws and glue where appropriate
· Drill/driver
· Saw
· Square, tape measure, and pencil
· Clamps
· Sandpaper and finish
Steps
1. Set the proportions from your seating. Measure the sofa and available floor space rather than copying a random plan. Choose a top length and width that feel balanced, then decide whether the shelf should sit high enough for baskets or low enough to keep the table visually open.
2. Construct the frame in stages. Build the two end frames first and confirm that the legs match. Connect them with long rails, checking square as each joint is tightened. Add shelf supports now if you plan to use them, because they are easier to position before the top closes the frame.
3. Fit the top and shelf cleanly. Dry-lay boards and select the faces you want visible. Fasten the top from below where the construction allows, and keep screw tips safely within the material thickness. Install the shelf level, then test it with the kind of baskets or books you expect to store.
4. Add the finish that suits your home. Sand all hand-contact edges and vacuum away dust. Keep the wood natural, stain it, or paint part of the table depending on the room, but avoid piling on decorative treatments simply because the piece is homemade. A restrained finish usually makes the craftsmanship easier to see.
The part I like about a homemade design is that you can solve your own small annoyances. If remotes always disappear, add a shallow tray. If the room feels crowded, reduce the depth. Those details matter more than copying someone else’s exact dimensions.
Use mismatched reclaimed boards for the shelf and reserve the straightest pieces for the top. Painting only the frame can make the mixed materials feel deliberate without hiding the reused timber completely.
Industrial-Style Coffee Table
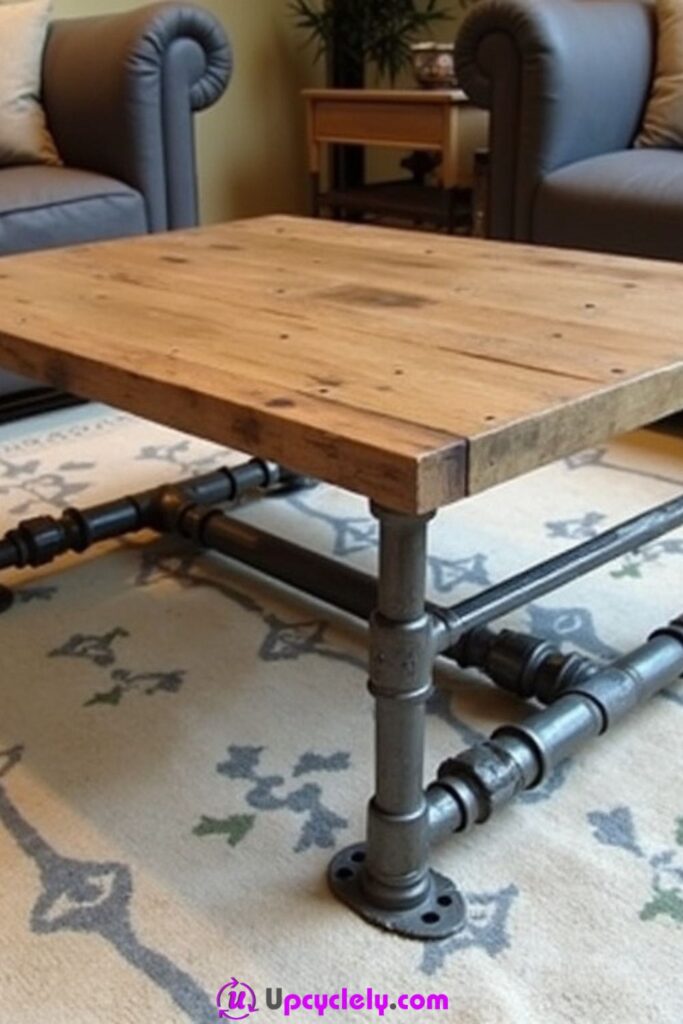
Industrial-style coffee tables usually work through a clear contrast between warm timber and exposed metal. Pipe legs, black steel frames, or visible brackets give the base a workshop feel, while a reclaimed wood top stops the table from becoming visually cold. The hardware needs to do real structural work, not simply imitate it.
If you use threaded pipe, plan the assembly order carefully. Fittings can tighten in directions that change the final alignment, so a dry build is essential. For welded or fabricated frames, make sure the metalwork is stable, smooth at touch points, and suited to indoor furniture before attaching the top.
Materials and Tools
· Reclaimed wood top or joined boards
· Furniture-suitable metal pipe and fittings or a fabricated metal frame
· Flanges or mounting plates if appropriate
· Bolts or wood screws sized for the top thickness
· Drill/driver
· Wrenches for threaded fittings
· Level and square
· Sandpaper for timber and appropriate metal edge-finishing tools
· Wood finish and, if needed, a suitable metal coating
Steps
1. Dry-build the metal base. Assemble the pipe or frame without the timber top and set it on a flat floor. Tighten fittings gradually while checking that the feet remain level and the top supports stay in the same plane. Correct alignment now instead of forcing the wood to compensate later.
2. Prepare the reclaimed top. Clean the boards, remove unsafe fasteners, and repair structural splits. Sand enough to make the surface practical while preserving grain and age marks. Join boards securely if the top is made from multiple pieces, then mark the base position from underneath.
3. Attach wood to metal securely. Use mounting plates, flanges, or brackets designed for a reliable connection. Drill pilot holes and choose screws that will not pierce the tabletop. Tighten the fasteners evenly so the metal base does not pull the timber into a twist.
4. Check exposed metal and finish the surfaces. Run a hand carefully around non-sharp areas and visually inspect every joint for burrs or roughness that could catch clothing. Smooth or cover problem areas appropriately. Finish the wood and metal as needed, then add floor protectors beneath hard metal feet.
I’d keep the styling simple here. Exposed pipe, timber grain, and visible fittings already provide plenty of texture, so extra decorative hardware can make the table feel busy rather than purposeful.
For a softer industrial look, use a simple black rectangular steel base instead of pipe. You keep the wood-and-metal contrast but lose some of the mechanical detail, which can suit a more contemporary room.
Modern Coffee Table Idea
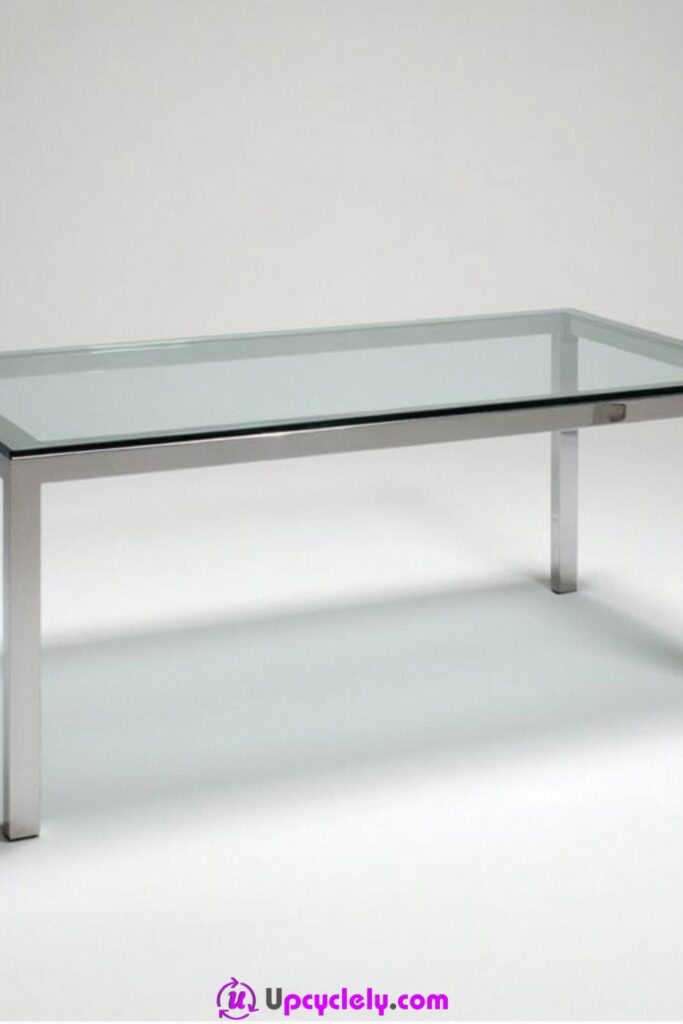
A modern coffee table often succeeds because almost everything unnecessary has been removed. A thin metal frame with a clear top creates a light outline rather than a heavy block, which works particularly well in rooms with clean lines or limited visual space. Since the design is minimal, accuracy becomes more important: crooked joints and uneven supports have nowhere to hide.
You can still approach this as an upcycling project by reusing a sound metal base from an old table, refreshing it, and replacing a damaged top with furniture-suitable glass or a new reclaimed-wood panel. Reusing the frame may save far more material than trying to rebuild a similar structure from scratch.
Materials and Tools
· A sound slim metal frame or reusable table base
· Furniture-suitable glass with finished edges, or a thin solid top
· Suitable glass pads or fasteners for the chosen top
· Metal cleaning supplies appropriate to the existing finish
· Touch-up coating if the frame requires refinishing
· Measuring tape, level, and square
· Protective gloves for handling glass
· Floor protectors
Steps
1. Evaluate the existing frame. Check every corner and weld or mechanical joint for movement. Set the frame on a flat surface and confirm all feet make contact. Remove loose coatings or rust only with methods appropriate to the metal and planned finish, and repair structural issues before cosmetic work.
2. Refinish without thick buildup. Clean and prepare the metal according to the coating you plan to use. A modern frame looks best when edges and joints remain crisp, so avoid heavy layers that soften the lines or gum up threaded parts. Allow each stage to cure as directed before handling.
3. Fit the new top safely. Measure the frame after refinishing rather than relying on old dimensions. Use professionally prepared furniture glass if choosing a transparent top, and place it on suitable supports. If using wood, attach it with discreet hardware that keeps the slim visual profile.
4. Keep the final arrangement restrained. Place the finished table in the room and check walking clearance around every corner. Add only the objects you genuinely use or enjoy seeing. The open design works because light can move through it, so avoid filling the frame or top with storage that defeats that effect.
Minimal furniture can be surprisingly unforgiving. For me, the biggest difference comes from straight lines, even gaps, and a top that sits exactly where it should—not from adding more decoration.
If glass is unsuitable for your household, use a slim wood top finished in a light tone. The table remains modern as long as the profile stays simple and the frame does not become visually heavy.
Common Mistakes to Avoid
Coffee tables look simple, which can make it easy to underestimate how much daily contact they receive. People lean on them, move them, place hot or wet objects on the surface, bump the corners, and use shelves in ways the original builder may not have expected. The most useful way to avoid problems is to think about structure and everyday use before decorative finish.
· Building from damaged reclaimed wood. Surface wear can be attractive, but rot, severe splitting, or weak fastener areas can make a table unreliable. Keep character only where the material remains structurally sound.
· Skipping a dry fit. Geometric bases, pallet layers, shelves, and pipe frames are much easier to correct before glue, grout, or final fasteners are involved.
· Ignoring walking clearance. A table can fit mathematically and still feel too large once people begin moving around it. Tape the footprint on the floor first, especially in small rooms.
· Using the wrong wheels. Casters need to support the real finished weight and should include brakes where uncontrolled movement could be a problem.
· Treating glass casually. Unknown or chipped glass is not a suitable shortcut. Use furniture-appropriate glass with finished edges and proper support.
· Adding tile without considering weight. Mosaic surfaces require a rigid top and a base strong enough for the extra load. Exposed tile edges also need careful finishing.
· Over-sanding reclaimed timber. Removing every saw mark, old hole, and color change can erase the reason you chose reused wood in the first place. Sand for safety and comfort, then decide deliberately which history to keep.
· Using finish to hide structural problems. Paint, filler, stain, or thick clear coat cannot make a weak joint safe. Repair movement first and finish second.
· Making hidden storage difficult to access. If the lid is heavy, the mechanism pinches, or the top must be cleared every time, the compartment will become inconvenient rather than useful.
· Forgetting the floor. Metal feet and wheels can mark certain surfaces. Add appropriate floor protection and test movement before the table enters everyday use.
I’d also avoid trying to make every coffee table idea suit every home. A heavy rustic slab can be wonderful in a large room and frustrating in a narrow apartment. A delicate glass table can feel airy in an adult living room but may not be the best fit for a space where children play actively. The best design is the one that respects the people, materials, and room you actually have.
Frequently Asked Questions
What is the easiest coffee table idea for a beginner?
A simple rectangular wooden table with four legs and apron rails is usually the most approachable because the parts repeat and the joints are easy to understand. I would avoid starting with a lift-top mechanism, complex geometry, or a full mosaic until you are comfortable measuring, drilling pilot holes, and checking a frame for square.
Can I build a coffee table entirely from reclaimed wood?
Yes, if the wood is clean, structurally sound, and suitable for indoor furniture. The boards do not need to match perfectly, but they should be free from serious rot, contamination, and unsafe fasteners. Use the straightest pieces for structural parts and save more irregular boards for visible surfaces where their character can be appreciated.
How do I stop a homemade coffee table from wobbling?
First test it on a floor you know is flat. Check whether the frame is square, whether all legs are equal in length, and whether joints have loosened before adding pads. Correcting the cause gives a better result than simply making one foot thicker to hide a twisted frame.
Is a glass top safe for an upcycled coffee table?
It can be, but the glass itself should be suitable for furniture, properly supported, and prepared with finished edges. Do not reuse cracked, chipped, or unknown glass simply because it happens to fit. For larger panels, handle and position the glass with appropriate help rather than trying to manage it alone.
What can I use instead of a lift-top for storage?
An open lower shelf with baskets is the simplest alternative, and shallow drawers can work if you are comfortable fitting runners. You can also build a removable tray-style top over a shallow compartment, but it should remain stable in normal use and easy to lift without creating pinch points.
Do I need to remove every mark from reclaimed timber?
No. Stable nail holes, color variation, old saw texture, and knots can be part of the appeal. Remove splinters, loose material, protruding metal, and anything that affects strength or comfort, then keep the marks that tell the material’s story without making the table unpleasant to use.
How can I make a coffee table look more modern without buying new materials?
Simplify the form. Reuse a sound metal frame, reduce visual clutter, keep the top thin, and use one consistent finish instead of several decorative treatments. A modern look often comes from proportion, straight lines, and open space rather than from expensive materials.
Let the Materials Decide What Your Next Coffee Table Becomes
The most useful coffee table ideas begin with two honest questions: what does the room need, and what sound material do you already have? A pallet may suggest a low rolling table, leftover tile can become a mosaic inset, a metal frame may only need a safer new top, and a few straight boards can become a simple table with storage. Reuse works best when the material is allowed to influence the design instead of being forced into something unsuitable.
I’d begin with the simplest version that solves your real problem, then add wheels, shelving, glass, geometry, or hidden storage only when those features genuinely help. Good upcycling is not about making an old object look complicated. It is about giving useful material a thoughtful second role. Which of these coffee table ideas fits the materials already waiting in your garage, shed, or spare room?