vanities work harder than most pieces of furniture in a home. They hold sinks and plumbing, collect splashes, store daily essentials, and somehow still have to leave enough room for doors, knees, towels, and cleaning. That is exactly why I find old cabinets, dressers, consoles, and reclaimed wood so interesting here: a piece that no longer suits another room can sometimes become the most useful object in the bathroom.
I’m always more interested in what an existing piece can become than in replacing it automatically. With bathroom furniture, though, appearance comes after structure and moisture control. I want drawers that still open, edges that can be wiped clean, a top that supports the sink properly, and plumbing that can be reached later without dismantling the whole project.
These bathroom vanity ideas range from light cosmetic refreshes to more involved furniture conversions. The strongest ones keep the useful character of the original material while making practical changes for water, storage, support, and everyday use.
Inspect the Vanity, Wall, and Plumbing Before You Change Anything
A bathroom vanity is part furniture and part building service. Before choosing paint, hardware, or a sink, check what the cabinet must support and what the wall and plumbing will allow. A solid-looking dresser can still hide loose rails, swollen panels, or drawers that collide with the drain.
· Check the cabinet for wobble, rot, swollen panels, loose veneer, and weak joints.
· Measure the wall width, door swing, toilet clearance, and comfortable standing space.
· Locate the drain, water-supply lines, shutoff valves, and any existing wall penetrations.
· Check which drawers or shelves sit directly in the plumbing path.
· Confirm the finished vanity height once the sink or vessel basin is included.
· Anchor tall, light, or floating units appropriately so they cannot shift or tip.
· Shut off water before plumbing work, and use a qualified professional when the connection or wall support is beyond your experience.
Choose Materials and Finishes That Can Handle Bathroom Moisture
Upcycled does not mean unprotected. Bathrooms expose wood, paint, laminate, and hardware to splashes and changing humidity, so every fresh cut and repaired edge needs the same attention as the front of the cabinet. I would rather preserve a simple finish properly than add a decorative surface that starts lifting around the sink.
· Clean grease, soap residue, wax, and old polish before sanding or painting.
· Seal raw wood, end grain, sink cutouts, and newly drilled openings.
· Repair lifting laminate or veneer before applying decorative coatings.
· Use finishes intended for cabinetry or surfaces exposed to regular bathroom moisture.
· Keep porous decorative materials away from direct splash zones unless they can be protected.
· Protect lower legs, plinths, and shelves from routine floor-cleaning water.
· Keep old hardware only when it is sound, smooth, and easy to clean.
Plan Storage, Sink Position, and Daily Clearance Before Cutting
The sink should not automatically go in the geometric center of a reused cabinet. Sometimes moving it slightly preserves a drawer, clears a rail, or makes the faucet easier to use. I know it can feel tempting to mark the prettiest position first, but the internal layout deserves equal attention.
· Set the sink or a full-size paper template on the cabinet before making any cut.
· Open every drawer and mark the drain and supply-line zone inside the cabinet.
· Preserve drawer fronts by rebuilding shallow or U-shaped drawer boxes where practical.
· Leave enough space to remove the trap and reach shutoff valves later.
· Check faucet handle movement against the wall, mirror, and backsplash.
· Use removable organizers rather than permanent dividers around plumbing.
· Keep countertop overhangs and open shelves clear of knees, doors, and cleaning tools.
Vintage-style vanities
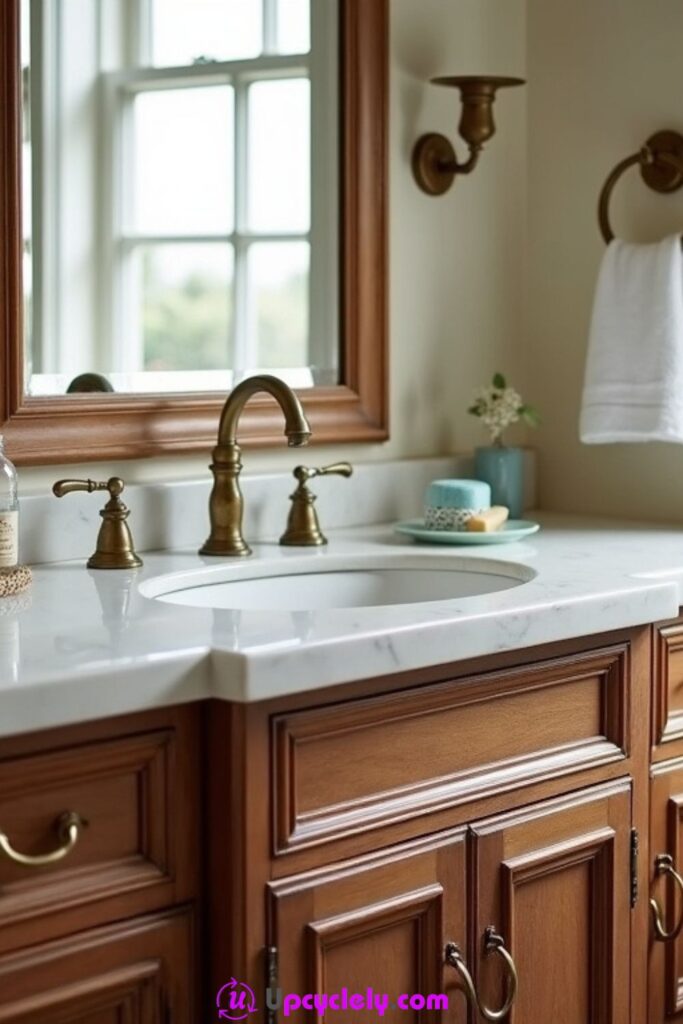
A vintage-style vanity works best when the furniture still looks like furniture. Rather than sanding away every mark, keep sound moldings, shaped feet, drawer fronts, and older hardware that give the piece its identity. The practical challenge is making those decorative details live comfortably beside a sink, faucet, sealed countertop, and everyday bathroom cleaning.
An old sideboard, washstand, or compact dresser can be adapted if the frame is rigid and there is enough interior space for the basin and plumbing. Before changing anything, inspect the top for sagging and the lower rails for looseness. Water resistance matters more here than an artificially distressed finish, so protect cut edges and splash-prone areas carefully.
Materials and Tools
· Sound vintage cabinet, washstand, or dresser
· Suitable sink and faucet
· Moisture-resistant vanity top or sealed countertop material
· Tape measure and pencil
· Drill, jigsaw, and eye protection
· Sandpaper and repair filler
· Bathroom-suitable primer, paint, stain, or clear finish
· Plumbing fittings appropriate to the sink layout
Steps for a Vintage-Style Vanity
1. Choose the strongest candidate. Measure the furniture against the bathroom wall, door swing, and plumbing location before bringing it into the room. Check that the legs, rails, and drawer runners are stable, then tighten or repair anything loose. A vanity can look wonderfully old and still needs to behave like a solid cabinet.
2. Plan the sink and plumbing openings. Set the sink or a paper template on the top and mark the opening only after checking what sits beneath it. Remove or shorten drawers only where the drain and supply lines actually require space. Then mark a discreet opening at the back so pipes can pass without forcing the cabinet away from the wall.
3. Prepare and protect the surfaces. Clean the cabinet thoroughly, scuff glossy finishes where needed, and repair weak veneer or chipped edges. Seal every fresh cut, especially around the sink opening and back plumbing cutout. If you repaint, keep carved details clear instead of filling them with thick coats.
4. Fit the top, sink, and hardware. Install the protected top and basin according to the fixture requirements, then secure the vanity so it cannot shift during use. Refit useful drawers, add stops if needed, and choose hardware that feels related to the original piece. Have the plumbing connected safely if the work is beyond your experience.
I would resist the urge to make every vintage surface look newly manufactured. A few honest age marks can stay, but soft wood, lifting veneer, and unsealed edges are not character; they are repair jobs waiting to become water damage.
Variation: Keep the original timber on the drawer fronts and paint only the body, or replace an unsuitable top with a stone-look or solid-surface top while leaving the old base visibly intact.
Wood bathroom storage
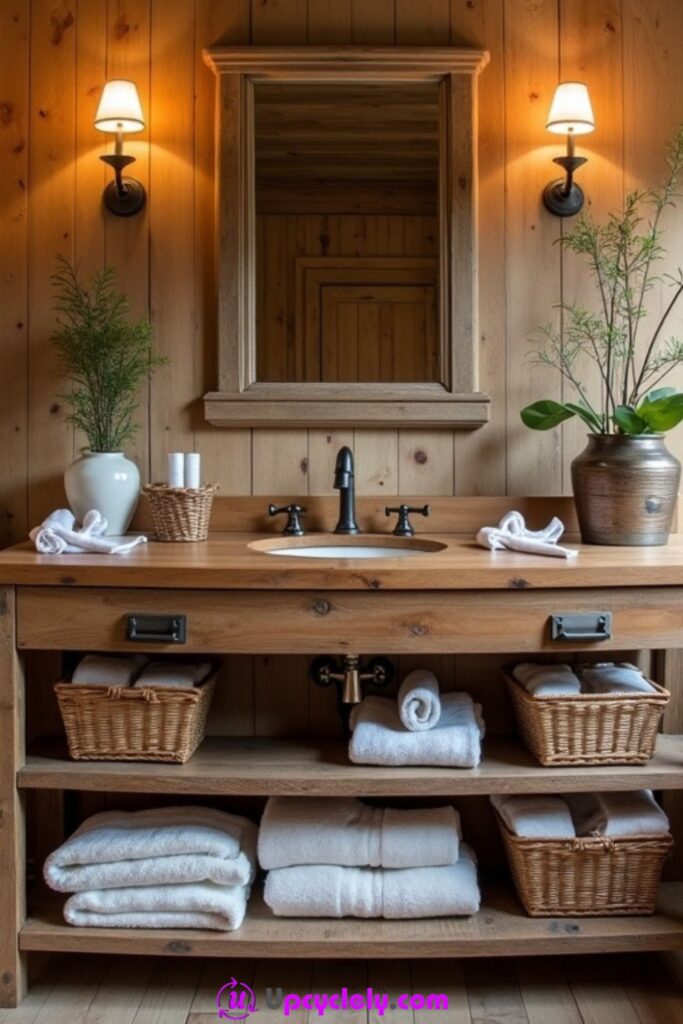
Wood storage around a vanity can make a bathroom feel warmer, but open shelves expose every surface to splashes, damp towels, and humidity. The strongest version uses sound timber, keeps baskets or towels off the floor, and leaves enough breathing space around plumbing so the cabinet can dry after everyday use.
Reclaimed boards, an old console base, or a sturdy shelving unit can all contribute to this look. I prefer storage that has a clear job: one shelf for folded towels, one basket for toiletries, and a protected top for the basin. That approach keeps the design relaxed without turning the vanity into an obstacle course of containers.
Materials and Tools
· Sound reclaimed or reused wood
· Existing vanity base or simple timber frame
· Baskets or washable storage bins
· Moisture-resistant sealer or bathroom-suitable finish
· Screws and brackets
· Drill and driver
· Sandpaper
· Level and tape measure
Steps for Wood Bathroom Storage
1. Sort and inspect the wood. Reject boards with rot, deep mold staining, active pests, or severe splitting. Remove protruding nails and staples, then sand splinters from all hand-contact edges. Keep attractive saw marks or grain only when the surface is still safe to wipe clean.
2. Build storage around real dimensions. Measure towel stacks, baskets, and the waste pipe before deciding shelf height. Leave enough clearance to remove the P-trap or access shutoff valves later. Then dry-fit shelves and check that nothing blocks feet or knees at the front of the vanity.
3. Seal vulnerable surfaces. Apply a bathroom-suitable protective finish to exposed timber, paying special attention to end grain and lower shelf edges. Do not leave the underside unfinished simply because it is hard to see. Moisture often reaches those hidden areas first.
4. Install and organize lightly. Fix shelves and supports securely, verify the unit is level, and keep heavier supplies low. Use baskets for small items but do not pack every shelf tightly. A little open space makes cleaning easier and helps damp air circulate.
The part I would check most carefully is the lowest shelf. It is close to floor splashes and cleaning water, so a pretty unfinished edge there can deteriorate long before the countertop shows any problem.
Variation: Use sealed drawer boxes from another cabinet as pull-out storage, or add removable slatted shelves so they can be lifted out for cleaning.
Space-saving bathroom vanity design
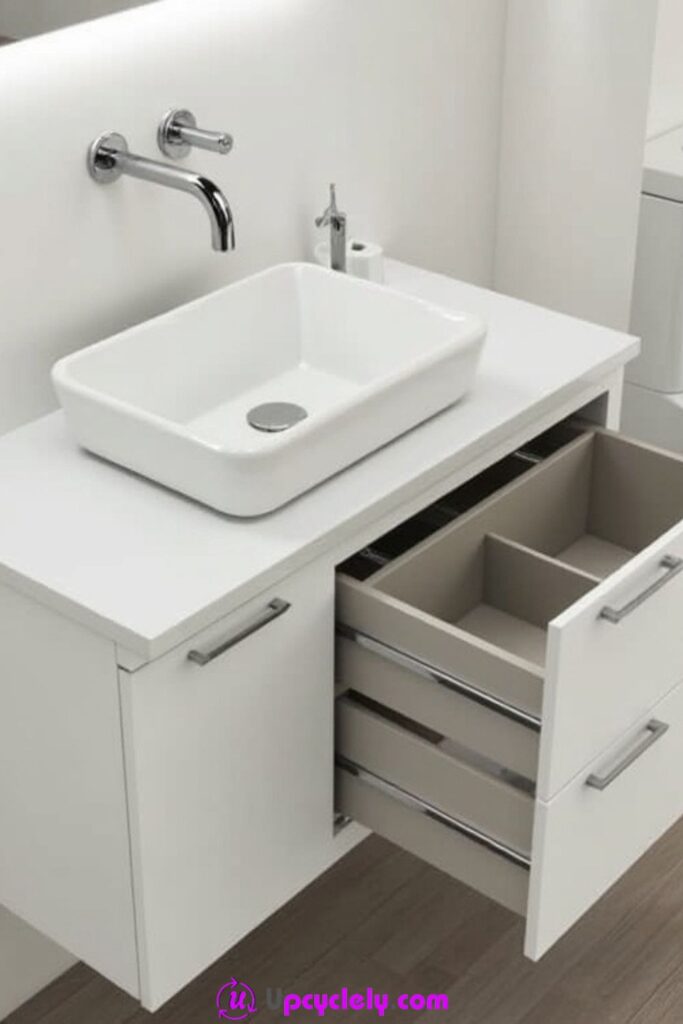
A space-saving vanity earns its place by improving movement, not simply by being narrow. Wall-mounted cabinets, shallow drawers, compact basins, and clear floor space can make a small bathroom easier to use, especially where a door, shower screen, or toilet already limits circulation.
Reusing a slim wall cabinet, console drawer unit, or shallow dresser section can work well if it has enough depth for the chosen basin and trap. Measure the plumbing first, then decide what can realistically become storage. I don’t think a tiny vanity benefits from pretending every inch is a drawer when half of that volume needs to remain accessible for pipes.
Materials and Tools
· Shallow cabinet or reusable drawer unit
· Compact sink or basin
· Wall cleat or heavy-duty mounting hardware
· Appropriate wall anchors or structural fixings
· Tape measure and level
· Drill and driver
· Moisture-resistant finish
· Flexible storage organizers
Steps for a Space-Saving Vanity
1. Map the clearances first. Mark the full depth of the proposed vanity on the floor with removable tape. Open the bathroom door, shower screen, and nearby drawers to see what collides. Also confirm comfortable standing room in front before you cut or mount anything.
2. Choose a shallow cabinet and basin together. Pair the cabinet depth with a sink that does not overhang awkwardly or force the faucet into an unusable position. Check the drain location beneath the sink and plan one open or shortened drawer zone for plumbing. A compact unit feels larger when its internal layout is honest.
3. Prepare strong wall support. Locate suitable structural support or use hardware rated for the wall and the loaded vanity. A floating vanity carries the weight of the cabinet, top, basin, stored items, and incidental leaning, so decorative anchors are not enough. Level the support before fixing the cabinet.
4. Finish the storage for daily use. Seal cut edges, fit the basin and plumbing, then add dividers or shallow trays only where they can be removed easily. Keep frequently used items in the upper drawer and leave floor space visually open. That is what gives the room its lighter feel.
In a small bathroom, an extra inch of depth can matter more than an extra drawer. I would prioritize comfortable movement and plumbing access before trying to maximize storage volume.
Variation: A repurposed wall cabinet can become a very shallow floating vanity, or a narrow console table can support a compact vessel basin if its structure and waterproofing are suitable.
Simple vanity projects
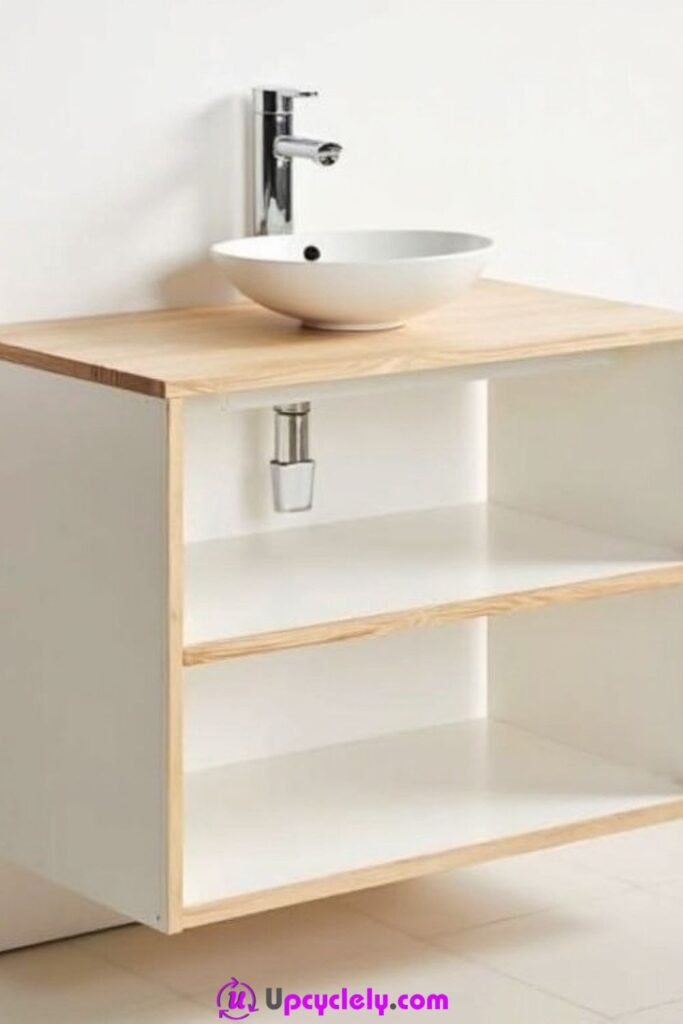
The simplest vanity projects usually succeed because they change one good existing piece instead of rebuilding everything. A sound cabinet may only need a better top, a sink opening, refreshed hardware, and a finish that can tolerate bathroom moisture. Keeping the scope small also reduces the number of plumbing and carpentry surprises.
Look for a base with straight sides, a stable top rail, and doors or drawers that already work. Decorative changes can come later. First make sure the sink fits, the trap can pass through the cabinet, and the finished height will be comfortable for the people using it.
Materials and Tools
· Sound existing cabinet
· Sink and faucet
· Replacement or reusable vanity top
· Drill and jigsaw
· Measuring tools
· Primer and bathroom-suitable paint or finish
· New or cleaned existing hardware
· Sealant suitable for the installation
Steps for a Simple Vanity Project
1. Keep the project scope realistic. Choose a cabinet that needs cosmetic work rather than major structural reconstruction. Test doors and drawers, check the back for swelling, and measure the cabinet against the sink and room. If the base is already square and stable, you are starting with a major advantage.
2. Mark only the necessary alterations. Use the sink template or actual fixture dimensions to mark the top cutout, then look inside before cutting. Plan the drain path and decide which drawer, shelf, or divider must be adjusted. Do not remove useful storage until the plumbing layout proves it necessary.
3. Refresh the cabinet finish. Clean thoroughly, dull glossy surfaces, prime where the coating requires it, and apply a finish appropriate to bathroom cabinetry. Reuse good handles after cleaning them or swap only the pieces that are damaged. Small changes often look more coherent than replacing everything.
4. Assemble and test. Fit the top and basin, secure the cabinet, and connect or arrange professional connection of the plumbing. Open every door and drawer after installation to confirm nothing hits pipes. Wipe the splash zone and check all edges for places that still need sealing.
I know it can feel tempting to turn a simple makeover into a complete custom build halfway through. If the original cabinet already works, I would let it keep doing most of the work.
Variation: Use a reclaimed stone offcut as the top, or keep the existing top and change only the sink, faucet, hardware, and cabinet finish if the surface is still suitable.
Modern Bathroom Vanity
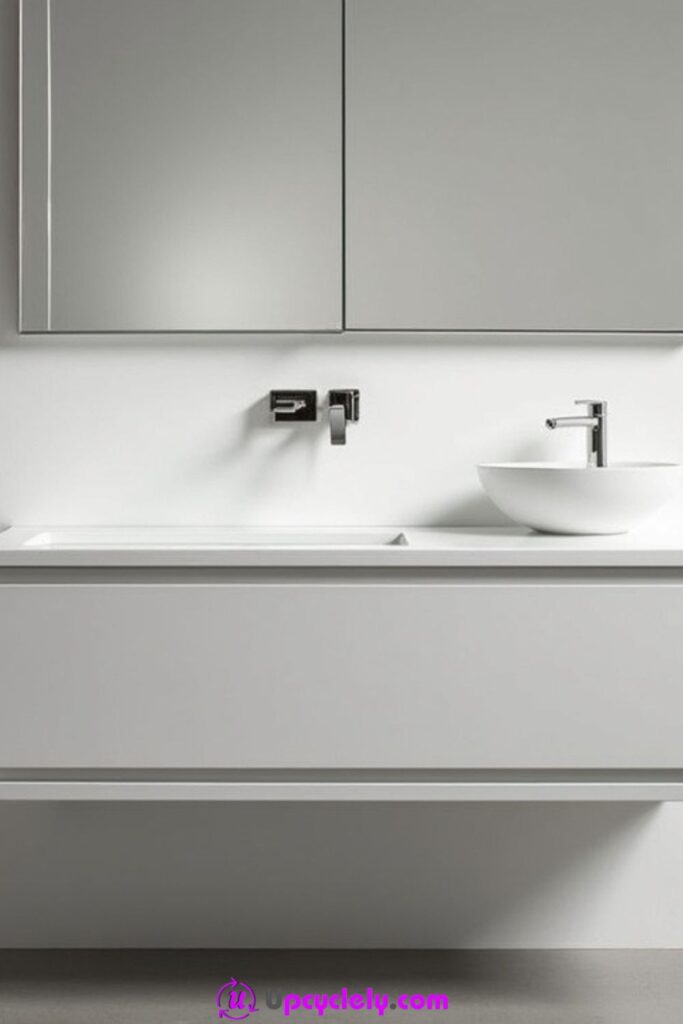
A modern vanity depends on proportion and clean alignment more than decoration. Flat fronts, restrained hardware, wide drawers, and a simple basin can make an older cabinet feel current without erasing every trace of reused material. The trick is to remove visual clutter while preserving service access.
An outdated flat-front cabinet is often an excellent starting point because it already has the geometry a modern bathroom needs. Fill unused hardware holes, repair chipped laminate or veneer, and choose one consistent finish. If the top is replaced, keep the edge profile simple and the faucet placement deliberate.
Materials and Tools
· Flat-front cabinet or dresser base
· Modern sink or integrated-style basin
· Simple vanity top
· Filler and sanding block
· Bonding primer if required
· Bathroom-suitable cabinet finish
· Minimal handles or push-latch hardware
· Level, drill, and driver
Steps for a Modern Bathroom Vanity
1. Simplify the cabinet front. Remove mismatched trim, decorative appliques, or damaged hardware that fights the clean shape of the base. Fill redundant holes and repair chipped corners. Keep doors and drawers aligned; modern styling makes uneven gaps more noticeable, not less.
2. Plan the sink and drawer layout. Center the basin where it works with plumbing and daily use rather than automatically centering it on the cabinet. Mark the drain zone inside and adjust only the affected drawer box. Wide drawer fronts can sometimes remain intact with a shallow internal cutout around the plumbing.
3. Create a consistent finish. Prepare the surface for the chosen coating and use thin, even coats. A restrained finish looks strongest when edges are crisp and sheen is consistent. Seal exposed substrate around the top, sink cutout, and any new holes before installation.
4. Install with clean lines. Level the cabinet or mounting rail carefully, fit the top, and align handles before drilling final holes. Keep countertop accessories minimal and confirm the drawers clear the trap. Then step back and check whether any extra detail actually improves the design before adding it.
For me, modern does not mean featureless. A reused timber drawer front or subtle grain can stay visible; what matters is that the lines feel deliberate and the cabinet functions cleanly.
Variation: Keep natural wood on one set of drawer fronts and paint the surrounding frame, or use discreet edge pulls instead of drilling new center holes.
Repurposed Dresser Vanity
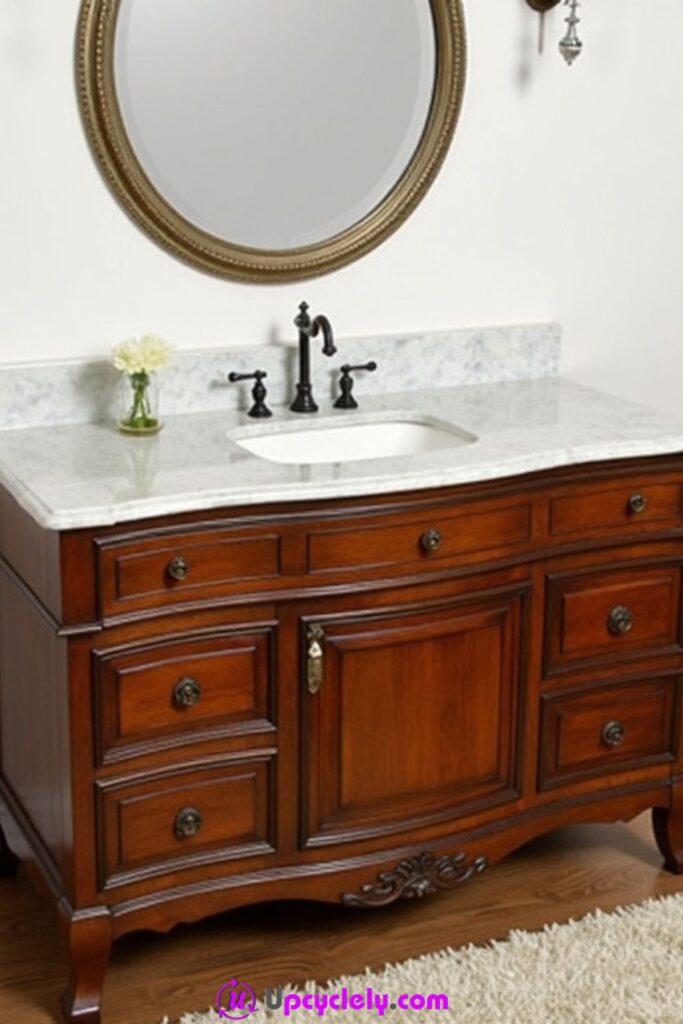
A dresser is one of the most useful furniture pieces to convert because it already offers storage, a strong top frame, and familiar proportions. The conversion becomes successful when the drawers are adapted around the plumbing instead of simply being sacrificed. That preserves the reason the dresser was worth reusing in the first place.
Solid wood and well-made plywood dressers are generally easier to modify than swollen particleboard pieces. Check the top rail, drawer runners, and back before planning the sink. A deep dresser may also need to sit closer to the wall by creating a neat plumbing recess rather than leaving a wide dust-catching gap behind it.
Materials and Tools
· Sound dresser
· Sink and faucet
· Protected vanity top or suitable countertop
· Jigsaw, drill, and eye protection
· Drawer repair materials
· Wood strips for rebuilding drawer boxes
· Bathroom-suitable finish
· Wall anchoring hardware
Steps for a Repurposed Dresser Vanity
1. Assess the dresser structure. Remove drawers and inspect the internal rails, joints, and back. Tighten loose corners and repair weak drawer bottoms before adding a sink. Then measure the finished vanity height and confirm the dresser depth does not crowd the room.
2. Lay out the sink and plumbing path. Position the basin on the top and trace the required opening. Inside the dresser, mark where the drain and supply lines will pass. Decide whether the top drawer needs a shallow U-shaped box, a false front, or a shortened back rather than removing it automatically.
3. Modify and seal the furniture. Cut the top and back carefully, rebuild affected drawer boxes, and smooth every raw edge. Seal all cut wood and repair worn finish around the sink zone. This is also the point to repaint or refinish the dresser while the hardware and drawers are removed.
4. Install, anchor, and test storage. Fit the top and sink, secure the dresser against tipping or movement, and connect the plumbing appropriately. Slide every modified drawer in and out while watching the pipes. Leave enough access to valves and the trap for future maintenance.
A dresser conversion feels much more convincing when at least some original drawers still function. I would spend extra time reshaping a drawer box before giving up that storage completely.
Variation: Use a single offset basin to save more drawer space, or keep the dresser top visible beneath a raised vessel sink if the top can be protected appropriately.
Vanity with Open Shelves
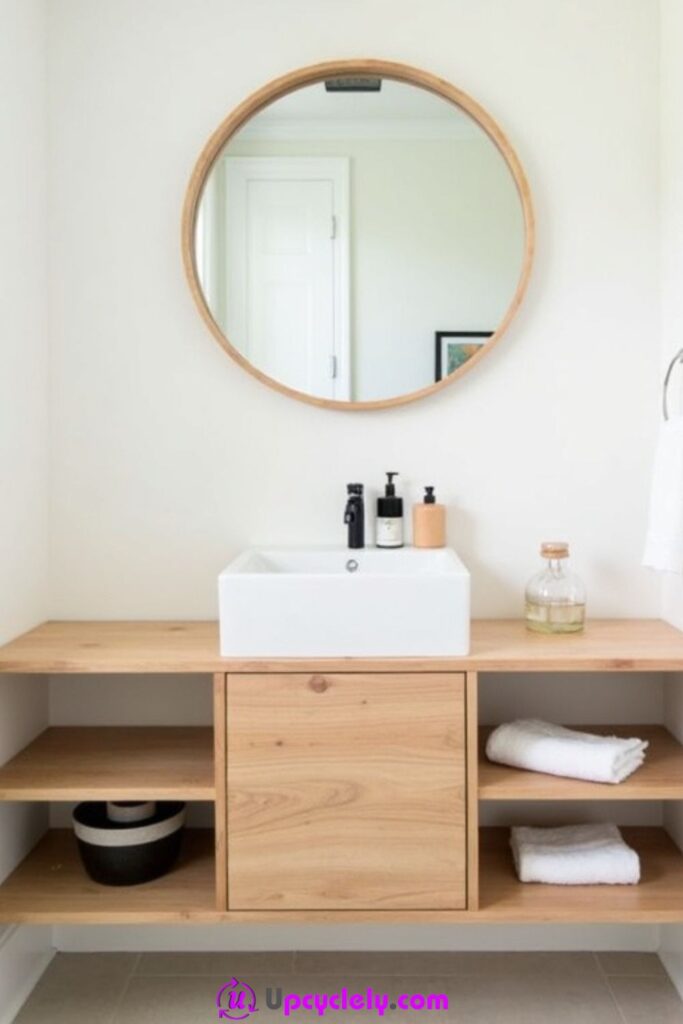
Open shelving keeps a vanity visually light and makes towels or baskets easy to reach, but it also puts storage on display. A reused console, old workbench base, or cabinet with removed doors can become this style of vanity if the shelves are strong, smooth, and protected from damp conditions.
The best open vanity has fewer, larger storage zones rather than a stack of narrow shelves. Leave room around the plumbing, keep the lowest shelf high enough to mop beneath, and use washable baskets for small toiletries. That way the open design still feels intentional when everyday life arrives.
Materials and Tools
· Sturdy console or open cabinet base
· Sealed timber shelves
· Sink and suitable top
· Baskets or washable bins
· Screws and shelf supports
· Sandpaper
· Moisture-resistant finish
· Level and measuring tools
Steps for a Vanity with Open Shelves
1. Strip the base back to useful structure. Remove damaged doors or unnecessary partitions while keeping the rails that actually brace the cabinet. Test the frame for wobble and reinforce corners if needed. Open shelving should not mean weakened structure.
2. Set practical shelf heights. Place towels, baskets, or storage boxes on the floor and measure their real height before fixing shelves. Leave plumbing access and enough space at the bottom for cleaning. A shelf placed around the trap is often more useful than trying to hide the trap completely.
3. Smooth and protect exposed edges. Sand every shelf edge that hands or towels will touch, then seal the wood on all sides. Pay attention to screw holes and freshly cut ends. Open shelves are easy to inspect, which means unfinished patches will also be easy to notice.
4. Fit the sink and organize selectively. Install the top and basin, secure the vanity, and add only the baskets needed for loose items. Keep spare towels folded in one consistent stack and leave some negative space. Then check that nothing stored beneath can press against plumbing connections.
Open shelves look effortless only when there is somewhere else for the less attractive bathroom supplies. I would keep cleaning chemicals and crowded refill bottles behind a door or in a separate cabinet.
Variation: Use reclaimed drawer boxes as open cubbies, or add one fabric-lined basket per shelf so the vanity keeps its airy look while hiding small items.
Vanity made from reclaimed wooden pallets
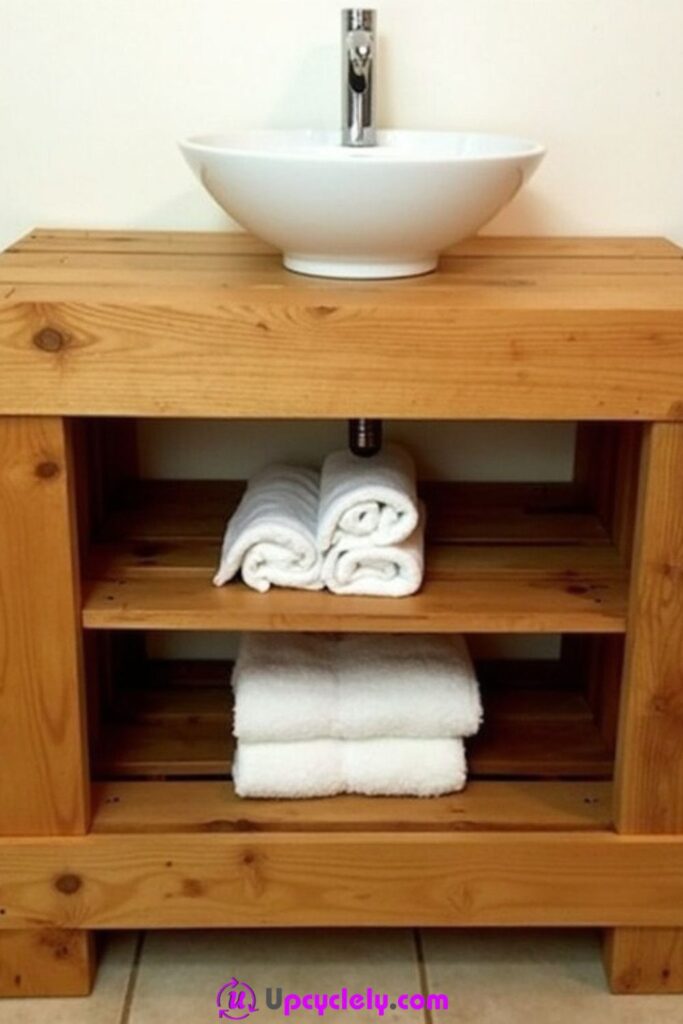
Pallet-style timber can create a rustic vanity, but the word reclaimed should never become an excuse to use questionable wood. Select boards with a known, suitable history, remove hidden fasteners, and reject pieces with chemical contamination, deep rot, or persistent odors. Bathroom furniture needs cleanable surfaces even when the design is intentionally rough.
Instead of treating a whole pallet as a ready-made cabinet, I would use safe boards as cladding or shelving over a properly braced frame. That gives you control over height, plumbing clearance, and strength. The visible nail holes and varied grain can stay while the structure underneath does the serious work.
Materials and Tools
· Clean, suitable reclaimed boards
· Strong vanity frame or reusable cabinet carcass
· Metal detector or careful fastener inspection
· Saw and drill with eye protection
· Screws and construction brackets
· Sandpaper
· Moisture-resistant wood sealer
· Sink and protected countertop
Steps for a Reclaimed Pallet-Wood Vanity
1. Select and de-nail the boards. Choose dry boards that are sound, clean, and free from uncertain residues. Remove nails, staples, and embedded metal before sawing, then inspect both faces carefully. Sand splinters without erasing all of the reclaimed texture.
2. Build around a strong frame. Use an existing cabinet carcass or construct a square, braced frame sized to the sink and room. Lay reclaimed boards over that structure as drawer fronts, side panels, or shelves. Do not rely on random pallet joints to carry the full sink load.
3. Plan plumbing and seal the timber. Create generous access for the drain and shutoff valves before closing the back. Seal the reclaimed boards on all exposed surfaces, including end grain. The finish should make routine wiping possible without turning the wood into a glossy imitation of new timber.
4. Install and check for movement. Fit the top and basin, anchor the vanity securely, and inspect every reclaimed board for loose corners after installation. Store heavy items on supported shelves rather than decorative slats. Recheck the lower boards after the first few cleanings for signs of water absorption.
I would rather use six safe reclaimed boards than an entire pallet of uncertain origin. The character comes from the wood itself, not from keeping every original pallet component.
Variation: Use reclaimed boards only on the drawer fronts of an existing cabinet, or build a clean modern carcass and add pallet timber as removable side panels.
Small bathroom vanity idea
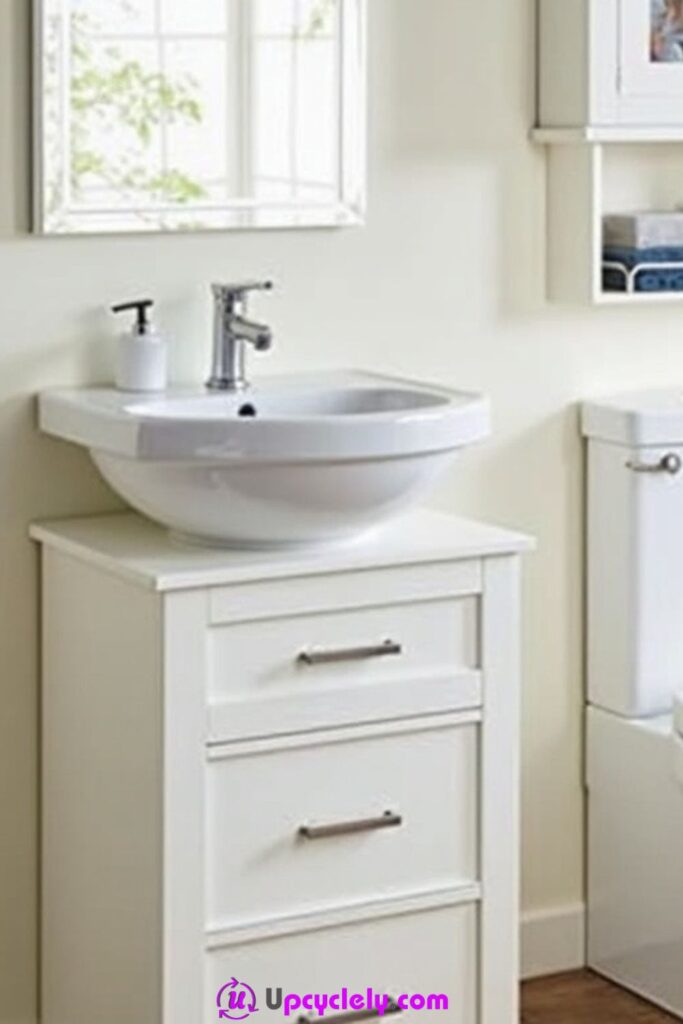
A small vanity should solve the essentials without making the room feel pinched. One or two drawers, a compact sink, and a clear countertop can be more useful than a deeper cabinet with awkward corners. Reusing a narrow bedside cabinet or small chest can work if the construction is strong enough and the finished height makes sense.
Before choosing the furniture, measure the path into the room as well as the wall where it will sit. Check door trim, toilet clearance, towel rails, and the arc of any shower screen. These details decide whether a small vanity actually feels small in a good way.
Materials and Tools
· Narrow cabinet or small chest
· Compact sink
· Slim vanity top
· Tape measure and removable floor tape
· Jigsaw and drill
· Moisture-resistant finish
· Compact drawer organizers
· Wall securing hardware
Steps for a Small Bathroom Vanity
1. Test the footprint in the room. Tape the proposed width and depth onto the floor, then walk through the bathroom normally. Open nearby doors and drawers and check whether knees, hips, or cleaning tools collide with the footprint. Adjust the cabinet choice before doing any cutting.
2. Pair the basin with the cabinet. Use a sink that leaves a usable strip of countertop rather than covering the entire top. Mark the drain location and preserve as much drawer space as possible by offsetting internal cutouts only where needed. A small vanity becomes frustrating when every item has to sit on top.
3. Prepare a durable compact finish. Repair edges, seal the top opening, and use a coating suited to frequent splashes. Keep hardware small enough that it does not catch clothing in the narrow walkway. If the cabinet has legs, protect their lower ends from floor moisture.
4. Install and simplify the contents. Secure the vanity, fit the sink, and organize only everyday items inside. Move bulk toiletries and spare towels elsewhere if necessary. The room will feel more spacious when the vanity stores the right things instead of trying to store everything.
I would choose a slightly narrower vanity with fully usable drawers over a wider one that steals circulation space. Small rooms reward restraint very quickly.
Variation: Convert a wall-hung bedside cabinet into a compact vanity, or use a shallow console with a small vessel basin and one basket below.
Rustic bathroom vanities
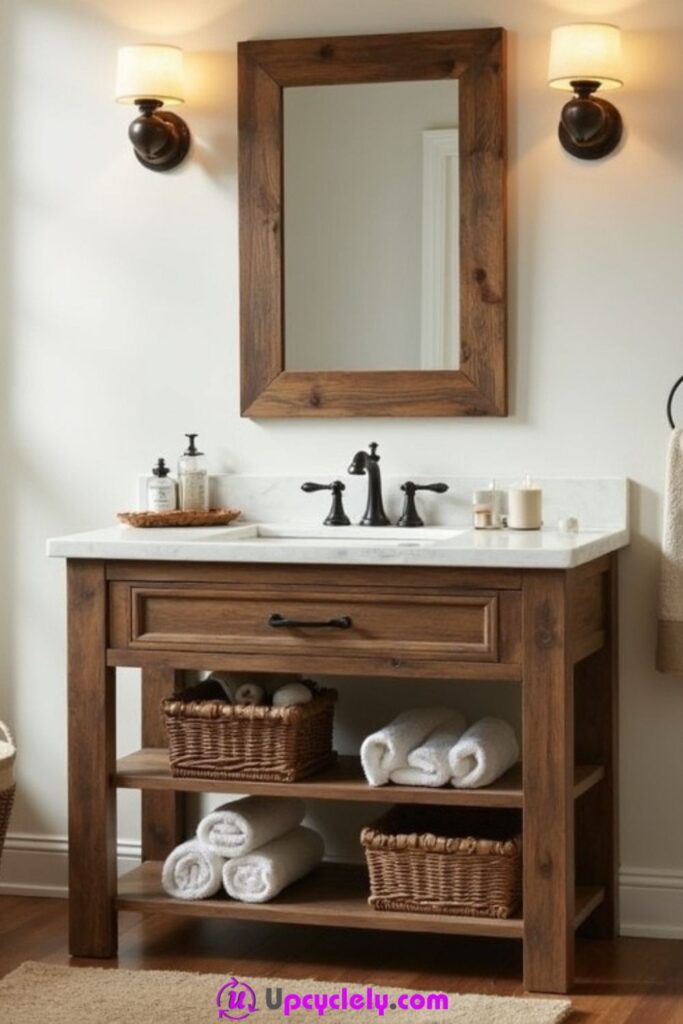
Rustic vanities look convincing when the wear, grain, and hardware feel connected to the original material. Reclaimed boards, old workbenches, sturdy farm-style cabinets, and simple dressers can all become bathroom bases, but their rougher surfaces need careful sanding and sealing where hands, towels, and water will reach them.
Stone-look tops, ceramic sinks, and dark metal hardware can sit comfortably beside aged timber without turning the whole room into a theme. Keep the cabinet structurally quiet: no rocking legs, unsupported overhangs, or loose boards. The visual texture should come from the finish, not from instability.
Materials and Tools
· Rustic cabinet, workbench, or reclaimed timber base
· Sink and suitable top
· Wood repair glue and clamps
· Sandpaper and scraper
· Moisture-resistant clear coat or finish
· Simple metal hardware
· Drill and fasteners
· Wall anchoring hardware
Steps for a Rustic Bathroom Vanity
1. Repair before preserving patina. Tighten joints, glue loose rails, and repair splits that affect strength. Clean years of grime from the surface before deciding which marks deserve to remain. Patina is much easier to appreciate when the furniture is stable and sanitary.
2. Balance the sink with the old structure. Position the basin so it does not cut through a critical rail or decorative front. Mark plumbing paths and consider an offset sink when that saves a useful drawer. Keep the top proportionate to the base rather than hiding all of the old furniture beneath a massive slab.
3. Smooth the contact areas. Sand sharp corners, splinters, and rough shelf edges while leaving broader texture visible. Seal all exposed wood, especially around the sink and lower rails. Use thin coats so grain and age marks remain readable.
4. Add restrained hardware and storage. Clean and reuse suitable handles or replace damaged pieces with simple metal pulls. Install baskets only where they fit easily, secure the vanity, and keep the countertop uncluttered. Rustic furniture already has visual movement, so it rarely needs much extra decoration.
The rustic pieces I find most convincing are the ones that stop before becoming theatrical. I would keep one or two strong textures and let the rest of the bathroom stay calm.
Variation: Use an old workbench as an open vanity, or keep only a reclaimed timber drawer front on a newer moisture-resistant cabinet carcass.
Easy bathroom remodel project

An easy remodel does not have to mean replacing the vanity. If the cabinet box is sound, the quickest improvement may come from repairing the finish, changing hardware, refreshing the top, and reorganizing the drawers. Those updates affect what you see and touch every day without creating unnecessary demolition.
Start by separating cosmetic problems from functional ones. Chipped paint, dated handles, and a tired mirror are different issues from swollen cabinet sides or active leaks. Fix water and structure first, then spend time on appearance. That order keeps a small makeover from covering a larger problem.
Materials and Tools
· Existing vanity in sound condition
· Cleaner and degreaser
· Repair filler
· Sandpaper
· Primer and cabinet finish
· Replacement or cleaned hardware
· Optional new top, faucet, or mirror
· Caulk or sealant appropriate to the installation
Steps for an Easy Bathroom Remodel
1. Audit what can stay. Open every drawer, inspect the cabinet base, and look beneath the sink for swelling or staining. Keep components that are solid and repairable. Make a short list of cosmetic changes only after confirming there is no leak or structural failure to address first.
2. Remove and prepare the visible parts. Take off handles, drawer fronts, or doors as needed and label their positions. Clean thoroughly, repair chips, and scuff the existing finish so the new coating can bond. Protect hinges and drawer slides from paint buildup.
3. Refresh the highest-impact details. Paint or refinish the cabinet, clean or replace the hardware, and update the countertop or faucet only if those changes are genuinely needed. Reuse a sound mirror by repainting its frame rather than replacing it automatically. Keep the material palette simple.
4. Reassemble and improve organization. Refit the parts after the finish is ready, align doors and drawers, and add removable organizers. Reseal the splash zone where appropriate and inspect the plumbing while the cabinet is empty. Then return only the items you actually use.
For a quick bathroom refresh, I would spend money on fixing the worn parts rather than replacing every visible component. A straight drawer, clean handle, and tidy top can change the room more than people expect.
Variation: Keep the existing cabinet color and change only the hardware plus mirror frame, or repaint just the vanity doors and drawer fronts while leaving a sound cabinet box untouched.
Homemade bathroom storage solutions
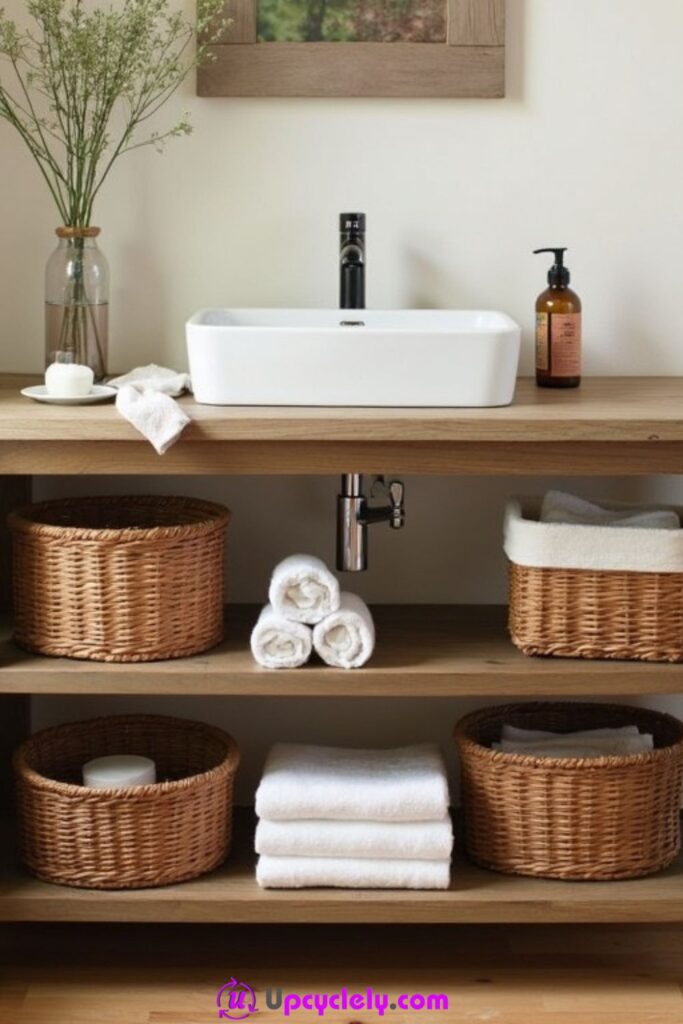
Homemade storage works best when it answers a specific nuisance: loose towels, crowded toiletries, cleaning bottles, or the empty space beneath an open vanity. Reused crates, drawer boxes, baskets, and small shelves can organize those areas without turning the bathroom into a collection of unrelated containers.
Choose materials that can be wiped clean and that will not collapse when damp. Cardboard and unsealed soft fiberboard are poor long-term choices near a sink, even if they look tidy on day one. I would rather reuse a sturdy wooden drawer or washable basket and leave a little open space around it.
Materials and Tools
· Reused wooden drawers, crates, or sturdy baskets
· Washable storage bins
· Shelf boards or spare cabinet panels
· Screws and brackets
· Sandpaper
· Moisture-resistant finish
· Labels or dividers
· Measuring tape
Steps for Homemade Bathroom Storage
1. Sort items by how often they are used. Separate everyday toiletries from refills, towels, and cleaning products before building storage. Measure the largest items that must fit. This prevents you from creating a beautiful little shelf that cannot hold the bottle it was meant to organize.
2. Match reused containers to each zone. Use shallow drawers for small items, deeper baskets for towels, and enclosed bins for less attractive supplies. Keep chemicals separate from personal-care storage where possible. Test every container beneath the vanity before adding rails or brackets.
3. Protect the reused materials. Sand splinters, seal raw wood, and add small feet or spacers where a container might sit on a damp floor. If you reuse a drawer as a bin, check that old staples or runner screws are not protruding. Add washable liners only when they can be removed for cleaning.
4. Install lightly and leave access. Secure shelves or rails without blocking plumbing valves, then load the storage gradually. Keep heavier items lower and frequently used items near the front. Leave enough space to reach the trap and clean the cabinet base without emptying the entire system.
Storage becomes much easier when every container has a single purpose. I don’t think a bathroom vanity needs a basket for every category; it needs just enough separation that things stop migrating into one messy pile.
Variation: Mount old wooden drawers on simple runners as pull-out bins, or stack sealed crates beside an open vanity where they can be removed individually.
Minimalist bathroom vanity design
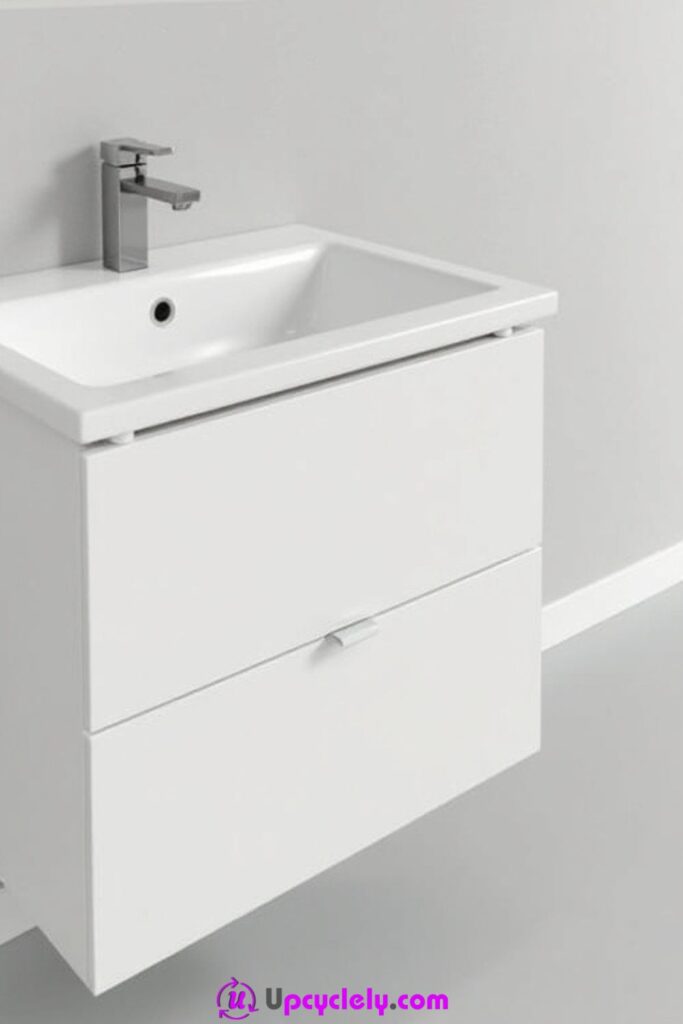
Minimalist vanity design is less about having almost nothing and more about removing decisions from the morning routine. Smooth fronts, one durable top, simple hardware, and drawers that actually contain everyday items can make a reused cabinet feel calm without requiring a completely new bathroom.
A plain chest or flat-front cabinet is useful here because the basic form already supports the style. Repair visual clutter such as extra trim, mismatched pulls, and uneven gaps. Keep one warm material, such as timber grain, if the room needs softness; minimalism does not require turning every surface white.
Materials and Tools
· Simple flat-front cabinet
· Compact or integrated-style sink
· Smooth vanity top
· Filler for unwanted hardware holes
· Primer and bathroom-suitable finish
· Minimal handles or edge pulls
· Drawer dividers
· Level and mounting hardware
Steps for a Minimalist Bathroom Vanity
1. Edit the cabinet before decorating it. Remove unnecessary trim and mismatched hardware, then fill redundant holes. Repair door and drawer alignment so the gaps look intentional. A minimal design makes crooked fronts immediately visible, so mechanical adjustment matters as much as paint.
2. Plan a clean sink zone. Choose a basin and faucet arrangement that leaves enough working space without creating extra seams. Route plumbing so drawers can remain as intact as possible. If one drawer must be modified, keep its front aligned with the rest of the cabinet.
3. Use one restrained finish strategy. Prepare the surface carefully and apply a consistent finish across fronts and side panels. If you retain natural wood, let that be the main texture rather than adding several competing materials. Seal all cut edges before the top and basin go in.
4. Organize inside, not on top. Add dividers or shallow trays to the most-used drawer and move backup products elsewhere. Keep the countertop to essentials, then check whether each visible object earns its place. The empty surface is part of the design, not wasted storage.
The easiest way to make a vanity look minimalist is not to buy matching countertop containers. I would first make the drawers work well enough that most products do not need to live on display.
Variation: Leave a strip of original wood grain on the top drawer as the only decorative feature, or use concealed finger pulls instead of adding visible hardware.
Budget-friendly vanity
A budget-friendly vanity begins with what can be reused safely. A secondhand cabinet, leftover countertop offcut, cleaned hardware, or a sound sink from a previous remodel can reduce the amount of new material you need. The key is not choosing the cheapest object; it is choosing a base that will not require expensive structural rescue.
Spend carefully on the parts that protect the project from moisture and movement. Sealers, sound fixings, suitable plumbing components, and a stable top matter more than decorative extras. Cosmetic details can come from paint, reused handles, or a simple mirror frame.
Materials and Tools
· Secondhand or existing cabinet
· Reusable or affordable sink
· Countertop offcut or suitable reused top
· Cleaning supplies
· Repair filler and sandpaper
· Bathroom-suitable paint or finish
· Reused or simple replacement hardware
· Basic drill and measuring tools
Steps for a Budget-Friendly Vanity
1. Choose the base by condition, not price alone. Inspect the cabinet for swollen panels, broken drawer systems, and weak joints before buying or rescuing it. A free cabinet that needs a full rebuild may cost more in time and materials than a modestly priced solid one. Measure the room before committing.
2. Reuse the components that still work. Clean the existing handles, test whether the sink can be retained, and look for a compatible countertop offcut. Keep functional drawer slides and hinges instead of replacing them automatically. Make a purchase list only after the reuse list is complete.
3. Put the budget into preparation. Repair chips, seal raw edges, and use a finish suited to bathroom conditions. Do not skip support brackets or wall anchoring to save a small amount. Those hidden details protect the visible work you have already invested in.
4. Install simply and avoid decorative creep. Fit the sink and top, reconnect or arrange the plumbing, and add only the hardware required. A clean cabinet with one consistent finish often looks more finished than a low-cost project covered in extra trim, appliques, and accessories.
I’d rather spend a small budget on making a reused cabinet solid and water-resistant than on decorative pieces that do not improve how it works.
Variation: Use leftover wall paint only if it is suitable for the cabinet system, or create a two-tone finish from small quantities of compatible paint already on hand.
Easy floating vanities for bathroom
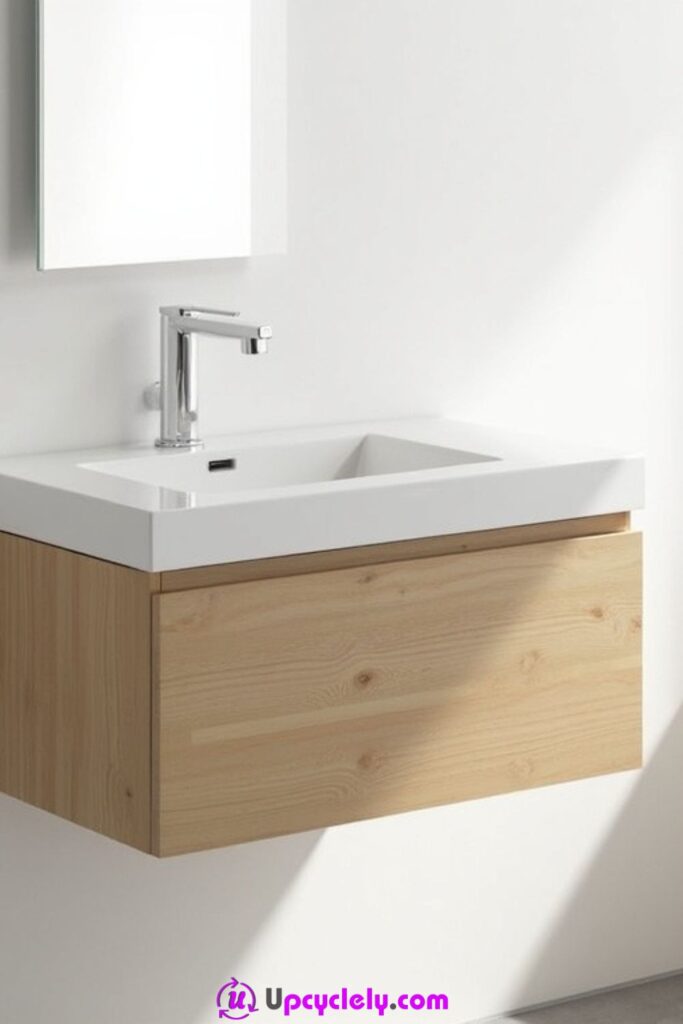
A floating vanity exposes the floor and can make a bathroom easier to clean, but the wall must carry the entire loaded cabinet. Reusing a wall cabinet, shallow drawer unit, or cut-down console can work if the mounting structure is properly designed. This is one project where hidden support matters more than the visual effect.
Keep the cabinet depth appropriate to the room and the sink. Plan the faucet, drain, drawers, and mounting rail as one system before making holes. If the wall construction or required load is uncertain, use professional help rather than relying on generic anchors.
Materials and Tools
· Strong reusable cabinet or drawer unit
· Wall cleat or engineered mounting rail
· Structural screws or rated fixings
· Level and stud finder where appropriate
· Drill and driver
· Compact sink and top
· Moisture-resistant finish
· Plumbing fittings
Steps for an Easy Floating Vanity
1. Confirm the wall can support the load. Identify appropriate structural fixing points and consider the combined weight of the cabinet, top, sink, water-filled basin, stored items, and incidental leaning. Do not treat a floating vanity like a picture frame. If the wall condition is uncertain, get suitable professional advice before installation.
2. Prepare the cabinet before mounting. Repair the cabinet, modify drawers around the drain, and seal all cut edges while it is still on a work surface. Mark the final mounting height based on the sink and users. Pre-fit any cleat or rail to the cabinet so you understand how it will sit.
3. Install the support dead level. Fix the rail or cleat into appropriate structure and check it across the full width. Hang or secure the cabinet, then verify there is no rocking or twist. Add any secondary fixings specified by the mounting method before placing the sink on top.
4. Finish the sink and storage. Fit the top and basin, connect the plumbing appropriately, and test drawer clearance. Keep the floor beneath clear and avoid adding heavy decorative shelves to the cabinet sides. The visual lightness should come from the open floor, not from reducing structural support.
A floating vanity can look simple enough to install in an afternoon, but I would never rush the mounting. The wall connection is the whole project, even though it disappears once the cabinet is in place.
Variation: Use a low wall cabinet as a shallow floating vanity, or mount a strong reclaimed drawer unit beneath a separate wall-supported countertop.
Farmhouse bathroom vanity build
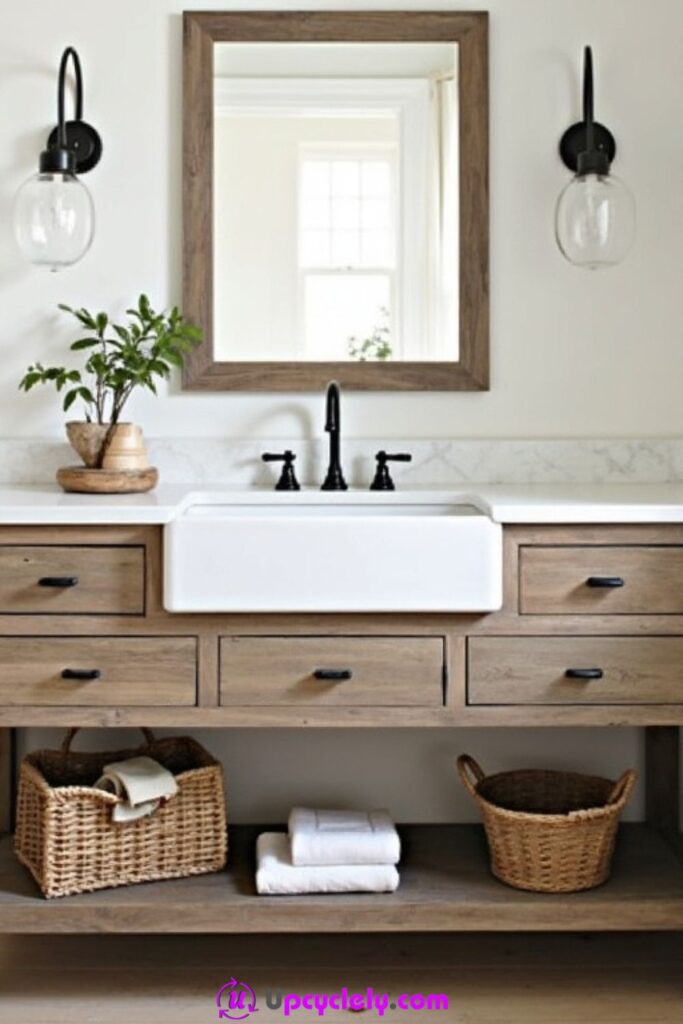
A farmhouse vanity usually combines a simple frame, visible wood, generous drawers or shelves, and straightforward hardware. Reused timber, an old worktable base, or parts from a solid cabinet can give the build character without requiring ornate decoration. The design should still feel easy to clean and stable under a heavy sink.
If you build around reclaimed components, decide which pieces are structural and which are decorative. Old boards can make excellent drawer fronts or shelf surfaces, while a square new or reused frame can carry the load. That distinction helps preserve rustic character without inheriting every weakness of old material.
Materials and Tools
· Reusable cabinet frame or sound timber components
· Reclaimed boards for fronts or shelving
· Sink and vanity top
· Saw, drill, and eye protection
· Screws and corner braces
· Drawer slides or reusable drawer hardware
· Moisture-resistant finish
· Simple pulls or knobs
Steps for a Farmhouse Bathroom Vanity Build
1. Set the dimensions from the room and sink. Measure the wall, plumbing, door clearance, and desired vanity height before cutting framing pieces. Place the sink template within the proposed top and mark the drain zone. This prevents a strong-looking farmhouse base from ending up too deep or too tall for the room.
2. Build or repair the main frame. Create a square, braced base using sound timber or a reusable cabinet carcass. Check diagonal measurements where appropriate and make sure the top rails can support the countertop. Add open shelf supports without blocking the plumbing path.
3. Add reclaimed details selectively. Fit reclaimed boards as drawer fronts, side panels, or a lower shelf after removing hidden metal and splinters. Seal every board, including unseen edges. Use consistent gaps around drawer fronts so the rustic material still looks deliberate.
4. Install the top and finish the storage. Secure the top and sink, anchor the vanity, and fit simple hardware. Use baskets only where they slide in and out without rubbing the finish. Then inspect the lower shelf and feet for vulnerable spots that may need extra protection from cleaning water.
I would keep the farmhouse details honest and simple. One good wood texture, straightforward pulls, and useful baskets usually feel more convincing than adding decorative crosses, signs, or extra trim to every surface.
Variation: Reuse an old workbench as the frame, or build a simple cabinet and use reclaimed barn-style boards only for the drawer fronts and open shelf.
Bathroom storage cabinets
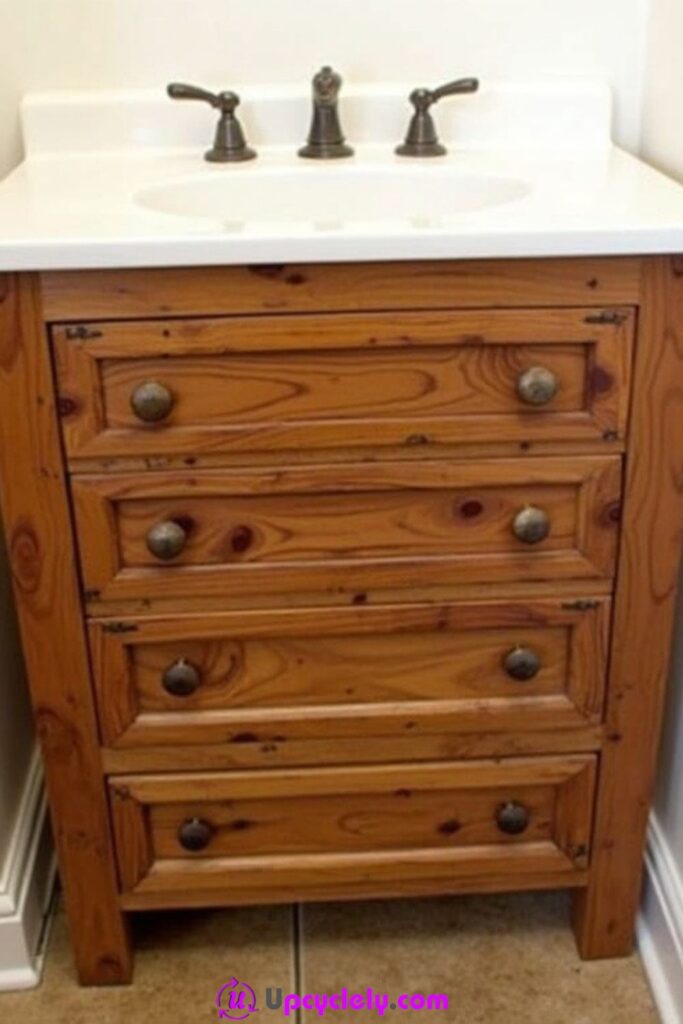
A bathroom storage cabinet can become a vanity when its internal layout already suits deep drawers or doors. The useful part of the conversion is keeping those storage systems working after the sink is added. That means planning the trap and supply lines around the cabinet, not cutting through every drawer because the pipes arrived later.
Older storage cabinets may also be shallower or taller than purpose-made vanities, so check ergonomics carefully. A durable cabinet with four good drawers can be worth adapting, but only if the sink, countertop, and plumbing can fit without weakening the structure.
Materials and Tools
· Sound storage cabinet
· Sink and top
· Drawer modification materials
· Drill and jigsaw
· Wood strips or plywood for drawer cutouts
· Bathroom-suitable finish
· Wall anchoring hardware
· Drawer organizers
Steps for Bathroom Storage Cabinets
1. Inspect the cabinet layout. Remove drawers and shelves and identify structural rails before planning the sink. Check the back and base for moisture damage. Measure the cabinet height and depth against typical daily use rather than assuming any storage cabinet will feel comfortable as a vanity.
2. Route plumbing through the least disruptive zone. Mark the drain and supply lines inside the cabinet and decide which drawer needs a shallow recess. Rebuild that drawer with a U-shaped or shortened box where possible. Keep full-depth drawers on the sides or lower levels for towels and larger supplies.
3. Prepare the cabinet for a wetter job. Seal cutouts, repair chipped surfaces, and protect the base where bottles or cleaning water may collect. If repainting, use a system suited to cabinetry in humid spaces. Refit drawer slides only after paint and sealer are no longer tacky.
4. Install and assign storage logically. Secure the top and sink, anchor the cabinet, and check all plumbing access. Put light daily items in the upper modified drawer, heavier refills lower down, and keep the cabinet base clear around connections. Make sure every drawer can be removed later for servicing.
The storage is the reason to reuse this kind of cabinet, so I would treat every saved drawer as a small victory. Plumbing should take the space it needs, but no more.
Variation: Convert only one half of a wide storage cabinet into the sink zone and leave the opposite side as full-depth drawers, or use a narrow tall cabinet beside the vanity instead of forcing all storage beneath the basin.
Custom vanity top creation
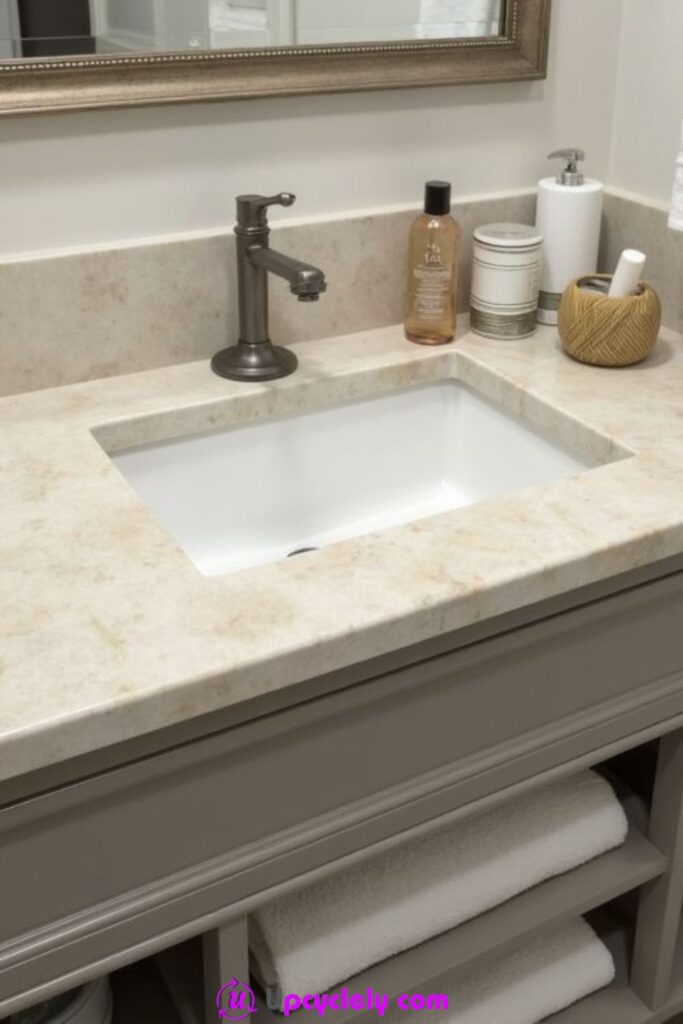
A custom top can make an ordinary reused base fit the bathroom properly, especially when walls are uneven or the cabinet is an unusual width. The important part is choosing a material and fabrication method appropriate to wet use. Decorative sheet materials and unsealed timber edges need more protection than they would on a bedroom dresser.
Start with the cabinet level and in its final position before making a precise template. Account for sink cutouts, faucet holes, wall clearance, and any side splash. If the chosen material requires specialist cutting or fabrication, a custom template can still let you reuse the cabinet while leaving the risky part to a fabricator.
Materials and Tools
· Reusable vanity base
· Template material such as cardboard or thin sheet
· Tape measure and straightedge
· Chosen wet-area-suitable top material
· Sink and faucet templates
· Jigsaw only for materials suitable for DIY cutting
· Edge sealer or finishing system
· Appropriate installation adhesive or fixing method
Steps for Custom Vanity Top Creation
1. Level and fix the base first. Place the vanity in its final position, level it, and secure it as required. Measure the wall at several points because bathroom corners are not always perfectly square. A custom top should fit the real room, not an ideal rectangle drawn on paper.
2. Make a full-size template. Create a template showing the wall edges, overhang, sink opening, faucet location, and any side splash. Set the actual sink or manufacturer template on top and confirm drawer and plumbing clearance beneath. Mark orientation clearly so nothing is reversed during cutting.
3. Fabricate and seal according to the material. Cut only materials that are appropriate for your tools and experience; use professional fabrication for heavy stone, engineered surfaces, or other specialist products. Smooth and seal all DIY-cut edges. Dry-fit the top before making final sink or faucet holes.
4. Install without trapping future problems. Fit the top, basin, and faucet with the correct support and sealing approach, then inspect the wall junctions and sink edge. Keep access to shutoff valves and the trap. Wipe away excess sealant neatly so water does not sit in ridges around the basin.
I would spend more time on the template than on decorative edge details. A top that fits the wall and sink properly looks intentional even when the material itself is quite simple.
Variation: Use a professionally cut offcut to fit a reused vanity base, or make a sealed timber top with a removable protective surface around the sink if that suits the fixture and maintenance needs.
Concrete bathroom vanity
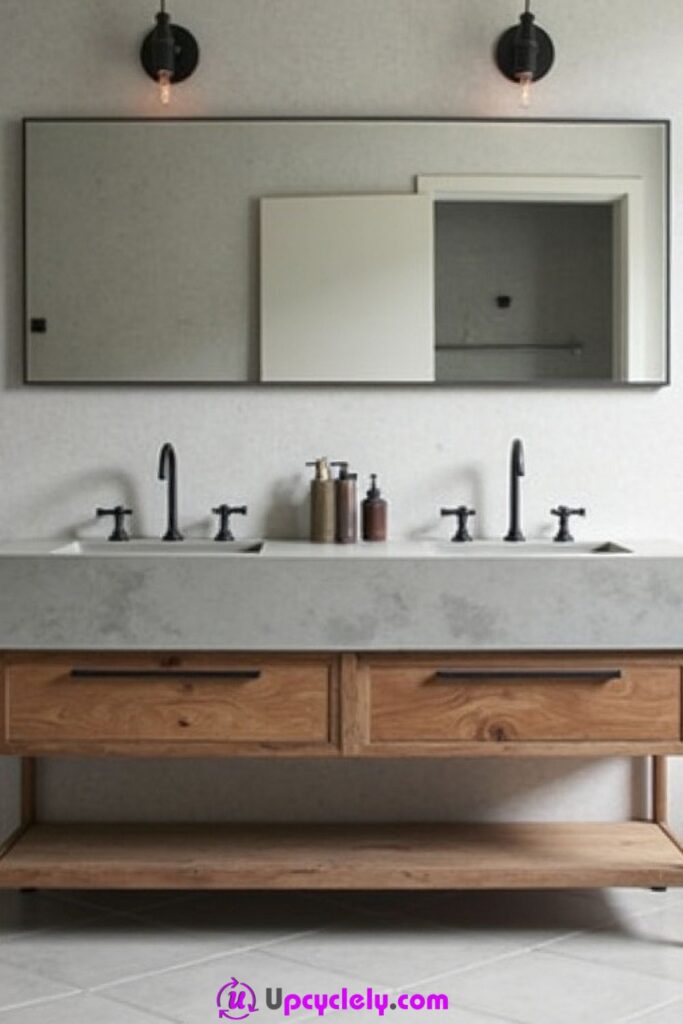
Concrete brings visual weight to a vanity, so the base and floor need to be considered before the top is added. A lightweight concrete-look finish can sometimes create the appearance without the same structural demand, while a true concrete top requires a cabinet or frame capable of supporting its considerable weight.
Pairing concrete with reused timber drawers can soften the industrial look and keep the project connected to upcycling. Protect the wood, seal the concrete appropriately, and avoid unsupported spans. If you are unsure about load, reinforcement, or fabrication, treat the top as a specialist component and reuse the base instead.
Materials and Tools
· Strong vanity base or reinforced frame
· Concrete top or suitable concrete-look surface
· Sink and faucet
· Structural support materials as required
· Level and straightedge
· Wood sealer for reused timber components
· Appropriate concrete sealer if applicable
· Mounting and plumbing hardware
Steps for a Concrete Bathroom Vanity
1. Check the support before choosing the top. Inspect the vanity frame, wall connection, and floor beneath it. Calculate or obtain the weight information for the intended concrete component and confirm the structure is suitable. Do not place a heavy slab on a light decorative cabinet and assume the countertop will brace it.
2. Prepare the reused base. Repair drawer fronts, rails, and shelves before the top arrives. Seal timber surfaces and create plumbing openings while the cabinet is still easy to work on. Add reinforcement only in a way that does not block the drain or drawer movement.
3. Dry-fit and protect the surfaces. Set the top in place safely with enough help for the weight, confirm overhangs and sink alignment, and follow the appropriate sealing system. Protect adjacent wood from drips during finishing. Keep the concrete surface smooth enough to wipe without trapping residue around the basin.
4. Complete installation and monitor movement. Secure the top and basin using the correct method, anchor the vanity, and connect the plumbing appropriately. Check for cabinet racking or sagging after loading drawers. Reinspect joints and seals periodically, especially around the sink and wall.
Concrete can dominate a small room very quickly. I would let the top be the main heavy texture and keep the reused cabinet fronts warm and simple underneath it.
Variation: Use a thin concrete-look overlay on a suitable existing top instead of a full slab, or pair a professionally made concrete top with a refurbished timber dresser base.
Additional Upcyclely Idea: Turn a Vintage Sewing Table into a Bathroom Vanity
A vintage sewing table can be a surprisingly useful vanity base because it often has a strong frame, decorative legs, and a compact footprint. Once the machine and moving hardware are removed, the top opening or internal cavity can sometimes provide useful space for a basin and plumbing. The table still needs reinforcement if the original top was designed only to support a sewing machine.
Choose a table with a rigid base and enough knee-free storage or side compartments to work in a bathroom. Preserve recognizable details such as turned legs or old drawers, but remove sharp mechanisms and loose hinges. A new protected top can sit over the frame while the old furniture remains visible beneath it.
Materials and Tools
· Vintage sewing table in sound condition
· Tools for safely removing old machine hardware
· Reinforcement timber or brackets
· Compact sink and suitable vanity top
· Drill and jigsaw
· Sandpaper and repair filler
· Bathroom-suitable finish
· Wall anchoring hardware
Steps for a Sewing-Table Bathroom Vanity
1. Remove the sewing mechanisms safely. Take out the machine, belts, hinges, springs, and sharp moving hardware that will no longer serve a purpose. Keep decorative drawer components that still work. Then inspect the frame for looseness and repair joints before adding any new weight.
2. Strengthen the top support. Add rails or brackets beneath the new countertop area so the sink load is carried by the frame rather than thin old panels. Check that reinforcement does not occupy the drain path. Confirm the finished height with the chosen sink before securing the supports.
3. Fit a protected top and plumbing route. Use a wet-area-suitable top that covers or incorporates the old machine opening. Mark the sink and plumbing cutouts carefully, seal raw edges, and create neat rear access. If the table has small side drawers, preserve them where the drain allows.
4. Finish and secure the conversion. Refinish the timber only as much as needed, install the top and basin, and anchor the light-looking table so it cannot shift. Connect the plumbing appropriately and test the remaining drawers. Keep the area beneath relatively open so the old leg structure remains visible.
I like this conversion because the original furniture shape stays obvious. I would avoid boxing in the legs with unnecessary panels; the open frame is what makes the sewing table worth reusing.
Variation: Keep the original dark finish and add a pale stone-look top, or paint only the top support rails while leaving the legs and drawer fronts in their existing wood tone.
Bathroom Vanity Choices That Can Lead to Water Damage, Wobble, or Awkward Plumbing
Cutting the Sink Opening Before Looking Inside the Cabinet
A sink can land directly over a structural rail, full drawer box, or the least convenient part of the plumbing. Always inspect the interior and mark the drain path before cutting. Moving the basin slightly is often easier than rebuilding half the cabinet afterward.
Treating Paint as a Waterproofing System
Paint can improve a vanity finish, but it does not repair swollen board, seal an open plumbing cutout automatically, or stop water entering an unprotected edge. Repair damaged substrate first and protect every fresh cut with a suitable system.
Keeping Every Drawer Full Depth
The drain and trap need real space. Forcing full-depth drawers around pipes can kink connections or make maintenance impossible. Rebuild the affected drawer as a shallow or U-shaped box, then keep full storage where the plumbing is not present.
Mounting a Floating Vanity Like a Light Wall Cabinet
A floating vanity carries the cabinet, top, sink, contents, and everyday loads. Use appropriate structural support and wall fixings rather than decorative anchors. If the wall structure is uncertain, get help before hanging the vanity.
Using Questionable Reclaimed Wood in a Damp Room
Unknown pallets, moldy timber, or boards with chemical residue do not become suitable because they look rustic. Choose clean, sound material with a known history, remove hidden fasteners, and seal the surfaces that remain.
Ignoring the Lowest Edges and Feet
Water from mopping and splashes often reaches the base before the countertop shows any problem. Seal lower edges, keep open shelves off the floor where possible, and repair damaged plinths instead of hiding them behind baskets.
Designing Around Appearance but Not Service Access
A beautifully fitted back panel can become a problem if the shutoff valves or trap cannot be reached. Leave removable or generous access where plumbing needs maintenance. A vanity should be easy to service without damaging the furniture.
Adding a Heavy Top to a Light Furniture Base
Stone and concrete tops can exceed what a decorative dresser or console was designed to carry. Reinforce the frame appropriately or choose a lighter surface. If you are unsure about load or support, use professional fabrication and installation advice.
Overfilling Open Shelves
Open vanities quickly look chaotic when every towel, refill bottle, and cleaning product is on display. Use a few purposeful baskets, store chemicals appropriately, and leave enough open space to clean and inspect the plumbing area.
Frequently Asked Questions
Can I turn any dresser into a bathroom vanity?
Not every dresser is a good candidate. Look for a rigid frame, sound panels, workable dimensions, and enough internal space for the sink and plumbing. Swollen particleboard or badly weakened furniture is usually better used for another project.
How can I keep drawers when adding a sink?
Map the drain and supply lines first, then modify only the affected drawer box. A shallow drawer or U-shaped cutout around the plumbing can often preserve the original drawer front and part of its storage.
Do I need to seal reclaimed wood in a bathroom?
Yes, exposed reclaimed wood should be protected so it can tolerate regular wiping and incidental splashes. Seal all faces that may encounter moisture, especially end grain, sink cutouts, lower shelf edges, and fresh screw holes.
Is a floating vanity suitable for an upcycling project?
It can be, provided the reused cabinet is strong and the wall support is designed for the full loaded weight. The mounting method is not a decorative detail, so use appropriate structural fixings and seek professional advice if the wall construction is unclear.
Can I use a vessel sink on an old cabinet?
A vessel sink can reduce the size of the top cutout and may help preserve drawers, but it increases the finished basin height. Measure the cabinet plus sink together before committing so the rim remains comfortable to use.
What is the easiest bathroom vanity update for a beginner?
If the existing cabinet is structurally sound, start with cleaning, minor repairs, refreshed hardware, better drawer organization, and a suitable new finish. Avoid altering plumbing or cutting a new sink opening until you are comfortable measuring and protecting the cabinet.
How do I know whether a reused vanity top is suitable?
The top should be structurally sound, compatible with the sink, and capable of being protected against regular bathroom moisture. Porous, cracked, swollen, or poorly supported materials need repair, sealing, reinforcement, or replacement before installation.
Let the Vanity Keep Its History While It Learns a New Job
The most successful bathroom vanity ideas do not depend on disguising the original object completely. A dresser can still read as a dresser, reclaimed timber can keep its grain, and an old sewing table can keep its distinctive legs. What changes is the way those materials are prepared, supported, sealed, and organized for a room where water and plumbing are part of everyday life.
I would begin with the soundest piece you already have and solve one practical problem at a time: stability first, then sink and plumbing clearance, then moisture protection, and finally storage and finish. Which unused cabinet, dresser, or small table in your home could earn a second life as a bathroom vanity?