Beads have a habit of surviving long after the object they came from has stopped being useful. A broken necklace can leave a handful of good glass beads, an old bracelet may still have a few sturdy spacers, and a craft box often ends up with odd colours that never quite belonged to the original project. I’m Stella Eve Louise, and I like that kind of leftover material because it already gives you a place to begin without asking you to buy a perfectly matched new set.
The trick with bead crafts is to think beyond colour. Size, weight, hole condition, edge smoothness, and the surface you are attaching them to all matter. A cluster that works beautifully on a keychain can be too heavy for a phone charm, while tiny seed beads that sit neatly on a coaster may disappear visually on a large flowerpot. I don’t think mixed beads need to look random, but they do need a clear job.
A good bead project feels secure first and decorative second. Once the thread, wire, adhesive, or backing suits the item, you can be much more relaxed about mixing old jewellery pieces, spare craft beads, and small findings into something useful again.
Sort Beads by Size, Weight, and Hole Condition
Before planning a pattern, separate what you actually have. Two beads can be the same colour and still behave very differently if one is heavy glass and the other is lightweight plastic. I know colour is usually the first thing the eye notices, but the condition of the bead and the size of its hole should decide where it can safely be used.
· Group tiny seed beads, medium round beads, large focal beads, spacers, charms, and jewellery findings separately so you can see the usable quantities.
· Check every reused bead for cracks, chips, rough edges, blocked holes, or old adhesive that may interfere with threading or gluing.
· Keep heavier glass, ceramic, stone, or metal beads for sturdy bases such as keychains, frames, pots, and firm accessories rather than delicate fabric.
· Reserve smooth lightweight beads for phone charms, glasses chains, hair accessories, pillows, and other projects that touch the body or move frequently.
· Place unmatched single beads in a small “accent” group instead of forcing them into a repeating pattern that needs pairs or equal quantities.
· Clean reclaimed beads gently before use, especially when they come from old jewellery, stored craft boxes, or items that have been handled often.
Match Thread, Wire, Adhesive, and Findings to the Project
A bead is only as useful as the connection holding it in place. Stretch cord is convenient for a simple bracelet, but it makes little sense on a picture frame; jewellery wire can hold a keychain cluster securely, but exposed wire ends would be uncomfortable on a cushion. Small material tests save a surprising amount of frustration later.
· Use beading thread or strong sewing thread for stitched fabric projects, choosing a needle that passes through the bead hole without forcing it.
· Use jewellery wire, head pins, eye pins, jump rings, and pliers for charms, keychains, rings, and other projects that depend on metal connections.
· Choose elastic cord only for projects designed to stretch, and test the finished knot before trimming the tails.
· Treat adhesive as surface-specific: a glue suitable for wood may not be suitable for fabric, glazed ceramic, plastic, or a flexible notebook cover.
· Test a small bonded area before covering a larger surface, especially when the base is painted, coated, porous, or likely to flex.
· Keep cut wire, sharp findings, strong adhesive, and loose beads away from children and pets while you work.
Plan Weight, Movement, and Cleaning Before You Secure Anything
Beadwork changes the way an object feels. It adds thickness to a bookmark, weight to a curtain tieback, hard edges to a pillow, and extra handling points to a phone charm. I’d decide how the finished object will actually be used before making the layout permanent, because an attractive design can still be annoying if it catches, scratches, or becomes difficult to clean.
· Keep bulky beads away from book spines, notebook hinges, zippers, phone ports, and other moving or functional areas.
· Distribute heavier beads across sturdy sections rather than concentrating all the weight on one weak loop, stitch, or fabric edge.
· Use smooth beads and covered connections on anything that will touch skin, hair, curtains, table linen, or soft furnishings.
· Plan removable or washable attachments when decorating fabric items that will need regular cleaning.
· For plant pots and table pieces, consider moisture, spills, and wiping before choosing thread, metal findings, or adhesive.
· Before final trimming, give the finished piece a gentle tug, movement, or placement test so loose connections can be corrected while you still have working room.
Beaded Coasters
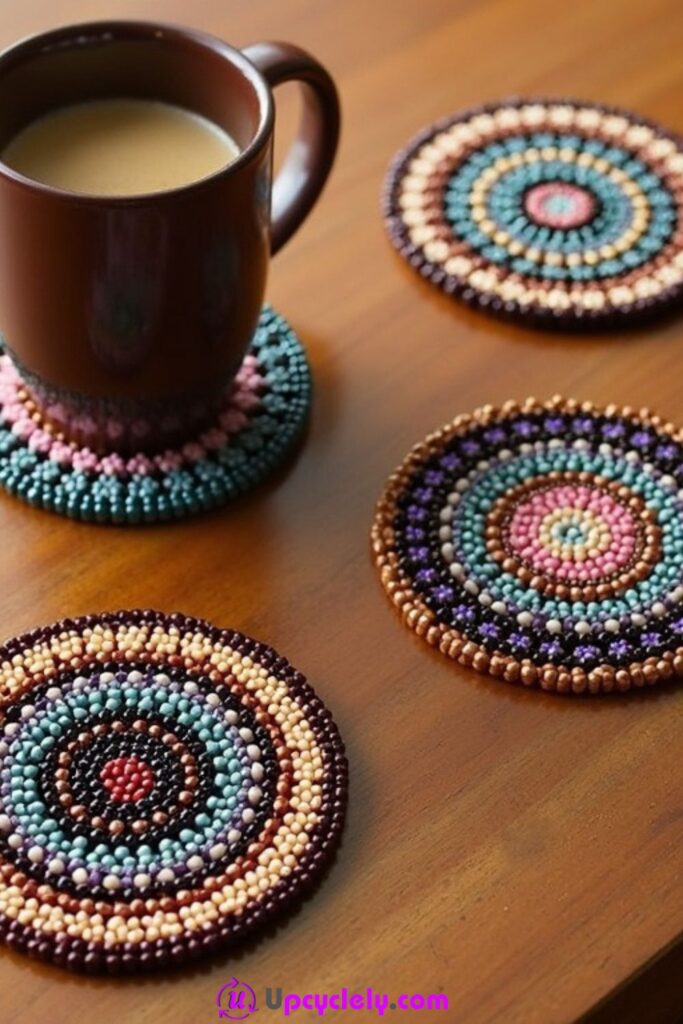
Small leftover beads work especially well on coasters because the project gives them a clear boundary. The circular examples use repeated rings of colour, which makes mixed beads look organised even when the shades are not identical. A firm flat base is useful here because the finished coaster needs to support a mug without wobbling.
I would keep the centre as level as possible and avoid tall focal beads where the cup will sit. The decorative work can become denser toward the outer rings, while a felt or cork underside can help protect the table and keep stitched or glued connections away from the surface beneath.
Materials and Tools
· Assorted small beads or seed beads
· Firm felt, cork, or another flat coaster base
· Strong beading thread and a beading needle, or a suitable flexible adhesive
· Scissors
· Paper circle template or existing coaster for sizing
· Optional felt or cork layer for the underside
Steps for This Bead Craft
1. Choose a flat base and sort the beads. Cut or select a coaster base that lies completely flat. Group the beads into a few colour families and remove any that are cracked, unusually tall, or rough underneath. If you are reusing beads from jewellery, clean them first and check that old thread or glue is no longer blocking the holes.
2. Lay out the rings before attaching them. Mark a light centre point and arrange one or two rings without securing anything. Work outward and keep checking the surface with an empty mug or flat-bottomed cup. Then adjust bead sizes so the drinking vessel sits on a stable area rather than balancing on raised decoration.
3. Secure the beadwork in small sections. Stitch the beads through a firm fabric base or use a surface-appropriate adhesive in short sections, depending on the construction you choose. Keep each row close enough to feel deliberate but not so tight that the base curls upward. If a row begins to buckle, loosen the spacing before continuing.
4. Finish the underside and test the coaster. Cover knots or rough backing with a thin felt or cork layer if needed. Let any adhesive cure according to its own instructions, then place the coaster on a hard table and test it with an empty mug before regular use. Check that nothing rocks, scratches, or sheds loose beads.
The part I like here is the rhythm created by the rings. You don’t need a perfectly matched packet of beads; repeating a few colours at sensible intervals can make leftover pieces feel connected without hiding their differences.
Variation: Make smaller matching mug mats from one colour family, or use a square felt base and build straight rows instead of circles. For a simpler version, bead only the outer border and leave the centre flat.
Bead Embellished Journal Cover
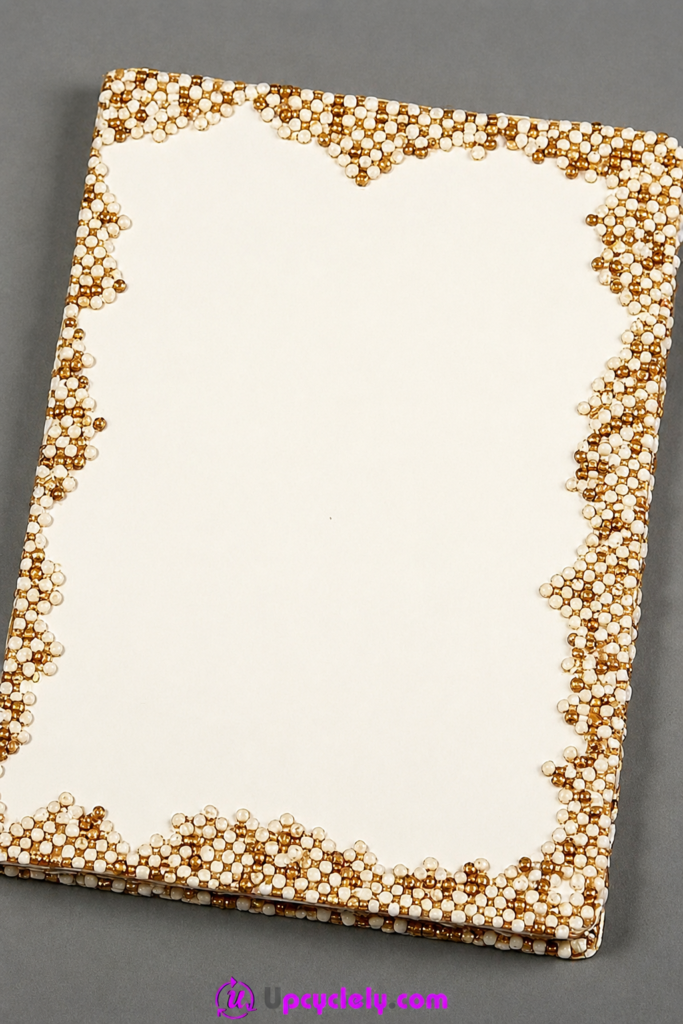
A plain journal becomes much more interesting when the beadwork is kept around the edges rather than spread across the writing surface. The pale cover and warm metallic-looking border make the decoration feel light, while the open centre still leaves room for a title, label, or simply a clean area to hold.
The spine and hinge deserve the most attention. Beads placed too close to a fold can pop off when the journal opens, and thick clusters can make the cover awkward to stack. I’d treat the embellishment as a frame and keep moving parts completely clear.
Materials and Tools
· Plain journal, notebook, or reusable hard cover
· Small smooth beads in one or more coordinated tones
· Adhesive suitable for the cover material
· Toothpick, fine applicator, or tweezers for placement
· Soft cloth for cleaning the cover
· Scrap card or paper for testing the adhesive
Steps for This Bead Craft
1. Clean the cover and protect the hinge. Wipe the cover so dust and hand oils do not interfere with adhesion. Open and close the journal several times and mark a narrow no-bead zone beside the spine, corners that rub, and any elastic closures or straps that need to move freely.
2. Plan an irregular but balanced border. Arrange the beads dry around the perimeter before gluing. If you have mixed sizes, let the smaller beads fill gaps around larger ones instead of trying to force a ruler-straight line. Step back and check that one corner is not much heavier or denser than the others.
3. Attach beads in short workable areas. Apply only enough adhesive for a small section at a time, then place the beads with a toothpick or tweezers. Keep glue from squeezing up over the bead surface. Work around the cover gradually so you can correct spacing before a large area becomes permanent.
4. Let the cover settle flat before using it. Leave the journal open or flat in the position recommended for the adhesive and avoid stacking books on it while the beadwork is fresh. Once secure, open the journal fully and make sure the border does not interfere with the spine, pages, or hand position while writing.
I don’t think every edge needs identical spacing. A slightly clustered border can look intentional as long as the corners, spine, and main visual weight feel balanced.
Variation: Use beads only on the front corners, spell a short initial with tiny beads, or create a removable beaded elastic band that slips around the journal instead of attaching anything permanently.
Beaded Bag Charm
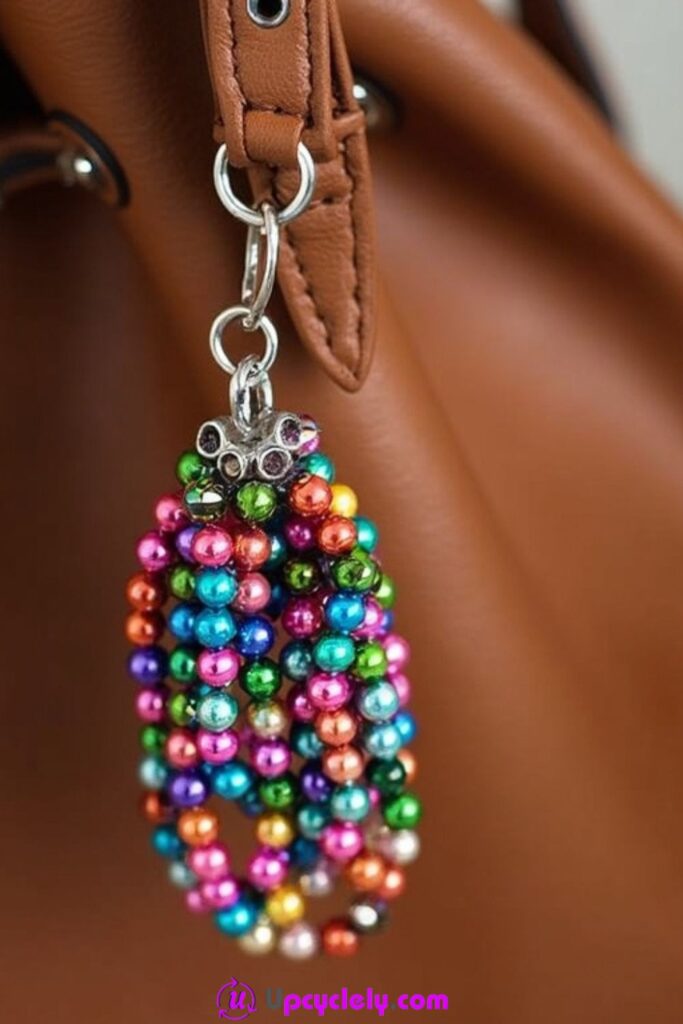
A bag charm is a useful place for beads that are too mismatched for a bracelet but still look lively together. The clustered version uses many glossy colours gathered from one metal attachment point, so the charm reads as a single bunch rather than a row that needs perfect symmetry.
Because it hangs from a handle or strap, the connection matters more than the exact bead order. I would keep the cluster short enough that it does not strike the bag constantly, and I’d use secure metal loops or strong cord rather than relying on decorative knots that can loosen through movement.
Materials and Tools
· Assorted medium or small beads, including reclaimed jewellery beads
· Lobster clasp, keyring, or sturdy bag clip
· Head pins, eye pins, strong cord, or jewellery wire
· Jump rings
· Jewellery pliers and wire cutters
· Optional small bead caps or spacer beads
Steps for This Bead Craft
1. Choose a light mixed bead group. Sort out beads that look good together by overall brightness or finish rather than trying to match every colour. Reject cracked beads and very heavy pieces that could pull on the bag hardware. If several beads came from broken jewellery, remove old wire and inspect the holes before rebuilding them.
2. Build several short dangles. Thread beads onto head pins or short secure strands, varying the lengths slightly so the cluster has movement. Finish each dangle with a closed loop or reliable knot. Then compare them together and remove any strand that makes the bunch feel too long or heavy.
3. Connect the cluster to one strong point. Use a jump ring or central loop to gather the separate dangles, then attach that point to a lobster clasp or keyring. Close every metal ring fully with pliers so the seam cannot work open as the charm swings against the bag.
4. Test the charm on the actual bag. Clip it to the handle, zipper pull, or strap position you intend to use and walk around with the bag. Check that the charm does not scrape leather, catch fabric, or hit the zipper repeatedly. Shorten the lowest strands if the movement feels excessive.
A bag charm can handle more colour than most small accessories because the bag itself gives the cluster a quiet background. For me, the main limit is weight, not the number of colours.
Variation: Use only three larger beads for a minimal charm, add a reclaimed tassel, or make the entire piece detachable so the same bead cluster can move between bags.
Beaded Bookmark
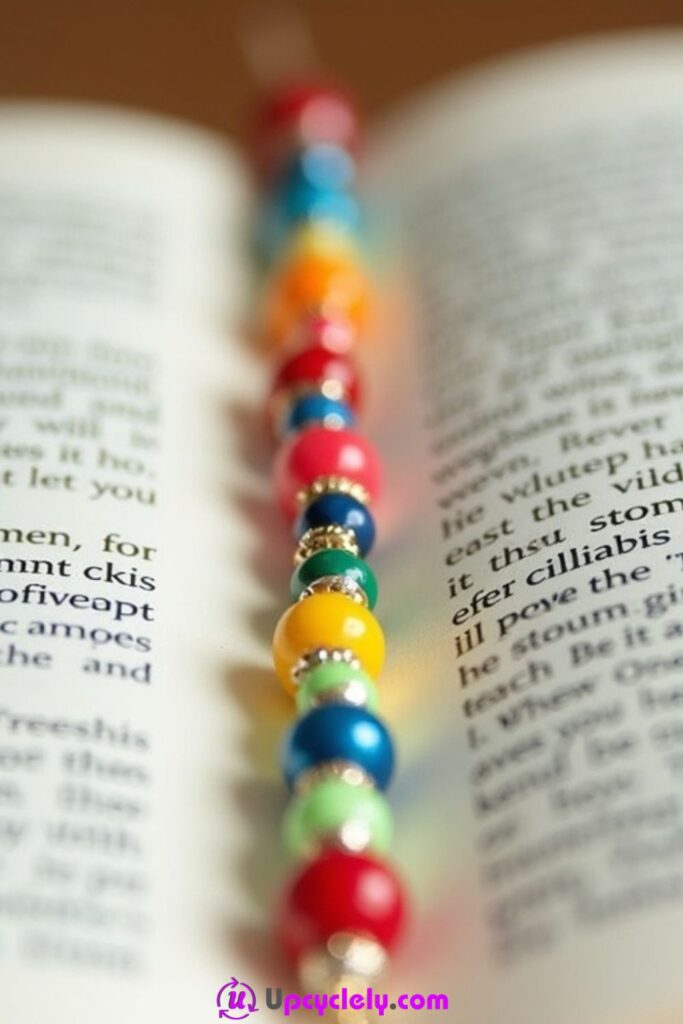
A beaded bookmark can turn a small collection of bright beads into something practical, but thickness needs to stay under control. The colourful strand looks decorative against an open book, yet a bookmark still has to sit between pages without forcing the spine or leaving deep impressions in the paper.
I would use the smallest smooth beads for the section that may lie inside the book and keep larger or heavier pieces near the ends. A flexible cord is usually kinder to pages than stiff wire, and every knot should be compact enough not to create a hard lump.
Materials and Tools
· Small smooth beads and optional spacer beads
· Thin strong cord, beading thread, or fine flexible beading cable
· Beading needle if required
· Scissors
· Optional small charm or tassel for the end
· A book for testing thickness and length
Steps for This Bead Craft
1. Measure against a real book. Choose a book similar to the size you use most and decide whether the beaded section will sit fully inside or whether decorative ends will hang beyond the pages. Leave enough length for comfortable placement without creating a long loose tail that tangles on a shelf.
2. Plan the thinnest section first. Arrange tiny smooth beads for the part that may sit near the spine. Save larger beads, metal spacers, or a focal bead for the outside end. If the beads are all thick, consider using a plain cord through the book and reserving the beadwork for the visible ends.
3. String and secure without bulky knots. Thread the beads in the planned order, then secure the ends with a compact knot, crimp, or loop suited to the material. Pull firmly enough to remove slack but not so tightly that the strand becomes stiff. Then run your fingers along it to catch any sharp edges or exposed wire.
4. Test it between pages before trimming. Place the bookmark in the book, close it gently, and check whether the cover sits normally. Open and remove the bookmark to see whether any bead leaves a strong mark. Adjust the thickest area before cutting away final tails or adding a charm.
The temptation is to make the whole length decorative, but a quieter centre usually works better. Books are not very forgiving of bulky beadwork, no matter how pretty the colour combination is.
Variation: Make a cord bookmark with a beaded tassel at each end, use letter beads for a name outside the pages, or create a short beaded marker for a journal rather than a full book-length strand.
Beaded Bracelets
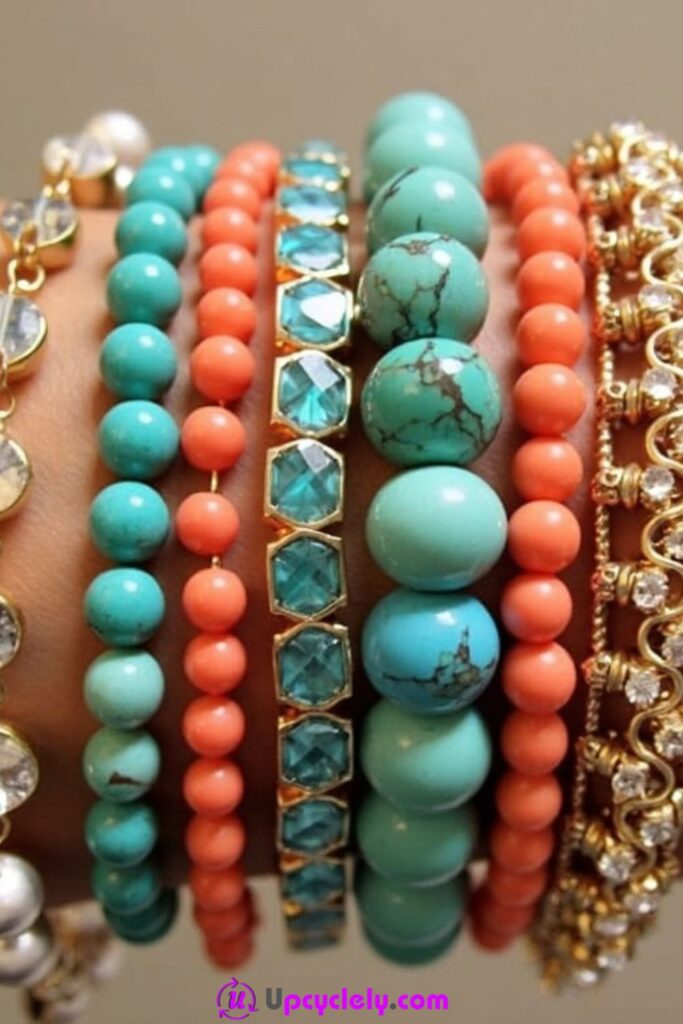
Bracelets are one of the easiest ways to give leftover jewellery beads another life because small differences can become part of the stack. The mix of turquoise-like, coral, clear, and metallic pieces works because each bracelet has its own simple rhythm, while the group creates the fuller colour story.
Comfort matters more than packing in every spare bead. Large beads can feel tight when the wrist bends, and a heavy stack can become tiring. I’d make each bracelet secure and comfortable on its own, then decide how many actually feel good together.
Materials and Tools
· Reclaimed or leftover beads with smooth holes
· Stretch cord, beading wire, or strong thread suited to the design
· Clasp and jump rings if making a non-stretch bracelet
· Crimp beads if required
· Scissors or wire cutters
· Jewellery pliers
· Measuring tape or an existing bracelet for sizing
Steps for This Bead Craft
1. Sort beads into small bracelet groups. Instead of mixing the entire collection at once, make several mini palettes based on size, colour, or finish. Check holes and edges as you sort. Keeping similar bead weights together makes each bracelet easier to balance and helps the finished stack sit more naturally.
2. Measure for movement, not just wrist size. Wrap the chosen cord or wire around the wrist and allow a little ease. If you are using large round beads, remember that they take up internal space and may require extra length. Test the layout around the wrist before committing to the closure.
3. String the design and check the rhythm. Build the bracelet in a repeating pattern or place one larger focal bead among smaller ones. Keep sliding the beads together to check for awkward gaps, but do not stretch elastic while threading. Then try the unfinished strand around the wrist to see how the sizes sit.
4. Secure the closure and wear-test it. Tie, crimp, or clasp the bracelet according to the stringing material, then test the connection with a controlled pull before trimming. Wear it briefly and bend the wrist. If a bead presses uncomfortably or the bracelet rotates constantly, adjust the size before making more matching pieces.
I like stacks where each bracelet is simple enough to be worn alone. That way the leftover beads give you several useful combinations instead of one heavy piece that only works as a set.
Variation: Create monochrome bracelets from odd shades of one colour, add one reclaimed charm to a plain strand, or use larger beads as a focal centre with tiny beads filling the rest of the wrist.
Beaded Fridge Magnets
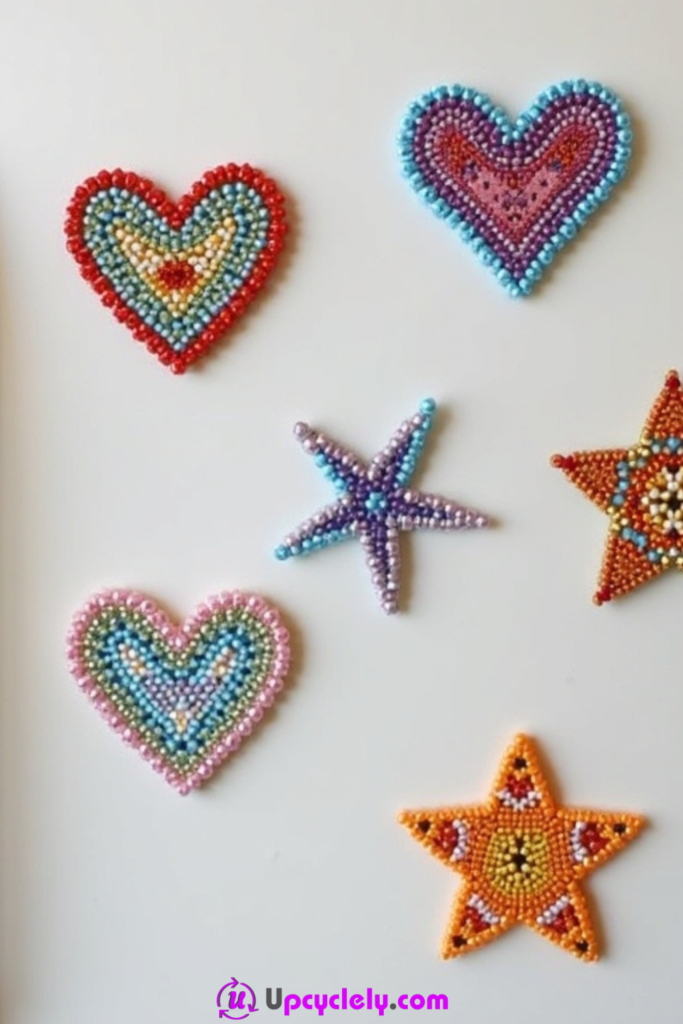
Small bead mosaics make good fridge magnets because the base shape can do most of the organising. Hearts and stars give a clear outline, so rows of tiny beads can follow the edge inward even when the colours are mixed. The finished piece stays compact and gives single leftover beads a purpose without needing a wearable construction.
The backing should remain flat. A thick, uneven magnet or a warped base can make the piece slide down the fridge door, and loose beads can fall where children or pets may find them. I’d keep these firmly bonded and use them as decorative magnets rather than anything expected to hold a heavy stack of papers.
Materials and Tools
· Small beads or seed beads
· Thin wood, stiff felt, cork, or firm card for the base
· Strong magnet disc or strip suitable for craft use
· Adhesive appropriate for both bead and base materials
· Pencil and simple heart, star, or geometric template
· Scissors or craft knife appropriate for the backing
· Tweezers or toothpick for bead placement
Steps for This Bead Craft
1. Cut a clean simple base shape. Trace a heart, star, circle, or another easy outline onto a firm backing and cut it neatly. Avoid very thin points that may bend or break. Test the undecorated base against the magnet so you know the finished piece will stay flat before adding bead weight.
2. Arrange the bead pattern from the edge inward. Place one outer row dry first and use it to define the shape. Continue with smaller rows or simple blocks of colour toward the centre. Mixed beads look more intentional when each row or section follows one clear direction rather than changing randomly every few millimetres.
3. Attach beads and keep the surface level. Work in small adhesive sections so you have time to nudge beads into place. Press gently instead of burying them in glue. If one bead is much taller than the rest, move it to an outer decorative area or leave it for another project.
4. Add the magnet only after the front is stable. Once the beadwork is fully secure according to the adhesive instructions, turn the piece over and attach the magnet centrally. Test it low on a clean metal surface first. If the magnet struggles with the weight, use a lighter base or reduce the bead density rather than assuming more glue will solve it.
The outline does a lot of the design work here. I’d rather make one small heart with tight, secure rows than a larger shape that needs so much bead weight the magnet can barely hold it.
Variation: Use circles with initials, simple fruit shapes, or tiny geometric tiles. A set of three small magnets can use colour leftovers more easily than one large mosaic.
Beaded Coiled Rings
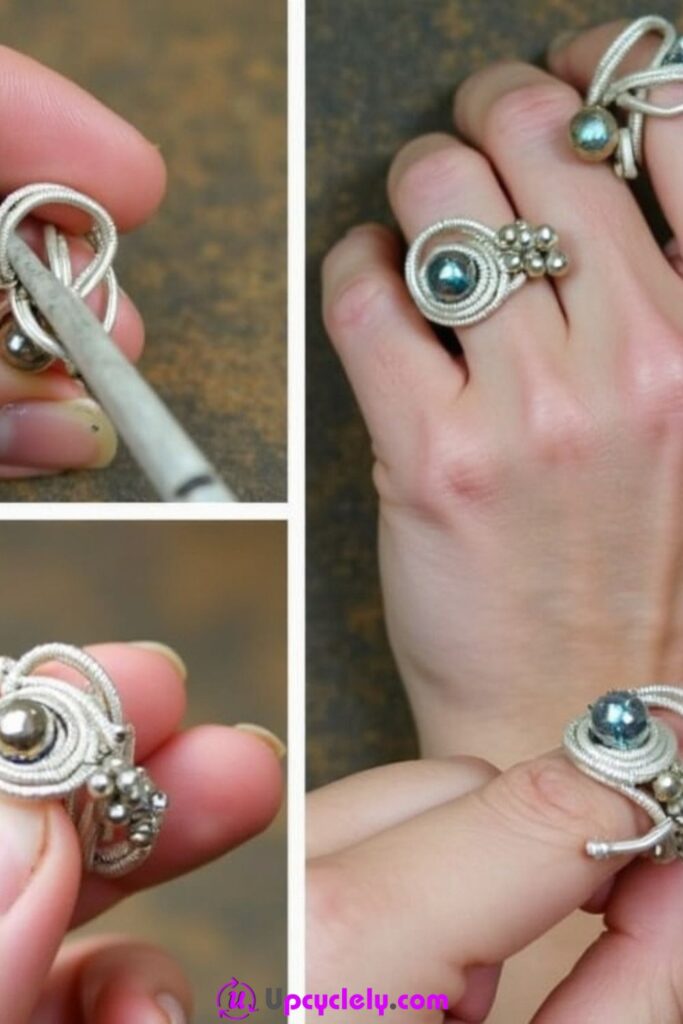
A coiled ring is a good use for one attractive focal bead plus a few tiny extras. The silver-toned wire in the example wraps around itself to create the ring shape and decorative setting, which means the wire is not just a connector; it becomes part of the design.
This is where smooth finishing matters. A ring sits against skin all day, and one clipped wire end can catch clothing immediately. I would practise the coil with inexpensive craft wire first if you have not made wire jewellery before, then use the reclaimed bead once the wrapping feels controlled.
Materials and Tools
· One focal bead and optional small accent beads
· Jewellery wire suitable for ring making
· Ring mandrel or smooth round form for sizing
· Round-nose and flat-nose jewellery pliers
· Wire cutters
· Small file or tool for checking and smoothing wire ends if appropriate
Steps for This Bead Craft
1. Choose the bead and test the wire through it. Make sure the wire passes through the focal bead without forcing or chipping the hole. Check that the bead is not so heavy that it will rotate constantly on the finger. Cut enough wire to form the band and decorative wraps while leaving comfortable working tails.
2. Form the ring band around a mandrel. Wrap the wire around the chosen size on a mandrel or smooth cylindrical form. Keep the coils close and even without crushing them together. Then slide the band off carefully and check that the basic circle holds its shape before adding the focal bead.
3. Position the bead and build the decorative coil. Thread or seat the focal bead at the top of the ring and use the wire tails to wrap a neat nest around its base. Add tiny accent beads only if the structure still feels balanced. Keep each wrap controlled so the setting grows upward rather than spreading into the finger space.
4. Trim, tuck, and check every wire end. Cut excess wire with the correct tool and press the ends firmly into a protected position using pliers. Run a fingertip around the inside and sides before wearing the ring. If anything scratches, catches, or lifts, reshape it before the ring goes into regular use.
The wire already gives this project plenty of texture. I don’t think it needs many beads; one strong focal bead often makes the coil easier to read and far more comfortable to wear.
Variation: Use a small pearl-like bead for a quieter ring, add two tiny side beads, or make a simple spiral ring without a centre bead when your leftover wire is more interesting than the bead collection.
Beaded Curtain Tiebacks
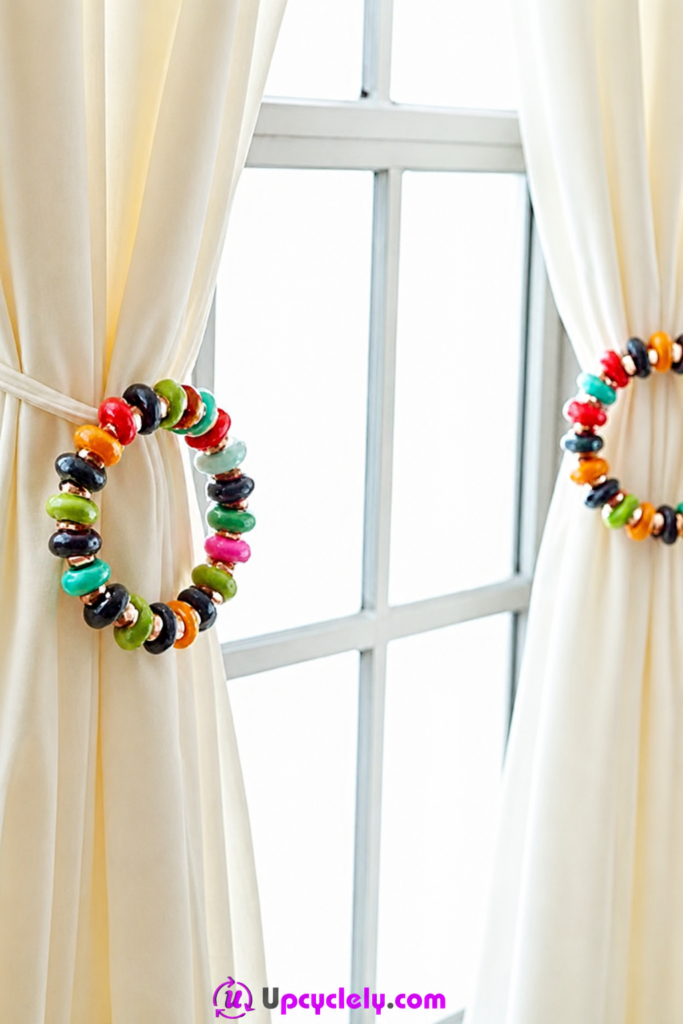
Curtain tiebacks can take advantage of larger beads that would feel too bulky in a bracelet. The circular loops sit against pale fabric, so the mix of chunky colours becomes a decorative band without needing to cover the curtain itself. This also makes the beadwork removable, which is useful when curtains need washing.
The loop should hold the fabric gently rather than squeeze it. Heavy glass beads can pull on delicate curtains, and rough bead edges may snag loose weaves. I would test the tieback on the actual curtain before finishing the closure so the length suits the amount of fabric being gathered.
Materials and Tools
· Large smooth beads with generous holes
· Strong cord, covered wire, or another flexible tieback base
· Clasps, loops, or hooks if a removable closure is needed
· Scissors or wire cutters suited to the material
· Jewellery pliers if using metal findings
· Measuring tape
Steps for This Bead Craft
1. Measure the gathered curtain first. Pull the curtain back by hand to the position you like and measure the loose loop needed around it. Do not pull the fabric into a tight bundle just to make a shorter tieback. Add enough working length for knots, loops, or a clasp.
2. Choose smooth beads and distribute the weight. Select beads without chips, sharp spacer edges, or rough drilled holes. Mix colours in a repeating sequence or place larger beads at intervals. If some beads are much heavier, spread them around the loop instead of clustering all the weight at the bottom.
3. String the tieback and build a reliable closure. Thread the beads onto strong cord or covered wire and leave enough flexibility for the loop to curve naturally. Finish with a clasp, hook loop, or secure knot according to the material. Then pull gently on both ends to make sure the closure does not slip.
4. Fit it to the curtain and watch for snags. Place the finished tieback around the curtain and check the fabric where beads and findings touch. Move the curtain slightly to see whether anything catches. If the loop feels heavy, remove some beads or substitute lighter ones before making a second matching tieback.
Large beads are very noticeable against plain curtains, so there is no need to make the loop crowded. A little space between statement beads can make the tieback lighter and easier on the fabric.
Variation: Use wooden beads for a lighter natural version, make a short beaded section on a fabric strap, or create clip-on tiebacks that attach to wall hooks without wrapping a full bead loop around the curtain.
Beaded Flower Pin
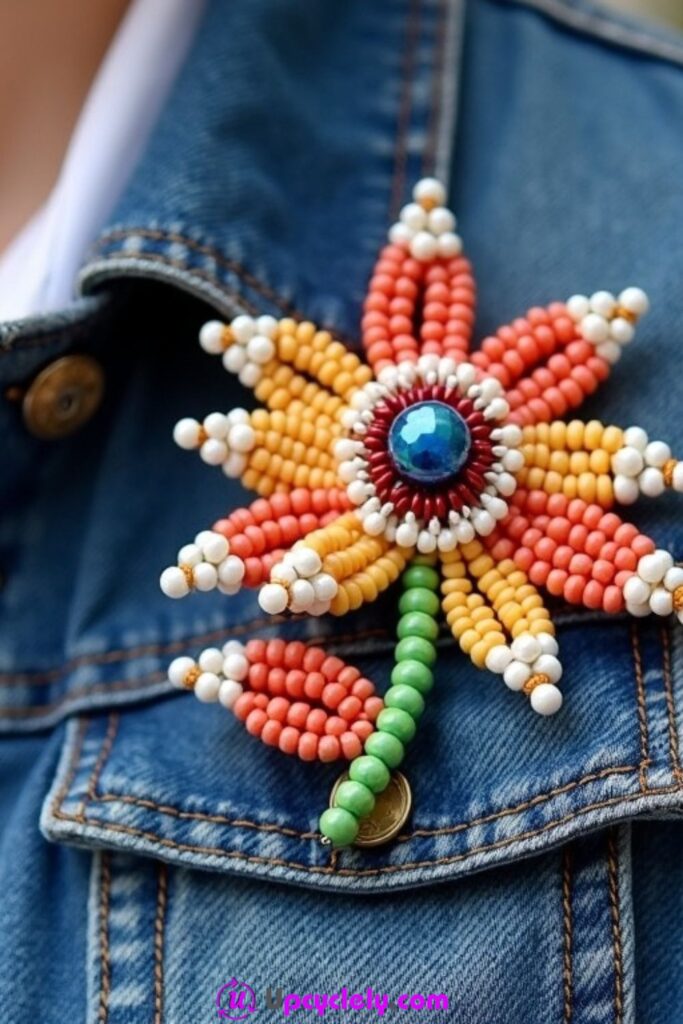
A flower pin gives small seed beads a more sculptural job. The layered petals use repeated bead rows to create shape, while a larger centre bead anchors the design visually. Against denim, the flower has enough contrast to stand out without needing extra fabric decoration around it.
Wire-framed petals need to be secure but not dangerously stiff. I would keep every cut end on the back, cover or tuck it neatly, and make sure the brooch finding is attached to a strong centre point rather than to one delicate petal loop.
Materials and Tools
· Seed beads in petal colours
· One larger focal bead for the centre
· Small green beads for an optional stem or leaf
· Fine jewellery wire
· Brooch back or sturdy safety-pin style finding
· Jewellery pliers and wire cutters
· Optional small felt circle for covering the back
Steps for This Bead Craft
1. Build one petal as a size sample. Thread a short run of seed beads onto fine wire and bend it into a petal loop. Twist or wrap the base enough to hold the shape, then compare it with the focal centre bead. Adjust the bead count now before making several petals that are all too large or too narrow.
2. Repeat the petals and arrange the flower. Make the remaining petal loops in similar sizes, allowing small variations that still look natural. Arrange them around the centre before permanently twisting the bases together. Then add a second petal layer only if the flower remains light enough for the pin backing.
3. Secure the centre and optional leaf detail. Fix the focal bead over the joined petal bases using a separate wire path or another secure jewellery method. Add a beaded leaf or short stem as a small accent rather than a load-bearing part. Keep all working wire behind the flower face.
4. Attach the pin backing and cover sharp areas. Connect the flower to a brooch back through several strong points so it cannot rotate easily. Trim and tuck wire ends, then cover the back with a small felt circle if that helps keep the surface smooth. Test the pin on sturdy fabric before wearing it on anything delicate.
I know it can be tempting to keep adding petal layers because the first flower comes together quickly, but extra wire adds weight fast. A flatter flower usually sits better on a jacket or bag.
Variation: Make a smaller daisy with one row of petals, turn the flower into a hair clip, or use translucent beads for a lighter-looking design while keeping the same basic wire structure.
Beaded Flowerpot Decor
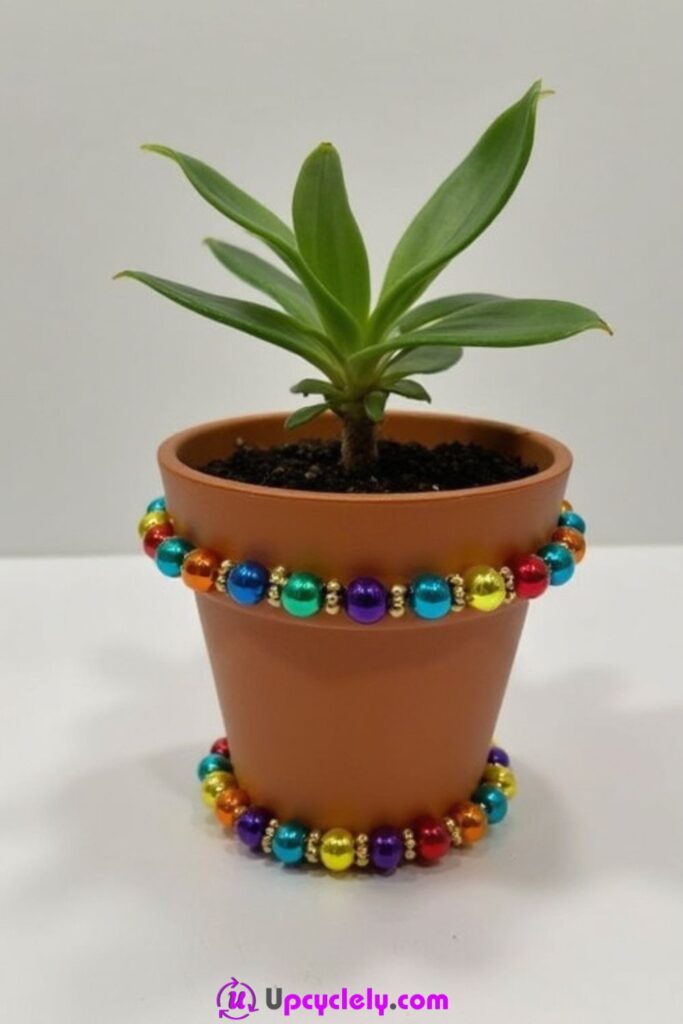
A terracotta pot gives beadwork a strong plain background, which is why two narrow bands can have more impact than covering the whole surface. The colourful strands sit around the upper body and near the base, leaving the clay visible and keeping the pot recognisable as a useful plant container.
Moisture is the practical issue here. Water runs down pots, saucers get damp, and outdoor containers face temperature changes. I would favour removable bead bands or a material that tolerates the intended setting rather than permanently gluing a delicate jewellery strand where it will be soaked repeatedly.
Materials and Tools
· Existing terracotta or plant pot
· Assorted medium beads and optional spacers
· Elastic cord, coated wire, strong string, or another suitable band material
· Scissors or wire cutters
· Jewellery pliers if using wire
· Measuring tape
· Optional removable clasp or connector
Steps for This Bead Craft
1. Clean and measure the pot where the bands will sit. Wipe away dust and soil from the outside and let the surface dry. Measure the circumference at the exact height of each planned bead band because tapered pots change size quickly from top to bottom. Add only the allowance needed for the chosen closure.
2. String a removable upper band. Arrange the beads in a simple repeating colour pattern and thread them onto elastic, coated wire, or another suitable material. Keep the strand flexible enough to follow the curve. Then secure the ends and slide or fasten it around the pot without forcing it over a wider rim.
3. Build the lower band separately. Measure again near the base rather than copying the upper length. String and secure the second strand, checking that it sits above the saucer line if water could collect below. Avoid covering drainage holes, pot feet, or areas that need to rest flat.
4. Water the plant and check real-life behaviour. Use the pot normally and observe where water runs. If the bead bands stay damp, stain, rust, or loosen, remove them and switch to more suitable materials. A removable decoration is useful because the pot can still be cleaned or moved without risking the beadwork.
The clay already brings plenty of texture, so the beadwork does not need to compete with it. For me, the two narrow bands are enough to make the leftover colours visible while keeping the pot easy to use.
Variation: Make one beaded collar just below the rim, use wooden beads on an indoor pot, or create a separate beaded plant-marker stake so the pot itself stays completely unchanged.
Beaded Phone Charm
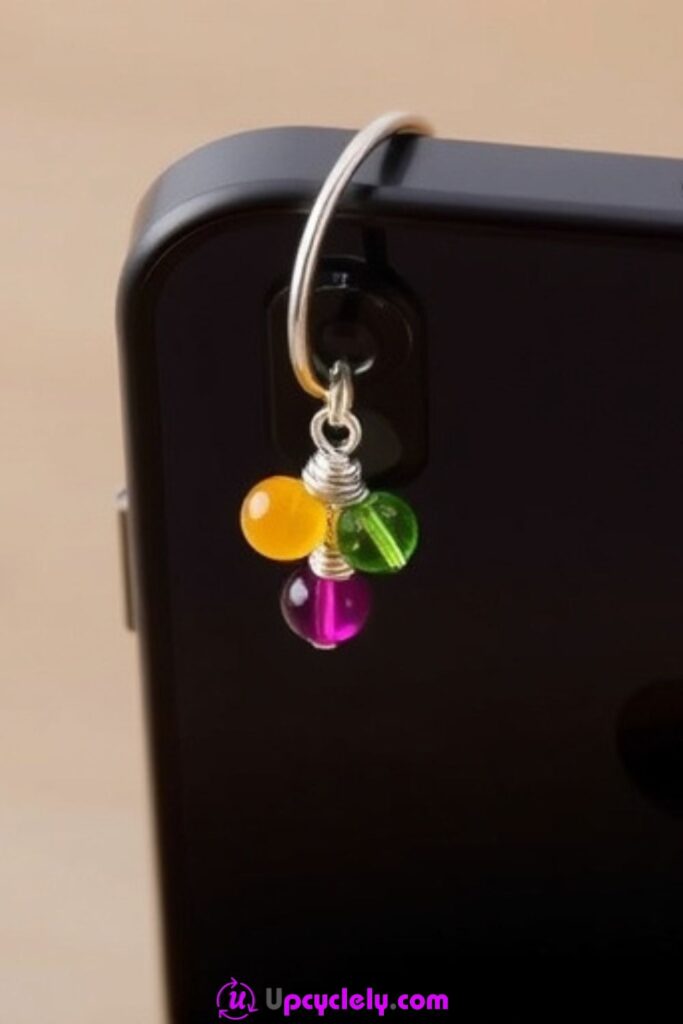
A phone charm does not have to be a long strand. The compact version uses only a few bright beads at one attachment point, which is a sensible way to reuse single leftover beads without adding much bulk to the phone. The simple cluster also keeps the focus on colour rather than complicated hardware.
Phones are handled constantly, so every loop needs to be smooth and secure. I would keep the charm well away from charging ports, buttons, camera lenses, and cases that cannot support extra pulling. A decorative charm should never become the handle you routinely lift the phone by.
Materials and Tools
· Three or more small lightweight beads
· Phone charm loop or case attachment point designed for a charm
· Head pins, eye pins, or fine jewellery wire
· Small jump ring
· Jewellery pliers and wire cutters
· Optional tiny spacer beads
Steps for This Bead Craft
1. Choose only lightweight beads. Pick a small colour group and compare their weight in your hand. Avoid sharp-edged glass pieces, oversized beads, or anything that could strike the screen heavily. Check the holes for cracks before inserting wire or pins.
2. Make tiny secure bead dangles. Thread each bead onto a head pin or short wire section and form a compact closed loop above it. Keep the loops similar in size so the small cluster sits neatly together. Trim and tuck wire ends completely before joining the pieces.
3. Gather the beads on one jump ring. Open a jump ring correctly with pliers, add the bead dangles and the phone loop attachment, then close the ring until the ends meet cleanly. Give each bead a light pull so a loose loop is discovered at the work table rather than after the charm is on the phone.
4. Attach and check interference. Fit the charm to the case or designated loop and move the phone through normal positions. Make sure the beads do not cover the lens, press buttons, enter a charging port, or swing hard against the screen. Shorten the cluster if it reaches a sensitive area.
This is one project where fewer beads can actually make the result more useful. Three good leftover beads are easier to live with than a long strand that spends all day knocking against the phone.
Variation: Use one focal bead and one tiny charm, add an initial bead, or make the cluster on a detachable lobster clasp so it can move between a phone case and a zipper pull.
Beaded Glasses Chain
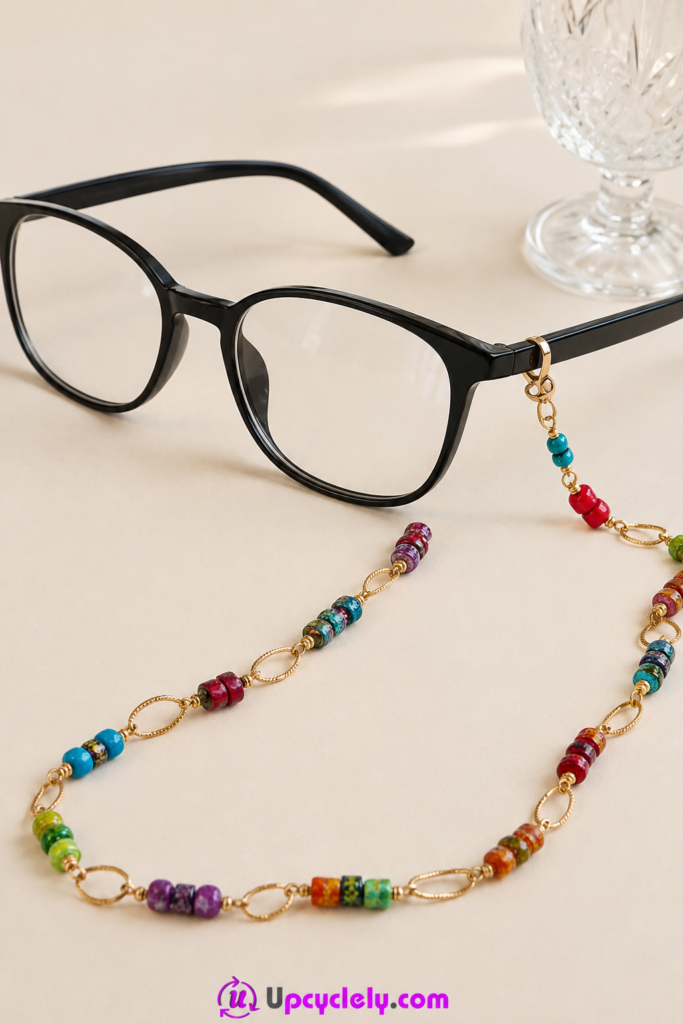
A glasses chain is naturally suited to mixed small beads because the length gives you room to repeat colours without making every section identical. The example combines bead groups with fine metal links, which keeps the chain visually open and prevents the beads from becoming one heavy continuous rope.
The connectors at the glasses arms need to grip securely without damaging the frames. Weight is also important: large beads can pull the chain down behind the ears. I’d use lighter beads and smooth findings, then test the chain while walking and turning the head before trusting it with a favourite pair of glasses.
Materials and Tools
· Small lightweight beads
· Fine chain, beading cord, or flexible jewellery wire
· Rubber or silicone glasses connectors
· Jump rings and crimp beads if required
· Jewellery pliers and wire cutters
· Measuring tape
· Optional small spacer links
Steps for This Bead Craft
1. Choose a comfortable finished length. Drape a soft cord around the neck and attach it loosely near the glasses arms to judge where you want the chain to hang. Leave enough length to remove the glasses comfortably without making the chain so long that it catches on bags, collars, or chair backs.
2. Build light bead sections rather than one heavy strand. Arrange small bead groups separated by chain links, plain cord, or tiny spacers. This gives mixed beads breathing room and reduces weight. If one focal bead is heavier, position it symmetrically or leave it for another project.
3. Secure both ends to glasses connectors. Finish the beaded length with closed loops, crimps, or jump rings suited to the material, then attach the rubber glasses grips. Check that the metal does not rub directly on the frame. Close every jump ring completely so the chain cannot slip free.
4. Wear-test before final trimming. Attach the chain to the glasses and move naturally for a few minutes. Look down, turn your head, and take the glasses on and off. If the chain pulls, slides, or feels heavy behind the ears, shorten or lighten it before trimming the final wire or thread tails.
Spacing the bead groups makes this kind of chain feel lighter both visually and physically. The gaps are useful, especially when you are working with a collection of bright colours that could otherwise become very busy.
Variation: Make a mostly plain cord chain with just two beaded sections near the ends, use pearls for a quieter look, or add detachable connectors so the same chain can become a mask lanyard or badge cord when appropriate.
Beaded Hair Accessories
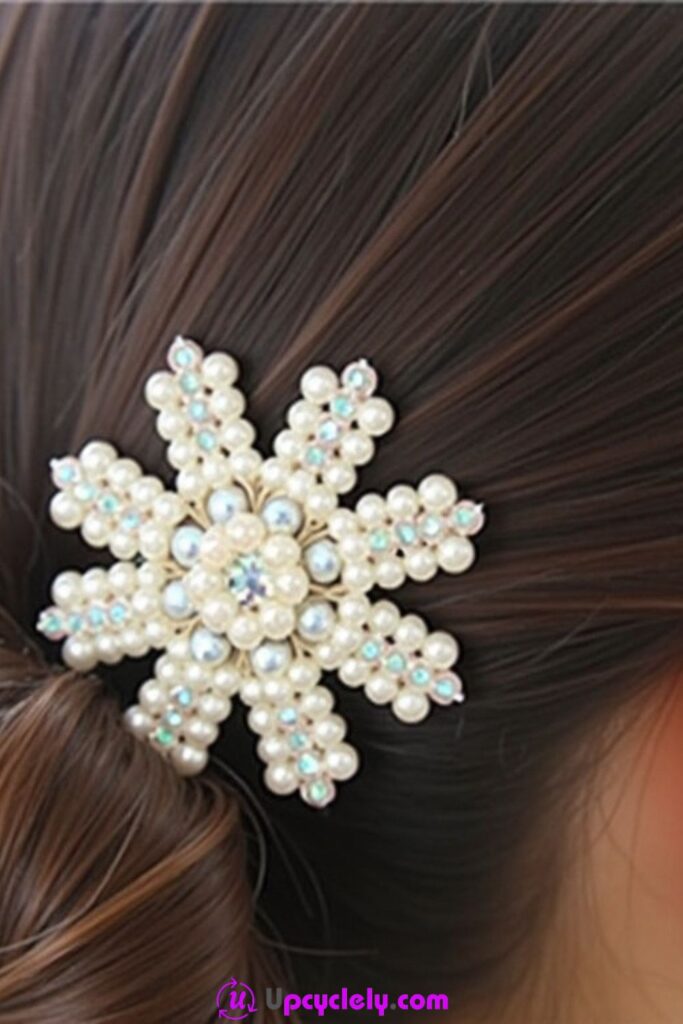
Pearl-like beads work particularly well on hair accessories because their rounded surfaces can create a floral shape without needing many colours. The clustered flower sits against the hair as one defined motif, making the accessory feel finished even though the individual beads are small.
Hair is very good at finding exposed wire ends. I would keep all wraps tight to the accessory base, use the minimum amount of adhesive, and run the finished piece through a scrap of loose thread or yarn before putting it in hair. If the thread catches, hair probably will too.
Materials and Tools
· Small pearl-like or smooth decorative beads
· Plain hairpin, hair comb, barrette, or clip
· Fine jewellery wire or strong beading thread
· Jewellery pliers and wire cutters if using wire
· Optional small felt backing piece
· Optional suitable adhesive for reinforcement
Steps for This Bead Craft
1. Choose a stable accessory base. Use a clip or pin that still opens, closes, and grips properly before decorating it. Decide where the bead flower will sit without blocking the hinge or teeth. If the base is very thin, keep the design small so the decoration does not twist it out of shape.
2. Build the flower in separate bead groups. Create petal loops or short bead clusters around a centre bead using fine wire or strong thread. Keep the shape shallow rather than stacking many layers. Then place the finished motif against the hair accessory to confirm the scale before attaching it.
3. Wrap the flower onto the base securely. Use several controlled wire wraps or strong stitches through stable points on the accessory. Keep the attachment compact and away from the opening mechanism. If adhesive is compatible, use it only as reinforcement rather than allowing a thick hard ridge to form underneath.
4. Smooth the back and test for snagging. Trim and tuck every wire end, cover the back with a small felt piece if useful, and run the accessory through loose thread or a soft fabric scrap. Open and close it several times. Remove or reshape anything that catches before wearing it in hair.
A hair accessory does not need a huge bead cluster to be noticeable. I’d keep the flower compact enough that the clip can still do its real job, which is holding hair rather than carrying decoration.
Variation: Make two matching small pins, use coloured seed beads for a daisy, or add a short beaded row along the top of a barrette instead of creating a three-dimensional flower.
Beaded Keychains
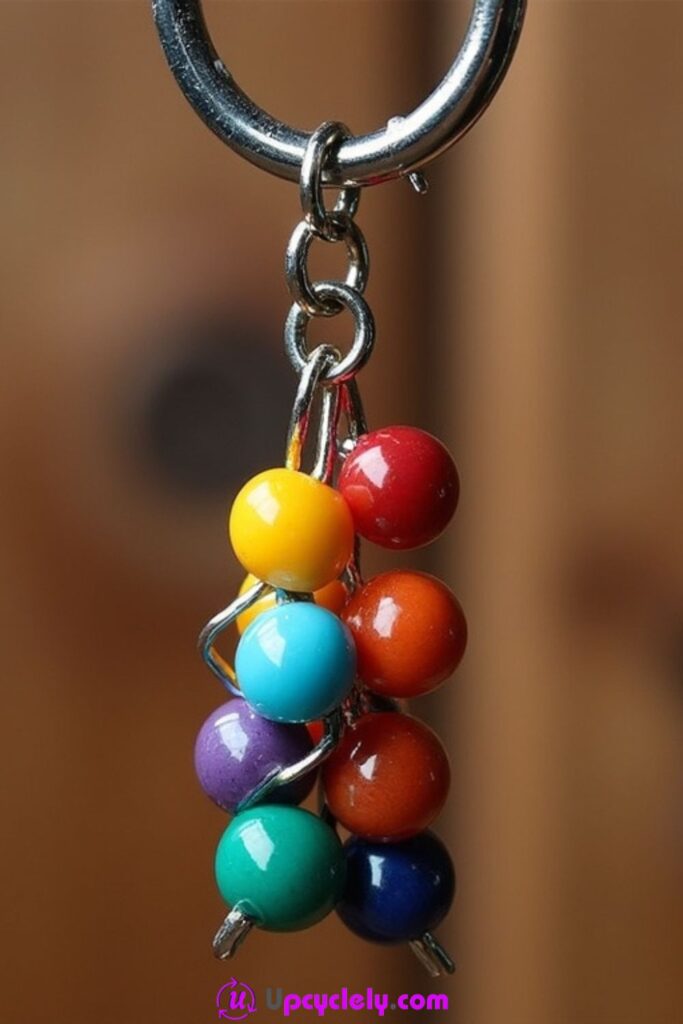
Keychains are practical homes for sturdier leftover beads because the metal ring and short dangles can handle more movement than delicate jewellery. The cluster of glossy round beads works well because each bead has its own small connector, so the bunch can move without relying on one long fragile strand.
Keys get dropped, pulled from bags, and rubbed against hard surfaces, so I would choose beads that can tolerate that treatment. Delicate glass, cracked ceramic, or sharp-edged beads are better saved for display pieces. The keyring itself should also be strong enough for regular use.
Materials and Tools
· Sturdy medium beads
· Metal keyring
· Head pins or short lengths of jewellery wire
· Jump rings
· Jewellery pliers and wire cutters
· Optional spacer beads or one small charm
Steps for This Bead Craft
1. Choose durable beads and a sound keyring. Inspect the ring for gaps, bending, or rust and replace it if the metal feels weak. Select beads with intact holes and smooth surfaces. A few bright colours are enough; durability matters more than using every leftover bead in one cluster.
2. Create individual bead drops. Place each bead on a head pin or short wire section and form a closed loop at the top. Keep the wire close to the bead so there is not a long stem that bends easily. Make several drops, varying the length slightly only if the cluster still feels compact.
3. Connect the drops securely. Gather the bead drops onto one or more jump rings and attach them to the main keyring. Close each jump ring completely with pliers. Then pull gently on the separate beads to check that no loop opens under light stress.
4. Test it with actual keys. Add your keys and place the keychain in a pocket or bag for a short test. Make sure the bead cluster does not catch zippers, scratch delicate items, or make the keys uncomfortably heavy. Remove the lowest or heaviest bead if the bunch becomes awkward.
This is a good place for the beads that are too bold or chunky for jewellery. They can still be decorative, but the keychain needs to survive everyday handling without becoming a pocket full of loose pieces.
Variation: Use one large reclaimed bead as a simple pull, create colour-coded keychains for different keys, or add a short fabric loop from an old ribbon to soften the metal-and-bead cluster.
Beaded Necklaces
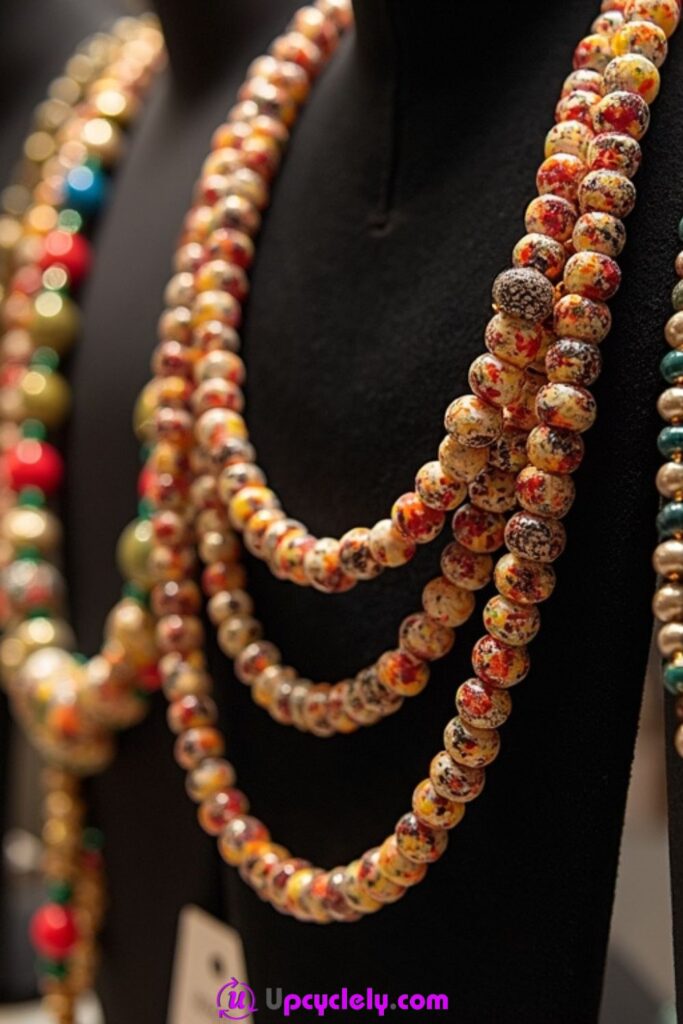
Long necklaces can absorb a surprising number of leftover beads, especially when several strands are layered together. The warm speckled beads in the example show how repetition can create a strong look even when some colours and finishes vary. A necklace does not need every bead to be rare; it needs the weight and spacing to feel comfortable around the neck.
If you are dismantling old jewellery, save any reusable clasps, bead caps, and spacers that still open and close cleanly. I would sort by hole size and weight before stringing, because mixing a very heavy focal bead into a light strand can make the necklace constantly rotate.
Materials and Tools
· Assorted reclaimed or leftover beads
· Beading wire, strong thread, or cord suited to bead weight
· Clasp and jump rings
· Crimp beads or knot covers if required
· Jewellery pliers and wire cutters
· Bead board, tray, or folded towel for layout
· Measuring tape
Steps for This Bead Craft
1. Sort by strand rather than by individual bead. Divide the collection into two or three groups that could each make a complete necklace. One strand may use mostly small speckled beads, another larger focal pieces, and a third a quieter colour. This keeps layered necklaces from becoming equally heavy everywhere.
2. Lay out the full length before stringing. Arrange the beads on a tray or towel and decide where the visual weight should sit. Check that the necklace length suits the bead size and intended neckline. If you are building several strands, vary the lengths enough that they sit separately instead of stacking on the same line.
3. String and secure each strand independently. Thread the beads onto suitable wire, cord, or strong thread and keep checking that the strand hangs freely. Add the clasp using crimps, knots, or jewellery loops appropriate to the material. Test the closure before trimming all working tails.
4. Wear the necklace before building the full stack. Try one strand first and check the weight, clasp position, and how the largest beads sit against the chest. Then add the second or third strand. If the combined set feels heavy, reduce the number of strands rather than making the clasp carry more weight than necessary.
Layering works best when the strands are not all trying to be the focal point. I’d let one necklace carry the stronger beads and keep the others simpler so the whole group feels intentional rather than crowded.
Variation: Make one long strand that can be doubled, alternate reclaimed beads with knots for a lighter necklace, or combine one old pendant with a newly arranged strand of leftover beads.
Beaded Pillows
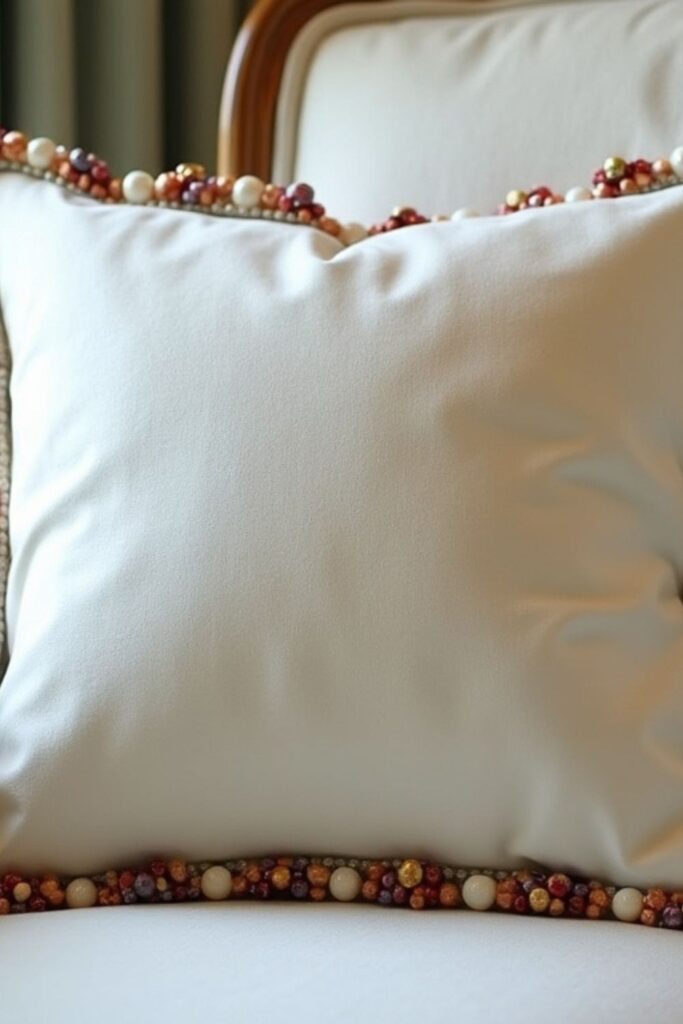
Beads can give an old cushion cover a more finished border without turning the entire sitting surface into something hard. The example keeps the embellishment close to the edges, which is a sensible placement: the centre remains soft, while the bead line frames the pillow and makes use of small mixed pieces.
I would treat this as a decorative cushion rather than a pillow meant for sleeping. Beads can press into skin, loosen through repeated compression, and become a small-part hazard if they detach. Strong stitching and a removable cover make the project easier to inspect and clean.
Materials and Tools
· Existing cushion cover in sound condition
· Small to medium smooth beads
· Strong sewing thread
· Needle that passes through the bead holes
· Pins or fabric marker for spacing
· Optional narrow tape or backing strip for reinforcement
· Cushion insert for fit testing
Steps for This Bead Craft
1. Inspect the cover and choose a low-pressure edge. Wash or clean the cover if appropriate and check the seams for weakness. Plan beadwork along the outer edge, flange, or a decorative border rather than the centre where someone may lean their head or back directly onto the beads.
2. Mark spacing before sewing. Lay the cover flat and mark a simple repeat along the chosen edge. Mix bead sizes carefully so very heavy beads are not concentrated in one corner. If the fabric is soft, place a narrow backing strip inside the seam area to support repeated stitches.
3. Sew beads with secure individual or small-group stitches. Use strong thread and anchor each bead or short cluster so one broken thread path cannot release the entire border. Keep knots on the inside of the cover and avoid pulling so tightly that the edge puckers. Then continue around the border in manageable sections.
4. Insert the cushion and check the finished edge. Put the cushion insert back in and squeeze, turn, and lightly use the pillow as it would normally be handled. Feel around the beaded border for hard knots or loose pieces. Reinforce anything that shifts and keep the finished cushion away from young children or pets if small beads could detach.
The soft centre is what makes this version work for me. The beadwork frames the cushion without trying to turn every square centimetre into decoration, and the pillow still reads as a textile object first.
Variation: Bead only the four corners, attach a removable beaded trim to a zipper-free edge, or use lightweight wooden beads on a rustic decorative cushion for less weight.
Beaded Table Runner
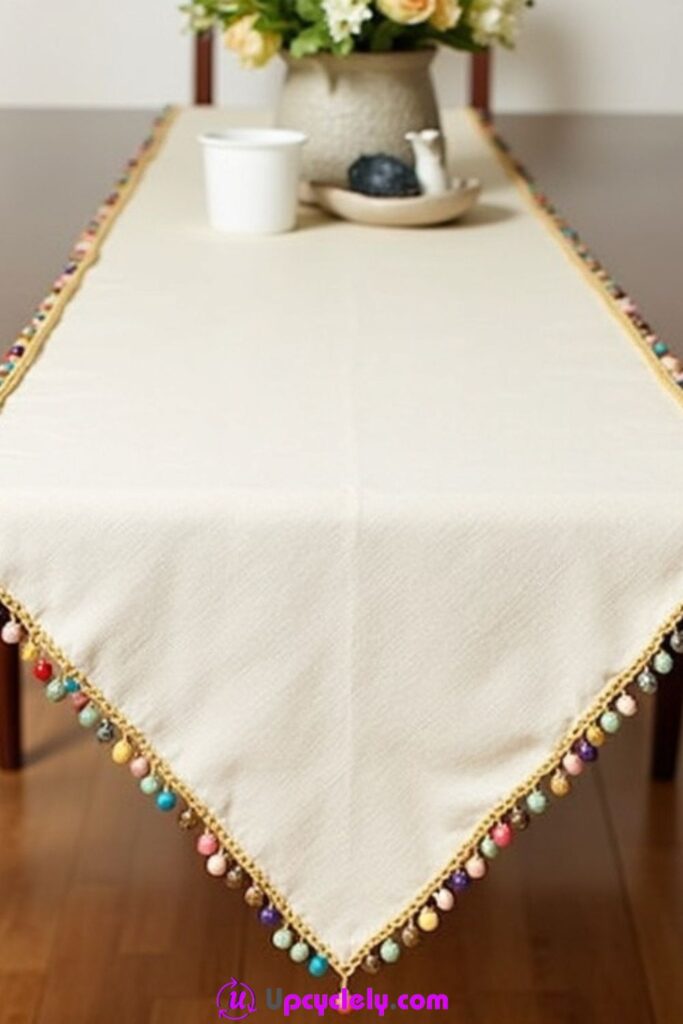
A beaded border can refresh a plain table runner while leaving the useful centre clear for plates, serving pieces, and flowers. The example uses small colourful beads around the edge, so the decoration appears mainly where the fabric hangs over the table rather than where objects need to sit flat.
That placement is practical. I would avoid raised beads across the centre because dishes can wobble and spills become harder to clean. A secure hem and washable construction are more important here than creating an extremely dense fringe.
Materials and Tools
· Plain or older fabric table runner in good condition
· Small smooth beads or lightweight bead drops
· Strong sewing thread
· Hand-sewing needle suited to both fabric and bead holes
· Pins or removable fabric marker
· Ruler or measuring tape
· Optional narrow trim or reinforced hem tape
Steps for This Bead Craft
1. Check the runner hem and table fit. Wash the runner first if the fabric allows it, then inspect all four edges. Repair frayed hems before adding any bead weight. Place it on the table and note which parts hang freely so you can keep the main serving surface unobstructed.
2. Mark a simple edge repeat. Decide whether the beads will sit directly on the hem or hang as tiny drops. Mark even intervals with pins or a washable marker. Mixed colours can still look consistent when the spacing repeats, so there is no need to force identical bead sequences on every side.
3. Sew the border in short reinforced sections. Anchor the thread securely inside the hem and attach each bead or small group with strong stitches. Avoid running one very long thread through the entire edge because a break could release too much work. Then knot and restart at sensible intervals.
4. Lay the runner flat and test it with tableware. Return the runner to the table, smooth it flat, and place a few empty dishes or serving pieces in the centre. Check that the bead trim does not creep under the tableware or pull the corners downward unevenly. Reinforce the busiest edges before regular use.
The centre of a table runner earns its keep by staying flat. I’d let the beads live on the edges where they can be seen without competing with cups, plates, and everything else that has to sit safely on the table.
Variation: Add bead drops only to the two short ends, combine a simple crochet edge with occasional beads, or turn an old narrow scarf into a runner and decorate only the hanging tips.
Bead-Embellished Picture Frame
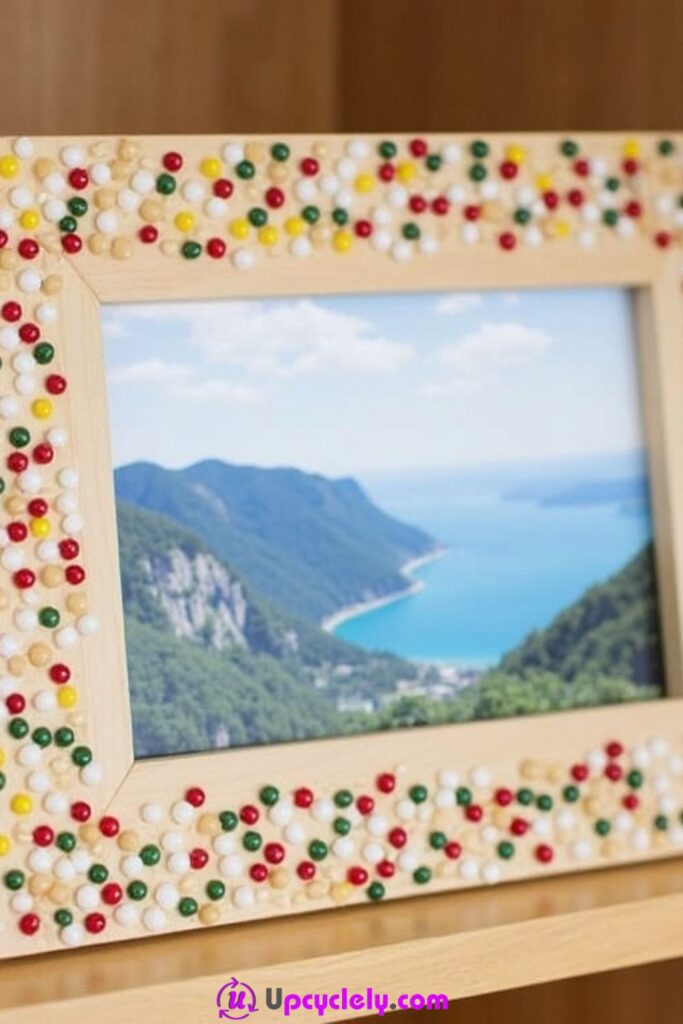
An old wooden frame is one of the easiest rigid surfaces for leftover beads because the border already gives you a contained area to decorate. The scattered red, green, yellow, and pale beads leave some wood visible, which keeps the design lighter than a completely covered mosaic and makes odd quantities easier to use.
The inner opening and back mechanism need to stay clear. Glue or beads that creep into the glass recess can stop the photo sitting flat, while thick decoration near clips or stands can interfere with the frame closing. I would plan the beadwork only on the front face and protect every moving part first.
Materials and Tools
· Existing wooden or rigid picture frame
· Assorted small smooth beads
· Adhesive suitable for the frame and bead materials
· Soft cloth
· Fine sandpaper only if the wooden surface genuinely needs smoothing
· Tweezers or toothpick for placement
· Scrap card for testing adhesive and layout
Steps for This Bead Craft
1. Remove the photo and prepare the frame. Take out the glass, backing, and photograph so none of them are exposed to dust or adhesive. Wipe the frame clean. If bare wood is rough, smooth only the necessary areas lightly and remove all sanding dust before planning the design.
2. Arrange the beads with some open space. Place small groups and single beads around the front border without glue first. Use the frame corners as visual anchors and distribute the strongest colours so they do not all collect on one side. Keep the inner edge clean so beads do not overlap the photograph opening.
3. Glue in small sections and control squeeze-out. Apply a small amount of suitable adhesive to one area at a time and position beads with tweezers or a toothpick. Press gently and clean obvious excess before it hardens, following the product directions. Continue around the frame while maintaining access to the back clips, stand, or hanging hardware.
4. Reassemble only when everything is secure. Once the beadwork is fully stable, inspect the frame for loose pieces and adhesive ridges. Replace the glass, photo, and backing, then set the frame upright or hang it in its normal position. If any bead interferes with the frame sitting level, remove or reposition it before display.
Scattered bead placement suits a frame because the photograph should still be the main focus. For me, leaving some wood visible makes the leftovers feel deliberate instead of making the border look like it was filled simply because space remained.
Variation: Create a colour gradient around one corner, use only pearl-like beads for a quieter frame, or decorate a small section of the border with beads from a piece of sentimental broken jewellery.
Bead Craft Decisions That Often Lead to Loose Pieces, Scratches, or Awkward Weight
Choosing the Pattern Before Sorting the Beads
A design can fail simply because the selected beads do not behave alike. Sort by weight, size, hole condition, and surface smoothness first, then build the colour plan from the beads that are actually suitable for the job.
Using One Adhesive for Every Surface
Wood, glazed pottery, fabric, coated notebook covers, plastic, and metal do not all bond in the same way. Test the adhesive on a small hidden or scrap area and follow its own instructions instead of assuming a familiar craft glue will work everywhere.
Pulling Thread or Wire Too Tight
Tightness can feel like security, but too much tension can curl a coaster, pucker fabric, crack a bead hole, or make jewellery stiff. Aim for firm connections that still let the base material sit or move as intended.
Leaving Cut Wire Ends Exposed
A tiny wire point can scratch skin, snag hair, or damage fabric. Trim with the correct tool, tuck ends into protected positions, and run a fingertip around the back and sides of jewellery before wearing it.
Adding Heavy Beads to Flexible or Delicate Bases
Large glass or stone beads can overwhelm a phone loop, soft pillow edge, thin curtain, or delicate hair clip. Use lighter substitutes, reduce the number of beads, or move heavier pieces to rigid projects such as frames, pots, or keychains.
Crowding Hinges, Spines, Closures, and Moving Parts
Beads near a notebook spine, bag zipper, hair-clip hinge, phone port, or frame backing may look harmless while the object is flat. Test the object through its full movement before attachment and keep a clear working zone around every functional part.
Ignoring Moisture and Cleaning
A beaded plant pot, cushion cover, or table runner still needs to survive ordinary care. Choose removable decoration when possible, keep rust-prone findings away from repeated moisture, and let the least washable added material set the cleaning method.
Skipping a Final Pull and Comfort Test
Loose jump rings, weak knots, rough beads, and heavy clusters are easier to correct before the last tails are trimmed. Give jewellery and charms a controlled tug, move fabric items naturally, and test rigid projects in their final position before regular use.
Frequently Asked Questions
Can I reuse beads from broken jewellery?
Yes, as long as the beads themselves are sound. Remove old thread, wire, and adhesive, then check for chips, sharp edges, and damaged holes before sorting them into a new project. Clasps, spacers, and jump rings can also be reused when they still close securely and show no serious wear.
What type of thread or wire should I use for bead crafts?
There is no single material that suits every bead project. Strong sewing or beading thread works well for fabric and some soft projects, while jewellery wire, head pins, and jump rings are better for charms and structured accessories. Match the connection to the bead weight and the way the finished object will move.
Can I glue beads instead of sewing or wiring them?
Glue can be useful on rigid surfaces such as some frames or notebook covers, provided the adhesive is compatible with both materials. I would not treat glue as an automatic replacement for stitching or metal connections on items that flex, carry weight, rub against skin, or are handled constantly.
How do I stop a bead project from becoming too heavy?
Use fewer large beads, replace some glass or stone pieces with lighter alternatives, and spread weight across a stronger base. If the object bends, sags, or feels uncomfortable during a test, removing bead weight is usually better than adding more reinforcement to compensate.
How can I make bead crafts safer around children and pets?
Keep loose beads, wire offcuts, strong adhesives, magnets, and small jewellery findings out of reach while working. Finished items with detachable small parts are not suitable as toys, and decorative magnets or beaded soft furnishings should be placed where young children or pets cannot pull pieces free.
Can beaded fabric items be washed?
Sometimes, but the cleaning method depends on the beads, thread, backing, and any adhesive or metal findings you added. A removable cover or detachable trim makes care easier. When in doubt, use the gentlest method compatible with every material and inspect the beadwork after cleaning.
How do I make mixed leftover beads look intentional?
Give the collection one organising rule. You might repeat a colour every few beads, group similar sizes, create separate colour blocks, or reserve the oddest beads as focal accents. The arrangement does not need to be perfectly symmetrical, but a repeated spacing or shape usually helps the mix feel planned.
Let Leftover Beads Decide the Scale of the Next Project
The most useful bead crafts begin with the beads you already have rather than with a shopping list for a perfectly matched new set. A handful of tiny beads may be enough for a phone charm or hair pin, while a larger mixed collection can become coasters, curtain tiebacks, necklaces, or a beaded border on a table runner. I like letting the quantity and weight of the materials set the size of the idea.
These 18 bead crafts also show why the hidden construction matters as much as the visible colour. Secure loops, suitable thread, smooth wire ends, sensible adhesive, flat backing, and realistic weight are what turn leftover beads into objects you can actually use. Then the mismatched colours become a strength instead of something you have to disguise.
If you have an old jewellery box or craft container full of single beads, start by sorting one small tray rather than planning the biggest project first. Which group already looks as though it belongs together? That is usually the easiest place to begin.