Tissue paper is easy to overlook because it is so light and inexpensive, yet those same qualities make it one of the most forgiving craft materials to keep in a drawer. A slightly crumpled sheet that no longer looks neat enough for gift wrapping can still become petals, leaves, butterflies, bunting, collage texture, or a glowing layer on a lantern. I don’t think tissue paper needs to be pristine to be useful. In many projects, wrinkles and torn edges actually make the finished piece feel softer and more handmade.
I’m especially drawn to crafts that use simple materials without making the process feel fussy. Tissue paper suits that approach well because you can fold it, tear it, layer it, crumple it, or let its colour transfer onto another surface. The main challenge is not cost or equipment; it is learning to handle thin paper gently and knowing when to stop adding more layers.
The twelve craft ideas here keep the same practical themes that already work well for this topic: cards, hanging decorations, butterflies, collage pieces, party details, lanterns, pom-poms, a seasonal tree, and translucent window art. Each project can be adjusted for the colours and scraps you already have, so there is no need to buy a new pack of tissue paper for every idea.
Sort Tissue Paper by Condition and Colour
Before cutting anything, I like to separate tissue paper into a few useful groups. Large uncreased sheets are helpful for folded projects such as pom-poms and bunting, while smaller wrinkled scraps are ideal for collage, cards, leaves, and layered decorations. This simple sorting step also stops you from cutting into a good sheet when a scrap would have worked just as well.
· Keep large sheets flat for pom-poms, lantern decoration, bunting, and balloon-style hanging pieces.
· Save medium scraps for butterflies, cards, cupcake toppers, and suncatchers.
· Use tiny torn pieces for collage art, tree leaves, stamped colour effects, and flower centres.
· Group similar shades together if you want a calm palette, or mix contrasting colours for children’s crafts and party decorations.
· Set aside tissue paper that bleeds colour easily for stamped-card projects, where colour transfer is useful rather than a problem.
· Discard pieces that are oily, damp, mouldy, or contaminated with food residue rather than trying to craft with them.
Gather Simple Tools Before You Begin
Most tissue paper crafts need very little equipment, but having the basics close by makes delicate paper much easier to handle. I know it can feel tempting to start folding or gluing immediately, especially with a quick children’s project, but tissue tears most often when you are reaching for scissors, tape, or glue with one hand while trying to hold the project together with the other.
· Use sharp scissors for clean edges and keep a separate pair for paper if possible.
· Choose a glue stick for dry, controlled attachment and a thin liquid glue or decoupage medium only when the project needs it.
· Keep clear tape, double-sided tape, or glue dots nearby for lightweight wall and hanging decorations.
· Use a soft paintbrush for colour-transfer cards, collage sealing, and lantern projects.
· Protect the table with scrap paper, wax paper, or a washable mat when working with damp tissue or wet adhesive.
· Prepare string, twine, wire, toothpicks, cardstock, or contact paper before folding so you can assemble the project without rushing.
Handle Thin Paper Without Making It Frustrating
Tissue paper looks delicate because it is delicate, so the goal is not to make it behave like cardstock. Let it remain light. A small tear can often disappear inside a layered flower or collage, while a slightly uneven fold can make a butterfly or pom-pom look more natural. For me, the project gets easier as soon as I stop expecting every edge to behave perfectly.
· Lift tissue paper from underneath rather than pinching one corner and pulling.
· Apply glue to the stronger base material whenever possible instead of spreading wet glue directly across tissue paper.
· Use light pressure when smoothing; heavy rubbing can stretch or shred wet tissue.
· Fold several sheets together only when your scissors can cut the stack cleanly.
· For children, prepare smaller pieces in advance so the activity focuses on arranging and making rather than difficult precision cutting.
· Let glued sections settle before adding another layer, especially on lanterns, collage art, and cards.
Plan Colour and Scale Before Cutting Your Best Sheets
Tissue paper can change character very quickly depending on how much of one colour you use. A tiny bright red flower on a card feels cheerful, while a wall filled with the same red can become visually heavy. Before cutting large sheets, decide whether the project needs one strong colour, a small coordinated palette, or a deliberately mixed look.
I often find that two main colours plus one lighter or darker accent are enough for cards, butterflies, bunting, and lanterns. Collage and suncatcher projects can handle a broader mix because overlapping pieces naturally connect the colours.
Scale matters just as much. Small tissue pieces are easier to control on cards and toppers, but they can disappear on a large wall display. Large folded pieces create impact in pom-poms and hanging decorations, yet they need more careful handling because the centre has to support a wider span of paper. If you are unsure, make one test piece first. It is much better to discover that a butterfly is too large or a bunting flag is too narrow before cutting a whole stack.
I also like to keep the first successful piece nearby as a loose reference rather than measuring every new one. Handmade tissue crafts usually look better with small differences, and a reference gives you consistency without turning the project into a precision exercise.
For repeated decorations, compare the pieces as you go, then adjust the next cut if the group is drifting noticeably larger or smaller. That approach keeps the set related while still allowing the paper to behave naturally.
Tissue Paper Cards
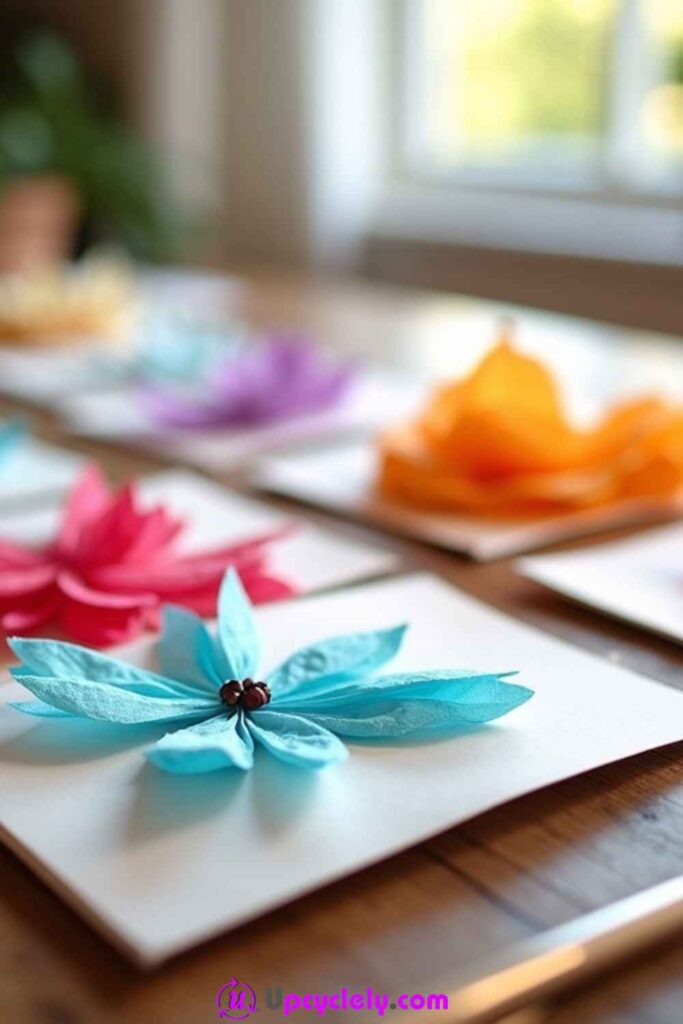
Tissue paper flowers work particularly well on handmade cards because the thin layers create volume without making the card too heavy. A small cluster can turn plain cardstock into a birthday card, thank-you note, spring greeting, or a simple note for someone who appreciates handmade details. The petals do not need to look botanical; what matters is the soft layered shape and the contrast against the firmer card base.
I would keep the card itself fairly simple. White, cream, kraft, or one quiet colour gives the tissue flowers enough space to stand out. If you use several bright tissue shades, leave some blank area around the arrangement so the front does not become visually crowded. A handwritten stem, leaf, or short message can connect the flowers without competing with their texture.
Materials and Tools
· Tissue paper scraps in two or more colours
· Blank cards or folded cardstock
· Sharp scissors
· Glue stick or small amount of craft glue
· Pen or fine marker
· Optional small beads, paper dots, or sequins for flower centres
Steps
1. Prepare the flower pieces before touching the card. Cut several circles, loose petal shapes, or small squares in gradually changing sizes, then stack a few layers for each flower. Gently pinch or crumple the layers so they lift away from one another rather than sitting completely flat.
2. Lay the card open on a clean surface and test the flower arrangement without glue. Try one main flower with two smaller ones, or build a small bouquet in one corner. Then step back for a moment; the arrangement usually looks better when the flowers have a little breathing room instead of covering the whole card.
3. Attach the flowers by placing glue on the cardstock rather than brushing it across the tissue. Press only at the centre of each flower so the outer layers remain loose. If you want a bead or paper centre, add it after the flower is secure so you are not trying to hold several slippery pieces at once.
4. Finish with a simple drawn stem, leaf, or message once the glue is stable. Keep the line work light because the tissue texture is already doing most of the decorative work. If the card needs to fit in an envelope, press the flowers gently before inserting it and let the recipient fluff them again after opening.
One detail I wouldn’t skip is testing the layout first. A flower that looks small in your hand can suddenly dominate the whole card once it is placed on the front.
Variation to Try
For a flatter version, tear tiny tissue pieces and arrange them as mosaic petals instead of building raised flowers. This is easier for mailing and works well for children who prefer gluing to precise cutting.
Tissue Paper Balloon Decorations
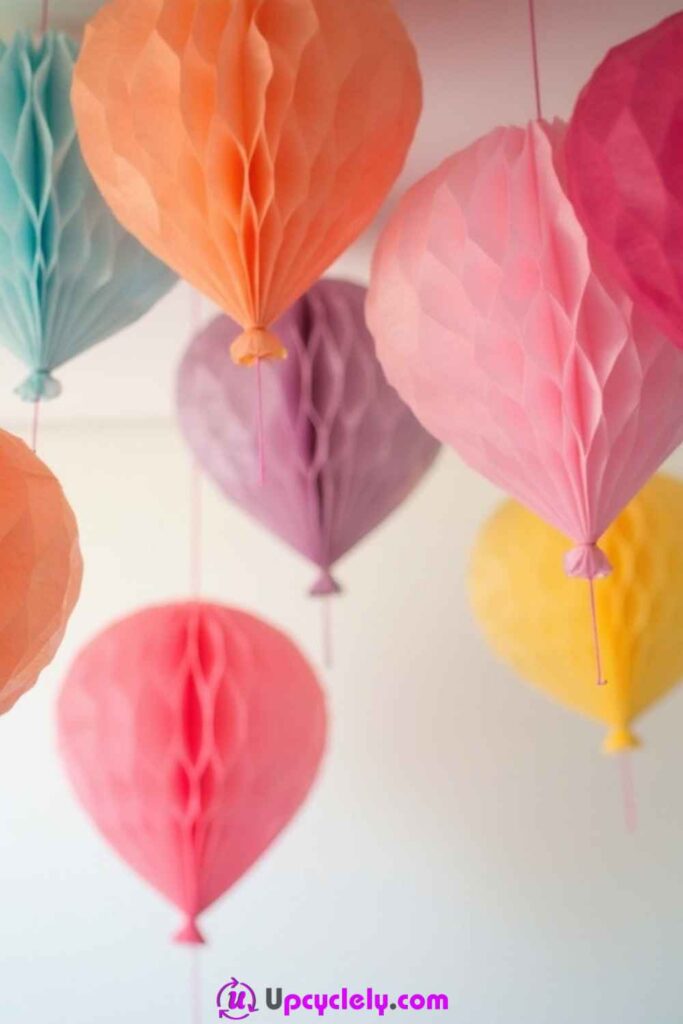
Honeycomb tissue decorations already have the rounded volume of a balloon, so turning them into a hot-air-balloon-style display is mainly about proportion and hanging. The pleated texture catches light nicely, and several pieces at different heights can fill an empty corner without needing bulky decorations. This is a useful party craft because the display looks substantial even though the materials remain lightweight.
The best results come from treating the balloon shape as the focal point and keeping the extra details modest. A thin string, a simple paper basket, or a few ribbon tails are enough to suggest the theme. I don’t think every balloon needs a different decoration; repeating the same treatment across several colours usually looks more intentional.
Materials and Tools
· Honeycomb tissue paper balls or lantern-style tissue decorations
· String, thin cord, or ribbon
· Clear tape or lightweight glue
· Scissors
· Optional small cardstock baskets or paper shapes
· Ceiling-safe removable hooks or another suitable hanging point
Steps
1. Open each honeycomb decoration carefully and secure its tabs according to the way it is designed to close. Check that the shape is even before adding anything else. If one side looks compressed, gently loosen the paper cells instead of pulling hard on the outer edge.
2. Cut the hanging strings in several different lengths and attach them securely to the top of the decorations. If you are adding a small paper basket, keep it very light and suspend it beneath the tissue ball with two thin strings. A heavy basket will pull the decoration out of shape.
3. Arrange the balloons on the floor first to decide which colours should sit next to one another. Then hang them at staggered heights, leaving enough space for each round form to be visible. A cluster usually looks more convincing when the largest or darkest balloon sits slightly lower and the smaller pieces appear to float around it.
4. Check the display from the main viewing direction and shorten any string that makes a balloon disappear behind another one. Keep the decorations away from open flames, hot light fittings, and places where people will brush against them. Lightweight does not mean indestructible; tissue can crush quickly in a busy walkway.
For me, hanging height matters more than adding extra embellishments. Once the balloons sit at varied levels, the display already has movement and interest.
Variation to Try
If you do not have honeycomb balls, use lightweight paper lanterns and decorate them with tissue strips or patches. The silhouette will be slightly different, but the same clustered hanging idea still works.
Tissue Paper Bunting

Bunting is one of the easiest ways to use leftover tissue paper because a long string can be built from many small pieces rather than one perfect sheet. Triangles are the obvious shape, but rectangles, fishtail flags, circles, and narrow tassel-like strips all work. Tissue bunting is best indoors or in a sheltered space because its charm comes from being light and slightly fluttery, not from being weatherproof.
I like this project for using mixed colours that might not suit a more formal craft. A few repeated shades help connect the flags, even when the pieces come from different packs. If the tissue is thin, doubling each flag over the string makes the top edge stronger and hides the attachment at the same time.
Materials and Tools
· Tissue paper sheets and scraps
· String, twine, or narrow ribbon
· Scissors
· Ruler or simple paper template
· Glue stick, clear tape, or double-sided tape
· Optional hole punch for reinforced paper tabs rather than tissue itself
Steps
1. Choose one flag shape and make a simple template from scrap card. Stack only a few tissue layers at a time, trace the shape lightly if needed, and cut through the stack with sharp scissors. Do not force a thick pile through dull scissors because the edges will drag and tear.
2. Lay the string across a table and place the flags underneath it before attaching anything. Adjust the spacing until the rhythm feels even. If you are making bunting for a doorway or table front, leave a generous length of bare string at both ends for tying.
3. Fold the top of each tissue flag over the string and secure the fold with a glue stick or a narrow strip of tape on the back. This is gentler than punching holes directly through thin tissue. Work from the centre outward so you can keep the spacing balanced without having to slide finished flags along the string.
4. Hang the bunting loosely rather than pulling the string completely tight. A shallow curve helps the tissue flags sit naturally and reduces strain on the top folds. If one flag twists, a tiny piece of removable tape on the back can keep it facing forward.
The edges don’t need to line up perfectly. A little variation actually makes tissue bunting feel relaxed, especially when it is used for birthdays, playrooms, or casual seasonal decorating.
Variation to Try
For longer-lasting bunting, glue tissue shapes onto recycled paper or lightweight card first, then attach those reinforced flags to the string. You keep the colour of tissue paper while gaining a stronger edge.
Tissue Paper Butterflies
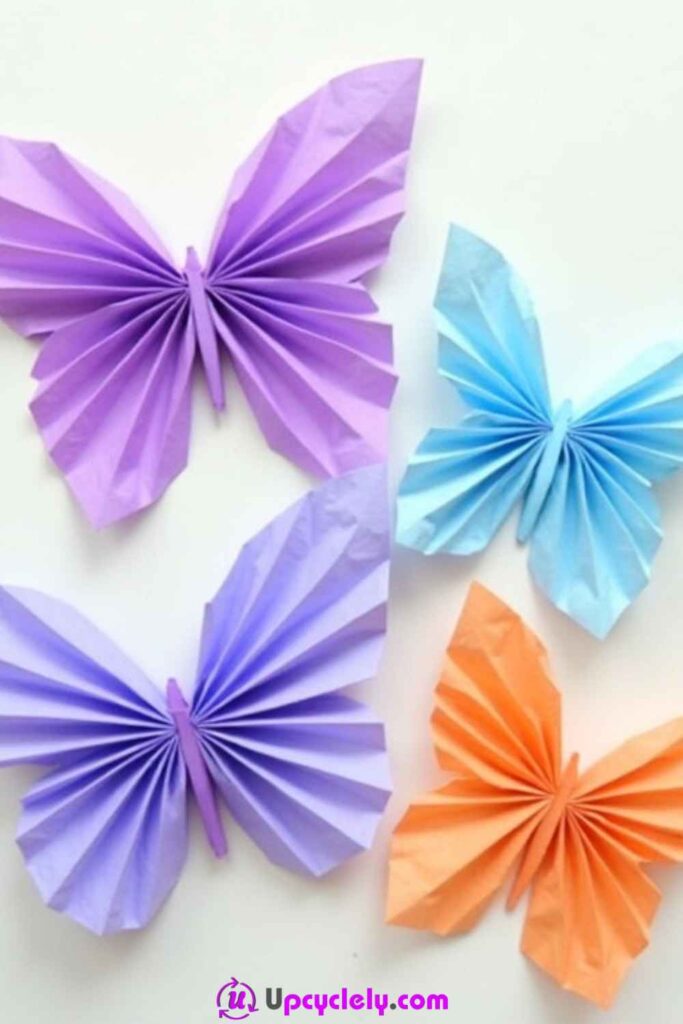
A tissue paper butterfly works because accordion folds turn a flat rectangle into a set of soft ridges that already resemble wings. Once the middle is pinched or tied, the paper can open on both sides with very little cutting. This is a nice craft for mixed scraps because layering two colours together creates more depth without adding any complicated drawing or painting.
Butterflies can be used on gift wrap, classroom displays, seasonal branches, cards, party tables, or wall art. Smaller ones need less shaping and are easier for beginners. Larger ones can look impressive, but the centre must be secured well enough to stop the folds opening completely.
Materials and Tools
· Rectangles of tissue paper
· Scissors
· Thin craft wire, twist ties, or pipe cleaners
· Optional thread or clear line for hanging
· Optional small paper body shape or bead
Steps
1. Stack one or two tissue rectangles and align the edges loosely; they do not need to be exact. Accordion-fold the stack from one short side to the other using narrow, even pleats. Press each fold lightly with your fingers instead of sharply creasing it with a tool, because soft folds make the wings easier to open later.
2. Pinch the folded strip at its midpoint and secure it with a short piece of thin wire or a twist tie. If the wire will also form antennae, leave the ends long enough to curl upward. Tighten the centre just enough to hold the folds; overly tight wire can cut into the tissue.
3. Round, point, or gently scallop the outer ends with scissors while the tissue remains folded. Then open the two sides and separate the layers carefully, lifting from the centre outward. If a layer tears near the middle, tuck that area under another layer rather than trying to glue a wet patch onto fragile paper.
4. Shape the wings with your fingertips and curl the wire ends into antennae if desired. Add a hanging thread or attach the butterfly to a surface with a small glue dot. Keep the centre attachment light so the wings remain the visual focus.
I know it can feel tempting to keep fluffing the wings until they look perfectly even, but tissue becomes weaker with repeated handling. Stop once the butterfly has a balanced silhouette; tiny differences between the two wings are completely fine.
Variation to Try
Layer a darker tissue sheet over a lighter one before folding. When the wings are separated, the two shades create a simple two-tone butterfly without paint or markers.
Tissue Paper Butterfly Wall Art
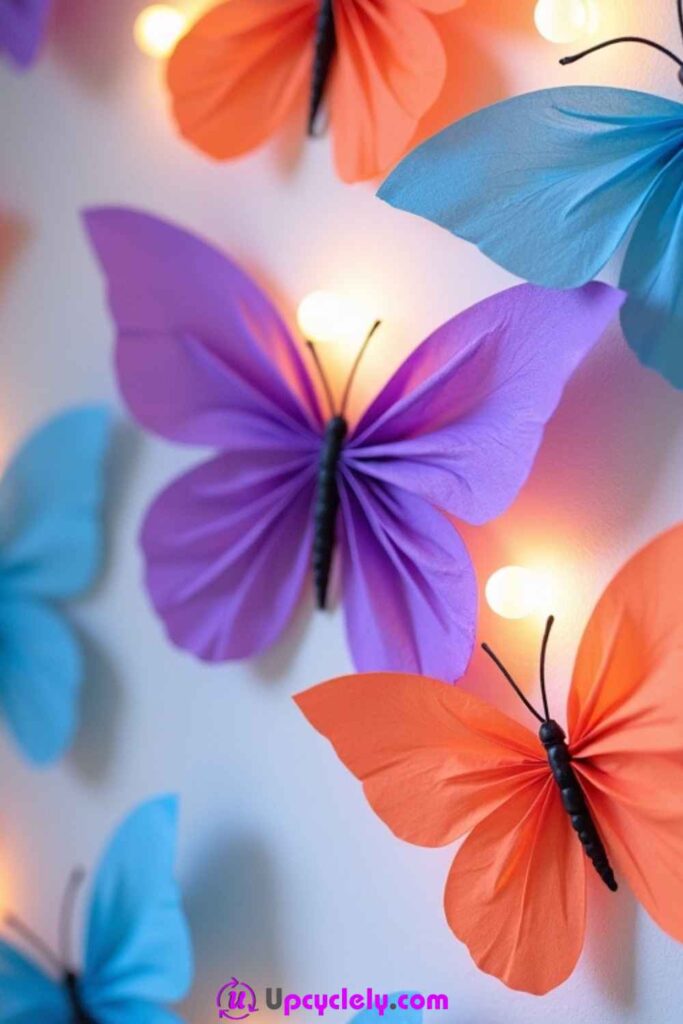
Butterfly wall art takes the same folded shapes and uses repetition to create movement across a larger surface. The wall itself becomes part of the composition, so you do not need to fill every gap. In fact, the empty space between the butterflies is what makes a sweeping arrangement feel as though it is moving rather than simply forming a dense cluster.
This idea works well above a desk, bed, reading corner, party table, or on a large removable board. The butterflies can stay within one colour family or move gradually from pale to dark. A few sizes are enough; too many different shapes can make the display feel busy.
Materials and Tools
· Several tissue paper butterflies in mixed sizes
· Removable glue dots or wall-safe double-sided tape
· Large sheet of poster board or foam board if you want a movable display
· Optional LED string lights
· Painter’s tape for temporary layout marks
Steps
1. Make the butterflies first and sort them by size and colour. Place the largest pieces in one group and the smallest in another so you can see what you have before planning the wall. If you are using a board, lay it flat on the floor; if you are working directly on a wall, mark the rough start and finish points with small pieces of painter’s tape.
2. Arrange the butterflies without attaching them permanently. Build a loose path that narrows or widens gradually, and angle some wings upward while others sit more level. Then stand several steps back. The overall movement matters more than the exact position of any one butterfly.
3. Attach each butterfly with a small amount of removable adhesive at the centre. Avoid pressing tape across the wings because they should remain lifted from the surface. Work from the largest anchor pieces toward the smaller butterflies so the composition keeps its original flow.
4. If you are adding LED string lights, place them after the butterflies rather than weaving them through fragile wings. Keep the lights loose around the outer edges of the display and use only cool-running LED lights. The butterflies should still look complete when the lights are switched off.
For me, the layout matters more than perfect matching. A display with slightly different wing shapes can feel much more natural than rows of identical butterflies.
Variation to Try
Renters or anyone who likes changing décor can build the entire arrangement on poster board, recycled cardboard, or a lightweight framed backing. You can then move the piece without attaching dozens of individual shapes to the wall.
Tissue Paper Stamped Cards
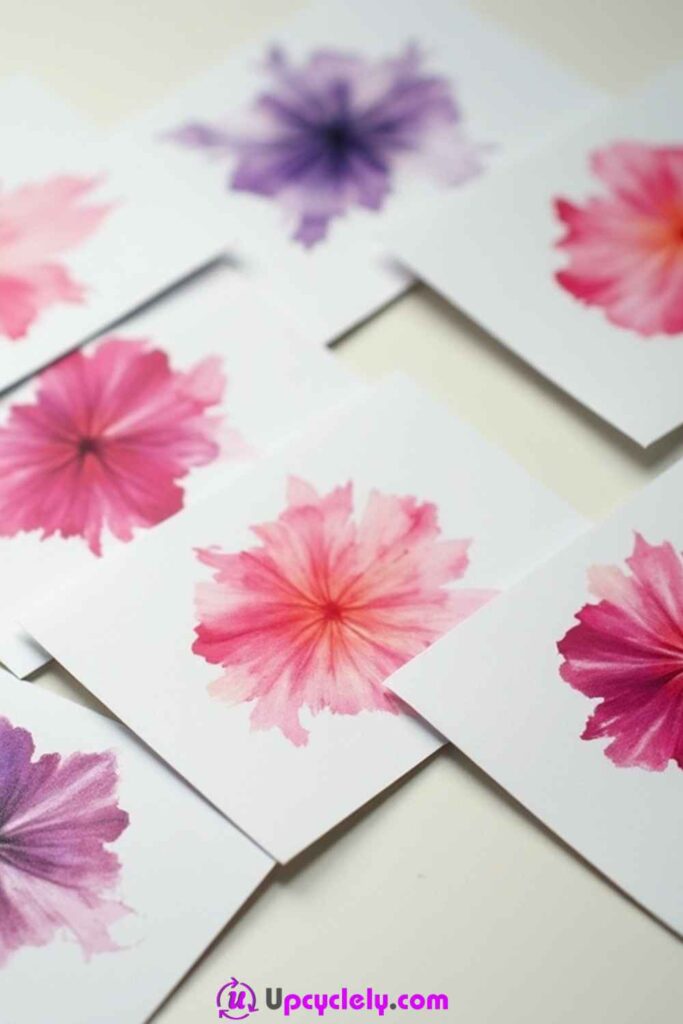
Some coloured tissue paper releases dye when it becomes damp, and that behaviour can be used deliberately to create soft printed shapes on cardstock. Rather than gluing the tissue permanently, you briefly wet it so the colour transfers, then peel the tissue away after the paper has taken on the stain. The result can look more like loose watercolour than a conventional paper collage.
Because not every tissue paper is colourfast in the same way, I would always test a small scrap first. This is one of those projects where unpredictability can be part of the appeal, but it is still useful to know whether your red tissue leaves a pink stain, a bright red one, or almost no colour at all.
Materials and Tools
· Coloured tissue paper that releases some dye when damp
· White or pale cardstock
· Scissors
· Small paintbrush
· Clean water
· Wax paper or washable protective mat
· Paper towel or clean cloth
Steps
1. Protect the work surface and test one small tissue scrap on an offcut of cardstock. Brush a little water over the tissue, leave it briefly, and then lift it. If the colour transfers clearly, cut or tear the remaining tissue into petals, circles, leaves, or abstract shapes.
2. Arrange a few dry shapes on the card to plan the design, then remove them and work one section at a time. Place a tissue piece flat against the cardstock and touch a damp brush over the top. Use enough water to moisten the paper, not so much that puddles form around the edges.
3. Let the damp tissue sit until the colour begins to show through, then lift it carefully from one edge. Repeat with other shapes, overlapping some printed areas if you want mixed tones. Pause between layers when the cardstock becomes very damp so the base does not buckle or soften too much.
4. Allow the card to dry completely under light pressure if the paper has curled. Add a handwritten message, simple line drawing, or a few pen details only after the surface is dry. The transferred colour already has soft edges, so heavy outlining is usually unnecessary.
One detail I’d check carefully is the tissue dye itself. If the first test barely transfers, save that tissue for collage rather than soaking the card repeatedly and hoping the colour will suddenly appear.
Variation to Try
Instead of flowers, try overlapping squares, circles, or torn strips for an abstract card. A limited palette of two or three colours often gives the soft transfer effect a more thoughtful finish.
Tissue Paper Collage Art
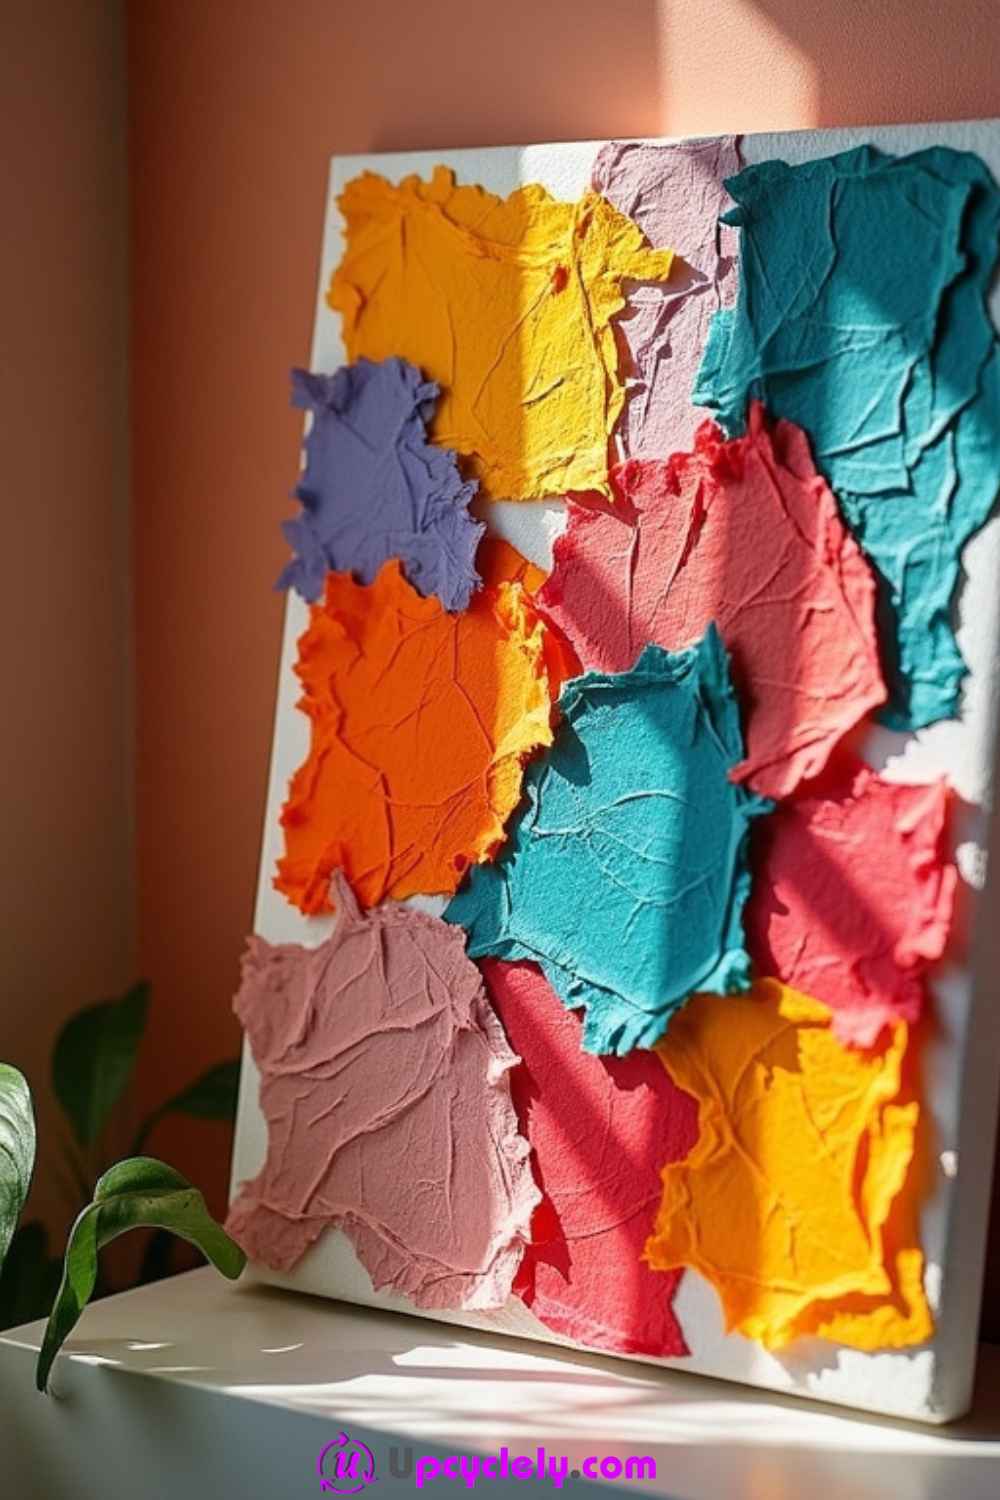
Collage is where the thinnest, most wrinkled tissue scraps become genuinely useful. Because tissue is translucent, overlapping two colours can create a third colour visually, and torn edges soften the joins between pieces. That makes it a good material for abstract pictures, simple landscapes, flowers, geometric designs, or completely free-form colour studies.
A sturdy base is important here. Tissue paper itself may be light, but repeated layers of wet adhesive can warp ordinary printer paper. Cardboard, thick poster board, a recycled box panel, or a small canvas gives the collage enough support to stay flat while you work.
Materials and Tools
· Tissue paper scraps
· Sturdy cardboard, poster board, canvas board, or another firm base
· Glue stick or decoupage-style adhesive
· Soft paintbrush if using liquid adhesive
· Scissors for selected clean shapes
· Scrap paper to protect the table
Steps
1. Choose the base and decide whether the collage will be planned or free-form. Tear a selection of tissue pieces in different sizes before gluing so you can concentrate on composition rather than stopping after every piece. Keep some straight-cut shapes if you want contrast against the softer torn edges.
2. Apply a thin layer of adhesive to a small section of the base, then place the first tissue pieces lightly on top. Smooth them with the brush or fingertip using minimal pressure. Wrinkles are not automatically a problem; in an abstract collage, they can add texture as long as they are not hiding large bubbles of wet glue.
3. Continue layering, allowing some pieces to overlap and others to leave the base visible. If colours become muddy, pause and place a lighter or neutral area nearby rather than stacking more saturated tissue on the same spot. This is where restraint often improves the design more than another layer.
4. Once the collage feels complete, let it dry flat. If you want a sealed surface, add a very thin top coat only after the first adhesive is dry and the base is still firm. Too much wet medium at once can soften tissue and turn crisp colour areas into a smeared surface.
I’d rather use several thin adhesive layers than one heavy coat. Tissue becomes almost transparent when saturated, and too much glue can erase the colour balance you worked to create.
Variation to Try
For a simpler child-friendly version, use a glue stick and dry tissue scraps on cereal-box cardboard. The surface will be less glossy, but cleanup is easier and the project still teaches layering and colour mixing.
Tissue Paper Cupcake Toppers

Tissue paper cupcake toppers are best treated as decorative picks rather than decorations that touch the frosting directly. A small layered shape attached to a wooden pick can add colour to a birthday table, shower, picnic, or classroom celebration without requiring elaborate cake decorating. Stars, hearts, small flowers, circles, and fringed fans all work well because the tissue stays light even when several layers are used.
The key is to keep the topper proportional. A huge tissue flower on a small cupcake will lean and may brush against other food. Small, neat shapes are easier to handle and look better as a repeated set across a tray.
Materials and Tools
· Tissue paper scraps
· Wooden cocktail picks or food-safe paper sticks
· Scissors
· Glue stick or small amount of craft glue
· Small cardstock circles for optional reinforcement
· Marker for non-food-contact decoration if desired
Steps
1. Fold or stack the tissue paper and cut pairs of matching shapes. If you want a fluffy topper, use several small layers; if you want a flatter topper, two matching shapes are enough. Keep the pieces compact so they remain stable once attached to the pick.
2. Place one tissue shape face down, add a very small amount of glue in the centre, and position the top end of the pick on it. Add the second matching shape over the top to sandwich the pick between the layers. Press gently around the centre without flattening the whole decoration.
3. If you are making layered flowers or fringed shapes, separate and fluff the outer tissue only after the glue is secure. Trim any uneven edges while holding the topper by the stick rather than pulling directly on the tissue. Repeat the same colour sequence across the set for a coordinated look.
4. Insert the topper into the cupcake only just before serving, keeping glued tissue and decorative materials above the food surface. Do not use wet paint, glitter that sheds, or non-food-safe coatings near the frosting. The decoration should be easy to remove before eating.
The part I would keep simple is the size. Small toppers repeat beautifully across a tray, while oversized tissue shapes tend to collapse or crowd one another.
Variation to Try
For a no-glue look near food, make a tiny accordion fan from tissue and tie it around the upper part of a paper stick with thread, keeping the attachment well above the cupcake.
Tissue Paper Lanterns
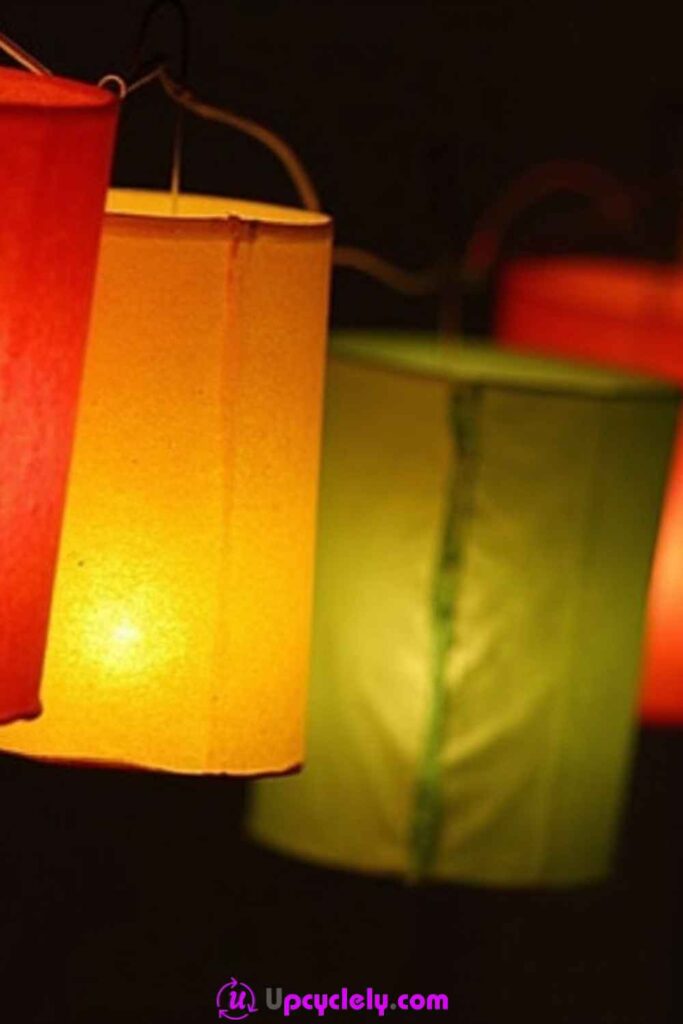
Plain paper lanterns become much more interesting when thin tissue shapes are layered over the surface. Because both materials are lightweight, the tissue can follow the curve without making the lantern look bulky. Leaf shapes, loose petals, torn patches, or simple colour bands all work, and overlapping translucent pieces creates depth once the lantern is illuminated.
Safety matters more than ornament here. Tissue paper is flammable, so these decorated lanterns should be used only with cool-running LED lights and kept away from candles, incandescent bulbs, and other heat sources. The decoration is meant to soften and colour the light, not sit near a flame.
Materials and Tools
· Plain paper lanterns
· Tissue paper in selected colours
· Scissors or torn tissue pieces
· Glue stick or thin decoupage-style adhesive
· Soft paintbrush
· Cool-running LED string lights or LED lantern inserts only
· String or suitable hanging hardware
Steps
1. Open the paper lantern carefully and make sure its frame is sitting evenly before decorating. Cut or tear the tissue shapes in advance and arrange a few on the unglued surface so you can judge scale. Larger pieces are easier to place on a curved lantern than dozens of tiny shapes.
2. Work on one small section at a time. Brush a thin layer of adhesive onto the lantern surface, lay the tissue over it, and smooth lightly with the brush. Do not soak the lantern because both the tissue and the paper shell can soften when too wet.
3. Continue around the lantern, overlapping some shapes to create darker areas while leaving other sections lighter. Rotate the lantern as you work instead of trying to reach around it. Then allow the decorated surface to dry fully in an open position so the layers do not stick together.
4. Add only LED lighting once the lantern is dry, and check that no tissue is hanging into the light source or frame. Hang the lantern from a secure point with enough space around it. If several lanterns are used together, vary the heights rather than packing them tightly into one cluster.
I don’t think a lantern needs complete tissue coverage. Leaving some of the original paper visible creates lighter spaces and usually makes the coloured layers look more deliberate.
Variation to Try
For a very simple version, add one band of torn tissue around the middle of a lantern instead of covering the whole surface. It uses fewer scraps and is easier for a first attempt.
Tissue Paper Pom-Poms
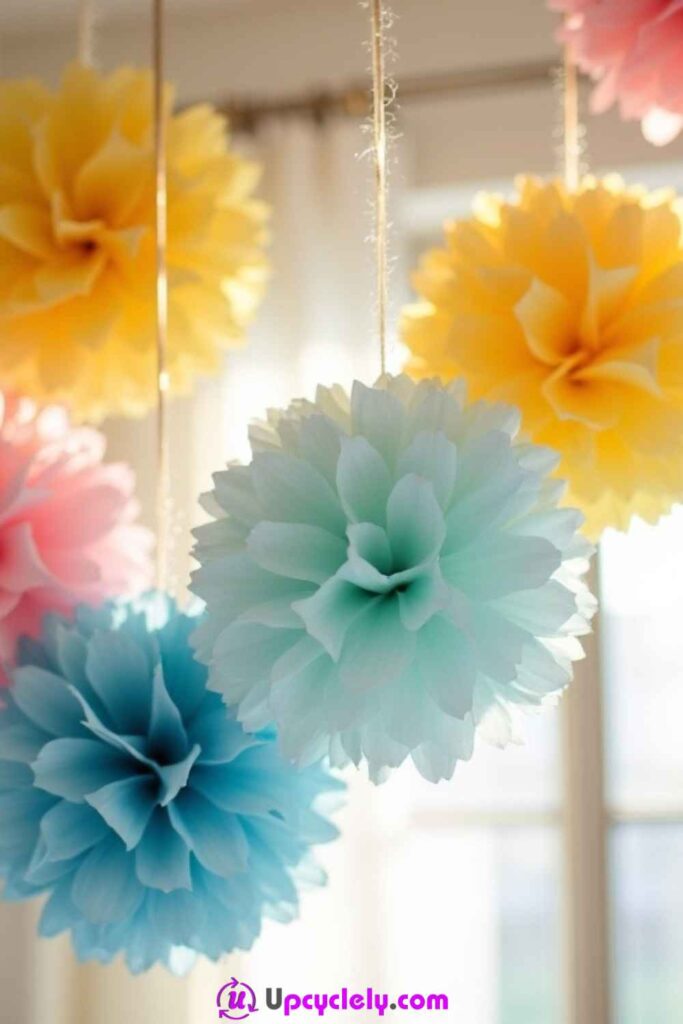
Pom-poms are one of the classic tissue paper crafts because a stack of flat sheets becomes a surprisingly full decoration through nothing more than accordion folds and careful fluffing. They work above party tables, in window displays, around photo backdrops, or as temporary room decoration. The method is simple, but neat folding at the beginning makes the final shaping much easier.
Large pom-poms need enough tissue layers to look full, while small ones can be made from leftover half-sheets. Mixing sizes is often more effective than making every piece identical. A cluster of three or five at different heights feels softer and more natural than a single oversized ball hanging on its own.
Materials and Tools
· Several sheets of tissue paper per pom-pom
· Scissors
· Thin wire, twist tie, or strong thread for the centre
· String or ribbon for hanging
· Ruler if you want consistent folds
Steps
1. Stack the tissue sheets and align them loosely. Accordion-fold the stack from one short edge to the other, keeping the pleats reasonably even. If the stack begins to drift, straighten the edges before making the next fold instead of trying to correct everything at the end.
2. Secure the centre of the folded strip with wire, thread, or a twist tie and attach the hanging string at the same point. Trim the two outer ends into rounded points, shallow curves, or sharper tips depending on the look you want. Cut through the folded stack slowly so the layers do not slide apart.
3. Fan out one half of the folded strip and begin lifting the tissue layers one at a time toward the centre. Alternate between the front and back rather than pulling all the layers to one side. Then repeat on the second half, rotating the pom-pom as it becomes fuller.
4. Shape the finished pom-pom with light touches, pulling only where a gap is obvious. Hang it and view it from below before making more changes; a decoration that looks uneven in your hands often appears completely balanced once suspended. Keep it away from flames and heat sources.
This is where patience matters more than buying another tool. Slow fluffing prevents tears, and one small rip usually disappears inside the finished layers anyway.
Variation to Try
Use two alternating tissue colours in the stack for a striped or two-tone pom-pom. For a softer gradient, place the darkest sheets in the centre of the stack and lighter shades toward the outside.
Tissue Paper Tree
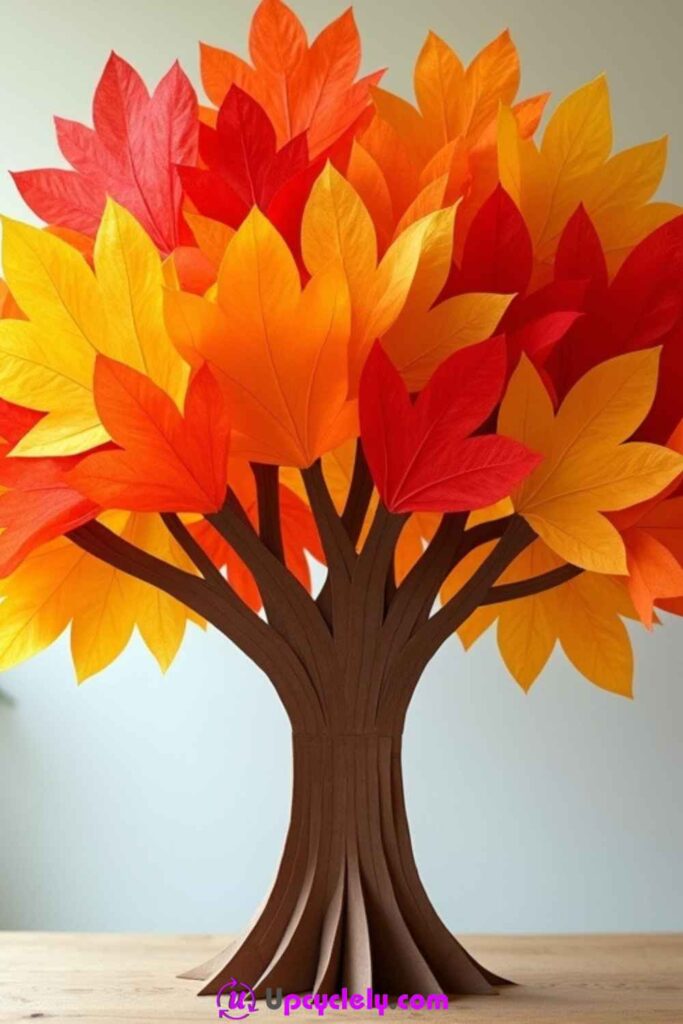
A tissue paper tree turns small torn scraps into clusters of leaves, which makes it especially useful for seasonal colours. Red, orange, yellow, and brown create an autumn display, while pink and white can suggest spring blossom and mixed greens suit a summer tree. The trunk provides the structure; the tissue only needs to supply texture and colour.
This project can be flat, like a collage on cardboard, or slightly three-dimensional with a freestanding trunk and crumpled tissue leaves. For most homes and classrooms, I would choose a sturdy cardboard base because it is easier to store, display, and repair than a delicate branch structure.
Materials and Tools
· Sturdy recycled cardboard or cardstock
· Brown paper, paint, or marker for the trunk if needed
· Tissue paper scraps in seasonal colours
· Scissors
· Glue stick or craft glue
· Optional extra cardboard strip for a standing base
Steps
1. Sketch a simple trunk and branch shape on sturdy cardboard and cut it out, or draw the tree directly onto a flat base if you prefer a collage. Keep the branches broad enough to hold tissue clusters. Very thin cardboard branches can bend once several glued leaves are added.
2. Tear the tissue into small irregular pieces and crumple each one loosely between your fingertips. Sort the colours into small piles so you can distribute them across the tree rather than accidentally using one shade in a single patch. The pieces do not need to resemble individual leaves.
3. Apply glue to short sections of the branches and press tissue clusters into place, beginning near the outer canopy and working inward. Overlap colours lightly and leave some gaps where the branch can still be seen. Then add a few loose pieces near the base if you want the effect of fallen leaves.
4. Let the tree dry flat or support it carefully if it is freestanding. Once dry, lift any tissue pieces that became completely flattened and reinforce loose clusters with a small amount of glue underneath. Avoid adding heavy decorations to the branches because the cardboard structure should remain easy to handle.
For me, torn pieces suit this tree better than perfectly cut leaves. The irregular edges blend together and make the canopy look fuller without hours of tiny cutting.
Variation to Try
Make a four-season set on separate recycled card panels: blossom pinks, summer greens, autumn warm tones, and mostly bare winter branches with a few white tissue pieces.
Tissue Paper Suncatchers
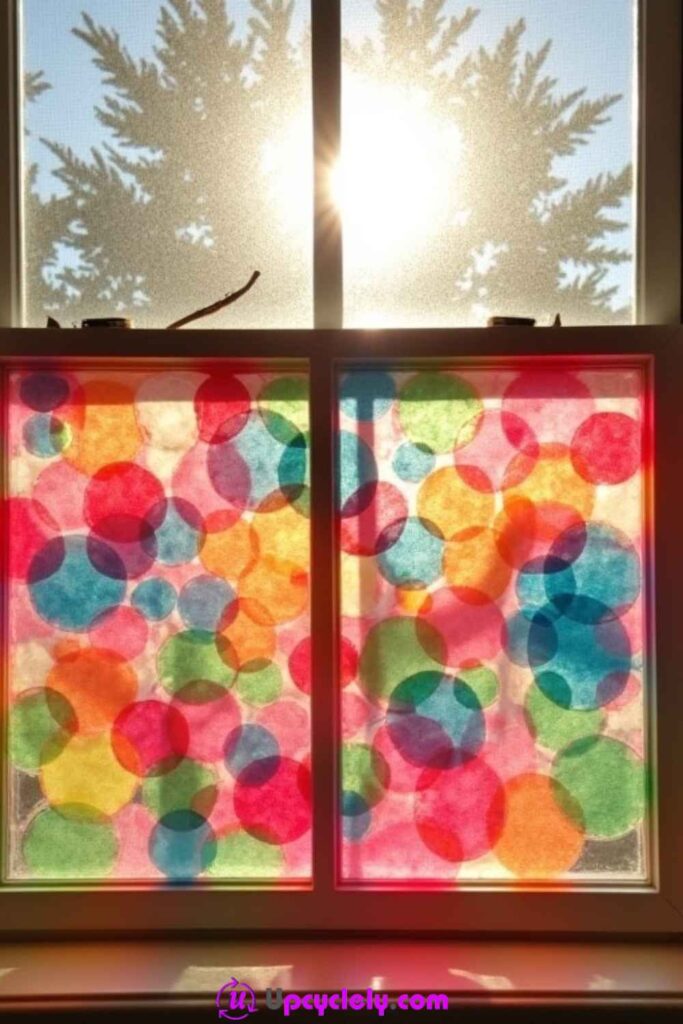
Tissue paper suncatchers make good use of transparency. When pieces overlap on a clear backing, the colours become deeper and new shades appear where two layers meet. The finished piece can be as simple as scattered circles or as planned as a flower, heart, star, leaf, or geometric pattern. Once placed in a bright window, the light becomes part of the craft.
Clear contact paper is helpful because children can arrange tissue directly onto the sticky surface without using wet glue. For a more structured result, you can add a paper frame around the outside after sealing the design. That frame gives the thin transparent panel a stronger edge and makes it easier to hang or tape to glass.
Materials and Tools
· Tissue paper in several colours
· Clear contact paper or another transparent self-adhesive sheet
· Scissors
· Tape for holding the backing steady
· Optional cardstock frame or stencil
· String or removable window tape for display
Steps
1. Cut or tear the tissue into circles, squares, strips, or another simple shape. Prepare more pieces than you think you need, because the design is easier to build when you can choose between sizes. If children are crafting, pre-cutting a bowl of shapes keeps the activity relaxed.
2. Place one sheet of clear contact paper sticky side up and tape the corners to the table so it does not curl. Arrange the tissue pieces on the sticky surface, overlapping some colours while leaving a little clear space between others. Press only lightly; heavy rubbing can wrinkle thin tissue against the adhesive.
3. When the design feels balanced, cover it with a second clear sheet to seal the tissue between the layers. Smooth from the centre outward to remove large air pockets, then trim the edges neatly. Add a cardstock border if you want the piece to feel more finished or if the clear sheet is very flexible.
4. Display the suncatcher in a bright window using removable tape or a simple hanging loop. Keep it away from condensation-heavy areas where moisture could get inside poorly sealed edges. If the colours look too dark in the window, the next version can use fewer overlapping layers.
The first arrangement rarely ends up being the final one, and that’s normal. Move the shapes around before sealing the second clear layer; once it is closed, the design is much harder to change.
Variation to Try
Instead of a free-form panel, cut a dark cardstock frame in the shape of a leaf, butterfly, house, or simple ornament and place the tissue-filled clear sheet behind the opening.
Common Mistakes to Avoid
Using too much wet glue is probably the fastest way to make tissue paper frustrating. The paper absorbs moisture quickly, stretches, and then tears when you try to smooth it. Apply adhesive to the stronger surface first, work in small sections, and use thin coats rather than flooding the project.
Another common problem is trying to make every edge exact. Tissue paper is not cardstock, and forcing it into perfectly rigid shapes often creates more handling than the material can tolerate. Clean cuts are useful for bunting and toppers, but torn edges, small wrinkles, and slightly uneven petals can improve collage, trees, flowers, and butterflies.
Skipping a dry layout can also lead to crowded results. Cards, wall art, bunting, collages, and suncatchers all benefit from arranging the main pieces before attaching them. Once tissue touches wet glue or sticky contact paper, moving it becomes much harder without damage.
For hanging decorations, weak attachment points are easy to overlook because the finished pieces weigh very little. The tissue may be light, but repeated movement can still tear a narrow hole or poorly taped fold. Reinforce the centre of pom-poms, fold bunting over the string instead of punching bare tissue, and attach hanging cords to frames or stronger supports whenever possible.
Finally, keep heat away from tissue paper. Lanterns and hanging decorations should use cool-running LED lighting only and should never sit near candles, hot bulbs, heaters, or open flames. Decorative paper does not need to be near heat to look warm and inviting.
Frequently Asked Questions
Can beginners make these tissue paper crafts?
Yes. Cards, bunting, collage art, simple butterflies, and suncatchers are especially manageable because the techniques are forgiving. If precise cutting feels difficult, use torn tissue pieces or pre-cut shapes and focus on arrangement rather than perfect edges.
What is the best glue for tissue paper?
A glue stick is often the easiest choice for cards, bunting, and dry collage because it gives you control without soaking the paper. For lanterns or sealed collage work, a thin layer of suitable liquid craft adhesive can work, but apply it to the base surface and use as little as the project needs.
Can I use wrinkled tissue paper?
Absolutely. Wrinkled tissue is useful for flowers, collage pieces, tree leaves, butterflies, and other textured crafts. Save the smoothest large sheets for projects that rely on repeated folding, such as pom-poms or neat bunting.
How can I stop tissue paper from tearing while I work?
Handle it from the centre or support it from underneath instead of pulling at one corner. Use sharp scissors, light pressure, and thin adhesive layers. If tissue becomes wet, give it time to settle before touching it again.
Are tissue paper lanterns safe?
They can be used as decorative lanterns when paired with cool-running LED lights and kept well away from heat and flames. Do not place candles, hot bulbs, or other flame-based light sources inside or near tissue-decorated lanterns.
Can children make tissue paper crafts?
Many of these projects work well for children with age-appropriate supervision. Pre-cutting difficult shapes, using glue sticks, and choosing contact-paper suncatchers can make the activity easier. Small beads, sharp tools, wire, and toothpicks should be handled according to the child’s age and with adult guidance.
How should I store leftover tissue paper?
Flatten large usable sheets and keep them in a folder, shallow box, or large envelope so they do not become impossible to sort. Store smaller scraps by colour in envelopes or reusable bags. Tiny pieces can be kept together for collage projects rather than being discarded.
Keep Tissue Paper Scraps Ready for the Next Small Project
Tissue paper craft ideas do not need expensive supplies or highly polished materials to feel worthwhile. What makes this paper useful is its flexibility: a smooth sheet can become a pom-pom, a wrinkled scrap can become a flower, a torn piece can become a leaf, and a translucent layer can colour a window or lantern. Keeping those small scraps together means the next card, party decoration, or children’s craft can begin with materials you already have.
If you are new to tissue paper, begin with one project that suits the condition of the paper in front of you. Try collage art or a card with the smallest scraps, save larger sheets for bunting or pom-poms, and use bright translucent colours for a suncatcher. Then, once you have handled the material a little, the folds and layers stop feeling so delicate and start feeling much more workable.
I’d love to know which tissue paper craft you would make first — something small for a card or window, or a bigger hanging decoration for a room or celebration?