A fruit tray can look generous and inviting without depending on rare ingredients or a brand-new serving board. The strongest arrangements usually begin with ordinary fruit that is ripe enough to taste good, firm enough to hold its shape, and cut in a way that guests can pick up without rearranging the whole platter. Colour matters, of course, but so do moisture, balance, temperature, and the simple question of whether the first person can take a piece without sending three others rolling away.
I like DIY fruit tray ideas that make good use of what is already in the kitchen: a wooden board, a shallow dish, a muffin tin, a clean glass bowl, or even a watermelon rind that can become the serving container. I don’t think every tray needs elaborate carving. A careful pattern, a few contrasting textures, and enough open space for serving utensils can feel far more considered than a crowded display.
Fresh fruit also asks for a little discipline. Wash it before cutting, dry it well, keep cut pieces chilled, and separate toppings or dips when guests may have allergies. Then build the arrangement as close to serving time as practical. The result should still look appealing after several people have helped themselves, because a fruit tray is meant to be eaten rather than admired from across the room.
Choose Fruit That Will Hold Its Shape on the Tray
Select fruit for both flavour and structure. Berries should be dry and free from crushed areas, grapes should remain attached to firm stems until preparation, and melons should feel ripe without becoming soft at the cutting surface. Apples, pears, bananas, and cut citrus can change quickly once exposed to air, so plan where they will sit and how soon the tray will be served rather than cutting everything at the beginning of the day.
Mix juicy fruit with firmer pieces so the tray does not become wet underneath. Watermelon, oranges, and ripe mango release more liquid than grapes, blueberries, pineapple, or crisp apple. A shallow bowl, paper liner, or separate section can contain that moisture. I would also avoid using damaged fruit simply because the bruised side can be hidden; trimming generously or choosing another piece gives a cleaner result and a better texture for guests.
Wash, Dry, and Cut With Clean Tools
Begin with clean hands, a clean work surface, and utensils reserved for ready-to-eat food. Rinse fresh produce under running water before peeling or cutting, including melons and citrus whose rinds will not be eaten, because the knife passes from the outer surface into the flesh. Dry the fruit with a clean towel or paper towel so water does not dilute dips, soften biscuits, or collect in the bottom of the platter.
Use a sharp knife and a stable cutting board. Dull blades crush soft fruit and make decorative cuts harder to control. Keep pieces comfortably bite-sized, remove hard seeds and inedible stems, and make sure skewers, cocktail picks, or cutters are stored safely while you work. When serving children, simplify the shapes and avoid hard frozen pieces or whole round fruit that may be difficult for them to manage.
Prepare Reusable Trays and Plan the Serving Order
A reused platter, wooden board, cake stand, muffin tin, or shallow basket can work well when it is clean, intact, and suitable for food contact. If the surface is painted, porous, scratched, or uncertain, cover it with a food-safe liner or place the fruit in small washable bowls rather than allowing direct contact. Decorative vintage pieces can still frame the display without becoming the eating surface.
Set out the empty tray and serving dishes before cutting the fruit. Place the largest bowls, watermelon shell, or central feature first, then reserve easy-to-reach areas for popular pieces and utensils. Keep yogurt, chocolate, cut melon, and other perishable elements chilled until needed, and replace small portions rather than leaving the entire supply on the table. This is where planning saves more effort than another decorative garnish.
DIY Fruit Skewers
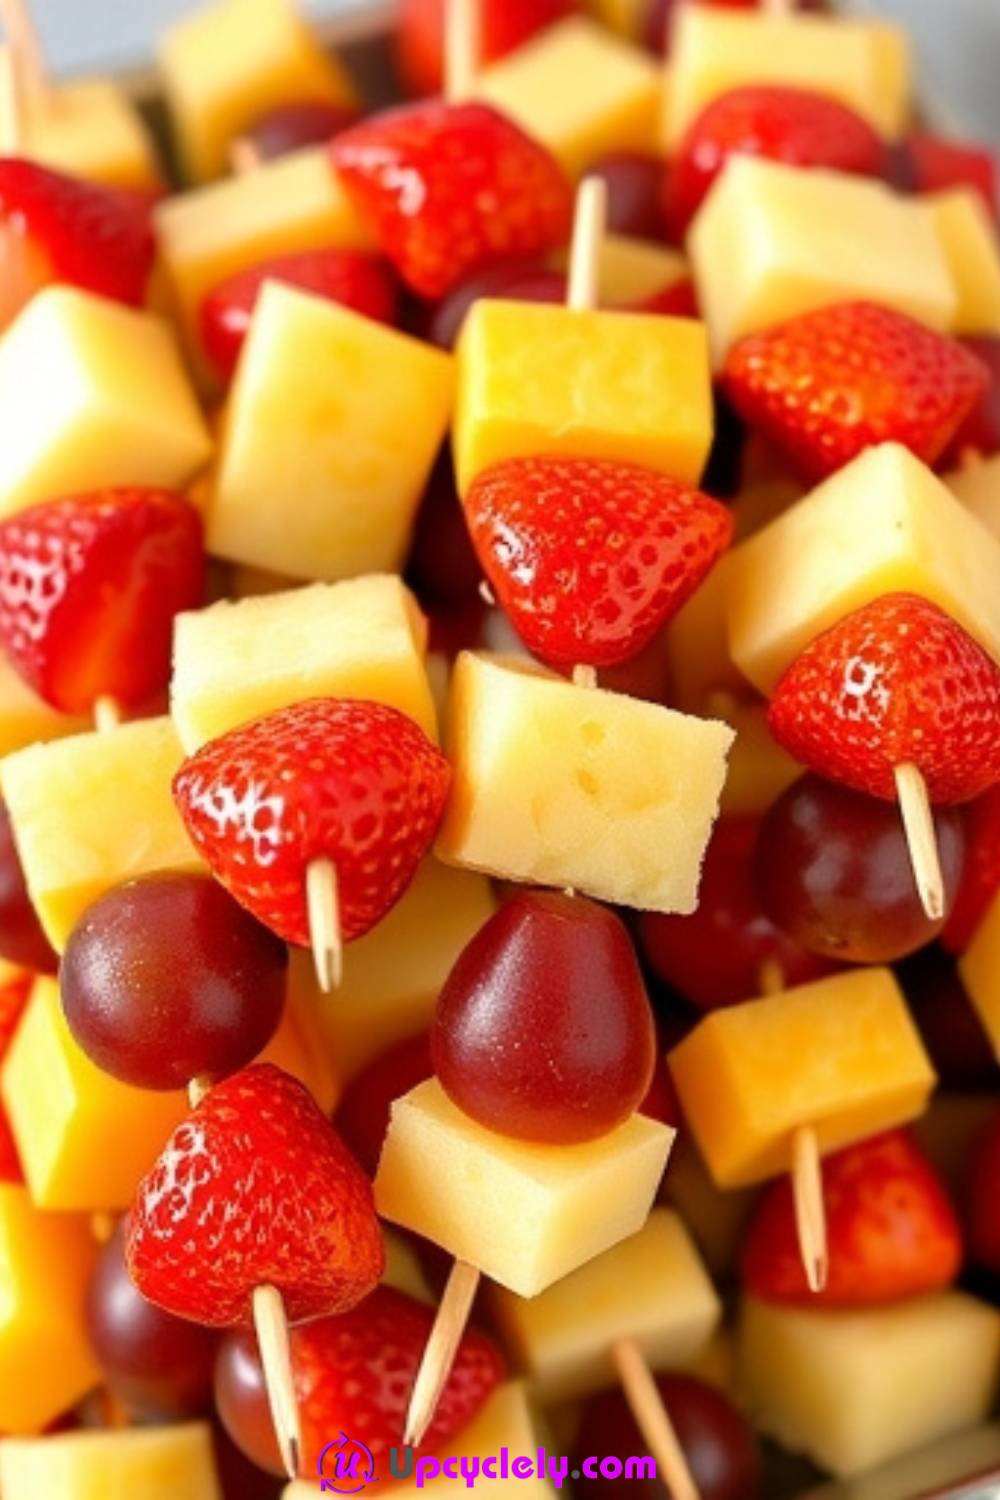
Fruit skewers turn loose pieces into neat individual portions, which is useful when guests are standing, children are serving themselves, or the table has little space for plates. Strawberries, pineapple, and grapes create a reliable mix because their colours contrast and the firmer fruit helps keep softer pieces in place. The skewers look best when the pattern repeats, but the fruit still needs enough breathing room to be easy to eat.
Choose pieces with similar width so one skewer does not become top-heavy. Large strawberry halves, pineapple chunks, and seedless grapes can be threaded without splitting when they are firm and dry. Keep the pointed ends facing one direction on the platter, and provide a clearly visible container for used sticks so they do not disappear beneath napkins.
Materials and Tools
· Fresh strawberries
· Pineapple chunks
· Seedless red or green grapes
· Food-safe bamboo skewers
· Sharp knife and clean cutting board
· Large platter or shallow tray
· Optional culinary mint for garnish
Steps for This Fruit Tray
1. Prepare and dry the fruit. Rinse everything before cutting, remove strawberry tops, and trim the pineapple into pieces that are large enough to hold the skewer without tearing. Dry the surfaces carefully, because wet fruit can slide and leave juice across the platter.
2. Plan one repeating order. Lay out a sample skewer with grape, pineapple, and strawberry, then check its weight and colour balance. Once the order feels right, prepare the remaining skewers in small batches rather than threading all of one fruit at once and discovering that the final proportions do not match.
3. Thread without overcrowding. Push each piece through a firm central area and leave a short gap between fruits so guests can remove them comfortably. Keep enough bare stick at the handle end to hold, but do not leave a long exposed point beyond the final piece.
4. Arrange and chill the finished skewers. Lay them in parallel rows, a fan, or a loose sunburst with all sharp ends controlled. Cover and refrigerate until serving, then add a few mint leaves around the edge rather than tucking herbs between every skewer.
The first skewer is worth treating as a test rather than a finished piece. If it bends, spins, or feels awkward to hold, changing the fruit size at that stage is much easier than rebuilding a whole platter.
Use short cocktail picks for smaller portions, or make single-colour rows for a more graphic display. For young guests, serve the same fruit in paper cups without sticks.
Berry Bonanza Fruit Tray
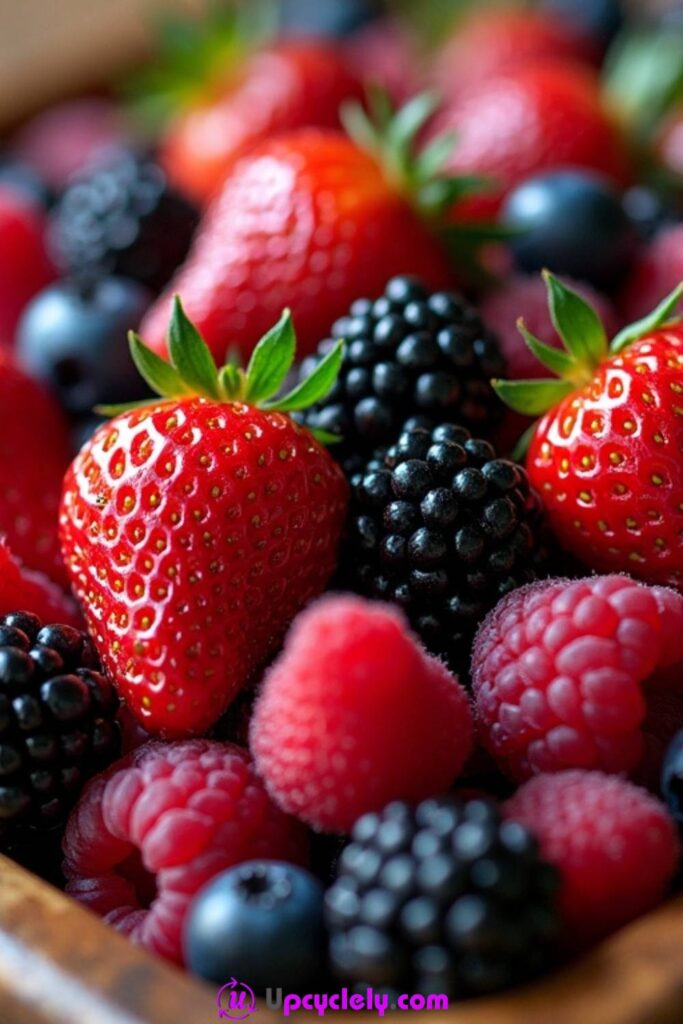
A berry tray depends on subtle differences rather than large shapes. Strawberries create the broad red areas, raspberries add a softer texture, blackberries give depth, and blueberries fill narrow gaps without making the arrangement heavy. Because berries bruise easily, the tray should feel abundant but not piled so deeply that the lower layers are crushed.
A light-coloured shallow dish helps the dark berries remain visible. Separate varieties into curved bands, small clusters, or a loose gradient, and keep damp garnish away from the fruit. Powdered sugar can look attractive for a few minutes, but it quickly dissolves on moist berries, so I would use it only immediately before serving and only when the extra sweetness suits the menu.
Materials and Tools
· Strawberries
· Raspberries
· Blackberries
· Blueberries
· Shallow serving tray or plate
· Clean paper towels for drying
· Optional mint leaves or edible flowers
· Small serving spoon or berry tongs
Steps for This Fruit Tray
1. Sort before washing. Remove mouldy, leaking, or badly crushed berries so they do not affect the rest. Rinse gently in cool running water, then spread the berries in a single layer on clean towels until the surfaces are fully dry.
2. Place the largest berries first. Arrange strawberries around the outer edge or in two broad anchor groups, turning some cut sides upward if they have been halved. Their size gives the smaller berries a clear boundary and prevents the tray from looking like one mixed heap.
3. Add the softer and darker berries. Build small sections of raspberries and blackberries without pressing them together, then pour blueberries into narrow spaces by hand. Keep the layers shallow so guests can reach the bottom without crushing the top.
4. Finish close to serving time. Add a few dry mint leaves, a light dusting of sugar if desired, and a small spoon for loose berries. Keep the tray chilled and replenish it from a separate container instead of stacking more fruit on a warming display.
I would rather leave one small patch of the tray visible than force delicate raspberries into a tight corner. A little space makes the colours easier to read and protects the fruit from being squeezed.
Use only two berries for a simpler tray, or serve each variety in a reused set of small glass bowls arranged on one board. That keeps juices separate and makes refilling easy.
Chocolate-Dipped Fruit Tray
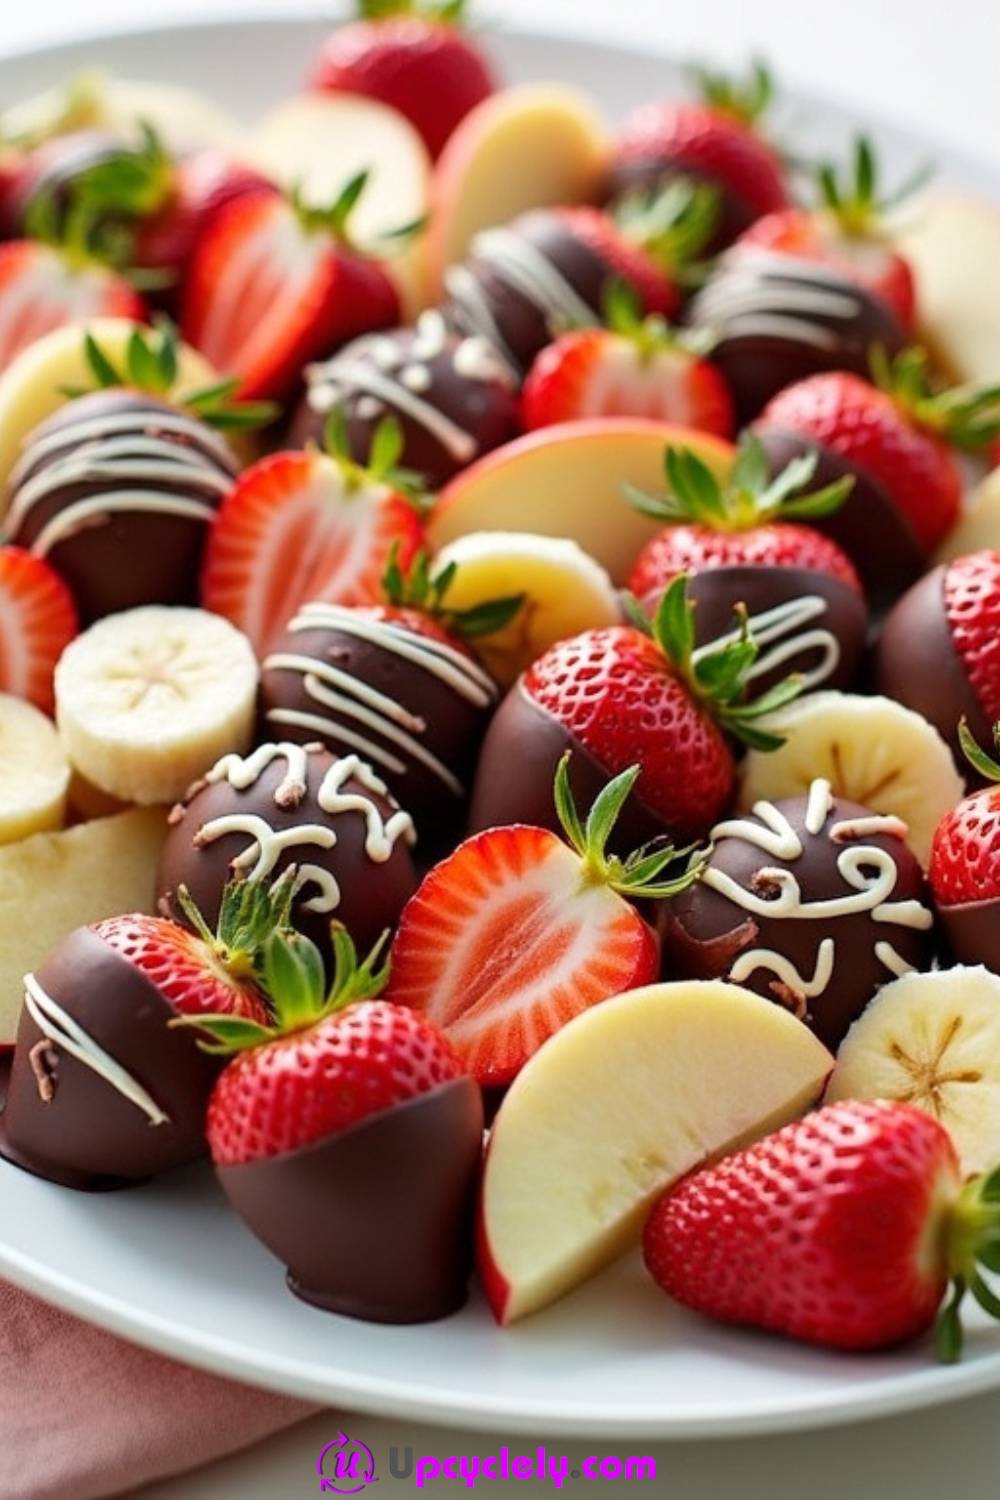
Chocolate-dipped fruit works because it combines a fresh centre with a firm decorative coating. Strawberries are the easiest choice, while apple wedges and banana pieces add variety when they are cut, dried, and coated carefully. The tray needs enough plain fruit to balance the richness; otherwise every piece begins to taste like dessert rather than fruit.
Moisture is the main difficulty. Water on the fruit can interfere with melted chocolate, and juicy cut surfaces may cause the coating to slide. Dry each piece thoroughly, dip only part of it, and let the chocolate set on a lined surface before arranging. Keep nuts and sprinkles clearly identified, especially when serving a group with unknown allergies.
Materials and Tools
· Strawberries
· Firm apples
· Bananas
· Dark, milk, or white chocolate
· Heatproof bowl and saucepan or microwave-safe bowl
· Parchment paper
· Forks or dipping tools
· Optional crushed nuts, coconut, or sprinkles
Steps for This Fruit Tray
1. Prepare the fruit in manageable batches. Wash strawberries and apples, dry them very well, then slice apples into sturdy wedges and bananas into thick pieces. Treat apple surfaces with a little citrus juice if needed, but dry them again before dipping.
2. Melt the chocolate gently. Use a heatproof bowl over barely simmering water or short microwave intervals, stirring frequently. Keep steam and water away from the bowl, and stop heating once the chocolate is smooth rather than making it unnecessarily hot.
3. Dip and decorate. Hold each piece by a dry edge, coat roughly half, and allow excess chocolate to fall back into the bowl. Place it on parchment, then add a drizzle or topping before the coating sets. Use separate utensils for allergen toppings so crumbs are not carried into the plain chocolate.
4. Set and arrange the tray. Chill the dipped fruit until the coating is firm, then transfer it to a cool platter in a single layer or gentle overlap. Add plain berries or grapes between the richer pieces and return the tray to refrigeration when it is not being served.
I know it can feel tempting to cover every piece completely, but a partial dip is easier to hold and keeps the fruit visible. It also reduces the amount of chocolate that cracks away when someone takes a bite.
Drizzle fruit instead of dipping it for a lighter version, or place warm chocolate in a small supervised fondue bowl with plain fruit beside it. For a dairy-free tray, choose a suitable chocolate and keep the label available for guests.
Citrus Delight Fruit Tray
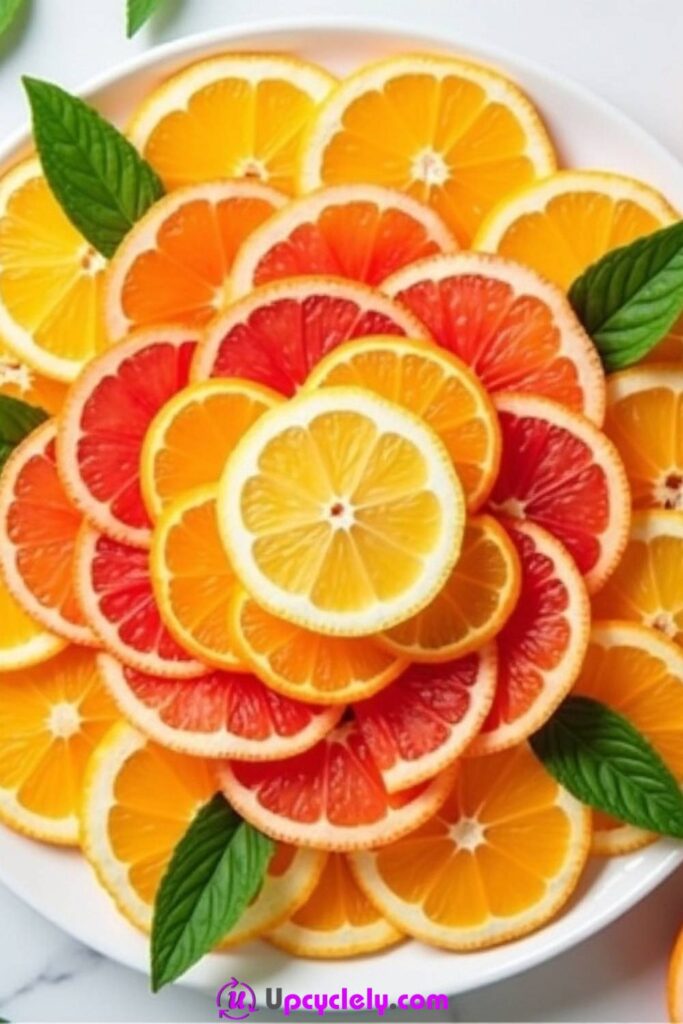
Citrus slices create a strong graphic tray because the segments form natural radial patterns. Oranges and grapefruit provide the main eating fruit, while thin lemon or lime rounds are better used as accents because their flavour is sharper. Overlapping slices in circles or loose petals makes the colours feel connected without requiring complicated carving.
Citrus releases juice quickly, so a shallow lipped plate is more practical than a flat wooden board. Remove obvious seeds, trim very thick peel where it makes eating awkward, and avoid piling slices so high that they slide. Mint offers a clear green contrast, but only clean culinary leaves should touch the food.
Materials and Tools
· Oranges or mandarins
· Pink or red grapefruit
· Lemons or limes for accents
· Sharp knife
· Shallow lipped platter
· Clean kitchen towel
· Optional mint leaves
· Small fork or fruit tongs
Steps for This Fruit Tray
1. Wash and dry the whole fruit. Even when the peel will not be eaten, clean the exterior before the knife passes through it. Use a stable board and trim only the ends needed to create a safe cutting position.
2. Cut consistent rounds or segments. Slice the oranges and grapefruit to a similar thickness, remove visible seeds, and reserve lemon or lime for small accents. If the peel feels especially thick, use peeled segments in part of the tray so guests have an easier choice.
3. Build the pattern from the outside inward. Overlap large grapefruit slices around the rim, add orange rounds inside them, and use smaller citrus pieces to close the centre. Keep the overlap shallow enough that each slice can be lifted without pulling several others along.
4. Control the juice before serving. Tilt away any liquid that collects, add mint at the last moment, and chill the platter. Serve with a small fork or tongs so guests do not need to separate slippery slices by hand.
The peel already supplies a strong outline, so I don’t think this tray needs extra flowers, sugar, and syrup at the same time. One garnish is usually enough.
Use peeled citrus segments in colour blocks for a softer, easier-to-eat version. A reused glass pie dish is especially useful because its rim catches juice without hiding the pattern.
Frozen Fruit Tray
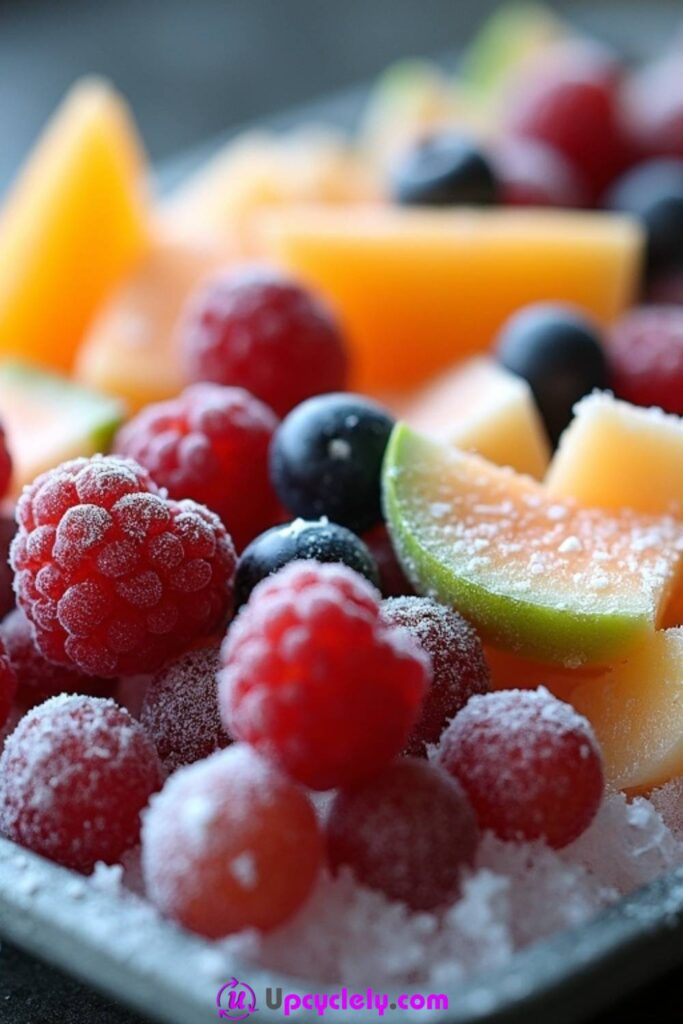
Frozen fruit can cool a summer table and offer a texture that feels different from an ordinary platter. Blueberries, raspberries, melon cubes, and pineapple pieces freeze more neatly when they are dry and separated first. The final tray should be treated as a chilled snack rather than a permanent display, because condensation appears quickly and some fruit becomes very hard straight from the freezer.
Freeze the pieces individually before combining them so they do not form one solid block. Serve small amounts over a cold plate or nested bowl, and allow very firm pieces to soften slightly before eating. Whole frozen grapes and other hard round fruit are not a suitable casual snack for young children, so adapt the serving style to the guests.
Materials and Tools
· Blueberries or raspberries
· Cantaloupe, honeydew, or pineapple
· Parchment-lined baking tray
· Melon baller or sharp knife
· Freezer-safe containers
· Chilled serving bowl or tray
· Optional lime zest
Steps for This Fruit Tray
1. Prepare fruit that freezes well. Rinse and dry the berries, cut melon or pineapple into small even pieces, and remove excess juice. Soft overripe fruit is better saved for smoothies because it can freeze into sticky, uneven clumps.
2. Arrange a single freezing layer. Spread every piece on parchment without touching and place the tray level in the freezer. Once firm, transfer the fruit to covered containers, keeping very delicate berries separate from heavier melon pieces.
3. Prepare a cold serving surface. Chill a shallow bowl or set a smaller bowl over ice, making sure meltwater cannot reach the fruit. Add only the amount likely to be eaten promptly and return the remaining fruit to the freezer.
4. Serve at the right texture. Let very hard pieces soften briefly, add zest rather than extra liquid, and provide small spoons or picks. Replace fruit that has fully thawed rather than repeatedly freezing and thawing the same batch.
The part I would keep simple is the seasoning. Frozen fruit already has a concentrated cold texture, and a heavy coating of salt or sugar can hide the fresh flavour rather than improve it.
Freeze fruit in small reusable silicone cups for individual portions, or mix partially thawed berries with chilled fresh melon for a tray that is easier to eat.
Fruit and Mint Garnish
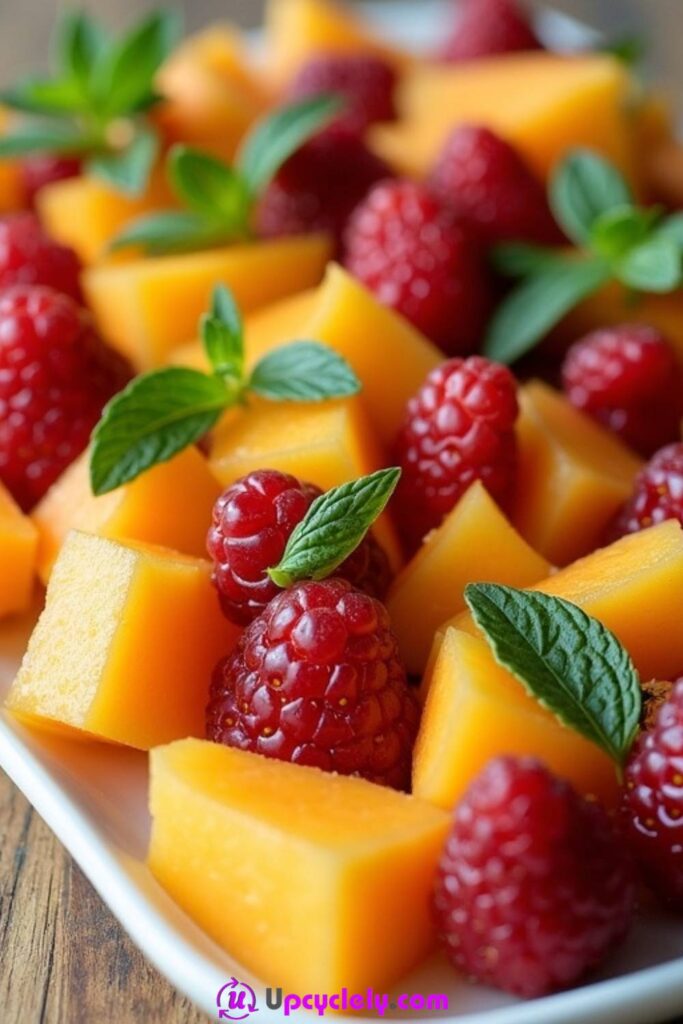
A small fruit-and-mint arrangement is useful when a full party platter would be excessive. Melon balls, raspberries, and mint can fill a shallow bowl with enough contrast to feel deliberate, while the simple shape keeps serving easy. The success comes from fresh herbs used sparingly, not from covering the fruit with a green layer.
Mint should be treated as an edible ingredient. Use a known culinary variety, rinse it gently, dry it well, and remove bruised leaves. Tuck small sprigs between fruit rather than chopping them over everything, so guests can enjoy the aroma without receiving a strong mouthful in every bite.
Materials and Tools
· Cantaloupe or honeydew
· Raspberries or strawberries
· Fresh culinary mint
· Melon baller or sharp knife
· Shallow bowl
· Clean towel for drying herbs
· Optional lime zest
· Small serving spoon
Steps for This Fruit Tray
1. Prepare the melon first. Wash the rind, cut it on a stable board, remove the seeds, and shape the flesh into balls or even cubes. Place the pieces in a covered container to chill while the softer fruit is prepared.
2. Handle the berries gently. Rinse and dry them, then remove any damaged pieces. Keep raspberries whole where possible and halve only large strawberries so the bowl does not become watery.
3. Build a loose arrangement. Add melon as the base, place berries in several small clusters, and turn a few contrasting cut surfaces upward. Leave enough room for the spoon to enter without crushing the fruit at the edge.
4. Add the mint at the end. Tuck small dry sprigs into two or three points, add a little zest if desired, and serve chilled. Remove wilted mint when replenishing the bowl rather than burying it beneath new fruit.
For me, mint works best as punctuation rather than filler. Three small green areas can make the whole bowl look fresher than a thick scattering of leaves.
Replace mint with basil for strawberries or with a few edible citrus leaves kept outside direct food contact. The same combination can be divided into reused glass dessert cups for seated guests.
Fruit Flower Arrangement
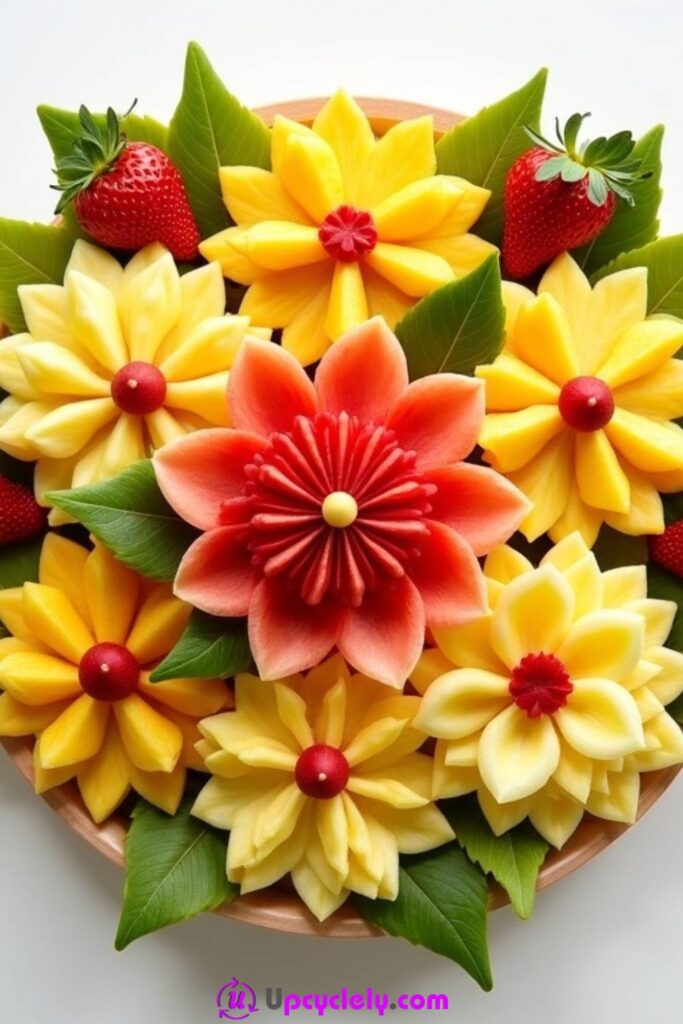
Fruit arranged as a flower gives a round plate a clear centre and repeated petal shapes. Mango slices, watermelon wedges, strawberries, kiwi, or melon can create petals when their cuts are consistent. The design is more effective when the fruit remains recognisable and easy to remove; carving every piece into a tiny ornament can make the tray impressive but frustrating to eat.
Begin with the strongest centre and work outward. A mound of berries or a round melon slice can anchor the pattern, while curved mango or kiwi pieces create the main petals. Use only edible garnish directly on the plate, and keep decorative garden leaves or florist foliage away from the food.
Materials and Tools
· Mango
· Watermelon or another firm melon
· Strawberries or berries
· Optional kiwi or orange segments
· Round plate or shallow dish
· Sharp knife and cutting board
· Small round bowl or cutter for planning the centre
· Optional culinary mint
Steps for This Fruit Tray
1. Choose a simple flower plan. Decide which fruit will form the centre, inner petals, and outer border before cutting. Sketch the arrangement on paper or place the empty plate over the fruit to estimate how many pieces will fit.
2. Cut repeated shapes. Slice mango into similar curved pieces, cut watermelon into manageable wedges, and halve strawberries in the same direction. Save offcuts in a covered bowl for smoothies or a separate mixed-fruit cup rather than forcing uneven scraps into the pattern.
3. Arrange from the centre outward. Place the central fruit first, then overlap the inner petals evenly and add broader outer shapes. Rotate the plate as you work so one side does not become tighter than the other.
4. Check serving access. Add berries and small mint leaves only where they will not lock the petals together, then provide tongs. Chill the completed plate and keep any syrup or dip in a separate bowl so the flower pattern stays clean.
Symmetry helps, but it does not need to become mathematical. I would correct an obvious empty side and then stop; fruit naturally varies in size, and that variation keeps the arrangement from looking rigid.
Make several small flowers on side plates instead of one large one, or use a single colour family for a quieter centrepiece. Beginners can use orange segments as ready-made petals.
Fruit Kabobs with Yogurt Dip
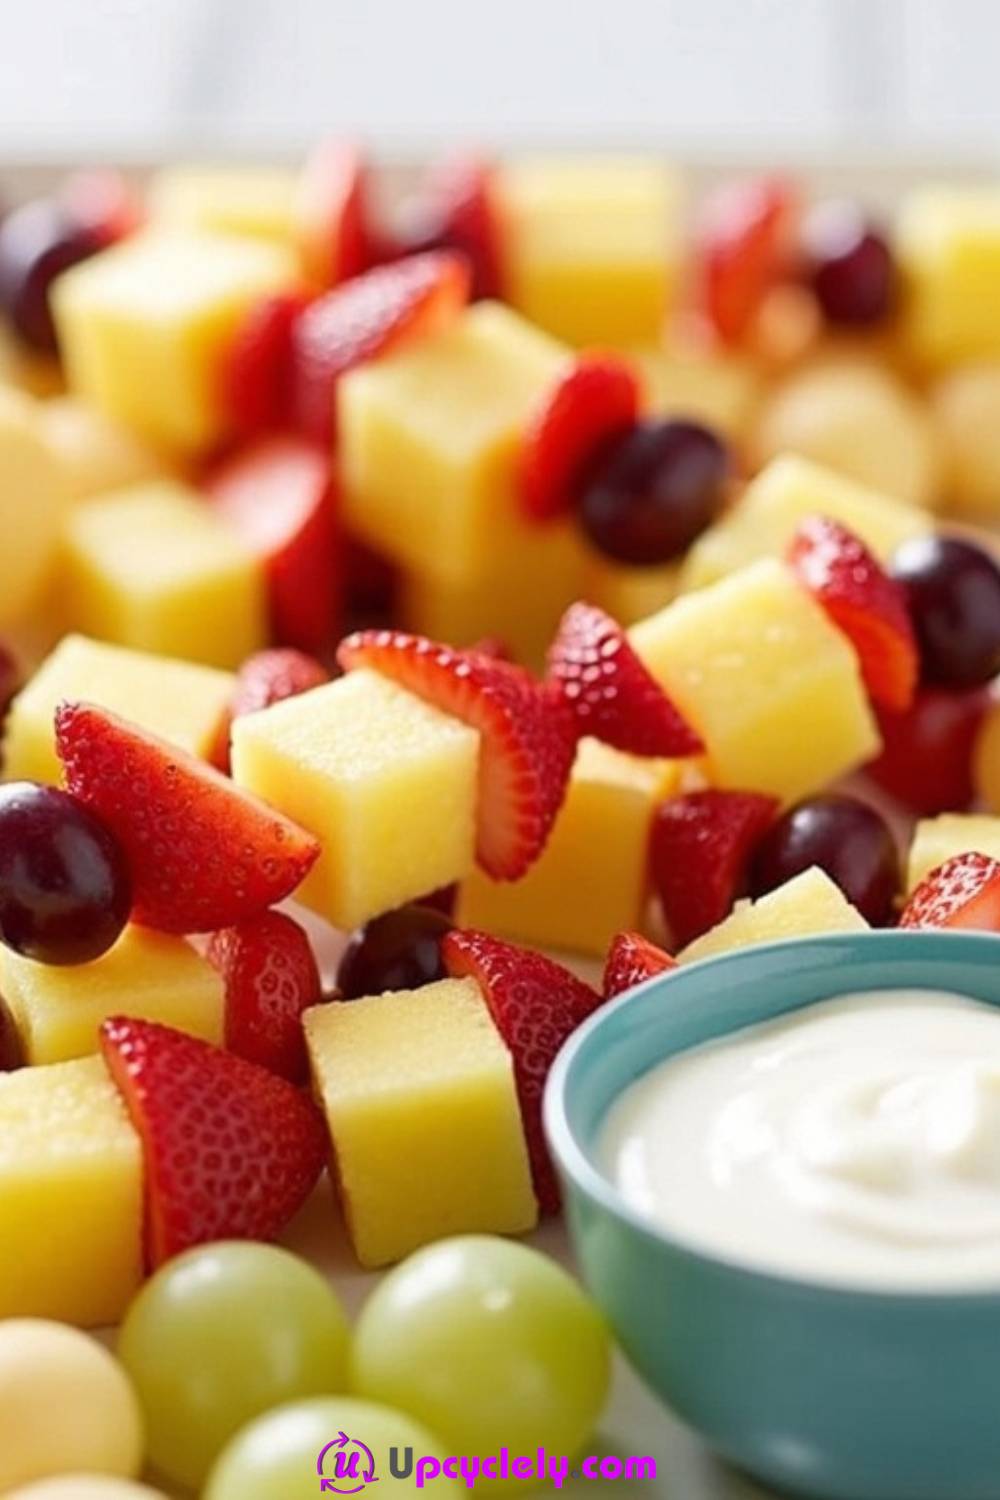
Fruit kabobs become a more complete party snack when they are served with a cold yogurt dip. Pineapple, grapes, and strawberries remain firm enough for dipping, and the separate bowl lets guests choose how much they want. The layout should prevent handles from touching the dip and keep the yogurt from warming beneath a pile of fruit.
Use a broad, shallow dip bowl placed securely in the centre or at one end of the platter. Keep the kabobs short enough to control, and label the dip when it contains dairy, honey, nuts, or other ingredients guests may need to avoid. A second plain dip or an undressed section can make the tray more inclusive without changing the main arrangement.
Materials and Tools
· Pineapple chunks
· Strawberries
· Seedless grapes
· Short food-safe skewers
· Plain or flavoured yogurt
· Small serving bowl
· Optional honey, cinnamon, or granola
· Large platter with space around the dip
Steps for This Fruit Tray
1. Prepare the fruit and dip separately. Wash, cut, and dry the fruit, then stir the yogurt until smooth. Add only a light flavouring so the dip remains thick enough to cling without running across the tray.
2. Assemble short balanced kabobs. Alternate fruit colours and place the firmest pieces near the handle end. Avoid pushing fruit tightly against itself, which can squeeze juice into the gaps and make the sticks slippery.
3. Anchor the dip bowl. Set it on a non-slip mat or within a shallow recess if the platter has one, then fan the kabobs around it with handles facing outward. Leave a clear gap at the rim so yogurt drips fall on the plate rather than onto other skewers.
4. Chill and replenish in small batches. Cover the yogurt and fruit separately until serving, then place only part of each on the table. Replace used utensils and remove any kabobs that have been dipped and returned to the shared platter.
I would keep crunchy toppings beside the yogurt rather than mixing them in early. Granola and nuts soften quickly, and separate bowls also make allergen choices clearer.
Use coconut yogurt or another suitable alternative, or swap skewers for small fruit cups with a spoonful of dip on the side. A reused divided serving dish can keep all three parts organised.
Fruit Pizza
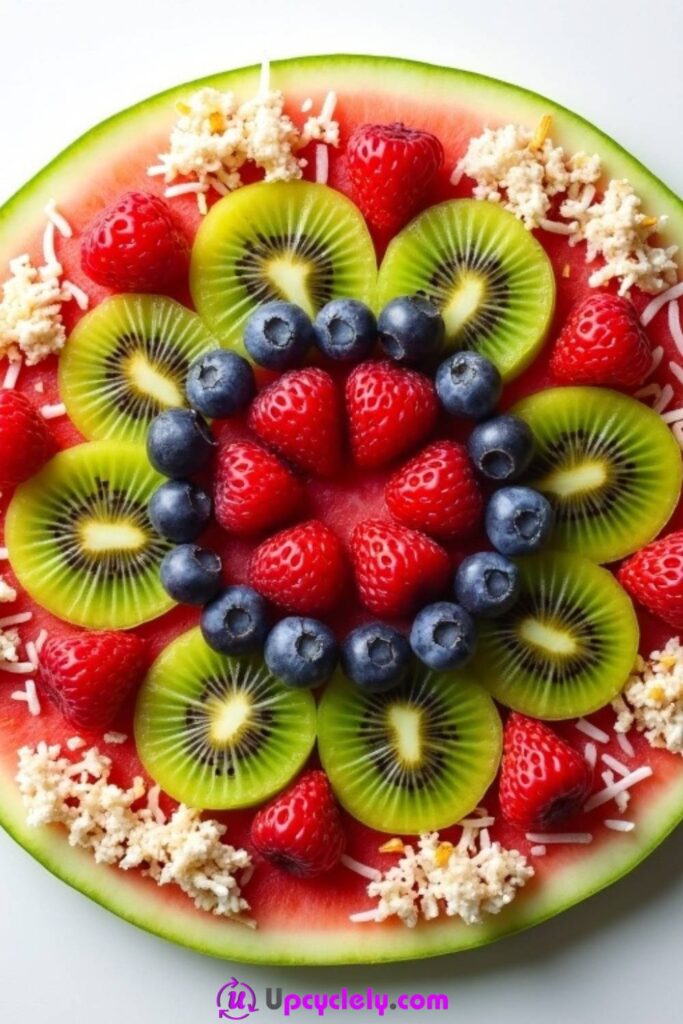
A thick watermelon round makes a convincing fruit-pizza base because it can be cut into wedges and lifted like a slice. Kiwi, strawberries, blueberries, and coconut create the topping pattern without needing a baked crust. The watermelon should be broad, firm, and not overly ripe, or the wedges may bend and release too much juice when lifted.
Treat the topping as a shallow arrangement rather than a heavy pile. Thin fruit slices sit more securely than large chunks, while a light yogurt layer can help them grip if the pizza will be served immediately. Keep the rind on for structure, wash it before cutting, and provide a plate because the slices are still juicy.
Materials and Tools
· Small seedless watermelon
· Kiwi
· Strawberries
· Blueberries
· Optional thick yogurt
· Optional coconut flakes
· Large sharp knife and stable cutting board
· Round platter
Steps for This Fruit Tray
1. Wash and cut the watermelon base. Scrub the rind, dry it, and slice a thick central round on a stable board. Set the round on paper towels briefly to absorb surface juice, then transfer it carefully to the serving platter.
2. Prepare thin toppings. Peel and slice kiwi, halve or slice strawberries, and dry blueberries. If using yogurt, spread only a thin layer within the rind so it does not squeeze out when the base is cut.
3. Arrange before slicing. Place larger kiwi and strawberry pieces in a repeating pattern, then add blueberries and a small amount of coconut. Keep the toppings away from the intended cut lines so the knife does not drag them across the surface.
4. Cut and serve promptly. Divide the round into wedges with a clean sharp knife, wipe the platter edge, and chill until needed. Offer a cake server or wide spatula so the first slice can be lifted without disturbing the rest.
The watermelon is already bright and patterned, so the topping does not need to cover every centimetre. Open red areas make the added fruit easier to see and keep the slice lighter.
Make mini pizzas from smaller melon rounds, or use a thin spread of soft cheese for an adult grazing table. Keep any dairy-topped version well chilled.
Fruit Popsicles
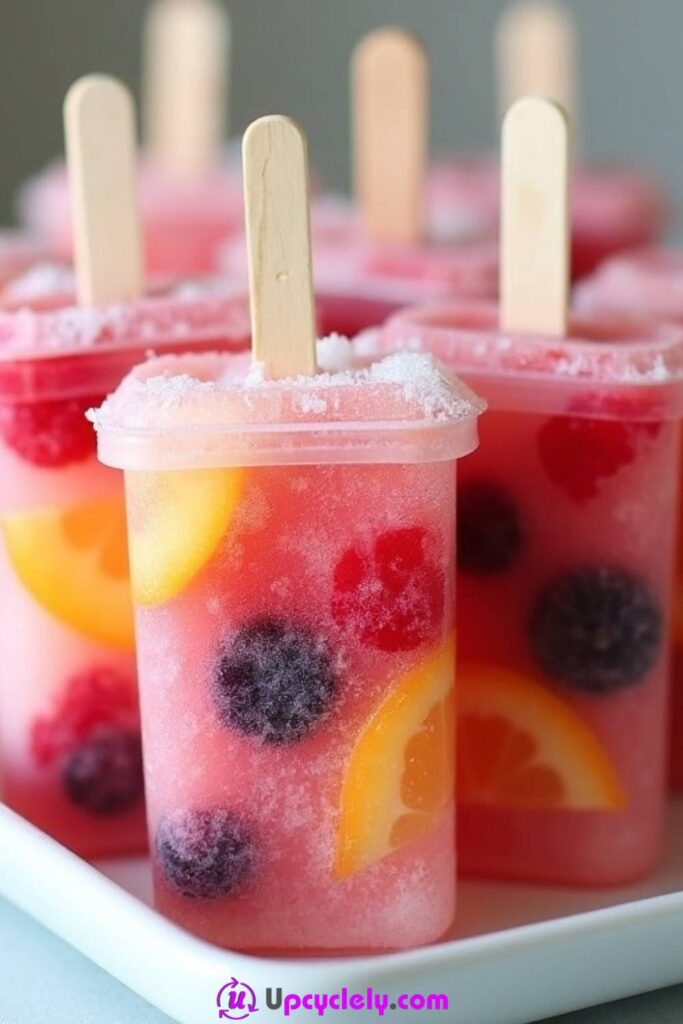
Fruit popsicles can be presented as a tray when they are arranged over ice or in a chilled stand just before serving. Clear juice shows berries and citrus pieces particularly well, while blended fruit creates stronger colour and a smoother texture. The mould shape, stick position, and freezing space all matter more than adding many different fruits to one pop.
Leave room for expansion in the mould and use pieces small enough not to block the stick. Citrus membranes, large berries, and thick chunks can make a frozen pop difficult to bite, so slice them thinly or crush them first. Once removed from the freezer, the pops should be served promptly rather than allowed to melt and refreeze.
Materials and Tools
· Mixed berries
· Orange or other fruit segments
· Fruit juice or blended fruit
· Popsicle moulds
· Food-safe sticks
· Small funnel or jug
· Tray filled with ice for serving
· Optional reusable sleeves or napkins
Steps for This Fruit Tray
1. Prepare a simple fruit mixture. Cut citrus into small pieces, halve large berries, and remove hard seeds. Decide whether the pops will contain visible fruit in juice or a blended mixture, because trying to combine too many textures can make the mould difficult to fill evenly.
2. Fill the moulds in stages. Add a small amount of fruit, pour in juice, and tap the mould gently to release trapped air. Leave space at the top and wipe the rims so frozen drips do not prevent the lid or sticks from sitting straight.
3. Insert sticks and freeze level. Secure the sticks in the centre and place the mould on a flat freezer shelf. Once fully frozen, release one test pop to check that the fruit is held securely before unmoulding the rest.
4. Build the serving tray at the last moment. Arrange the pops over clean ice with the handles accessible, or stand them in a chilled holder. Add napkins, return spare pops to the freezer, and discard any that have melted extensively rather than freezing them again.
The clearest pops usually contain fewer pieces than expected. One berry and one thin citrus slice can read more clearly than a mould packed so tightly that the juice cannot surround the fruit.
Use reusable silicone moulds, make small yoghurt-and-fruit pops, or freeze blended leftover fruit that is too soft for a platter but still sound. Label dairy versions separately.
Fruit Tray with biscuits
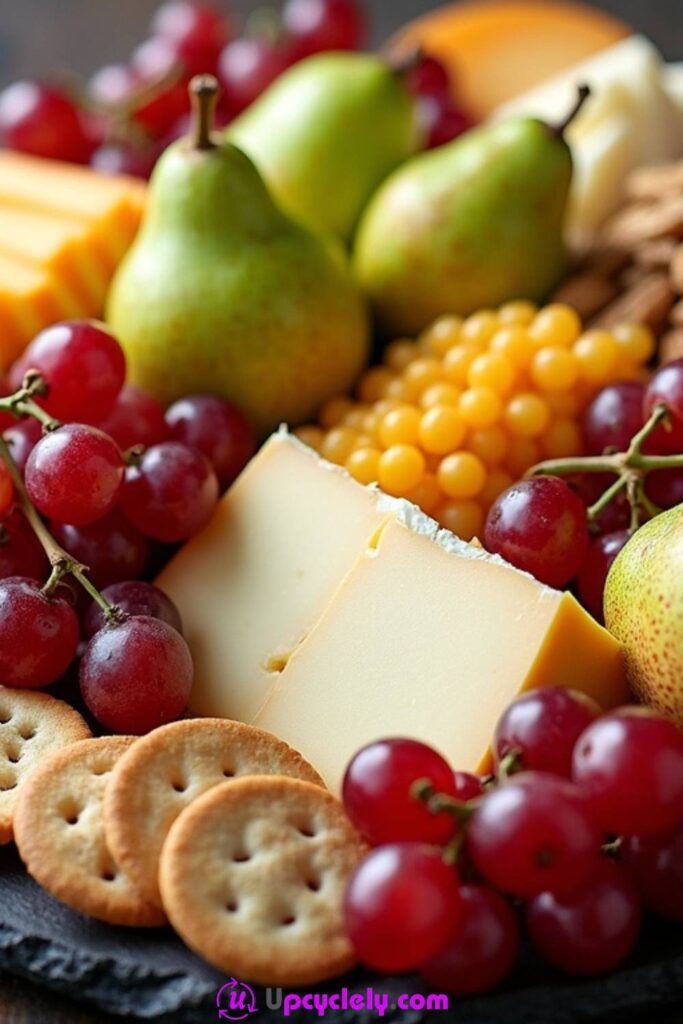
A fruit tray with biscuits sits between a dessert platter and a grazing board. Crisp biscuits or crackers provide a dry contrast to grapes, pears, berries, cheese, or dried fruit, but they need protection from juicy pieces. Small clusters work better than one large pile because guests can see the pairings and reach the biscuits before they soften.
Use a broad board with ramekins or folded parchment barriers. Keep cheese, nuts, and any spreads clearly separated when allergies or dietary choices may matter. Pear and apple slices should be cut close to serving time, while biscuits can be added last so their texture stays intact.
Materials and Tools
· Grapes
· Pears or apples
· Biscuits or crackers
· Cheese, optional
· Dried fruit
· Nuts, optional
· Small bowls or parchment dividers
· Large serving board or tray
Steps for This Fruit Tray
1. Prepare the dry and wet elements separately. Portion biscuits, dried fruit, nuts, and cheese into covered containers, then wash and dry the fresh fruit. Slice pears or apples shortly before assembly and remove any seeds or hard cores.
2. Place bowls and cheese first. Set small dishes for nuts, dried fruit, or spreads so loose pieces stay controlled. Add cheese in one or two anchor groups, leaving enough room for a knife or serving fork without crossing over the fruit.
3. Create fruit clusters. Add grapes in short stemmed bunches, fan pear slices beside the cheese, and use berries to fill small spaces. Keep juicy cut surfaces facing away from the biscuit sections and replace any fruit that begins to leak.
4. Add the biscuits at the end. Stand some upright and lay others in short overlapping rows, keeping them clear of damp fruit. Label allergen-containing sections and replenish from separate containers rather than mixing crumbs through the whole board.
I like this style of tray when the gaps are intentional. A narrow open line between pears and biscuits does more to protect texture than another handful of decorative berries.
Make a sweet version with plain biscuits and chocolate-dipped fruit, or a savoury version with crackers, cheese, grapes, and figs. Use a reused cutlery tray as a compartmented base only if it is food-safe and thoroughly clean.
Layered Fruit Tray
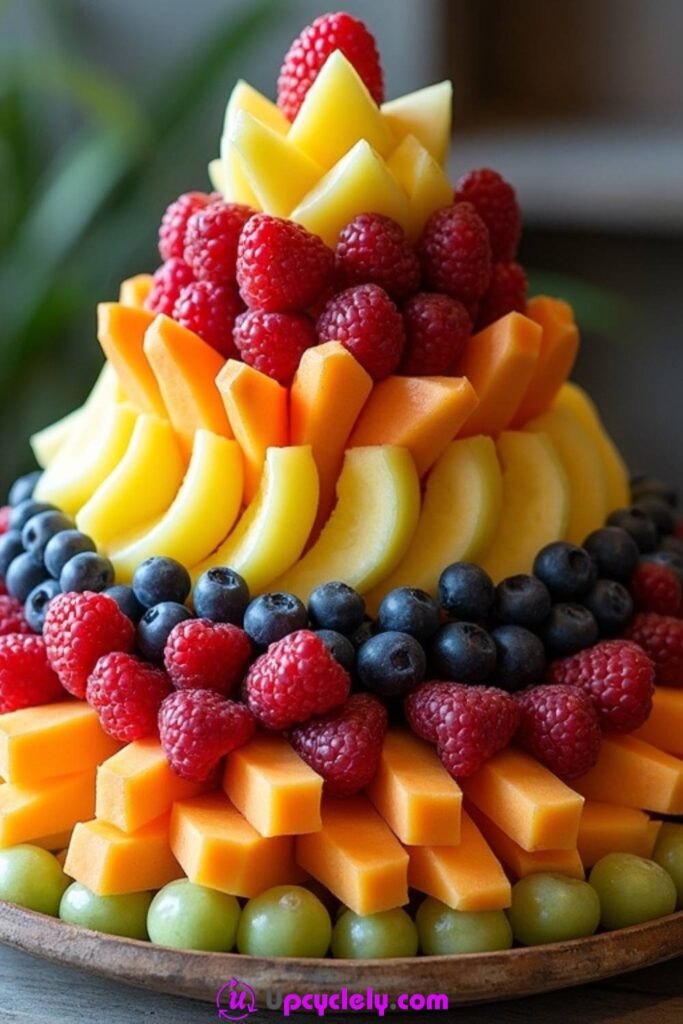
A layered fruit tray creates height by arranging grapes, melon, and berries in visible bands or shallow levels. The method works well in a clear-sided dish because guests can see the colour order from the side. The layers should remain broad and light; a deep compressed stack can crush berries and make the lower fruit difficult to serve.
Choose the heaviest, firmest fruit for the base and save raspberries or delicate slices for the top. Drain melon well and dry grapes before assembling. A serving spoon with a wide bowl helps guests lift through several layers without stirring the entire arrangement into a mixed salad.
Materials and Tools
· Green or red grapes
· Cantaloupe
· Honeydew melon
· Blueberries
· Raspberries or strawberries
· Clear shallow bowl or lipped tray
· Melon baller or sharp knife
· Wide serving spoon
Steps for This Fruit Tray
1. Prepare fruit by weight and firmness. Cut melons into even cubes or balls, wash grapes and berries, and dry everything thoroughly. Keep each variety in its own chilled container until the tray is ready to build.
2. Create a stable base. Spread grapes or firm honeydew in a shallow even layer rather than a deep mound. Check that the bowl remains stable and that the serving spoon can reach the lower edge without scraping the sides.
3. Add contrasting bands. Layer cantaloupe, blueberries, and remaining melon in visible rows or rings, keeping each band low. Place raspberries or strawberry pieces on top where they will not support additional weight.
4. Finish without adding excess liquid. Skip heavy syrup, or serve it separately, because it will run to the bottom and soften the lower fruit. Chill the completed tray and gently rebuild the top layer when replenishing rather than pouring new fruit over delicate berries.
The side view matters as much as the top. I would use a clear bowl only when the lower layers are tidy enough to be seen; otherwise a shallow plate gives easier access and less pressure on the fruit.
Build concentric rings instead of vertical layers, or divide the colours among stacked reusable glass bowls on a tiered stand.
Nutty Fruit Tray
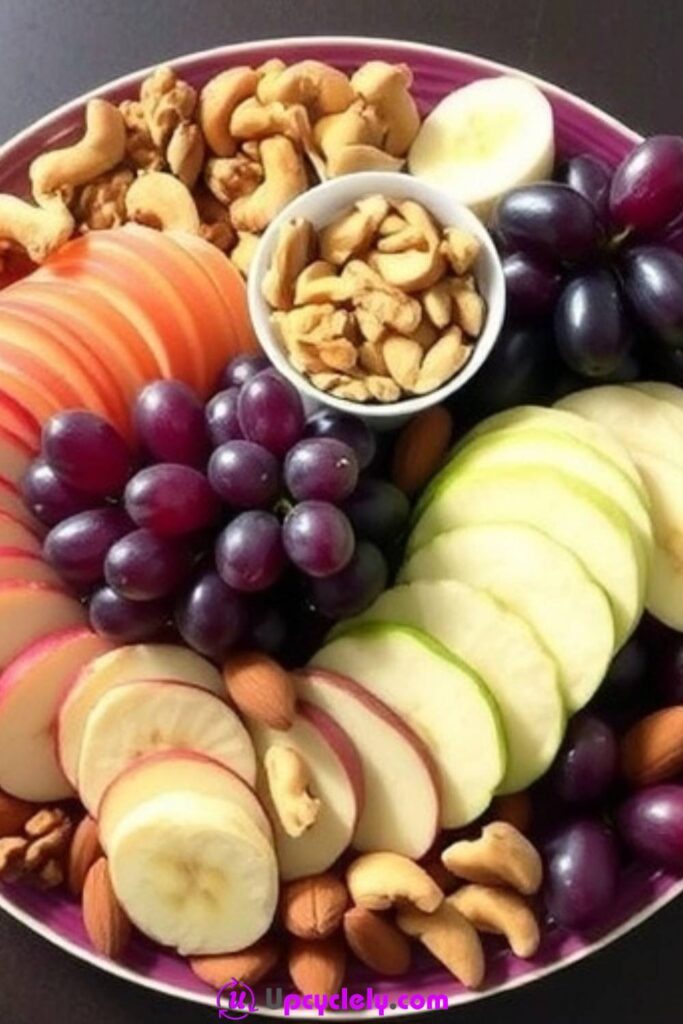
Nuts add crunch and savoury contrast to apples, bananas, grapes, and dried fruit, but they also change how the tray should be planned. Loose nuts roll into fruit sections, crumbs cling to damp slices, and allergies can make a mixed platter unsuitable for some guests. Small bowls are therefore more useful than scattering nuts across the entire surface.
Apples and grapes hold their shape well, while bananas need to be cut late and used in a small area. If nut allergies are possible, serve the nuts on a separate clearly labelled dish with their own spoon. That separation is practical as well as polite, and it keeps the main fruit tray available to more people.
Materials and Tools
· Red and green apples
· Bananas, optional
· Red and green grapes
· Almonds, cashews, or walnuts
· Small bowls for nuts
· Lemon or another citrus for apple surfaces
· Shallow platter
· Fruit tongs and nut spoon
Steps for This Fruit Tray
1. Prepare the allergen plan first. Decide whether nuts will sit on the tray or on a separate board, and use dedicated bowls and utensils. Keep package information available when serving guests who need to check ingredients or cross-contact warnings.
2. Slice the firm fruit. Cut apples into even wedges, remove cores, and lightly treat exposed surfaces with citrus if desired. Wash and dry grapes, then arrange them in short clusters that are easy to lift without dragging across other sections.
3. Add fragile fruit at the last moment. Cut bananas thickly and place them in one small area lined with parchment or in a bowl. Do not bury them beneath apples, because pressure and moisture will make them discolour and soften quickly.
4. Place the nuts with clear boundaries. Fill small bowls and set them where the spoon can be used without crossing the fruit. Add a few dried fruits if desired, then chill the fresh components and serve promptly.
This is one tray where separation improves the design. The small nut bowls create useful height and stop the platter from becoming a mixture of crumbs and fruit juice.
Use toasted seeds when suitable, or make the main tray nut-free and offer a separate topping bar. A reused ceramic egg tray can hold small portions only when it is food-safe, glazed, and easy to clean.
Rainbow Fruit Tray
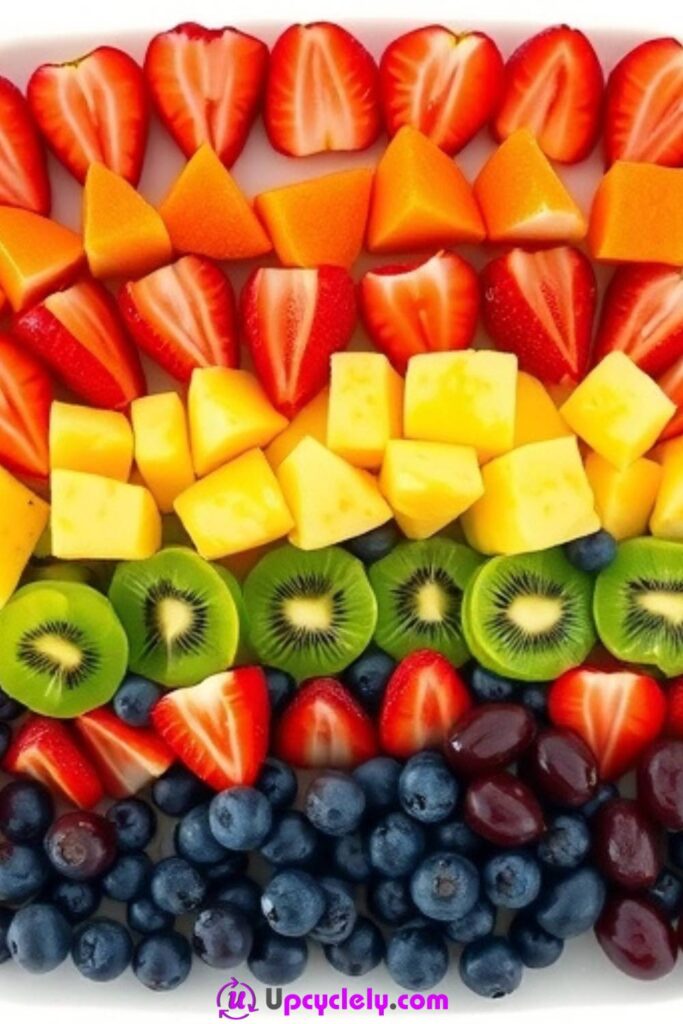
A rainbow fruit tray uses colour order as its main decoration. Strawberries, oranges or cantaloupe, pineapple, green grapes or kiwi, blueberries, and purple grapes can form clear curved bands. The arrangement reads best when each colour has enough width to be recognised and when the pieces are cut to a similar visual scale.
The colours do not need to follow a scientific spectrum perfectly. What matters is a smooth visual transition and a tray shape that supports the curves. A large oval or rectangular platter provides room for broad bands, while a round plate can turn the rainbow into concentric rings.
Materials and Tools
· Strawberries or raspberries
· Orange segments or cantaloupe
· Pineapple
· Kiwi or green grapes
· Blueberries
· Purple grapes or blackberries
· Large platter
· Small bowls for dips, optional
Steps for This Fruit Tray
1. Choose one fruit for each colour band. Select pieces that are firm and available rather than forcing a weak fruit into the tray only to complete a colour. Wash, dry, and cut the fruit into sizes that will create bands of similar depth.
2. Mark the overall curve. Use clean empty bowls or strips of parchment as temporary guides, especially on a rectangular tray. Place the red band first and check that enough space remains for every later colour before filling it completely.
3. Build the remaining rows. Add orange, yellow, green, blue, and purple sections with shallow overlaps at the edges. Use small berries to correct narrow gaps, but do not mix colours so heavily that the bands disappear.
4. Remove guides and prepare for serving. Add dip bowls at the ends rather than in the middle of the colour sequence, wipe away juice, and provide tongs. Chill the tray and refill each colour from its own container to preserve the pattern.
The hardest part is usually judging the space, not cutting the fruit. I would outline all six bands lightly before making any one row thick, because the final purple section otherwise tends to become a narrow afterthought.
Create a vertical colour grid, small rainbow cups, or a half-rainbow around a bowl of yogurt. Use whatever ripe fruit is available instead of choosing colour over flavour.
Star-Shaped Fruit Tray
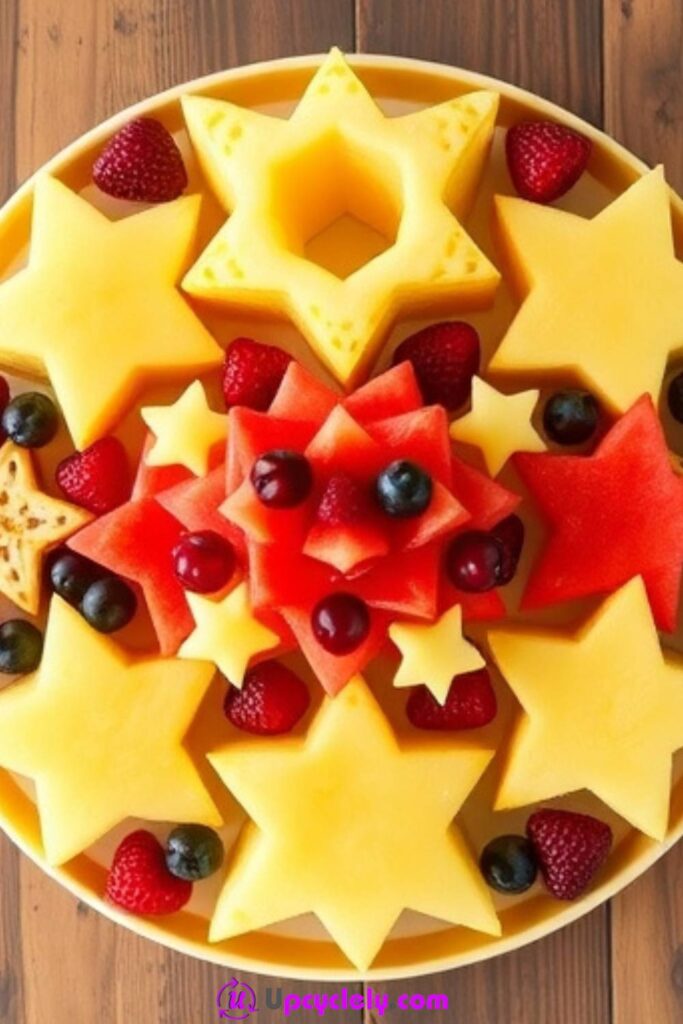
Star-shaped melon pieces create a clear themed tray for summer gatherings, birthdays, and celebrations. Watermelon and cantaloupe are firm enough to cut with metal cookie cutters when sliced into even slabs. The stars can become a central cluster while strawberries and blueberries fill the surrounding space without competing with the main shape.
Cutters leave useful scraps, so plan a second bowl for the offcuts before beginning. The fruit slabs should be thick enough to hold their points but not so thick that guests struggle to bite them. Sharp cutters and knives require a stable surface, and hand-carving is not a sensible shortcut for a beginner when a simple cutter is available.
Materials and Tools
· Watermelon
· Cantaloupe or honeydew
· Strawberries
· Blueberries
· Star-shaped metal cutters
· Sharp knife and stable cutting board
· Wooden or round serving platter
· Bowl for fruit offcuts
Steps for This Fruit Tray
1. Prepare even melon slabs. Wash the rinds, cut the melons safely, remove seeds, and slice broad pieces of consistent thickness. Blot excess juice so the cutter does not slip across the surface.
2. Cut stars efficiently. Press the largest cutters near the edges first, then fit smaller stars into the remaining areas. Push straight down rather than twisting aggressively, and move all scraps into a covered bowl for another use.
3. Build the centrepiece. Arrange the largest stars in the centre, overlap smaller stars around them, and support any leaning pieces with low fruit underneath. Keep the pointed shapes visible instead of covering them with berries.
4. Fill and serve. Add strawberries and blueberries in clear clusters, provide tongs, and chill the tray. Check the stars after transport because thin points can break, then replace damaged pieces with whole berries rather than trying to hide them.
One strong group of stars usually looks better than dozens scattered everywhere. The repeated shape needs a quiet background so guests notice it immediately.
Use hearts, circles, flowers, or simple geometric cutters for another event. Small broken stars and melon scraps can become a mixed fruit cup instead of waste.
Tropical Fruit Tray
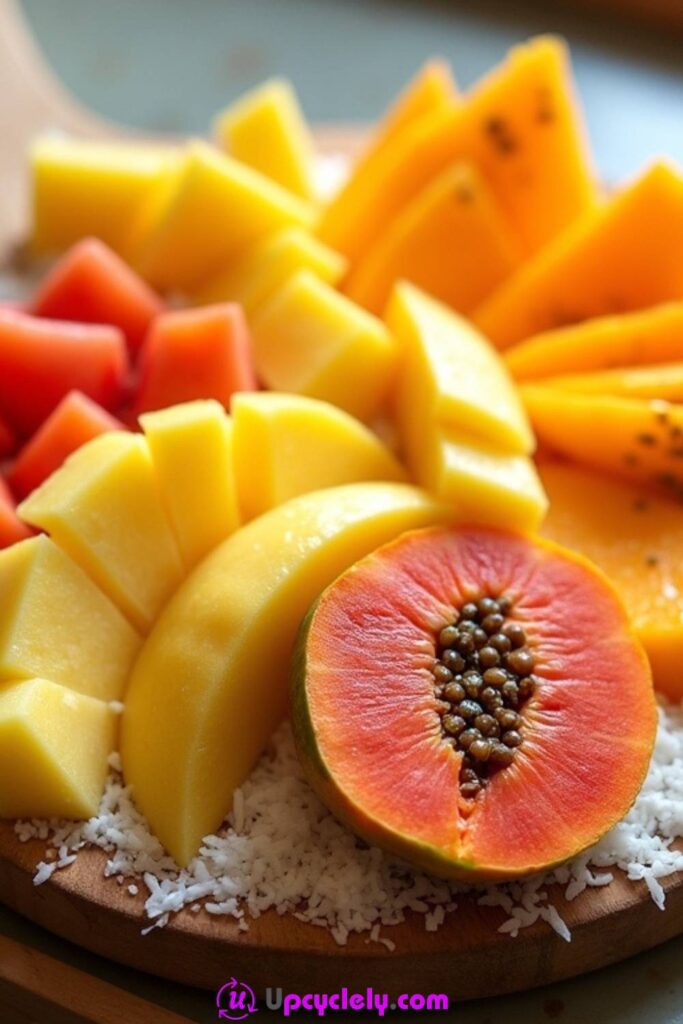
Mango, papaya, pineapple, watermelon, and coconut create a warm-coloured tray with strong differences in texture. Mango and papaya are soft and slippery when very ripe, while pineapple and watermelon provide firmer structure. The arrangement should keep those softer fruits in shallow sections rather than stacking them under heavier cubes.
A wooden or bamboo board can suit the visual style, but juicy fruit needs bowls, parchment, or a food-safe washable surface. Remove papaya seeds completely, trim fibrous pineapple eyes, and cut mango away from the stone with a controlled method. Mint or lime can freshen the display, but the fruit itself should remain the main focus.
Materials and Tools
· Mango
· Papaya
· Pineapple
· Watermelon
· Optional coconut flakes
· Lime
· Mint leaves, optional
· Large food-safe board or lipped platter
Steps for This Fruit Tray
1. Prepare each fruit according to its structure. Cut pineapple and watermelon into firm bite-sized pieces, remove papaya seeds and peel, and slice mango into broad cubes or cheeks. Keep softer fruit chilled in separate containers until the board is ready.
2. Create a firm foundation. Place pineapple and watermelon in two low anchor areas, then add mango and papaya beside them rather than underneath. Use small bowls if the mango or papaya is especially juicy.
3. Balance the colour and texture. Alternate orange, yellow, and red sections, leaving a few clean lines of the board visible. Add lime wedges at the edge and coconut in a separate bowl so it does not become wet across the fruit.
4. Finish and keep cool. Add mint just before serving, provide tongs and small forks, and replenish the soft fruit in limited amounts. Wipe collected juice from the board edge so it does not reach napkins or other foods.
Tropical fruit already has varied colour and shape, so I would avoid cutting every piece into the same cube. A few mango slices beside pineapple chunks make the tray feel more natural and easier to identify.
Serve the fruit in a hollow pineapple half, use banana only in a small last-minute section, or add a bowl of plain yogurt away from the wettest fruit.
Watermelon Bowl
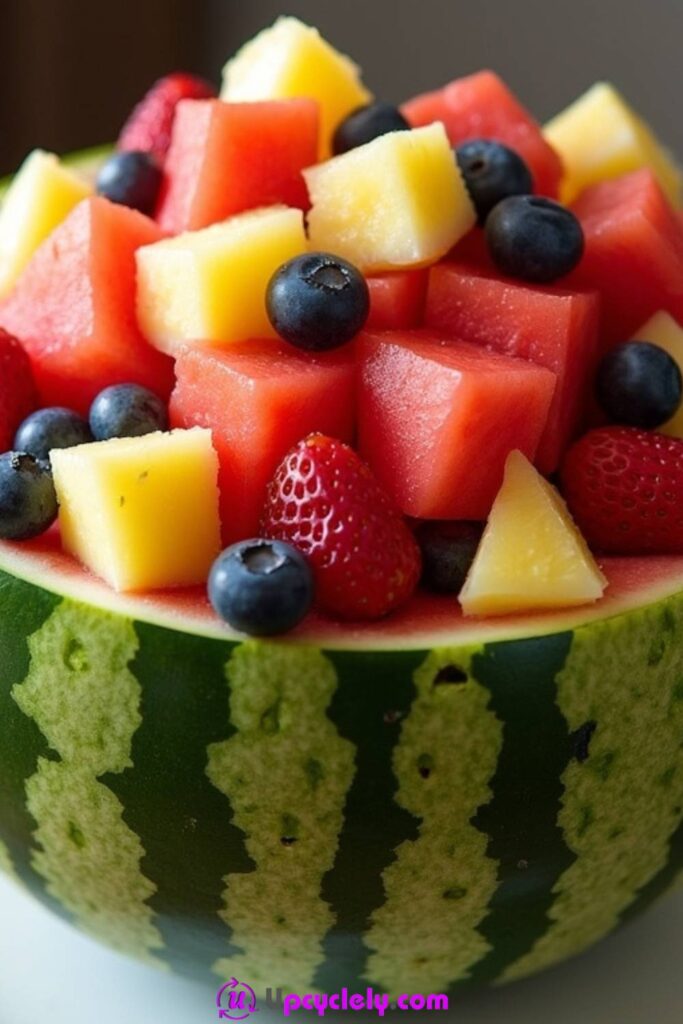
A watermelon rind can become the serving bowl for a mixed fruit salad, using part of the fruit itself as the container. The effect is generous and practical for an outdoor table, provided the shell is stable and not cut so deeply that it leaks. Pineapple, strawberries, blueberries, and reserved watermelon pieces create enough colour without needing a complicated carved rim.
Wash and dry the whole melon before cutting, because the knife moves through the rind into the edible flesh. Choose a melon that can sit securely on one side, and trim only a very thin piece from the base if necessary. A large bowl should be placed underneath while filling and carrying, as the rind can become heavy and slippery.
Materials and Tools
· Whole watermelon
· Pineapple chunks
· Strawberries
· Blueberries or grapes
· Large sharp knife
· Large spoon or melon baller
· Stable cutting board
· Large plate or tray to support the shell
Steps for This Fruit Tray
1. Stabilise and open the watermelon. Wash the rind, set the melon on a non-slip board, and identify the side that sits most securely. Cut off the top with a controlled level slice, keeping enough depth in the lower shell to hold fruit.
2. Remove the flesh carefully. Score the inside without piercing the rind, then lift out pieces with a spoon or melon baller. Reserve attractive cubes or balls for the filling and place broken pieces in another container for juice or smoothies.
3. Prepare and mix the filling. Combine the reserved watermelon with pineapple, strawberries, and blueberries in a separate bowl first. Drain excess liquid, then spoon the mixture into the shell so heavy pieces are distributed evenly.
4. Support, garnish, and serve. Place the filled bowl on a broad platter, add a serving spoon, and chill until needed. Carry it by the supporting tray rather than gripping the rind, and do not refill it indefinitely after the shell has warmed.
The plain cut rim is often the most practical choice. Elaborate teeth, handles, and deep carvings remove strength from the shell, while the fruit inside already provides the decoration.
Use a half cantaloupe for individual portions, or set a clean small bowl inside the watermelon shell if the rind feels thin. That insert makes refilling and cleaning easier.
Fruit Tray Choices That Can Make Serving Messier Than It Needs to Be
Cutting all of the fruit too early. Fresh pieces can release juice, soften, or discolour while they wait. Prepare firm fruit first, leave apples, bananas, soft berries, and garnishes until later, and keep each variety covered and chilled before arranging.
Building height without considering weight. A high mound may look generous but can crush berries and make lower pieces inaccessible. Use shallow layers, bowls, and clear sections so guests can take fruit without collapsing the display.
Putting food directly on an uncertain reused surface. Old paint, scratches, porous wood, and decorative finishes may not be suitable for direct food contact. Use washable food-safe dishes, parchment, liners, or removable bowls while allowing the reused object to act only as the supporting base.
Letting wet fruit touch biscuits, chocolate, or dry toppings. Moisture softens crackers, dissolves sugar, and prevents chocolate from setting cleanly. Dry fruit thoroughly and create physical gaps or separate bowls between wet and dry components.
Forgetting serving tools and used-stick disposal. A tray becomes awkward when guests must lift slippery slices by hand or hide used skewers beneath napkins. Place tongs, spoons, forks, and a small waste cup where they are visible from the beginning.
Mixing allergens through the whole platter. Scattered nuts, dairy dips, and crumb toppings can make every section unsuitable for some guests. Keep them in separate labelled bowls with dedicated utensils, and avoid moving one spoon between sections.
Leaving the full tray at room temperature for the whole event. Cut fruit and dairy dips lose quality and should remain properly chilled. Present smaller portions, replenish them from the refrigerator, and discard food that has been handled or left warm beyond a safe serving period.
Decorating with unidentified leaves or flowers. Garden foliage may be inedible, treated, or unsuitable for food contact. Use known culinary herbs or edible flowers, or keep non-food decoration completely separate from the fruit and serving surface.
Frequently Asked Questions
Which fruit tray ideas are easiest for beginners?
A berry tray, rainbow rows, fruit skewers, and the muffin-tin sampler are manageable because they rely on sorting and repetition rather than carving. Begin with firm fruit, keep the arrangement shallow, and use bowls to control anything juicy or loose.
How far ahead can I prepare a fruit tray?
Firm fruit can be washed, dried, and stored separately in advance, but the final cutting and arrangement are best done closer to serving. Apples, bananas, soft berries, yogurt, and chocolate-coated pieces need particular attention because their appearance and texture can change quickly.
How do I stop cut apples and pears from turning brown?
Prepare them late and lightly coat the cut surfaces with a small amount of citrus juice if the flavour suits the tray. Keep the slices covered and chilled, and avoid soaking them so long that they become wet or sharply flavoured.
Can I use an old wooden board as a fruit tray?
Use it only when it is clean, intact, and intended for food contact. If the board is painted, cracked, heavily scratched, or purely decorative, cover it with a food-safe liner or place the fruit in washable bowls instead of setting it directly on the wood.
How can I keep a fruit tray cold at a party?
Serve a smaller platter and replenish it from covered containers in the refrigerator. A serving bowl can also be nested over ice when meltwater is kept away from the fruit, dips, and table surface.
What should I do when guests have nut or dairy allergies?
Keep nuts, yogurt, chocolate toppings, and cheese in separate clearly labelled dishes with dedicated utensils. Do not scatter them over the main fruit, because that can spread crumbs or residue across sections that otherwise would have been suitable.
How do I keep fruit from sliding around the tray?
Dry the fruit thoroughly, use a shallow lipped platter, and build the arrangement around stable bowls or firm anchor pieces. Parchment, paper cups, and silicone liners can also provide gentle grip without adding an inedible decorative coating.
What can I do with leftover fruit pieces and cutter scraps?
Keep sound offcuts chilled and use them in smoothies, fruit cups, sauces, or frozen pops. Separate scraps from rinds, seeds, used skewers, and fruit that has already been handled on the serving table.
Let the Fruit Do Most of the Decorating
The most effective DIY fruit tray ideas are not necessarily the ones with the most cuts, toppings, or separate colours. They are the ones that respect the fruit: firm pieces support delicate ones, wet ingredients stay away from dry biscuits, serving tools have a clear place, and the arrangement remains easy to use after the first few guests arrive.
A reused platter, watermelon shell, muffin tin, glass bowl, or wooden board can give the display its structure without requiring another single-purpose purchase. What matters is that the food touches a clean suitable surface and that the tray can be carried, chilled, and replenished safely. Then the colour and shape of the fruit can provide nearly all the decoration.
Begin with one manageable arrangement that suits the fruit already available. A berry plate, a row of skewers, or a small rainbow tray is enough to make the table feel considered. Which of these 18 fruit tray ideas would be easiest to serve at your next gathering?