Fun craft ideas often begin with materials that look too ordinary to save: an unmatched sock, a cardboard tube, a handful of wooden sticks, leftover tissue paper, or a page from an old magazine. Their familiar shapes are useful because they already suggest what they could become. A spoon has a face-like bowl, a paper plate has the curve of a mask, and a row of pom-poms almost arranges itself into a caterpillar.
I am Stella Eve Louise, and I enjoy projects that give overlooked materials a clear second purpose without making the process feel complicated. The most satisfying crafts are not always the ones with the most decoration. They are the ones that hold together, suit the person making them, and remain enjoyable after the glue has dried. I know it can feel tempting to open every paint pot at once, but a little planning usually leaves more room for imagination, not less.
Sort Reusable Materials Before You Start
Gather the household and craft leftovers that genuinely suit the activity, then inspect them before they reach the table. Cardboard should be clean and firm, socks and spoons should be washed, paper should be dry, and wooden pieces should have no sharp splinters. Remove tape, staples, food residue, loose labels, and any damaged parts that could interfere with the finished craft.
Sort materials by size, colour, and strength instead of placing everything in one large pile. This makes it easier to see whether there is enough for the project and prevents a child or beginner from having to search through sharp tools or unsuitable scraps. Keep a small tray for pieces that can return to storage rather than becoming table clutter.
Match Tools and Adhesives to the Maker
A paper bookmark, a wooden coaster, a sock puppet, and a clear suncatcher do not need the same adhesive. Choose glue that suits both materials and use the smallest amount that will make a secure join. Adult help is appropriate for hot glue, craft knives, precise tube cutting, strong sealants, and any task involving sharp wire or small parts.
For children, use washable non-toxic paint, blunt tools where possible, and larger decorative pieces that are easier to handle. Keep beads, magnets, tiny pom-poms, buttons, and cut wire away from young children and pets. A safer substitution rarely harms the design; felt eyes can be just as expressive as loose plastic ones.
Protect the Table and Plan for Drying
Cover the work surface with reused paper, a washable cloth, or a craft mat, and set up separate areas for wet paint, cutting, and finished pieces. Put water, wipes, and a waste container within reach before starting. Projects often become frustrating when a clean card has nowhere to sit except beside an open glue bottle.
Leave enough time and space for paint and adhesive to dry properly. Label shared projects, support rounded objects so they do not roll, and keep delicate tissue or paper pieces flat while they set. Once that is done, return reusable scraps to storage and clean the tools before dried glue becomes a second, less enjoyable craft project.
DIY Popsicle Stick Coasters
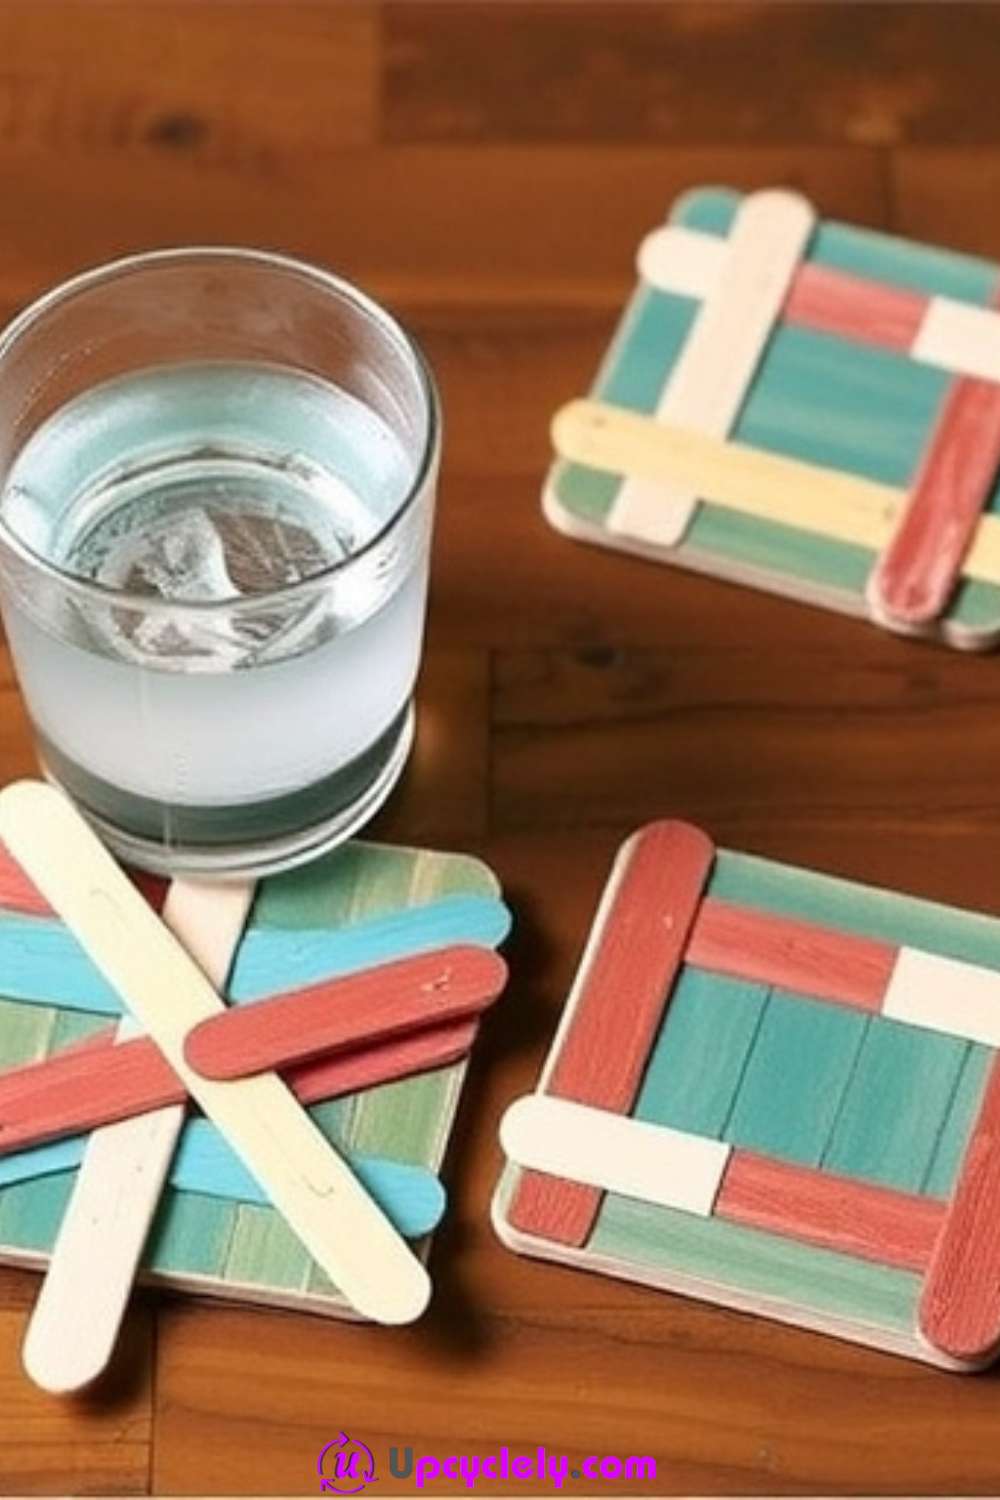
A small stack of wooden craft sticks can become a useful coaster without hiding the material it started as. The finished shape works because the sticks sit in a close, even grid, while alternating paint colours give the surface rhythm. A second layer underneath can strengthen the piece and keep the top sticks from shifting when a mug is lifted.
This is a sensible use for clean sticks left from another project, including pieces with minor paint marks that can be covered or sanded. Check each one for splinters, cracks, and warping before building. I would rather discard one weak stick than have a rough edge catch a hand later.
Materials and Tools
· Clean wooden craft sticks in similar lengths
· Fine sandpaper or a sanding block
· Acrylic or water-based craft paint
· Small paintbrushes and a protected drying surface
· Strong craft glue suitable for wood
· Optional water-resistant clear finish and felt pads
Steps for This Craft
1. Sort and smooth the wooden sticks. Lay the sticks side by side and remove any that are badly bent or split. Sand rough ends and raised fibres, then wipe away the dust so paint and glue can grip the wood instead of sitting on loose particles.
2. Plan the colour pattern before painting. Arrange the sticks in the order you want them to appear and decide whether the design will alternate colours, form stripes, or stay natural. Paint thin coats on the visible faces and edges, then let the pieces dry flat without stacking them.
3. Build a stable coaster base. Place two or three support sticks across the back, then glue the top sticks over them with narrow, even gaps. Press the assembly under a flat, protected weight while the glue sets, checking first that no glue has squeezed onto the finished surface.
4. Seal and test the finished coaster. Add a compatible clear finish only after the paint and glue are fully dry. Attach small felt pads if the underside feels rough, then place a cool mug on the coaster and check that it sits level before using it near hot drinks.
For me, the neatness of the edges matters more than adding extra decoration. A simple pattern looks intentional when the sticks line up and the coaster sits flat.
A beginner version can use unpainted wood and one central stripe. Leftover narrow timber strips or clean bamboo pieces can create a larger trivet using the same layered construction.
Wooden Spoon Puppet Theater
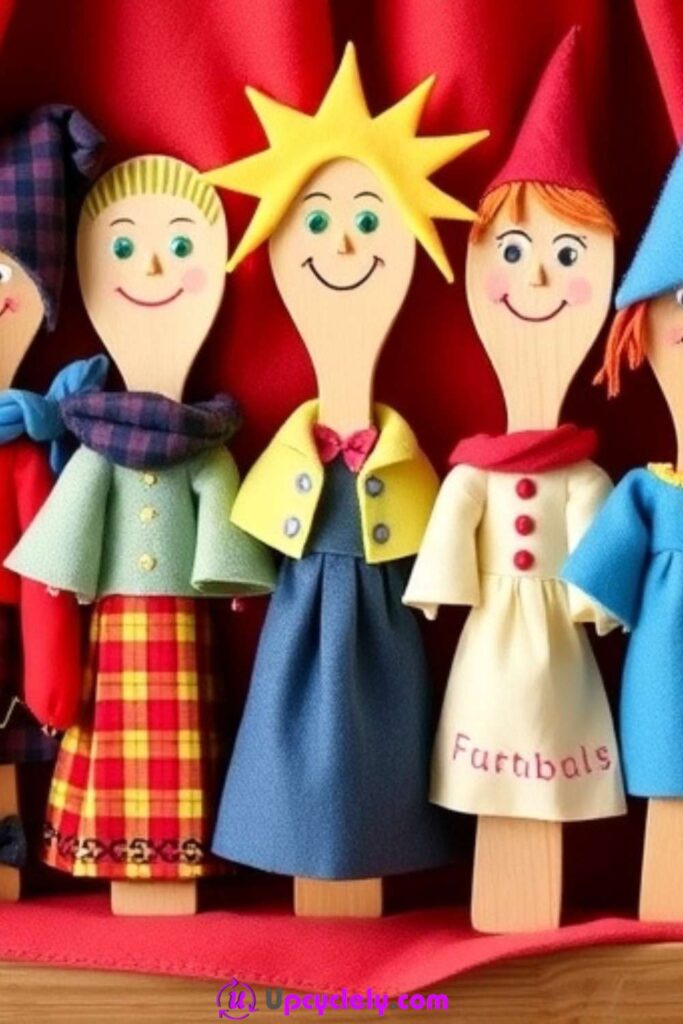
Wooden spoons already have a rounded face, a long handle, and enough strength for small hands to hold during a story. Felt clothing, yarn hair, and drawn features can turn several mismatched kitchen spoons into a cast of characters. A reused cardboard box gives them a stage and keeps the performance area separate from the decorating table.
Choose spoons that are no longer suitable for cooking but remain smooth and sound. Avoid pieces with burnt areas, deep food stains, cracks, or sharp splinters. The theater itself does not need to be elaborate; a clear opening and a stable base matter more than curtains that collapse halfway through the first scene.
Materials and Tools
· Clean retired wooden spoons
· Felt, fabric scraps, yarn, and paper offcuts
· Washable markers or craft paint
· Craft glue or a low-temperature glue tool used by an adult
· A sturdy cardboard box for the theater
· Scissors, tape, and optional fabric for curtains
Steps for This Craft
1. Prepare the spoons and decide on characters. Clean and dry each spoon, sand any rough handle edges, and sketch simple character ideas on scrap paper. Give every puppet one or two recognisable features, such as a hat, glasses, long hair, or a patterned shirt, instead of covering the entire spoon.
2. Create the faces and clothing in layers. Draw or paint the face first and let it dry before attaching yarn, felt, or fabric. Keep glued pieces clear of the lowest part of the handle so the puppet remains comfortable to hold and can move easily behind the stage.
3. Turn a box into a steady theater. Cut a wide opening in one side of a firm cardboard box, leaving enough border to keep the structure rigid. Reinforce weak corners with tape, decorate the front with reused paper, and add lightweight curtains only if they do not block the puppet opening.
4. Test the puppets through a short performance. Move every spoon behind the stage and check that large hats or hair do not catch on the opening. Then create a brief story with a beginning, a problem, and an ending; simple dialogue usually works better than trying to remember a long script.
I know it can feel tempting to give every puppet ten accessories, but the audience needs to recognise the face from a little distance. One clear feature often does the job.
For a smaller setup, skip the box and perform over the back of a chair draped with fabric. Cardboard strips, old rulers, or sturdy paint stirrers can replace spoons when none are available.
Cupcake Liner Flowers
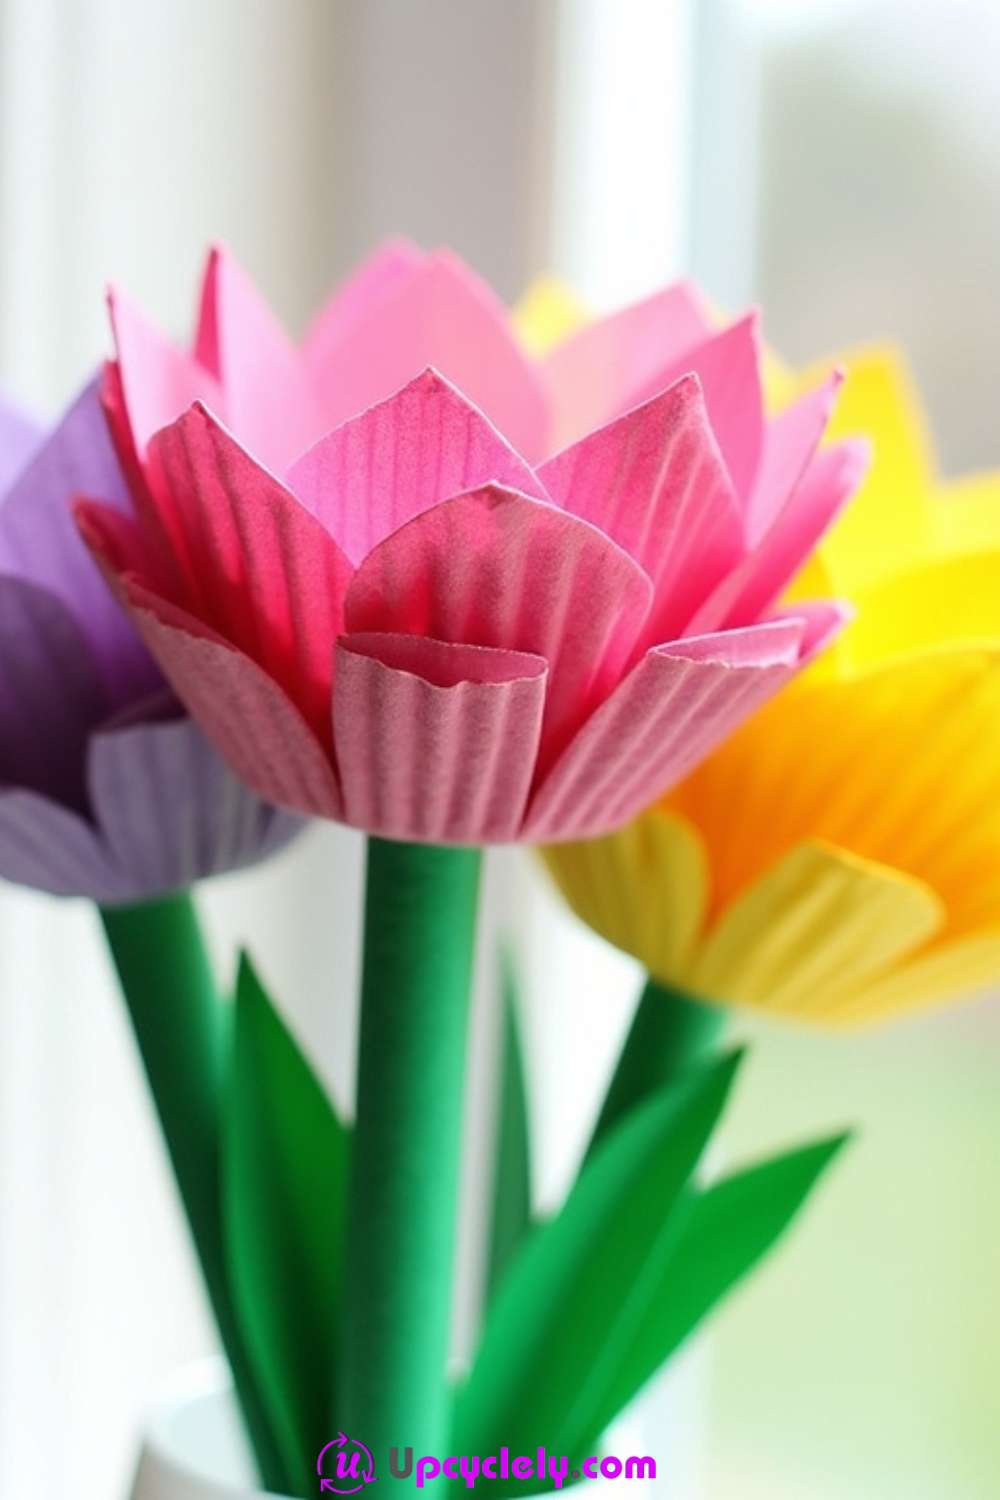
Paper cupcake liners open naturally into soft circles, so they need very little cutting to resemble layered flower petals. Nesting two or three sizes gives the centre depth, while a straw, twig, or paper-wrapped wire provides a narrow stem. The crimped edges add texture that plain craft paper would take much longer to fold by hand.
This is a useful project for unused liners from mixed packs, especially colours that do not suit the kitchen anymore. Food-stained liners should not be reused. Keep the arrangement light, because too many layers can make the flower head heavy enough to bend a thin stem.
Materials and Tools
· Clean unused cupcake liners in several colours or sizes
· Paper straws, thin twigs, or craft wire
· Scrap paper for centres and leaves
· Craft glue or glue dots
· Scissors and a pencil
· Optional buttons, paper circles, or pom-poms for flower centres
Steps for This Craft
1. Shape the liners without flattening their texture. Fold a liner loosely into quarters and trim only the outer edge to create rounded or pointed petals. Open it carefully and repeat with smaller liners, varying the cuts slightly so the layers do not sit directly on top of one another.
2. Build the flower from the largest layer upward. Place the widest liner at the back and add smaller pieces in the centre with a small amount of glue. Rotate each layer before pressing it down, then cover the joining point with a paper circle, button, or lightweight pom-pom.
3. Attach a stem that supports the flower head. Flatten the end of a paper straw or tape a small tab to the top of a twig or wire. Glue the flower to this wider contact point and let it rest horizontally until secure, rather than standing it up while the adhesive is still soft.
4. Add leaves and arrange the finished flowers. Cut simple leaves from green packaging, magazine pages, or scrap paper and attach them below the flower. Gather several stems in a reused jar, or keep one flower flat for a card, gift tag, or wall display.
The part I like is the natural crimp around the petal edge. I do not think glitter is needed when the paper already has that much texture.
Coffee filters, tissue circles, or old paper baking cups can create softer variations. For young children, pre-cut the petals and use glue dots so the assembly stays manageable.
Kaleidoscope DIY
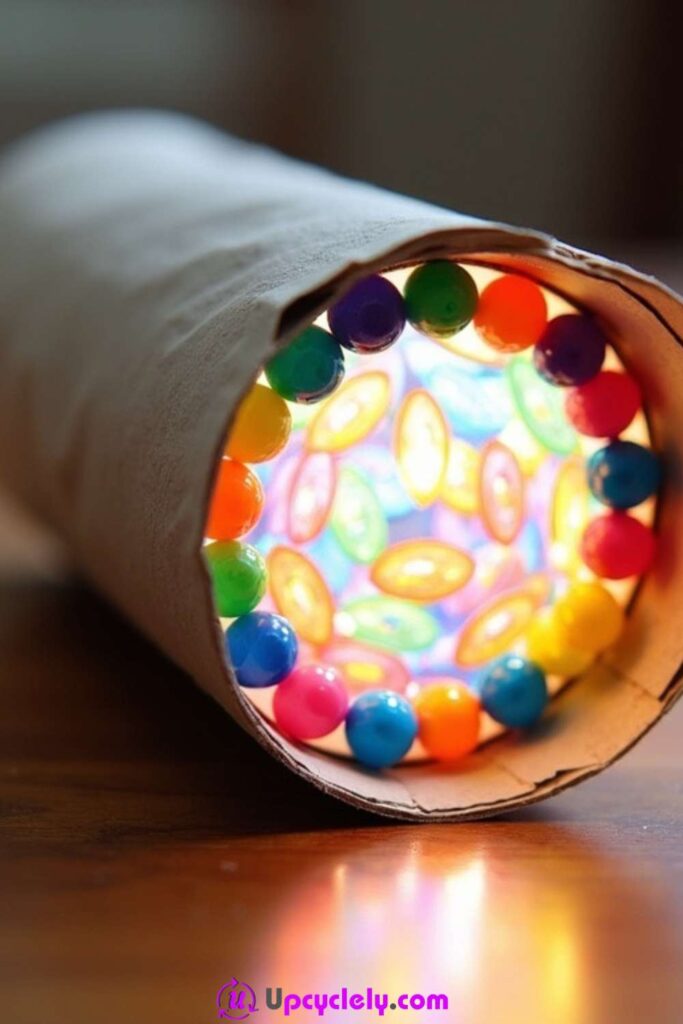
A cardboard tube can become a simple viewing toy when reflective surfaces repeat the colours placed at one end. The tube provides the body, while three reflective strips arranged as a triangular channel create the changing pattern. Small translucent scraps move inside a shallow end chamber and shift every time the tube turns.
The reflective material needs careful handling. Thin mirror card or purpose-made reflective plastic is safer for a children’s craft than broken mirrors, cut glass, or sharp metal. The goal is a bright repeated pattern, not a perfect optical instrument, so smooth edges and a securely closed chamber should come first.
Materials and Tools
· A clean cardboard tube
· Reflective card or flexible mirror-effect plastic
· Clear plastic from clean packaging
· Small translucent paper, beads, sequins, or coloured film
· Strong tape and craft glue
· Ruler, pencil, scissors, and adult help for precise cutting
Steps for This Craft
1. Measure the inside of the cardboard tube. Cut three reflective strips slightly shorter than the tube so they fit without protruding. Tape them together along the long edges with reflective faces inward, forming a triangular channel that slides into the tube snugly.
2. Create a safe viewing end. Cover one end of the tube with sturdy card and make a small central viewing hole. Smooth the opening with tape and check that the reflective insert cannot slide toward the eye when the tube is lifted.
3. Build the colour chamber at the opposite end. Cut two clear plastic circles to fit the tube. Secure one circle over the end, add a small amount of lightweight coloured material, then close it with the second circle, leaving enough space for the pieces to move rather than packing them tightly.
4. Seal, decorate, and test the kaleidoscope. Tape every outer edge securely and cover the tube with reused paper if desired. Point the colour chamber toward a bright window, look through the viewing hole, and rotate slowly; if the pieces stick, reduce the amount inside rather than shaking the tube forcefully.
One detail I would check twice is the viewing end. Nothing sharp or loose should sit near the eye, even if that means using more tape than the decoration appears to need.
A shorter tube creates a compact version, while a paper towel roll gives a longer viewing tunnel. Coloured cellophane offcuts can replace beads when the craft is intended for younger makers.
Handmade Paper Beads Jewelry
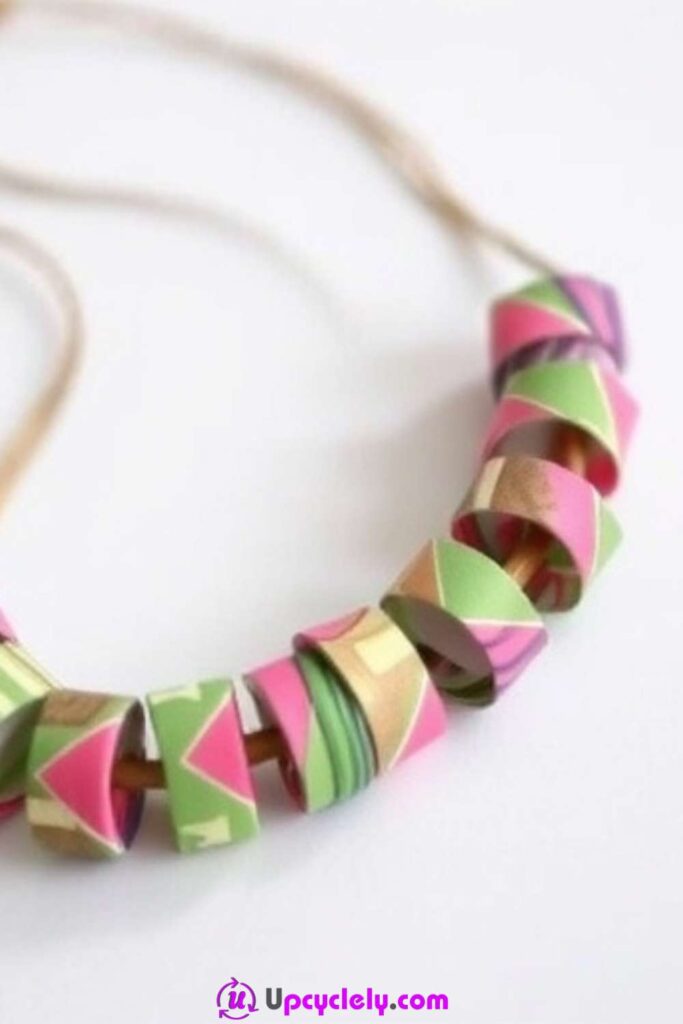
Long triangular paper strips roll into beads with a tapered shape and visible bands of colour. Magazine pages, old calendars, wrapping-paper scraps, and unwanted prints all produce different patterns once the image is wrapped around itself. Stringing the finished beads turns paper that might have been discarded into a light necklace or bracelet.
The paper needs to roll tightly enough to keep its shape without becoming stiff with glue. Exact matching is not essential; small differences make the beads feel handmade. I would sort the finished pieces by size before stringing, because that reveals whether a balanced pattern is possible without making more.
Materials and Tools
· Magazine pages, old gift wrap, maps, or coloured paper scraps
· Ruler, pencil, and scissors or a paper cutter
· Glue stick or clear-drying paper glue
· Toothpicks, skewers, or a paper-bead rolling tool
· Elastic cord, thread, or jewellery wire appropriate to the design
· Optional clear paper sealant and reused spacer beads
Steps for This Craft
1. Cut tapered strips from the reused paper. Mark long triangles across the page, keeping the bases similar if you want beads of a related size. Cut cleanly and place the strips in colour groups, remembering that the narrow tip will form the final visible band.
2. Roll each strip around a narrow tool. Begin at the wide end and keep the paper centred as it wraps around the toothpick or skewer. Apply a small amount of glue as the roll develops, then secure the tip without flooding the outside surface.
3. Dry and protect the paper beads. Leave the beads on the rolling tools or transfer them to a drying rack so the holes remain open. Add a compatible clear finish in thin coats only when extra protection is needed, allowing the beads to dry without touching each other.
4. Arrange and string the jewellery. Lay the beads in a row before cutting the cord and alternate sizes or colours until the sequence feels balanced. String them with optional spacers, test the fit, then finish the closure in a way suited to the cord and the person who will wear it.
For me, the most interesting beads are often made from pages that looked unpromising when flat. A strip with only two colours can produce a surprisingly clear spiral.
Roll wider strips for statement beads or narrow strips for lighter bracelets. Paper beads can also decorate key rings, gift tassels, or hanging ornaments when jewellery is not practical.
Handprint Wall Art
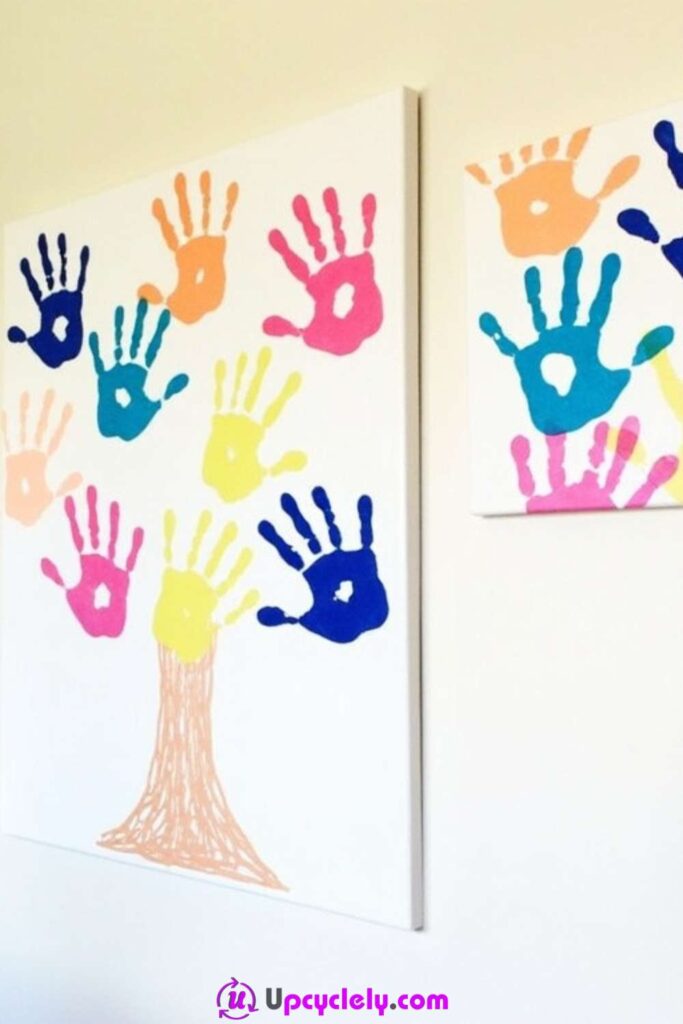
Handprints preserve a size and shape that changes quickly, which gives this wall art more meaning than an ordinary painted motif. Several prints can form the crown of a tree, a flower, a circle, or a loose colour field. A simple painted trunk or handwritten date connects the marks without making the composition feel crowded.
Use washable, non-toxic paint and prepare the washing area before anyone puts paint on a hand. Heavy paper or canvas works better than thin printer paper, which can wrinkle under the moisture. The small smudges are part of the process, but a well-placed sheet and a straight lift make the main shape easier to recognise.
Materials and Tools
· Canvas board or heavy paper
· Washable non-toxic paint
· Wide soft brush or sponge
· Aprons, table covering, wipes, and water
· Pencil, marker, or additional paint for the main design
· Optional frame and labels for names or dates
Steps for This Craft
1. Plan the overall shape before making prints. Lightly mark where the trunk, centre, or outer boundary will sit, then decide how many handprints fit comfortably. Leave space for names or a date without squeezing them into the painted area later.
2. Apply an even layer of paint to the hand. Brush a thin coat across the palm and each finger, filling dry gaps but avoiding pools. Press straight down onto the surface with fingers spread naturally, then lift upward without sliding sideways.
3. Build the composition one print at a time. Let overlapping areas become touch-dry before adding another hand, especially when colours differ. Turn the paper or canvas rather than asking the maker to reach awkwardly across wet paint, and wipe hands immediately after each print.
4. Add the connecting details and display information. Paint the tree trunk, flower centre, or other simple structure after the handprints dry. Add names and the date neatly, then frame the piece without allowing glass to press against thick paint ridges.
I do not think every print needs a perfect outline. A slightly uneven fingertip can make the artwork feel more honest, as long as the hand shape remains readable.
Trace hands onto fabric or old patterned paper for a paint-free version. A family piece can use different hand sizes, while one child can repeat the same hand in a gradual colour sequence.
No-Sew Sock Puppets
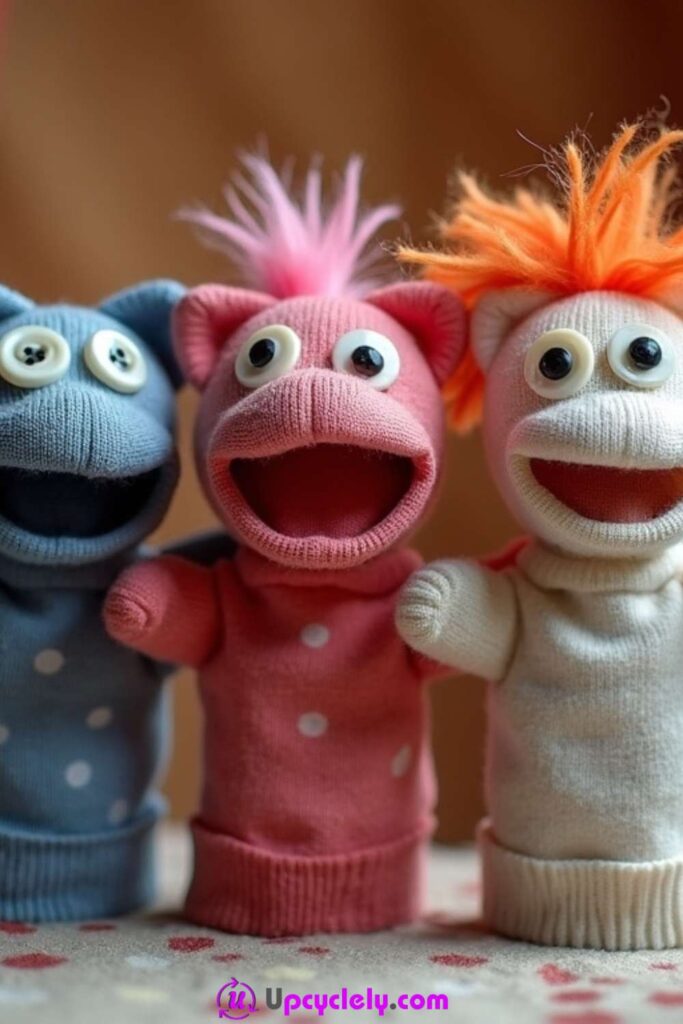
An odd sock becomes a puppet as soon as the toe folds into a mouth and a few lightweight features give it a face. Yarn, felt, ribbon, and fabric offcuts can create hair, ears, teeth, or clothing without a sewing machine. Keeping the decoration flexible allows the sock to move naturally when a hand opens and closes inside it.
Choose a clean sock with a sound heel and no thinning fabric around the toe. Small buttons and loose eyes are not suitable for very young children or pets, so paper or felt shapes may be the safer choice. Hot glue should be handled by an adult, and the puppet must cool completely before use.
Materials and Tools
· A clean unmatched sock
· Felt, fabric, yarn, ribbon, and paper scraps
· Fabric glue or another flexible craft adhesive
· Large felt eyes or securely attached craft eyes when age-appropriate
· Cardboard for an optional mouth insert
· Scissors, marker, and adult help where needed
Steps for This Craft
1. Find the puppet mouth and test the fit. Place a hand inside the sock and fold the toe inward between the fingers and thumb. Mark the natural mouth area lightly, then remove the sock and decide whether it needs a thin rounded cardboard insert for extra shape.
2. Prepare the main facial pieces before gluing. Cut eyes, ears, a tongue, teeth, and hair while the sock lies flat. Arrange them around the mouth and move the pieces several times; the face should still look clear when the sock is lifted and curved.
3. Attach features from the centre outward. Secure the mouth pieces first, then add eyes and the largest shapes. Use small amounts of flexible adhesive and keep glue away from the inner hand area, placing a temporary card inside the sock if needed to stop both layers sticking together.
4. Let the puppet cure and practise its movement. Remove any protective card only after the adhesive is secure. Put the puppet on, open and close the mouth slowly, and reinforce loose corners before adding a voice, name, or short story.
The mouth movement is more important than a crowded face. I would rather use two secure felt eyes than several heavy parts that make the sock flop forward.
A glove puppet can be made from a retired mitten, and a paper-bag puppet offers an easier version for a group activity. Washable fabric markers can replace glued details when a flatter finish is preferred.
Painted Rock Creatures
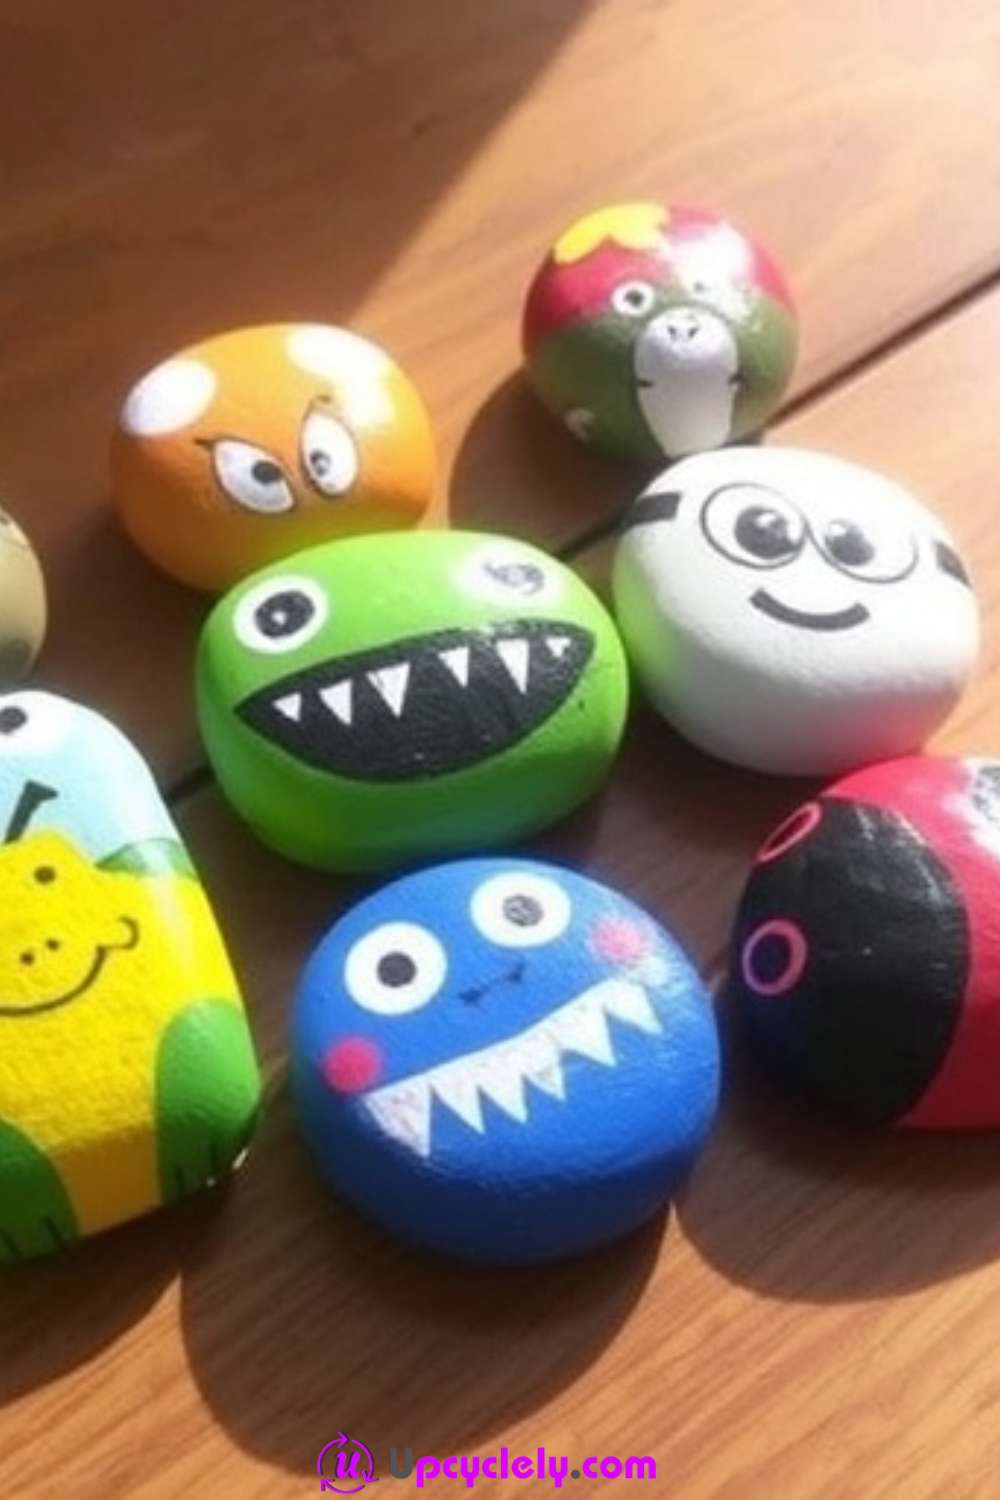
A smooth rock often suggests its own creature before the first brush touches it. A rounded pebble can become a beetle or owl, a long stone can become a fish, and an uneven edge may suit a lizard or imaginary animal. Working with the existing shape reduces the amount of drawing and keeps the natural object visible beneath the paint.
Collect stones only where it is permitted and avoid taking them from protected landscapes or maintained garden features. Wash away soil and let the rocks dry fully, because hidden moisture can prevent paint from bonding. Very heavy stones are better displayed low down rather than placed on a narrow shelf.
Materials and Tools
· Clean dry rocks with stable surfaces
· Acrylic or water-based craft paint
· Small and medium paintbrushes
· Pencil or chalk for light planning marks
· Paint pens or fine markers compatible with the dry base coat
· Optional clear finish suitable for indoor or outdoor use
Steps for This Craft
1. Match each stone to a simple creature shape. Turn the rocks in several directions and identify where a head, back, wing, or shell could fit naturally. Sketch only the main divisions, avoiding tiny features that the rough surface will not hold clearly.
2. Block in the largest colour areas first. Apply a thin base coat where needed and let it dry before adding the creature’s main colours. Paint around the rock rather than only across the top if the design will be viewed from several angles.
3. Add facial features and patterns in stages. Use a fine brush or paint pen for eyes, spots, scales, or feathers after the base is dry. Work from larger marks to smaller ones, and stop before the pattern hides the outline that makes the creature recognisable.
4. Protect and place the finished rocks appropriately. Add a compatible clear coat only when the rock will be handled often or displayed outdoors. Let it cure on a protected surface, then place the creature where it cannot roll, fall, or be mistaken for a toy by a pet or small child.
For me, the rock should still look like a rock from at least one angle. That natural weight and texture are part of what makes the creature interesting.
Use small stones as story characters or plant-pot markers, and larger flat stones as doorstop decorations only after checking stability. Reclaimed wooden offcuts can take the same painted-creature idea when stone collecting is unsuitable.
Paper Plate Masks
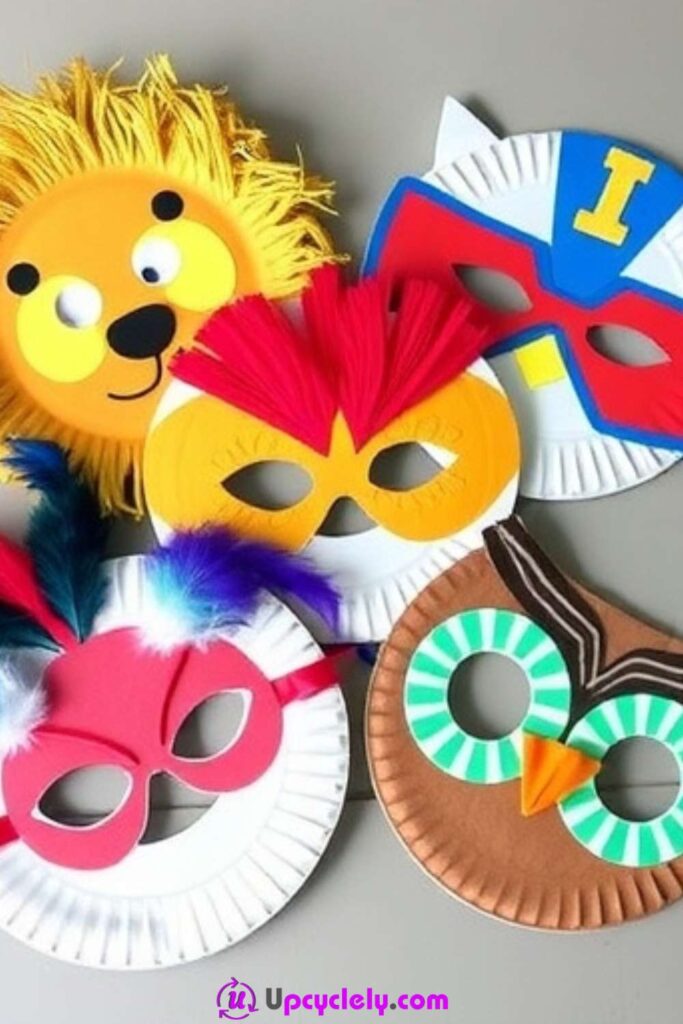
A paper plate provides a ready-made curve for a lightweight mask, while the rim creates a strong border around cut eye openings. Ears, feathers, paper shapes, and drawn lines can turn that plain circle into an animal, imaginary creature, or theatrical character. Cutting away part of the lower plate often makes the mask more comfortable around the nose and mouth.
Clear vision and a comfortable fit matter more than the amount of decoration. An adult should cut the eye openings for young children and check that elastic is not too tight. Avoid long feathers, sharp wire, or loose small pieces near the eyes, and remove the mask immediately if it blocks breathing or sight.
Materials and Tools
· Clean sturdy paper plates
· Construction paper, packaging paper, or card scraps
· Washable markers, crayons, or paint
· Glue stick, tape, or child-safe craft glue
· Scissors and a hole punch used with supervision
· Elastic, ribbon ties, or a craft-stick handle
Steps for This Craft
1. Mark the eye position on the wearer, not by guesswork. Hold the uncut plate gently in front of the face and mark the eye centres from the outside. Remove it before cutting, make the openings wider than the eyes, and smooth the edges so they do not scratch the skin.
2. Choose a character and build the largest shapes. Cut ears, a mane, horns, or a beak from lightweight paper and arrange them around the plate. Attach these structural pieces first, keeping the lower face and eye area open.
3. Add colour and simple facial details. Paint or draw broad areas before gluing on smaller features. Use bold shapes that remain visible at arm’s length and let wet materials dry flat so the plate does not curl unnecessarily.
4. Add a safe way to hold or wear the mask. Punch reinforced side holes for loose ribbon ties, attach comfortable elastic, or glue a craft-stick handle to the bottom edge. Test vision and fit while standing still before using the mask during a parade or performance.
I would always choose wider eye holes over a more realistic face. A mask is much more enjoyable when the wearer can see where the table, doorway, and other people are.
Half-plate masks feel lighter for younger children, while a stick-held version avoids elastic altogether. Cereal-box card can create a flatter mask with extra strength.
Tissue Paper Tree
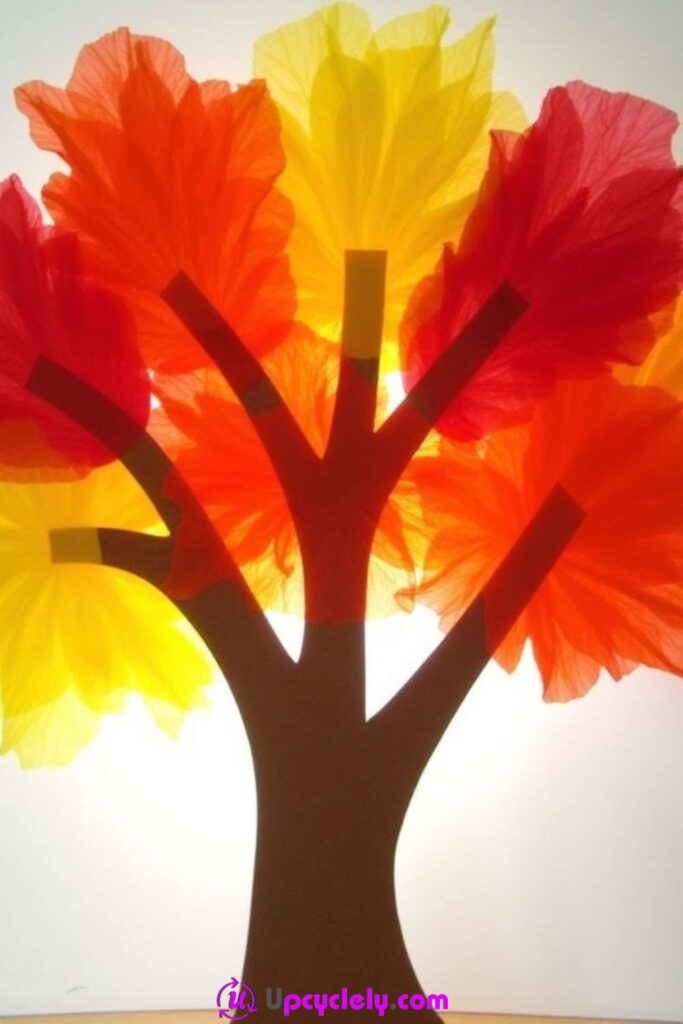
Crumpled tissue squares create a canopy with more depth than flat paper leaves. A simple brown trunk anchors the design, while warm red, orange, yellow, and green pieces build the crown in loose clusters. The uneven surface catches light and makes a small paper craft feel almost sculptural without requiring complicated construction.
Tissue paper tears easily once it becomes wet with glue, so the adhesive should stay mainly on the background. Reuse clean tissue from gift packaging by flattening it first and trimming away tape or damaged areas. A firm cardstock base prevents the finished page from buckling under the raised canopy.
Materials and Tools
· Heavy paper, card, or a reused box panel
· Brown paper or paint for the trunk
· Clean tissue paper in selected colours
· Glue stick or small amount of liquid craft glue
· Scissors and a pencil
· Optional cotton swab or blunt pencil for shaping tissue pieces
Steps for This Craft
1. Create a trunk that can support the canopy visually. Draw or cut a trunk with several clear branches, then attach it slightly below the centre of the page. Leave enough open space above and beside it for the tissue clusters to spread without touching every edge.
2. Prepare the tissue pieces by colour. Cut or tear small squares and sort them into shallow containers. Crumple each piece loosely rather than twisting it into a hard ball, because softer folds create a fuller leaf texture.
3. Build the canopy from broad areas to small gaps. Apply glue to a limited section of the background and press tissue pieces into it with a fingertip or blunt tool. Mix colours gradually, overlap some edges, and leave small spaces where the branches can still be seen.
4. Finish the scene and let it dry flat. Add a few fallen leaves, a simple ground line, or a small paper label if it supports the design. Keep the page horizontal until the glue is dry, then lift any flattened tissue gently rather than adding more layers everywhere.
The branches should not disappear completely. I think a few brown lines showing through make the tree feel stronger and keep the tissue from becoming one solid mound.
Change the palette for spring blossom, summer greens, or a winter tree with white paper. Old napkins and thin packing paper can replace gift tissue when their surfaces are clean.
Personalized Bookmarks
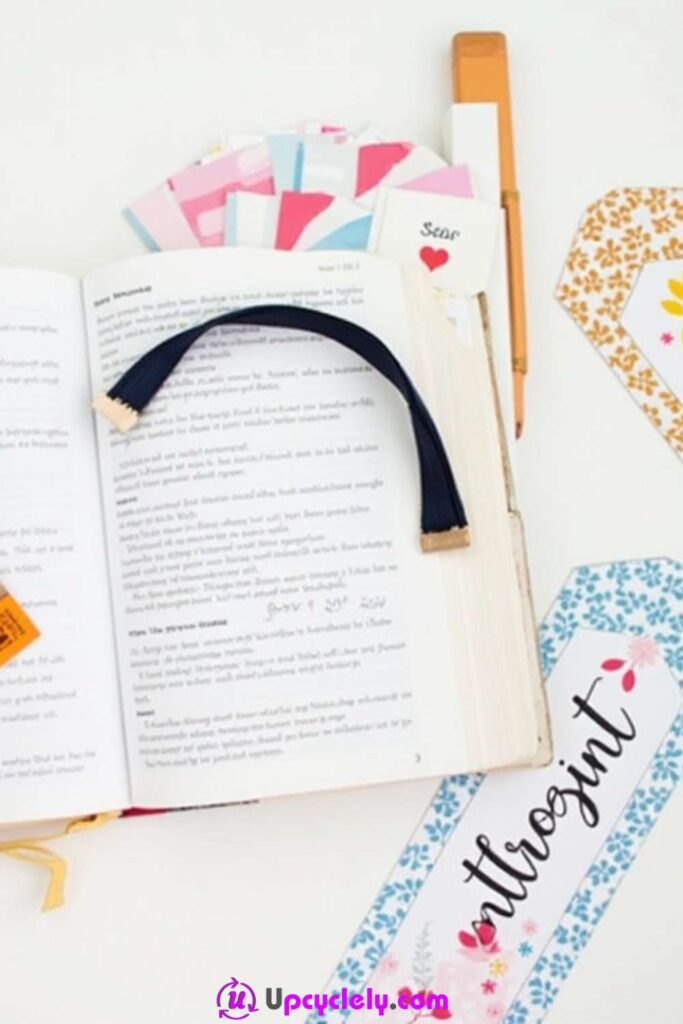
A bookmark only needs to be thin, smooth, and long enough to find easily between pages. Card offcuts from packaging, old folders, and unused printed paper can provide the base, while lettering, stamps, collage, or narrow fabric scraps make each one personal. A ribbon at the top is optional; the decorated surface should remain the main feature.
A thick button, raised bead, or rough layer can damage a book and make the bookmark uncomfortable to use. Keep the front and back as flat as possible, round sharp corners, and protect wet media before placing the finished piece inside a valued book.
Materials and Tools
· Heavy cardstock, packaging card, or old folder offcuts
· Ruler, pencil, and scissors or paper cutter
· Markers, stamps, stickers, magazine pieces, or washi tape
· Glue stick or thin paper adhesive
· Hole punch and optional ribbon or reused thread
· Optional clear self-adhesive film for protection
Steps for This Craft
1. Cut a straight, comfortable bookmark base. Mark a long narrow strip that fits inside an average book without protruding far beyond the edge. Cut cleanly, round the corners, and test the undecorated card between pages before adding anything else.
2. Choose one personal theme. Plan a name, short quote, colour pattern, small collage, or reading-related motif. Arrange paper pieces first and keep important lettering away from the edges, where trimming or sealing may cover it.
3. Decorate both sides without adding bulk. Attach flat materials with a thin, even layer of glue and let one side dry before turning the bookmark over. Add drawn details last so pens do not smear across adhesive or damp paper.
4. Protect the surface and add an optional tassel. Cover the bookmark with clear film or laminate it only after all materials are dry, then trim with a sealed border. Punch a hole through a strong top area and add a short ribbon that will not tangle around the book.
The most useful bookmark is often the simplest one. A clear name and one strong pattern can feel more personal than a surface filled with every sticker on the table.
Use old maps for travel readers, music sheets for performers, or fabric-backed card for a softer finish. A group can exchange bookmarks as small handmade gifts without needing identical supplies.
Pom-Pom Caterpillars
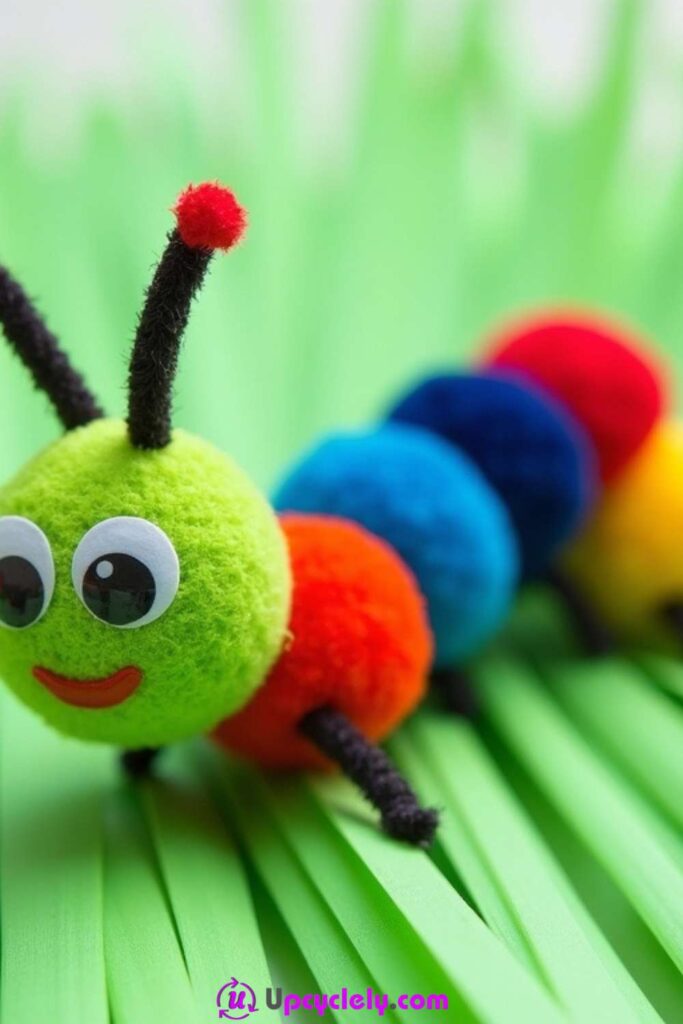
A row of soft pom-poms naturally forms the segmented body of a caterpillar. One larger piece creates the head, while smaller colours can repeat or change along the body. Short pipe-cleaner antennae and a simple face make the character readable without adding heavy decoration.
Small pom-poms, eyes, and pipe-cleaner pieces can be choking hazards, so this activity needs age-appropriate materials and supervision. For younger children, use larger handmade yarn balls and paper eyes. Keep wire ends folded inward and covered so they do not scratch fingers.
Materials and Tools
· Large and medium pom-poms or handmade yarn balls
· Craft glue appropriate to the fibres
· Paper or felt eyes, or craft eyes when age-appropriate
· Pipe cleaners for antennae
· A card strip, leaf shape, or peg for an optional base
· Scissors and adult supervision
Steps for This Craft
1. Arrange the caterpillar before using glue. Choose one larger head and line up the body pieces on a card strip or work surface. Test a straight, curved, or gently rising shape, making sure the colours feel balanced from head to tail.
2. Join the body in small sections. Glue the head to the first body pom-pom, then continue one piece at a time. Press neighbouring fibres together without flattening them and leave the shape supported until the joins are secure.
3. Prepare safe antennae and facial features. Cut two short pipe-cleaner pieces, fold every cut end inward, and bend them into simple curves. Attach them behind the head, then add flat paper or felt eyes and a small mouth if desired.
4. Mount or use the finished caterpillar. Glue the caterpillar to a leaf-shaped card, a clothespin, or a sturdy strip when it needs extra support. Let all adhesive cure before handling and store it away from pets or children who may pull off small parts.
I know the bright colours are tempting, but the body shape is clearer when the head remains slightly larger than the rest. That one change does most of the character work.
Make a no-glue caterpillar by threading large felt balls onto thick cord with adult help. Paper circles or egg-carton cups offer a flatter alternative for classrooms.
Popsicle Stick Puppets
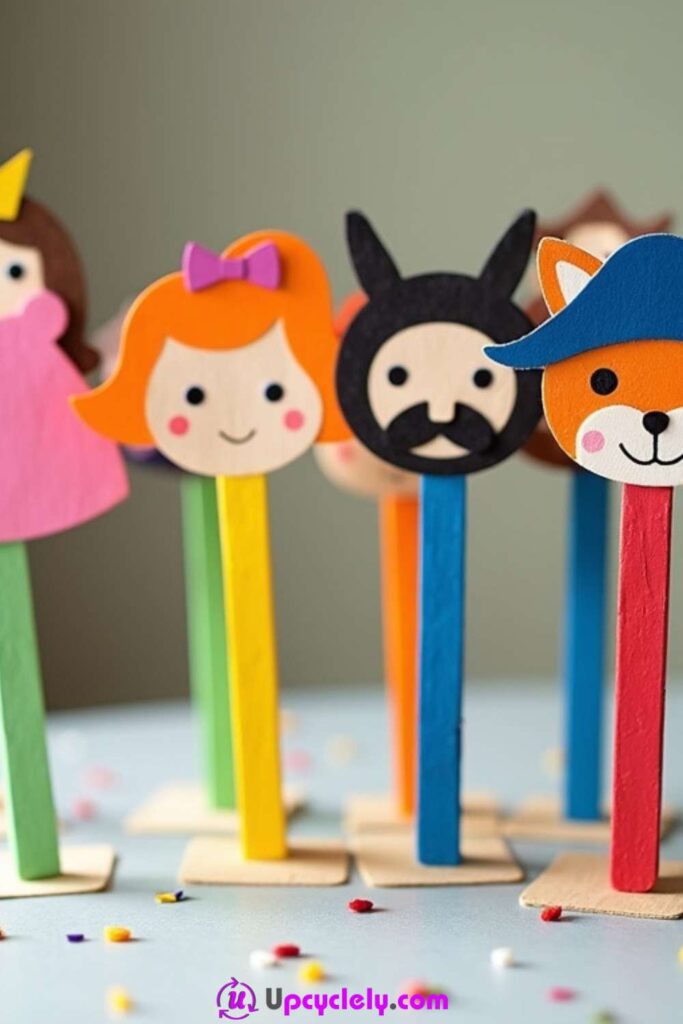
A single wooden craft stick can support a paper character without the bulk of a full hand puppet. The stick becomes the handle, while a drawn or collaged head sits above it and small fabric or paper details suggest clothing. Several puppets can be made from unrelated scraps and still feel like one set when their scale remains consistent.
Smooth the stick before decorating and keep heavy pieces near the top to a minimum. A large wet paper shape may bend or rotate during play. Strong card, simple silhouettes, and secure joints make the puppet easier to move through a story.
Materials and Tools
· Clean wooden craft sticks
· Cardstock, packaging card, or firm paper scraps
· Markers, paint, crayons, or coloured pencils
· Felt, yarn, buttons, and paper offcuts used appropriately
· Craft glue or double-sided tape
· Scissors and optional envelopes for storing characters
Steps for This Craft
1. Plan a set of characters at one scale. Decide whether the puppets will be people, animals, storybook figures, or imaginary creatures. Sketch the heads and bodies so none becomes too wide or heavy for a single stick.
2. Decorate the sticks and character pieces separately. Paint or colour the stick handles and let them dry. Create faces and clothing on card, then add only lightweight details that will not peel away when the puppet moves.
3. Attach each character securely to its handle. Glue the card figure to the upper part of the stick with enough overlap to form a strong joint. Add a second small card patch on the back if the figure wobbles, then dry it flat under light pressure.
4. Use the puppets in a simple scene. Make a small background from a folder, box, or folded card and practise moving the puppets without covering their faces. Store them flat in a labelled envelope so yarn, ears, and paper corners do not catch on other craft supplies.
For me, clear silhouettes matter more than tiny facial details. A crown, pair of ears, or striped shirt can identify a character from across the table.
Use old photographs only with permission, or cut figures from discarded greeting cards. A magnetic board performance is possible when a securely enclosed magnet is added by an adult and kept away from young children.
Tissue Paper Bunting
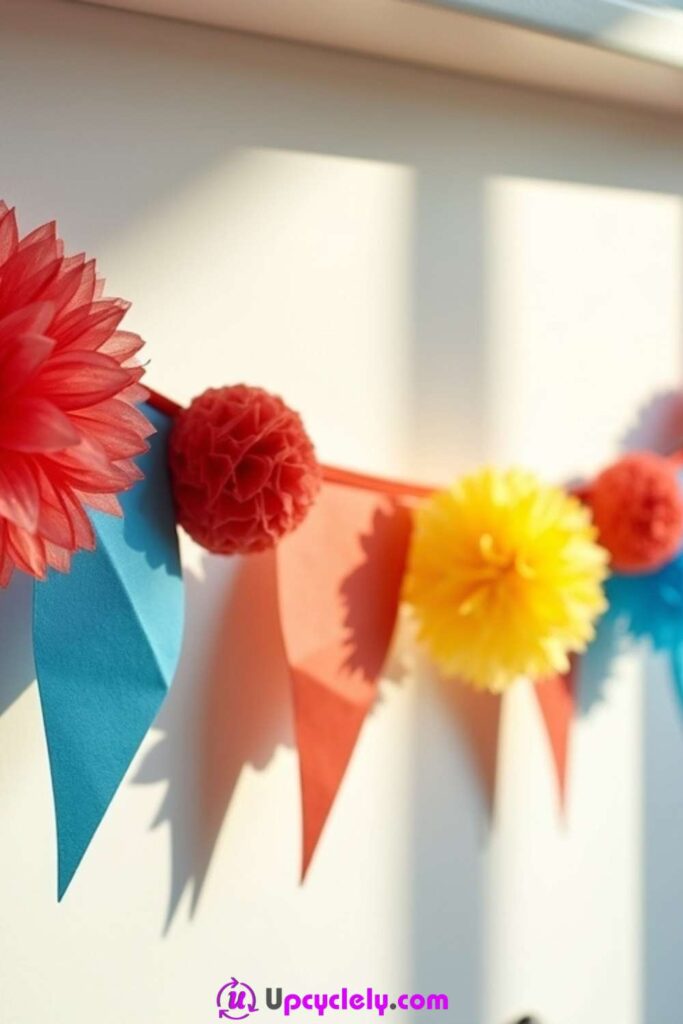
Tissue paper bunting creates a light line of colour across a wall, shelf, or party table without using much material. Folded triangles, rectangles, or tassels can hang from reused ribbon or string, and the slight transparency lets overlapping colours appear deeper. The flags do not need to match perfectly, but their spacing should feel deliberate.
Tissue tears easily around string, so reinforce the folded top rather than punching holes through a single layer. Indoor display is best unless the material is protected from wind and moisture. Keep bunting away from flames, heaters, and hot light fittings.
Materials and Tools
· Clean tissue paper from gift wrapping or craft packs
· String, ribbon, yarn, or light cord
· Scissors and a ruler
· Glue stick, tape, or glue dots
· Scrap card for a reusable flag template
· Removable hooks or another suitable hanging method
Steps for This Craft
1. Measure the display area before cutting flags. Run the string loosely across the intended space and decide how much curve it should have. Add extra length for tying and mark the section where flags will sit so the ends remain clear.
2. Cut tissue pieces in a consistent basic shape. Use a card template to cut triangles, rectangles, or folded diamonds. Stack only a few tissue sheets at once so the edges remain controlled rather than slipping into uneven layers.
3. Attach the flags around the cord. Fold the top of each piece over the string and secure it with a narrow line of glue or tape. Space the flags on the table before fixing every fold, then alternate colours or sizes according to the planned rhythm.
4. Hang and adjust the bunting gently. Let the adhesive dry with the cord lying flat, then lift it from both ends. Secure it to appropriate hooks, straighten any folded flags, and roll the bunting loosely around card for storage instead of crushing it into a box.
A little open string between flags keeps the bunting light. I would not fill every centimetre, because tissue needs room to move without tangling.
Layer two colours for deeper flags or mix tissue with paper cut from old gift bags. For a reusable outdoor version, make the same shapes from fabric remnants instead.
Tissue Paper Confetti
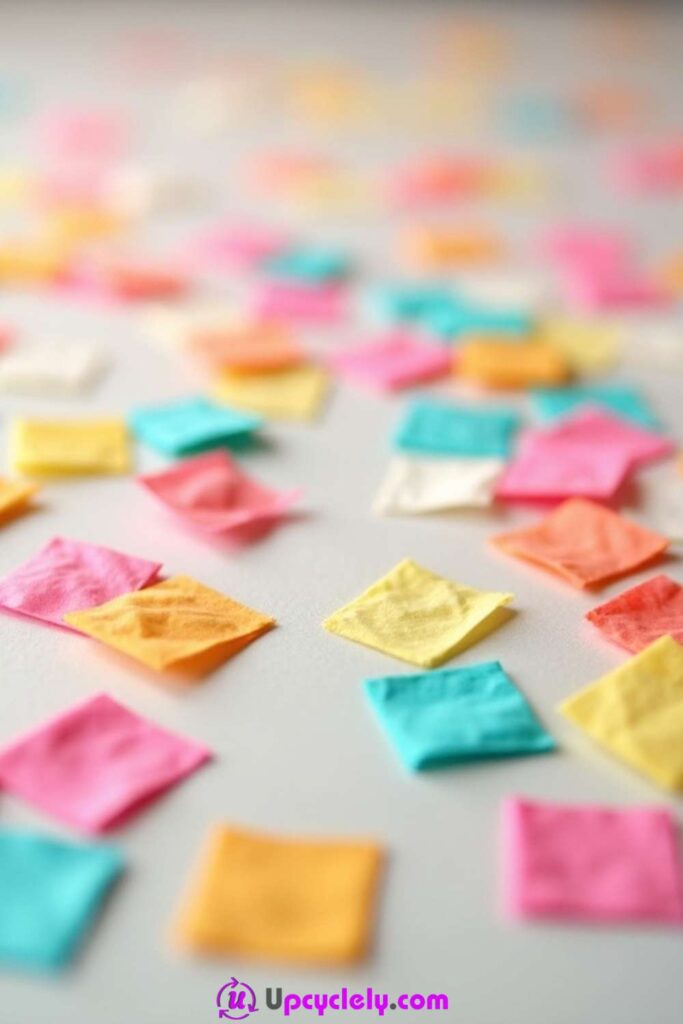
Small tissue-paper pieces can turn leftover gift wrap into table decoration, envelope filler, or material for another collage. Circles made with a punch look orderly, while hand-cut squares and narrow strips feel more informal. Mixing only a few colours usually creates a clearer result than combining every scrap available.
Confetti spreads easily and can be slippery on hard floors, so plan how it will be used and collected. Do not release it outdoors where it can become litter, and keep small pieces away from babies, pets, food, and open drinks. Reusing it for craft work is often more practical than throwing it into the air.
Materials and Tools
· Clean tissue-paper scraps
· Scissors, paper punch, or craft punches used safely
· Shallow trays or envelopes for sorting
· Scrap card used as a cutting support
· Reusable jars, paper packets, or labelled bags for storage
· Optional stencil for consistent hand-cut shapes
Steps for This Craft
1. Flatten and sort the tissue scraps. Remove tape, labels, torn wet areas, and heavily creased sections. Group the paper by colour and place only a few layers together so the cut shapes do not fuse or tear.
2. Choose shapes that match the intended use. Punch circles for neat table details, cut squares for gift filler, or make narrow strips for collage texture. Keep the pieces large enough to handle and clean up, especially when children are involved.
3. Build a controlled colour mix. Combine colours in a shallow tray and check the balance before cutting more. Add a small amount of a contrasting shade rather than making equal piles of every colour, then separate themed mixes into labelled packets.
4. Use and collect the confetti responsibly. Place it on cards, gift wrap, or a protected table in small amounts. Sweep or gather unused pieces immediately and store clean leftovers for mosaics, suncatchers, or handmade paper rather than letting them spread through the room.
The best confetti mix is not necessarily the largest one. Three related colours and one accent are usually easier to use than a bag that looks like every celebration happened at once.
Punch old book pages or coloured paper for a firmer version. Larger tissue shapes can become collage petals or scales, giving the scraps a purpose beyond party decoration.
Tissue Paper Mosaics
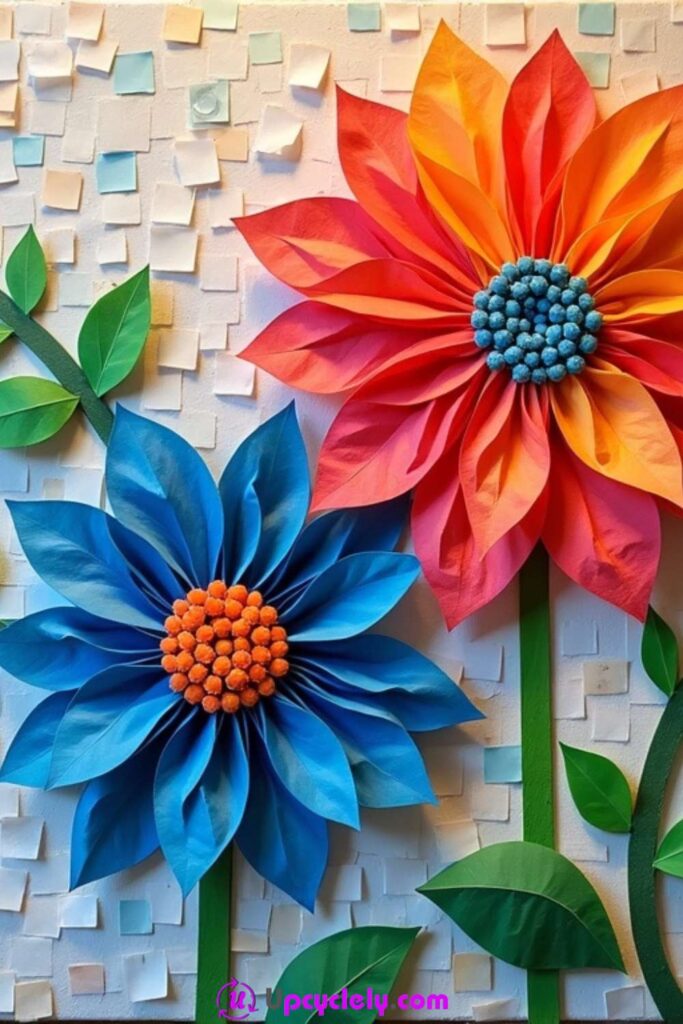
A tissue-paper mosaic builds an image from many small translucent pieces rather than from solid paint. Overlapping squares can create new shades, while torn edges soften the boundaries between areas. A simple outline of a flower, animal, landscape, or geometric shape gives the paper a structure without dictating every placement.
The base should be firm enough to accept repeated glue without wrinkling. Apply adhesive to the card, not directly to the tissue, and work in short sections. Patience matters here more than buying another tool; rushing usually creates glue-covered fingers and paper that folds onto itself.
Materials and Tools
· Heavy white or coloured cardstock
· Clean tissue-paper scraps in a limited palette
· Pencil and eraser
· Glue stick or thin liquid paper adhesive
· Small brush or cotton swab for controlled glue
· Optional frame or backing board
Steps for This Craft
1. Sketch a design with broad, simple regions. Draw the main outline lightly and divide it into areas that can hold different colours. Avoid tiny details at first, because the tissue pieces need enough space to overlap without hiding the entire drawing.
2. Prepare the tissue pieces before gluing. Cut or tear small squares, triangles, and irregular fragments and sort them by colour. Make some pieces lighter and smaller for edges, highlights, or narrow spaces rather than trying to force one size everywhere.
3. Fill the design from larger areas toward the details. Brush or rub adhesive onto one section of card and lay tissue pieces over it with slight overlaps. Use a dry fingertip or blunt tool to press them gently, then continue while keeping the outside edges of the picture clear.
4. Refine the image and dry it under control. Add darker layers where more depth is needed and trim only pieces that extend far beyond the intended outline. Let the mosaic dry flat, erase visible guide marks carefully, and mount it on a stronger backing if the page has softened.
I like the places where two tissue colours overlap and form a third shade. Those accidental changes are part of the material, so there is no need to cover every uneven edge.
Use magazine fragments for a sharper collage or natural flower petals for a temporary version. A large group mosaic works well when each person completes one card square that later joins the full image.
Tissue Paper Suncatchers
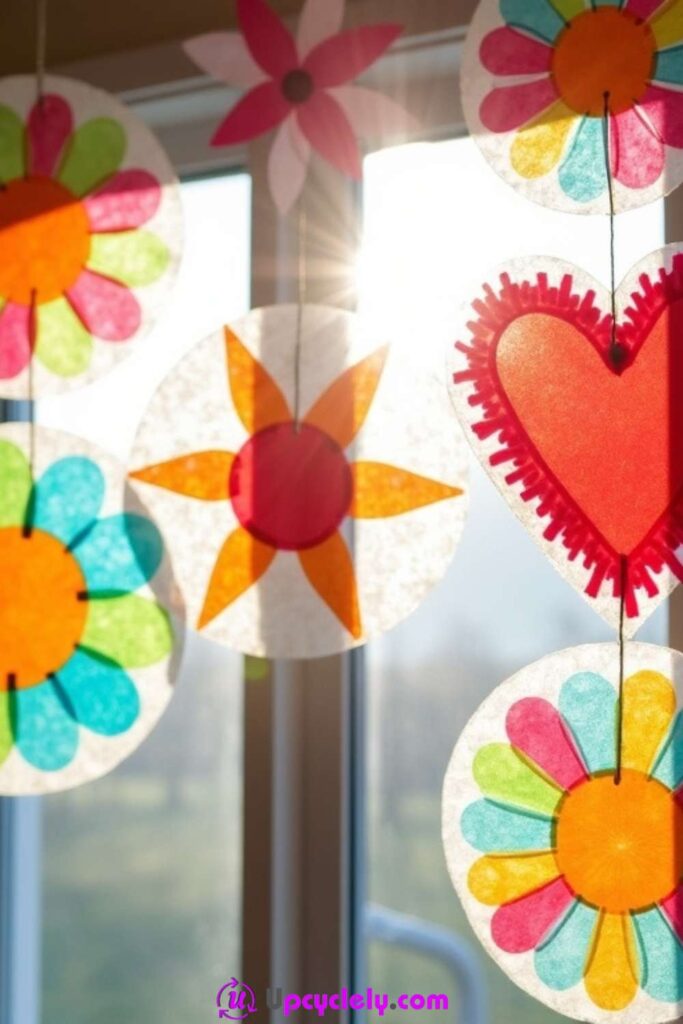
Tissue paper becomes especially vivid when light passes through it. Small coloured pieces sealed between two clear layers can form a circle, leaf, heart, window, or abstract panel. The transparent border holds the design together, while overlapping paper creates darker areas that change throughout the day.
Clear self-adhesive film is usually easier to manage than liquid glue for this project. Keep the finished suncatcher away from open flames and place it where strong heat will not soften the plastic. Window glass should be cleaned before hanging, and the attachment method should remove without damaging the surface.
Materials and Tools
· Clear self-adhesive film or transparent craft sheets
· Clean tissue-paper scraps
· Scissors and a simple paper template
· String, ribbon, or removable window-safe adhesive
· Hole punch if the border is wide enough
· Optional black paper frame for a defined outline
Steps for This Craft
1. Cut a clear base with a generous border. Use a template to create the main shape and leave enough material around the design for sealing and hanging. Place the sticky side upward on a protected table and secure the corners temporarily so it does not curl.
2. Arrange tissue pieces across the clear surface. Lay small colours inside the shape, overlapping some areas and leaving a few transparent gaps. Keep paper away from the outer sealing edge and move pieces with dry fingers or tweezers rather than pressing too early.
3. Seal the design with a second clear layer. Lower another sheet from one side to the other and smooth outward to reduce trapped air. Press around the entire border, then trim the outside shape without cutting through the sealed edge.
4. Add a hanger and position it in the light. Punch a hole only through a strong clear border or use removable window-safe tabs. Hang the suncatcher where daylight passes through it, check that the edges remain sealed, and store it flat between smooth sheets when not in use.
The transparent gaps are just as useful as the coloured paper. I do not think every space needs filling; open areas make the overlaps easier to notice.
Try leaf-shaped pieces for autumn, pale petals for spring, or scraps of translucent sweet wrappers after cleaning them carefully. A black card outline can make a simple stained-glass effect without adding more tissue.
Crafting Shortcuts That Can Turn a Fun Project Into a Frustrating One
Starting with dirty or damaged materials. Grease, moisture, loose fibres, and cracked wood can stop paint or glue from bonding and may make the craft unpleasant to handle. Clean and inspect reused items first, then replace anything sharp, mouldy, deeply stained, or structurally weak.
Using one adhesive for every surface. Paper glue may not hold wood, and a rigid glue can make fabric puppets stiff. Match the product to the materials, test a spare piece, and use thin applications so the join stays neat and the base does not wrinkle.
Adding decoration before the main structure works. A puppet that cannot move, a coaster that rocks, or a mask that blocks vision will not improve with extra glitter or ribbon. Assemble and test the functional shape first, then add only details that do not interfere with its use.
Ignoring drying time. Wet paint smears under markers, soft glue allows pieces to slide, and sealed paper can trap moisture. Create a drying area before beginning and move the project only when the joins are secure enough to support their own weight.
Making children handle unsafe steps. Hot glue, sharp wire, craft knives, small choking hazards, and difficult eye-hole cutting need adult control or a safer substitute. Prepare risky parts in advance and keep supervision active until tools and loose pieces are put away.
Using too many colours and materials at once. An unlimited supply pile can make a simple design difficult to read. Choose a small palette and one or two textures first, then add an accent only when it strengthens the character, pattern, or shape.
Forgetting how the finished craft will be stored or used. Tall puppet hair tangles in boxes, raised bookmark pieces damage pages, and fragile bunting crushes when folded. Test the object in its real setting and plan a flat envelope, labelled box, or loose roll for storage.
Treating every imperfection as a reason to restart. Handmade work naturally contains uneven cuts, visible brush marks, and slightly different shapes. Correct problems that affect safety or function, but allow harmless variation to remain; it often gives the finished craft its personality.
Frequently Asked Questions
Which fun craft ideas are easiest for beginners?
Personalized bookmarks, cupcake liner flowers, tissue paper trees, and simple paper plate masks require only a few familiar materials. Prepare the cutting in advance for young children and focus on one clear shape rather than adding many separate techniques.
How can I use recycled materials safely in crafts?
Use only clean, dry items with no sharp edges, food contamination, mould, or chemical residue. Wash suitable materials, remove staples and labels, sand rough wood, and reject anything that cannot be made safe with ordinary preparation.
What glue should I use for mixed-material crafts?
Choose according to the surfaces being joined: paper, fabric, wood, plastic, and glass may need different products. Test a small offcut first, use the minimum amount needed, and follow the product instructions without inventing faster drying methods.
How do I keep children interested without taking over the project?
Offer a small selection of materials and let the maker choose the character, colours, or arrangement. Adults can manage safety, measuring, and difficult cutting while leaving the visible decisions to the child.
Can these crafts be made without buying new supplies?
Many can use packaging card, odd socks, magazine pages, gift tissue, wooden spoons, jars, ribbon, and other clean leftovers. A few basic items such as suitable glue, safe paint, or clear film may still be needed when the reused materials cannot perform that function reliably.
How can I make paper crafts more durable?
Begin with a stronger card base, use thin adhesive layers, and let every layer dry flat. Clear film or a compatible protective finish can help handled items, but raised decorations should stay away from bookmarks and other pieces that need a smooth surface.
How should finished crafts be stored?
Store flat paper work between clean sheets, keep puppets in wide labelled boxes, roll bunting loosely around card, and separate painted rocks so they do not chip one another. Make sure everything is fully dry before closing a container.
Let an Ordinary Material Become the Best Part of the Afternoon
The strongest fun craft ideas begin by noticing what a material already offers. A sock can move like a mouth, a stone can suggest an animal, tissue paper can change colour in the light, and a simple wooden stick can become either a coaster or a character. Good preparation makes those transformations easier: clean the item, choose a safe method, build the working structure, and then decide how much decoration it truly needs.
Start with one manageable project and the materials already waiting in a drawer, recycling box, or craft cupboard. You do not need every colour or tool on the table. Which of these 17 fun craft ideas would turn an overlooked object into something you would actually enjoy making, using, or sharing today?