Needlepoint has a useful way of turning small lengths of thread into something that feels complete. A few metres of green can become one tropical leaf, several leftover pinks can form a heart grid, and a narrow strip of canvas can become a bookmark instead of remaining folded in a drawer. The regular holes make planning easier, but the finished pieces still show the tiny differences that come from working by hand.
I especially like needlepoint projects that have a clear purpose after the stitching is finished. Framed panels are lovely, but coasters, bookmarks, cushion fronts, bag inserts, and borders can keep old canvas, partial skeins, and unfinished motifs in everyday use. I don’t think every project needs a large new kit. Often the more interesting result comes from choosing a pattern that suits the thread and materials already available.
Before beginning, look at the condition of the canvas, the strength of the thread, and the way the final piece will be handled. A wall panel can carry more texture than a bookmark, while a coaster needs a flat surface and reliable backing. Matching the stitch density to the new use is what turns a decorative idea into a piece that remains practical.
Check the Canvas, Thread, and Existing Stitching
Canvas that has been stored for years may be dusty, bent, stained, or weakened along the folds. Hold it up to the light and inspect the grid before adding new work. Small bends can often be corrected during blocking, but torn intersections and brittle areas need repair or a smaller project that avoids the damage. If an unfinished design already occupies part of the canvas, decide whether it can become the centre of a new patchwork, border, bookmark, or framed panel rather than being removed.
Sort the thread by fibre, thickness, and condition. Faded or slightly uneven shades can work well in geometric blocks and leaves, while weak, fuzzy, or colour-bleeding thread should not be placed where it will receive frequent handling. Test a short length through the canvas and check whether it fills the holes without forcing them apart. The goal is firm coverage, not a stitch so bulky that the grid begins to distort.
Plan the Pattern, Colour Order, and Final Use
Choose the final purpose before deciding the full chart. A framed picture can use a generous background, but a coaster, bookmark, or cushion insert needs an exact size and a practical edge allowance. Trace the usable area on graph paper and place the largest shapes first. Then test the colours beside one another in daylight, because thread that looks balanced in a storage box may appear very different once stitched into broad areas.
Keep a small record of colour names, thread strands, and pattern changes. When using leftovers, estimate whether each shade can complete its planned section and prepare a substitute before the thread runs out. A deliberate change of shade can create depth; an unplanned change halfway through a plain stripe may simply look unfinished. Photographing the paper layout is also helpful when the project will be completed over several sessions.
Prepare Needles, Edges, and a Comfortable Work Area
Bind or tape raw canvas edges so they do not fray against the working thread. Use a tapestry needle that passes through the grid without stretching it, and keep a second needle ready when the pattern changes colours often. A frame or stretcher bars can help with large backgrounds and geometric lines, though a small flexible bookmark may be easier to handle without a heavy frame.
Good lighting and a comfortable hand position matter because repeated stitches can encourage tight gripping. Work in short sessions, place tools where they can be reached without leaning across the canvas, and keep scissors closed when they are not in use.
If children are joining the project, use blunt tapestry needles, supervise the thread lengths, and keep small beads, pins, and sharp scissors away from younger hands and pets.
Geometric Patterns
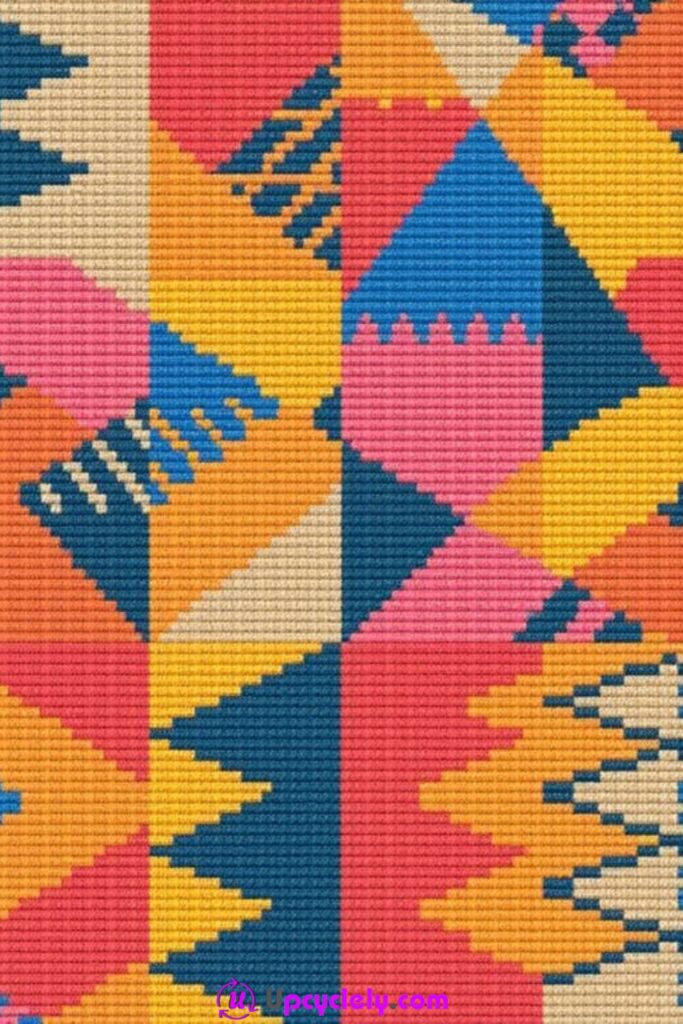
Geometric needlepoint depends on clean blocks of colour rather than a recognisable object. Triangles, stepped diamonds, jagged lines, and irregular rectangles can share the same canvas because the repeated grid keeps them connected. The finished design feels lively when one or two dark shades create structure and brighter colours move across them without every shape becoming the same size.
This is also a practical way to use partial skeins. A small amount of pink, orange, yellow, teal, or cream can fill one shape without requiring enough thread for an entire background. I would decide the largest colour areas first, then fit the smaller shapes into the spaces around them. That order makes the composition feel planned instead of looking like leftover thread was placed wherever it happened to fit.
Materials and Tools
· Needlepoint canvas with an even, visible grid
· Tapestry needles sized for the canvas holes
· Leftover threads in four to six coordinated colours
· Graph paper, pencil, and coloured pencils for planning
· Masking tape or binding tape for canvas edges
· Embroidery frame or stretcher bars when helpful
· Small sharp embroidery scissors
· Optional neutral thread for a background or border
How to Build the Geometric Pattern
1. Map the large shapes on graph paper. Draw the outer dimensions first, then divide the space into a few strong shapes rather than dozens of tiny ones. Mark the darkest colour areas so they create a visual path across the design. Keep several shapes open until the main balance feels right; the first sketch rarely needs to become the final one.
2. Transfer only the necessary guides. Count the canvas intersections and mark key corners with a removable fabric-safe method. Avoid drawing every stitch line, because heavy marks can remain visible beneath pale thread. Start with the central or most noticeable shape, then use its edges to locate the surrounding blocks.
3. Fill the colour areas with consistent direction. Work one section at a time and keep the stitches travelling in the same direction within each block. Change direction only when it clearly separates one shape from another. Carry thread across the back only over very short distances so dark colours do not shadow through pale sections.
4. Refine the joins and finish the outer edge. Check the places where several colours meet and add a single correcting stitch where a corner looks broken. Do not keep filling simply because a small patch of canvas remains visible; negative space may improve the composition. Block the finished piece gently, then frame it or apply it to a firm panel once the canvas sits square.
For me, the strongest geometric designs repeat one shape or colour in several places. That repetition gives the eye something to follow even when the rest of the pattern remains deliberately irregular.
A beginner can limit the project to horizontal bars and stepped triangles. A more advanced version could turn the finished canvas into a cushion front, bag panel, or insert for a reclaimed picture frame.
Birdhouse Design
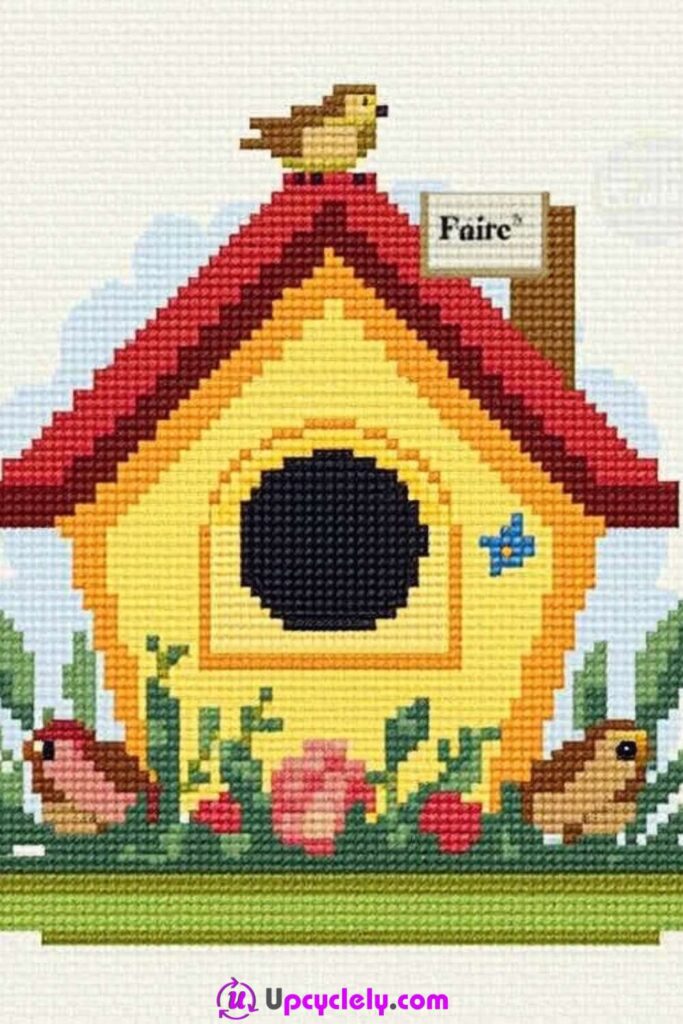
A stitched birdhouse scene combines a simple building shape with smaller details that make the picture feel inhabited. The warm yellow walls, layered red roof, dark circular opening, flowers, greenery, and small birds create clear depth without requiring realistic shading. The house provides the strong centre, while the plants and birds soften its straight edges.
The small sign and flower details deserve planning before stitching because lettering can become cramped quickly on a coarse canvas. I know it can feel tempting to begin with the roof because the colour is so noticeable, but placing the birdhouse body and opening first usually protects the proportions. Then the roof, sign, and surrounding garden can be counted from a stable centre.
Materials and Tools
· White or pale needlepoint canvas
· Tapestry needles
· Threads in yellow, gold, red, burgundy, brown, black, green, pink, blue, and cream
· Graph paper or a printed grid for planning
· Fabric-safe pencil or short guide threads
· Frame or stretcher bars
· Embroidery scissors
· Optional backing fabric and a reclaimed frame
Steps for the Birdhouse Scene
1. Position the house and opening. Mark the centre line and the lowest point of the birdhouse before stitching. Build the yellow body around the dark entrance so the circle remains centred and large enough to read clearly. Use a second yellow or gold shade along selected edges to separate the front panel from the side and trim.
2. Add the roof, post, and sign. Work the roof from the peak downward, keeping both slopes even. Use a darker red beneath the main roof line to create depth, then stitch the post and sign with firm outlines. Simplify the lettering if the grid is too large; a clear short word is better than cramped letters that disappear.
3. Create the birds and garden details. Place the larger birds first, using compact blocks of brown, tan, pink, or cream to define their bodies and wings. Add leaves, stems, and flowers around the base, keeping the plants low enough that the house remains visible. Small knots or single cross stitches can form flower centres without adding unnecessary bulk.
4. Complete the background and presentation. Use a pale blue or cream background only where it helps separate the shapes. Check that no long thread carries are visible through the open areas, then secure the back neatly. Block the canvas square and frame it with a little breathing room around the roof and birds rather than pressing the design tightly against the mount.
One detail I would protect is the dark opening. It anchors the whole birdhouse, so decorative flowers should not crowd its edge or compete with its simple round shape.
A smaller version can show only the house, one bird, and two flowers. The same motif could become a garden sign insert, a seasonal cushion panel, or a stitched patch on a sturdy fabric tote.
Cactus Designs
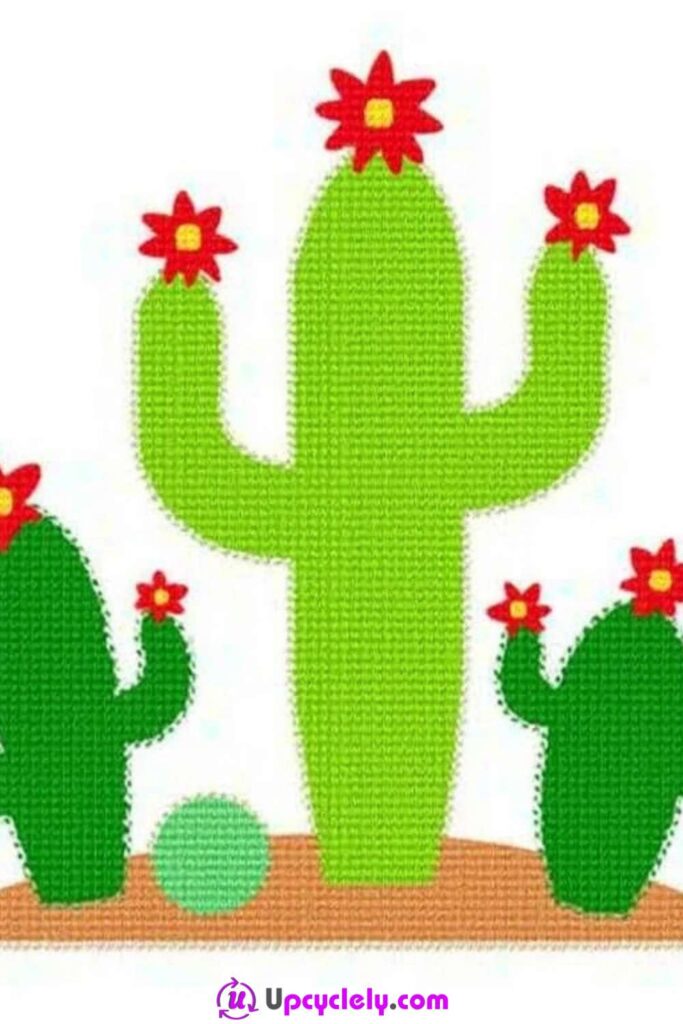
Cactus needlepoint works well because the plants already have bold, simplified silhouettes. A tall central cactus, two shorter side plants, and a rounded small form create a balanced group even before flowers or ground are added. Using several greens makes the scene feel layered, while red blooms and a warm brown base keep the design from becoming one large block of green.
The curved arms need careful counting. A cactus can become lopsided when one arm begins a row too early or the narrow neck changes width unexpectedly. I would outline the outside edge with temporary guide stitches, check the shape from a distance, and only then fill the interior. That little pause is easier than unpicking a broad section later.
Materials and Tools
· Needlepoint canvas
· Tapestry needles
· Threads in light, medium, and dark green
· Red, yellow, brown, and optional cream thread
· Graph paper or a counted chart
· Short contrasting thread for temporary outlines
· Embroidery frame or stretcher bars
· Scissors and optional backing material
How to Stitch the Cactus Group
1. Plan the silhouettes and ground line. Draw each cactus as a simple stepped outline on graph paper and leave a small gap between neighbouring plants. Mark the ground as one calm horizontal band so the different shapes feel connected. Check that the central cactus remains tallest without touching the upper edge of the canvas.
2. Outline and fill one cactus at a time. Begin with the largest plant and stitch its outer edge in a medium green. Fill the body with consistent diagonal stitches, adding darker green along one side and lighter green near the centre if a little depth is wanted. Repeat the process for the side cacti while changing the dominant green shade.
3. Add flowers and small surface details. Build the red flower petals in compact groups and place a yellow centre in each bloom. Keep the flowers slightly oversized so they remain visible against the strong cactus shapes. A few darker vertical marks can suggest ribs, but too many lines may make the canvas feel striped.
4. Finish the base and secure the piece. Stitch the brown ground with an even direction and add one small rounded plant or stone if the composition needs a lower shape. Inspect the arm curves and fill any accidental gaps. After blocking, frame the scene or sew it onto a firm cushion panel with the raw canvas edge fully enclosed.
I don’t think every cactus needs the same green. The variation is what separates the shapes and stops the group from reading as one continuous plant.
A very easy version can use one cactus in a small hoop. For a playful set, stitch three separate mini canvases and place them in mismatched second-hand frames painted in related tones.
Cute Coffee Cups

A teal cup and saucer with heart-shaped steam turns a familiar drink into a compact needlepoint picture. The cup body offers one large calm colour area, while the white heart, brown drink, curled orange steam, and small pink hearts provide contrast. The stepped outline of the saucer also gives the design a stable base, which is useful in a motif with so many curved details.
The steam is the delicate part. It needs enough open background around it so the curls remain visible and the hearts do not merge into the cup rim. I would keep the lines slightly thicker than a single thread when the canvas is coarse, then simplify one curl rather than forcing every small turn into too little space.
Materials and Tools
· Pale needlepoint canvas
· Tapestry needles
· Teal, dark teal, cream, brown, orange, and pink threads
· Graph paper or counted pattern
· Fabric-safe marking method
· Small frame or hoop
· Embroidery scissors
· Optional felt or fabric for turning the piece into a mug mat
Steps for the Coffee Cup Motif
1. Place the cup, handle, and saucer. Mark a vertical centre line and stitch the broad cup body first. Keep the top rim level, then build the handle outward in a clear stepped curve. Add the saucer beneath, leaving a narrow shadow line so the cup does not disappear into it.
2. Fill the drink and cup details. Use brown thread for the coffee surface and a darker teal for the lower shadow or inner rim. Place the large pale heart on the cup only after checking its centre. Work the surrounding teal in small sections so the heart edge remains crisp rather than becoming uneven.
3. Stitch the steam and floating hearts. Begin the orange steam at the cup rim and count each change of direction carefully. Add the larger pink heart first, then position the smaller one where it has enough white space around it. Keep the back tidy because dark carried threads may show through the open background.
4. Choose a practical finish. Block the canvas so the saucer sits level. Frame the motif, apply it to a small cushion, or turn it into a decorative mug mat with a washable backing. If used beneath a cup, keep raised beads and bulky knots away from the working surface so the mug remains stable.
The part I like is the contrast between the large quiet cup shape and the light, curling steam. Extra words or borders would probably make this particular design busier than it needs to be.
A beginner can stitch only the cup and one heart. A set of small cup motifs in different colours could reuse thread remnants and become individual coasters or a narrow kitchen wall panel.
Fruit Slices
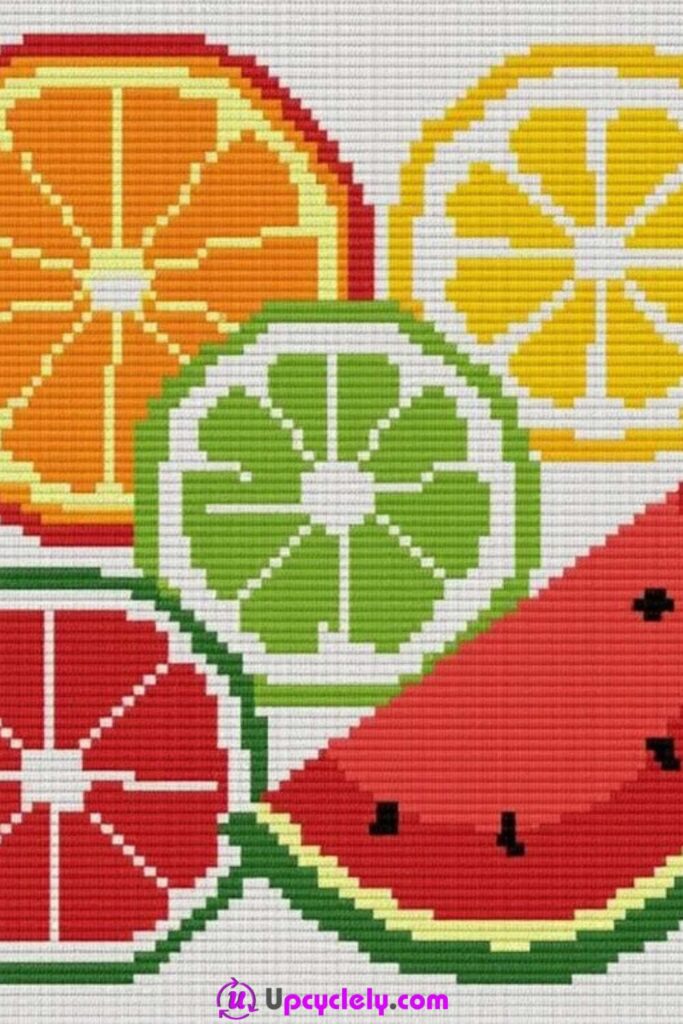
Overlapping citrus rounds and a watermelon wedge create a bright needlepoint arrangement without demanding realistic fruit shapes. Orange, lemon, lime, grapefruit, and watermelon can all be built from circles, segments, rind bands, and a few black seeds. The white spaces between them help each colour stay clean and prevent the design from feeling like one large solid block.
Overlaps need to be decided before stitching because the front fruit should interrupt the outline of the fruit behind it. I would place the watermelon and the largest citrus slice first, then tuck the smaller circles around them. This makes the layered arrangement believable without adding complex shading.
Materials and Tools
· White needlepoint canvas
· Tapestry needles
· Threads in orange, yellow, lime, green, red, pink, white, cream, and black
· Graph paper, compass, or circular templates
· Fabric-safe pencil or temporary thread markers
· Frame or stretcher bars
· Embroidery scissors
· Optional backing fabric for a cushion or tray insert
How to Arrange and Stitch the Fruit
1. Map the overlapping shapes. Draw the watermelon wedge and large citrus rounds on graph paper, then add smaller slices where they fill gaps without hiding the main forms. Mark which fruit sits in front at every overlap. Transfer only the outer edges and central segment lines needed to keep the circles even.
2. Build the rinds and outer rings. Stitch the dark green watermelon skin, pale rind, and red flesh as separate bands. For citrus, create an outer peel, a narrow pale pith ring, and the coloured centre. Keep the band widths consistent within each fruit even when different fruits use different sizes.
3. Divide the fruit into segments. Use pale thread to create the citrus spokes and black or dark brown stitches for watermelon seeds. Work the segment lines before filling the pulp if that helps maintain clean boundaries. Use a slightly lighter or darker shade in selected sections rather than changing every segment.
4. Complete the overlaps and background. Fill the front fruit first where two shapes meet, then stop the rear outline cleanly at that edge. Add only enough white background to stabilise the canvas and separate the colours. Block the finished work and use it as framed kitchen art, a cushion panel, or a decorative insert protected from food and moisture.
The seeds and pale segment lines do most of the descriptive work. I would keep them clear and avoid adding extra leaves unless the arrangement has a large empty corner.
A simpler project can use one orange slice in a round frame. Leftover threads can also form a set of four small citrus coasters with flat, washable backing and no raised embellishments.
Simple Patterns on Coasters
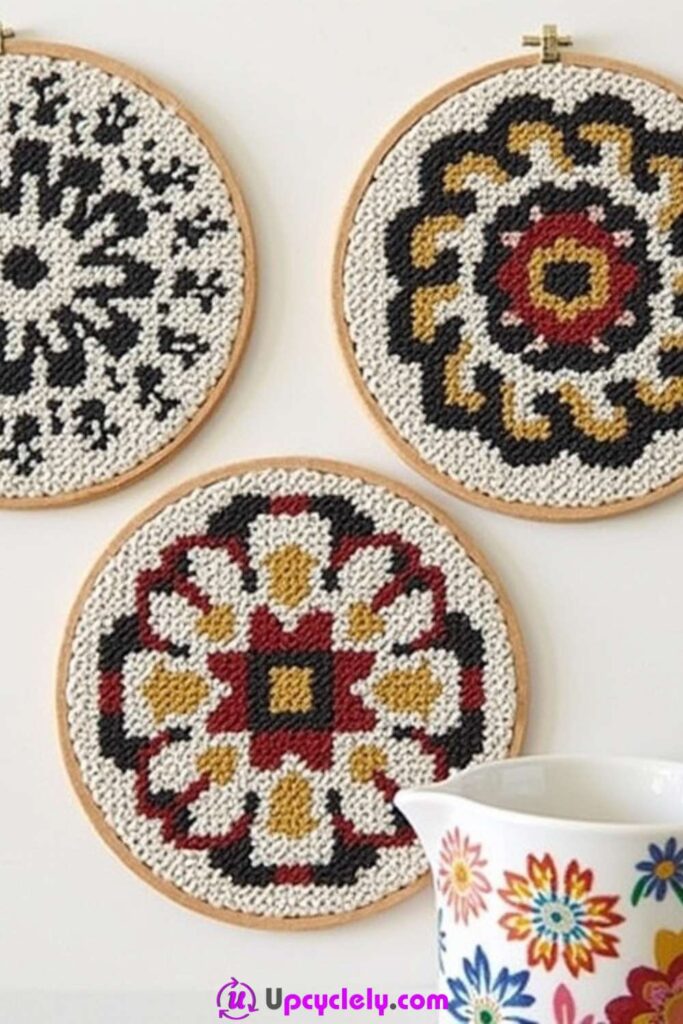
Small circular needlepoint pieces can become coasters when the stitched face is supported by a firm, flat backing. Repeated floral medallions, black-and-white shapes, and warm red or gold patterns suit this size because they read clearly within a limited area. The wooden hoop look may be kept for display, but a coaster used beneath a drink needs a lower, more level edge than an embroidery hoop usually provides.
The functional surface matters more than decorative volume. Large knots, beads, and loose loops may look appealing on wall art but can make a cup wobble. I would use firm, even stitches, keep the top flat, and add a moisture-resistant layer beneath the canvas rather than relying on the stitched piece alone.
Materials and Tools
· Needlepoint canvas cut for coaster-sized motifs
· Tapestry needles
· Durable threads in a limited colour palette
· Graph paper or small circular charts
· Firm coaster blanks, cork, or dense felt backing
· Fabric suitable for covering the rear edge
· Compatible adhesive or strong sewing thread
· Scissors, ruler, and clips
Steps for Flat Needlepoint Coasters
1. Choose a compact pattern and test the scale. Place a paper circle over the chart to see which details will remain visible inside the coaster. Remove tiny elements that would create clutter or weak single stitches. Keep a plain outer band so the finished edge can be wrapped or attached without cutting into the main motif.
2. Stitch with even coverage and low bulk. Work from the centre outward and keep the tension consistent. Use flat stitches for the main design and secure thread tails without building thick lumps on the back. Check the front regularly for missed holes, especially where dark colours meet a pale background.
3. Block and mount the stitched circles. Shape the canvas while damp only if the thread and canvas are suitable for that method, then let it dry square and flat. Trim with a generous seam allowance and attach it to the firm blank. Keep adhesive away from the visible stitch surface and press evenly while the join sets.
4. Finish the underside and test stability. Cover the back with cork, felt, or another appropriate non-scratch layer. Place an empty mug on the coaster and press gently around the rim to check for rocking. Use the coasters for cool or ordinary drinks unless every material in the construction is specifically suited to heat and moisture.
One practical detail I wouldn’t skip is the cup test. A coaster can look perfectly flat in the hand and still wobble once the weight sits near one raised stitch.
A beginner can make one two-colour motif with a wide plain border. Older unfinished needlepoint circles may also be cut down and mounted as coasters if the stitching remains clean, strong, and flat.
Heart-Shaped Motifs
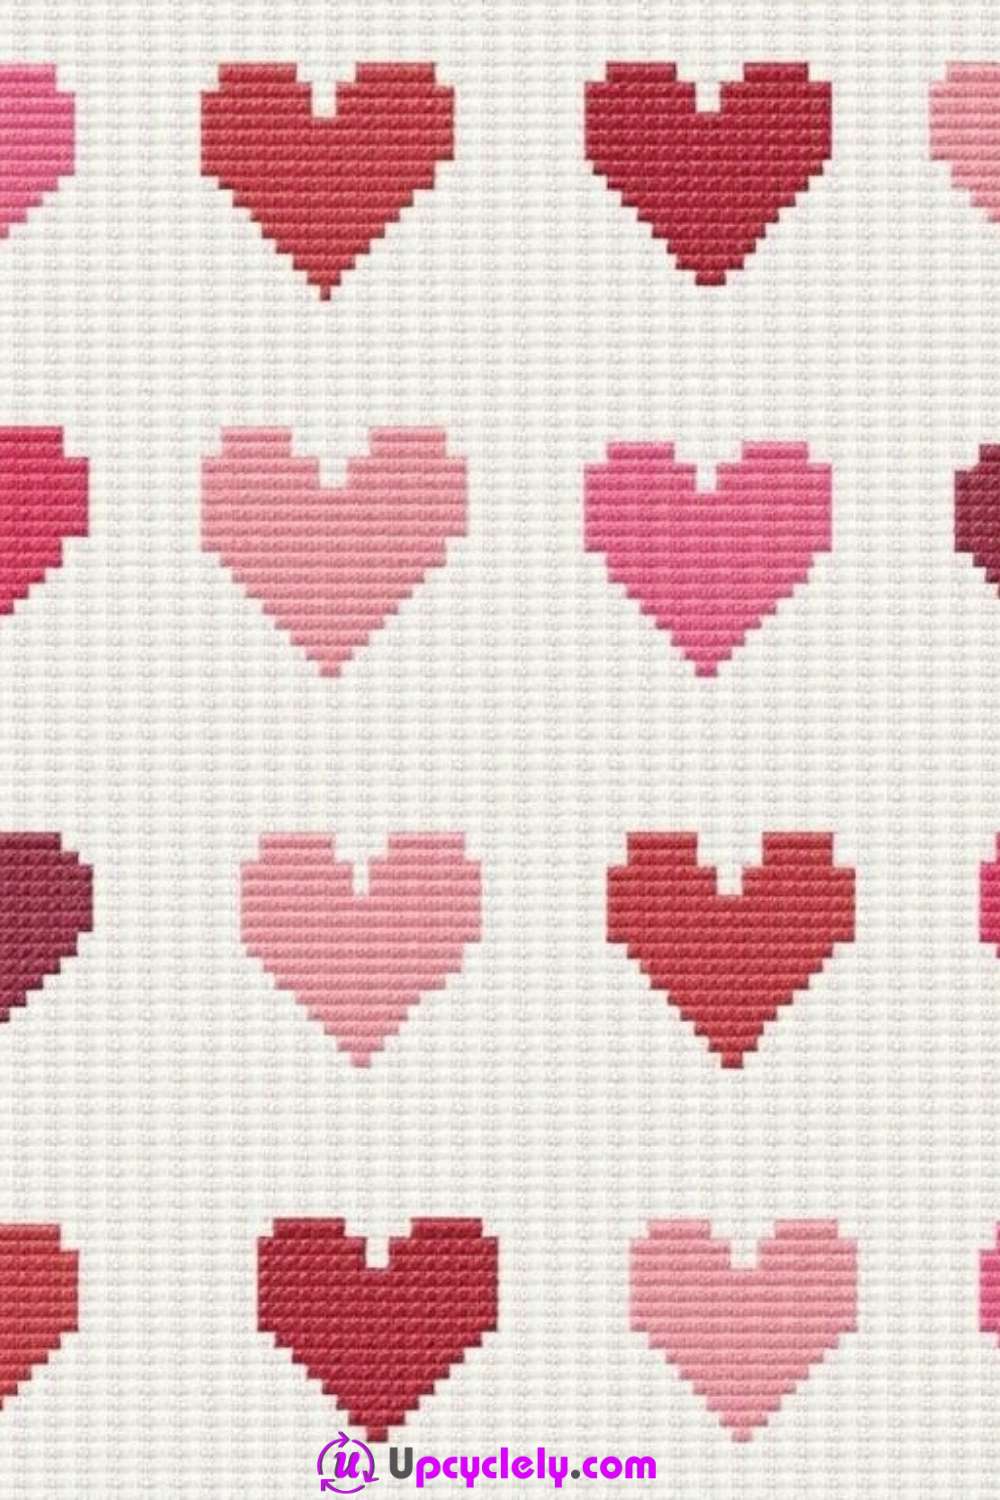
A grid of small red and pink hearts uses repetition to turn one very simple motif into a complete pattern. The hearts can change shade from row to row or alternate between pale pink, coral, red, and burgundy. The white space is important because it keeps each shape distinct and gives the repeated design a light, orderly rhythm.
Counting is more noticeable in a repeated grid than in a single picture. One heart placed a row too high can make the whole arrangement feel uneven. I would create the centre heart first, place guide threads for the rows and columns, and then work outward in a balanced order instead of stitching all the hearts from one side to the other.
Materials and Tools
· Pale needlepoint canvas
· Tapestry needles
· Threads in several pink and red shades
· Graph paper and ruler
· Temporary guide thread in a contrasting colour
· Frame or stretcher bars
· Embroidery scissors
· Optional frame, cushion backing, or fabric for a small sachet
How to Keep the Heart Grid Even
1. Draft one heart and repeat its spacing. Create a small pixel-style heart on graph paper and note its width and height. Decide the number of empty canvas rows between motifs, then draw the full grid lightly. Check the outside margins so the pattern sits centred rather than being crowded at one edge.
2. Place the centre and corner hearts. Stitch the central motif first, then add the four corner positions or outermost hearts as reference points. Count from those anchors when filling the remaining spaces. This approach reveals spacing errors early, before an entire row needs to be removed.
3. Build a controlled colour sequence. Arrange the thread shades from pale to dark or repeat a short colour order across the rows. Complete each heart fully before moving to the next so the outline stays crisp. Avoid carrying dark thread behind wide white spaces where it may show through the canvas.
4. Complete the background and finish the piece. Fill the background only if the design needs more structure; leaving the canvas visible can keep the pattern lighter. Remove temporary guides, block the work, and choose a finish that keeps the grid square. A simple frame, cushion panel, or fabric-covered box lid suits the repeated layout.
For me, the spacing matters more than making every heart identical. A tiny variation in one edge still feels handmade, while uneven rows can distract from the entire pattern.
Use fewer hearts for a bookmark or small card insert. A gradient from pale pink to deep red can also use up short thread lengths that are too small for a larger single-colour background.
Patchwork Patterns
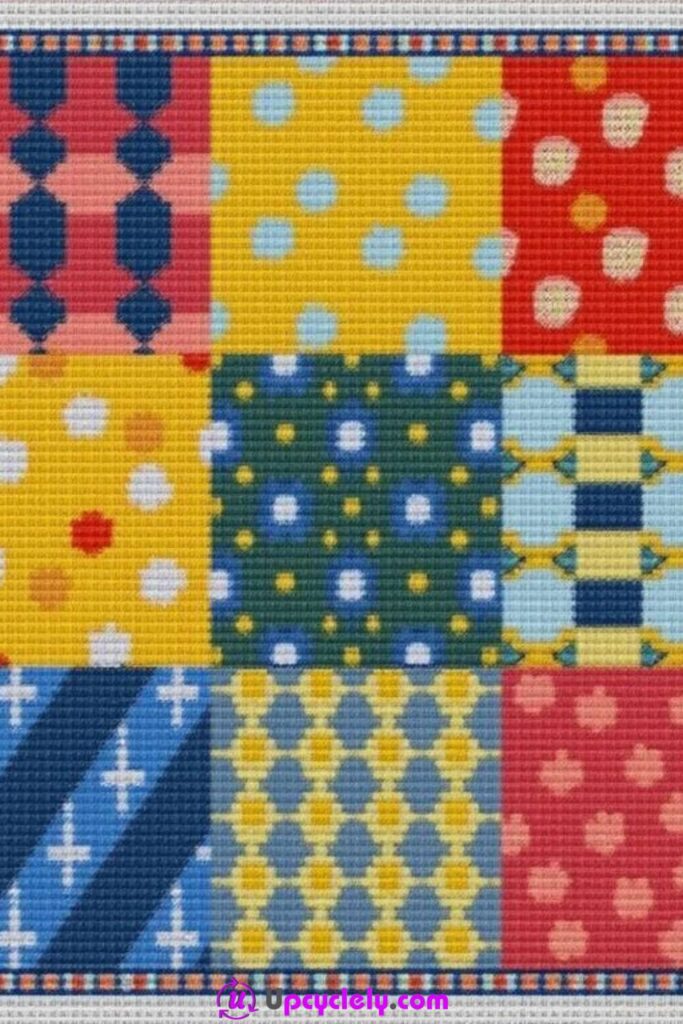
Patchwork needlepoint treats one canvas as a collection of smaller stitched squares. Dots, stripes, diamonds, checks, floral forms, and narrow decorative bands can sit together because the grid gives every section the same basic structure. The strongest versions repeat two or three colours across different squares, which stops the finished piece from feeling like unrelated samples placed side by side.
This is an especially useful project for leftover thread. A small length can complete one dot pattern or border without needing to match a large area. I would plan the colour links before choosing every pattern: perhaps blue appears in five squares, yellow in four, and red only in two stronger accents. That kind of restraint gives the patchwork a clear visual rhythm.
Materials and Tools
· Needlepoint canvas large enough for a square grid
· Tapestry needles
· Mixed leftover threads in a coordinated palette
· Graph paper, ruler, and coloured pencils
· Temporary guide thread or fabric-safe marker
· Frame or stretcher bars
· Embroidery scissors
· Optional cushion backing, tote fabric, or frame
Steps for a Balanced Patchwork Canvas
1. Divide the canvas into equal blocks. Mark the full outer rectangle, then split it into a simple grid such as three by three. Leave a narrow border or shared dividing line between blocks. Count carefully from the centre so small measuring differences do not grow by the time the final row is reached.
2. Assign colours before assigning patterns. Place the main colours across the grid so no one shade gathers in a single corner. Then choose stripes, dots, checks, diamonds, or floral shapes for each square. Repeat at least one pattern element elsewhere, even if the colours change, to connect the sections.
3. Stitch square by square without distorting the canvas. Alternate between areas rather than filling every dense square on one side first. Keep the overall tension similar, especially where one block uses long stitches and another uses compact cross stitches. Secure each colour neatly and avoid dragging threads across the backs of neighbouring squares.
4. Add the border and prepare the final use. Stitch the shared border last so it straightens the visual edges and ties the colours together. Block the canvas thoroughly because mixed stitch densities may pull it unevenly. Turn the piece into a cushion front, framed panel, bag pocket, or cover for a firm reclaimed box lid.
The part I would keep controlled is the palette. The patterns can vary widely, but too many unrelated colours can make the grid lose its patchwork order.
A beginner can create four large squares instead of nine. An unfinished sampler can also be extended into a patchwork piece by adding new blocks around it and repeating a few of its original colours.
Rainbow Stripes
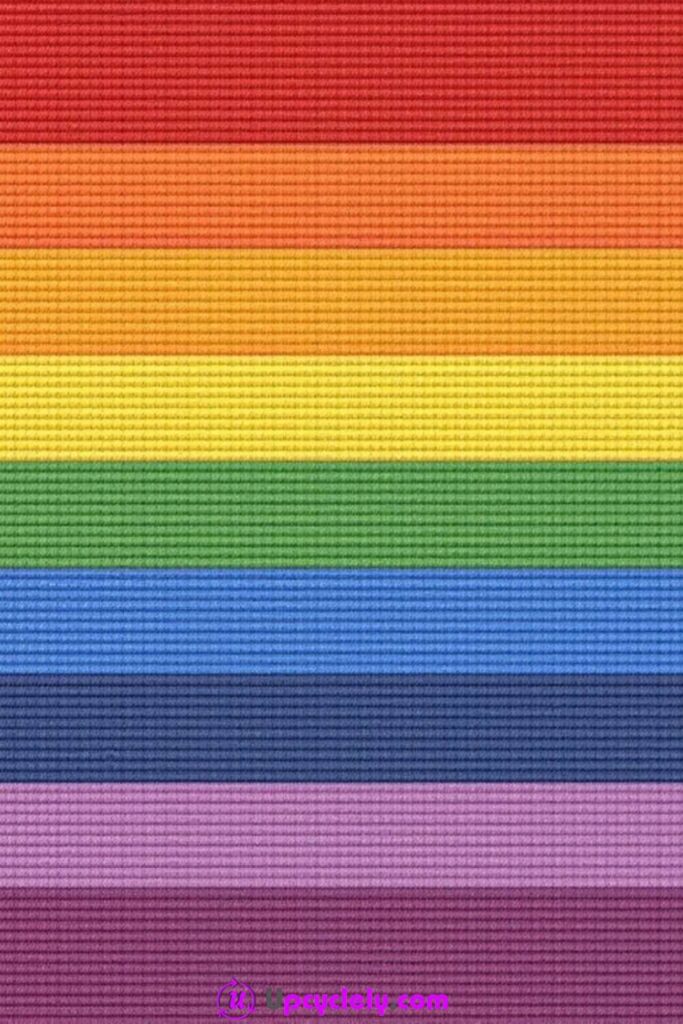
Rainbow stripes create a clear colour progression with very little charting. Red, orange, yellow, green, blue, indigo, and purple can run in straight horizontal bands, or the sequence can be adjusted to suit the thread already available. The simplicity makes thread tension and row width more visible, so the cleanest result comes from careful counting rather than from adding extra decoration.
Stripes are also a sensible way to reuse partial skeins, but each band should have enough thread to finish its planned width. I would weigh or compare the remaining lengths before beginning. A narrower stripe is fine when it repeats intentionally; an unexpected half-row colour change usually looks like a shortage rather than a design choice.
Materials and Tools
· Needlepoint canvas
· Tapestry needles
· Threads in a rainbow sequence or another ordered palette
· Ruler and graph paper
· Temporary guide thread
· Frame or stretcher bars
· Embroidery scissors
· Optional backing for a pouch, cushion, or wall panel
How to Keep Rainbow Stripes Straight
1. Choose the order and band widths. Lay the thread colours side by side and decide whether every stripe will be equal. Draw the sequence on graph paper and count the total rows. Place any narrow accent bands symmetrically or repeat them so they look deliberate.
2. Mark horizontal guides across the canvas. Use temporary thread or small edge marks to show where each colour changes. Check the line against the canvas grid from both sides. Begin near the centre or at one outer edge, depending on the stitch, but keep the canvas supported so long rows do not pull it into a curve.
3. Stitch one complete band at a time. Use consistent diagonal or basketweave stitches and maintain the same tension across the full width. Secure the thread at the edge before changing colour. If a band runs short, remove enough stitches to create a planned narrower width rather than tying in a near-match halfway across.
4. Finish the edges and decide the orientation. Inspect the colour changes for accidental gaps and correct them before blocking. Horizontal stripes suit cushions and wall panels, while vertical stripes may work better on a bag or glasses case. Add a simple neutral border only if the rainbow needs separation from the final fabric or frame.
There’s no need to add motifs inside every band. The quiet repetition is the point, and the thread texture already prevents the colour fields from feeling flat.
Pastel remnants can create a softer rainbow, while earth tones can form a sunset sequence. Narrow striped pieces also make practical bookmarks, straps, and inserts for small zip pouches.
Simple Borders and Frames
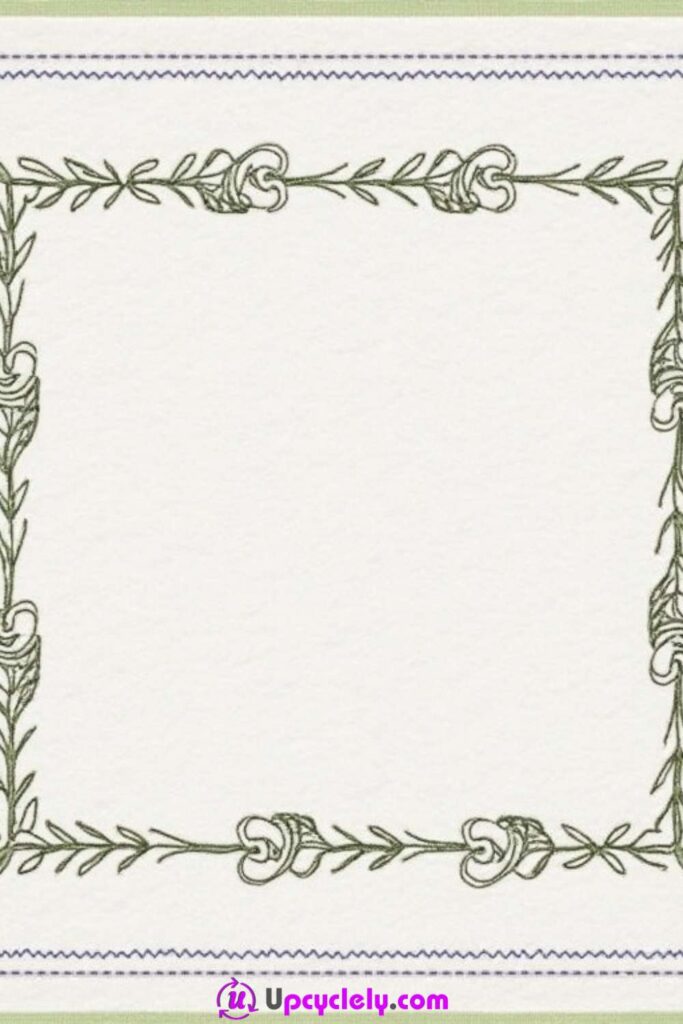
A stitched border can give an old photograph, handwritten quote, fabric label, or small print a new setting without covering the centre. The leafy green line, small flower shapes, and narrow inner outline create a frame that feels decorative but still leaves plenty of open space. Because the centre remains blank, the corners and repeated side motifs need to be especially even.
The final use should be decided before stitching. A border for a photograph needs an opening that matches the mount, while a border for text needs enough room for lettering and margins. I would cut a paper template of the centre first and place it over the canvas. That simple check prevents the finished stitching from being hidden by the frame rebate later.
Materials and Tools
· Needlepoint canvas or even-weave fabric suited to counted stitching
· Tapestry needles
· Green thread with optional blue, yellow, cream, or muted floral accents
· Ruler, paper template, and graph paper
· Temporary guide thread or fabric-safe marking method
· Frame or stretcher bars
· Embroidery scissors
· Mount board or backing for the final insert
Steps for a Clean Stitched Border
1. Set the inner opening and outer limits. Place the paper template at the centre and mark the inner rectangle with guide thread. Measure equal margins on all four sides, then mark the outer boundary. Check the corners diagonally so the frame remains square before adding any decorative line.
2. Build the plain guide lines first. Stitch the narrow inner border and any simple outer line before starting leaves or flowers. These straight lines provide reference points and reveal measuring errors. Correct the rectangle now, because decorative vines will make later adjustments more difficult.
3. Repeat the vine and corner motifs. Choose one short leaf-and-flower repeat and chart it for the top edge. Mirror or rotate the repeat on the other sides rather than redesigning each border. Simplify the corners with one flower, curl, or leaf cluster so the lines turn cleanly without becoming crowded.
4. Insert the centre content and finish the back. Block the canvas square and test the photograph, quote, or textile label behind the opening. Mount the centre separately so it can be changed later if desired. Frame the whole piece with acid-free or suitable materials when preserving an important photograph or paper item.
The blank centre is part of the design. I would resist filling it with extra stitches before deciding what the frame will actually hold.
A very narrow border can decorate a table runner or cushion edge. Small stitched frames can also surround initials, dates, or repaired pieces of vintage fabric that deserve a more visible place.
Space-Themed Design

A dark navy background makes coloured planets and small stars appear brighter, which is why a space scene can feel dramatic even when the shapes remain simple. Large blue and purple planets, golden rings, orange suns, and tiny scattered stars create scale through size rather than through realistic detail. The open distances between the forms are just as important as the planets themselves.
The background is the time-consuming part. Large areas of one dark colour can pull the canvas if the tension changes or if every row is worked in the same direction from one side. I would place and complete the planets first, then fill the navy in balanced sections around them. That order keeps the outlines clean and makes the long background stage easier to divide into manageable areas.
Materials and Tools
· Needlepoint canvas
· Tapestry needles
· Navy thread for the background
· Blue, turquoise, purple, yellow, orange, pink, green, and cream threads
· Graph paper and coloured pencils
· Temporary guide thread or fabric-safe marker
· Stretcher bars or a supportive frame
· Embroidery scissors
· Optional metallic thread used sparingly for stars
How to Build the Space Scene
1. Arrange planets of different sizes. Draw the largest central planet first and place smaller circles around it without creating a rigid row. Leave clear dark spaces between the forms. Add one or two ringed planets and several tiny stars, making sure the outer planets do not crowd the canvas edge.
2. Stitch the planet bodies and rings. Work the large circles with two related shades so one side appears lighter. Complete a planet body before adding its ring, then layer the ring across the front and behind in the correct places. Use clean stepped curves rather than trying to force perfectly round lines onto a coarse grid.
3. Add stars and tiny accents. Place the larger four-point stars first, then scatter small single stitches or knots across the remaining spaces. Keep the distribution irregular but balanced. Metallic thread can highlight a few stars, though using it everywhere may reduce the contrast between ordinary and bright points.
4. Fill the navy background in sections. Begin around the central planet and work outward in alternating areas so the canvas stays balanced. Keep thread tails short and avoid carrying bright colours behind the dark field. Block the finished piece carefully, then frame it or apply it to a cushion or wall hanging with the full scene visible.
What matters here is the dark space between the objects. Filling every gap with another star can make the planets lose their sense of scale.
A beginner can stitch one ringed planet with five stars. Small space motifs also work on children’s room banners, pencil cases, or patches backed with sturdy fabric.
Stitched Bookmarks
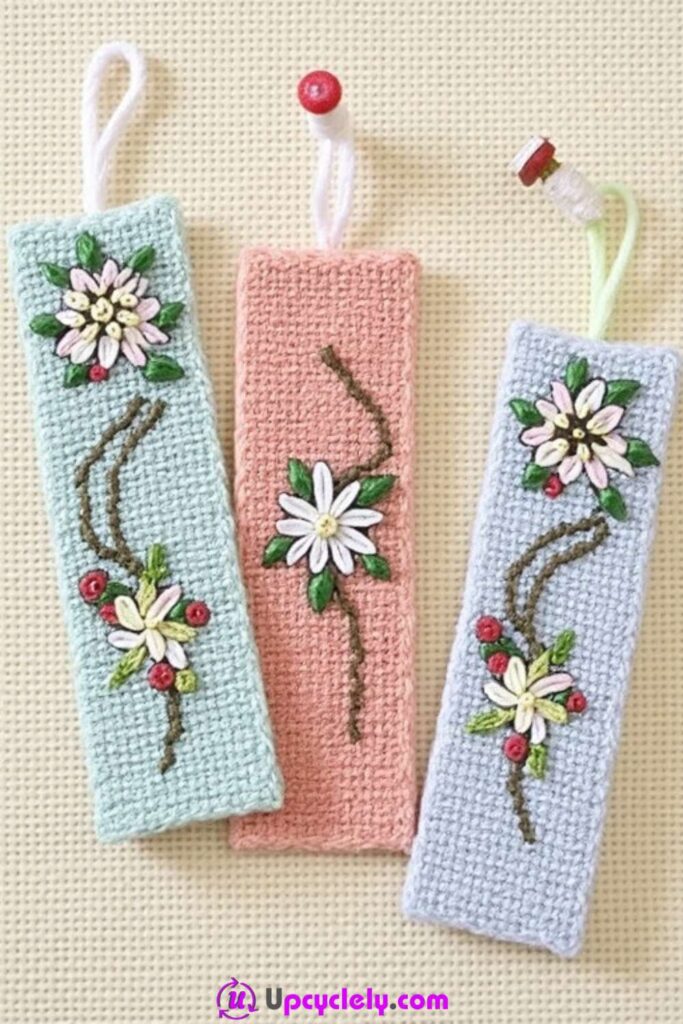
Narrow needlepoint strips become useful bookmarks when the stitching remains flat, the edges are enclosed, and the finished piece bends without cracking. Pastel backgrounds with white flowers, green leaves, red berries, and a simple top loop make the design decorative without adding hard pieces against book pages. The long shape naturally suits a climbing stem or two separated floral clusters.
A bookmark should not be too thick. Heavy knots, large beads, and bulky backing can strain the book spine or mark the paper. I would use compact stitches on the front, keep the thread ends tidy, and place any bead only on the top loop where it remains outside the pages.
Materials and Tools
· Narrow strips of needlepoint canvas
· Tapestry needles
· Pastel background thread with white, green, yellow, red, and brown accents
· Graph paper for a long narrow chart
· Fabric or felt for a thin backing
· Ribbon, cord, or stitched loop for the top
· Embroidery scissors
· Needle and sewing thread or compatible adhesive
Steps for a Flexible Needlepoint Bookmark
1. Plan the design around the narrow shape. Draw the full bookmark outline and leave a plain margin along both sides. Position one main flower near the lower half and another smaller cluster above it, connecting them with a curved stem. Keep the top clear for the loop or ribbon attachment.
2. Stitch the background and floral motifs. Work the pale background evenly, then add the darker stem and leaves. Build the flowers with flat petal stitches and small centres that do not rise sharply. Check the back frequently and trim thread tails so they do not form ridges beneath the backing.
3. Trim and enclose the edges. Block the strip before cutting and leave enough canvas for a neat folded or bound edge. Add a thin fabric backing by stitching around the perimeter or using a compatible adhesive sparingly. The sides should feel smooth when a finger moves along them.
4. Add the top loop and test it in a book. Attach a soft ribbon or stitched loop securely at the centre. Keep beads or buttons above the bookmark body, not between pages. Close the finished piece inside a thick book for a short test, then remove any bulky area that leaves a visible gap or pressure mark.
I’d rather keep the floral stitching low and let the top loop carry the extra decoration. The bookmark should serve the book first.
Use scraps from a larger needlepoint project for a patchwork bookmark, or make a very simple striped version from leftover threads. A worn vintage canvas may also be cut into bookmark strips if the stitches remain secure and the edges can be enclosed.
Sun and Moon Designs
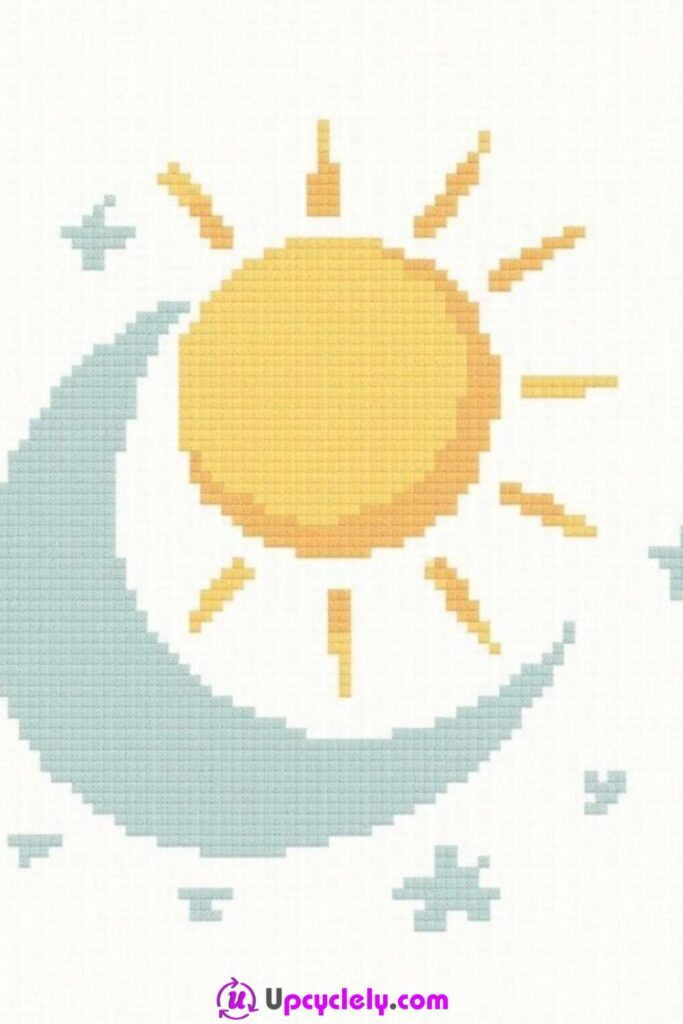
A golden sun overlapping a pale blue crescent creates a calm celestial motif with very few colours. The large circular sun, stepped rays, curved moon, and scattered stars are clear enough to read from a distance, while the light background keeps the composition open. The overlap gives the two shapes a relationship instead of making them look like separate symbols.
The circle and crescent should be charted together. If the moon is added after the sun without planning, it may become too narrow or hide an awkward section of the rays. I would draw the full overlap on graph paper, then choose which edges sit in front before any colour is filled.
Materials and Tools
· Pale needlepoint canvas
· Tapestry needles
· Golden yellow, warm orange, pale blue, medium blue, and optional cream thread
· Graph paper, compass, and pencil
· Temporary guide thread
· Frame or stretcher bars
· Embroidery scissors
· Optional backing for a cushion, banner, or framed panel
How to Stitch the Sun and Moon
1. Chart the overlap and main proportions. Draw the sun as a stepped circle and place the crescent so it crosses the lower or side edge. Mark the front shape clearly. Add rays at regular intervals, but vary their lengths slightly so the design does not feel mechanical.
2. Fill the sun with gentle colour changes. Use golden yellow across most of the circle and add a warmer orange along one edge or selected rays. Keep the stitch direction consistent within the sun. Work the rays outward from the circle so their bases remain evenly spaced.
3. Build the crescent and stars. Outline the moon in medium blue and fill it with a paler shade, following the charted curve. Stop cleanly where it passes behind or in front of the sun. Add stars in several sizes, leaving enough blank background that each one remains visible.
4. Block and choose a simple display. Correct any uneven points on the crescent before securing the back. Block the canvas so the circular shapes do not appear stretched. Frame it with a wide pale margin, apply it to a cushion, or use it as the centre panel of a soft wall banner.
The limited palette is what gives this motif its calm feeling. Extra colours can work, but I would introduce them through one border rather than scattering them across the sky.
A small sun-and-moon patch can decorate a denim pocket or fabric pouch. Separate mini canvases, one sun and one crescent, can also reuse two small frames that do not quite match.
Tropical Leaves
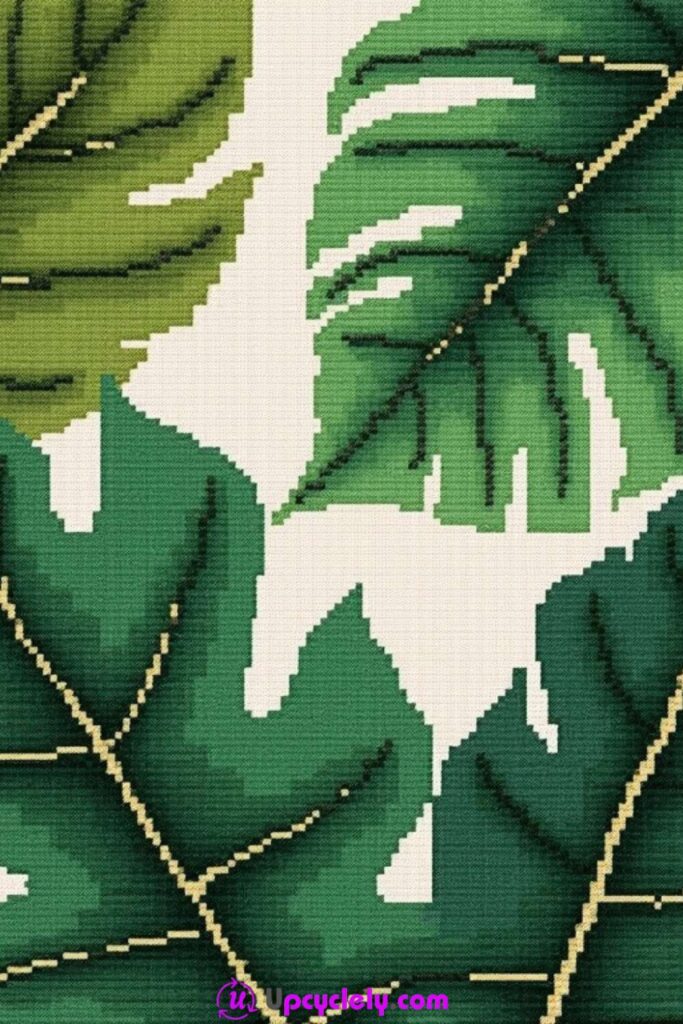
Large overlapping tropical leaves create a strong needlepoint pattern because their cut edges, central veins, and different green tones remain recognisable on a grid. Deep emerald, medium green, olive, and pale highlights can separate the leaves without requiring a realistic botanical study. Small cream gaps and thin gold or dark vein lines stop the broad shapes from blending together.
The overlaps need a clear front-to-back order. I would number the leaves on the paper pattern and stitch the rear shapes first, then place the foreground leaves over their interrupted edges. This is one of those projects where patience matters more than adding another colour, because a clean overlap gives more depth than several unrelated highlights.
Materials and Tools
· Needlepoint canvas
· Tapestry needles
· Threads in dark green, emerald, olive, light green, cream, black or deep green, and optional muted gold
· Graph paper and coloured pencils
· Temporary guide thread or fabric-safe marker
· Stretcher bars or a strong frame
· Embroidery scissors
· Optional fabric backing for a cushion or wall panel
Steps for Layered Tropical Leaves
1. Map the leaves and decide the overlap order. Draw three to five large leaves, allowing some to continue beyond the edge of the design. Mark the central veins and note which leaf sits at the front. Keep a few cream openings between forms so the pattern does not become one uninterrupted green mass.
2. Stitch the rear leaves first. Begin with the palest or furthest leaf and fill its main shape with even stitches. Add a darker outline or vein only where it will remain visible. Stop the stitching cleanly at every point that will be covered by a foreground leaf rather than wasting thread beneath it.
3. Add the foreground leaves and highlights. Work the deepest green shapes next, using the chart to preserve cut-out sections and split edges. Place light highlights along selected surfaces and darker veins through the centres. Keep the highlight direction related to the leaf structure instead of scattering pale stitches randomly.
4. Balance the negative space and finish the canvas. Review the cream gaps and fill only those that interrupt a leaf unintentionally. Add a narrow neutral border if the design needs separation from the final frame or fabric. Block the piece carefully and use it as wall art, a cushion front, or a firm bag panel with the edges fully protected.
For me, the open cream shapes are as useful as the green leaves. They give the eye a place to rest and make the layered edges easier to understand.
A beginner can stitch one monstera-style leaf in two greens. Small repaired sections from an older leafy canvas can also become patches, box-lid inserts, or framed miniatures instead of being discarded.
Needlepoint Choices That Can Pull a Neat Pattern Out of Shape
Starting with damaged canvas without checking the grid. A weak intersection may open further as the thread is pulled through it, and a deep fold can shift an otherwise square pattern. Inspect the full working area, reinforce or avoid damaged sections, and choose a smaller project when the canvas cannot support dense stitching.
Using thread that is too thick for the holes. Bulky thread may seem to provide faster coverage, but it can stretch the grid, flatten nearby stitches, and make the finished piece difficult to block. Test several stitches first and reduce the number of strands until the canvas remains open and even.
Pulling every stitch as tightly as possible. Needlepoint needs consistent tension, not maximum tension. Over-tight stitching narrows the canvas, curves straight borders, and creates ridges where colour blocks meet. Let each stitch sit against the surface and support large pieces with a frame when needed.
Carrying dark thread behind pale open areas. Long thread floats can show through white canvas or light stitching, especially in hearts, borders, and coffee-cup steam. End the thread, restart closer to the next section, and keep carries short enough that they remain hidden.
Adding knots and beads to a functional surface. Raised details may suit framed art, but they can make coasters wobble, bookmarks press into pages, and cushion panels catch on clothing. Keep working surfaces flat and move dimensional decoration to an outer border or top loop.
Cutting the canvas too close to the stitching. A narrow edge leaves little material for binding, mounting, or sewing into another item. Plan the final finish at the beginning and keep a generous allowance until the piece has been blocked and measured again.
Ignoring the direction of stitches inside a colour block. A sudden change of direction can look like a shadow or repaired area even when the colour matches. Keep one direction within a shape, and change it only when the pattern uses the difference deliberately.
Filling every blank space. Open canvas can separate motifs and make a composition lighter. Adding background simply because space remains may use unnecessary thread and reduce clarity. Step back before filling and decide whether the negative space already supports the design.
Mounting before the canvas has been blocked. A distorted piece may be forced into a square frame, which places constant strain on the stitching and backing. Correct the shape first, let it dry completely, and only then trim, sew, or mount it.
Choosing the finish after the stitching is complete. A pattern may be too thick for a bookmark, too small for the intended cushion, or too uneven for a coaster. Decide the likely use early, test the dimensions on paper, and adjust the chart before large areas have been stitched.
Frequently Asked Questions
Which needlepoint craft ideas are easiest for beginners?
Rainbow stripes, a small heart motif, one cactus, and a simple border use clear counting and limited colour changes. Begin with a medium-grid canvas and a compact project so mistakes can be corrected without unpicking a large background.
Can I use leftover embroidery thread for needlepoint?
Yes, when the thread passes through the canvas comfortably and provides suitable coverage. Sort the remnants by fibre and thickness, test for colour bleeding when washing or damp blocking may be involved, and use short amounts in patchwork, geometric, heart, or floral details.
Do I need a hoop or frame for every project?
No. A supportive frame helps large backgrounds, straight stripes, and geometric pieces stay square, but a narrow bookmark or small motif may be easier to stitch in hand. Avoid forcing stiff needlepoint canvas into a small embroidery hoop that leaves permanent creases.
How do I keep needlepoint canvas from warping?
Use even tension, alternate the areas you stitch, and support larger work with stretcher bars when practical. Do not pull thread tightly, and block the finished canvas using a method suited to the fibre and materials before mounting it.
Can old unfinished needlepoint be reused?
It can often become part of a patchwork panel, bookmark, framed border, bag insert, or small cushion. Inspect the old stitches and canvas first, clean only with a method appropriate to the fibres, and design the new sections so they support rather than hide the original work.
What backing should I use for functional needlepoint pieces?
Bookmarks need a thin smooth fabric, while coasters need a firm flat base with a non-scratch underside. Cushions and bags require durable fabric and enclosed canvas edges. Match the backing to the use rather than using one material for every project.
How should I clean a finished needlepoint project?
Begin with gentle dust removal and follow the needs of the thread, canvas, backing, and any adhesive. Do not soak a mixed-material project without confirming that every component is colourfast and washable. For framed or older pieces, professional textile advice may be safer than experimenting with water or cleaners.
Let Needlepoint Become Something You Will Actually Use
The most useful needlepoint craft ideas begin with the material already in front of you. Short thread lengths can fill a patchwork square, an unfinished floral canvas can become a bookmark, and a carefully stitched motif can move from a drawer into a frame, cushion, coaster, or bag. The pattern does not need to be complicated; it needs to suit the canvas, thread, and way the finished piece will be handled.
Choose one manageable design, prepare the edges, and plan the final use before filling the first large section. Then let the original grid do what it does best: turn patient, repeated stitches into a clear image or practical surface. Which of these 14 needlepoint craft ideas would give your leftover thread or unfinished canvas the most satisfying new role?