Foam scraps have a habit of collecting in awkward shapes: a narrow strip left from a frame, a small circle cut from a flower centre, or a bright corner that seems too useful to throw away. Their softness, colour, and clean cut edges make them especially good for light decorations, children’s crafts, bookmarks, magnets, and small accessories, yet the material works best when the project respects its limits rather than treating it like paper, wood, or heat-resistant plastic.
I am Stella Eve Louise, and I prefer foam craft ideas that use the shape and flexibility already present in the material. I know it can feel tempting to cover every surface with gems and glitter, but clear cutting, sensible layering, and a secure attachment usually make a project more enjoyable to use. A small offcut can become the exact leaf, star, eye, or centre that finishes another piece, which is why I sort the scraps before buying anything new.
Choose the Right Foam for the Project
Craft foam varies in thickness, flexibility, surface texture, and adhesive backing. Thin sheets bend easily for bunting, bookmarks, bracelets, and hat coverings, while thicker foam supports coasters, magnets, keychains, and layered wall pieces. Match the material to the new purpose before cutting, and avoid using foam near flames, hot cookware, or surfaces that may become very hot.
Inspect reused pieces for tears, permanent folds, dust, sticky residue, or areas that have stretched around an old fastening. Wipe suitable foam gently and let it dry flat. Keep the cleanest broad sections for structural pieces and reserve irregular scraps for leaves, dots, stars, facial features, and flower centres.
Plan Shapes Before Cutting the Foam
Paper templates save material and make repeated shapes easier to balance. Draw the design first, test it against the intended object, and then place the template near the edge of the foam. Rotate triangles, petals, and leaves so neighbouring shapes share space rather than leaving unusable gaps between them.
Use long scissor movements for smooth curves and turn the foam as you cut. Intricate internal openings may need an adult-controlled craft knife and cutting mat. Keep every tool away from children who are not ready to use it safely, and simplify the design when a narrow point or tiny hole would weaken the finished piece.
Set Up Adhesive, Safety, and Drying Areas
Different foam surfaces respond differently to glue, tape, and heat, so test the chosen adhesive on an offcut. Use the smallest amount that makes a secure join and avoid high heat unless the material and tool are specifically suitable. Strong solvents and some paints can damage foam, which is another reason to test before applying anything across the full project.
Cover the table, organise small pieces in shallow trays, and create a flat drying space before beginning. Magnets, key rings, gems, pom-poms, and tiny foam details can become choking hazards, so keep them away from young children and pets. Let finished pieces dry fully before bending, hanging, wearing, or testing them.
Foam Fruit Magnets
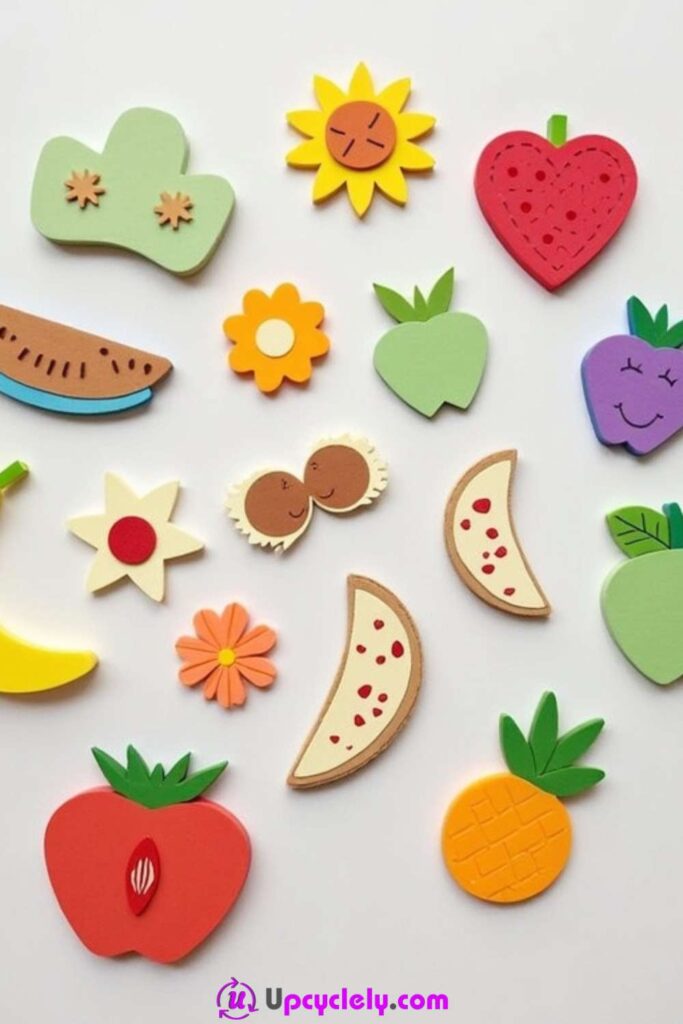
Fruit shapes work especially well in foam because their outlines remain easy to recognise even after they are simplified. A strawberry can begin as a heart, an apple as a rounded shape with a small leaf, and a pineapple as an oval with a pointed crown. Layering two colours gives each piece enough depth to stand away from the refrigerator without making it heavy.
Use clean foam scraps from previous projects before opening a new sheet. The smallest offcuts can become leaves, seeds, centres, or facial details. I would keep the forms broad and cheerful rather than chasing realistic curves; magnets are usually seen from a short distance, so a clear silhouette matters more than tiny decoration.
Materials and Tools
· Craft foam scraps in fruit, leaf, and accent colours
· Paper templates, pencil, and a blunt tracing tool
· Sharp scissors suitable for foam
· Fine-tip marker or small foam pieces for details
· Craft glue that remains flexible when dry
· Self-adhesive magnetic tape or lightweight craft magnets
Steps for This Foam Craft
1. Plan a small set of fruit shapes. Sketch three or four fruits on paper and reduce each design to its largest recognisable parts. Check that the finished size can hold the magnet without the magnetic piece showing around the edges.
2. Cut the base and raised details. Trace each main outline onto foam and cut with long, steady movements rather than many short snips. Add separate leaves, centres, or rind pieces, then place everything together without glue to check the balance.
3. Build the designs from the back forward. Glue large layers first and press them under a light flat object protected with scrap paper. Once the main joins feel secure, draw seeds and lines or attach the smallest foam details with only a dot of adhesive.
4. Attach and test the magnets. Fix a magnet near the centre of the back so the fruit hangs straight. Let the adhesive set fully, then test each piece on a metal surface with one sheet of paper beneath it; remove any magnet that cannot hold the craft securely.
The part I would watch is the thickness. Several heavy layers may look impressive on the table but can slide down a smooth fridge door if the magnet is too small.
Turn the same shapes into gift tags, counting pieces, or play-food labels by leaving off the magnet. For homes with young children, keep detachable magnets and tiny foam parts well out of reach.
Foam Animal Footprints
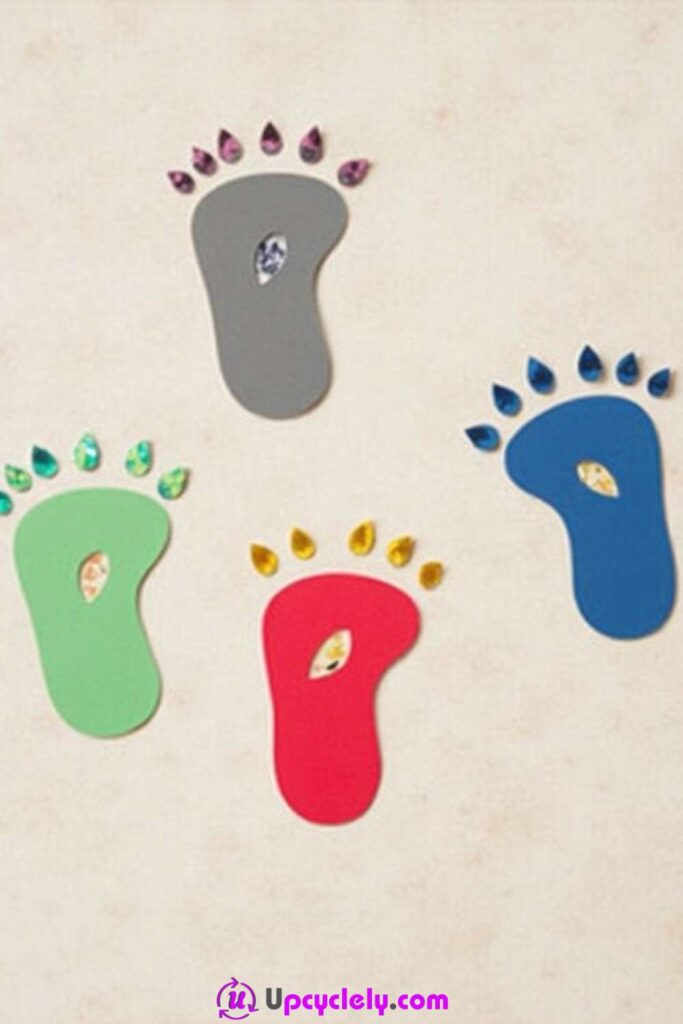
Large foam footprints can create a playful trail across a wall, classroom board, party table, or indoor activity area. The broad pad and smaller toe shapes are simple to cut, while jewel-like stickers or contrasting foam spots give each print a slightly theatrical finish. Different colours make it easy to assign a separate animal or instruction to every step.
The footprint does not have to copy a real species exactly. A rounded paw, long bird-like toes, or a three-toed dinosaur print can all work if the shapes stay consistent through the set. I know it can feel tempting to decorate every centimetre, but leaving some plain foam around the details helps the outline remain clear.
Materials and Tools
· Medium-weight foam sheets or clean large foam offcuts
· Paper for a footprint template
· Pencil, marker, and scissors
· Foam circles, flat gems, or paper shapes for toe details
· Removable adhesive putty or low-tack tape for temporary display
· Optional number or animal-name labels
Steps for This Foam Craft
1. Choose the trail and make one strong template. Decide whether the prints will represent paws, claws, hooves, or imaginary animals. Draw one print on folded paper so paired elements stay balanced, then test its size against the intended floor, wall, or game board.
2. Cut a repeated set without wasting foam. Place the template close to the edge of each sheet and alternate its direction to use the material efficiently. Cut the main print first, then prepare matching toes or pads from smaller scraps.
3. Decorate with flat, secure details. Arrange the embellishments before attaching them and keep raised pieces away from any footprint that may be walked on. For a floor game, use marker lines or thin foam layers rather than gems that could loosen or become slippery.
4. Create the trail and test the spacing. Lay every print in order before fixing it temporarily. Walk beside the trail and check that the steps feel natural, then attach them with a removable method suited to the surface and supervise any activity involving children.
For me, the direction of the toes does more to create movement than extra sparkle. Rotate a few prints gently and the trail immediately feels as though something has passed through the room.
Use the footprints for colour matching, counting, movement prompts, or a simple treasure hunt. Cardboard, felt, or washable chalk can replace foam when the surface or activity needs a different material.
Foam Animal Puppets
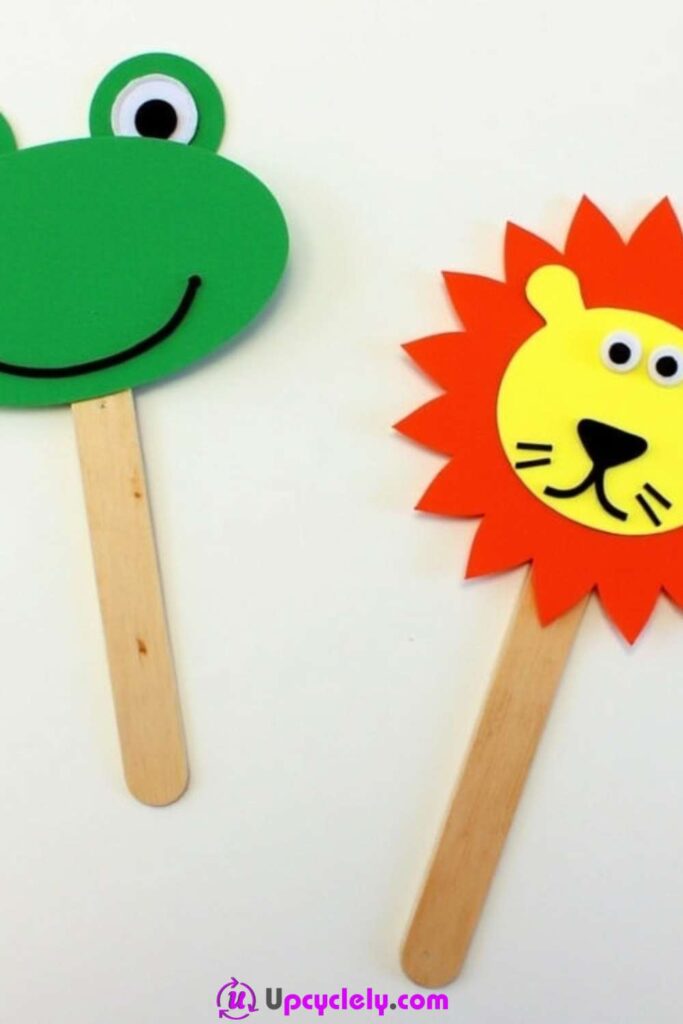
A foam animal face becomes a useful puppet as soon as it is attached to a sturdy craft stick. The frog and lion shapes suit this method because their features can be built from broad circles, ovals, and pointed pieces. Googly eyes may add movement, but flat foam or drawn eyes can look just as expressive and are easier to manage around younger children.
What matters here is the order of the layers. A mane, ears, or eye bumps need to sit behind the main face, while noses and mouths belong on top. Arrange the entire animal before gluing, because changing an ear after the face is fixed usually leaves visible adhesive and a puppet that looks permanently surprised.
Materials and Tools
· Foam sheets and scraps in animal colours
· Paper templates for heads, ears, manes, and facial pieces
· Craft sticks or clean reused wooden stirrers
· Scissors and fine-tip markers
· Flexible craft glue or double-sided craft tape
· Optional large craft eyes, yarn, or paper details
Steps for This Foam Craft
1. Simplify the animal into layered shapes. Choose one or two animals and sketch the main face, ears, and distinctive feature on paper. Keep the lower edge wide enough to cover the top of the craft stick and avoid very thin points that may tear.
2. Cut and arrange the foam pieces. Cut the largest back layer first, followed by the face and small details. Stack everything without adhesive, move the eyes and mouth until the expression feels balanced, and mark the final positions lightly.
3. Assemble the face in a sensible order. Glue the mane, ears, or eye bumps behind the face, then add the front features. Press the layers flat while drying and draw fine lines only after the surface is clean and secure.
4. Add the handle and test the puppet. Attach the craft stick to the back with a generous overlap and cover the join with another foam patch if extra support is needed. Hold the puppet upright, move it through a short story, and reinforce any piece that bends or catches.
I do not think every puppet needs a complicated body. A strong face and a comfortable handle leave more attention for the story, which is the part people usually remember.
Make a matching set for songs, animal sounds, or bedtime stories. Paper plates, cereal-box card, or felt can replace the foam, while reused spoons can serve as handles when craft sticks are unavailable.
Foam Star Bookmark
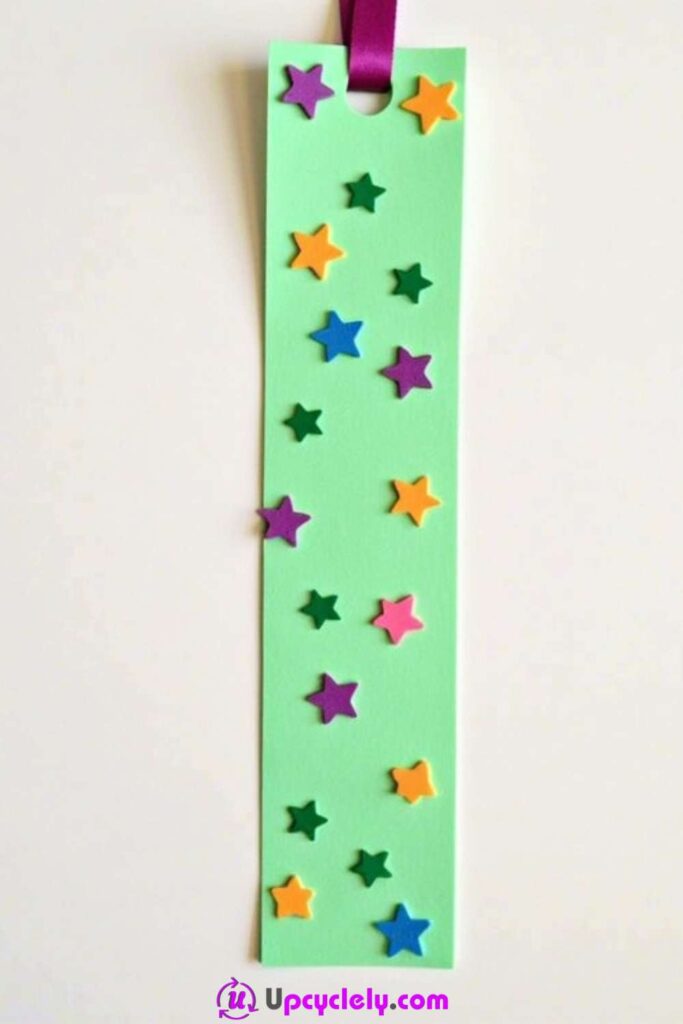
A long strip of foam makes a soft bookmark that will not crease as quickly as thin paper. Small stars scattered across the surface add colour without making the design difficult to use, and a short ribbon gives the top a clear marker above the page. The finished piece should stay flat enough to slide between sheets without forcing the book open.
Choose thinner craft foam for this project and avoid hard beads, thick gems, or bulky knots. A bookmark lives under pressure whenever the book closes. The decoration can be cheerful, but the edges need to remain smooth and the ribbon should be short enough that it does not tangle around the cover.
Materials and Tools
· Thin craft foam for the bookmark base
· Small foam scraps or pre-cut stars
· Ruler, pencil, and scissors
· Hole punch or small rounded cut at the top
· Narrow ribbon, reused gift cord, or soft thread
· Flexible glue or double-sided craft tape
Steps for This Foam Craft
1. Cut a straight bookmark base. Measure a narrow strip that sits comfortably inside an average book and round the corners. Test the plain foam between several pages before decorating so you can adjust the width or length without wasting finished work.
2. Arrange the stars with open space between them. Cut small stars from scraps or use flat pre-cut pieces, then spread them across the strip. Keep the bottom edge and centre area fairly clear so the bookmark stays flexible and does not develop a thick ridge.
3. Secure the decoration neatly. Attach each star with a very small amount of glue and press the bookmark between clean sheets under a light book. Wipe away any adhesive that reaches the edges before it dries into a rough patch.
4. Add the ribbon and check the finish. Punch a centred hole near the top, thread through a short ribbon, and knot it without adding a large bead. Once everything is dry, close the bookmark inside a book and make sure the pages lie naturally.
The first arrangement rarely needs as many stars as the original pile suggests. I would stop while the base colour can still be seen, because that contrast makes each small shape clearer.
Use moons, letters, leaves, or simple dots instead of stars. Old folder covers and thin felt can create similar bookmarks when foam scraps are not available.
Foam Bracelets
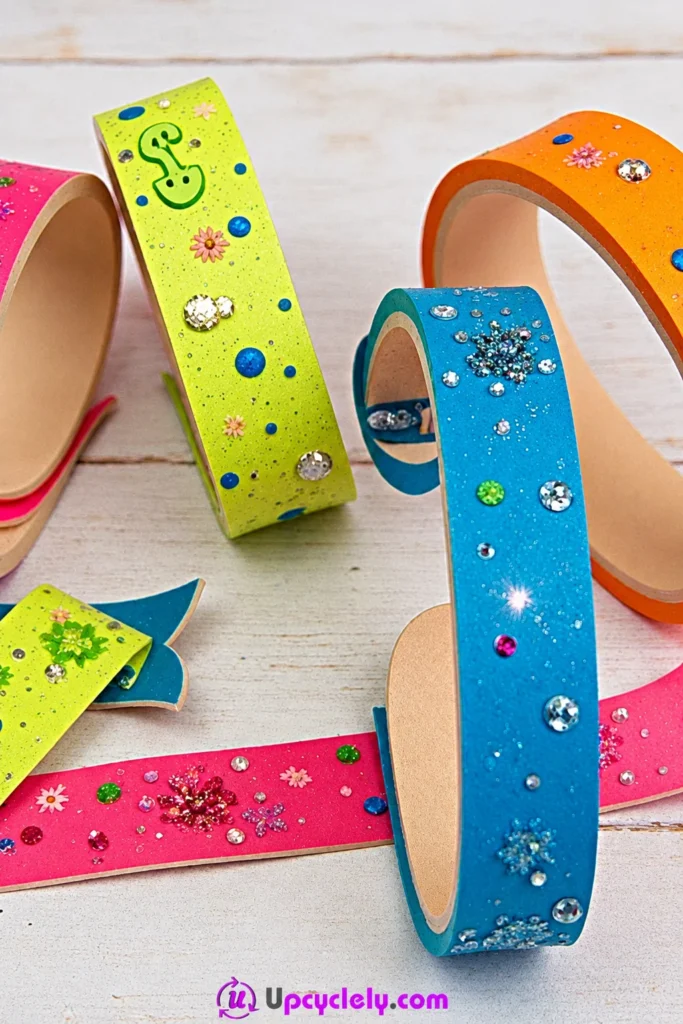
Foam bracelets use a plain strip as the structure and let small surface details provide most of the personality. Bright colours, flat rhinestones, tiny flowers, and marker patterns can turn leftover strips into lightweight costume jewellery. The curved appearance comes from the closure rather than permanently bending the foam, so the band can be stored flat between uses.
Measurement matters more than it first appears. A band that is too tight can feel uncomfortable, while a long loose strip catches on clothing and encourages the wearer to pull at the decorations. Use a flexible closure and keep every cut edge smooth, especially when the bracelet is intended for children.
Materials and Tools
· Flexible craft foam cut into long strips
· Paper measuring strip or soft tape measure
· Scissors and a ruler
· Flat gems, foam dots, sequins, or marker pens
· Flexible craft glue
· Hook-and-loop dots, foam tabs, or another soft closure
Steps for This Foam Craft
1. Measure with room for the closure. Wrap a paper strip loosely around the wrist and mark a comfortable overlap. Transfer that length to the foam, cut the band evenly, and round both ends so no sharp corner presses into the skin.
2. Plan a decoration that can bend. Lay out flat embellishments along the centre and leave the closure area empty. Bend the unglued band gently to see where stiff pieces lift, then move them toward sections that remain flatter.
3. Attach the details in light layers. Glue small elements one at a time and avoid thick pools of adhesive that harden the band. Let the strip dry flat, then flex it slowly and reinforce only the pieces that show movement.
4. Fit the closure and test comfort. Attach hook-and-loop dots or another soft fastening to the overlapping ends. Wear the bracelet briefly while moving the hand, then trim or reposition the closure if the band twists, pinches, or slides.
For me, a simple centre line of decorations looks more finished than covering the whole strip. It also leaves the foam free to curve instead of behaving like a decorated ruler.
Create name bands with foam letters, wider superhero cuffs, or narrow friendship bracelets from layered offcuts. Avoid giving small detachable embellishments to very young children.
Foam Bunting
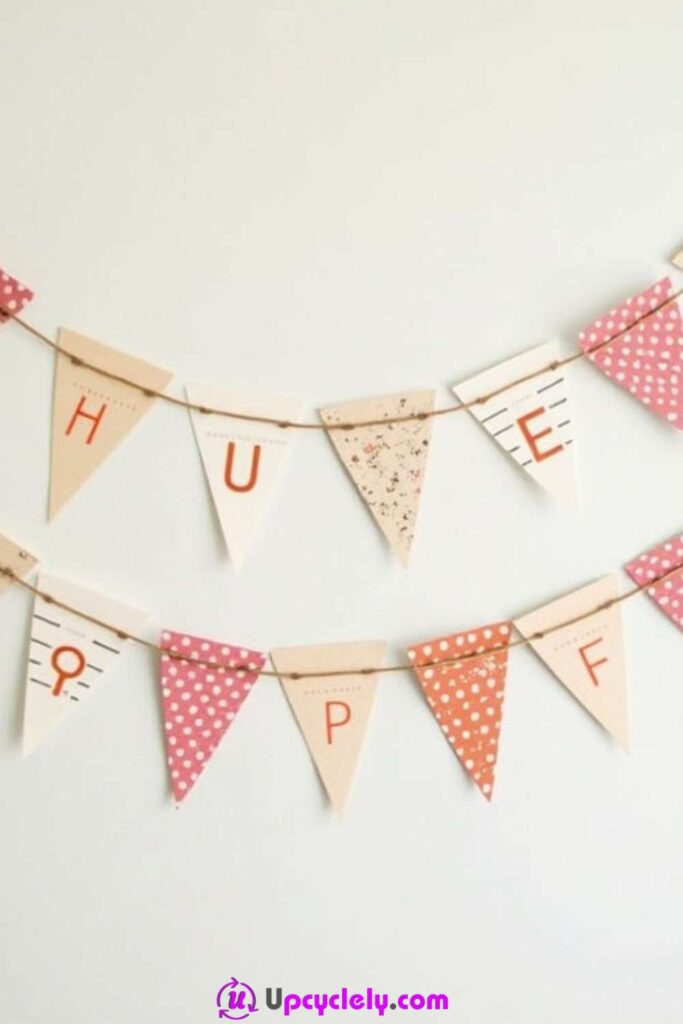
Foam bunting can stay bright through repeated indoor use because the flags do not crease as easily as thin paper. Triangles remain the clearest shape, while letters, dots, and contrasting panels can turn a simple garland into a name, celebration message, or reusable classroom display. The string should support the flags without pulling the top corners out of shape.
Thin foam works better than heavy sheets for a long garland. Before cutting, decide where the bunting will hang and how much empty string is needed at both ends. This is where a little planning saves a surprising amount of rearranging later, especially when letters need to appear in the correct order.
Materials and Tools
· Thin foam sheets, offcuts, or patterned foam
· Paper triangle template
· Scissors, ruler, and pencil
· Hole punch or narrow foam-safe awl used by an adult
· Cord, ribbon, twine, or reused gift string
· Foam letters, markers, or flat decorative pieces
Steps for This Foam Craft
1. Measure the display area and plan the message. Estimate the finished length, including tying space, and write the flag order on paper. Make one triangle template sized to the wall, shelf, or table rather than guessing from the sheet.
2. Cut the flags efficiently. Trace triangles side by side, alternating their direction to reduce waste. Cut cleanly and place the finished flags in order as you work so repeated colours or letters can be balanced.
3. Decorate while the pieces remain flat. Add letters, shapes, or drawn patterns before threading. Keep the upper corners free of decoration, because that area will bend slightly around the string and may need reinforcement.
4. Punch, thread, and hang the bunting. Make two small holes near the top of every flag, leaving enough foam around them to prevent tearing. Thread the cord from the back, adjust the spacing on a flat surface, then hang the garland with secure fixings appropriate to the wall.
A little movement between the flags keeps bunting relaxed, but large gaps can make a word difficult to read. I would arrange it on the floor and step back before committing to the wall.
Use the same flags for several events by attaching removable letters. Fabric scraps, card packaging, and old wallpaper can be mixed with foam for a more varied garland.
Foam Coasters
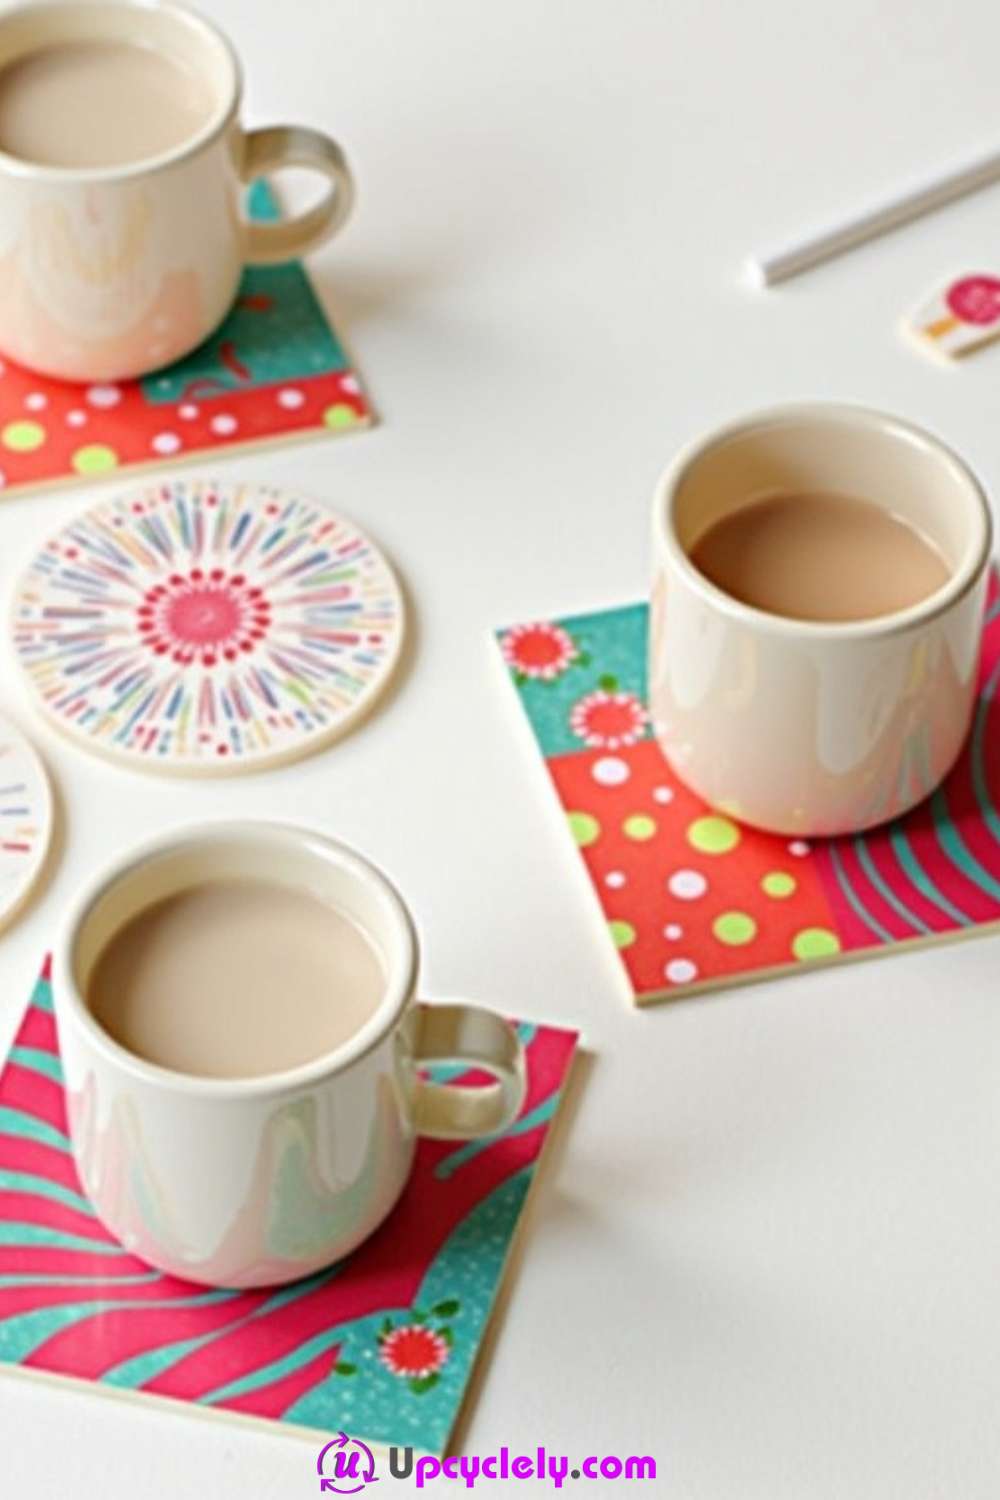
Thicker foam can form a light coaster when the top remains level and the underside stays flat. Bright paper, fabric scraps, drawn patterns, or thin foam shapes can decorate the surface, while a second foam layer gives the piece more body. Round and square versions can sit together as a set without needing identical designs.
These coasters suit cool or warm cups rather than hot pans, kettles, or cookware. Craft foam can soften, mark, or trap heat if it is used beyond its intended purpose. Protect any paper decoration with a compatible finish, test the coaster with an ordinary mug, and replace it if moisture reaches the layers or the surface begins to curl.
Materials and Tools
· Thick craft foam or two layers of medium foam
· Cup or template for circles and a ruler for squares
· Scissors or craft knife used by an adult
· Fabric, decorative paper, or thin foam scraps
· Flexible adhesive suitable for the selected layers
· Optional compatible water-resistant top finish
Steps for This Foam Craft
1. Choose the shape and build a firm base. Trace a circle or square large enough for the mug base and cut two matching foam pieces. Stack them without glue, trim uneven edges, and check that the pair lies flat on the table.
2. Prepare a thin decorative surface. Cut paper, fabric, or foam decoration slightly smaller than the base so the outer edge remains visible. Avoid thick overlaps in the centre where the cup needs a stable place to sit.
3. Join the layers under even pressure. Spread a thin adhesive layer, align the pieces carefully, and press them between protected flat boards or books. Let the coaster dry completely before trimming any small misalignment around the edge.
4. Seal and test ordinary use. Apply a compatible finish only if the top material needs protection, keeping the foam edge clean. Place a room-temperature mug on the coaster, then test a warm drink while watching for wobbling, softening, moisture, or colour transfer.
The practical test is simple: the mug should not rock. I would remove a raised decoration rather than keeping a pretty surface that makes every cup feel unstable.
Use old mouse-mat material, cork, or felt as an alternative base. Make a matching trivet only from a material specifically suitable for heat, not by enlarging the foam coaster.
Foam Dragonflies
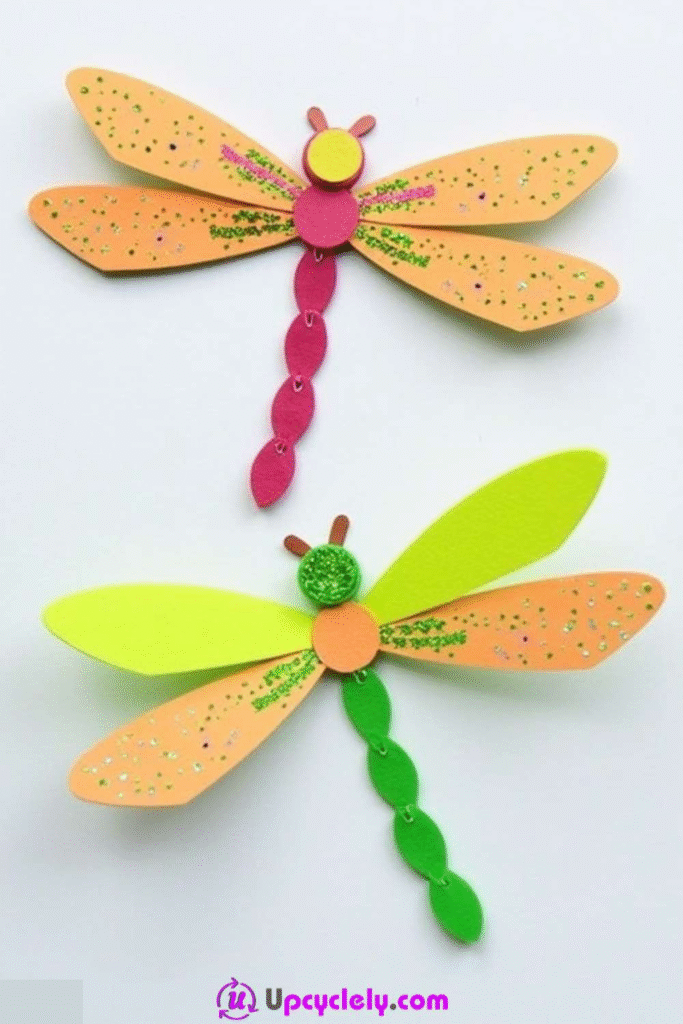
Long foam wings and a segmented body make dragonflies easy to recognise even in bold, unrealistic colours. The visible examples use glittered wings, layered circles, and linked body pieces to create movement. A small hanging loop, craft stick, or plant pick can turn the finished insect into wall decoration, a mobile element, or a pot accent.
The wings need enough support to hold their shape without becoming heavy. Two thin layers can be stronger than one oversized thick piece, especially when the dragonfly will hang. Keep glitter, gems, and tiny rings secure, and fold or cover any wire ends before the craft is handled.
Materials and Tools
· Foam sheets in wing, body, and accent colours
· Paper wing and body templates
· Scissors and hole punch
· Flexible craft glue
· Glitter glue, flat sequins, or marker details
· Optional cord, paper fasteners, or a craft stick for display
Steps for This Foam Craft
1. Design one balanced pair of wings. Fold a paper template to create matching left and right wings, then test it against the planned body length. Shorten very narrow tips that may tear or droop once decoration is added.
2. Cut and decorate the flat pieces. Prepare two pairs of wings, several body segments, and a head. Add glitter lines or marker patterns while everything is flat, leaving the central joining areas clean for stronger adhesion.
3. Assemble the body over the wing centres. Place the wings in a crossed arrangement and glue the first body piece over their meeting point. Continue the body downward with overlapping foam shapes or loosely linked segments, keeping the line straight.
4. Add antennae and choose a display method. Use short foam strips, folded pipe cleaners with covered ends, or drawn antennae. Attach a loop, stick, or backing patch according to the display, then lift the dragonfly gently and reinforce any wing that bends at the centre.
I especially like a little asymmetry in the wing colours, but the wing sizes should still feel balanced. That contrast keeps the insect playful without making it look as though one side has fallen off.
Create smaller dragonflies for cards or larger pairs for a wall arrangement. Translucent packaging, felt, or painted card can replace foam when a lighter wing is preferred.
Foam Flower Bouquet
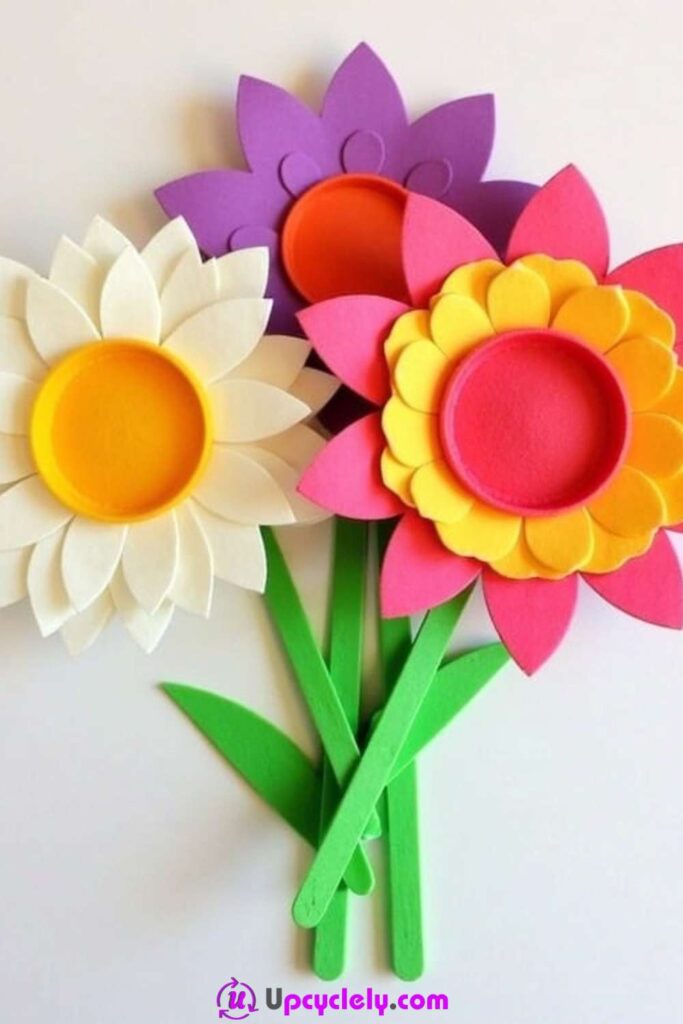
Layered foam petals can hold a rounded shape without wilting, which makes them useful for a permanent bouquet, party decoration, or handmade gift. The flowers in this style combine wide outer petals, smaller inner petals, and raised circular centres. Green craft sticks or foam-wrapped stems keep the arrangement light and easy to reposition.
A bouquet looks fuller when the flower heads vary slightly in size and angle. There is no need to make every bloom identical. I would repeat the same few colours and petal shapes, then change the number of layers so the group feels connected without looking factory-made.
Materials and Tools
· Foam sheets and scraps in flower and leaf colours
· Paper petal templates in two or three sizes
· Scissors and pencil
· Craft sticks, paper straws, or reused smooth skewers
· Flexible glue
· Optional bottle caps, foam circles, or rolled strips for centres
Steps for This Foam Craft
1. Prepare reusable petal templates. Draw one broad outer petal, one smaller inner petal, and simple leaves on card. Test the shapes together around a centre circle and adjust the width before cutting a full set from foam.
2. Build each flower head in layers. Arrange the largest petals first, overlapping their bases around a foam circle. Add the smaller petals, rotate the second layer to cover gaps, then press a raised centre over the joining point.
3. Attach stems without distorting the flower. Glue a craft stick to the back and cover the upper join with another foam circle or leaf-shaped patch. Let each flower dry face down with the stem supported so the head remains flat and secure.
4. Add leaves and arrange the bouquet. Attach leaves at different heights and gather the stems loosely before placing them in a reused jar, paper wrap, or lightweight container. Turn the flowers outward and leave small spaces so individual petal shapes remain visible.
The centre is the easiest place to hide the petal joins, so I would finish that part neatly rather than adding more decoration around every edge.
Use soft neutral colours for a room display, bright colours for a celebration, or single flowers as gift toppers. Cardboard tubes, paper straws, or clean twigs can replace purchased stems.
Foam Keychains
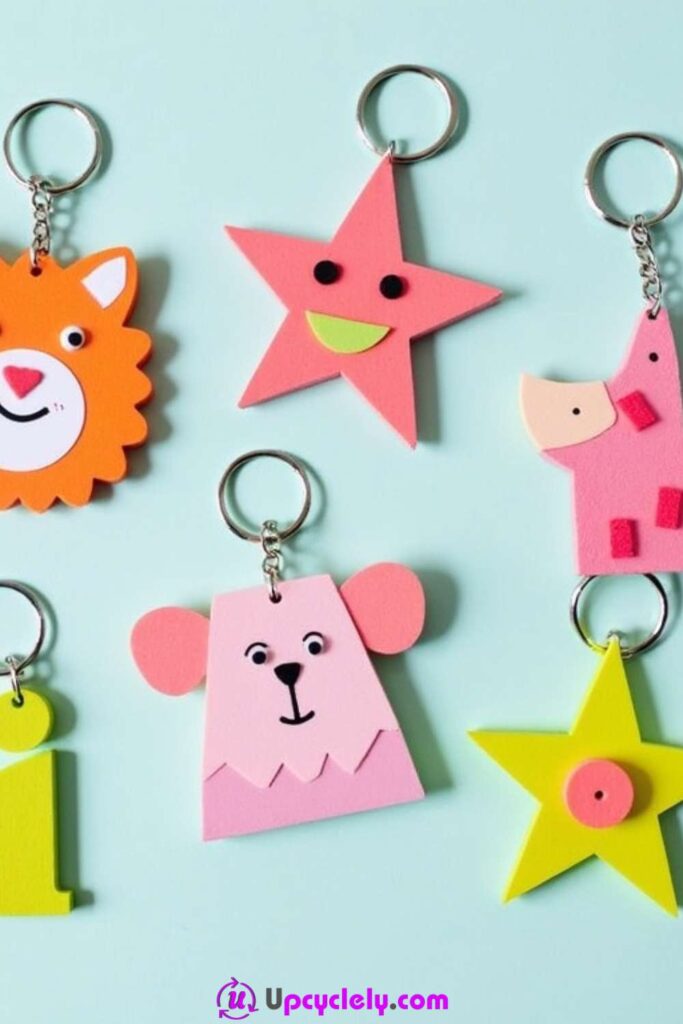
Foam keychains work best as broad, lightweight shapes such as animals, stars, letters, and simple characters. Layered faces give them personality, while a reinforced hole keeps the ring from pulling directly through the soft material. The finished piece can mark a bag, pencil case, or set of low-use keys without adding much weight.
The attachment point deserves more attention than the decoration. A single thin foam layer may tear after repeated movement, especially when the ring hangs from a narrow ear or star point. Build the hole into a wide part of the shape and add a backing layer before inserting hardware.
Materials and Tools
· Medium or thick craft foam and small detail scraps
· Paper templates for letters, animals, or stars
· Scissors and hole punch
· Flexible glue
· Key rings, short chains, or cord loops
· Markers and optional flat decorative pieces
Steps for This Foam Craft
1. Choose a shape with a strong top area. Draw the keychain slightly larger than the final design and place the hanging hole inside a broad section. Avoid narrow projections that will carry the full weight of the ring.
2. Cut a front, back, and reinforcing patch. Prepare two matching main shapes and a small foam circle or tab for the attachment area. Arrange the face or lettering on the front layer before the pieces are joined.
3. Glue the layers and finish the design. Sandwich the reinforcement between the front and back, align the edges, and press the piece flat. Add facial details, initials, or colour blocks once the main body feels secure.
4. Punch the hole and attach the ring. Make the hole through all reinforced layers and insert the ring or cord without stretching the foam. Tug gently in several directions, then remove and rebuild the attachment if the hole begins to widen.
One clear face or initial is enough at this scale. Tiny loose details may look charming for five minutes and then become the first parts to disappear inside a bag.
Use cord loops instead of metal rings for children’s bags, or turn the same shapes into luggage markers and zipper pulls. Keep small hardware away from young children.
Foam Wall Decor
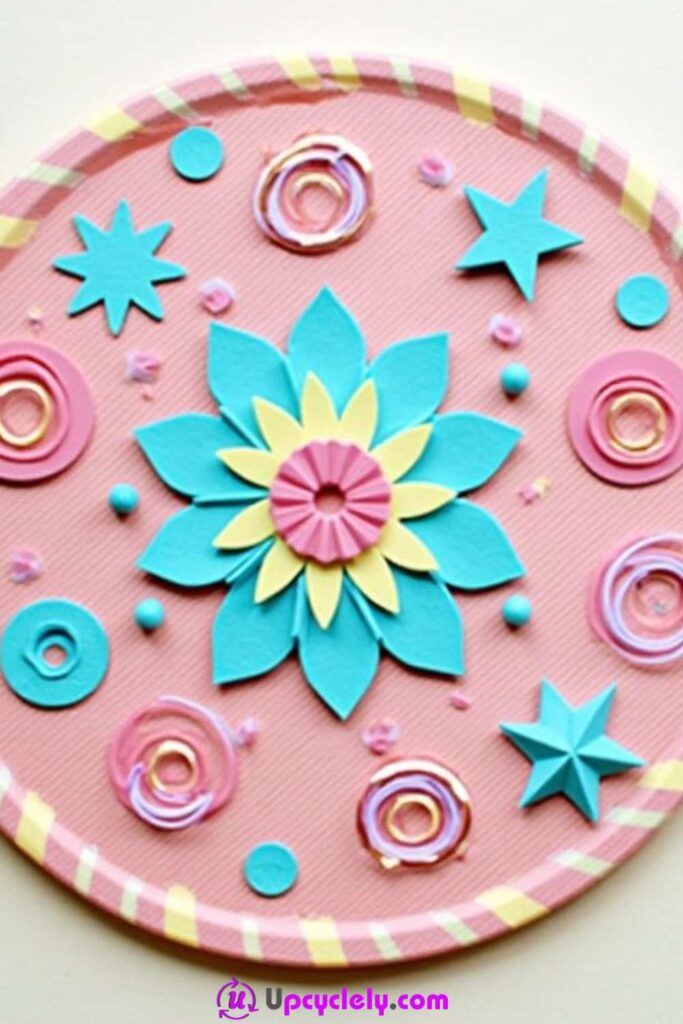
A circular foam composition can bring together flowers, stars, dots, and folded shapes without needing a heavy frame. The broad base keeps the design unified, while layered pieces create shadows across the surface. This type of wall decor works best when one central motif leads the arrangement and the smaller elements support it rather than competing for attention.
Foam is lightweight, but a large layered piece still needs a stable backing and a dependable hanging method. A reused cardboard circle can stop the base from bending. Before decorating, decide where the hanger will sit and make sure it cannot pull through the soft foam after the finished piece is lifted.
Materials and Tools
· Large foam circle or foam-covered cardboard base
· Foam scraps in a limited colour palette
· Paper templates for flowers, stars, and circles
· Scissors and adult help for intricate cuts
· Flexible craft glue
· Ribbon loop, removable hanging strips, or another suitable wall fixing
Steps for This Foam Craft
1. Strengthen the base and mark the top. Cut a firm circular backing from clean cardboard and cover it with foam if needed. Mark the top and plan the hanger before any front decoration hides the safest attachment area.
2. Build the central motif first. Layer large petals or geometric shapes around a centre and test the scale against the base. Glue this main element slightly off-centre only when the surrounding pieces can balance the visual weight.
3. Arrange supporting shapes with breathing room. Place stars, circles, spirals, or folded pieces around the centre without glue. Vary their size, repeat the colours, and leave some plain background so the surface does not become one continuous cluster.
4. Secure, dry, and hang the piece safely. Glue from the largest shapes to the smallest, then leave the decor flat until every layer is firm. Attach or test the hanger, lift the piece over a soft surface, and use a wall fixing suited to both the weight and wall type.
For me, the plain background is part of the design. If every space is covered, the eye has nowhere to rest and the central flower loses its purpose.
Use a square base, a name initial, or a seasonal colour scheme for variations. Fabric-covered card and felt offcuts can replace some foam layers and add quieter texture.
Foam Party Hats
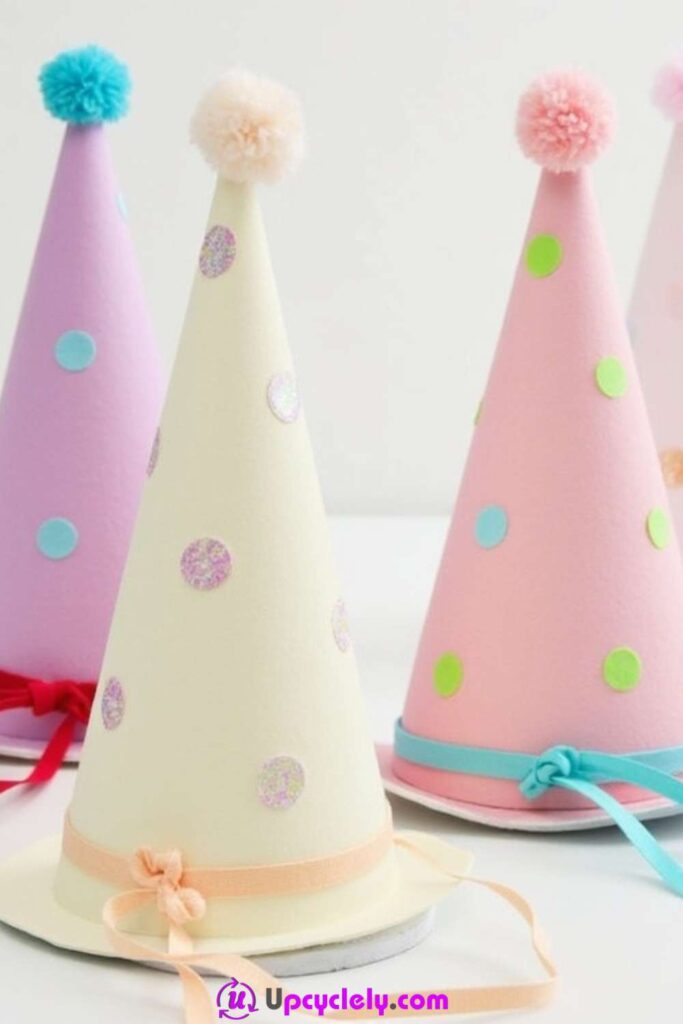
Thin foam can wrap around a card cone to create a soft-looking party hat that keeps its shape. Pom-poms at the tip, flat dots across the surface, and ribbon around the base give the hats a cheerful finish without requiring complicated construction. A firm inner layer is useful because foam alone may flop or stretch when the hat is worn.
Fit and visibility need to come before decoration. The cone should sit above the ears, the strap should feel loose rather than tight, and embellishments should not hang near the eyes. For young children, a headband-style version may be more comfortable than an elastic cord under the chin.
Materials and Tools
· Thin craft foam or foam scraps for covering
· Lightweight card for the cone structure
· Paper cone template, pencil, and scissors
· Flexible glue or strong double-sided tape
· Pom-poms, foam dots, and ribbon
· Soft elastic, ribbon ties, or a headband base
Steps for This Foam Craft
1. Make and test the paper cone first. Cut a cone from card, overlap the edges, and hold it temporarily with tape. Check the fit above the ears and trim the base until it sits level before adding foam or permanent adhesive.
2. Cover the cone with thin foam. Use the card shape as a template, leaving a small overlap for the seam. Wrap the foam smoothly around the cone, fix the seam at the back, and secure the bottom edge without creating a thick ridge.
3. Add light decorations in stages. Attach a pom-pom at the tip and arrange flat circles, stars, or initials across the surface. Keep the decorations away from the seam and lower edge, where they may catch during fitting.
4. Fit a comfortable wearing method. Attach loose ribbon ties, soft elastic, or the cone to a headband, reinforcing the connection from inside. Test the hat while sitting still and adjust it immediately if the strap presses, slips, or interferes with vision.
I would rather make a slightly smaller decoration than a taller hat that refuses to stay upright. Comfort tends to decide how long the finished piece is actually worn.
Create crowns, mini table hats, or reusable birthday-number hats from the same materials. Reclaimed gift boxes can supply the inner card and old ribbon can replace a new strap.
Foam Picture Frame with Colorful Shapes
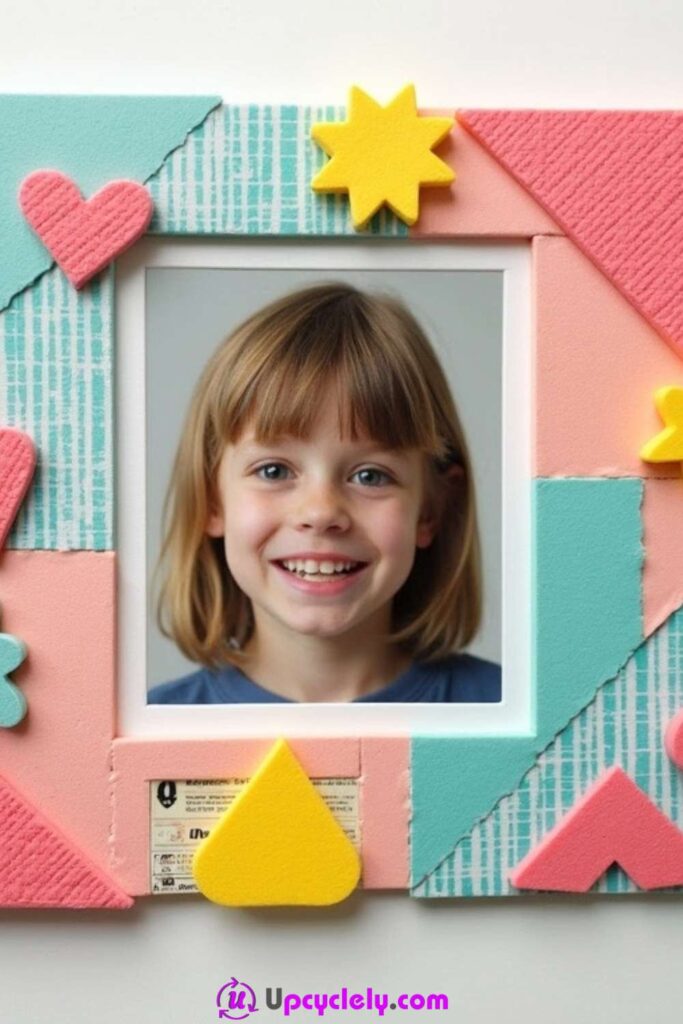
A plain frame can become more playful when broad foam panels and simple shapes cover the border. The mix of hearts, stars, triangles, and textured strips gives the surface interest, while the photograph remains the visual centre. Using a reused cardboard frame underneath keeps the project light and allows the foam to hide ordinary packaging material.
The opening should be planned around the photograph before any decoration is attached. If the border becomes too narrow, shapes can overlap the image or make it difficult to remove later. Keep the inside edge clean and make sure any stand or hanging loop supports the frame without bending the foam-covered card.
Materials and Tools
· Sturdy cardboard frame or clean packaging card
· Foam sheets and patterned foam scraps
· Photograph or paper template in the intended size
· Ruler, pencil, scissors, and craft knife used by an adult
· Flexible glue or double-sided craft tape
· Card strip, ribbon loop, or reused frame backing
Steps for This Foam Craft
1. Cut the frame around a photo template. Place a paper copy or measured template on the cardboard and mark an opening slightly smaller than the photograph. Cut the outer shape and opening carefully, then check that the picture sits behind the border without slipping through.
2. Cover the broad border areas. Cut foam panels or strips to fit each side and arrange their colours before gluing. Keep the inner edge straight and avoid thick overlap where the photograph or backing needs to lie flat.
3. Add colourful shapes with a clear hierarchy. Place a few larger shapes first, then use small hearts, stars, or circles to fill selected gaps. Keep at least part of every base panel visible and remove any piece that pushes into the photo opening.
4. Finish the back for display. Attach the photograph with removable corners or a simple backing panel, then add a stand or hanging loop. Test the frame upright over a soft surface and strengthen the back rather than adding more foam to a weak support.
The photo should still be the first thing noticed. I would move a bright shape away from a face rather than insisting that every decoration stay exactly where it was first placed.
Use old folders, cereal boxes, or an unfinished frame as the base. A monochrome version with only one accent colour can suit older photographs or quieter rooms.
Foam Flower Picture Frame
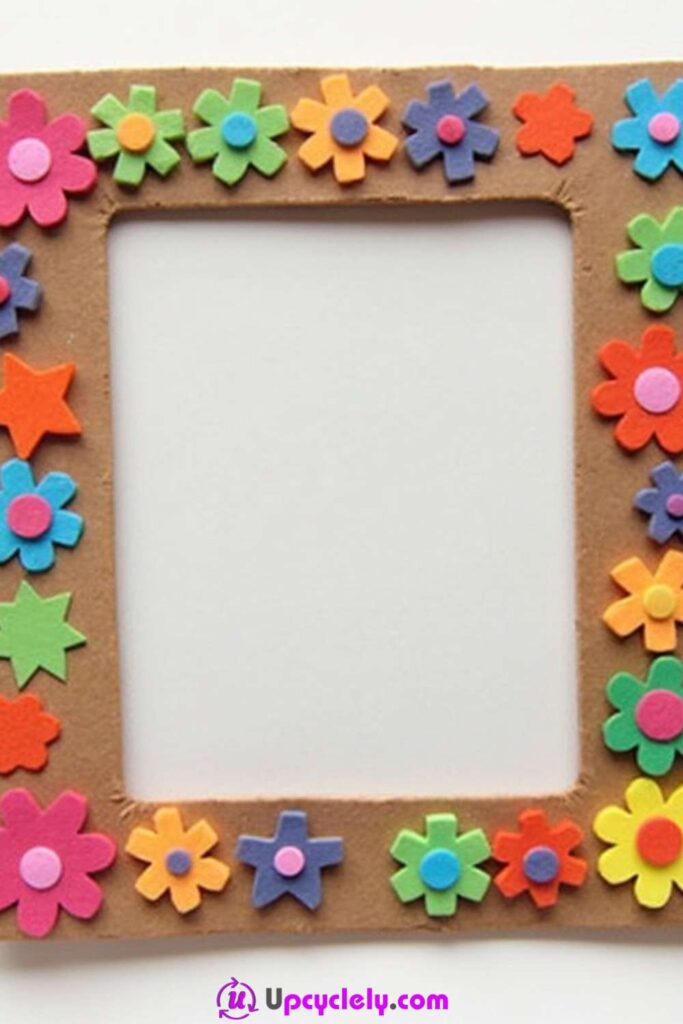
A border of small foam flowers can turn an ordinary cardboard frame into a dense, garden-like display. Repeating the flower shape creates unity, while different sizes and colours stop the border from becoming flat. Layering a small centre over each flower also hides joins and gives the frame a more finished edge.
The flowers should sit on the outer border rather than covering the photograph opening. Build the frame first, then arrange the largest blooms at the corners and smaller pieces between them. This order makes it easier to keep the design balanced and avoids discovering at the end that one side has all the visual weight.
Materials and Tools
· Cardboard frame base and backing panel
· Foam scraps in flower, centre, and leaf colours
· Paper flower templates in several sizes
· Scissors and pencil
· Flexible glue
· Optional ribbon loop, stand, or magnetic backing
Steps for This Foam Craft
1. Prepare a strong frame base. Cut the cardboard border and photo opening, then test the photograph and backing. Cover the base with one foam colour if the card will show between the flowers.
2. Cut flowers in grouped sizes. Use two or three simple templates and cut enough pieces to frame all four sides. Pair larger flowers with smaller centres and reserve tiny offcuts for dots or leaves.
3. Arrange from the corners inward. Place the largest flowers at or near the corners, then fill the side spaces with medium and small pieces. Check the frame from a distance and leave a clean margin around the photograph opening.
4. Glue, finish, and choose the display. Attach the flowers in the planned order and press only at their centres so the petals keep a little lift. Add the photograph, backing, and stand or loop after the front is dry, then test the frame on its intended surface.
A few repeated colours make the border feel calmer than using every scrap in the box. The variation can come from size and layering instead.
Make a seasonal version with leaves, snowflakes, or stars, or use felt flowers for a softer surface. A magnetic backing can suit a small lightweight frame intended for a metal board.
Foam Snowflakes
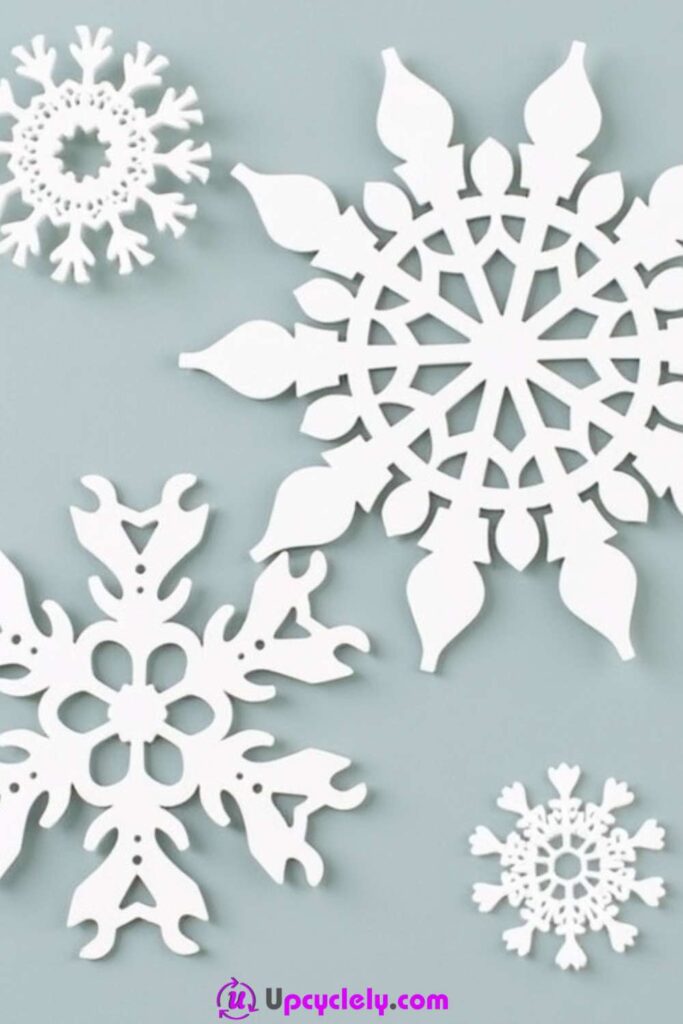
White foam snowflakes keep their cut shape better than thin paper and can be reused for windows, hanging displays, or table arrangements. Folding a template rather than the foam itself helps create symmetry without leaving permanent creases. The strongest designs combine open spaces with wide connecting areas so the arms do not tear when lifted.
Intricate cutting needs patience and the right level of supervision. An adult should handle craft knives and very narrow internal cuts, while children can work with simpler templates and scissors. Foam does not need dozens of tiny holes to look snowflake-like; repeated branches and a clear centre are usually enough.
Materials and Tools
· White or pale foam sheets
· Folded paper snowflake templates or printed stencils
· Pencil or washable marking tool
· Sharp scissors
· Craft knife and cutting mat for adult use only
· Optional glitter glue, cord, or removable window adhesive
Steps for This Foam Craft
1. Create a paper template before touching the foam. Fold paper, cut a snowflake pattern, and open it to check the strength of the arms. Widen any connection that looks fragile, then flatten the template for tracing.
2. Trace and cut the outer shape first. Mark the complete snowflake lightly and cut around the outside with steady movements. Rotate the foam rather than twisting the scissors into narrow corners, which can leave jagged edges.
3. Open the internal spaces carefully. Use small scissors or an adult-controlled craft knife on a cutting mat to remove selected inner shapes. Work from the centre outward and stop if a connecting strip begins to stretch or thin.
4. Decorate and display without damaging the arms. Add a fine line of glitter or small flat accents after cutting, keeping the design lightweight. Punch or pierce a hanging hole through a wide section, then store finished snowflakes flat between clean sheets.
I would choose fewer, wider cut-outs over an extremely delicate pattern. A reusable snowflake should survive being taken down as well as being admired on the wall.
Combine several sizes for a window display, use pale blue foam for contrast, or trace the templates onto packaging card when a firmer ornament is needed.
Additional Upcyclely Idea: Foam Pencil Toppers
Small foam scraps can become pencil toppers without needing a full sheet or a complicated pattern. Stars, flowers, animals, and initials work well because the topper only needs a broad shape and a secure pocket or slot for the pencil. A pair of matching foam layers hides the attachment and makes the piece look finished from both sides.
The topper should slide on without splitting and should not cover so much of the pencil that writing becomes awkward. Keep the design light, avoid loose gems near the user’s face, and make the opening wide enough that the foam is not stretched every time the topper is removed.
Materials and Tools
· Small foam offcuts in two or more colours
· Paper templates for stars, flowers, initials, or simple faces
· Scissors and hole punch
· Flexible glue
· Pencil or reusable paper tube for sizing
· Markers or flat foam details
Steps for This Foam Craft
1. Choose a broad shape and test its scale. Draw the topper on paper and hold it above a pencil to check that it will not block the writer’s view. Avoid long points or heavy layers that may make the pencil top-heavy.
2. Cut two matching outer pieces. Trace the shape twice and prepare any front details from smaller scraps. Align the pair and trim them together if the edges need correction.
3. Create the pencil pocket. Glue only the upper and side edges, leaving a narrow opening at the bottom, or sandwich a short foam loop between the layers. Use a pencil wrapped in scrap paper to test the space without bonding the craft to it.
4. Decorate and test repeated use. Add the face, initial, or centre detail after the pocket is secure. Slide the topper on and off several times, then reinforce the side seams if the opening pulls or the shape begins to separate.
This is one of those projects where the scraps often decide the design. A tiny yellow piece may be exactly enough for a star even when it could not support anything larger.
Use the same method for reusable straw markers, cable labels, or slim paintbrush identifiers. Keep small toppers away from toddlers and pets.
Foam Craft Choices That Can Make a Neat Idea Look Messy
Using foam that is too thick or too thin. A thin base may curl under layered decoration, while a thick sheet can make a bookmark, bracelet, or bunting flag stiff and awkward. Match the foam to the movement and weight the finished object needs, then test one sample before cutting the whole set.
Cutting every piece before testing a template. A shape that looks balanced on paper may be too small for a magnet, too narrow for a key-ring hole, or too large for the frame border. Make and assemble one test version first, then adjust the template before using more material.
Applying too much glue. Excess adhesive squeezes from the edges, hardens flexible pieces, stains some surfaces, and allows layers to slide while drying. Use small dots or thin lines, press the project flat, and add more only where a dry join genuinely lifts.
Relying on a weak attachment point. Keychains, bunting holes, hanging loops, magnets, and puppet sticks all place repeated stress on a small area. Reinforce the back with an extra foam or card patch and test the join gently before the object is worn, hung, or handled often.
Adding raised decoration to a working surface. Thick gems can make coasters wobble, damage book pages, catch on bracelets, and pull light magnets downward. Keep functional areas flat and move decorative volume to edges or surfaces that do not need direct contact.
Using foam around high heat. Ordinary craft foam is not a trivet material and should not be placed under hot cookware, beside flames, or against heating equipment. Limit foam coasters to ordinary cups, monitor warmth, and choose a purpose-made heat-resistant material for hotter uses.
Ignoring small-part safety. Magnets, gems, key rings, pom-poms, and tiny foam pieces can detach during play. Use age-appropriate alternatives, supervise the activity, and store or discard loose pieces before children and pets return to the area.
Overcrowding the colour palette. Foam arrives in tempting bright colours, but using all of them in one small design can hide the main shape. Choose a limited group, repeat one accent, and leave areas of the base visible so the object remains easy to read.
Hanging a piece before the adhesive has set. Gravity can shift wall decor, stretch bunting holes, and pull flower layers out of place while the glue remains soft. Dry the project flat, test the hanger over a protected surface, and strengthen the backing instead of hoping the front layers will carry the weight.
Frequently Asked Questions
Which foam craft ideas are easiest for beginners?
The star bookmark, fruit magnets, simple animal puppets, pencil toppers, and broad foam snowflakes use clear shapes and only a few layers. Prepare templates in advance and keep the decoration flat so the maker can focus on cutting and arrangement.
What type of foam should I use for these projects?
Use thin flexible sheets for bookmarks, bunting, bracelets, and party-hat coverings. Medium or thick foam suits magnets, keychains, coasters, frames, flowers, and wall decor, although several thin layers can provide strength when thick offcuts are unavailable.
Can I reuse foam from old crafts?
Yes, when it is clean, dry, flexible, and free from torn fastening holes or stubborn residue. Save the broad undamaged sections for bases and use irregular pieces for small shapes, leaves, dots, centres, and facial details.
Which glue works best on craft foam?
The best choice depends on the foam surface and the second material being attached. Use a product intended for the materials, test it on an offcut, avoid unnecessary heat and solvents, and follow the manufacturer’s instructions rather than guessing at drying times.
How can I cut foam more neatly?
Work from a paper template, use sharp scissors, make longer cuts, and rotate the foam instead of forcing the blades around corners. For internal openings, an adult can use a craft knife on a cutting mat, while simple scissor-friendly patterns remain safer for children.
Are foam coasters safe for hot drinks?
They may suit ordinary cool or warm cups when the finished coaster stays flat and the foam does not soften or transfer colour. Do not use craft foam beneath hot cookware or as a substitute for a heat-resistant trivet, and stop using a coaster that curls, melts, smells, or traps moisture.
How should finished foam crafts be stored?
Keep bookmarks, snowflakes, wall pieces, and frames flat; store bunting loosely around card; and separate decorated pieces so gems or raised petals do not press into neighbouring surfaces. Make sure the adhesive is completely dry before placing anything in a closed box.
Let the Smallest Foam Scraps Find a Useful Shape
The most practical foam craft ideas begin with a clear job for the material. A flexible strip can become a bracelet or bookmark, a sturdy layered shape can hold a magnet or key ring, and the smallest scraps can supply the petals, leaves, stars, eyes, and centres that bring a larger project together. Choosing the right thickness, testing the attachment, and keeping working surfaces flat make those ideas last longer than decoration alone.
Start with one manageable craft and sort the foam already waiting in the cupboard before buying another pack. Then make a paper template, build the main structure, and add only the details that help the finished object. Which of these 16 foam craft ideas would give your leftover pieces the clearest new purpose today?