Thanksgiving crafts work best when they feel connected to the day rather than looking like decorations that could belong to any season. A scrap of warm-colored felt can become a tiny turkey coaster, a glass jar can hold a soft autumn glow, and a bare branch can collect handwritten notes of gratitude. I like that these projects use ordinary materials and familiar fall shapes, because the finished pieces can sit naturally on a dinner table, a mantel, a child’s craft shelf, or beside the front door without needing a complicated setup.
I’m always drawn to craft ideas that are manageable enough to finish and useful enough to keep around for more than an afternoon. Thanksgiving is especially good for that kind of making. Some projects can become place settings or table accessories, while others are better as family activities that hold memories from the day. I don’t think every handmade piece needs to look perfectly matched. A little variation in paint, paper, leaves, stitching, and handwriting is often what makes a seasonal craft feel personal rather than mass-produced.
The key is to choose materials that suit the people making the project and the way the finished piece will be used. If children are helping, keep hot tools and sharp hardware in adult hands. If something will sit near food, candles, or drinks, think about mess, heat, and cleanup before adding extra decoration. That practical planning leaves more room for the enjoyable part: making something together and giving simple materials a reason to stay on the table a little longer.
Choose Thanksgiving Craft Materials That Suit the People Making Them
A craft can be simple on paper and still become frustrating if the materials are wrong for the age group or setting. Felt, cardstock, washable paint, yarn, paper leaves, and smooth stones are forgiving choices because they can be handled and adjusted without much equipment. Natural materials such as pinecones, branches, cinnamon sticks, and corn husks bring lovely texture, but I would clean and inspect them first so dirt, loose pieces, or sharp bits do not end up scattered across the table.
If younger children are involved, separate the project into child-safe and adult-only jobs before you begin. They can arrange felt feathers, paint handprints, choose bingo symbols, write thankful notes, or place leaves along a garland. An adult can handle hot glue, craft knives, pushpins, strong adhesives, and anything that needs to be pierced, drilled, or heated. I know it can feel easier to keep the whole project moving by doing everything yourself, but giving children a few clear jobs usually makes the craft more memorable for them.
It also helps to work with materials you already have in sensible quantities. You do not need six shades of orange felt if three scraps already create enough contrast. You do not need a special jar if a clean food jar has a good shape. Thanksgiving crafts often look better when the palette is limited and the materials have a little variation, so check the craft cupboard before buying a fresh set of supplies.
Prepare Natural, Reused, and Food-Related Materials Before Crafting
Several of these ideas start with objects that have already been used or collected outdoors, so preparation matters. Wash glass jars and let them dry fully before adding leaves or glue. Brush dirt from pinecones and make sure they are dry before attaching feathers. Smooth stones should be scrubbed clean so paint can grip. If you are using a real branch for a thankful tree, choose one that is dry, sound, and free from loose bark that will shed every time someone adds a paper leaf.
Reused materials deserve the same attention. Old jars should be free from chips around the rim, and any container used near candles should be stable and heat-appropriate. Felt scraps should be clean, and old cardstock should still be flat enough to cut neatly. For the cupcake project, keep craft-only materials away from the food preparation area and use decorations intended for eating. That separation sounds obvious, but it makes the whole craft session calmer and cleaner.
I would also set up the work surface before opening paint or glue. A washable cloth, scrap paper, or reusable craft mat catches most of the small messes. Put scissors, glue, markers, thread, and spare pieces in the center so people can reach them without leaning across wet projects. Then each finished craft can move to a separate drying or display area instead of staying in the middle of the next project.
Plan the Display, Table Use, and Cleanup Before You Add Decoration
A Thanksgiving craft is easier to enjoy when you already know where it will go. Coasters need to sit flat. Place cards should leave enough room for plates and glassware. A garland needs an attachment point that will not damage the wall or sag halfway through dinner. Memory jars and thankful trees need pens and paper close enough that guests will actually use them. These small decisions affect the finished project more than another layer of embellishment.
Think about cleanup too. Glitter, loose dried leaves, and thick layers of glue can be awkward around food. If a project sits on the dining table, I would keep the surface simple enough to wipe and leave plenty of open space. Candle holders are safer with cool LED tealights when children are nearby, and paper crafts should stay away from open flames altogether.
For me, the best seasonal crafts are the ones that still work once the table is busy. A coaster should hold a cup without rocking. A place card should stay upright. A centerpiece should not block conversation. A game should be easy to explain. If the practical part works first, then the colors, stitches, leaves, and little turkey faces can do their job without getting in the way.
Felt Turkey Coasters
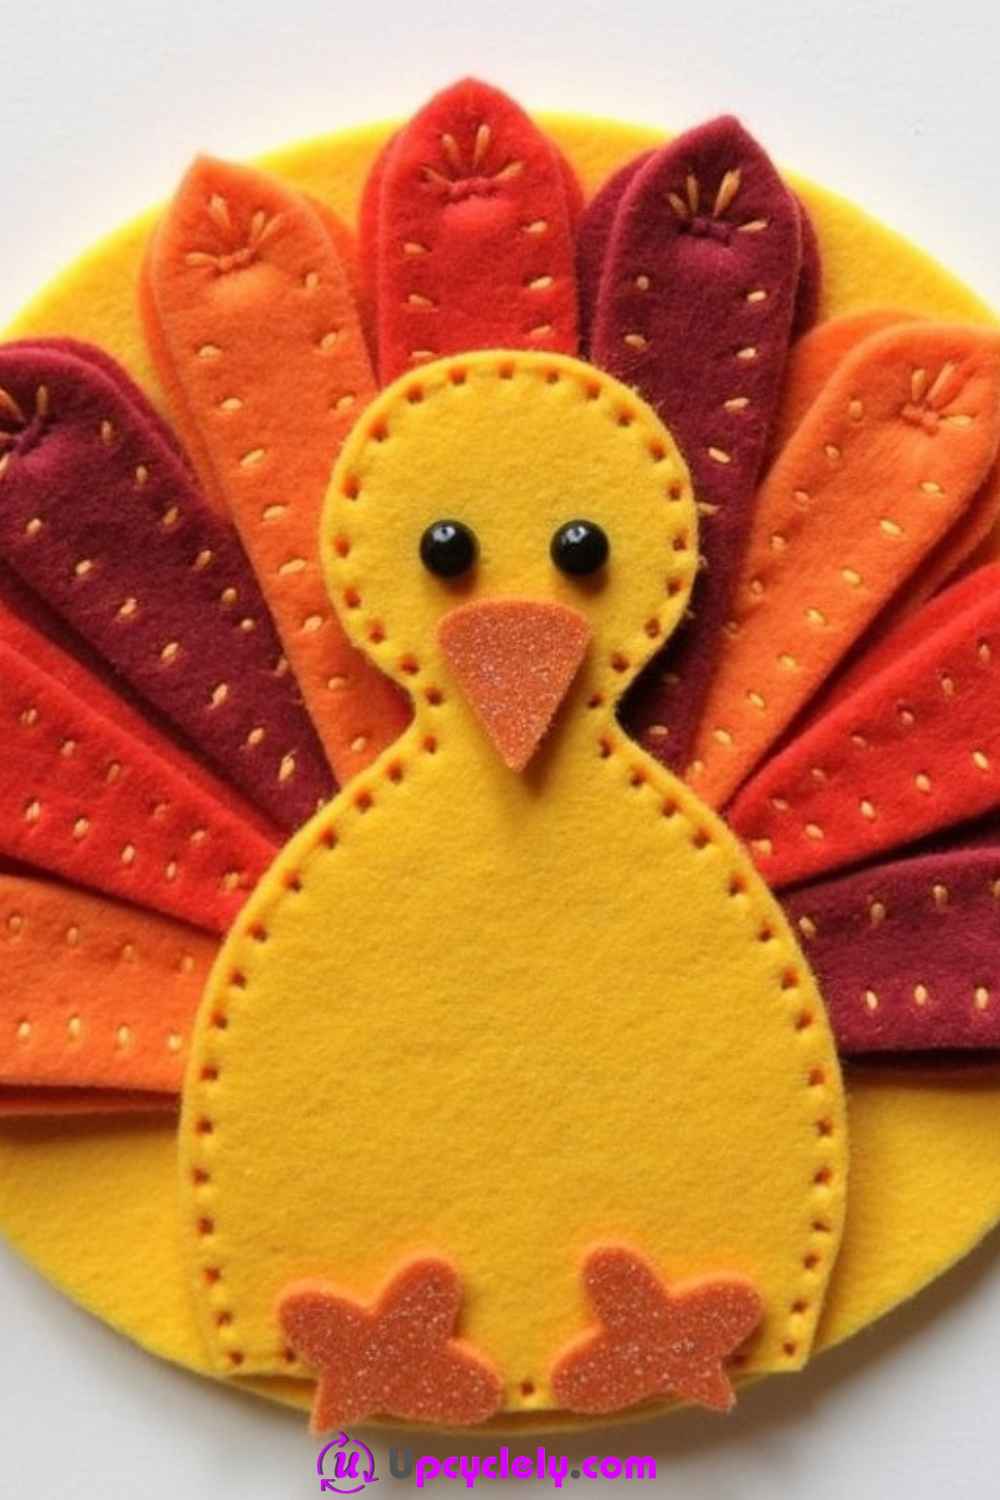
Materials Needed:
- Felt sheets in yellow, red, orange, and purple
- Small black buttons (eyes)
- Orange glittery felt (feet)
- A needle and embroidery thread in coordinating colors
- Fabric glue or a hot glue gun
- Scissors
Step-by-Step Instructions:
- Cut and Assemble the Pieces
Begin by cutting a large yellow circle from the felt for the turkey’s body. From the other felt sheets, cut out feather shapes in red, orange, and purple. Make sure each feather has a rounded base and pointy tip. Cut two small orange triangles for the beak and two feet shapes with little leaf-like curves. Arrange the tail feathers in a fan pattern and glue them to what will be the back side of the yellow body. - Add Turkey Features
Sew or glue the black buttons onto the yellow felt for the turkey’s eyes. Next, attach the orange triangle just below the eyes for the beak. Hold the body upright to see how it looks before securing the legs. Add the orange glittery feet to the bottom; these will dangle cutely when the coaster lays flat. - Finish With Details
Use embroidery thread to sew along the edges of the yellow body and tail feathers. The stitches not only hold the layers together but also create lovely texture.
Pro Tip: You can personalize each coaster with family members’ initials on the feathers. It makes for a thoughtful gift and a fun way to mark seating arrangements at dinner.
Autumn Candle Holders
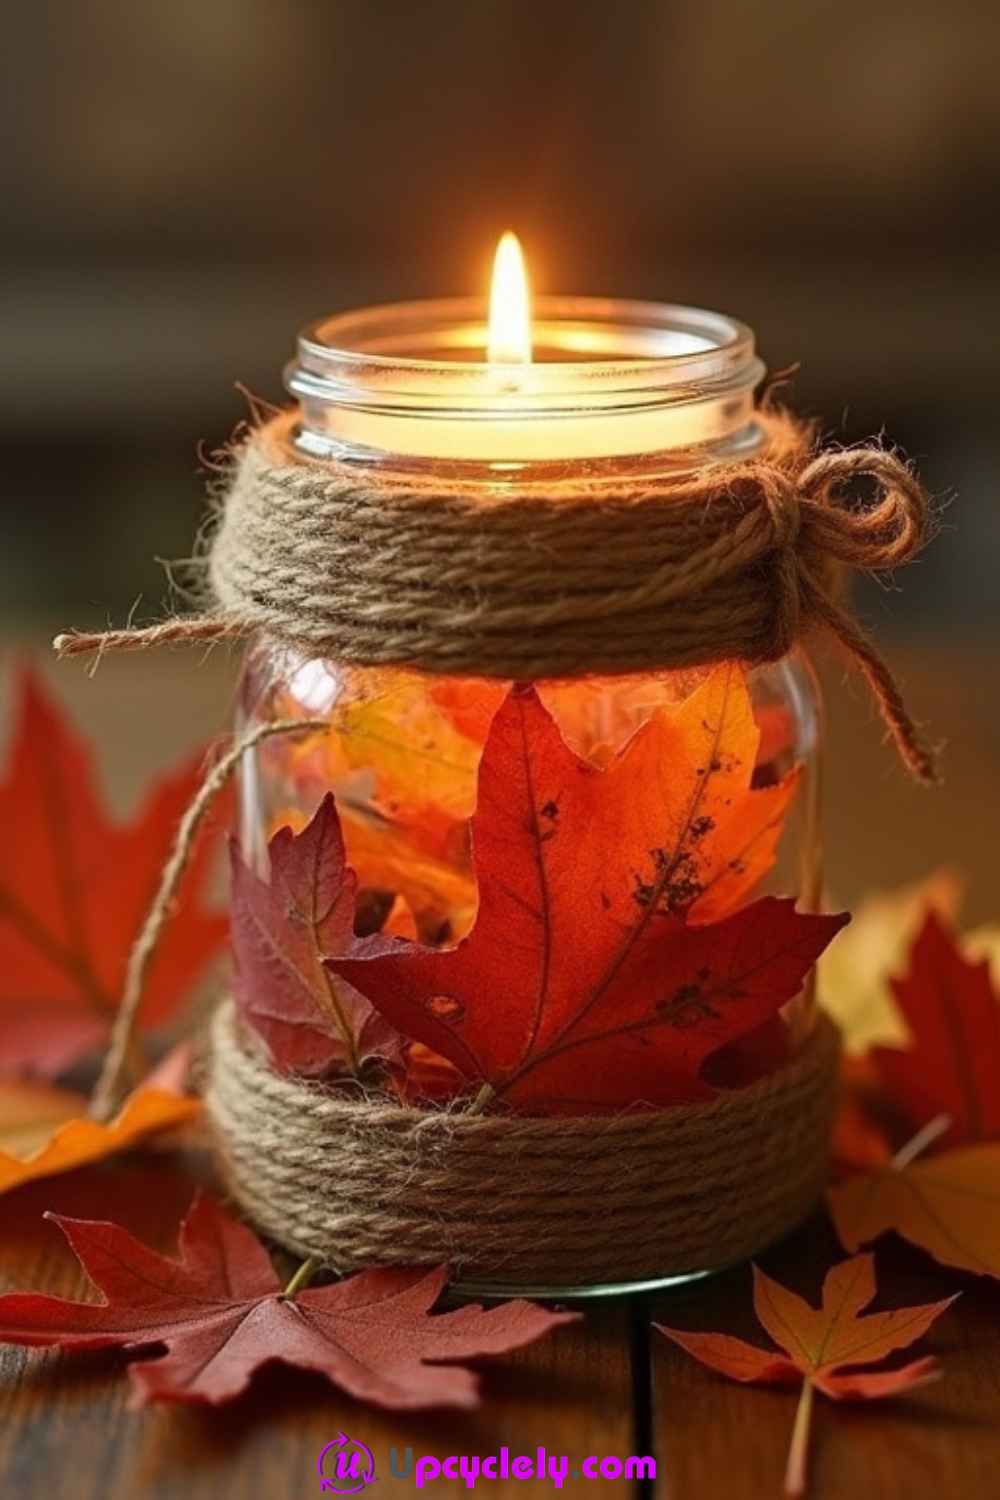
Materials Needed:
- Glass jars (any size)
- Real or faux autumn leaves in red, orange, and yellow
- Mod Podge or clear craft glue
- Thick rustic rope or twine
- A small candle or LED tealight
- Foam brush
Step-by-Step Instructions:
- Prepare the Jar
Clean and dry your glass jar to ensure the leaves will stick properly. Lay out your materials on a protected surface to avoid glue mess. - Attach the Leaves
Use a foam brush to evenly coat sections of the jar with Mod Podge. Gently press the leaves onto the jar, overlapping them in places to create a natural look. Once you’ve covered the jar, brush another thin layer of Mod Podge over the leaves for a sealed, glossy finish. Allow it to dry completely. - Add the Finishing Touches
Wrap rustic rope or twine around the neck of the jar and tie it into a bow. Place a small candle or LED light inside, and light it to see the beautiful glow of the colorful leaves!
Pro Tip:
For an extra pop of sparkle, sprinkle fine gold glitter onto the leaves before sealing with glue. It adds a festive, magical touch to your Thanksgiving table!
Cinnamon Stick Place Cards
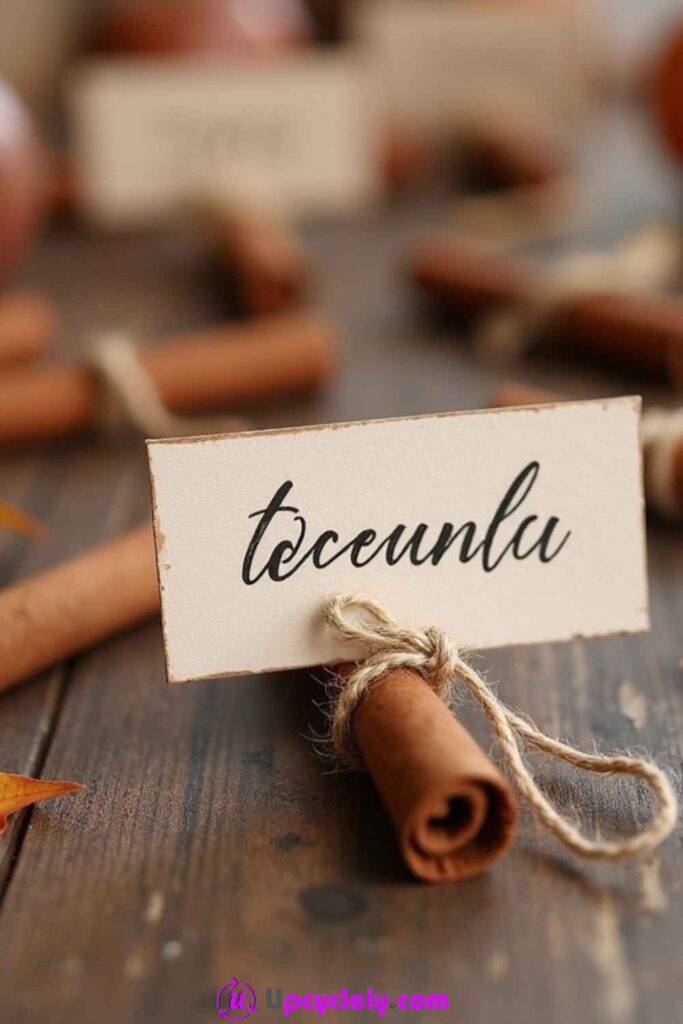
Materials Needed:
- Cinnamon sticks
- Twine
- Cardstock or kraft paper
- A fine-tip marker or calligraphy pen
- Scissors and hole punch
Step-by-Step Instructions:
- Create the Cards
Cut cardstock or kraft paper into small rectangles (about 3×2 inches). Use your marker to write guests’ names in your best handwriting. If you love calligraphy, now’s your time to shine! Punch a hole on one side of each card. - Assemble the Place Cards
Tie a piece of twine around the center of a cinnamon stick and loop it through the hole in the card. Secure the card so it rests perfectly against the cinnamon stick. - Add Decorative Elements
Scatter some autumn leaves or small pumpkin-shaped confetti around the table to complement the place cards. Tie the twine in a bow for that extra charming detail.
Pro Tip:
Spritz the cinnamon sticks lightly with orange essential oil to intensify the fragrance. The fresh aroma will delight guests.
Corn Husk Dolls
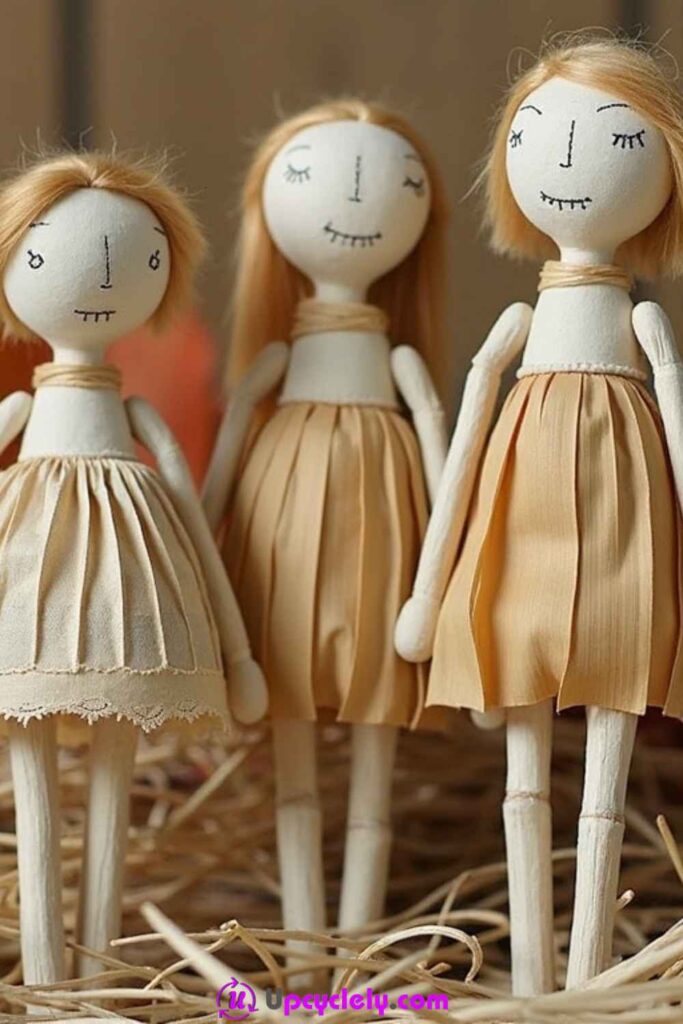
Materials Needed:
- Dried corn husks (available at craft stores)
- Yarn
- Fabric scraps (optional for additional decoration)
- Scissors
- Hot glue gun
Step-by-Step Instructions:
- Prepare the Corn Husks
Soak the husks in warm water for about 10 minutes to make them soft and easy to work with. Pat them dry with a towel but keep them slightly damp so they bend easily. - Form the Doll’s Body
Bundle a few husks together to form the base. Tie them in the middle using yarn to create a head shape above the knot. Below the “head,” separate the husks into arms and a torso. Trim the arm length and tie the ends to resemble hands. - Add Clothes or Details
Wrap more husks or fabric scraps around the doll’s torso to form a layered skirt or shirt. Glue yarn at the top of the head for hair, and use a fine-point marker to draw facial expressions.
Pro Tip:
Use natural-colored yarn or even decorate the dresses with tiny lace pieces for a refined, vintage look. These dolls also make lovely gifts.
Felt Pilgrim Hats
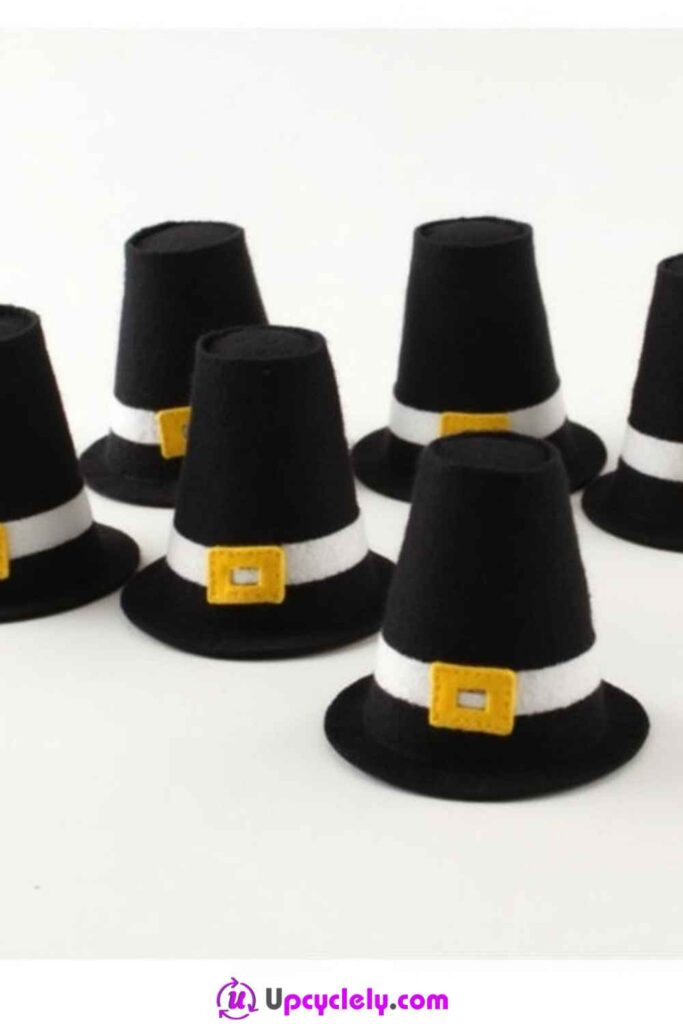
Materials Needed:
- Black felt sheets
- White felt sheets (for bands)
- Yellow felt sheets (for buckles)
- Scissors
- Hot glue gun
Step-by-Step Instructions:
- Cut the Hat Shapes
Cut out conical shapes and flat circles from the black felt to serve as the crown and brim of the hats. Roll and glue the conical shapes into mini hats and attach them to the circles for secure bases. - Create the Hatbands
Cut white felt into strips, about half an inch wide, and glue them around the base of the hat’s crown. Yellow felt can be cut into small square buckles, and don’t forget to cut out the middle to get the authentic look. - Add the Final Details
Attach the yellow buckle to the front of the white hatband. Once everything is set, arrange the hats in groups or use them to add flair to a dessert table or kid’s corner.
Pro Tip:
Use these hats as placeholders for sweets and treats! Stuff them with candy to create a cute surprise for the kids’ table.
Pinecone Turkeys
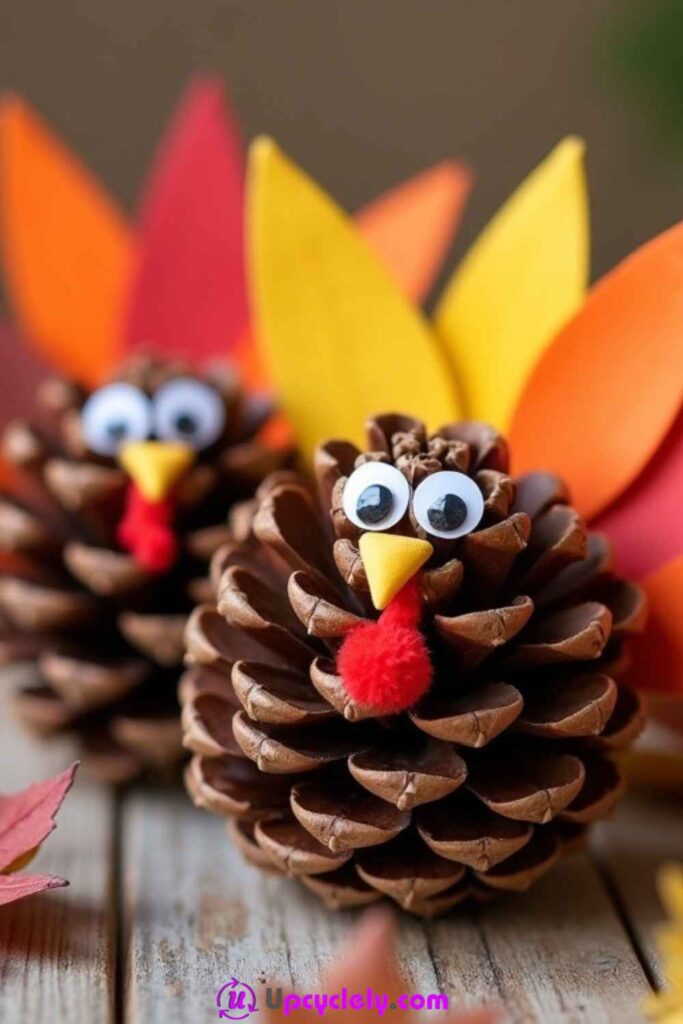
Materials Needed:
- Pinecones (medium-sized, preferably smooth)
- Craft feathers in red, orange, and yellow
- Small googly eyes
- Mini red pom-poms (for the wattle)
- Yellow and orange construction paper (for the beak and feet)
- Hot glue gun or craft glue
Step-by-Step Instructions:
Step 1: Prep Your Pinecone Body
Start by gathering your pinecones. I like to rinse mine off with water and brush away any dirt to make sure they’re clean and ready to craft. Once dry, position your pinecone so the flatter side is facing down. This will help it “sit” securely on your surface without toppling over.
Step 2: Attach Feathers for the Tail
Take 5-6 craft feathers in red, orange, and yellow and arrange them in a fan shape. Gently press them into the smaller end of the pinecone (the tail area) and secure them with glue. Feather placement is key to making your turkey vibrant, so adjust as needed until the tail looks nice and full.
Step 3: Add the Adorable Details
Cut a small triangle out of yellow construction paper for the beak and two tiny foot shapes from the orange paper. Glue the googly eyes and beak to the front of the pinecone, then add a red pom-pom just below the beak for the wattle. Glue the feet to the bottom of the pinecone. Once everything is dry, admire your cute turkey!
Pro Tip:
Instead of store-bought feathers, you can cut feather shapes out of colored paper if you’re crafting with items you already have at home. It’s a fun way to improvise and make it even more personal!
Hand-Painted Fall Rocks
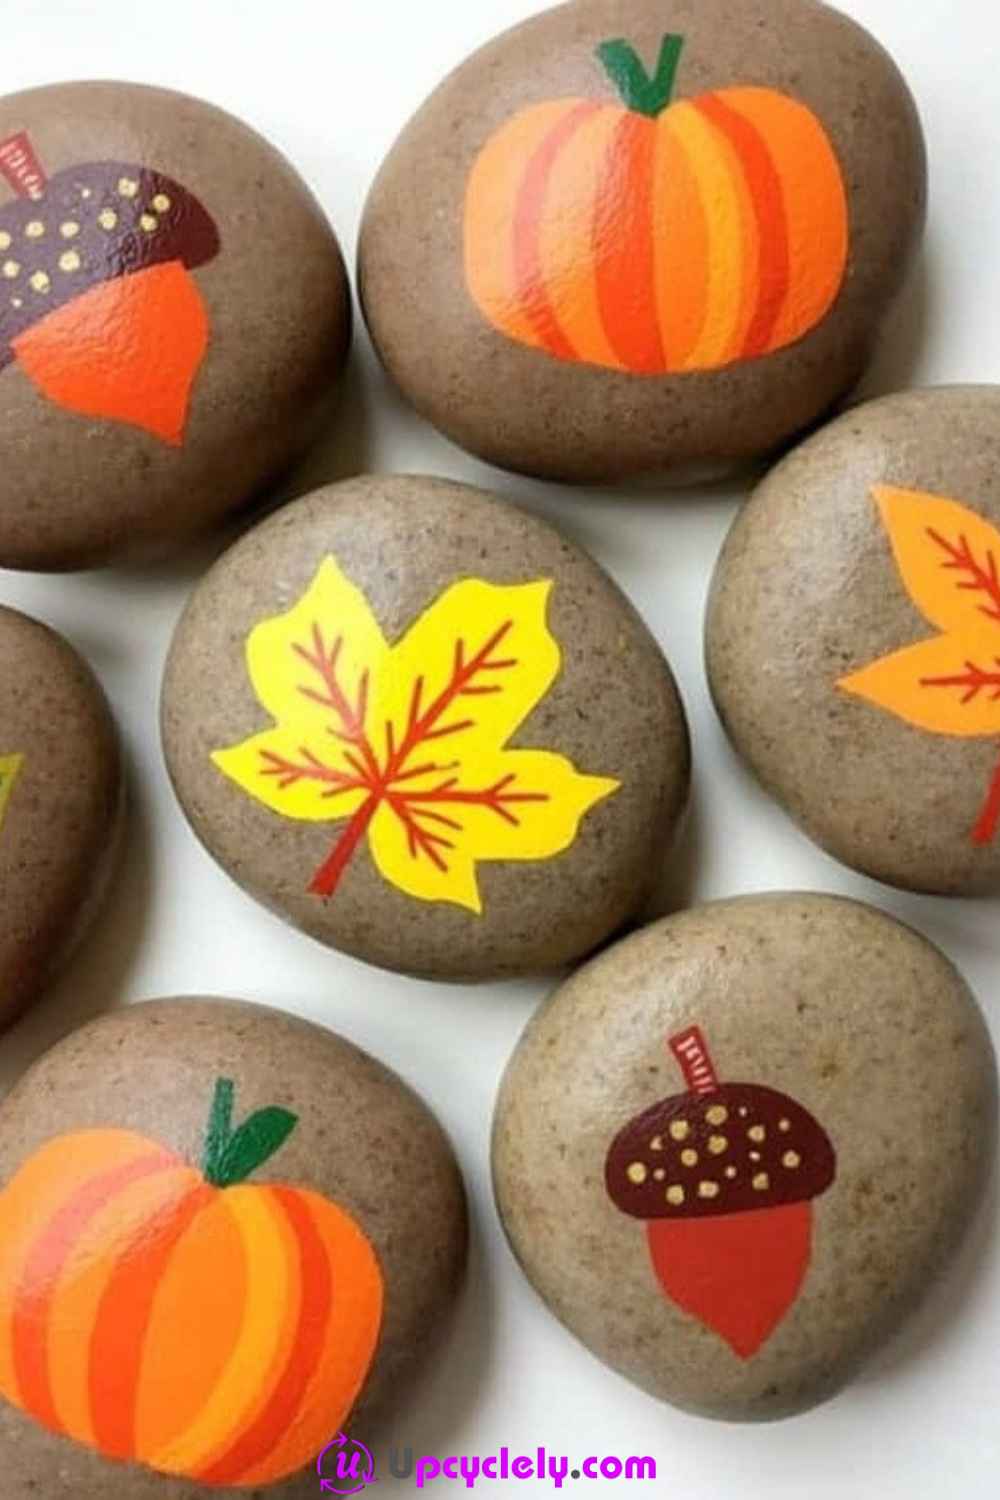
Materials Needed:
- Smooth, flat stones (you can find them at craft stores or outdoors)
- Acrylic paint in fall colors (red, orange, yellow, brown, green)
- Paintbrushes (fine-tip for details and wider ones for base coats)
- Sealer spray or Mod Podge
Step-by-Step Instructions:
Step 1: Prep the Rocks
Wash your rocks under warm water and scrub them to remove any dirt or debris. Once clean, allow them to dry completely. If the surface is rough, use sandpaper to gently smooth it out for easier painting.
Step 2: Design and Paint Base Layers
Decide on your designs. Pumpkins, leaves, and acorns work beautifully for Thanksgiving vibes. Start with a solid background color if needed (like yellow for a leaf). Then, add bold, clean shapes for your designs. For example, use orange for a pumpkin body and add green later for the stem.
Step 3: Add Fine Details and Seal
Once the base shapes dry, use a fine-tip brush to add veins on leaves, stripes on pumpkins, or dots on acorns. These details make your rocks pop! Once they’re completely dry, seal them with Mod Podge or a clear spray to protect the artwork.
Pro Tip:
Write inspirational Thanksgiving words like “Grateful” or “Thankful” on the rocks for extra charm. Use gold or white paint to make them stand out!
Handprint Turkey Cards
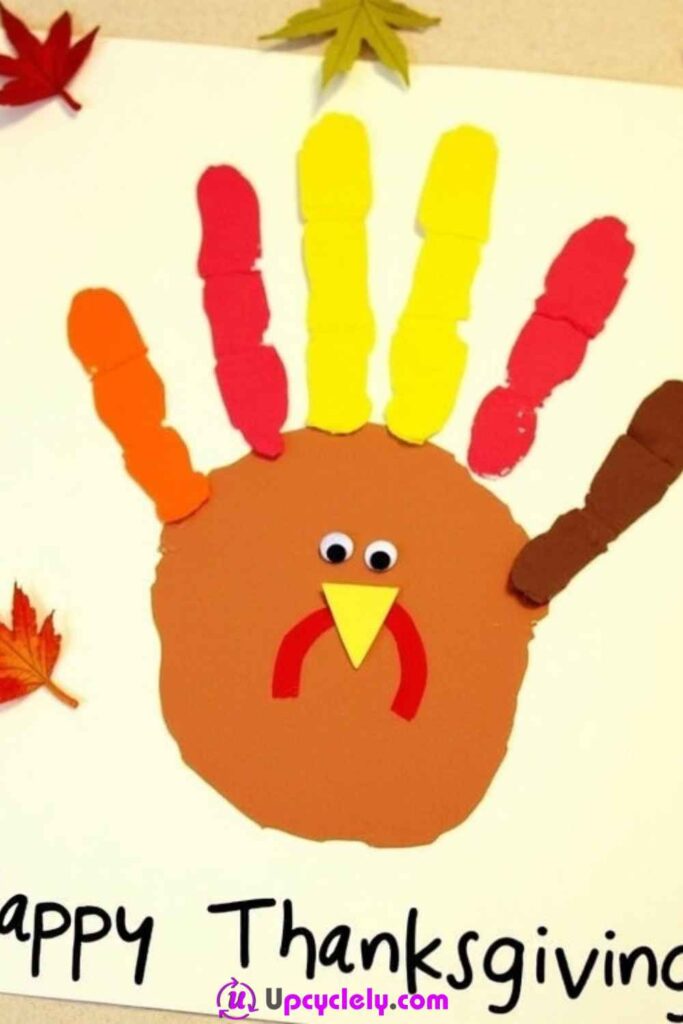
Materials Needed:
- White cardstock or construction paper
- Washable paint in fall colors
- Googly eyes
- Yellow and red paper or paint (for beak and wattle)
- Markers
Step-by-Step Instructions:
Step 1: Create the Handprint Base
Paint your child’s palm and fingers (use one color per finger for feathers). Help them press their hand flat onto the paper. The palm will be the turkey’s body, and the fingers will serve as the feathers. Lift the hand gently to reveal the print!
Step 2: Add Turkey Details
Once the paint dries, glue on googly eyes to the palm area (the “head” of the turkey). Cut out a small yellow triangle for the beak and a red wattle shape, then glue them under the eyes. You can also draw legs at the bottom.
Step 3: Write Your Message
Add a festive message like “Happy Thanksgiving” below the turkey. Use colorful markers for a cheerful and personal touch!
Pro Tip:
If you have toddlers, make several of these at once to send as Thanksgiving cards to friends and family. They’ll love receiving such a heartfelt, handmade piece of art!
Leaf Garlands
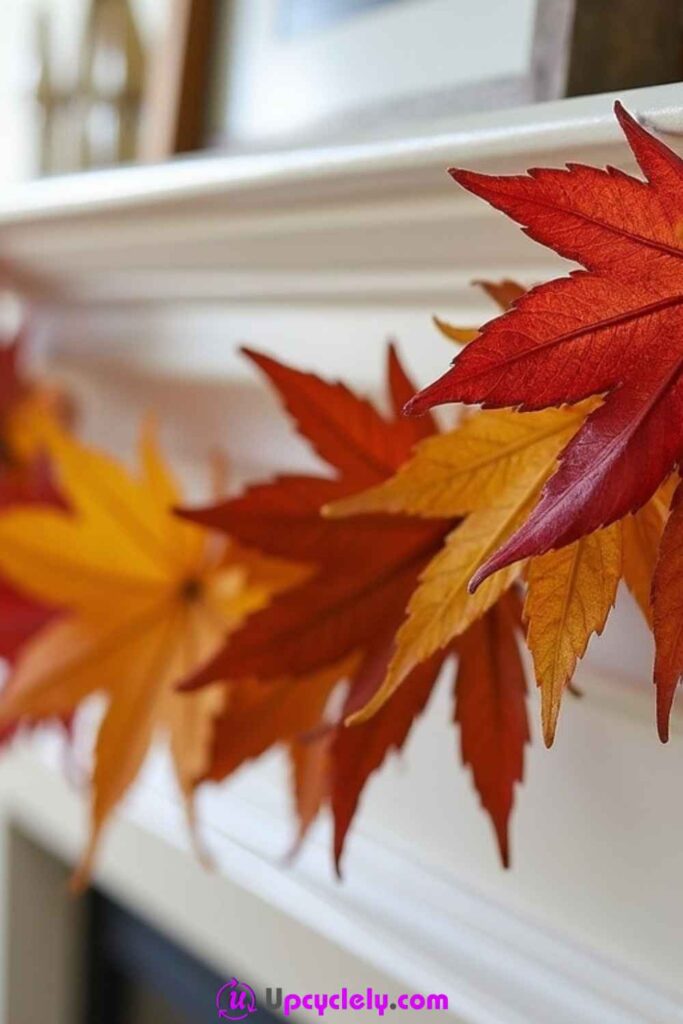
Materials Needed:
- Artificial or real fall leaves (in red, orange, yellow)
- String or twine
- A hole punch
- Mini clothespins (optional)
Step-by-Step Instructions:
Step 1: Select and Prepare Leaves
Choose a selection of artificial leaves (or press and dry real ones if you’re up for an extra step). If your leaves are artificial, punch a small hole near the stem for stringing.
Step 2: Thread the Leaves
Thread your twine or string through the punched holes. Adjust the spacing as needed, ensuring your leaves don’t clump together. If you’re using mini clothespins, simply clip each leaf onto the string for a slightly rustic look.
Step 3: Hang and Admire
Drape your garland across a fireplace mantle, banister, or even around a window. The vibrant colors will instantly make your space feel cozy and seasonal.
Pro Tip:
Add fairy lights to your garland for a magical glow in the evenings. It’s such a cozy feature for Thanksgiving night!
Pie Chart Coasters
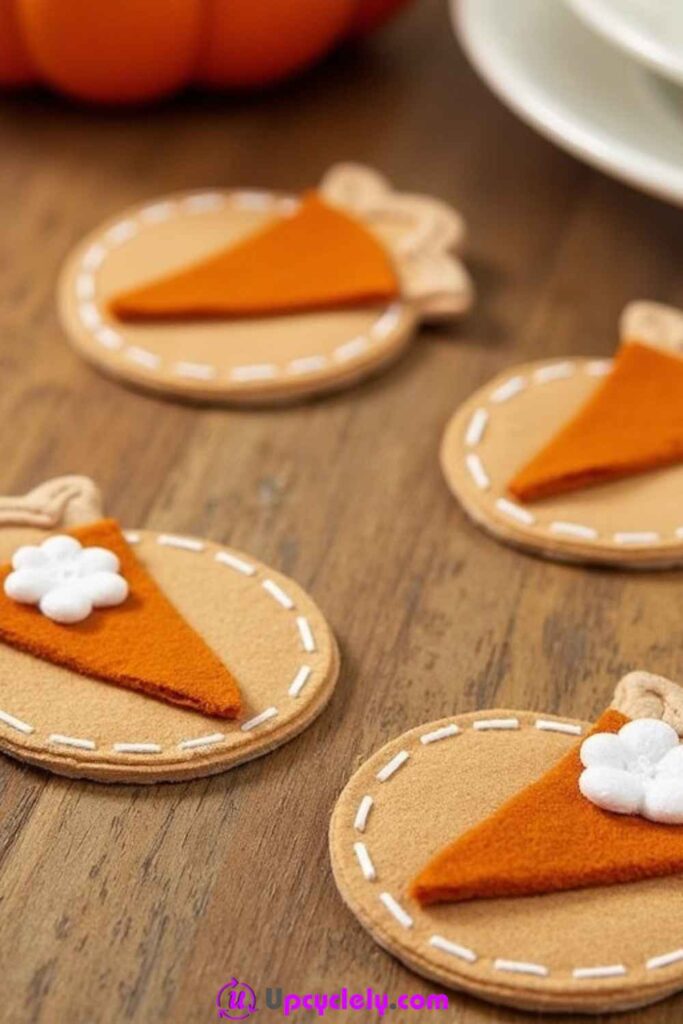
Materials Needed:
- Tan, orange, and white felt sheets
- Scissors
- Needle and thread (or hot glue)
- Circular object to trace (like a jar lid)
Step-by-Step Instructions:
Step 1: Cut the Felt
Trace circles on the tan felt for the base and triangles on the orange felt for the pie slices. Each “slice” will cover one side of a coaster. Cut a small white swirl from the white felt to mimic whipped cream.
Step 2: Stitch or Glue the Pieces
Attach the orange pie slice to the tan circle using either stitching or glue (I love stitching for a handmade look). Sew the whipped cream detail on top of the slice for a final touch.
Step 3: Finish Your Coasters
Repeat the process for as many coasters as you need. Once completed, arrange them on the table for a fun Thanksgiving dinner accessory.
Pro Tip:
Make a set with different “pie flavors”! Use brown felt for chocolate pie, red for cherry, and so on to delight your guests with variety.
Thanksgiving Bingo Cards
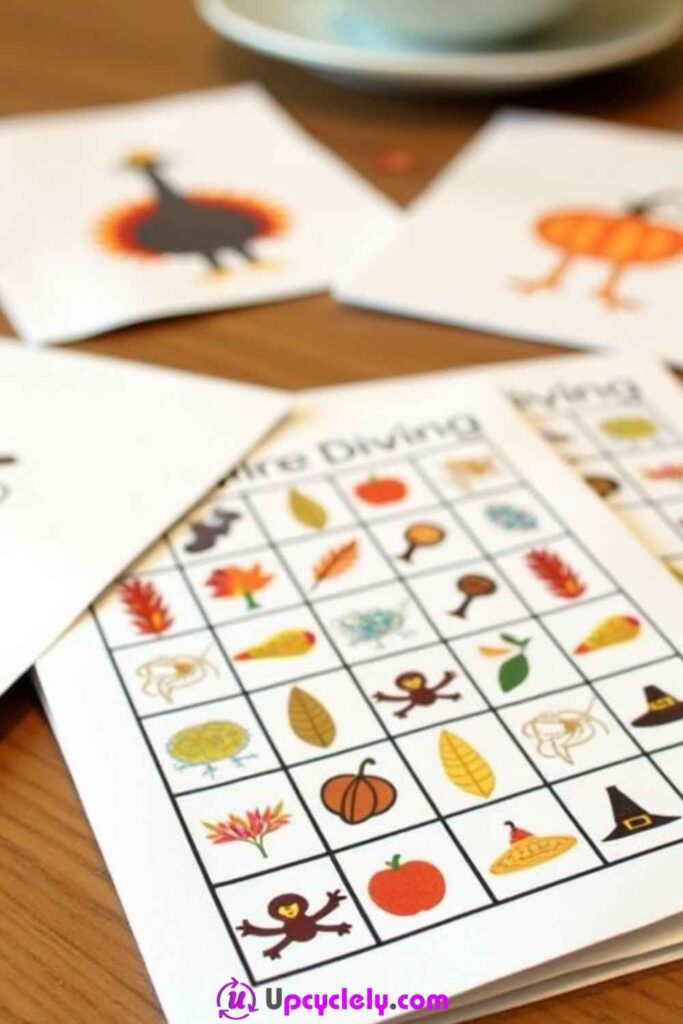
Materials Needed:
- Sturdy card stock paper
- Ruler and pencil
- Markers, crayons, or colored pens
- Fall-themed stickers (like pumpkins, acorns, and turkeys)
- Laminator (optional)
Step-by-Step Instructions:
Step 1: Design the Bingo Grid
Start by dividing a piece of cardstock into a 5×5 grid using a ruler and pencil. The center slot can be a “Free Square,” just like traditional bingo, or you can make it Thanksgiving-themed with a cute graphic or the word “Thanks!”
Step 2: Add Fall-Themed Symbols
Choose a mix of Thanksgiving-themed items to fill the grid. You can get creative here with pumpkins, pies, hats, or even turkey drumsticks. Draw or use stickers to decorate each square. Be sure to mix up the designs across multiple cards so no two cards are the same.
Step 3: Finish and Prep for Play
Once all the cards are complete, laminate them if you’d like to make them last for years. Supply small candies, dried corn kernels, or cute autumnal markers to use during the game. Gather the whole family around the table, call out symbols, and enjoy the fun!
Pro Tip:
For personalized Thanksgiving fun, include pictures or drawings of family members alongside the festive designs. It makes the cards feel even more special and meaningful!
Thanksgiving Memory Jars
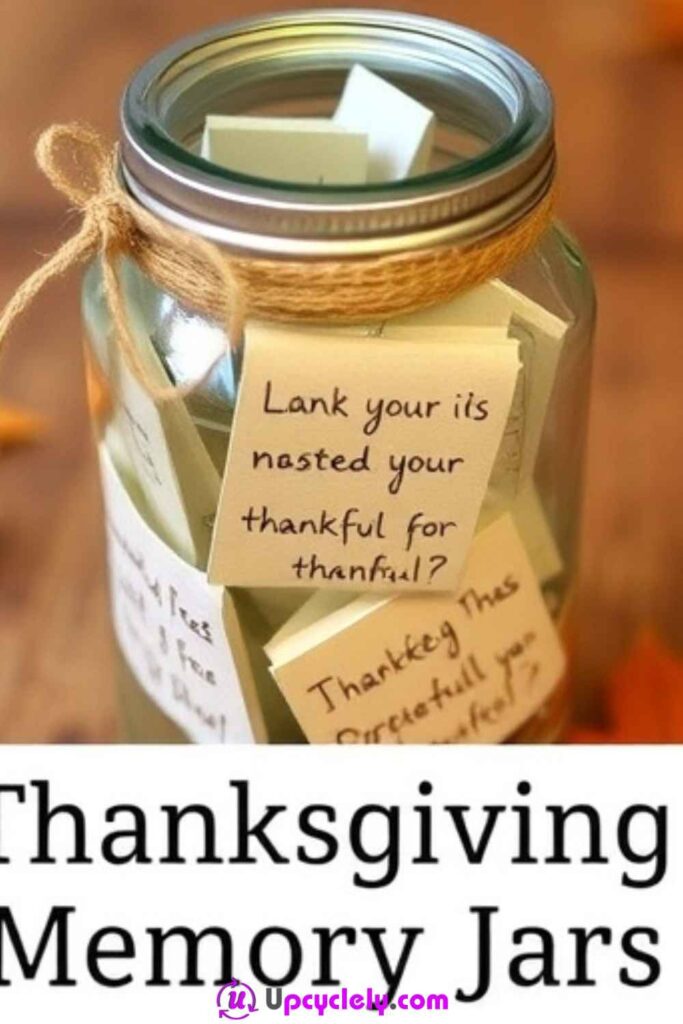
Materials Needed:
- A large glass jar (preferably with a lid)
- Fall-themed ribbon or twine
- Autumn leaves (real or faux)
- Small slips of paper
- Markers or pens
Step-by-Step Instructions:
Step 1: Decorate the Jar
Wrap twine or ribbon around the neck of the jar, tying it into a bow. Add faux leaves for a festive touch. Decorations should make the jar look inviting yet keep it versatile for any table setting.
Step 2: Prepare Your Notes
Cut your paper into small, even-sized slips. The idea is for people to have enough room to write a short memory or gratitude. Place these slips and markers near the jar and invite your family or guests to write something heartfelt.
Step 3: Display and Enjoy
Place your jar on a visible table, surrounded by autumnal accents like pumpkins or candles. Throughout the day, watch as the jar fills up with precious expressions of thankfulness. To close the event, sit as a group and read the notes aloud.
Pro Tip:
Include pre-written prompts like “What made you smile this week?” or “I’m thankful for…” to inspire even the shyest guests to participate.
Thanksgiving Pinwheels
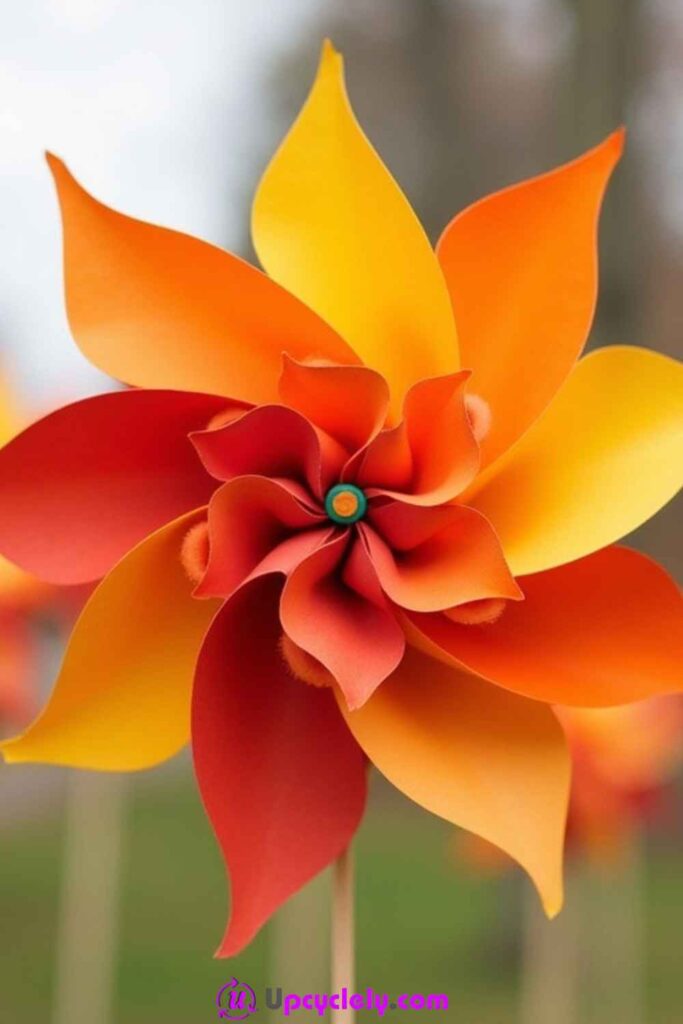
Materials Needed:
- Fall-colored craft paper (red, orange, yellow)
- Scissors
- Pushpins
- Wooden dowels
- Hot glue gun
Step-by-Step Instructions:
Step 1: Cut and Fold the Paper
Start with a square piece of craft paper. Fold it in half diagonally both ways to form an “X” crease. Then, cut along the creases towards the center but stop about an inch before the middle.
Step 2: Form the Pinwheel Shape
Bend every other corner towards the middle without creasing the paper. This creates the windmill shape. Secure the ends at the center with a small dab of glue, then push a pin through the center to hold everything together.
Step 3: Attach to the Dowel
Thread the pin through the top of a wooden dowel. Glue the pinwheel securely to the dowel so it rotates smoothly. If you want multiple pinwheels, repeat the process and place them together in a decorative pot for a stunning display!
Pro Tip:
Layer multiple pinwheel blades in different colors for a whimsical, multi-dimensional effect. It’s eye-catching and adds fun to your outdoor setup!
Turkey Cupcakes
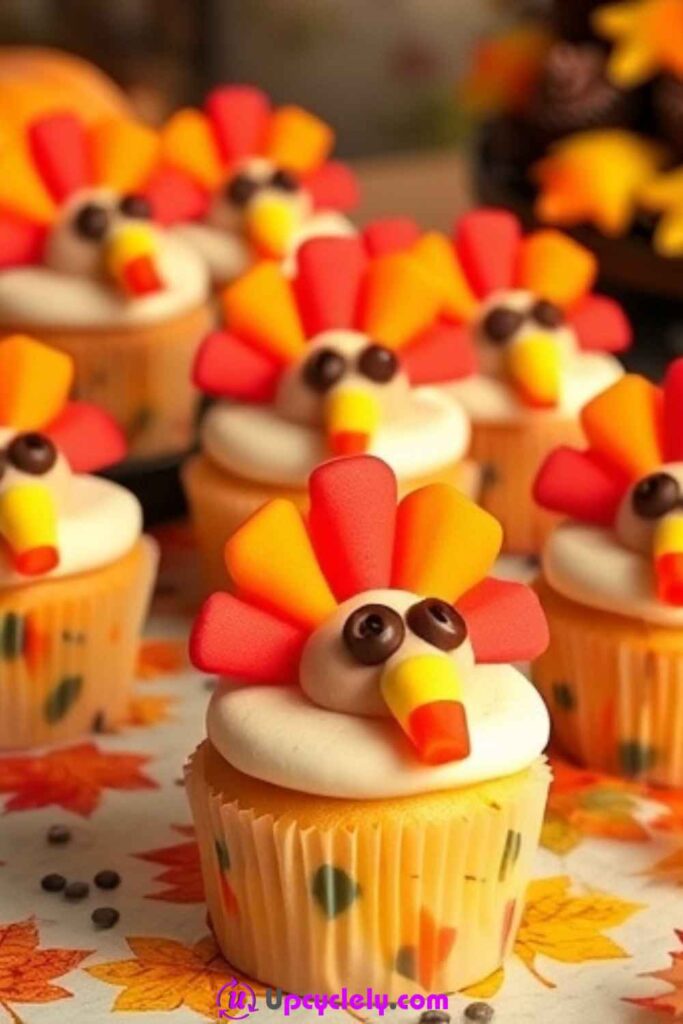
Materials Needed:
- Pre-baked cupcakes
- White frosting
- Candy eyes
- Candy corn (for feathers)
- Red licorice (for the wattle)
- Orange and yellow fondant or candies
Step-by-Step Instructions:
Step 1: Frost the Cupcakes
Generously spread or pipe white frosting onto the top of each cupcake. A swirl design works great here because it looks puffy, like feathers.
Step 2: Create the Details
Place candy eyes front and center. Use red licorice to hang below the eyes for a wattle, and position candy corn in a fan shape at the back to make colorful feathers. Finish the face with a small orange candy for the beak.
Step 3: Display Your Turkeys
Place your turkey cupcakes on a beautiful, fall-themed tray surrounded by small scatter decorations like faux leaves or mini pumpkins. These sweet treats will be hard to resist!
Pro Tip:
Want to make them extra special? Add a surprise filling inside each cupcake using caramel or chocolate ganache. Guests will love the sweet surprise!
Thankful Tree
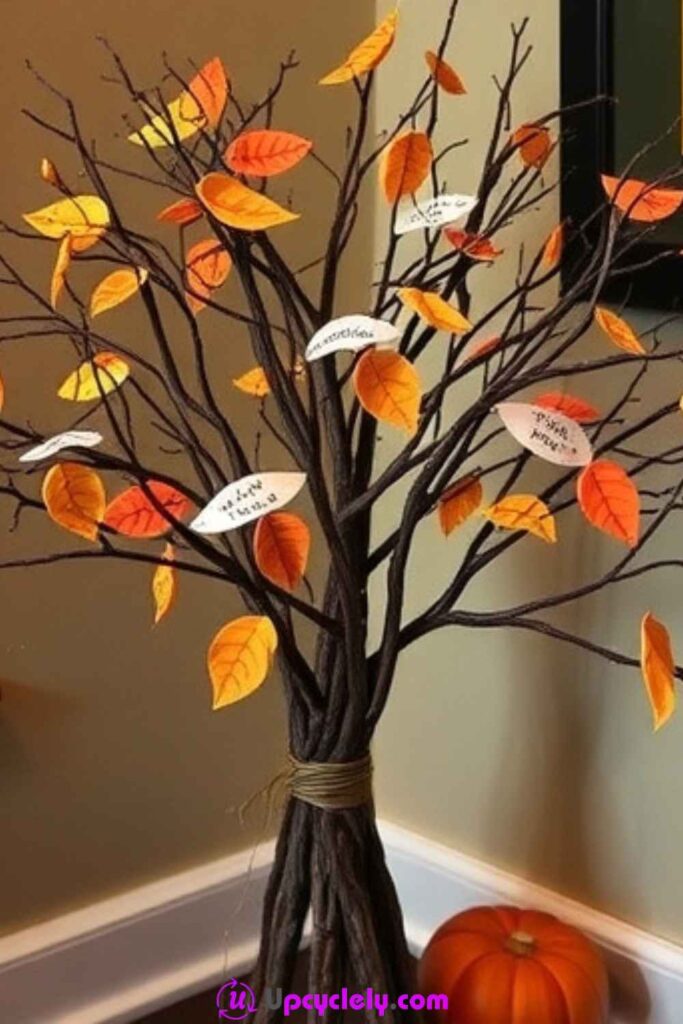
Materials Needed:
- A small tree branch or pre-made craft tree
- Construction paper leaves in fall colors
- String or ribbon
- Hole punch
- Pens or markers
Step-by-Step Instructions:
Step 1: Prepare the Tree
Find a sturdy branch from outdoors or use a purchased craft tree. Secure it upright in a small pot filled with pebbles or foam. This creates the “trunk” and ensures stability.
Step 2: Cut and Decorate the Leaves
Cut out leaf shapes from construction paper in various sizes. Punch a hole at the top of each leaf and thread a small loop of ribbon or twine through it for hanging.
Step 3: Express Gratitude
Lay the leaves and markers near the tree, inviting everyone to write something they’re thankful for. Hang each completed leaf on the tree, creating a visual representation of collective gratitude. The colorful leaves will bloom with heartfelt words as the day progresses.
Pro Tip:
Make it a tradition! At the end of the season, store the leaves and bring them out next year to reflect on previous years’ blessings.
Thanksgiving Crafting Problems That Can Turn Simple Projects Into Frustrating Ones
Most Thanksgiving crafts do not fail because the idea is too difficult. They become awkward when the materials, the age group, or the final use were not considered before the glue came out. A few small checks can keep the craft table enjoyable and prevent finished pieces from becoming fragile clutter.
Using the same adhesive for every material
Felt, glass, paper, pinecones, and plastic do not all respond to the same glue in the same way. A thick adhesive that works on a pinecone may soak through paper or leave a hard patch on felt. Match the adhesive to the materials, use the smallest amount that holds, and keep structural joins separate from purely decorative ones.
Putting children in charge of adult-only tools
Hot glue, craft knives, pushpins, and strong sealants can turn an otherwise calm craft into a safety problem. Divide the job first. Children can choose colors, arrange pieces, paint, write, and decorate, while an adult handles piercing, cutting dense materials, heating glue, or applying products that require ventilation.
Adding decoration before the useful part works
A coaster still needs to sit flat, a place card needs to stand, a garland needs to hang securely, and a jar needs to remain stable. Test the function before adding another ribbon, bead, or leaf. If the basic object does not work, decoration only makes the repair harder.
Using brittle or dirty natural materials
Pinecones, leaves, branches, stones, and corn husks all need a quick inspection. Dirt can stop glue or paint from bonding, while brittle pieces break during handling. Clean them, let them dry properly, and discard natural materials that are moldy, crumbly, sharp, or otherwise unsuitable for indoor use.
Crowding the Thanksgiving table
A handmade centerpiece can be lovely and still make dinner inconvenient if it blocks plates, drinks, serving dishes, or conversation. Build the table layout before the meal and remove anything too tall or wide. I would rather display an extra craft on a sideboard than make guests rearrange decorations every time a dish is passed.
Using open flames beside paper, leaves, twine, or children
Autumn craft materials are often combustible, and Thanksgiving tables can already be busy. LED tealights give the candle-holder effect without adding an exposed flame. If a real flame is used anywhere, keep combustible decorations well away and use only containers designed for candle heat.
Trying to make every piece identical
Handprints, painted rocks, paper leaves, felt feathers, and handwritten notes naturally vary. Forcing perfect matching can make a relaxed family craft feel like production work. Repeat a few basics—color family, size, or stitch style—then let small differences remain. They are often what make the finished set feel personal.
Frequently Asked Questions
Which Thanksgiving craft ideas are easiest for young children?
Handprint turkey cards, simple leaf garlands, painted rocks, paper gratitude leaves, and decorating pre-cut felt pieces are good starting points. Adults should prepare any sharp cutting, hot glue, pushpins, or small pieces in advance. Choose a craft where the child can complete a visible part of the project rather than only watching.
How can I make Thanksgiving crafts without buying many new supplies?
Start with paper, felt scraps, jars, twine, buttons, natural materials, and leftover ribbon you already have. Pick a limited fall palette and repeat it across several projects. A small shared supply set often looks more coordinated than buying a different decoration kit for every craft.
Can real autumn leaves be used for the candle holders and garlands?
They can, but they need to be clean, dry, and reasonably flat. Fresh leaves often curl or become brittle as they dry, so pressed leaves are easier to work with. Keep real dried leaves away from open flames and use LED lights for leaf-covered jar displays.
How do I keep family craft time from becoming too messy before Thanksgiving dinner?
Set up one washable surface away from the food-prep area and give each material a small container. Keep wet projects on a separate tray and have wipes, a water bowl, and a rubbish or scrap container close by. I also like finishing messy paint-and-glue projects earlier in the day and saving writing or game crafts for later.
Which crafts can be stored and reused next year?
Felt coasters, felt hats, bingo cards, pinwheels, faux-leaf garlands, painted rocks, and some jar decorations can all be stored if they are completely dry and packed carefully. Keep paper flat, avoid crushing pinwheels, and store felt where it will not pick up dampness or pests. Natural branches and fragile real leaves are often better replaced each season.
How can I make the crafts look coordinated around the house?
Repeat two or three colors and one natural material, such as twine, across several projects. The objects themselves can be different—a jar, felt coaster, paper garland, and gratitude tree will still relate visually if the palette stays consistent. You do not need every shade, pattern, or texture to match exactly.
Are these crafts suitable for a classroom or large family group?
Yes, but choose projects that can be prepared in stations. Pre-cut complicated shapes, portion small materials into bowls, and separate adult-only tools from child-safe supplies. Bingo cards, handprint cards, thankful leaves, painted rocks, felt coasters, and pinecone turkeys are especially easy to scale when the basic pieces are prepared ahead of time.
Make the Thanksgiving Table Feel Handmade Without Making It Complicated
The thing I like most about these Thanksgiving craft ideas is that they do not all have to serve the same purpose. A coaster can be useful during dinner, a handprint card can become a keepsake, a bingo set can keep the family busy, and a thankful tree can quietly collect the words people want to remember. That mix makes the handmade parts of the day feel natural rather than forced.
Start with one project that matches the time and supplies you actually have. If dinner preparation is already busy, choose place cards, a memory jar, or painted rocks rather than a craft that needs several tools. If children want to help, give them a project where they can make real choices about color, layout, or writing. Then let the finished piece be slightly imperfect. A hand-drawn leaf or uneven felt feather often carries more character than something that looks as though nobody touched it.
Thanksgiving crafts are at their best when they support the gathering instead of competing with it. Use what you can, keep the table practical, and save the pieces that hold a memory worth revisiting. Which of these Thanksgiving craft ideas would fit most naturally into your own celebration this year?