Decoupage has a way of making ordinary surfaces worth looking at again. A plain box, an old jar, a tired picture frame, or even a stack of leftover paper can become useful décor once the pattern, base, and finish are planned as one project rather than treated as separate parts.
The technique looks simple paper and adhesive but the difference between a smooth result and a wrinkled one often comes down to preparation, thin layers, and knowing when to stop touching the surface.
I’m especially drawn to decoupage when it gives an existing object a second purpose instead of asking me to buy a brand-new blank. I don’t think every surface needs full coverage either. Sometimes one well-placed botanical cutout, a narrow border, or a few overlapping scraps have more character than covering every visible inch.
The most practical decoupage craft ideas also respect how the finished object will be used. A tray needs different protection from wall art, a notebook has to flex at the hinge, and anything near heat, food, or electricity deserves extra caution. Once those practical limits are clear, the decorative part becomes much easier and a lot more enjoyable.
Choose a Base That Can Handle Paper and Adhesive
Before cutting any paper, inspect the object you want to reuse. Wood, sturdy cardboard, sealed ceramic, glass, metal, canvas, and some rigid plastics can all support decoupage, but they do not accept adhesive in exactly the same way. A weak box lid, flaking painted frame, greasy jar, or flexible purse surface needs attention before decoration begins.
Check for loose paint, sharp edges, rust, cracks, peeling laminates, oily finishes, or parts that move against one another. Repair structural problems first and set aside anything that cannot safely perform its new job. Decoupage is a decorative layer; it cannot strengthen a cracked handle, repair faulty electrical hardware, or make an unsuitable food-contact surface safe.
Prepare Paper, Surfaces, and Edges Before Gluing
Thin napkins and tissue create soft, blended edges but tear easily once wet. Heavier decorative paper is easier to position yet can lift at corners if the base curves sharply. I know it can feel tempting to cut everything and start gluing, but test one scrap first so you can see how the paper darkens, stretches, or becomes translucent under your chosen medium.
Clean the base according to its material, let it dry fully, and lightly smooth rough areas where appropriate. Plan seams away from high-wear edges whenever possible. If you are using several motifs, arrange them dry before applying adhesive; then you can move pieces around without racing against a sticky surface.
Match the Finish to How the Object Will Be Used
A decorative wall panel can tolerate a delicate finish that would be frustrating on a tray, coaster, drawer handle, or notebook. Choose the decoupage medium and any topcoat according to the surface, the paper, and the object’s real use. Follow the product label for compatible materials, recoating, curing, cleaning, and ventilation instead of assuming one finish works for every project.
Keep ordinary craft coatings away from food-contact zones, direct flame, hot surfaces, and electrical openings. For altered candle holders, I prefer battery-operated lights unless the holder and every decorative material are specifically suitable for heat. For kitchen utensils, treat decoupaged pieces as decorative unless the complete system is explicitly approved for the intended food contact and washing conditions.
Decoupage Coasters
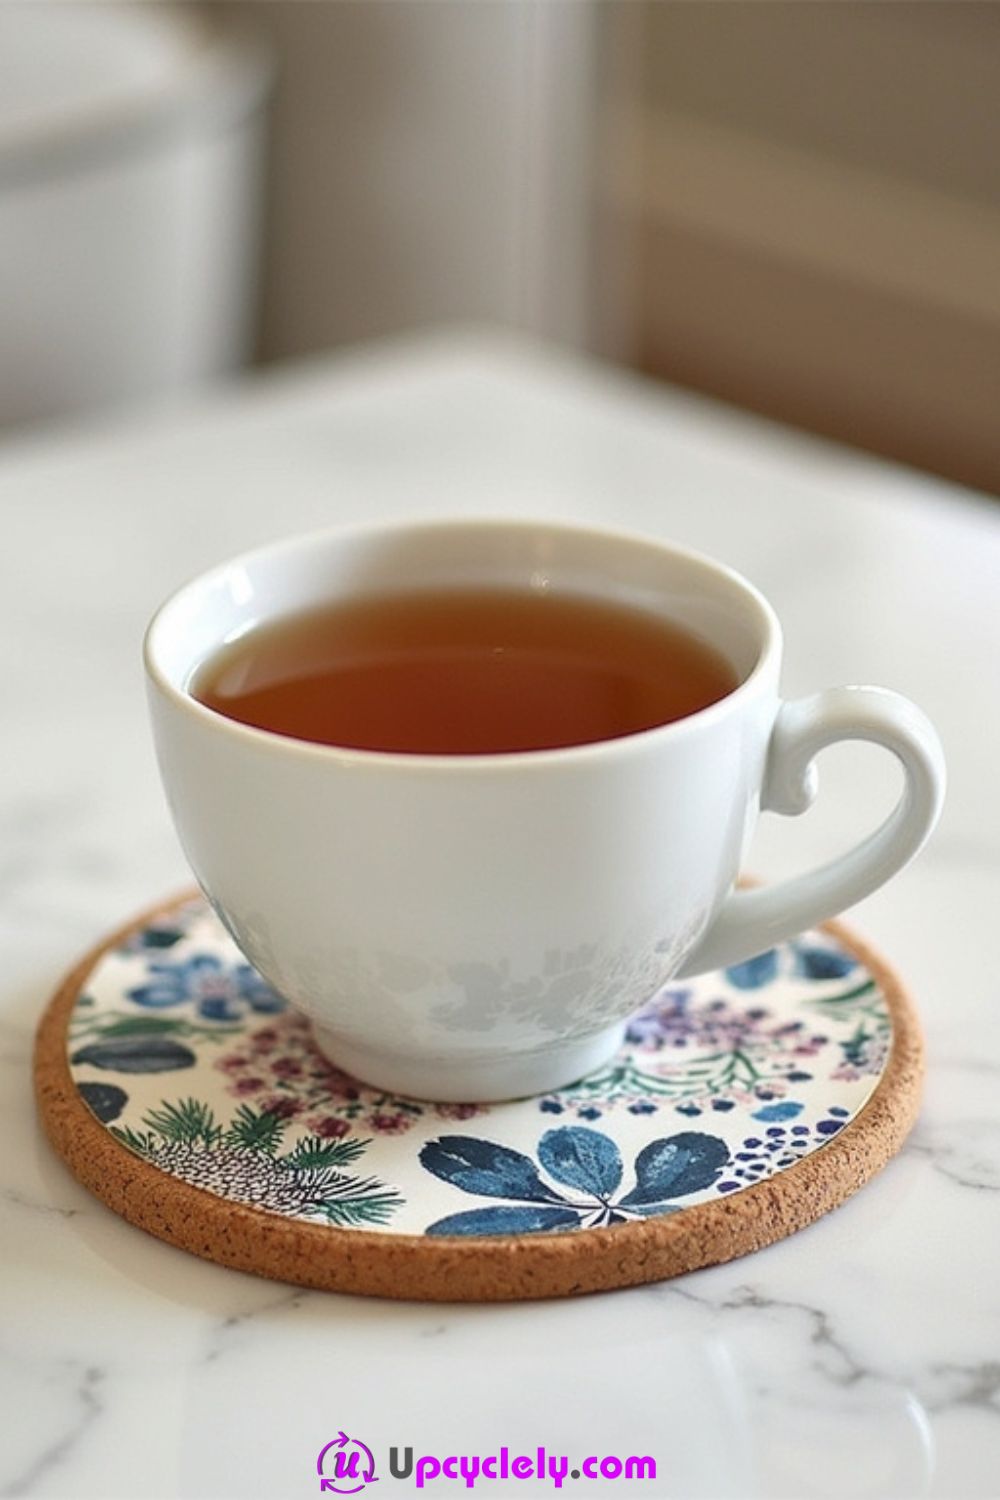
Coasters are a good place to see how much difference a small paper pattern can make. A set of mismatched cork, wood, or suitable ceramic coasters can be brought together with one botanical theme, while the individual motifs can still vary from piece to piece.
The important part is durability. Coasters are handled, stacked, and exposed to condensation, so the paper needs to sit completely flat and the finished surface needs a compatible protective system. I would keep designs slightly inside the edge if the paper is thick; exposed corners are usually the first places to catch and lift.
Materials and Tools
· Clean cork, wood, or suitable ceramic coasters
· Decorative paper, napkin motifs, or reused printed paper
· Decoupage medium compatible with the coaster surface
· Soft flat brush or foam applicator
· Small scissors or craft knife with cutting mat
· Burnishing card or clean plastic sheet for smoothing
· Compatible protective topcoat if the product system calls for one
Steps for This Decoupage Project
1. Plan the set. Trace one coaster on scrap paper and test how the main motifs fit. Decide whether every coaster will match or whether the set will share only a colour palette. Cut the designs slightly smaller than the base if you want a clean exposed border.
2. Prepare and apply the first layer. Clean and dry each coaster, then apply a thin, even layer of compatible decoupage medium. Place the paper from one edge toward the other instead of dropping it flat all at once. Smooth gently through a clean sheet of plastic or baking parchment so damp paper is not pulled by your fingers.
3. Seal the paper without flooding it. Once the first layer is stable, brush a light coat over the design, working from the centre outward. Avoid repeatedly brushing one soft area because that can stretch fibres and create ridges. Build only the number of coats recommended for the chosen system.
4. Finish the edges and let the set cure. Check the perimeter for lifted corners and press them down with a tiny amount of medium if needed. Clean the underside so each coaster sits level. Complete the curing and protective finish exactly as the product instructions require before stacking or using the set.
For me, the edges matter more than a perfectly centred flower. A slightly off-centre motif can look intentional; a loose paper corner rarely does.
Variation: Use pages from a damaged botanical book, old wrapping-paper scraps, or monochrome maps. For a quieter set, repeat one leaf shape in different positions rather than using a different busy pattern on every coaster.
Decoupage Bookmarks
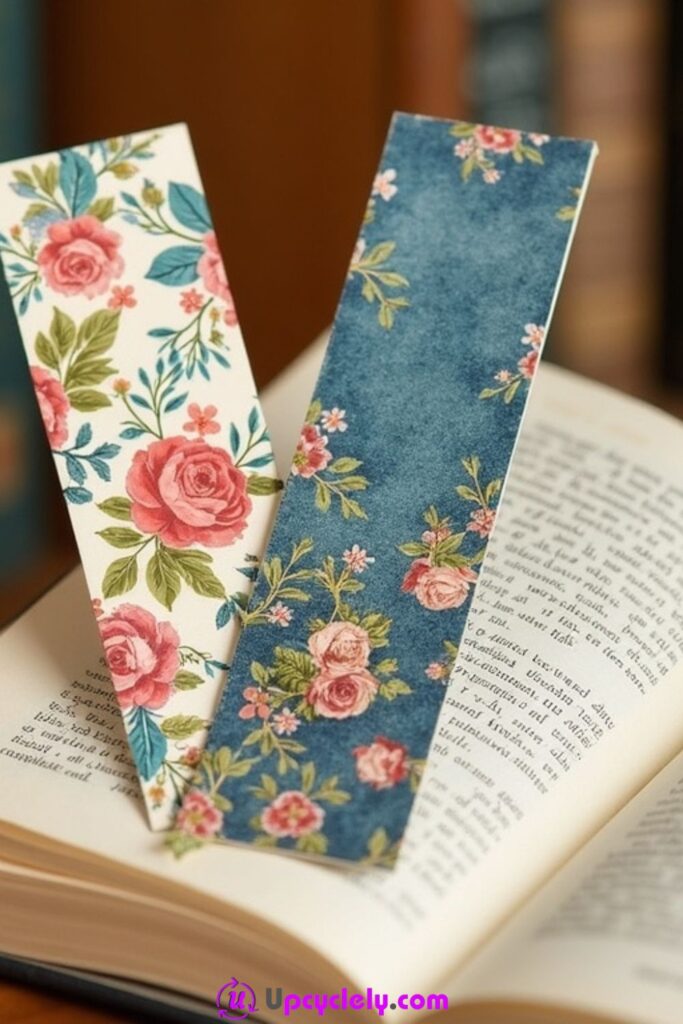
Bookmarks suit leftover paper because the surface is narrow and the finished piece does not need much material. Old card packaging, thin wood blanks, or sturdy offcuts can become useful markers with small pieces of patterned paper that might otherwise be too tiny for a larger project.
A bookmark also needs to stay slim. Thick embellishments, heavy glue ridges, and curled edges can damage book pages or make the marker awkward to use. I would focus on a smooth face, rounded or clean corners, and a sealed edge rather than adding lots of dimensional decoration.
Materials and Tools
· Sturdy card, thin wood, or reused packaging board
· Decorative paper scraps or thin napkin motifs
· Surface-compatible decoupage medium
· Small flat brush
· Scissors, ruler, and craft knife with cutting mat
· Hole punch and reused ribbon or thread if desired
· Fine sandpaper for wooden edges when appropriate
Steps for This Decoupage Project
1. Cut and test the base. Choose a bookmark length that sits comfortably inside your books and trim the base with straight, smooth edges. If using thin wood, sand only enough to remove splinters. Test the piece between pages before decorating so you know the thickness is practical.
2. Build the paper layout dry. Arrange one long strip or several small scraps on the front. Keep bulky overlaps away from the tip and sides. If you want a tassel, mark the hole position now so an important motif does not end up punched through later.
3. Attach and smooth the design. Brush on a thin layer of medium, lay the paper in position, and smooth toward the edges. Wrap very thin paper around the sides only if it stays flat; otherwise trim it flush. Let the first side become stable before decorating the reverse.
4. Seal and finish the marker. Apply a restrained sealing coat and keep the surface as flat as possible. Once fully cured, trim any paper fibres that extend beyond the edge and add a soft ribbon or thread if desired. Avoid hard beads that could press into book pages.
The part I would keep simple is the thickness. A bookmark can be decorative without becoming a tiny sculpture that makes the book refuse to close.
Variation: Create a patchwork from paper scraps left by other decoupage projects, add a single pressed-paper silhouette, or make a coordinated set using different sections of the same old gift wrap.
Decoupage Candle Holders
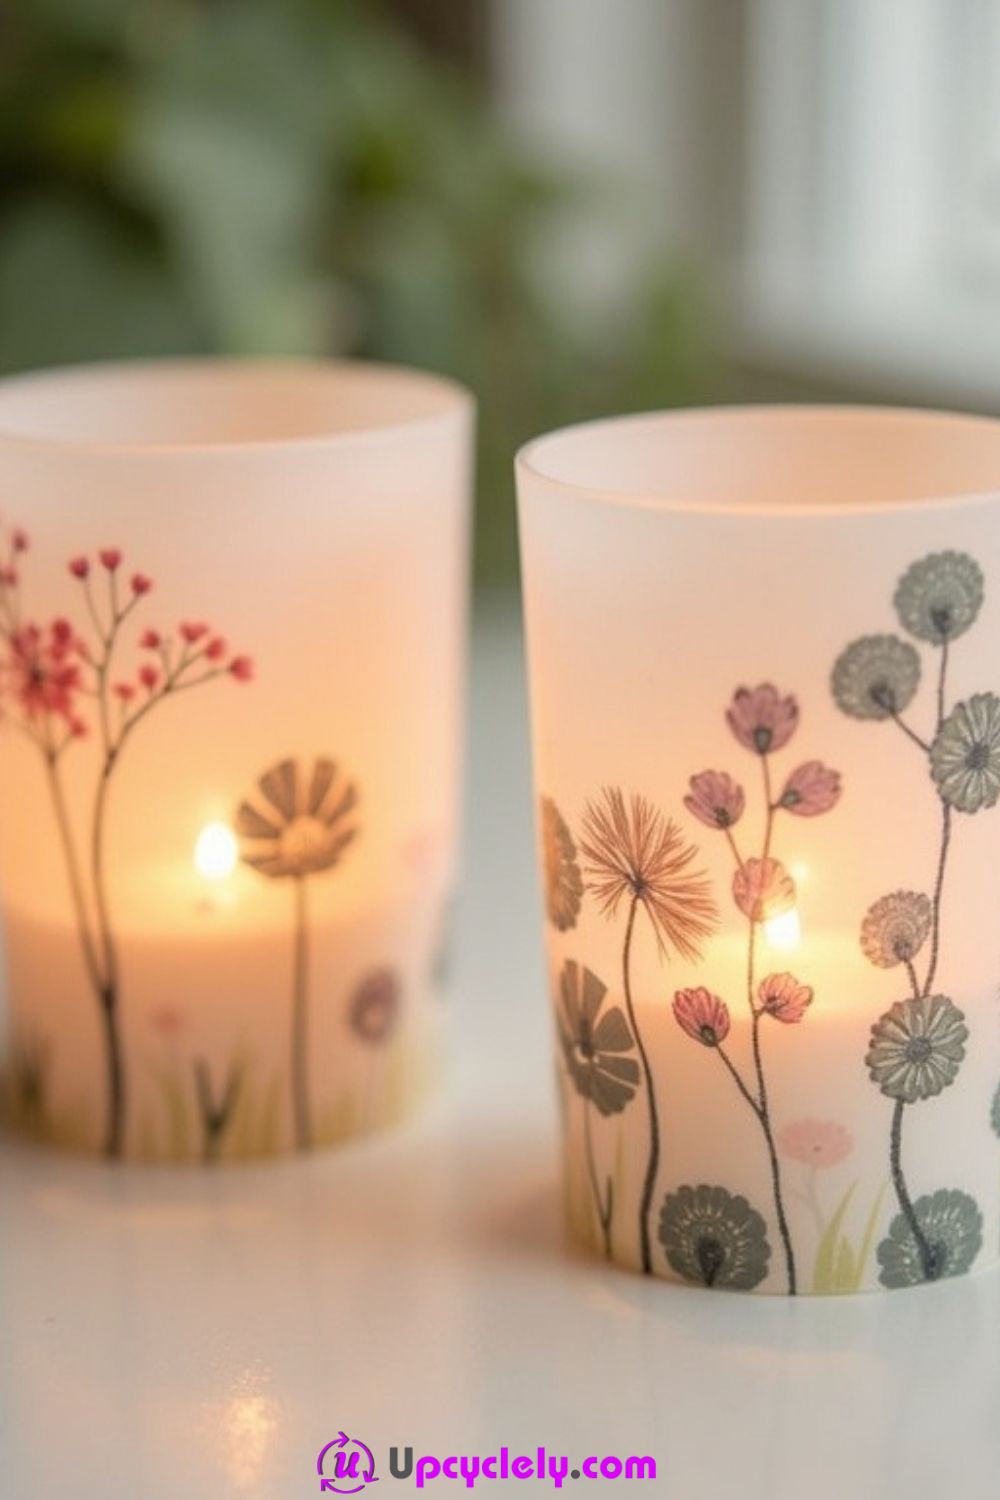
Glass candle holders can look completely different once a translucent paper motif sits against the surface. Tissue and thin napkins allow light to pass through softly, which makes botanical cutouts and pale patterns especially effective.
Heat is the practical concern here. Paper, adhesive, ribbons, and many sealers are combustible or may not be suitable near high temperatures. I would use the altered holder with a battery-operated LED light unless the original holder and every added material are specifically designed for the intended heat exposure.
Materials and Tools
· Clean glass votive holder or jar intended for decorative lighting
· Thin tissue or napkin motifs
· Decoupage medium compatible with glass
· Very soft brush
· Small scissors or water-brush method for feathered napkin edges
· Lint-free cloth and glass cleaner compatible with preparation
· Battery-operated LED tealight for the finished altered holder
Steps for This Decoupage Project
1. Prepare the glass. Remove wax, labels, grease, and fingerprints, then let the holder dry fully. Test one small piece of paper low on the glass to see whether the medium leaves a cloudy ring or changes the transparency more than expected.
2. Position the motifs with open space. Cut or tear a few lightweight shapes and arrange them without covering the entire holder. Leave clear areas between motifs so the light can still move through the glass. Keep paper away from the top edge and any area that could become warm.
3. Apply the paper gently. Brush a small area with medium, lay the tissue down, and pat it into place with the soft brush rather than dragging repeatedly across it. Work in sections around the holder, allowing each area to settle before rotating the glass in your hand.
4. Seal lightly and choose a safe light source. Add only a thin compatible sealing coat over the paper and allow the project to cure fully. Check for loose edges and adhesive inside the holder. Use a cool LED light for display unless the complete altered setup is specifically rated for another use.
I don’t think a glowing holder needs dense decoration. A few thin leaves often look better because the uncovered glass becomes part of the pattern.
Variation: Try white tissue with one darker silhouette for a shadow effect, use torn book-page fragments on an opaque jar, or group three holders with related but not identical motifs.
Decoupage Canvas Shoes
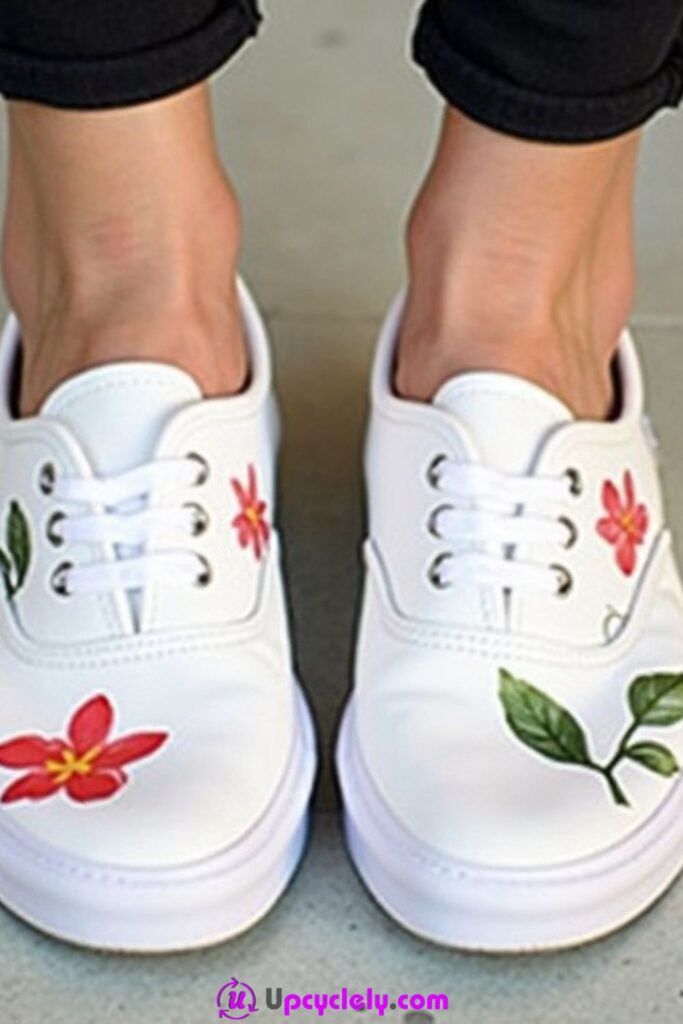
Canvas shoes introduce movement into decoupage. The fabric bends at the toe, stretches slightly at the sides, and rubs near seams, so a stiff paper layer that looks fine on the table may crack once the shoe is worn.
Small flexible motifs are usually easier than one large sheet. Fabric scraps, thin napkin layers, or a medium specifically intended for fabric can follow the shoe more naturally. I would treat heavily worn areas as design boundaries rather than trying to cover every curve.
Materials and Tools
· Clean canvas shoes suitable for decorating
· Thin fabric scraps, flexible paper motifs, or napkin pieces
· Decoupage medium specifically suitable for fabric or flexible textiles
· Soft brush
· Small sharp scissors
· Low-tack masking tape for soles and hardware
· Clean cloth or shoe form for support while working
Steps for This Decoupage Project
1. Clean and support the shoes. Remove the laces and clean the canvas according to the shoe material. Let it dry fully, then stuff the toe lightly with clean cloth so the working surface holds its shape. Mask rubber edges if needed.
2. Plan around movement points. Flex the shoe gently and notice where deep creases form. Keep larger motifs away from those fold lines and place smaller pieces near seams or side panels. Arrange both shoes together so the pair feels related without needing mirror-image placement.
3. Attach small sections at a time. Apply a thin layer of flexible medium to one area, press the motif down, and smooth from the centre outward. Avoid soaking the canvas. Continue across the shoe while leaving enough drying time that your hand does not pull earlier pieces out of position.
4. Seal according to the fabric system. Add the recommended top layer only after the motifs are secure. Remove tape carefully, clear any adhesive from eyelets, and let the shoes cure fully before lacing or flexing them. Follow the product’s washing and care limitations rather than assuming the finish is waterproof.
For me, the best layout respects the creases instead of fighting them. The shoe will keep bending no matter how persuasive the paper pattern looks.
Variation: Decorate only the heel panels, add a narrow floral border around the sides, or use small monochrome motifs for a subtler pair that is easier to repair later.
Decoupage Christmas Ornaments
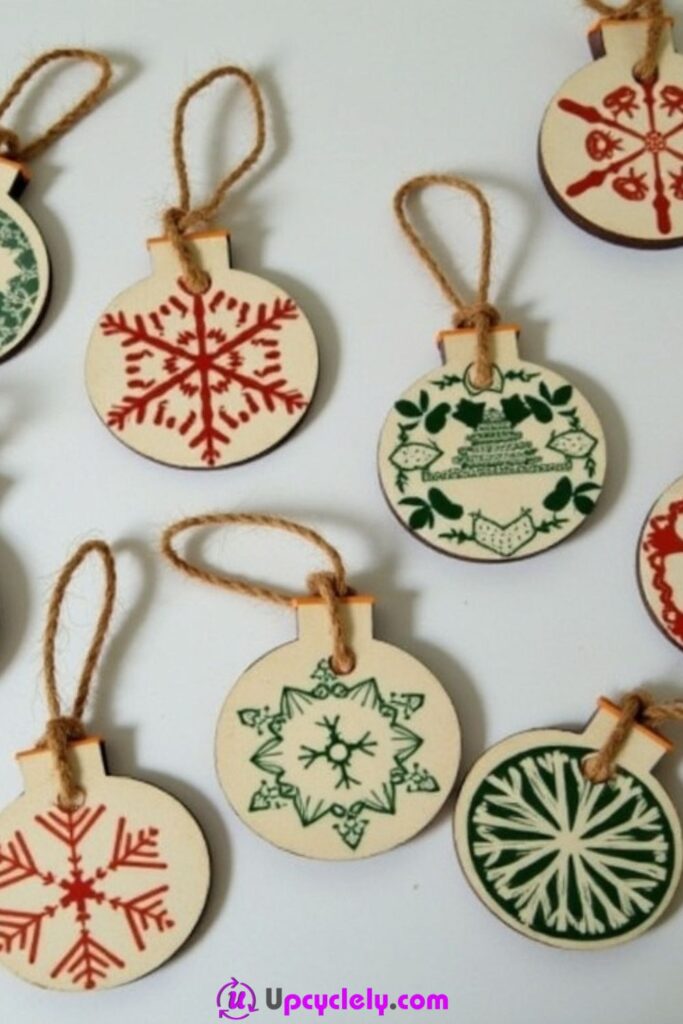
Ornaments are forgiving because their small scale makes leftover napkin motifs and paper scraps useful. Wood, papier-mâché, and other craft-safe blanks can take completely different characters depending on whether the paper is torn, cut into precise shapes, or layered over a painted background.
Curved ornaments need patience. A flat paper circle does not naturally want to wrap around a sphere, so smaller torn pieces usually sit more smoothly than one large sheet. Working in overlapping sections also makes it easier to use scraps from other projects.
Materials and Tools
· Plain ornament blanks suitable for decoupage
· Holiday paper scraps, napkins, old music paper, or maps
· Compatible decoupage medium
· Small soft brush
· Fine scissors
· Ribbon, twine, or reused cord for hanging
· A skewer, cup, or drying stand to hold the ornament
Steps for This Decoupage Project
1. Prepare the ornament and hanger point. Remove loose dust and smooth rough wood where appropriate. Make sure the hanging cap, drilled hole, or loop is secure before decorating. If the ornament needs a base colour, complete that first and let it become stable.
2. Break the design into manageable pieces. Cut or tear motifs small enough to follow the curve. For a spherical ornament, test several pieces dry and allow slight overlaps. Keep the hanger area clear so paper does not bunch under the cap or knot.
3. Apply while rotating the ornament. Hold the ornament on a skewer or by an unpainted section and work around it gradually. Add medium beneath each paper piece, press the centre down first, then ease the edges over the curve. Tiny wrinkles are easier to accept than tearing the paper while chasing total smoothness.
4. Seal and hang only after curing. Add a light finishing coat and leave the ornament supported so wet areas do not stick to the table. Once fully cured, reattach the hanger and check that no hard drips remain along the bottom edge.
A little texture is normal on a rounded ornament. I’d rather keep a soft wrinkle than keep brushing until the napkin disappears under the bristles.
Variation: Use old sheet-music fragments for a neutral tree, turn damaged greeting cards into motif cutouts, or make a memory set from photocopied handwriting and dated paper scraps.
Decoupage Picture Frames
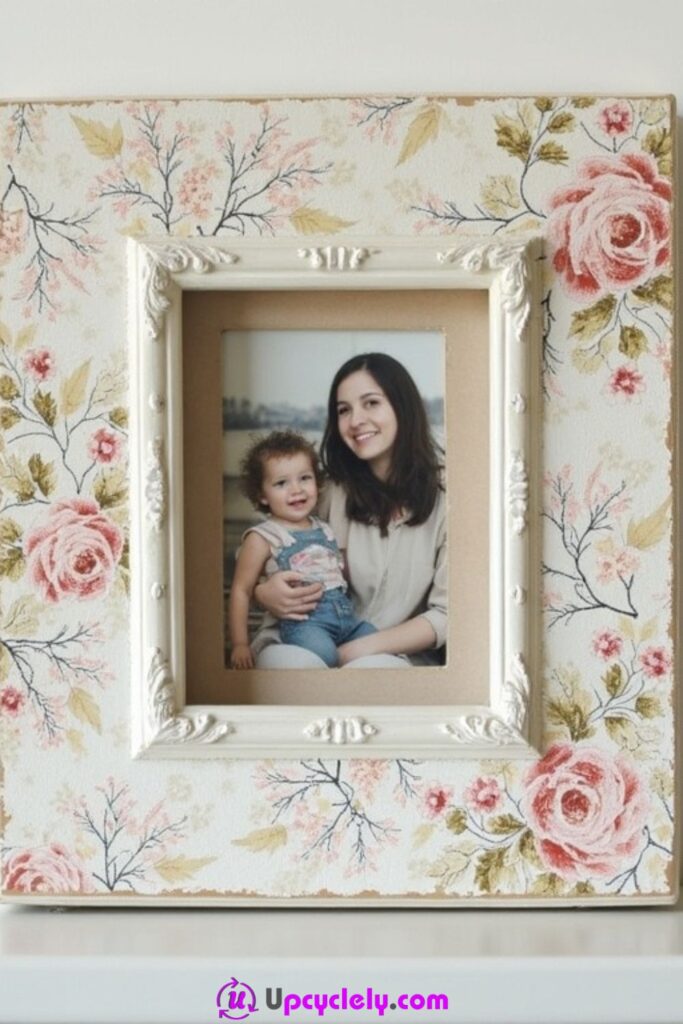
A worn picture frame is an easy object to repurpose because its flat border gives paper a clear place to sit. Decoupage can cover scratches, dated stain, or a mismatched finish while leaving the photograph itself as the focal point.
Corners deserve most of the planning. Large paper sheets can bunch where the frame changes direction, while small pieces can create a deliberate patchwork that handles corners more gracefully. I would remove the glass and backing before any wet work so adhesive never creeps onto the viewing area.
Materials and Tools
· Wood, MDF, or suitable plastic picture frame
· Decorative paper scraps or napkin motifs
· Compatible decoupage medium
· Soft flat brush
· Scissors and craft knife with cutting mat
· Fine sandpaper for rough wood where suitable
· Wax paper or clean board for protecting the work surface
Steps for This Decoupage Project
1. Strip the frame down to the border. Remove the backing, photograph, and glass. Clean the frame and repair loose corner joints before decorating. If the surface is glossy or rough, prepare it only as recommended for that material.
2. Plan the corners before the long sides. Dry-fit paper at each corner and decide whether pieces will overlap, mitre, or wrap to the back. Mark the inner opening carefully so no paper extends where it could show beneath the glass.
3. Apply paper in a balanced sequence. Attach corner pieces first, then work along opposite sides so the pattern stays visually balanced. Smooth each piece before moving on and keep medium out of the frame rebate where the glass and backing need to sit flat.
4. Seal, trim, and reassemble. Once the paper is stable, add the compatible finishing layer. Trim any fibres from the inner edge and check that the back remains clean. Reinstall the glass and image only after the frame has cured fully.
The photo opening is the line I would protect most carefully. A lovely paper edge that creeps into the glass area can make the whole frame look less precise.
Variation: Cover only the corners, combine neutral book pages with one floral strip, or use paper from an old map connected to the photograph inside the frame.
Decoupage Furniture Handles
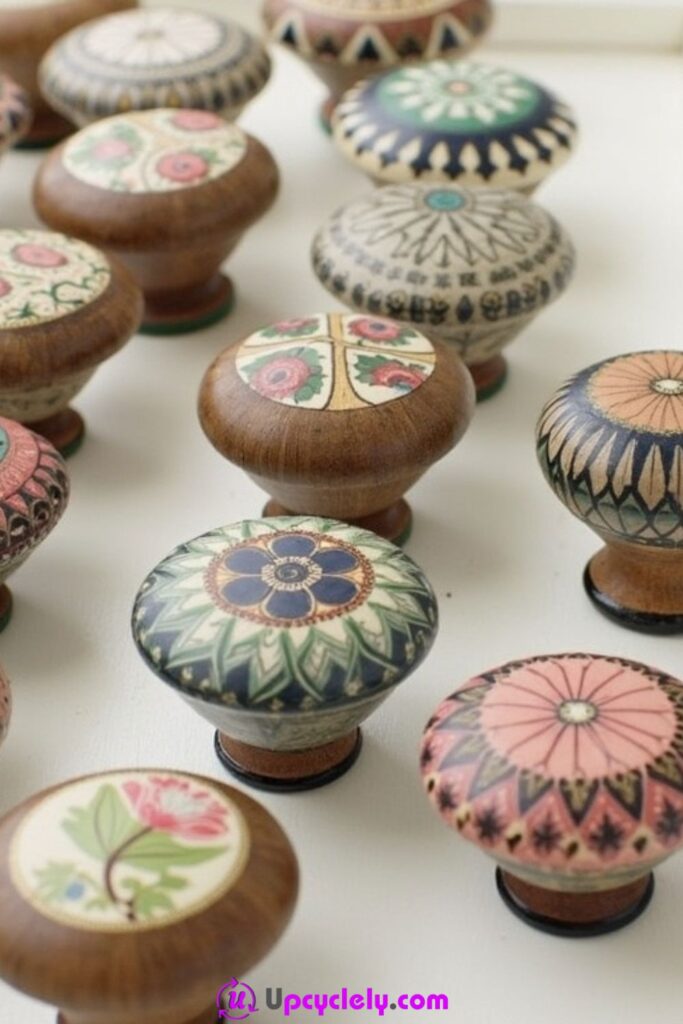
Drawer pulls and cabinet handles are small but high-contact surfaces, which makes them an interesting decoupage challenge. A set of mismatched wooden knobs can be visually connected with the same paper pattern, while flat-front pulls can take tiny motifs that repeat across a piece of furniture.
Because hands touch them constantly, the paper needs to be placed where it will not snag against fingers, screws, or drawer fronts. I would remove the hardware before decorating and keep every screw hole and mounting surface completely clear.
Materials and Tools
· Removable wooden knobs or suitable flat-front handles
· Thin decorative paper or napkin motifs
· Decoupage medium compatible with the handle material
· Small detail brush
· Fine scissors or craft knife
· Screwdriver for removal and reinstallation
· Compatible durable topcoat if appropriate for the system
Steps for This Decoupage Project
1. Remove and label the hardware. Take off each handle and keep its screws together, noting which piece came from which drawer if sizes vary. Clean skin oils and grime from the decorative surfaces. Do not cover threads, screw holes, or the back face that must sit against the furniture.
2. Cut motifs for the visible faces. Choose paper that fits the part you actually see and touch. On round knobs, small central motifs are easier than wrapping the whole curve. Test the pair or set together so one handle does not accidentally become much busier than the others.
3. Attach without building bulky edges. Apply a small amount of medium and smooth the paper firmly across the visible face. Keep the paper edge away from the narrowest grip area if possible. Let one side stabilize before turning the handle over or resting it on a finished surface.
4. Protect and reinstall carefully. Use the compatible protective finish recommended for repeated handling, then allow full curing. Check that the paper is not lifting around edges. Reinstall the handles without scraping the decorated face against tools or drawer fronts.
This is one place where durability matters more than covering every millimetre. A small secure motif can survive handling better than a full wrap with several vulnerable seams.
Variation: Use the same flower in different colours, decorate only the centre caps of knobs, or coordinate handles with a decoupaged drawer liner made from the remaining paper.
Decoupage Glass Jars
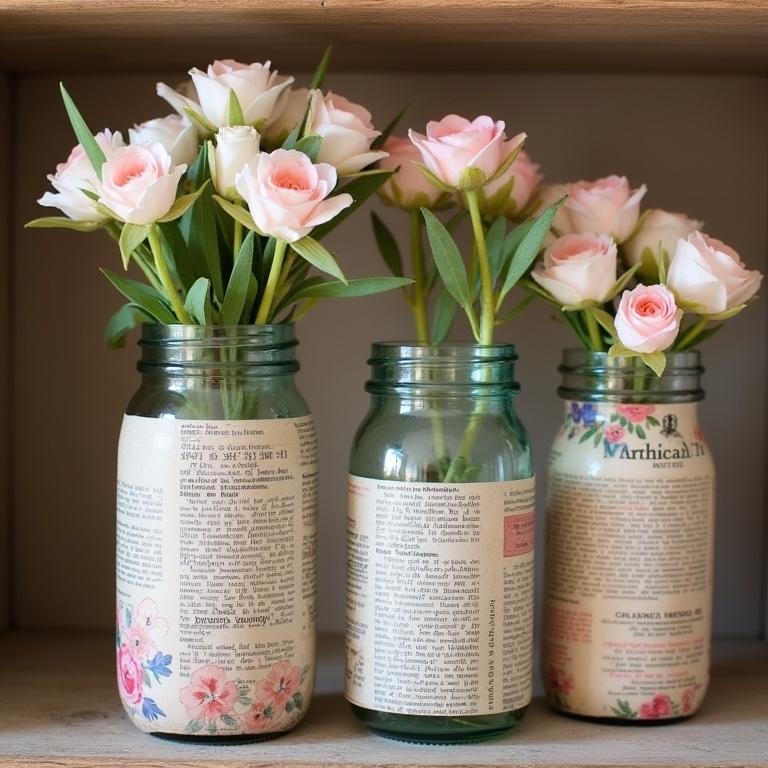
Empty glass jars are useful decoupage bases because they already have a practical shape. Once labels and adhesive residue are removed, the glass can become a brush holder, dry decorative storage container, vase sleeve, or small display vessel.
The new purpose should be decided before decorating. Ordinary decoupage materials should not be assumed safe for direct food contact or prolonged soaking, so I prefer using altered jars for craft supplies, flowers, or wrapped items rather than storing food against the decorated surface.
Materials and Tools
· Clean empty glass jars
· Paper scraps, napkin layers, book pages, or labels
· Glass-compatible decoupage medium
· Soft brush
· Scissors
· Adhesive-removal method suitable for glass
· Optional twine or fabric strip for the neck
Steps for This Decoupage Project
1. Remove labels and residue completely. Wash the jar, remove paper labels, and clean away sticky adhesive without leaving an oily film. Dry it fully, especially around the rim and base. Decide whether the finished jar will be fully covered or retain clear glass sections.
2. Plan around the curve and seams. Wrap a scrap strip around the jar to estimate how the paper behaves. Large sheets can wrinkle on tapered jars, so smaller panels or torn pieces may be easier. Keep bulky overlaps away from the base so the jar remains stable.
3. Attach paper in sections. Brush medium onto one manageable area and place the paper gradually, smoothing outward. Rotate the jar by holding a clean, undecorated section. If using tissue, work with a soft brush and accept a little texture rather than overworking the wet fibres.
4. Seal and choose a gentle cleaning method. Finish with the compatible top layer, cure fully, and check the bottom edge for hardened drips. Use the jar according to the finish instructions; many decorative versions are better wiped gently than soaked or placed in a dishwasher.
Clear glass is useful negative space. I often prefer leaving a narrow window uncovered so the jar still looks like glass rather than a cylinder wrapped in paper.
Variation: Use torn labels from old packaging, combine pressed-paper silhouettes with transparent areas, or make a matching group from jars of different heights using one shared colour family.
Decoupage Greeting Cards
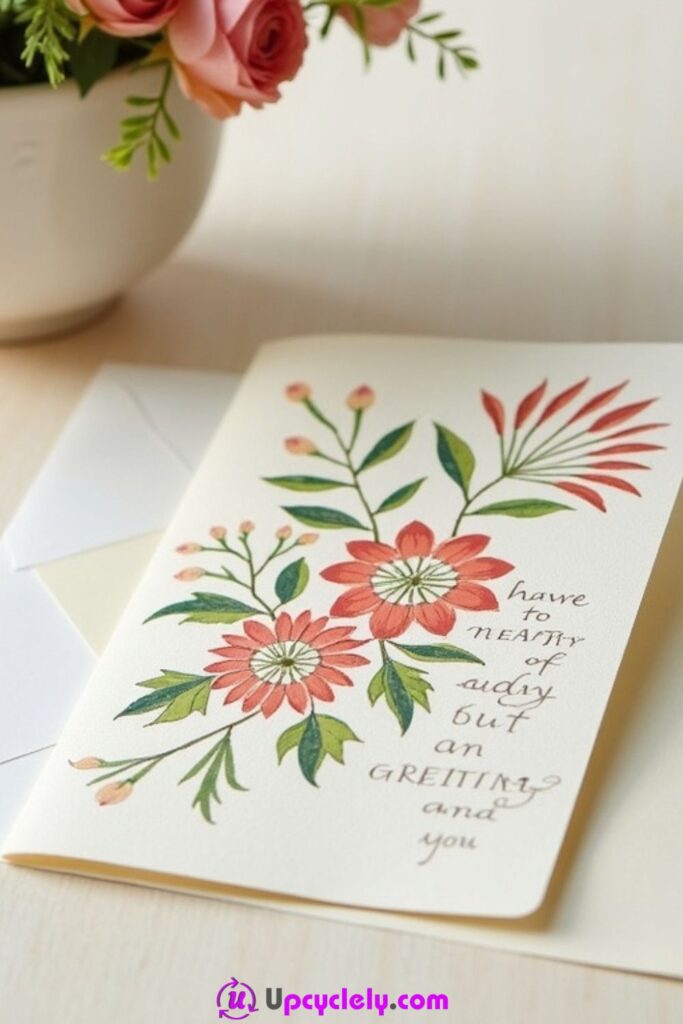
Greeting cards are a practical home for tiny paper fragments. Leftover florals, tissue scraps, old wrapping paper, and damaged printed cards can be cut into small shapes and layered onto a blank base without needing enough material for a large craft.
Because a card has to fold and travel in an envelope, the surface should stay relatively flat. Heavy sealing coats can warp cardstock, and thick overlaps near the fold can make the card spring open. I would concentrate decoration on the front panel and keep the crease clean.
Materials and Tools
· Blank folded cardstock or reused sturdy card
· Small decorative paper scraps
· Paper-compatible decoupage medium or adhesive used sparingly
· Fine brush
· Scissors or craft knife
· Bone folder or smooth card for pressing
· Extra cardstock for backing thin or fragile bases
Steps for This Decoupage Project
1. Choose a strong card base. Check that the fold is crisp and the card stands without sagging. If you are reusing printed card, cover only the areas that need hiding or add a clean backing panel rather than coating the whole surface.
2. Build a front-panel composition. Arrange two or three larger paper elements first, then add smaller pieces around them. Leave breathing room near the edges and fold. If a motif crosses another piece, keep the overlap thin so the card still fits easily inside an envelope.
3. Attach with minimal moisture. Use a restrained amount of medium and work from the centre of each piece outward. Press under a clean sheet while the adhesive settles if the paper tends to curl. Avoid saturating cardstock because water-heavy layers can cause permanent waves.
4. Finish only as much as the card needs. Add a light protective layer if your chosen system calls for it, or leave dimensional paper edges unsealed if that suits the design better. Let the card dry flat, then add the message and envelope after checking that nothing sticks or transfers.
I’d rather send a card with a little paper texture than flatten it under so much medium that it feels like a laminated menu.
Variation: Use monochrome book-page hearts, layer scraps into a small landscape, or create a batch of cards from the offcuts left by a larger decoupage project.
Decoupage Jewelry Boxes
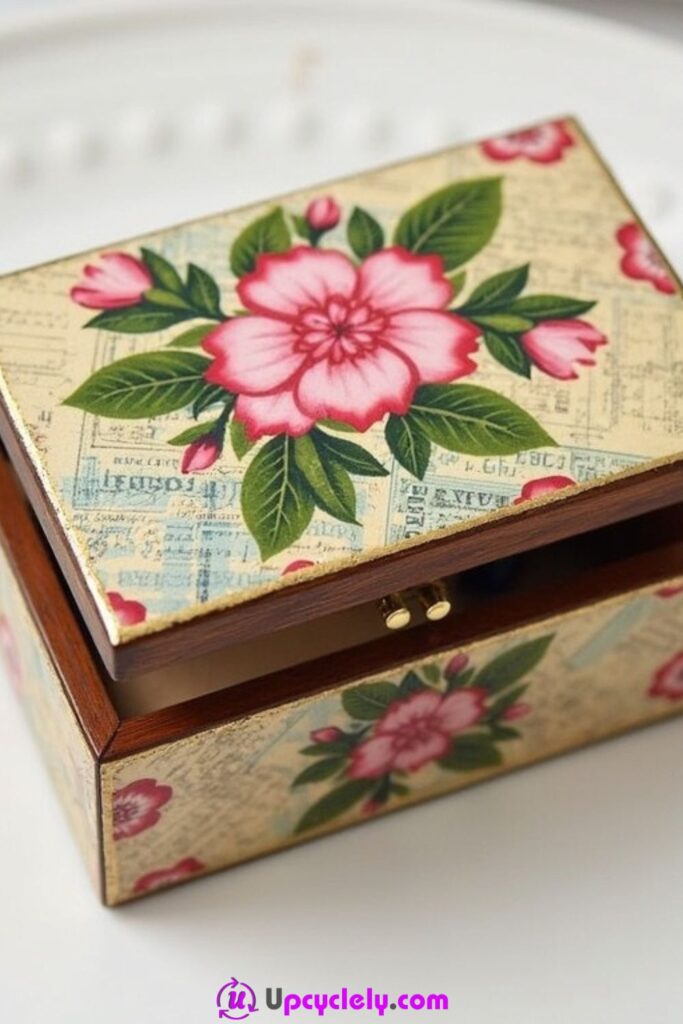
A small wooden jewelry box can hold a surprising amount of pattern because the lid, sides, and interior edges divide the surface naturally. Decoupage works well for disguising a scratched finish or coordinating a plain thrifted box with the colours already used in a room.
Hinges and lid clearances need special attention. Paper or thick coats built up along the back edge can make a box scrape or refuse to close. I would operate the lid several times before decorating and mark every moving or rubbing area to keep clear.
Materials and Tools
· Wooden or sturdy paperboard jewelry box in sound condition
· Decorative paper or napkin motifs
· Surface-compatible decoupage medium
· Soft flat and detail brushes
· Scissors and craft knife
· Fine sandpaper for rough wood if appropriate
· Wax paper for protecting the interior while working
Steps for This Decoupage Project
1. Check the box mechanism. Open and close the lid, inspect hinges, and repair loose hardware first. Clean the exterior and lightly smooth rough wood where needed. Keep the hinge line, latch, and any close-fitting lip free from paper buildup.
2. Plan the lid as the focal area. Choose the largest motif or paper panel for the top and decide whether the sides will repeat the same pattern or stay simpler. Dry-fit corner pieces so the design wraps cleanly without creating thick stacks.
3. Decorate one face at a time. Apply medium to the lid first and smooth the paper carefully. Let that side become stable before turning the box. Continue around the sides, trimming seams neatly and wiping accidental adhesive from the interior edge before it hardens.
4. Seal and test the closure. Add the compatible finishing coat, cure the box open, and then test the lid gently. If an edge rubs, do not force it; remove only the interfering paper or finish where safe to do so. Line the interior separately if desired after the exterior is complete.
The lid should still feel like a lid, not a test of upper-body strength. Keeping paper away from the hinge line saves a lot of frustration later.
Variation: Use one vintage illustration on the lid and plain painted sides, line the inside with leftover fabric, or create a patchwork only on the top panel for a simpler beginner version.
Decoupage Light Switch Covers
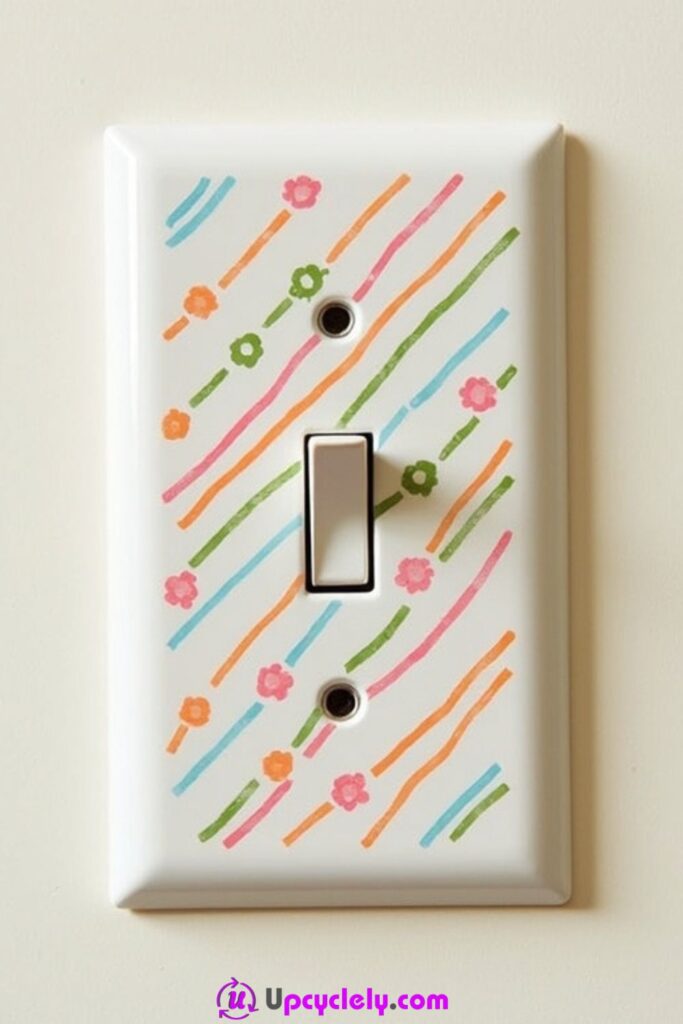
A removable switch plate is small enough for a single paper motif to make an obvious difference. Floral paper, maps, or a restrained geometric print can turn a plain cover into a detail that connects the wall with nearby décor.
Electrical safety comes before decoration. Work only on the removable cover, not on wiring or electrical components. Turn off power at the appropriate breaker before removing or reinstalling the plate, keep adhesive and paper away from switch openings and screw holes, and reinstall only when the cover is completely dry and structurally unchanged.
Materials and Tools
· Removable plastic or metal switch cover in good condition
· Thin decorative paper
· Decoupage medium compatible with the plate material
· Small flat brush
· Sharp craft knife and cutting mat
· Screwdriver suitable for the cover screws
· Pencil or awl for locating openings before trimming
Steps for This Decoupage Project
1. Remove the cover safely and inspect it. Switch off power at the correct breaker before loosening the plate and follow safe household electrical practice. Set the screws aside. Clean only the removed cover and do not alter, coat, or touch the wiring or electrical device behind it.
2. Cut the paper with generous openings. Lay the cover face-down on the paper and mark the outer edge, switch opening, and screw holes. Cut the main piece slightly oversized at the perimeter but keep the electrical openings clear. Dry-fit it before adhesive is involved.
3. Attach the paper to the face only. Apply a thin layer of compatible medium to the decorative face, smooth the paper in place, and wrap only a minimal amount around the outer edge if it will not interfere with installation. Trim openings neatly so no fibres extend toward the switch mechanism.
4. Cure fully and reinstall without forcing. Seal the front lightly, keep all holes open, and allow complete curing. Reinstall the cover flat against the wall with the power still off, ensuring it does not bind the switch or outlet. Restore power only after the cover is secure.
A switch plate is not the place to improvise with thick layers. The safest-looking result is also the neatest: paper only on the removable face, clear openings, and no material where the plate must sit flush.
Variation: Use a narrow border instead of full coverage, decoupage only a large blank plate in a child-free craft room, or match the paper to a nearby framed artwork for a subtle connection.
Decoupage Magazine Holders
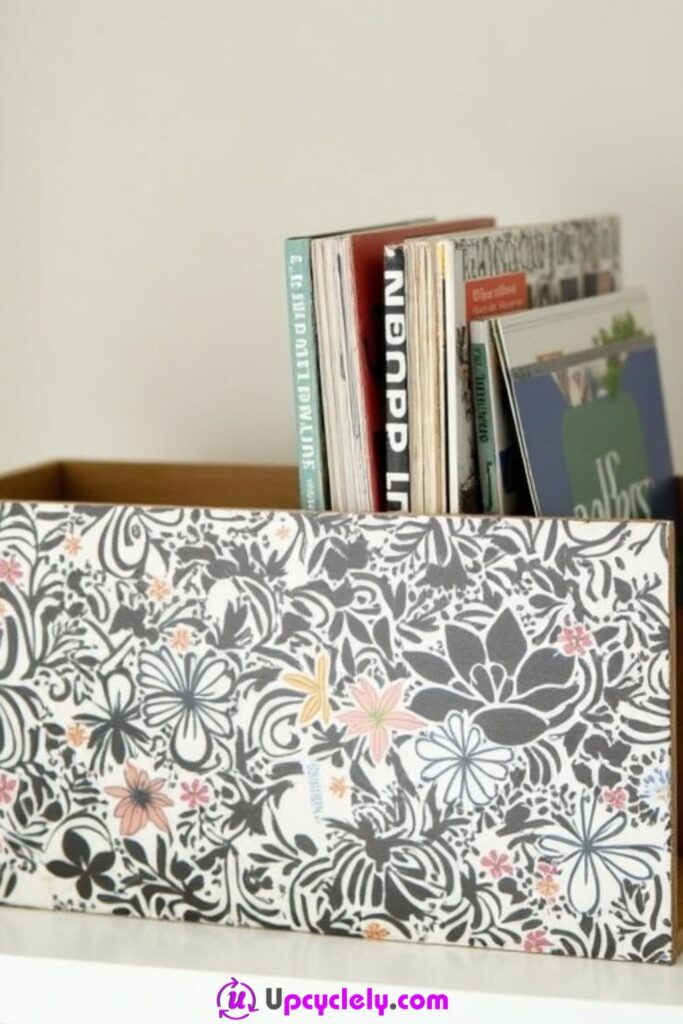
Cardboard magazine holders often remain useful long after their printed finish looks tired. Decoupage can cover branding, scuffs, and mismatched colours while turning several unrelated holders into one organized set.
Cardboard does not like excessive moisture. A heavy coat can soften edges and bow large panels, so the most reliable method uses thin adhesive layers and works one side at a time. Reinforce weak corners before decoration rather than expecting paper to hold the structure together.
Materials and Tools
· Sturdy cardboard or wood magazine holders
· Decorative paper large enough for side panels
· Paper-compatible decoupage medium
· Wide soft brush or foam applicator
· Scissors, ruler, and craft knife
· Clean card for smoothing
· Optional kraft paper strips for reinforcing interior corners
Steps for This Decoupage Project
1. Strengthen the holder first. Check the base and side seams, and repair loose cardboard with an appropriate structural adhesive before decorating. Let repairs dry fully. Flatten any lifting labels or remove them if they create ridges under the new paper.
2. Make panel templates. Trace each large side onto scrap paper so you can cut decorative panels accurately. Decide whether the pattern will wrap around corners or stop at clean seams. Keep the bottom largely undecorated if the holder slides frequently across a shelf.
3. Cover alternate sides. Apply a thin layer of medium to one side, position the paper, and smooth from the centre to the edges. Let that panel settle before working on the opposite side. This helps reduce warping and gives you a dry surface to hold.
4. Trim, seal, and label. Once every face is covered, trim stray fibres and add only a light compatible sealing coat. Let the holder cure square rather than leaning. Add a paper label frame or simple title strip after the main finish is stable.
With cardboard, more glue usually creates more problems, not more strength. I’d rather use a thin, even coat and keep the box crisp.
Variation: Cover only the visible spine panel, use old maps for office storage, or make a coordinated set with different patterns united by one repeated label colour.
Decoupage Mirrors
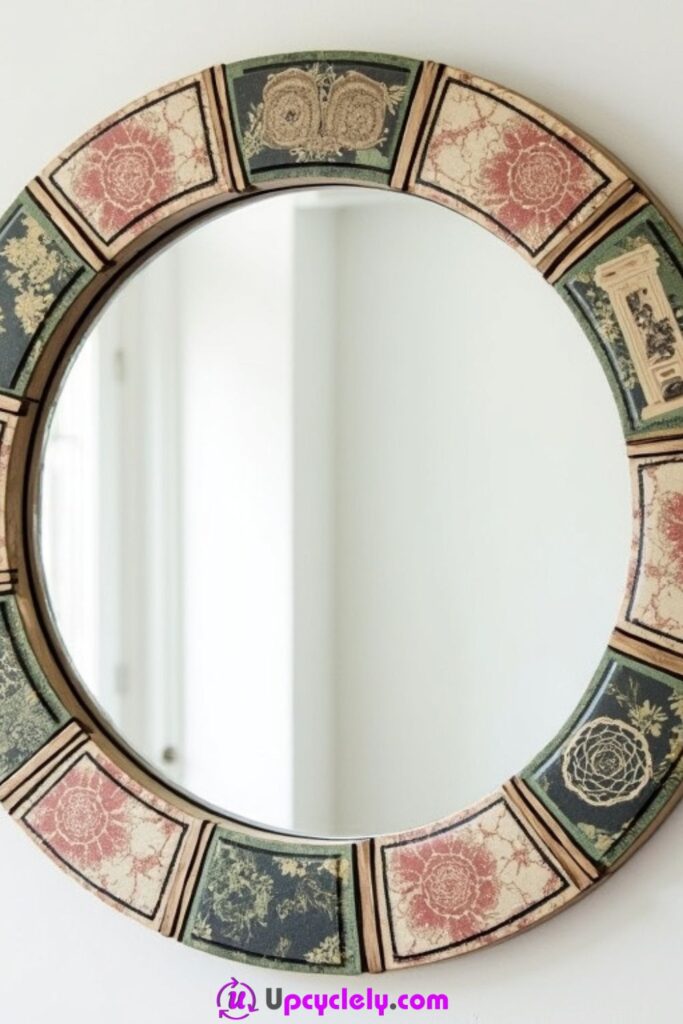
A plain mirror frame can carry pattern without changing the reflective surface itself. Small paper pieces are especially useful on ornate or narrow frames because they can follow corners and curves more easily than one large sheet.
Protecting the mirror glass is the main practical job. Decoupage medium can dry cloudy or leave stubborn residue, so I would mask the glass carefully and work with the frame laid flat whenever possible. Heavy mirrors also need their original hanging system left untouched unless it is professionally upgraded.
Materials and Tools
· Mirror with a sound wood, MDF, or suitable plastic frame
· Decorative paper or napkin pieces
· Frame-compatible decoupage medium
· Soft brush
· Low-tack masking material and protective paper for glass
· Scissors and craft knife
· Compatible topcoat if needed
Steps for This Decoupage Project
1. Protect the glass and check the frame. Lay the mirror face-up on a padded surface and cover the glass completely, leaving only the frame exposed. Tighten loose decorative trim if appropriate and make sure the existing hanging hardware remains secure and free from glue.
2. Plan the pattern around corners. Use smaller pieces where the frame changes direction and larger panels on straight sections. Dry-fit the pattern so strong motifs do not disappear beneath the glass edge or into the outer corner.
3. Apply paper while keeping the glass clean. Work one section at a time with a thin layer of medium. Smooth paper outward and remove accidental adhesive from the protected glass edge before it cures. Rotate your working position instead of dragging the mirror across the table.
4. Seal, unmask, and inspect the hanger. Apply the compatible finishing coat to the frame only and let it cure flat. Remove masking carefully, clean the glass, and confirm the hanging hardware has not been coated, loosened, or obstructed before returning the mirror to the wall.
For me, the most satisfying frame leaves a clean, sharp boundary around the glass. That little line of control makes even a loose patchwork pattern feel deliberate.
Variation: Decoupage only the inner border, use metallic-looking paper accents with old book pages, or create a soft botanical frame from torn napkin edges instead of full coverage.
Decoupage Notebooks
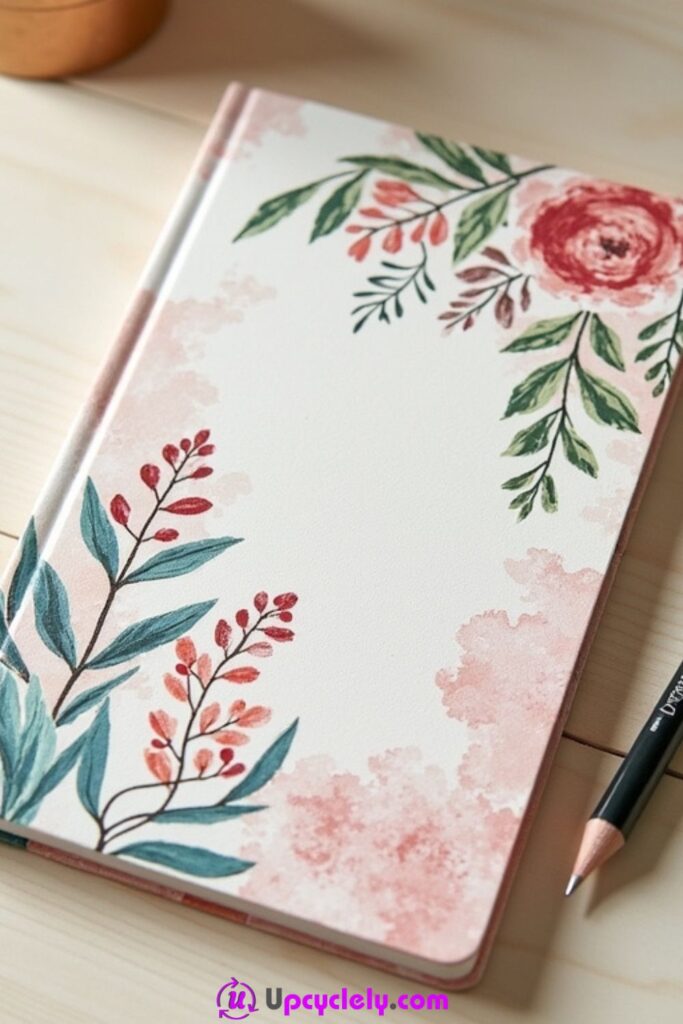
A plain notebook is one of the easiest everyday objects to refresh because the cover already acts like a flat panel. Old gift wrap, magazine cutouts, maps, and handmade paper scraps can hide scuffs or turn a basic notebook into something easier to recognize on a desk.
The hinge area needs room to move. Thick paper, layered seams, and heavy coating across the spine can crack or make the cover resist opening. I would decorate the front and back as separate panels and leave the working hinge relatively free.
Materials and Tools
· Hardcover or sturdy paperboard notebook
· Decorative paper, maps, wrapping scraps, or magazine cutouts
· Paper-compatible decoupage medium
· Wide soft brush
· Scissors, ruler, and craft knife
· Wax paper for protecting inner pages
· Optional paper label or title panel
Steps for This Decoupage Project
1. Protect the pages and test the hinge. Open the notebook and slide wax paper or scrap card beneath each cover so adhesive cannot reach the text block. Flex the cover gently and mark the true hinge line. Keep that narrow moving area free from thick paper buildup.
2. Cut front and back panels. Use the cover dimensions to make two paper panels, leaving either a clean border or a small amount to wrap to the inside. Position large motifs away from the edge that will be trimmed or hidden beneath a label.
3. Attach one cover at a time. Brush a thin coat of medium onto the front, place the paper from one side to the other, and smooth firmly. Let it settle before turning the notebook over and repeating the process. Avoid pressing wet adhesive against the pages.
4. Seal lightly and reopen the notebook. Apply only the finish needed for the chosen paper and medium. Once cured, open and close the book slowly to check the hinge. Trim any lifting corners and add a label or elastic band only if it does not interfere with the cover movement.
A notebook still has to be a notebook. If the decorated cover looks wonderful but fights you every time you open it, the paper has crossed the line from decoration into obstruction.
Variation: Use one map panel, combine three narrow paper strips, or create a collage from scraps saved from cards and packaging for a more obviously reused look.
Decoupage Pen Holders
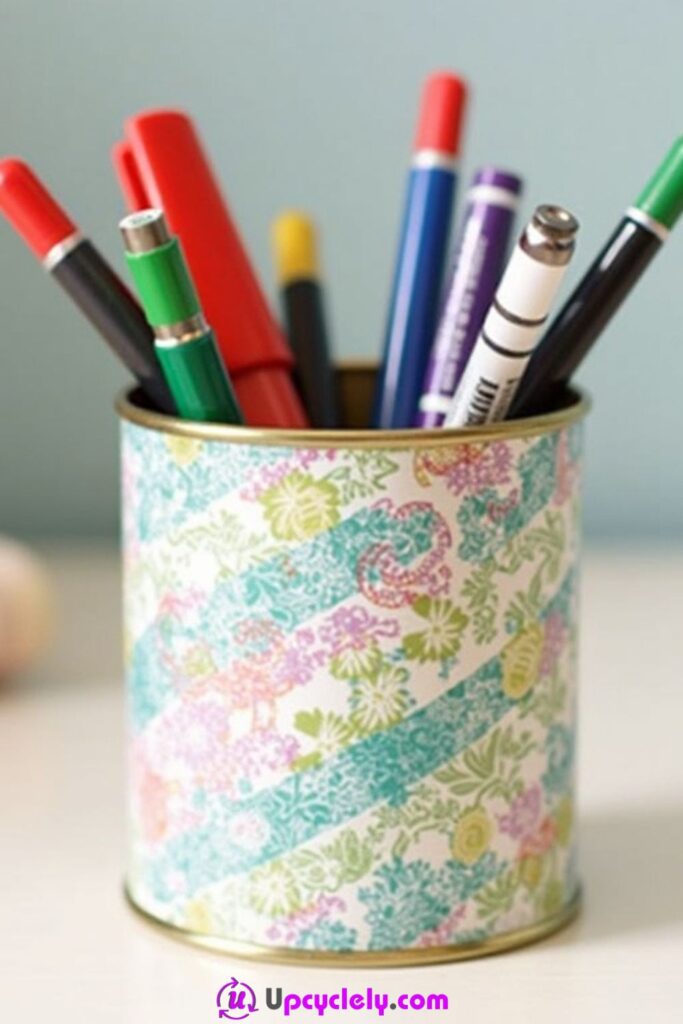
Tin cans and sturdy containers are natural candidates for pen holders, but their printed labels and sharp-looking industrial finishes do not always suit a desk. Decoupage softens the appearance while keeping the container’s useful shape.
Check the rim before doing anything decorative. A cut metal can should never be used if the edge remains sharp or unstable. Choose a container with a factory-finished safe rim, or use a different base. Paper is not a substitute for proper edge safety.
Materials and Tools
· Clean container with a smooth, safe rim
· Decorative paper or napkin motifs
· Surface-compatible decoupage medium
· Soft brush
· Scissors and ruler
· Fine sandpaper only for a suitable non-sharp surface when appropriate
· Felt or scrap card for an optional protective base
Steps for This Decoupage Project
1. Choose a safe, stable container. Inspect the rim and base carefully. Remove labels and grease, and confirm the holder will not tip when filled with pens. If the metal edge is sharp, choose another container rather than trying to hide it under paper.
2. Plan one clean seam. Measure the circumference with scrap paper and decide where the main seam will sit, ideally at the back. A single wrap works well on a straight cylinder; tapered containers are often easier with smaller overlapping pieces.
3. Apply and smooth the paper. Brush medium onto a manageable section, attach the paper, and work around the holder gradually. Keep the top rim clear so pens do not scrape against a thick paper edge. Press the bottom edge flat so the container sits level.
4. Seal and protect the desk surface. Finish with the compatible top layer and cure fully. Add a felt or reused card circle beneath the base if the metal might scratch a desk. Avoid soaking the holder during cleaning unless the finish specifically allows it.
The best pen holder is one you can actually reach into without catching your hand on an edge. I’d check that before choosing the paper pattern every time.
Variation: Use strips from old magazine covers, wrap only the lower half and leave metal visible above, or make several holders with related scraps for pens, brushes, and rulers.
Decoupage Wooden Spoons
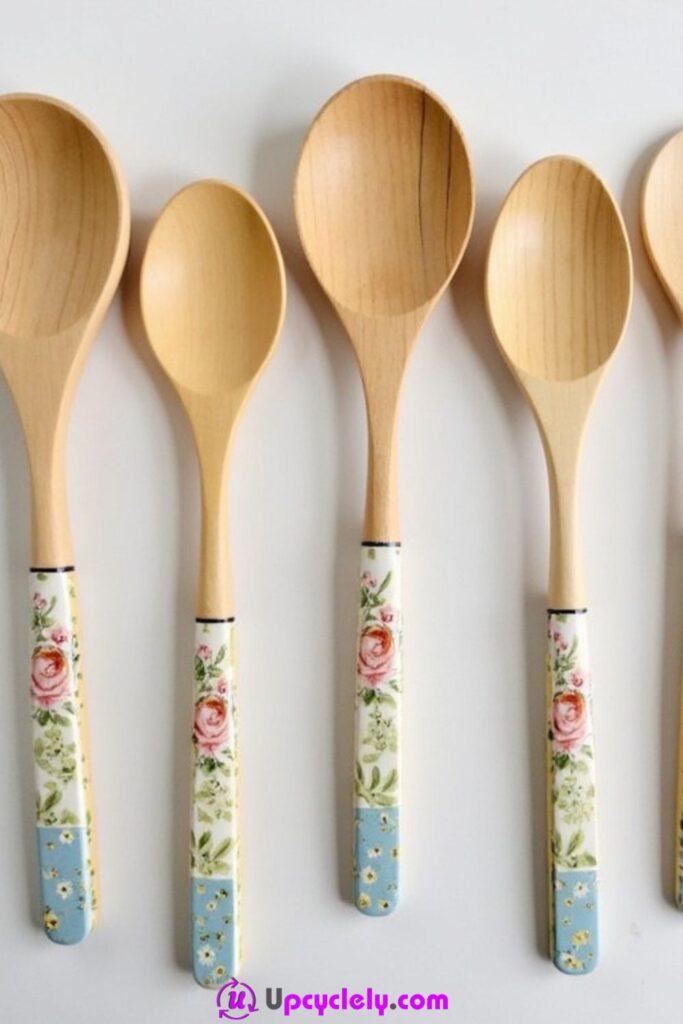
Wooden spoons are often used in decoupage inspiration because their handles create a long, narrow canvas. The safest way to approach the idea is as decorative kitchen wall art or display utensils, not as ordinary cooking spoons coated with craft paper and adhesive.
Heat, washing, abrasion, and food contact place demands on materials that typical decorative decoupage systems may not meet. I would keep paper and craft coatings completely away from the bowl and any area intended to touch food, and I would not use an altered spoon near a hot pan unless the entire finish system is specifically approved for that purpose.
Materials and Tools
· Retired or display-only wooden spoons in sound condition
· Thin decorative paper or napkin motifs
· Wood-compatible decoupage medium
· Small flat brush
· Fine scissors
· Fine sandpaper for rough display spoons if appropriate
· Twine or hanging hardware for display
Steps for This Decoupage Project
1. Decide on display use first. Choose spoons that will be removed from cooking service and clean them thoroughly. Sand rough handle areas if suitable, but do not try to rescue cracked or splintered utensils with adhesive. Keep the bowl and food-contact portion undecorated.
2. Plan a handle-only design. Cut narrow motifs that follow the handle shape and stop well before the bowl. If the spoon will hang, mark the top hole or hanger area so the paper does not obstruct it.
3. Attach paper without thick ridges. Apply a thin layer of medium to the handle, smooth the paper along the grain direction, and trim the sides neatly. Work around curves with small pieces rather than forcing one stiff strip to crease around the wood.
4. Seal for display and label the purpose. Use only the compatible decorative finish and let it cure fully. Add a hanging loop if desired. Keep the altered spoon as décor rather than returning it to food preparation unless every material and use condition is explicitly approved.
I like this idea far more as wall décor than as a cooking experiment. A retired spoon can still be useful visually without having to survive soup, steam, and the sink.
Variation: Group three old spoons with related botanical handles, decoupage only one side for a lighter look, or combine paper with a painted handle section while leaving the bowl natural.
Decoupage Shoe Boxes
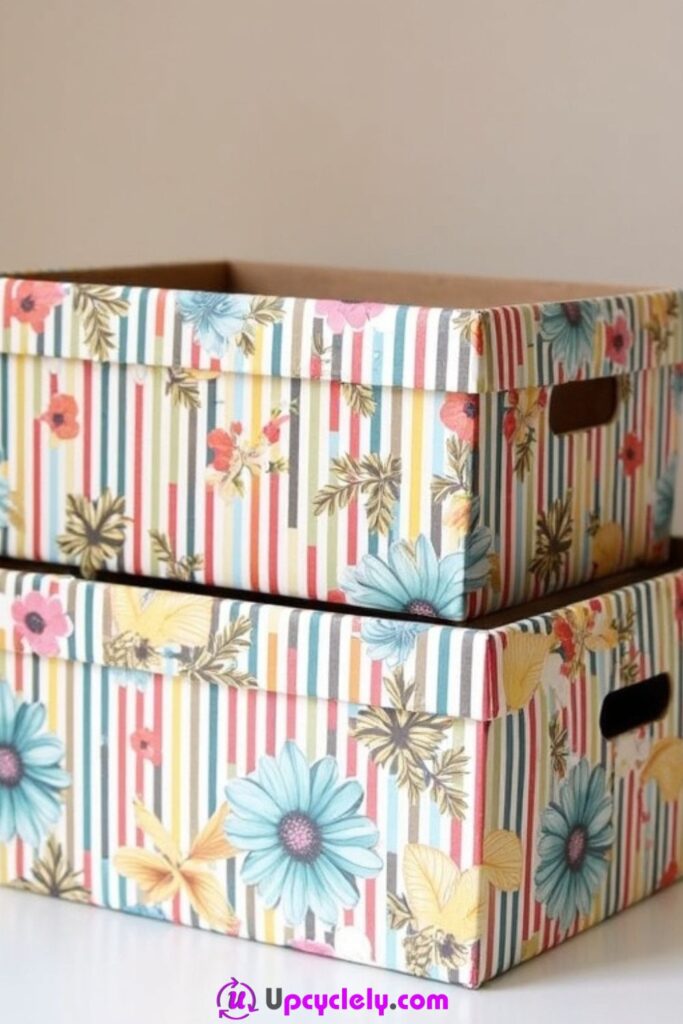
A sturdy shoe box already provides useful storage, so decoupage can focus on making it easier to keep in view. Covering old branding, reinforcing a visual theme, and adding a clear label can turn a temporary-looking box into practical shelf storage.
The lid still needs to slide or lift properly. Paper wrapped too far over the lip can make the fit tight, while wet adhesive can soften cardboard. I would decorate the lid and base as separate objects and test the fit after every major layer.
Materials and Tools
· Strong shoe box with intact corners and lid
· Decorative paper or reused gift wrap
· Paper-compatible decoupage medium
· Wide soft brush
· Scissors, ruler, and craft knife
· Clean card or brayer for smoothing
· Label card and optional fabric pull tab
Steps for This Decoupage Project
1. Repair the box before covering it. Reinforce loose corners from the inside and let repairs dry. Remove bulky labels or tape that would show as ridges. Check that the lid fits comfortably before adding any paper.
2. Cut separate panels for lid and base. Measure each face and decide where seams will fall. Wrap paper only as far around the lid edges as the fit allows. Keep the lower box lip relatively thin so the lid can still move without scraping.
3. Apply paper one panel at a time. Use a thin coat of medium and smooth each panel from the centre outward. Let opposite faces settle before continuing. Keep the box square while drying so softened cardboard does not take on a twist.
4. Seal lightly and test the lid. Once the decorative paper is stable, add the compatible finishing coat and cure the two parts separately. Test the fit without forcing. Add a label or handle only after you know the lid opens easily.
A storage box should not require negotiation every time you open it. I always leave a little breathing room around the lid rather than wrapping every edge just because I can.
Variation: Use map pages for travel keepsakes, old wrapping paper for seasonal storage, or one patterned lid with plain painted sides for a faster project.
Decoupage Tissue Box Cover
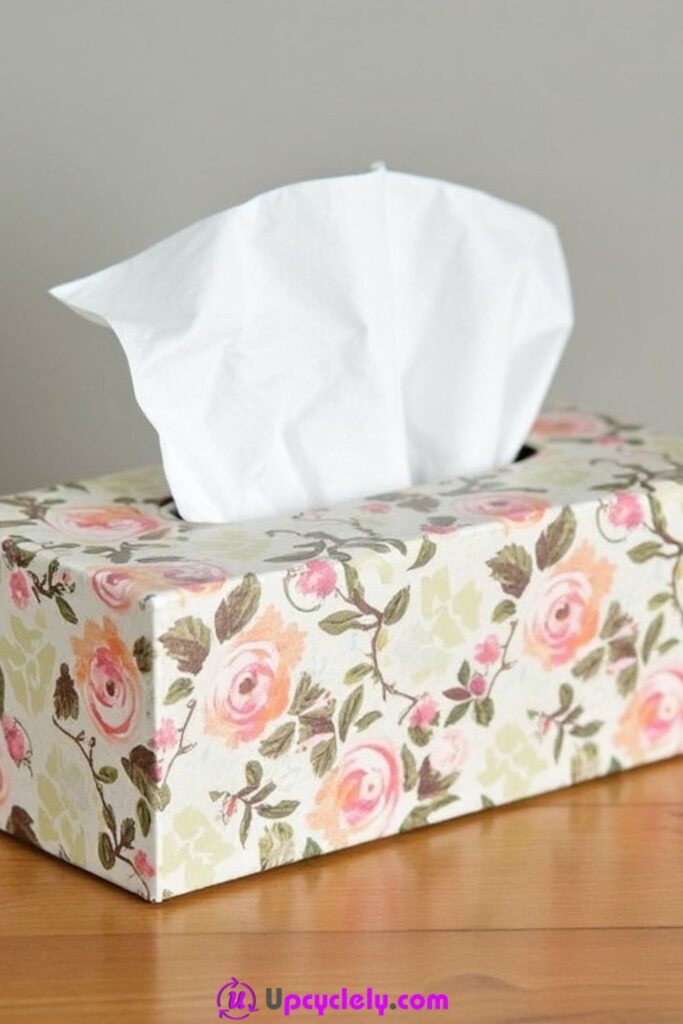
A reusable tissue box cover is a good decoupage base because it stays on display while the disposable carton inside changes. Wood, MDF, or sturdy craft covers can be refreshed with paper that coordinates with a bathroom, bedroom, or desk area.
The opening at the top gets handled repeatedly, so paper edges there need to be neat and well secured. I would keep motifs slightly back from the opening or wrap them cleanly underneath where the construction allows, rather than leaving a fragile cut edge exactly where tissues rub against it.
Materials and Tools
· Reusable tissue box cover in wood, MDF, or another suitable rigid material
· Decorative paper or napkin motifs
· Compatible decoupage medium
· Soft brush
· Scissors and craft knife
· Fine sandpaper for rough wood where appropriate
· Compatible protective finish if needed
Steps for This Decoupage Project
1. Check the cover and tissue opening. Make sure the cover fits over a standard box and lifts off easily. Clean the surface and smooth rough wood if appropriate. Trace the top opening before decorating so you always know where the cut edge must remain clear.
2. Plan the top panel first. Arrange paper around the opening and decide whether the pattern will continue down the sides. Use smaller pieces near the curved opening because they are easier to trim cleanly than one large sheet.
3. Attach paper from top to sides. Apply a thin layer of medium, smooth the top pieces into place, and trim the opening while the paper is stable enough to cut cleanly. Continue down the sides, keeping seams away from the most visible front edge where possible.
4. Seal and test normal use. Finish with the compatible protective layer and let the cover cure fully. Insert a tissue box, pull several tissues through, and check that no paper edge catches. Trim or reseal any vulnerable spot before daily use.
The opening is the part I would inspect with my fingertips, not just my eyes. A tiny rough paper edge becomes much more noticeable after the tenth tissue passes over it.
Variation: Use one large botanical motif on the front, cover only the top panel, or combine neutral paper with a narrow patterned border for a calmer room.
Decoupage Trays
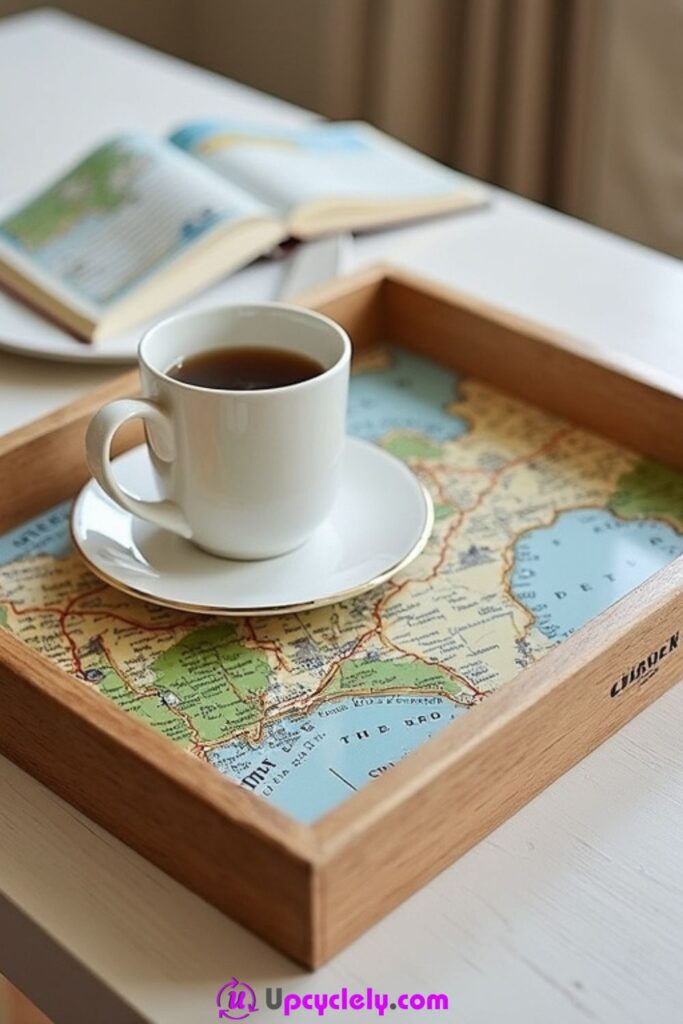
A tray offers a generous flat base for decoupage, which makes it ideal for maps, larger floral papers, or collages built from several scraps. An old wooden tray with a scratched centre can often keep its useful handles and frame while the inner panel gets a completely different surface.
Think about what the tray will carry. Decorative craft finishes should not automatically be treated as food-safe or heat-resistant. I would use a decoupaged tray for wrapped items, stationery, toiletries, or decorative display unless the complete finish system is specifically approved for direct food contact and the intended cleaning method.
Materials and Tools
· Sound wood, MDF, or suitable rigid tray
· Decorative paper, map, or collage scraps
· Surface-compatible decoupage medium
· Wide soft brush
· Ruler, scissors, and craft knife
· Smooth card or brayer
· Compatible protective topcoat for the intended decorative use
Steps for This Decoupage Project
1. Repair and clean the tray. Tighten loose handles or joints before decorating and clean the base thoroughly. If the centre has rough scratches, smooth them as appropriate to the material. Decide whether paper will stay inside the flat well or continue up the sides.
2. Make an accurate paper template. Trace the base onto scrap paper and test the fit around curved corners. For a collage, arrange larger pieces first and keep thick overlaps away from the perimeter where they are more likely to catch.
3. Lay the design from one side across. Apply a thin, even layer of medium and position the paper gradually, using a clean smoothing sheet to press out air. Large panels need calm handling; lifting and repositioning them repeatedly usually creates more wrinkles than it solves.
4. Protect and assign a sensible use. Add the compatible finishing system and allow full curing before placing objects on the tray. Keep hot cookware, wet food, and prolonged standing water away unless the selected product system explicitly supports those conditions.
A tray is one of those projects where the paper can be the star. I’d keep the handles and outer frame relatively quiet if the centre already has a strong map or floral pattern.
Variation: Use a map tied to a favourite place, collage old recipe-card copies for display-only kitchen décor, or cover only one end of the tray for an asymmetrical look.
Decoupage Wall Art
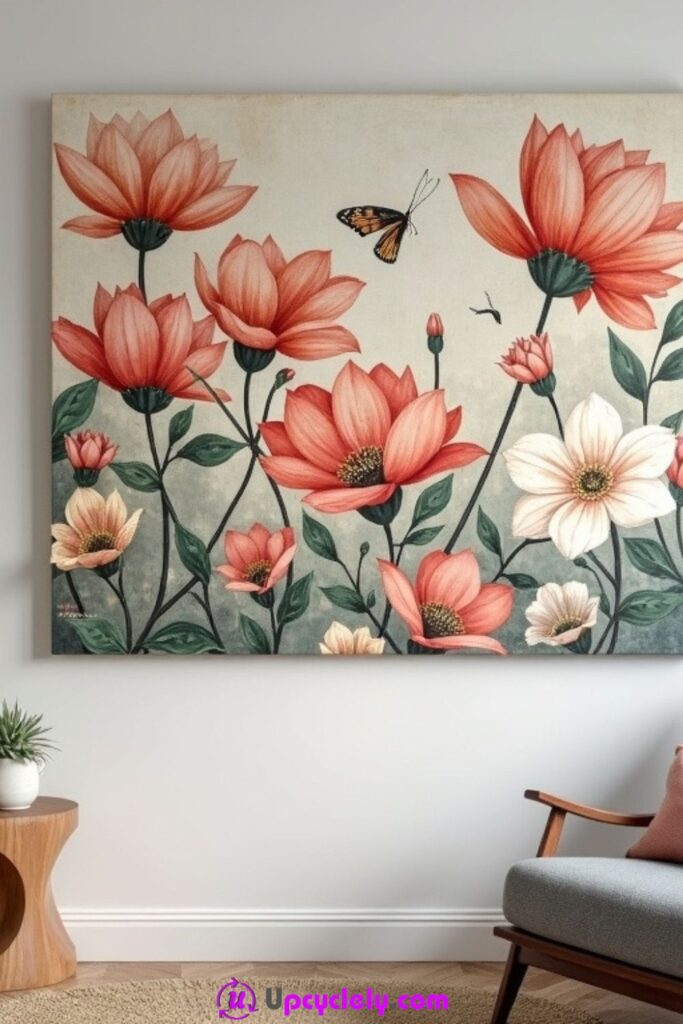
Wall art removes many of the wear problems found in functional decoupage objects, which gives you more freedom with thin paper, uneven torn edges, and layered collage. An old canvas, wood offcut, rigid board, or shallow frame backing can all become a base for paper that might be too fragile elsewhere.
The challenge is composition rather than durability. Too many equally strong motifs can make the surface feel noisy, so I would choose one focal area and let some of the base remain visible. A reused panel with marks or old paint can even become part of the background instead of being hidden completely.
Materials and Tools
· Rigid canvas, wood panel, board, or reused frame backing
· Paper scraps, book pages, tissue, maps, or printed motifs
· Compatible decoupage medium
· Wide and small soft brushes
· Scissors or tearing tools
· Pencil and scrap paper for composition planning
· Hanging hardware appropriate to the finished weight
Steps for This Decoupage Project
1. Prepare a sound hanging base. Check that the panel is flat and structurally suitable for hanging. Clean loose dust and stabilize peeling paint if necessary. Plan the hanging method before decorating so you do not later drill through finished paper.
2. Build the composition without glue. Lay out the largest shapes first, then smaller connecting pieces. Take a quick photo of the arrangement if helpful. Leave some quiet areas and decide where the eye should land first rather than spreading equal detail across the whole surface.
3. Attach from background to foreground. Begin with larger background papers and apply medium in thin layers. Add smaller motifs after the first layer is stable. Overlap edges intentionally and smooth only enough to secure them; a little paper texture can suit wall art better than a glass-flat finish.
4. Seal selectively and hang securely. Apply a compatible finishing coat where needed, then cure the panel flat. Attach or check the hanging hardware and make sure the wall fixing suits the finished weight. Keep moisture-sensitive paper away from damp locations unless the system is designed for them.
Wall art is where I’m happiest leaving torn edges visible. They remind you that the piece came from paper rather than trying to imitate a printed poster.
Variation: Create a monochrome book-page collage, layer botanical tissue over an old painted panel, or make a triptych from three small offcuts instead of one large piece.
Decoupage Wall Clocks
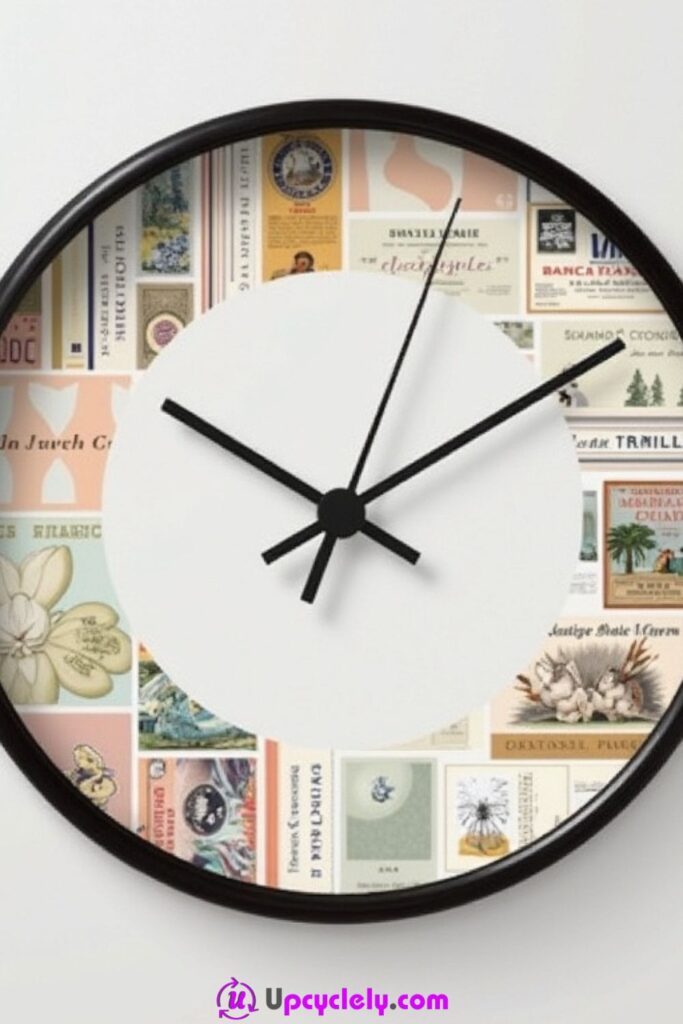
A plain clock face can become a useful display surface without changing the clock’s basic function. Maps, vintage-style paper, and subtle patterns work particularly well because the circular face naturally frames the design.
The hands and mechanism need absolute freedom to move. Paper, adhesive, or finish built up around the centre shaft can stop the clock or make the hands rub. I would remove the movement components carefully, decorate only the removable face where possible, and keep the central opening crisp and clear.
Materials and Tools
· Clock with a removable face or suitable craft clock blank
· Decorative paper or map
· Decoupage medium compatible with the clock face
· Soft brush
· Scissors, craft knife, and cutting mat
· Small screwdriver or tool required by the clock design
· Ruler and pencil for locating the centre and number positions
Steps for This Decoupage Project
1. Disassemble only what the clock design allows. Remove the battery and take off the hands and face according to the clock’s construction, keeping small parts in order. Do not coat the motor, shaft, battery compartment, or wiring. Clean the decorative face only.
2. Cut the paper and locate the centre. Trace the clock face, cut the paper accurately, and mark the centre shaft opening. Dry-fit it with the number positions visible. If the pattern is directional, stand back and check that it will appear upright on the wall.
3. Attach without blocking the mechanism. Apply a thin layer of medium to the face, place the paper, and smooth outward. Trim the centre opening cleanly and keep glue away from the shaft area and edges that fit into the clock case.
4. Seal, reassemble, and test. Finish the decorative face lightly, allow complete curing, and reinstall it with the hands in their correct order. Confirm the hands do not touch each other or the paper surface, then insert the battery and test the clock before hanging it.
The clock still has one important job: telling time. I’d sacrifice a tiny piece of pattern around the centre long before I let a paper edge interfere with the hands.
Variation: Use a travel map, old sheet music, or a quiet neutral paper and add only simple number markers. A beginner can decoupage just the outer ring and leave the mechanism area untouched.
Decoupage Wallet or Purse
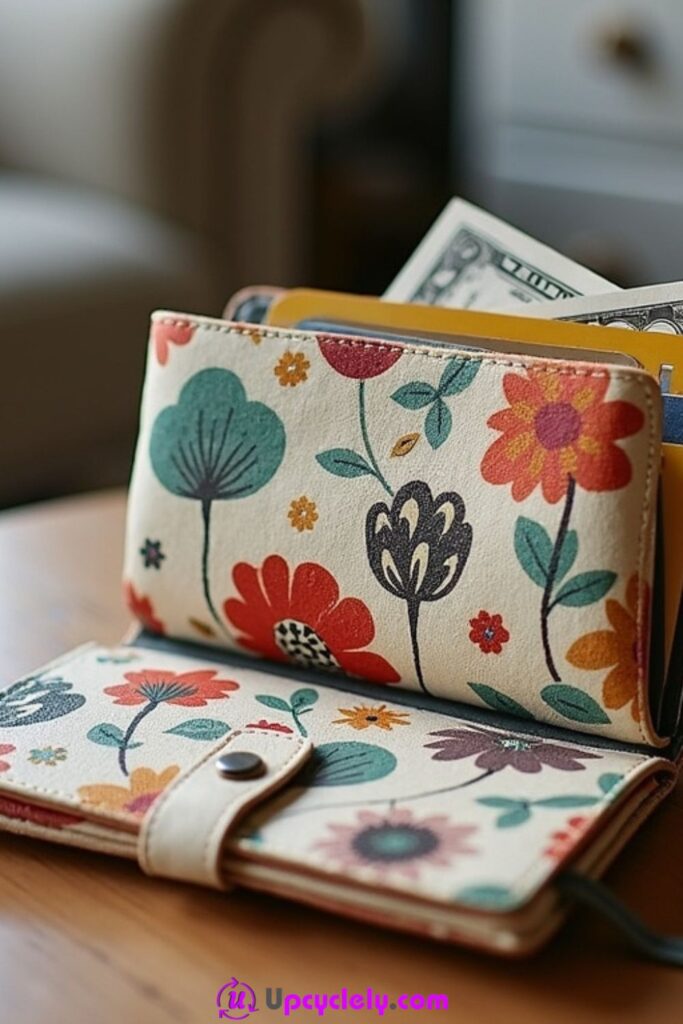
A wallet or purse is one of the most demanding decoupage bases because it bends, folds, rubs against clothing, and gets handled repeatedly. That means the decorative idea needs to suit the material rather than simply borrowing a method that works on a rigid box.
Flexible fabric or textile-specific decoupage systems are a better starting point than a stiff general-purpose coating. Leather, coated faux leather, and specialty synthetics can react unpredictably to water-based products or surface preparation, so test a hidden area and avoid valuable bags. I would begin with a thrifted or already-worn piece whose loss would not matter if the experiment fails.
Materials and Tools
· Plain fabric purse, canvas pouch, or low-value test wallet suitable for the chosen medium
· Thin fabric motifs, napkin pieces, or flexible decorative paper
· Decoupage medium specifically intended for the base material and flexibility required
· Soft brush
· Sharp small scissors
· Masking material for zippers, snaps, and hardware
· Clean stuffing or form to support the bag while working
Steps for This Decoupage Project
1. Test the material before committing. Clean the item according to its material and test a tiny hidden spot with the intended medium. Check for colour change, stickiness, stiffness, or poor adhesion. Protect zippers, snaps, seams, and any manufacturer hardware from glue.
2. Choose low-stress decorative zones. Flex the wallet or purse and identify fold lines, corners, and areas that rub most often. Place larger motifs on flatter panels and use smaller pieces near curves. Avoid covering seams that need to move or be repaired later.
3. Attach in thin flexible layers. Support the bag with clean stuffing and work on one panel at a time. Apply the medium sparingly, press the motif smoothly, and keep edges flat. Let each area stabilize before turning or bending the item.
4. Finish, cure, and reassess flexibility. Use only the finishing method specified for the flexible system and let it cure fully. Remove masking, open every zipper and closure, and flex the item gently. If the coating cracks or becomes tacky, stop using it as an everyday bag and repurpose it as decorative storage instead.
This is the project where I would test first and decorate second. A purse spends its life bending and rubbing against things, so a pretty finish has to coexist with movement.
Variation: Decorate only a front pocket, use fabric motifs on a canvas pouch, or add one narrow botanical strip to a thrifted clutch rather than covering the entire surface.
Decoupage Decisions That Can Cause Wrinkles, Lifting Edges, or Unsafe Use
Decoupage usually fails for practical reasons rather than artistic ones. Paper can look perfectly placed while it is wet and still lift later if the base was dirty, the adhesive layer was too heavy, or the finished object is asked to tolerate heat, water, bending, or food contact that the craft system was never designed to handle. These are the choices I would check before calling a project finished.
Decorating Before Cleaning the Base
Dust, grease, wax, label residue, and skin oils create weak spots under adhesive. Clean the material in a way that suits the base, let it dry fully, and handle the prepared area as little as possible before applying paper.
Using Too Much Medium Under Thin Paper
A flooded layer makes tissue stretch and creates pools that dry unevenly. Use a thin, even coat and work in manageable sections. If the paper begins to soften, stop brushing it and let the area settle.
Chasing Every Tiny Wrinkle
Repeated smoothing can tear wet fibres or push adhesive into ridges. Decide whether the project truly needs a glass-flat finish. On curved ornaments, jars, and textured wall art, a small amount of paper character often looks more natural than an overworked surface.
Ignoring Moving Parts and Tight Clearances
Hinges, lids, clock shafts, zippers, switch openings, and drawer-handle screws all need space to function. Dry-fit the object before decorating and keep paper away from areas that rub, rotate, close, or fit tightly together.
Assuming Decorative Coatings Are Food-Safe or Heat-Safe
Ordinary decoupage materials should not be treated as suitable for food contact, cookware, flames, or hot surfaces. Keep altered spoons decorative, use LED lights in paper-decorated holders, and choose tray uses that match the verified finish system.
Wrapping Weak Cardboard in Wet Layers
Paper cannot repair a collapsing shoe box or magazine holder, and excessive moisture may make it worse. Reinforce the structure first and apply thin layers to one panel at a time so the box stays square.
Covering Flexible Items With a Rigid System
Shoes, wallets, and purses bend during normal use. A stiff coating may crack even if it looked smooth at first. Match the medium to the base material, test a hidden area, and keep larger motifs away from deep flex points.
Rushing the Reassembly Stage
A clock face, switch plate, frame, box lid, or hardware set should not be put back together while the finish is soft. Let the project cure according to the product instructions, then reassemble carefully so pressure does not mark or tear the decorated surface.
Leaving Vulnerable Paper Edges Exposed
Corners, rims, tray perimeters, coaster edges, and notebook covers receive repeated handling. Trim paper cleanly, keep thick seams away from high-wear locations, and seal only with a compatible finish rather than trying to hide rough edges under more glue.
Adding Decoration Until the Base Disappears
Decoupage does not need to cover everything. Empty glass, visible wood, painted borders, and plain background areas can make a pattern easier to read. Stop once the composition feels balanced instead of filling every remaining gap.
Frequently Asked Questions
What paper is easiest for beginner decoupage?
Medium-weight decorative paper is usually easier to position than very thin tissue because it does not tear as quickly when damp. Napkins can create softer edges, but they need a lighter touch and more patience. Always test a scrap with your chosen medium first.
Do I need to sand every surface before decoupage?
No. Sanding is useful only when it suits the material and solves a real surface problem such as rough wood or a finish that the selected system specifically requires you to key. Glass, many plastics, coated fabrics, and finished objects may need a different preparation method, so follow the material and product guidance.
How can I reduce wrinkles in decoupage paper?
Use a thin adhesive layer, place the paper gradually, and smooth from the centre toward the edges through a clean protective sheet when practical. Large sheets are harder to control on curves, so smaller pieces or torn motifs may give a cleaner result.
Can decoupage projects be washed?
That depends entirely on the base, medium, protective finish, and curing instructions. Many decorative projects are better wiped gently rather than soaked or put in a dishwasher. Do not assume a clear topcoat makes an altered object waterproof.
Can I decoupage items that touch food?
Only when the complete material system is specifically approved for that exact food-contact use. Ordinary craft paper, adhesive, paint, and decorative sealers should not be assumed food-safe. For projects such as wooden spoons and trays, decorative or non-contact uses are the safer default.
What should I do if an edge starts lifting?
Do not pull at it. If the system is still repairable, place a tiny amount of compatible medium beneath the loose edge, press it flat, and allow it to stabilize before applying any top layer. If moisture or repeated movement caused the failure, also reconsider how the object is being used.
Can I decoupage flexible items such as shoes or purses?
Yes, but only with materials intended to flex with the base. Test a hidden area first, use small motifs near bend points, and avoid stiff coatings on surfaces that fold sharply. A decorative result that cracks when the object moves is a sign that the system and base were not well matched.
Let Paper and Everyday Objects Work Together Again
Decoupage works best when the paper respects the object underneath it. A jar can keep some clear glass, a frame can leave its inner edge crisp, and a box can stay easy to open. Those practical decisions matter just as much as choosing a floral print, vintage map, or stack of colourful scraps.
These 22 decoupage craft ideas are also a useful reminder that small leftovers do not have to become waste. A narrow strip can finish a bookmark, a tiny motif can refresh a drawer pull, and a larger sheet can turn a scratched tray or storage box into something worth keeping in sight. I’d begin with one sturdy object and a paper scrap you already have, then test the materials before covering anything important.
The nicest result is not necessarily the one with the most paper. It is the one that still opens, bends, hangs, stores, or displays exactly as it should after the decoration is finished. Which everyday object would you be most tempted to decoupage first?