Birthday cards are small objects, but they carry a surprising amount of personality. A folded piece of card can hold paint, paper scraps, buttons, fingerprints, old ribbon, leftover tape, or a few lines drawn by hand, and suddenly it feels far more thoughtful than something pulled from a multipack. I’m Stella Eve Louise, and the part I enjoy most about handmade cards is that the materials do not need to be expensive or perfectly matched. In fact, many of the nicest details come from using what is already sitting in a drawer.
That makes birthday card making a natural place for mindful crafting. A strip of patterned paper too narrow for another project can become a banner. Odd buttons can turn into flowers. Tiny colored scraps can become confetti. Even a plain kraft card has enough warmth to carry a good handwritten message. The aim is not to make every card look professionally printed. It is to create something balanced, practical, and personal enough that the recipient can tell time and thought went into it.
Choose a Card Base That Suits the Technique
The base has to support whatever you add to it. Paint, buttons, tape, and layered paper all behave differently, so choosing the card first prevents problems later.
· Use heavier cardstock for watercolor, buttons, layered paper, or raised embellishments.
· Choose smoother card when stamping or writing with fine pens so the lines stay crisp.
· Use kraft or recycled packaging card only when it is clean, flat, and strong enough to fold without cracking.
· Check that the finished card will still fit the envelope after adding dimensional pieces.
· If the front will become heavy, add a plain insert inside to balance the structure and provide an easy writing surface.
· Keep one scrap of the same card nearby for testing ink, paint, glue, and tape before working on the final piece.
Gather Reusable Materials Before Buying Anything New
Birthday cards are ideal for using small leftovers because most decorative pieces are tiny. Before buying a fresh pack of supplies, I’d look through the scraps you already have and build the design around those.
· Save narrow paper strips for banners, candles, borders, and small labels.
· Use odd buttons, short embroidery-thread pieces, and ribbon offcuts as tactile details.
· Punch confetti from paper scraps that are too small for larger shapes.
· Reuse clean acetate from packaging for shaker windows or protected panels.
· Keep old gift bags, envelopes, and wrapping paper for patterned inserts and pocket cards.
· Choose only the materials that support the design; using leftovers does not mean every leftover must appear on the same card.
Plan the Front Before You Glue, Stamp, or Paint
Most card-making problems happen because the permanent step starts too early. A thirty-second dry layout can save the whole front from becoming crowded, crooked, or difficult to read.
· Place the main greeting first so you know how much space the decoration can use.
· Arrange buttons, paper shapes, and banner pieces without glue before attaching them.
· Test stamps and fingerprint ink on scrap paper to judge pressure and color strength.
· Lightly sketch painted or doodled designs when placement matters, then erase only after the final medium is dry.
· Check contrast: the birthday message should remain readable against patterned or colorful backgrounds.
· Step back from the card before adding the last embellishment. If it already feels finished, stop there.
Fingerprint Balloon Card
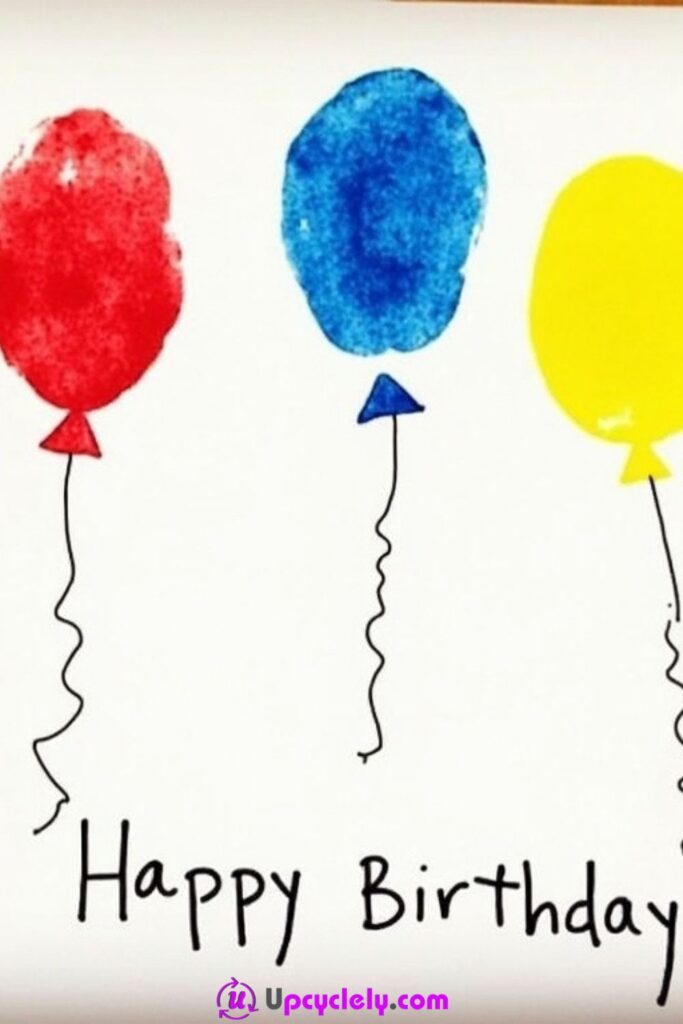
Fingerprint balloons work because the handmade mark is the decoration. You do not need perfect circles, expensive stamps, or a cutting machine. Each print has a slightly different edge, and that variation makes the balloons feel lively rather than mass-produced. A white or pale card base gives the colors enough space to stand out, while fine black strings keep the design visually light.
This is also a useful way to work with ink pads that are already in a craft drawer. If you have small leftover pads from stamping projects, even better. I’d choose three or four colors that sit comfortably together rather than using every shade you own. The finished card can suit children, friends, coworkers, or anyone who appreciates something simple and personal without too much decoration.
Materials and Tools
· Blank white or pale cardstock
· Washable ink pads in a few colors
· Fine black pen or marker
· Scrap paper for test prints
· Pencil and eraser for light placement marks
· Wet cloth or wipes for cleaning fingers
Steps
1. Prepare the card and test the ink. Fold the cardstock neatly and press the crease with a ruler or the back of a spoon. Test each ink color on scrap paper first, because some pads stamp more strongly than others. I know it can feel tempting to go straight onto the card, but one quick test helps you judge how much pressure to use and prevents the first balloon from becoming an accidental ink blob.
2. Plan the balloon cluster. Lightly mark a few tiny pencil dots where you want the balloon centers to sit. Keep the group slightly irregular rather than arranging every print in a rigid row. Then press a clean fingertip into the first ink pad and stamp it onto the card with steady pressure, lifting straight up so the edge stays as clean as possible.
3. Build color without crowding the front. Clean your fingertip between colors and continue stamping until the cluster feels balanced. Leave enough white space around the balloons for the strings and greeting. If one print is much darker than the others, repeat that color elsewhere in the group so it looks intentional rather than like a single heavy mark.
4. Draw the strings and finish the greeting. Use a fine black pen to add a small knot under each balloon and draw loose strings downward. Let a few strings cross naturally, but do not make the lower half too busy. Add a handwritten birthday message underneath or inside the card, then erase any visible pencil guides once the ink is completely dry.
For me, the best version keeps the fingerprint texture visible. I don’t think outlining every balloon is necessary; the tiny irregularities are what make the design feel warm and handmade.
Variations and Alternatives
· Use thumbprints for larger balloons and little-finger prints for smaller ones.
· Swap ink pads for washable poster paint applied very lightly.
· Create a monochrome version with several shades of one color.
· Turn the balloons into a number shape for a milestone birthday.
Button-Bouquet Card

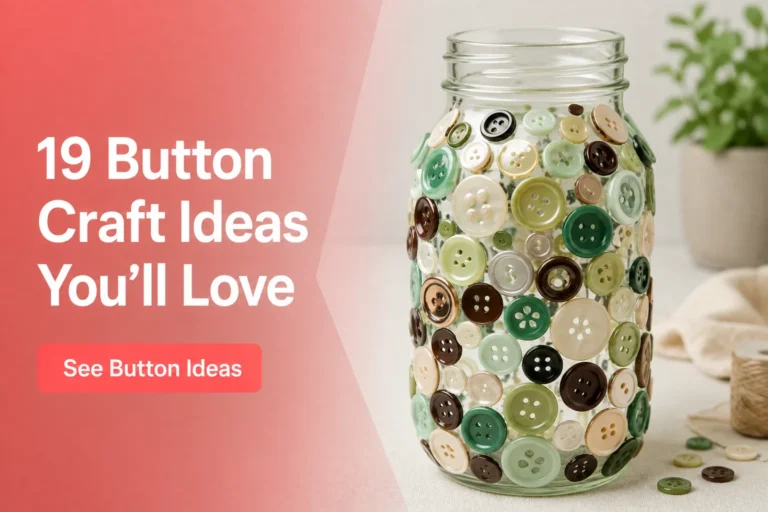
A button bouquet is especially satisfying if your sewing box has a collection of odd buttons that no longer match anything. Instead of waiting for the exact garment that needs them, you can use the mix of sizes and colors as flower heads. The buttons provide dimension without requiring complicated paper construction, and a few drawn stems are enough to connect them into one coherent arrangement.
The practical challenge is weight. A card covered in thick buttons can become top-heavy and difficult to post, so restraint matters. I’d use the flattest buttons for most of the bouquet and save one or two chunkier pieces for the center. A cream or kraft-toned background softens bright plastic buttons, while a crisp white card gives a cleaner, more modern result.
Materials and Tools
· Blank cardstock
· Assorted spare buttons
· Strong craft glue suitable for paper and buttons
· Green fine-tip marker or paint pen
· Small scraps of green paper for optional leaves
· Scissors
· Scrap card for testing the layout
Steps
1. Sort the buttons before gluing. Spread the buttons on the table and group them roughly by size and color. Choose a mix that gives you variety without looking chaotic. Place the largest button near the center of the planned bouquet, then arrange smaller buttons around it until the shape feels rounded but not perfectly symmetrical.
2. Transfer the arrangement to the card. Fold your cardstock and lightly mark where the bouquet will sit. Move the button arrangement onto the card one piece at a time, keeping the spacing close enough that the buttons read as flowers rather than scattered dots. Do not glue yet; this dry layout is your chance to remove any color that feels too dominant.
3. Glue the flower heads securely. Lift each button, add a small amount of strong craft glue, and return it to the same position. Too much glue can squeeze through the button holes and leave shiny marks, so use less than you think you need. Then leave the card flat until the buttons are fully secure rather than checking them every two minutes—patience is doing most of the work here.
4. Add stems, leaves, and a simple message. Draw thin green stems from the buttons toward a shared point near the bottom of the bouquet. Add a couple of paper leaves or draw them directly onto the card. Finish with a short birthday greeting that does not compete with the button texture, and check that the card still opens and closes comfortably before packaging it.
One detail I would keep in mind is postage. If the card is being mailed, use flatter buttons and a padded envelope. For a hand-delivered card, you can be a little more playful with thickness.
Variations and Alternatives
· Use only vintage shell or wooden buttons for a softer palette.
· Arrange buttons into a single oversized flower rather than a bouquet.
· Replace drawn stems with short pieces of embroidery thread.
· Use tiny paper circles if you want a lightweight version for mailing.
Candle Stick Card
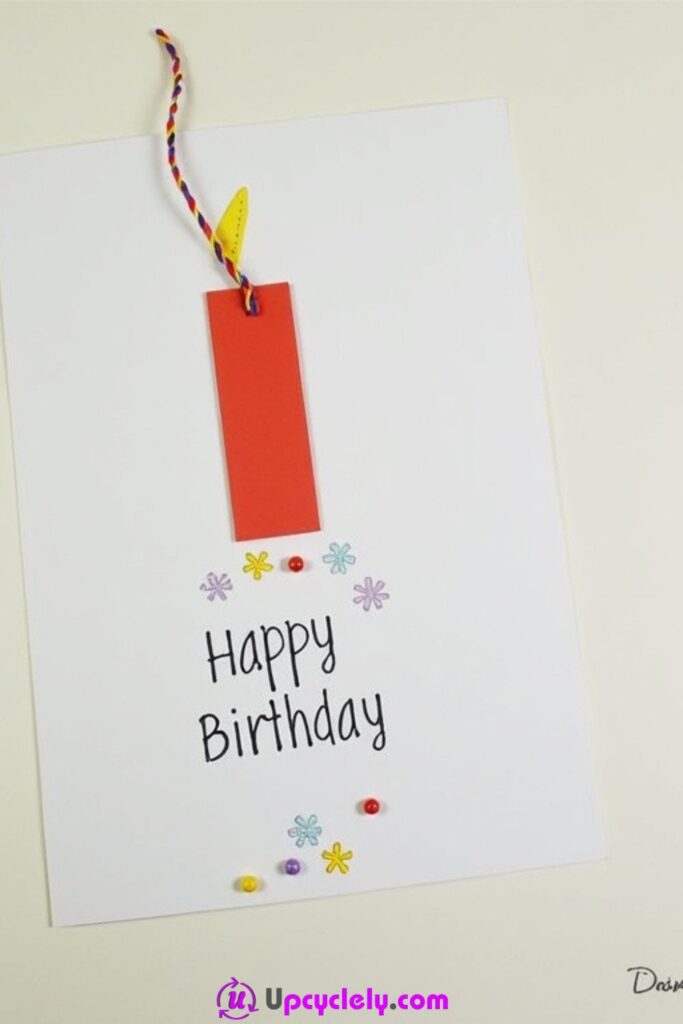
A candle-themed card is a natural birthday design, and it works well when the construction stays simple. Narrow paper rectangles can become candles, small tags can suggest flames, and embroidery thread or drawn details can add texture. What matters is the vertical rhythm: several slim shapes rising from the lower half of the card immediately read as birthday candles even before you add a message.
This idea is a good place to reuse small paper offcuts because the pieces are narrow. Gift-wrap scraps, leftover cardstock, old paper tags, or even patterned envelope liners can all become candle bodies. I’d keep the widths similar while varying the heights slightly. That small difference makes the front feel relaxed and celebratory rather than measured like a spreadsheet.
Materials and Tools
· Blank cardstock
· Small paper or cardstock scraps
· Embroidery thread or thin string
· Fine-tip markers
· Hole punch if using tags
· Glue stick or double-sided tape
· Scissors
Steps
1. Prepare a balanced candle layout. Cut several narrow rectangles from paper scraps and arrange them vertically across the card front. Vary the heights a little, but keep enough space between each candle for the design to breathe. If your scraps are heavily patterned, alternate them with plain pieces so no single print overwhelms the rest.
2. Create the flame details. Cut tiny flame shapes from yellow, orange, or warm-toned paper, or use small tags if that matches the materials you have. Another simple option is to draw the flames with markers. If you are adding thread, punch a small hole near the top of a candle piece and tie a tiny loop or bow before attaching it to the card.
3. Attach the candle pieces. Glue or tape the candle bodies in place, working from the center outward so the spacing remains balanced. Then add the flames above them, leaving a narrow gap so the pieces do not merge visually. Press everything flat under a clean sheet of paper for a few moments to help the adhesive bond without smearing the surface.
4. Add the greeting and small celebratory marks. Write the birthday message underneath or between the candle shapes, depending on the available space. A few tiny dots, stars, or confetti marks can fill awkward gaps, but stop before the front becomes crowded. The candle motif is already clear, so the finishing details should support it rather than compete with it.
I’d rather use fewer candles with good spacing than squeeze a large number onto the front. If you want to represent the recipient’s age, you can do that inside the card instead.
Variations and Alternatives
· Use strips cut from old gift bags for the candle bodies.
· Create a minimalist version with one large candle centered on the card.
· Use stitched thread lines instead of paper candles for a textile look.
· Add small metallic paper flames for a little shine without loose glitter.
Confetti Card
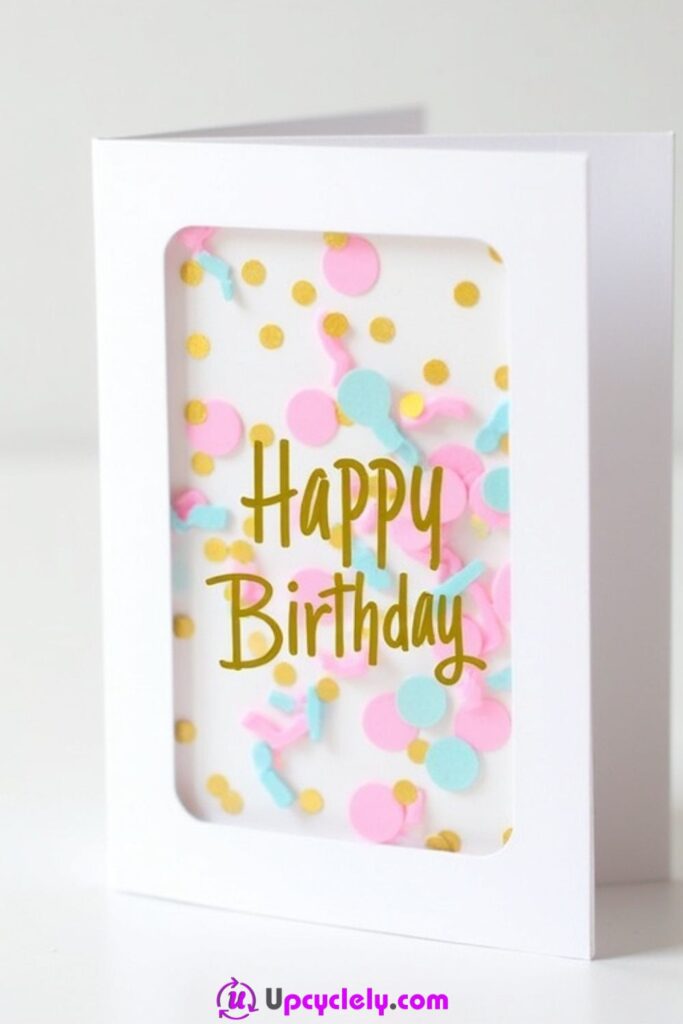
Confetti cards make very small paper leftovers useful. The pieces do not need to be large enough for cutting shapes or lettering; even punched dots and tiny snippets can become part of the design. A window format is especially effective because it contains the confetti visually while allowing the colors to remain the focus.
The important distinction is whether you want the confetti fixed or loose. Fixed confetti is flatter and easier to mail, while loose confetti behind a clear window creates gentle movement. For a beginner, I’d choose the fixed version first. It gives the same celebratory look with less risk of the card becoming bulky or the contents escaping onto someone’s lap at the wrong moment.
Materials and Tools
· Cardstock
· Small colored paper scraps
· Hole punch or scissors
· Clear acetate from clean packaging, optional
· Double-sided tape or glue
· Craft knife and cutting mat for a window, if used
· Metallic or dark marker for the greeting
Steps
1. Prepare the card front safely. Fold the cardstock and decide whether the design will use a true cutout window or simply a framed rectangle. If cutting a window, mark it with pencil and use a craft knife only on a protected cutting mat. Keep your fingers away from the cutting path, and use several light passes rather than forcing the blade through in one heavy cut.
2. Make the confetti from scraps. Punch circles from leftover colored paper or snip small geometric pieces with scissors. Mix a few colors and sizes, but keep the palette controlled enough that the finished window does not look muddy. Then spread the pieces on a white sheet of paper to judge the balance before fixing anything to the card.
3. Build the confetti area. For a fixed design, apply small amounts of adhesive inside the framed area and press the confetti into place. For a shaker-style window, attach clear acetate behind the opening, create a shallow taped border, add a small amount of confetti, and seal it with a second backing layer. Test the seal before closing the card.
4. Finish the wording without covering the color. Add the birthday greeting above, below, or across a plain strip that overlaps the confetti area. Use a simple font or handwritten style because the window is already visually active. Then hold the card upright and check that no loose pieces escape and no adhesive shows through the clear section.
The part I like here is that scraps that seem too tiny to save suddenly become useful. Still, there’s no need to fill the whole window; a little empty space makes the movement and color easier to see.
Variations and Alternatives
· Use tissue-paper confetti for a softer translucent effect.
· Replace the cutout with a strip of clear packaging acetate laid over the card front.
· Use only one color family for a more grown-up birthday card.
· Create star or heart confetti with a shaped punch.
Embossed Heart Cards
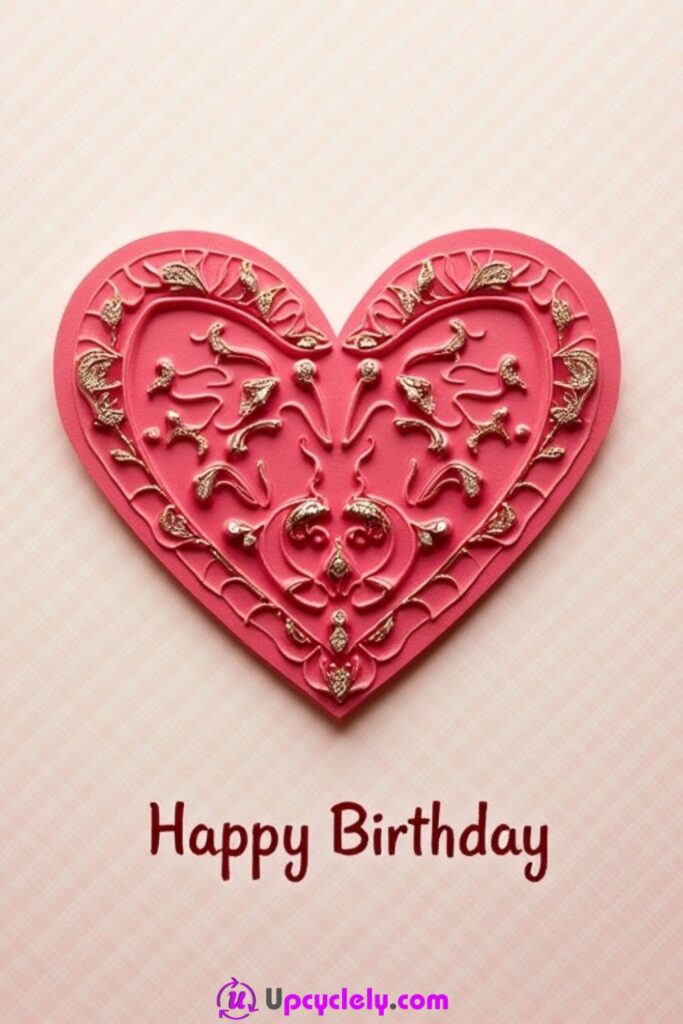
An embossed heart card feels more refined because the decoration relies on texture as much as color. The raised design catches light and gives the front a finished quality without requiring many separate embellishments. A heart also works beyond romantic occasions; with the right colors and greeting, it can feel warm, celebratory, and suitable for a close friend or family member.
Heat embossing requires a little more care than the paper-only ideas. Work on a clear surface, keep loose powder contained, and follow the safety instructions for your heat tool. If you do not own embossing equipment, you can still recreate the layered look with metallic pen, dimensional glue, or raised paper cutouts. The design principle matters more than the exact technique.
Materials and Tools
· Colored cardstock
· Embossing pen or suitable embossing ink
· Embossing powder
· Heat tool designed for embossing
· Anti-static pouch or clean soft brush, optional
· Birthday stamp or fine pen
· Scrap paper for catching excess powder
Steps
1. Prepare the card and control stray powder. Fold the card base and work on a clean sheet of scrap paper. If you have an anti-static pouch, lightly treat the area where the heart will sit so loose powder is less likely to cling outside the design. Sketch the heart very lightly in pencil if you want a guide, but keep the line faint enough to disappear beneath the embossed pattern.
2. Draw or stamp the heart design. Use an embossing pen to trace the heart and add simple internal lines, dots, vines, or floral marks while the ink remains tacky. Sprinkle embossing powder generously over the area, then tip the excess back onto the scrap paper. Tap the card gently rather than blowing on it, which tends to redistribute powder exactly where you do not want it.
3. Set the embossing carefully. Use the heat tool according to its instructions, keeping it moving so one area does not overheat. The powder will change from dusty to smooth and raised as it melts. Once the full heart has set, place the card down and let it cool before touching the surface; freshly melted embossing can mark easily if handled too soon.
4. Add the birthday message and quiet finishing details. Place the greeting where it balances the heart rather than competing with it. A small stamped message beneath the design usually works well. If the corners feel empty, add only one or two restrained accents. I don’t think extra decoration improves a strong embossed focal point; the texture already gives the card enough presence.
The part I would check carefully is heat-tool placement. Keep the card on a heat-safe surface and give your fingers enough distance from the hot airflow. If that sounds like more equipment than you want, use layered paper instead.
Variations and Alternatives
· Create the heart with layered metallic paper rather than heat embossing.
· Use clear embossing powder over colored ink for a subtle raised effect.
· Replace the heart with a birthday number or monogram.
· Try white embossing on deep-colored cardstock for stronger contrast.
Interactive Scratch-Off Card
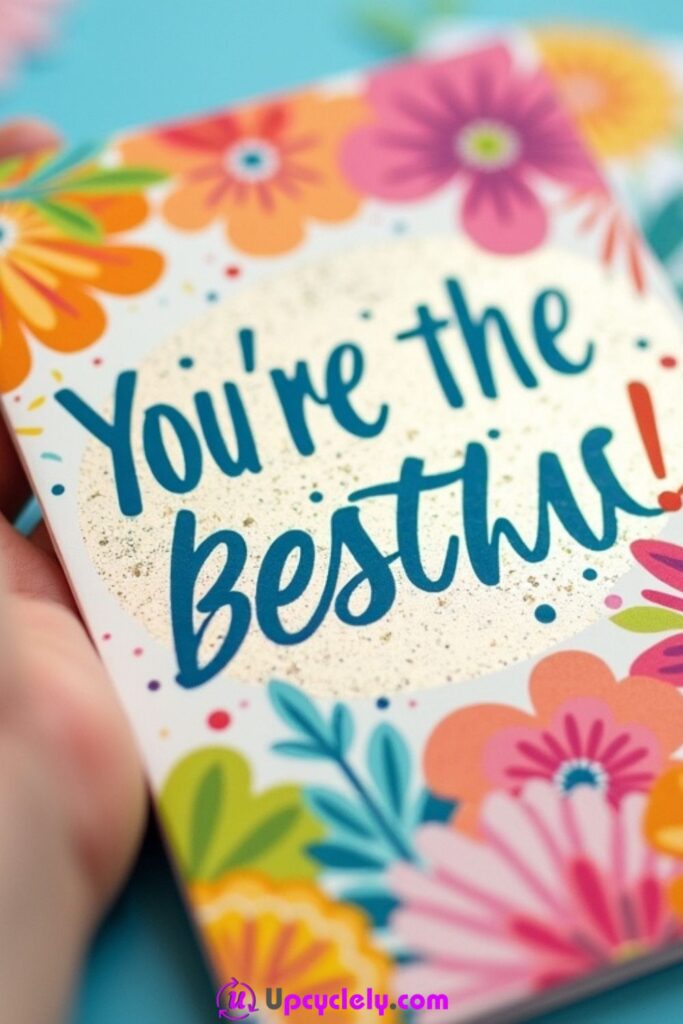
A scratch-off card gives the recipient something to do, which makes the greeting feel more like a tiny experience than a flat message. The hidden areas can reveal wishes, jokes, clues, or mini rewards. The card does not need elaborate decoration because curiosity already provides the main attraction.
There are several ways to create scratch-off areas, and the exact method depends on the materials you are comfortable using. A reliable beginner option is to write the message on a smooth surface protected with clear tape, then cover that area with a removable scratch layer. I’d make a test sample on scrap card first, especially if you are mixing your own coating, because the goal is easy removal without damaging the message underneath.
Materials and Tools
· Blank greeting card or cardstock
· Pens or markers
· Clear tape or self-adhesive clear film
· Scratch-off stickers, or a tested DIY scratch coating
· Small paper shapes if making removable panels
· Scissors
· Coin for testing the finished surface
Steps
1. Write the hidden messages first. Decide what each scratch area will reveal and write the messages before attaching any coverings. Keep the wording short so the recipient can read it immediately once revealed. Place the messages far enough apart that each one can have its own scratch zone without overlapping another area.
2. Protect the message surface. Cover each hidden message with a smooth piece of clear tape or transparent film, pressing out bubbles and wrinkles. This protective layer matters because it separates the writing from the scratchable coating. Trim the tape neatly so it does not extend far beyond the intended shape and become visible around the edges.
3. Add the scratch-off layer. Apply ready-made scratch stickers over the protected messages, or use a DIY coating only if you have already tested it successfully on scrap material. Build the layer evenly rather than very thickly. Then let it set completely before touching it or stacking the card under other supplies.
4. Test one sample and finish the card. Use a coin on your scrap test to confirm the coating scratches away cleanly. If it requires heavy pressure, adjust the material before using the final card. Add simple instructions such as “scratch to reveal” near the hidden areas, then keep the rest of the decoration light so the interactive feature remains the focus.
I know the temptation here is to hide a long message, but small reveals are more satisfying. Three short surprises usually work better than one large coated rectangle that takes ages to scratch away.
Variations and Alternatives
· Use ready-made scratch stickers for the simplest version.
· Hide three compliments, three memories, or three birthday wishes.
· Create one scratch area shaped like a balloon or gift box.
· Use a removable paper flap instead if you prefer a no-coating alternative.
Glitter and Glam Card
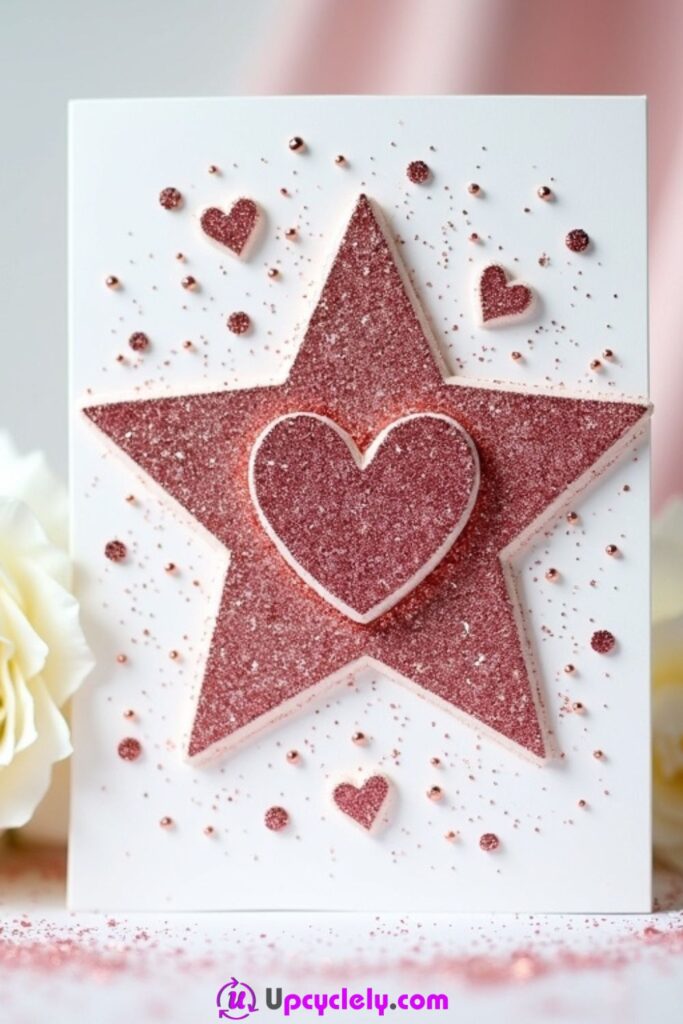
A glitter card can look polished when the sparkle is concentrated in a few deliberate areas. Glitter paper is usually easier to manage than loose glitter because it gives you the shine without turning the craft table—and somehow the next three rooms—into a permanent disco. A large star, heart, or number makes a strong focal point, while smaller gems or dots can echo the shine around the edges.
The key is to separate texture from clutter. If the central shape is bold, keep the greeting simple and leave some plain cardstock visible. I’d also think about how the card will be delivered. Raised gems are fine for hand delivery, but flatter glitter paper is a better choice if the card needs to go through the mail.
Materials and Tools
· Blank cardstock
· Glitter paper or sparkly paper scraps
· Shape stencil or hand-drawn template
· Scissors
· Double-sided tape or craft glue
· Small adhesive gems, optional
· Fine-tip pen for the greeting
Steps
1. Choose one main sparkling shape. Decide whether the focal point will be a star, heart, number, candle, or gift shape. Trace it onto the back of glitter paper and cut carefully, turning the paper as you cut rather than twisting the scissors into tight corners. Place the shape on the folded card before gluing to check its scale.
2. Attach the focal piece cleanly. Use double-sided tape or a thin, even layer of adhesive so the glitter paper sits flat. Press the shape from the center outward to avoid lifted edges. If the glitter surface sheds, handle it by the edges and clean the card base before moving on so stray particles do not become part of the design by accident.
3. Add smaller details with restraint. Place a few adhesive gems, tiny glitter-paper hearts, or pen-drawn stars around the main shape. Keep the accents in small clusters instead of filling every empty area. Then step back from the card for a moment; if your eye goes immediately to the central shape, the balance is probably working.
4. Add the greeting and check the profile. Write or stamp a short birthday message in a plain area where it remains easy to read. Run a hand lightly over the front and check whether any raised pieces feel loose. If the card is going into an envelope, slide it in once before giving it away to make sure nothing catches or peels back.
For me, sparkle looks better when it has somewhere quiet to sit. Plain cardstock is not wasted space; it is what makes the glittered areas feel intentional.
Variations and Alternatives
· Use metallic paper instead of glitter paper for a cleaner finish.
· Replace gems with punched paper dots for easier mailing.
· Use one large birthday number as the focal shape.
· Try black cardstock with silver or gold accents for an adult birthday.
Hand-Drawn Doodles Card

A doodle card is one of the most accessible ideas because the materials are ordinary and the style does not depend on perfect drawing. Small balloons, cakes, candles, stars, party hats, and confetti marks are recognizable even when the lines are a little uneven. In fact, that slight looseness helps the card feel personal.
The easiest way to avoid a chaotic front is to treat the greeting as the anchor. Put the birthday message in the center, then build a loose border of doodles around it. Larger shapes should appear only a few times, with tiny dots and stars filling the smaller gaps. If drawing makes you nervous, sketch everything lightly in pencil first and keep the shapes very simple.
Materials and Tools
· Blank cardstock
· Pencil
· Eraser
· Fine-tip black pen
· Colored markers or pencils
· Scrap paper for practicing lettering
Steps
1. Set the greeting area first. Fold the card and lightly mark a central zone for the words “Happy Birthday” or another short message. Sketch the lettering in pencil, keeping it large enough to remain readable after the doodles are added. You do not need ornate calligraphy; clear hand lettering often suits the playful style better.
2. Add the larger doodles around the edges. Draw a few simple balloons, cakes, wrapped gifts, candles, or stars around the greeting area. Repeat some shapes in different sizes so the border feels connected. Avoid drawing every object at once; rotate the card as you work and leave intentional gaps between the larger motifs.
3. Ink and color the design. Trace the pencil lines with a fine black pen, then let the ink dry before erasing. Add color to selected areas rather than filling every shape completely. A limited palette of two or three colors usually looks more cohesive, and leaving some white space keeps the front from becoming visually heavy.
4. Use tiny marks to finish the balance. Add small dots, dashes, sparkles, or confetti lines only where the border still feels sparse. Then look at the card from arm’s length. If one side seems much darker or busier, add one small matching motif to the opposite side rather than filling every available corner.
I don’t think a doodle card should look mechanically perfect. Slight differences in line weight and shape are part of the appeal, so resist the urge to redraw every wobble.
Variations and Alternatives
· Use only black pen for a sketchbook-style card.
· Draw objects linked to the recipient’s hobbies instead of generic party motifs.
· Let a child contribute some of the doodles for a family card.
· Use colored pencil for a softer finish than marker.
Stamped Pattern Card
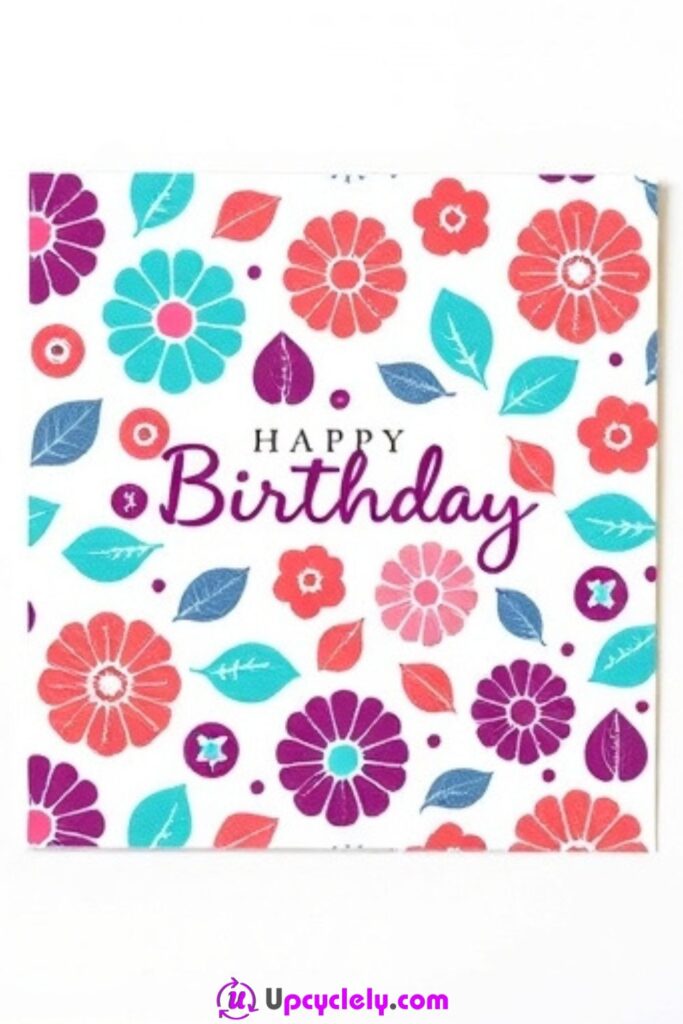
Stamped patterns are useful when you own a few small stamps but do not have a single large birthday image. Repetition turns ordinary floral, leaf, dot, or geometric stamps into a full background. The trick is to vary direction and color while leaving one clear area for the greeting.
A stamped card can also use homemade stamps. Small shapes cut from clean foam scraps, a simple potato stamp, or the end of a pencil eraser can all create repeat marks. I’d test the spacing on scrap paper before committing to the final card because stamp placement is harder to undo than pencil. A little practice also tells you how much ink gives a clean impression without pooling at the edges.
Materials and Tools
· Blank cardstock
· Small pattern stamps or homemade stamp shapes
· Ink pads in a limited color palette
· Black or dark ink for the greeting
· Scrap paper
· Paper towel for blotting excess ink
Steps
1. Test each stamp before using the card. Ink the stamp lightly and press it onto scrap paper with even pressure. Check whether the design prints clearly and whether the color is stronger than expected. Repeat until you know how much ink the stamp needs, because over-inking creates thick edges and can make layered patterns look muddy.
2. Reserve space for the birthday greeting. Lightly mark a central rectangle, circle, or strip where the wording will sit. Then begin stamping around that reserved area rather than covering the whole front first. Rotate the stamp slightly between impressions and allow some motifs to extend beyond the card edge so the pattern feels natural rather than boxed in.
3. Layer a second color or smaller motif. Once the first layer is dry, add another stamp in a contrasting but compatible color. Keep the second layer lighter and more selective. If two motifs overlap, let it happen occasionally, but do not stack so many prints that the shapes lose definition.
4. Add the greeting after the background is dry. Stamp or handwrite the birthday message in the reserved area using a dark ink that stays legible against the patterned background. If the center still feels busy, add a small plain paper label beneath the words. Then check the edges for accidental smudges and trim the card only if a clean edge is necessary.
For me, the layout matters more than perfectly matching every impression. A few lighter or slightly incomplete stamps actually make a repeated pattern feel less mechanical.
Variations and Alternatives
· Use one stamp in several shades of the same color.
· Make a tiny stamp from foam scraps for a low-cost option.
· Stamp only the lower third of the card for a quieter design.
· Use metallic ink for a few selected highlights rather than the entire background.
Hand-Painted Floral Card
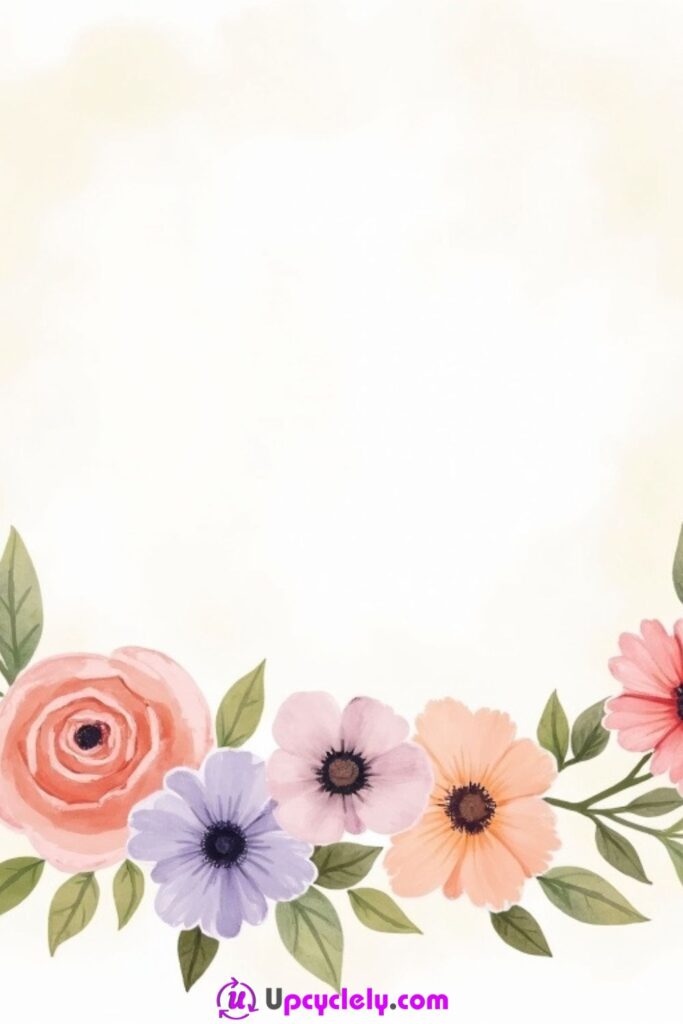
A hand-painted floral card does not need botanical accuracy. Loose petals, simple leaf shapes, and soft color transitions are enough to suggest flowers. Watercolor works particularly well because small imperfections blend into the overall softness of the arrangement instead of looking like errors.
Cardstock choice matters more here than in many paper-only ideas. Very thin card can buckle under water, so use a heavier paper or paint on a separate watercolor-friendly panel and attach it to the card base afterward. I’d keep the flowers concentrated along one corner or edge. That gives the painting room to breathe and leaves a natural place for the birthday message.
Materials and Tools
· Heavy cardstock or a small watercolor-paper panel
· Watercolor paints or diluted gouache
· Small round paintbrushes
· Cup of clean water
· Paper towel
· Pencil and eraser, optional
· Glue or tape if mounting a painted panel
Steps
1. Plan a loose floral area. Decide whether the flowers will sit along the bottom edge, one corner, or around a central greeting. Lightly sketch only the broad placement of the largest blooms and leaves. Avoid drawing every petal in pencil, because too much underdrawing can make a loose watercolor design feel stiff.
2. Paint the largest flowers first. Use a damp brush and build each flower from simple rounded or tapered strokes. Let a little white paper show between petals instead of filling every shape. Then add a second color while the first is still slightly damp if you want soft blending, or wait until dry if you prefer clearer layers.
3. Add smaller flowers and leaves. Paint tiny buds, leaves, and stems around the main blooms to connect the composition. Change the direction of the leaves so they do not all point the same way. Keep some gaps in the arrangement; the empty spaces help separate the colors and prevent the cluster from becoming one solid painted mass.
4. Refine only after the first layer dries. Once the painting is dry, deepen a few petal centers or add a darker leaf edge for definition. Erase any visible pencil very gently. Add the birthday greeting in an open area, or mount the painted panel onto a folded card if you worked separately. Then leave the painting alone—overworking watercolor is usually where the freshness disappears.
I’d keep one thing in mind here: the first layer often looks lighter once dry. It is easier to add a little more color later than to rescue a flower that became too dark too quickly.
Variations and Alternatives
· Use acrylic paint with very little water on ordinary cardstock.
· Paint simple daisies or leaves if roses feel too complicated.
· Create a monochrome botanical card in one color family.
· Paint on a separate scrap of sturdy paper and mount it as a panel.
Kraft Paper Birthday Card
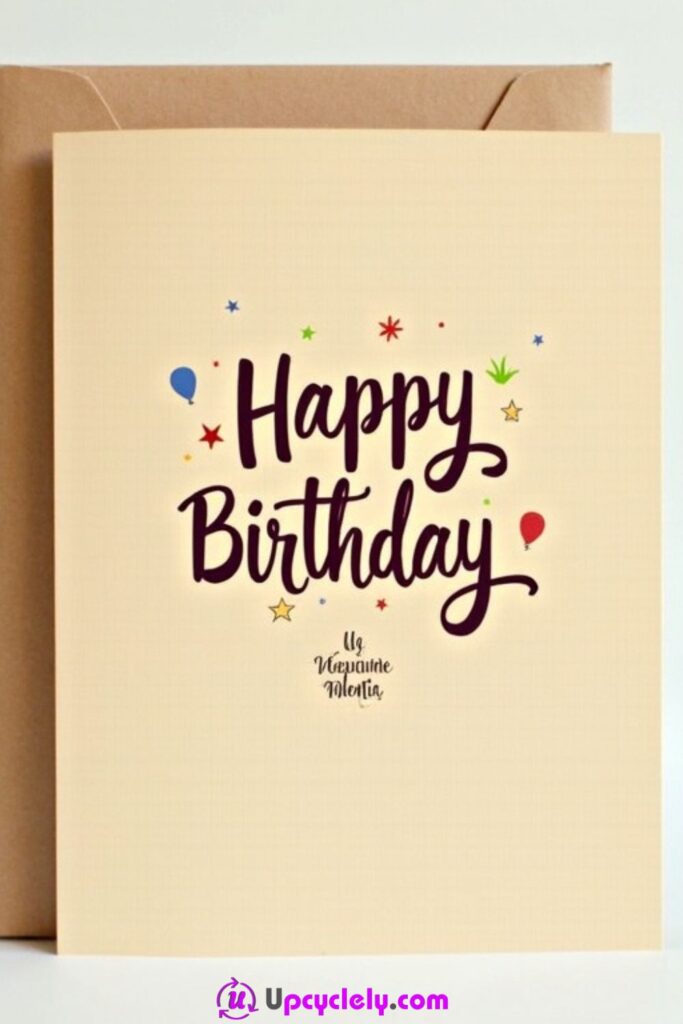
Kraft paper has enough natural texture and color that it does not need heavy decoration. Dark ink reads clearly against the brown surface, while a few bright colored accents can make the front feel celebratory without losing the understated look. It is also a good base for using recycled card or clean packaging card when the surface is smooth enough for writing.
The challenge is contrast. Pale markers can disappear into kraft stock, so test your pens before committing to the greeting. White, black, deep purple, navy, and metallic accents usually show more clearly than very light transparent colors. I’d keep the lettering central and let smaller stars, balloons, or confetti marks create movement around it.
Materials and Tools
· Kraft cardstock or clean recycled packaging card
· Dark marker or brush pen
· A few contrasting colored markers
· Ruler and pencil, optional
· Decorative envelope or reused envelope
· Metallic pen, optional
Steps
1. Prepare a clean, square card base. Fold the kraft cardstock and sharpen the crease with a ruler or bone folder if you have one. If you are reusing packaging card, choose an unprinted area and trim away any weakened folds or torn edges. Check that the inside surface is light enough to write on, or plan to add a pale paper insert later.
2. Place the main lettering. Lightly mark the center and sketch the birthday greeting in pencil. Write over it with a dark marker using a simple script or block style that remains readable. If hand lettering is not your favorite skill, use a printed label or stamped greeting instead; the kraft background will still provide the same warm effect.
3. Add bright accents around the words. Draw a few stars, balloons, candles, or confetti marks in two or three colors. Use the larger shapes first, then fill only the most obvious gaps with smaller dots. Let some areas of plain kraft paper remain visible because the natural brown background is part of the design, not something that needs covering.
4. Coordinate the inside or envelope. Add a simple paper liner inside if the writing needs more contrast, or decorate the envelope flap with one matching doodle. Then check the front under normal room light to make sure the greeting remains easy to read. Metallic details can be lovely, but use them as accents rather than tracing every line.
The good thing about kraft paper is that it already feels finished. I wouldn’t add layers just for the sake of making the card look more complicated.
Variations and Alternatives
· Reuse a clean brown paper shopping bag by mounting it onto cardstock.
· Use white gel pen for a chalk-like contrast.
· Create a minimalist version with only lettering and three small stars.
· Add a scrap-paper banner across the kraft base for extra color.
Mini Pocket Card
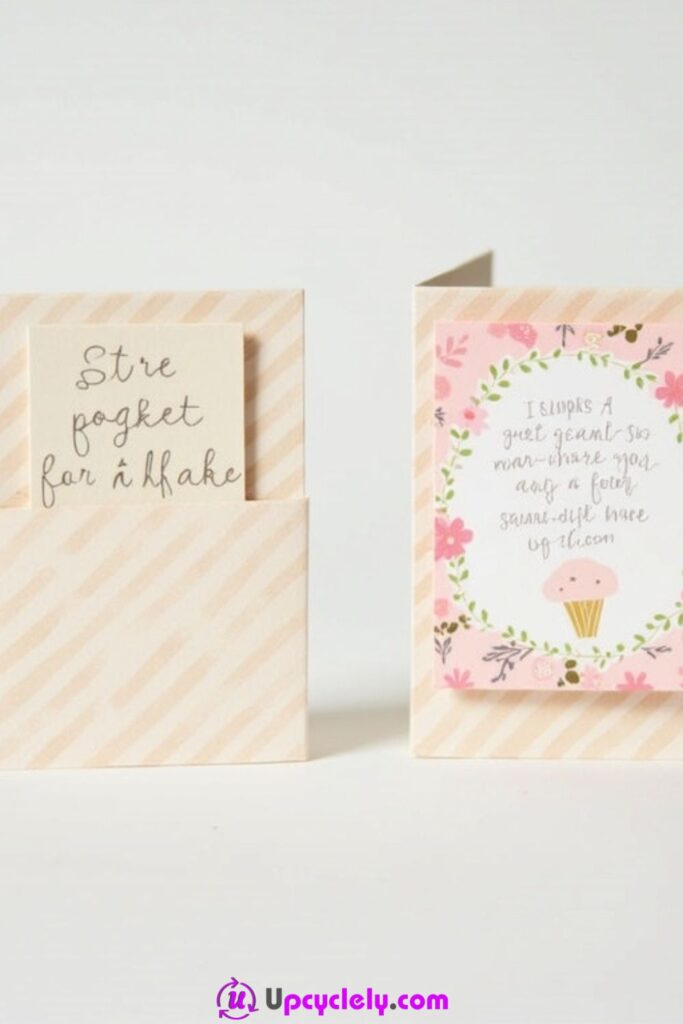
A mini pocket card is useful when you want the message to feel like a little discovery. Instead of opening a standard folded card, the recipient pulls out a small note, tag, photo, voucher, or birthday wish from the pocket. The construction is simple, but the removable insert makes it feel more interactive.
Double-sided patterned paper works well because both the pocket and inner flap can remain attractive, but leftover gift wrap mounted onto cardstock can do the same job. The biggest practical point is clearance: if the insert fits too tightly, it will catch at the glued edges. I’d make the pocket first, then trim the insert to fit rather than trying to guess both sizes at once.
Materials and Tools
· Patterned paper or sturdy paper scraps
· Cardstock backing if needed
· Scissors or paper trimmer
· Glue stick or double-sided tape
· Small card or tag for the insert
· Fine-tip pen
· Ribbon or folded paper tab, optional
Steps
1. Build the pocket with open top clearance. Cut a rectangle of patterned paper and fold it into the pocket shape. Apply adhesive only along the side edges and bottom, keeping the top fully open. Press the seams flat and wait until they are secure before testing the insert; sliding paper into wet glue is an excellent way to create a permanently trapped birthday message.
2. Create the removable insert. Cut a small card or tag that is narrower than the pocket interior. Slide it in and out several times, trimming a sliver from the sides if it catches. Leave enough of the top visible that the recipient immediately understands something can be pulled out.
3. Write and decorate the message. Add the birthday greeting to the insert, keeping the wording within the area that will remain hidden or visible as you prefer. Draw a small balloon, cake, or border if the paper is plain. If you want a pull tab, attach a short ribbon loop or fold a small paper tab over the top edge.
4. Finish the pocket front without adding bulk. Decorate the pocket itself with one simple motif or a short label. Avoid raised embellishments near the opening because they can make the insert awkward to remove. Then test the finished card upright to be sure the insert does not slide out too easily when carried or placed inside an envelope.
The part I would check carefully is fit. A pocket that looks lovely but grips the insert too tightly quickly becomes frustrating, so give the paper a little breathing room.
Variations and Alternatives
· Use the pocket to hold a small gift card or handwritten coupon.
· Make the pocket from a reused envelope section.
· Add a tiny photo to the insert instead of a long message.
· Create several small pockets inside a larger folded card.
Paper Strip Banners Card
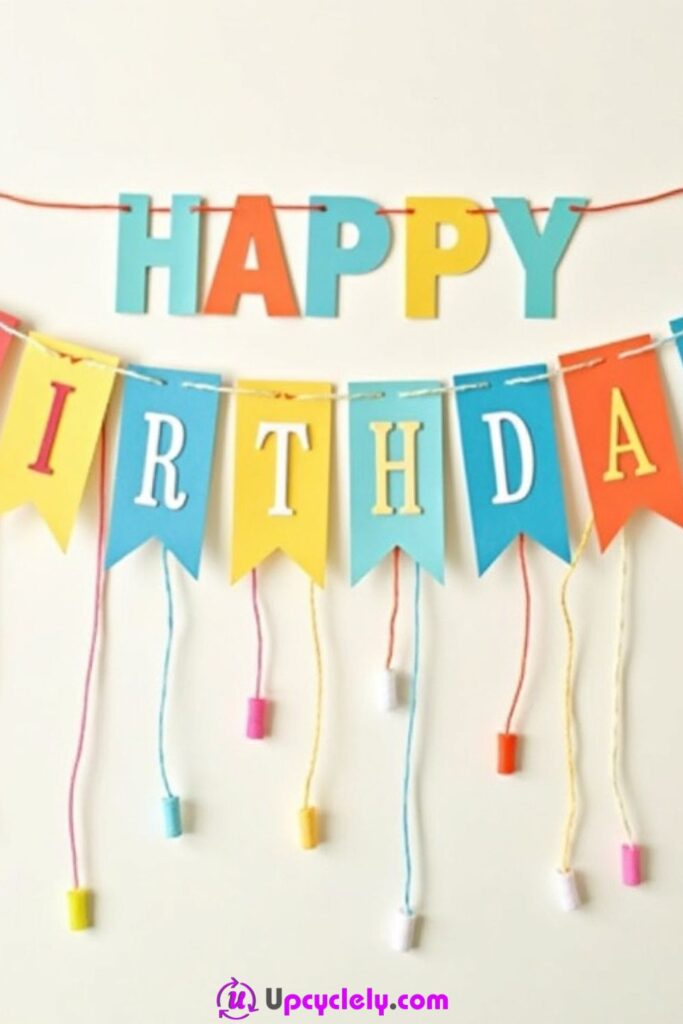
Paper strip banners are ideal for leftover cardstock because the pieces can be narrow and mismatched. Once trimmed into pennants and arranged in rows, they read as miniature party bunting. This structure also gives you a natural place to put one letter on each flag, so the decoration and wording become the same element.
The main planning issue is space. “Happy Birthday” needs enough individual flags to stay readable, and trying to force all the letters into one line can make the card too wide or cramped. Two rows usually solve the problem. I’d cut a few spare pennants at the beginning so you can replace any piece that ends up too narrow for its letter.
Materials and Tools
· Blank cardstock
· Colored or patterned paper scraps
· Scissors
· Glue stick or double-sided tape
· Markers or letter stickers
· Thin ribbon or drawn line for optional bunting cord
· Ruler, optional
Steps
1. Cut a consistent set of pennant pieces. Trim paper scraps into narrow rectangles of similar width. Cut a small V from the bottom of each piece to create a banner shape. The heights can vary slightly, but keeping the widths reasonably consistent makes the lettering easier to read once the flags are arranged together.
2. Plan the words before gluing. Lay out the pennants in two rows and assign one letter to each piece. Check the spacing for “HAPPY” and “BIRTHDAY” before attaching anything. If the rows feel too crowded, shorten the pennants or leave a little more margin at the sides rather than squeezing the letters together.
3. Attach the banners and add the letters. Glue each pennant in place, beginning with the middle of each row and working outward. Once the adhesive has set, write the letters in a contrasting color or add stickers. Keep the lettering style consistent across the row even if the paper colors and patterns are different.
4. Connect the banner visually and finish the card. Draw a thin line across the tops of the flags to suggest string, or add a real piece of fine thread if the card will be hand delivered. Add only a few small confetti marks around the remaining space. Then check that the banner remains the dominant feature and that the greeting can be read at a glance.
For me, mixed paper looks better here when one thing repeats either the flag shape, the letter style, or the color family. That repeated element stops the scraps from looking random.
Wash Tape Design Card
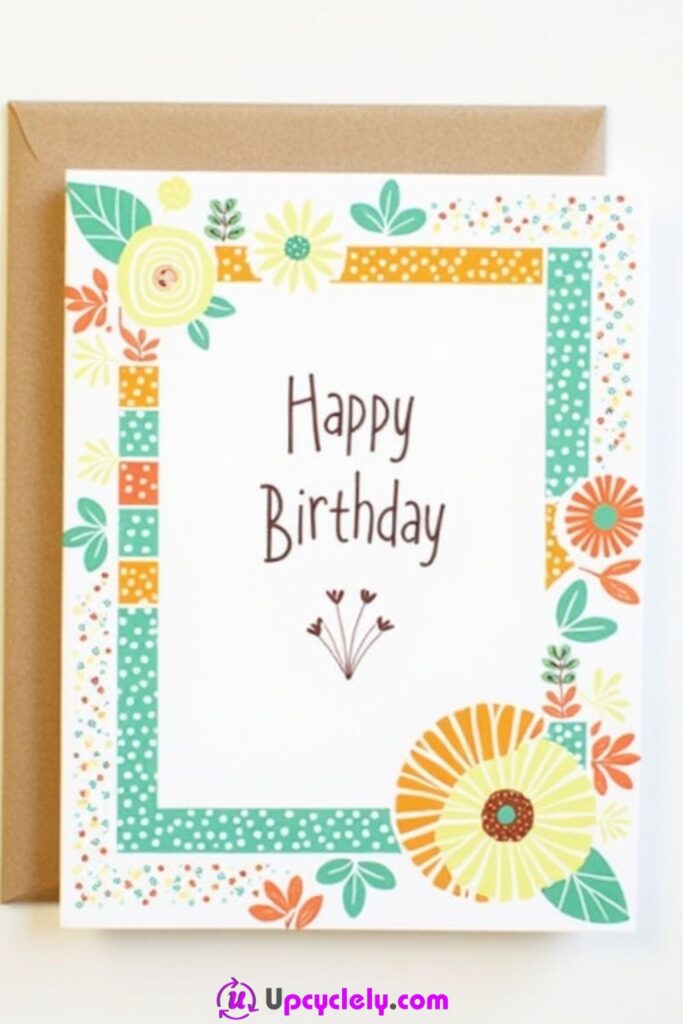
Patterned paper tape is one of the quickest ways to create a finished card front because the color, print, and adhesive are already combined. A taped border also provides instant structure: once the edges are framed, the center naturally becomes the place for the greeting. This makes the idea especially useful when you want a handmade card but do not have time for intricate cutting.
The live heading calls this a “Wash Tape Design Card,” while the material itself is commonly sold as decorative paper tape or washi tape. Whatever you have, choose tapes that share at least one color or visual mood. I know mixing every pattern can be fun, but four unrelated prints at the same scale can make the border fight with the message.
Materials and Tools
· Blank cardstock
· Decorative paper tape or washi tape
· Scissors
· Ruler, optional
· Fine-tip black pen or marker
· Stamp or letter stickers, optional
Steps
1. Prepare a crisp folded base. Fold the cardstock neatly and decide whether the tape will run exactly along the outer edges or sit slightly inside as a frame. A narrow inner border often looks cleaner because the tape edges stay protected from handling. Use a ruler only if straight alignment matters to you; a slightly handmade line can also suit the design.
2. Build the tape border one side at a time. Apply the first strip along the top edge, smoothing it from one end to the other to avoid wrinkles. Trim the excess cleanly, then add the remaining sides. Alternate patterns in a way that feels balanced, and overlap the corners only slightly so they do not become thick.
3. Add the central birthday message. Write the greeting in the open center using a fine black pen, or use a stamp if you prefer uniform lettering. Keep the message large enough to hold its own against the patterned border. If the center feels too empty, add a thin dotted frame or one tiny doodle rather than another full layer of tape.
4. Check the corners and finish the details. Press each taped edge firmly, especially at the corners where peeling usually begins. Trim any overhang with scissors or a craft knife on a cutting mat. Then add one or two small accents inside the card using the same tape so the front and interior feel connected without becoming repetitive.
I’d keep the tape patterns doing the decorative work. Once the border is lively, the center usually benefits from a calm greeting and plenty of plain space.
Variations and Alternatives
· Use leftover strips from several tape rolls to avoid buying a new set.
· Create vertical tape candles instead of a border.
· Use one monochrome tape pattern on colored cardstock.
· Cut small tape triangles to make a miniature bunting design.
Birthday Card Crafting Mistakes That Can Spoil the Finish
Starting with decoration before checking the card base is one of the easiest ways to create trouble. Thin paper can buckle under watercolor, heavy buttons can pull a lightweight card forward, and thick layers can stop the card from sitting flat. Match the base to the technique first, then let the decoration follow.
Another common problem is gluing too early. Buttons, banner letters, tape strips, and paper candles all benefit from a dry layout. Once adhesive is involved, small spacing problems become much harder to correct. I know it can feel slow to arrange and rearrange pieces, but the first layout is rarely the best one, and those few extra minutes usually show in the final balance.
Too many competing materials can also weaken a handmade card. Glitter, gems, stamps, doodles, patterned tape, and buttons may all be attractive individually, but putting them together on one small front can make the greeting disappear. Choose one main technique and let one or two supporting details do the rest.
Ignoring the envelope is another practical mistake. A card may look lovely on the table and then refuse to fit inside the envelope because the buttons, gems, or layered paper extend too far. Test the fit before the adhesive is completely set, especially when the card will be posted rather than hand delivered.
Finally, do not rush wet materials. Ink, paint, embossing, glue, and homemade scratch-off coatings all need enough time to settle before the next stage. Smudging often happens not because the technique is difficult, but because the card was handled too soon. If the surface still looks glossy or feels cool and damp, give it more time before closing or stacking it.
Frequently Asked Questions
What is the easiest birthday card idea for a complete beginner?
The fingerprint balloon card, kraft paper card, and wash tape design card are all straightforward because they need only a few materials and very little precision. Start with a simple folded base and one main decorative idea. Once you feel comfortable with spacing and lettering, try layered paper or interactive designs.
How can I make handmade cards look neat without special equipment?
Use a ruler for folds, test pens and stamps on scrap paper, and arrange pieces before gluing. Clean edges and good spacing matter more than owning specialist tools. A simple card with two well-placed elements often looks more considered than a crowded card made with expensive supplies.
What can I reuse from around the house for birthday cards?
Clean packaging card, gift-wrap scraps, old envelopes, ribbon offcuts, spare buttons, thread, patterned paper, and clear acetate packaging can all be useful. Choose only materials that are clean and structurally sound. Avoid anything greasy, brittle, or likely to stain the paper over time.
How do I stop a handmade card from becoming too bulky to mail?
Use flatter materials such as paper, tape, stamps, and thin thread when the card needs posting. Keep buttons, gems, and thick layered embellishments for hand-delivered cards or use only one small raised feature. Always test the finished card inside its envelope before sealing it.
Can children help make these birthday cards?
Yes, several ideas are suitable for supervised crafting, especially fingerprints, doodles, paper banners, and simple tape designs. Adults should handle craft knives, heat embossing tools, and any cutting that requires sharp blades. Small buttons and gems should also stay away from very young children.
What should I do if I make a mistake on the card front?
Small mistakes can often become part of the design. A smudge may be covered with a paper label, an uneven stamp can be balanced with another lighter impression, and a crooked paper strip can sometimes be removed before the glue sets. If the error is too large, mount the successful part onto a fresh card base rather than throwing the whole piece away.
How can I personalize a birthday card without making it overly complicated?
Use the recipient’s favorite colors, initials, age, hobby, or a short inside message that refers to a shared memory. You do not need to rebuild the entire design around the person. One meaningful detail often makes a simple handmade card feel more personal than adding several extra decorations.
Make the Birthday Card Feel Personal, Not Perfect
The most useful lesson in these birthday card ideas is that small materials can do a lot. Fingerprints become balloons, spare buttons become flowers, narrow scraps become banners, and old patterned paper becomes a pocket or frame. None of those materials has to be flawless before it becomes useful. What matters is choosing one clear idea and giving it enough space to work.
If you want to try one of these creative birthday card ideas, begin with the supplies already within reach. Pick a folded card base, choose the technique that feels manageable, and make one version without worrying about producing a shop-perfect finish. A handmade card earns its value from the attention behind it. Which everyday scrap or forgotten craft supply would you like to turn into your next birthday card?