Cross-stitch has a wonderfully practical relationship with leftover thread. A few short lengths that feel too small for a large embroidery project can still become a rabbit ear, a cactus flower, a tiny anchor, or one line in a rainbow. Even an offcut of Aida cloth can be large enough for a miniature motif, so I don’t think every useful piece of fabric or floss needs to wait for a grand project before it earns a place in the hoop.
What I like most about cross-stitch craft ideas is how easily they can be scaled to what you already have. A full chart can become a framed piece, while one small section can turn into a patch, card insert, bookmark, ornament, or label. The grid does most of the measuring for you, but it still rewards patience: a missed square can shift an entire motif, and a crowded back can make finishing more difficult than the stitching itself.
The strongest results usually come from three quiet choices made before the needle starts moving: choosing fabric and thread that suit the design, finding the center accurately, and deciding how the finished piece will be used. Once those are settled, even detailed patterns become a series of small, manageable crosses rather than one intimidating block of work.
Choose Fabric Count, Thread, and Needle as One System
Cross-stitch is easiest when the fabric holes, needle size, and thread thickness cooperate. Aida cloth with clearly visible squares is forgiving for beginners, while finer fabric can make miniature work look delicate but also demands more careful counting. If you are reusing fabric from an older kit or unfinished project, inspect the edges, stains, stiffness, and any areas where the weave has been distorted before committing a detailed motif to it.
· Choose a fabric count that you can comfortably see and count under your usual lighting.
· Use a blunt tapestry-style needle sized for the fabric so it passes through the holes without splitting the weave unnecessarily.
· Test how many strands of floss give even coverage without crowding each hole.
· Separate and smooth reused thread before stitching; tangled or kinked lengths are better saved for very small details.
· Keep darker or strongly dyed thread away from damp fabric until you know it is colourfast enough for your finishing method.
· Leave generous fabric around a motif if you plan to frame, hoop, sew, or turn it into another object later.
Find the Center and Protect Your Counting
A cross-stitch chart is really a map, and the center is its most reliable landmark. Starting from a clearly marked center helps motifs sit where you intended instead of wandering toward one edge. I know it can feel faster to begin at the first corner you recognise, but that shortcut becomes much less charming when the final flower loses half a petal because the fabric allowance disappeared.
· Fold or lightly mark the fabric center using a removable method suited to the cloth.
· Compare the chart center with the fabric center before making the first stitch.
· For repeating motifs, mark a light temporary grid or use counting pins to reduce long counting jumps.
· Complete nearby areas in small blocks instead of carrying thread across wide sections of the back.
· Check your count whenever a shape begins looking wider, taller, or closer to another motif than expected.
· Keep the hoop comfortably taut rather than drum-tight so the weave stays square and is easier to press later.
Plan the Finish Before the Final Stitch
A motif intended for a frame can tolerate a different back from one that will become a bookmark, pouch panel, or wearable patch. Decide early whether the piece needs a soft back, extra fabric allowance, washable materials, or a clean edge. That choice affects everything from where you start and stop thread to how much fabric you should leave around the design.
· Avoid bulky knots when the finished fabric needs to lie flat against backing or inside a sewn item.
· Secure thread tails beneath nearby stitches rather than leaving long loose ends.
· Keep food-contact, baby, or pet items free of loose embellishments unless the construction is genuinely suitable for that use.
· Press finished work from the back through a clean cloth rather than flattening raised stitches directly.
· Wash only when the fabric and threads are suitable for washing; otherwise use careful dry finishing.
· Do not trim the fabric to final size until you have confirmed the frame, hoop, hem, or seam allowance.
Cute Animal Silhouettes
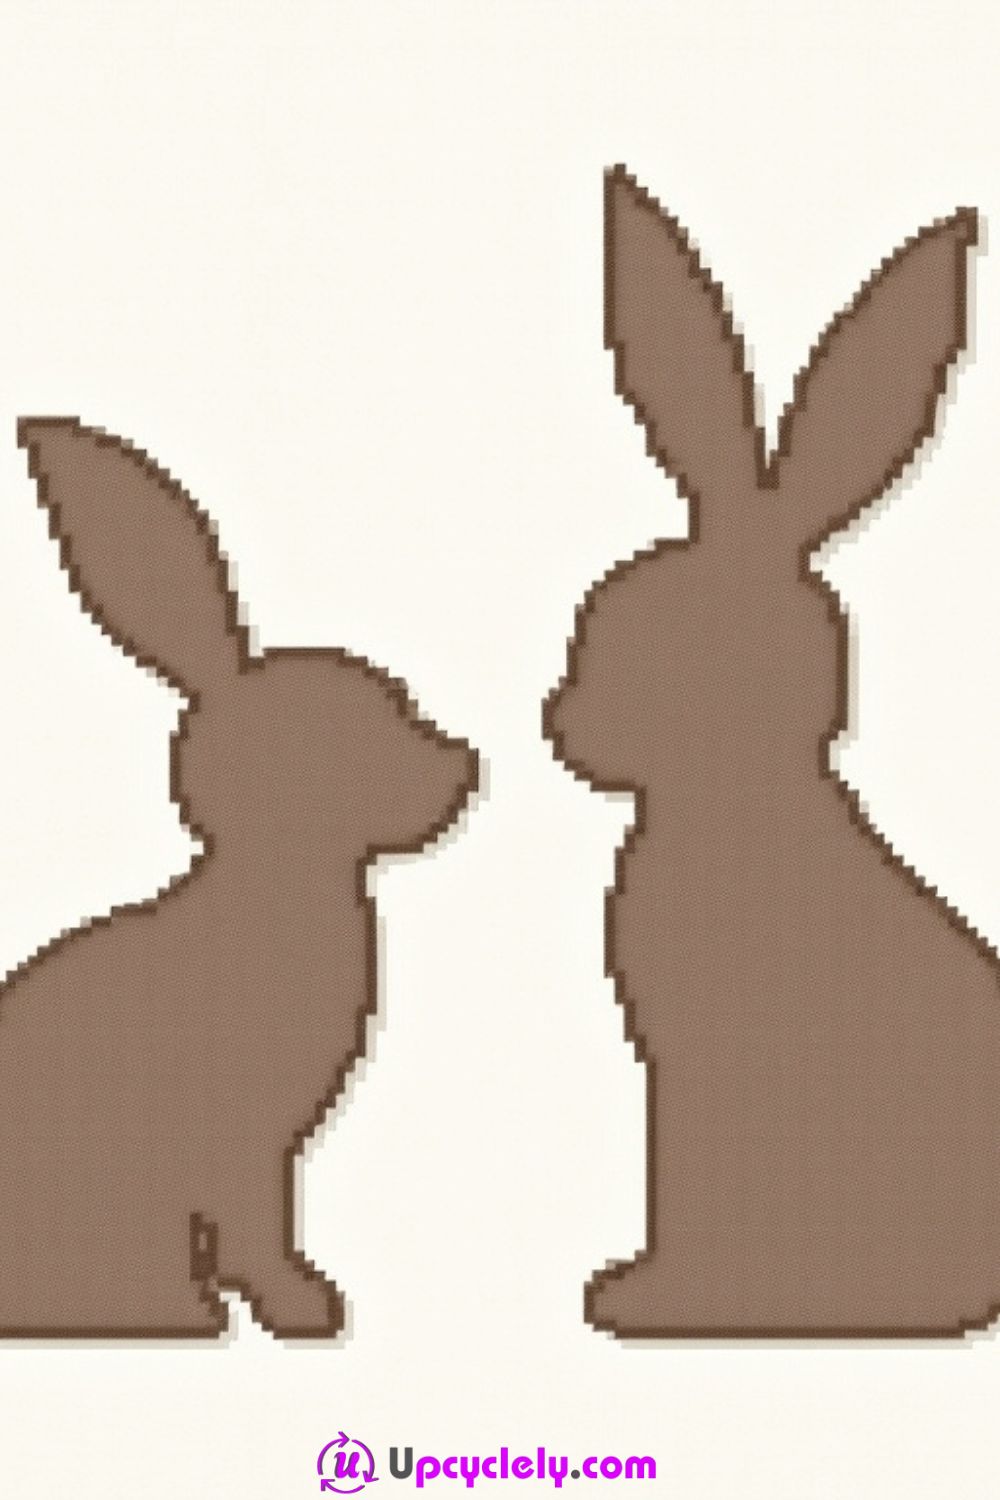
Materials Needed:
- Aida cloth (light beige or off-white)
- Cross-stitch needles
- Brown embroidery thread (varied shades if you want depth)
- Embroidery hoop
- Scissors
- Pixelated design (reference the rabbit silhouettes image)
Steps:
Step 1: Start by preparing the Aida cloth. Measure the design size and cut the fabric with a bit of allowance on the edges for framing later. Stretch it snugly into the embroidery hoop to keep it taut as you work. The pixelated silhouette design will be your guide.
Step 2: Using the darker brown thread, outline the shapes of the rabbits first. That will help define their forms and keep the edges crisp. The pixelated style is essential here, so count the squares precisely.
Step 3: Fill in the silhouettes with a single shade of brown thread. If you want extra texture, use different shades of brown for certain sections of the rabbits, adding subtle variations to create depth.
Step 4: Once your rabbits are fully stitched, inspect the design carefully to spot any missed sections. Go over any areas needing a quick touch-up, and then gently remove the hoop. Cut off excess fabric to tidy up your masterpiece before framing.
Pro Tip:
If you’re new to cross-stitch, start with just one rabbit. Completing a smaller part of the design will boost your confidence before tackling the second silhouette.
Animal Tracks
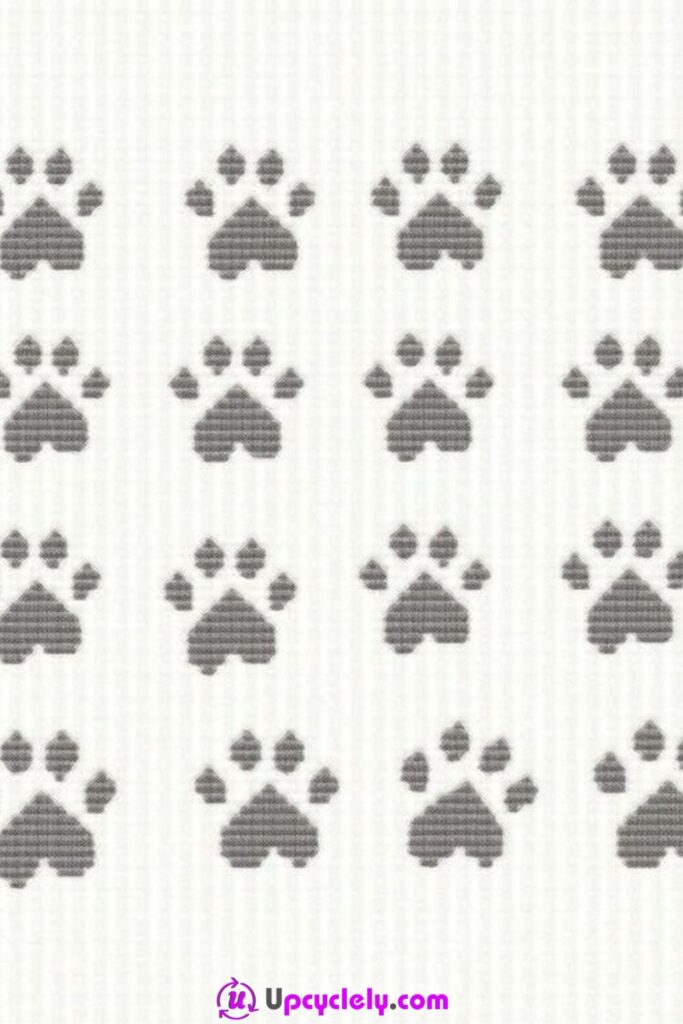
Materials Needed:
- Aida cloth (light gray or striped, if possible)
- Embroidery thread in dark gray
- Cross-stitch needle
- Scissors
- Embroidery hoop
- Gridded pattern with animal paw prints
Steps:
Step 1: Begin with the light gray Aida cloth that mimics the image’s background, or use plain light-colored cloth if striped isn’t available. Secure the fabric into the hoop and print out your grid pattern.
Step 2: Stitch the outline of each paw print. Start with the central pad before working on the smaller toe pads. Count each stitch carefully to ensure uniformity.
Step 3: Once one paw print is complete, use the same process to stitch the remaining prints in the grid. Be deliberate with alignment so that all paw prints are evenly spaced.
Step 4: After completing the stitching, gently iron the back of the fabric with a pressing cloth to flatten it. This will enhance the clarity of the paw print pattern.
Pro Tip:
To make your paw prints pop, use satin thread for extra shine. It adds an elegant, modern touch to this classic pattern.
Cacti in Pots
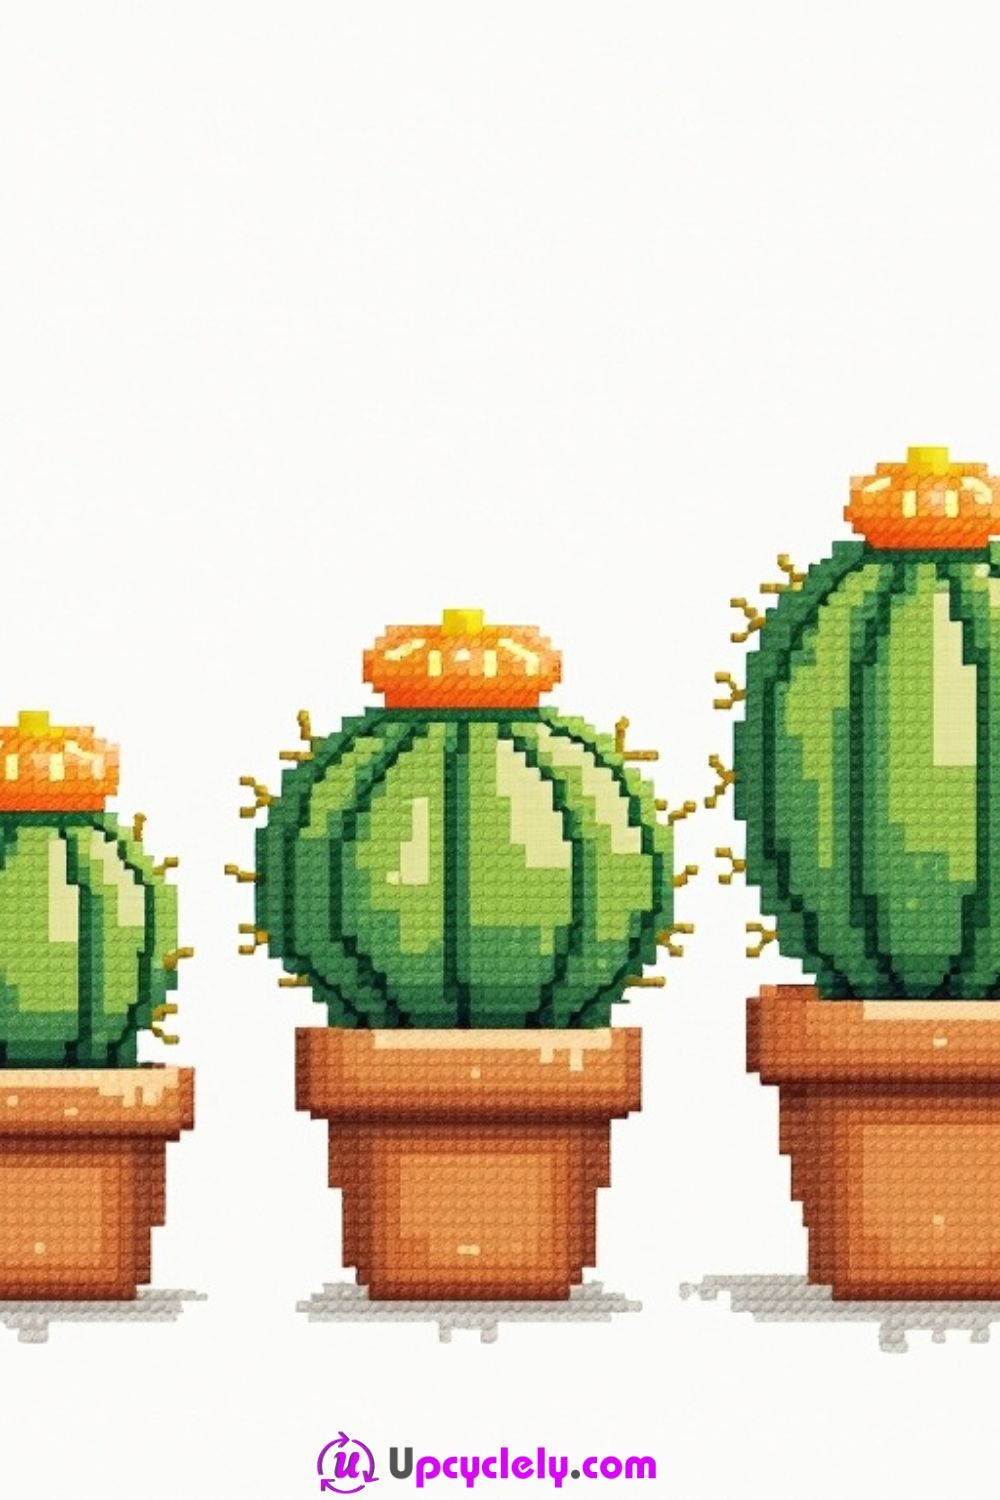
Materials Needed:
- Aida cloth (off-white)
- Embroidery thread in green, terracotta, orange, and yellow
- Cross-stitch needles
- Scissors
- Embroidery hoop
- Pixelated cactus pattern (as a guide)
Steps:
Step 1: Secure your fabric in the hoop and determine the position of the first cactus. The pixelated style works beautifully with cross-stitching, so you can use simple square stitches.
Step 2: Begin with the pots. Use terracotta-colored thread to stitch the pot shapes for all three cacti. Add any texture details with a different shade of terracotta, if you like.
Step 3: Move on to the cacti themselves. Use green thread to stitch the vertical ridges of each plant, creating dimension. Count the stitches carefully, as the ascending size of the cacti is a key design element.
Step 4: Finish by stitching the orange and yellow flowers on top of each cactus. These small details might require extra patience but will truly bring the design to life.
Pro Tip:
Use a metallic thread for the flowers to add a sparkle that contrasts with the matte green of the cacti.
Cupcakes and Treats
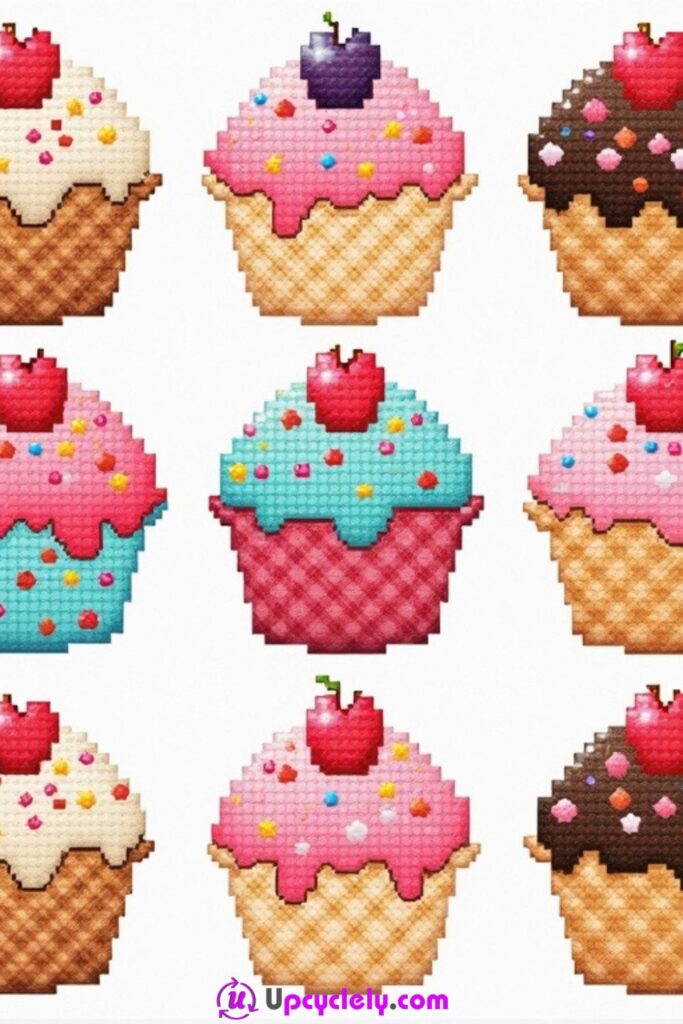
Materials Needed:
- Aida cloth (white)
- Embroidery threads in pastel shades (pink, cream, blue, chocolate brown) and red
- Cross-stitch needles
- Scissors
- Embroidery hoop
- Grid pattern with cupcake designs
Steps:
Step 1: Start by setting the cloth into the hoop. Mark off the center and count the stitches to allocate space for the 3×3 grid of cupcakes. This will ensure every design is evenly spaced.
Step 2: Begin with a single cupcake. Stitch the wrapper at the bottom first, adding in details like checkered or woven textures. Move upward to the icing using the chosen contrasting color.
Step 3: Once the icing is complete, add final design elements like sprinkles and a cherry on top. Use delicate stitching for the small details to keep them neat.
Step 4: Repeat this process for the remaining cupcakes. By the end, you’ll have a playful and perfectly symmetrical grid. Add a border around the grid if you want an extra polished finish.
Pro Tip:
For extra fun, use a glow-in-the-dark thread for the sprinkles to make your cupcakes shine in the dark!
Heart-Shaped Motifs
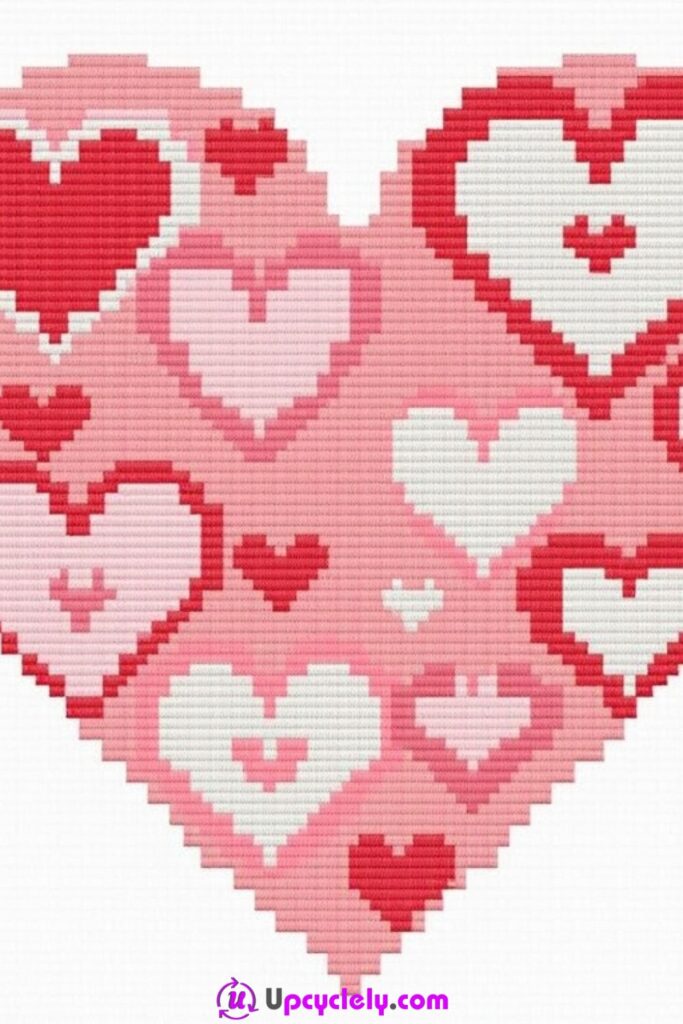
Materials Needed:
- Aida cloth (white or light pink)
- Embroidery threads in red, pink, and white
- Cross-stitch needles
- Scissors
- Embroidery hoop
- Printed pixel pattern of the heart-shaped motif
Steps:
Step 1: Start by picking your fabric. Using Aida cloth in a contrasting light shade like white or pale pink will make the red and pink threads stand out. Secure the fabric in the embroidery hoop to avoid any stretching during the project.
Step 2: Find the center of your cloth and begin stitching the large heart motif from the middle. Use pink thread as the base color for most smaller hearts in the design and follow the pixel pattern as your guide. Count each square carefully to maintain symmetry.
Step 3: Once the pink hearts are done, use red thread for the accent hearts to add depth and variety. Then finish with the smallest details, like stitching the white hearts to balance the color palette and bring brightness to the design.
Step 4: Review your stitching and fill in any gaps. When complete, turn the cloth over and tie off loose ends securely. Trim any excess fabric, and your heart-shaped cross-stitch motif is ready to frame or gift.
Pro Tip:
For a cleaner look, always outline with one backstitch layer around the large heart. This provides a polished border that enhances the motif.
Cute Coffee Mugs

Materials Needed:
- Aida cloth (cream or white)
- Embroidery threads in pink, brown, red, and cream
- Cross-stitch needles
- Embroidery hoop
- Scissors
- Printed or sketched pixel coffee cup pattern
Steps:
Step 1: Attach the Aida cloth in an embroidery hoop and lightly draw an outline of the coffee mug on your fabric. Starting with the mug, use pink thread to build the base and the saucer first. Carefully follow the grid-style pattern and keep your stitches tight and even.
Step 2: Move on to adding the coffee. Stitch the liquid area in dark brown thread, keeping the edges smooth. This contrast will make the pink mug stand out even more. Pay close attention to the pixel stops for accuracy.
Step 3: Create the steam swirling above the coffee by using cream thread. The steam’s curves and details can be tricky, so take your time and use single thin stitches for a wispy effect. Complete the design with the small red heart floating near the mug for a cute, cozy touch.
Step 4: Once the mug and steam are done, inspect all your work for missed spots. Secure loose threads on the back, and trim the excess carefully to keep your stitching looking professional.
Pro Tip:
To make the steam look dreamy, blend cream and white threads for a subtle shaded effect. It brings a realistic feel to the design.
Cute Robots
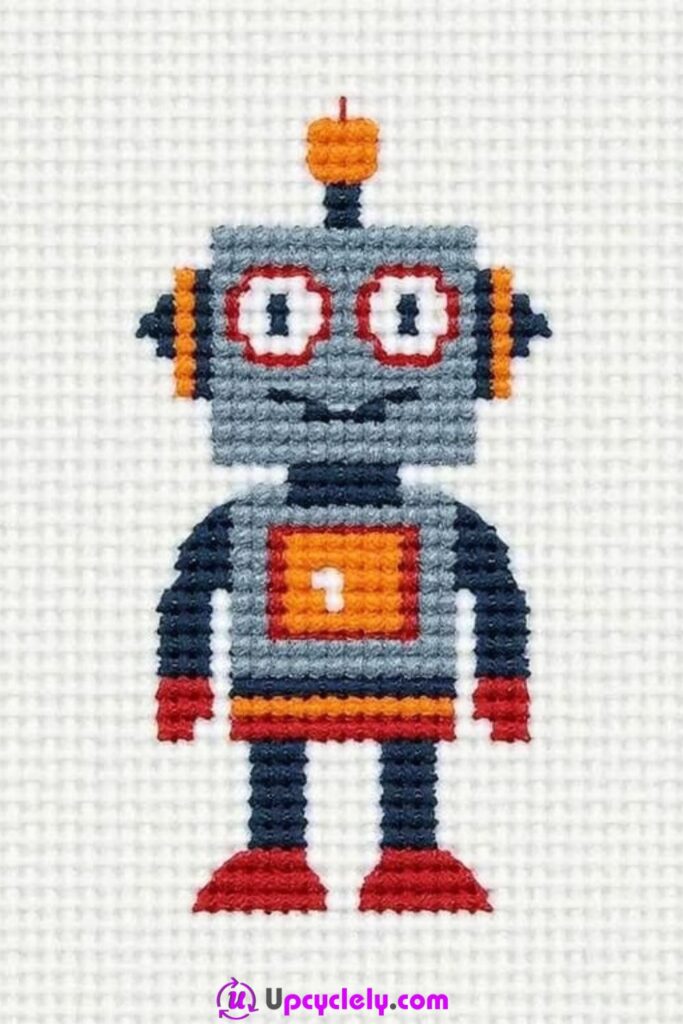
Materials Needed:
- Aida cloth (white or light gray)
- Embroidery threads in gray, red, orange, and black
- Cross-stitch needles
- Embroidery hoop
- Scissors
- Pixel pattern of the robot design
Steps:
Step 1: Stretch a piece of white or light gray Aida cloth into your hoop and locate the center. Start stitching the main robot body in medium gray thread, following the pixelized grid pattern. Work outward from the robot’s chest to maintain balance and symmetry.
Step 2: Add features like the antenna, eyes, and mouth using orange and red threads. Take your time with the face details as these bring character to your robot and make it visually engaging.
Step 3: Outline the limbs, starting with the arms and then the legs. Use a darker shade of gray or black to create definition. Add the red mittens and boots at the ends—increase the thread thickness for these parts to make them pop.
Step 4: For the final touch, stitch the orange box on the chest and embroider the white “1” inside. Keep the edges sharp by using backstitches for precision. Inspect the robot thoroughly, tie off loose threads, and trim the fabric for a neat finish.
Pro Tip:
For a playful touch, use metallic embroidery threads for the antenna and chest details to give the robot an exciting, futuristic vibe.
Feathers and Leaves
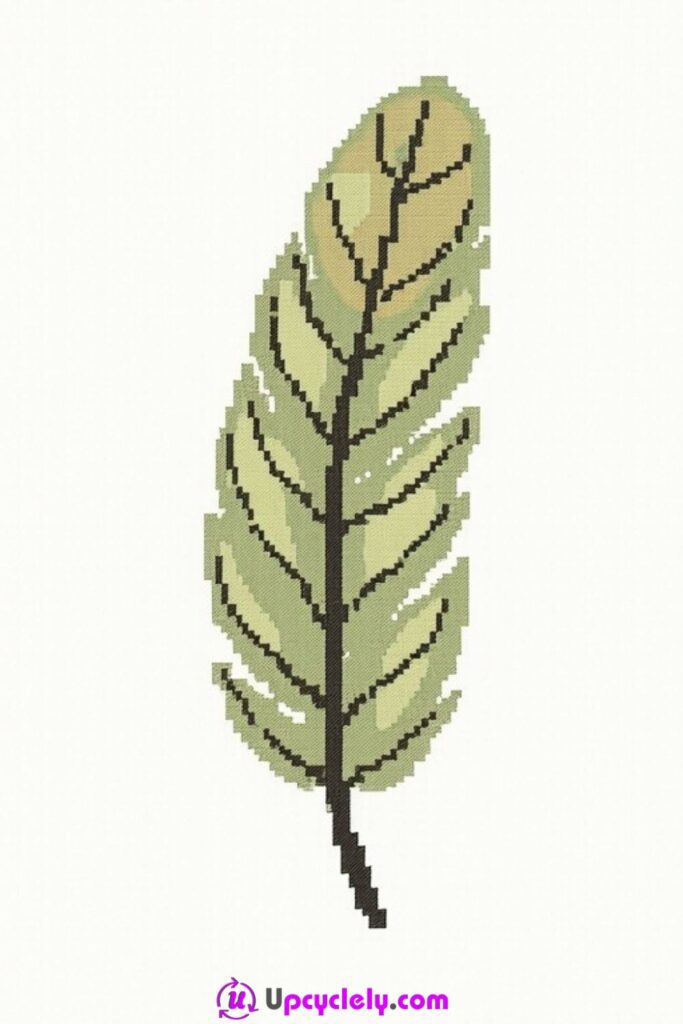
Materials Needed:
- Aida cloth (light green or white)
- Embroidery threads in light green, dark green, and brown
- Cross-stitch needles
- Embroidery hoop
- Scissors
- Pixelated leaf pattern for reference
Steps:
Step 1: Stretch out your fabric and mark the center. Begin by stitching the leaf’s stem in dark green thread. Use straight-line stitches for the stem to create a clean, uninterrupted base.
Step 2: Move on to stitching the veins branching out from the central stem. Light green thread works great for this as it contrasts subtly with the darker stem, lending the leaf a natural look. Focus on symmetry to keep the design balanced.
Step 3: Fill in the segments between each vein using light green and darker green thread alternately. This shading approach gives a textured and three-dimensional feel to your finished leaf.
Step 4: Once the entire leaf is completed, complete any additional detailing around the edges to define its silhouette. Trim and frame your work for a bold botanical design.
Pro Tip:
Blending two shades of green for the filling stitches creates soft transitions, making the leaf look more dynamic and lifelike.
Geometric Shapes
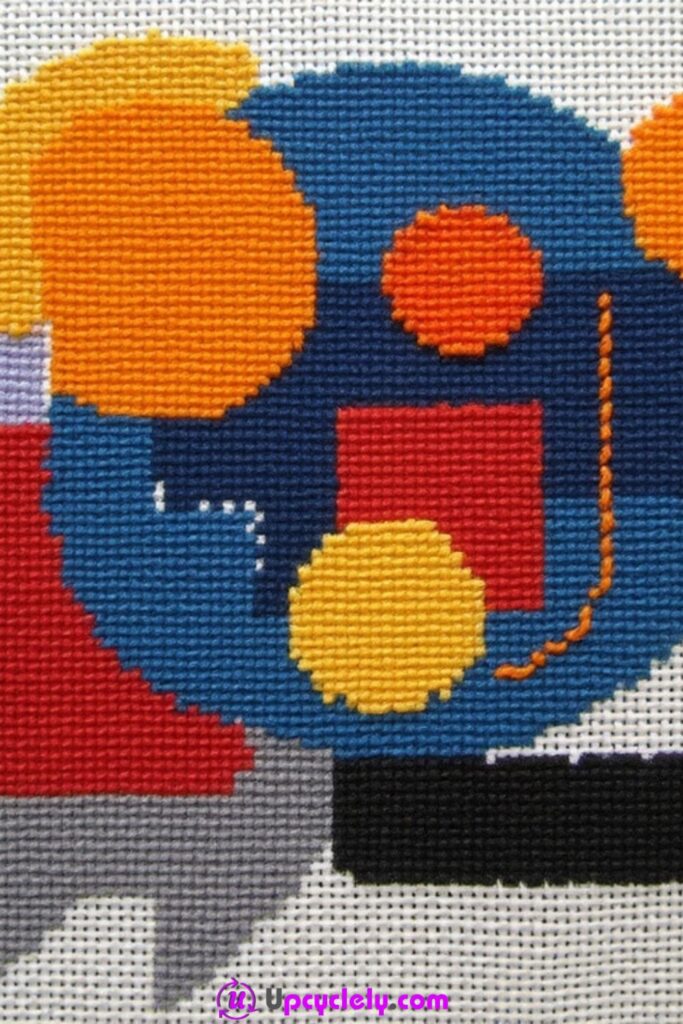
Materials Needed:
- Aida cloth (cream or light beige)
- Embroidery threads in red, navy blue, pink, and orange
- Cross-stitch needles
- Embroidery hoop
- Scissors
- Geometric pattern chart (triangles, circles, and rectangles)
Steps:
Step 1: Secure the Aida cloth tightly in the embroidery hoop and find the center. Begin with the largest shapes like the red rectangle and navy circle. Use long backstitches for their outlines and work your way inward with cross-stitches to fill them in.
Step 2: Stitch the orange and navy blue triangles surrounding the central circle. Be precise when placing angular shapes, as crooked stitching can disrupt the whole geometric look of the pattern.
Step 3: Add decorative details like the pink ring and other smaller elements. Cross-stitch is ideal for filling, while backstitching can outline finer elements to add definition and clarity to the overall design.
Step 4: Double-check your stitching for missed spots and use a pair of embroidery scissors to trim any stray threads. Clean lines are critical to highlight the symmetry and angular features of this geometric masterpiece.
Pro Tip:
When working with multiple shapes and colors, finish each one completely before moving to the next. This avoids thread tangling and keeps your edges crisp.
Simple Borders
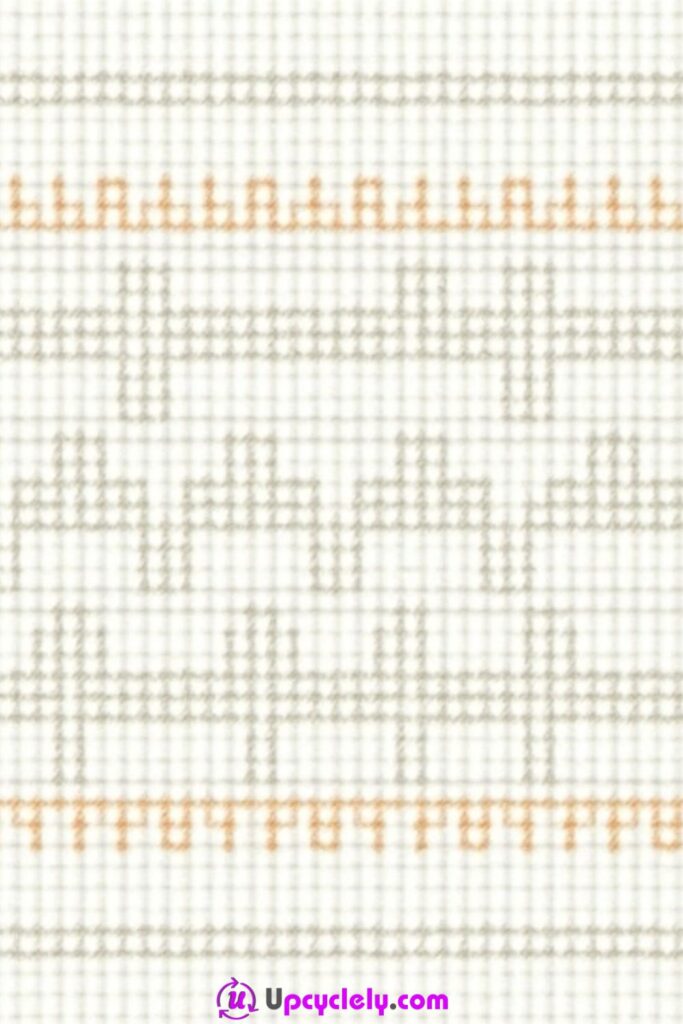
Materials Needed:
- Aida cloth (off-white or light beige)
- Embroidery threads in orange and gray
- Cross-stitch needles
- Scissors
- Embroidery hoop
- Simple border pattern (zigzag and geometric shapes)
Steps:
Step 1: Secure your Aida cloth into an embroidery hoop, stretching the fabric taut to prevent puckering as you stitch. Lightly mark sections for the top, middle, and bottom border patterns using a washable fabric marker to create a layout guide.
Step 2: Begin stitching the top horizontal zigzag border in bright orange thread. Start in one corner and work meticulously, keeping each stitch consistent in size. Follow the pattern to maintain the sharp angles of the zigzag design, ensuring the line flows smoothly across.
Step 3: Move to the middle geometric section. Using gray thread, carefully stitch the repeating shapes, paying close attention to proportions and alignment. This section is more intricate, so take your time to count stitches correctly and keep the design symmetrical.
Step 4: Finish with the bottom zigzag border, mirroring the top one with the same orange thread. Inspect the entire design, tie off any loose threads at the back neatly, and trim the excess fabric if needed.
Pro Tip:
When stitching symmetrical designs like borders, start from the center and work outward to ensure balance and avoid uneven spacing.
Holiday-Themed Designs

Materials Needed:
- Aida cloth (white or light gray)
- Embroidery threads in green, yellow, red, blue, purple, and orange
- Cross-stitch needles
- Embroidery hoop
- Scissors
- Holiday-themed design pattern (Christmas tree with gifts)
Steps:
Step 1: Begin by securing your fabric in the hoop and marking the center. Start with the green threads to create the base layers of the Christmas tree. Stitch each layer row by row, tapering the shape as you reach the top to form the triangular silhouette.
Step 2: Use yellow thread to stitch the star at the top of the tree. For added dimension, you can introduce a backstitching technique around the edges of the star. Then move on to decorating the tree with ornaments using multicolored threads like red, blue, purple, and orange. Place these evenly to mimic a festive look.
Step 3: Stitch the gifts at the base of the tree. Use contrasting colors like pink, purple, and blue for the boxes and bows to make them pop. Follow the pixelated design closely to maintain proportionality and symmetry.
Step 4: Add finishing touches like white garlands on the tree and small orange baubles for additional detail. Once done, inspect your work for any gaps, clean up loose threads, and iron the back of the fabric for a flat finish.
Pro Tip:
Metallic embroidery threads can be used for the star and ornaments to give your holiday design a shimmering, festive look!
Miniature Animal Portraits
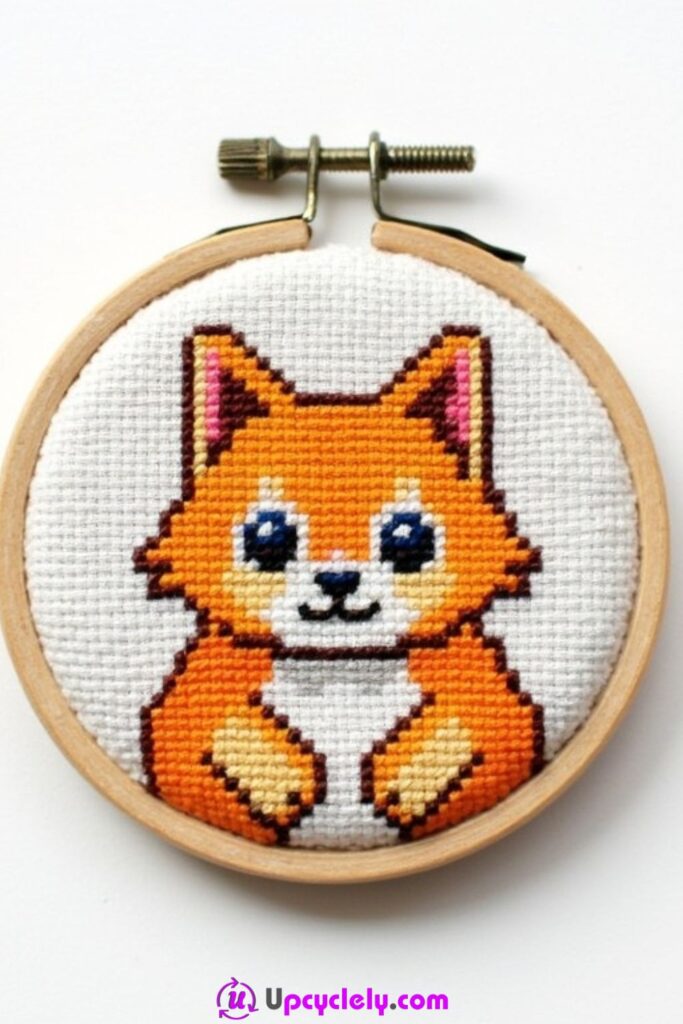
Materials Needed:
- Aida cloth (white or light beige)
- Embroidery threads in orange, white, black, blue, and pink
- Cross-stitch needles
- Embroidery hoop (small size)
- Scissors
- Animal portrait pattern (cartoon fox)
Steps:
Step 1: Secure your Aida cloth in a small embroidery hoop to better fit the fox portrait design. Find the center point of your fabric and begin the outline of the fox with orange thread, focusing first on its head and body.
Step 2: Use white thread to fill in the inner details like the chest and ears. Take your time as these areas require smaller, precise stitches to define the fox’s features and achieve clarity in the design.
Step 3: Add the facial details such as the eyes, nose, and smile using blue and black threads. Pay special attention to the eyes, as bringing expressions to life in cross-stitch portraits adds personality to the design. Use pink for subtle accents on the inner ears and cheeks.
Step 4: Once the portrait is complete, inspect the design for missed stitches or uneven areas. Secure loose ends at the back neatly and trim the fabric to fit snugly within the embroidery hoop for display.
Pro Tip:
Use a combination of satin and matte threads to make the fox’s fur texture stand out while keeping the overall design cohesive.
Nature Elements
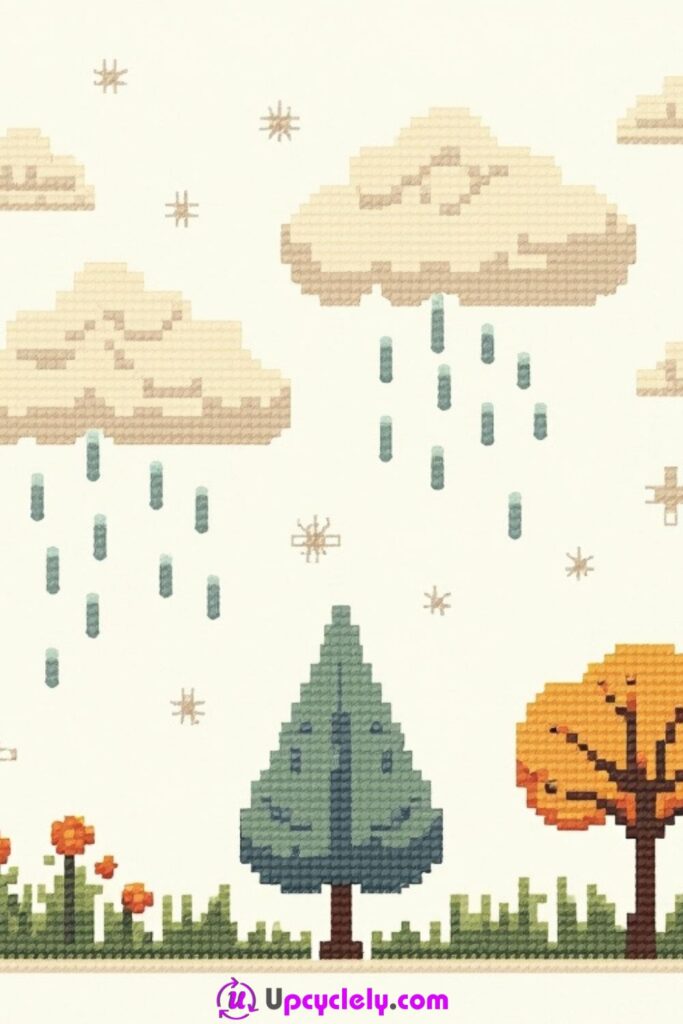
Materials Needed:
- Aida cloth (light blue or white)
- Embroidery threads in blue, green, orange, and beige
- Cross-stitch needles
- Embroidery hoop
- Scissors
- Nature-themed pattern (clouds, trees, and raindrops)
Steps:
Step 1: Stretch your fabric in the hoop and lightly mark the placement for each element. Start with the clouds near the top of the design. Use beige thread to outline and fill in the pixelated cloud shapes, keeping your stitches consistent for a neat finish.
Step 2: Move to the raindrops below the central cloud. Use blue thread for straight, vertical stitching to create delicate, symmetrical rows of raindrops. Count your stitches carefully to maintain alignment with the cloud above.
Step 3: Stitch the trees toward the bottom. Begin with the green and orange canopies, closely following the pattern to distinguish between the pine tree and the autumn tree. Complete the trunks in brown thread, and add smaller details like flowers on the grass with orange floss.
Step 4: Once complete, review all areas for clarity and missed stitches. Tie off the loose threads on the back, and press your design to give it a crisp finish for display or gifting.
Pro Tip:
Enhance the design by using variegated threads for the raindrops to create a natural gradient effect, adding more depth to the scene.
Rainbow Stripes
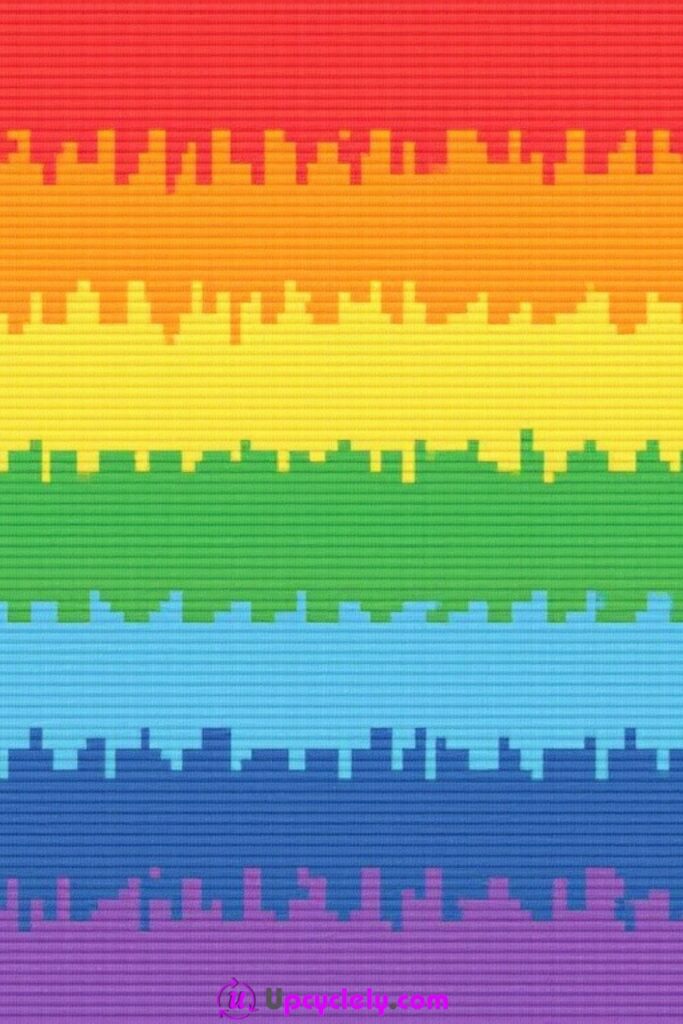
Materials Needed:
- Aida cloth (cream or white)
- Embroidery threads in red, orange, yellow, green, blue, indigo, and violet
- Cross-stitch needles
- Scissors
- Embroidery hoop
- Rainbow stripe pattern reference
Steps:
Step 1: Stretch your fabric in the embroidery hoop and mark the grid outline for the seven horizontal stripes. Begin with the red stripe at the top, carefully stitching the jagged edges to give the design its unique, dynamic appearance.
Step 2: Continue working downward through each color in rainbow order (orange, yellow, green, and so on). Use bright, bold threads to create vibrant rows. Maintain consistent spacing between the rows for a clean, sharp finish.
Step 3: Take extra care to stitch the jagged interlocking edges where the stripes overlap slightly. This detail gives the rainbow a “waveform” aesthetic that makes it visually interesting. Use backstitching if needed for sharper outlines.
Step 4: Once all the stripes are complete, review your work and tie off any loose threads on the back. Iron the fabric carefully to flatten it before framing or using it as a decorative piece.
Pro Tip:
Use color-blending techniques at the edges of each stripe to create smoother transitions between colors, making the rainbow appear more seamless while retaining its pixelated charm.
Tiny Nautical Designs
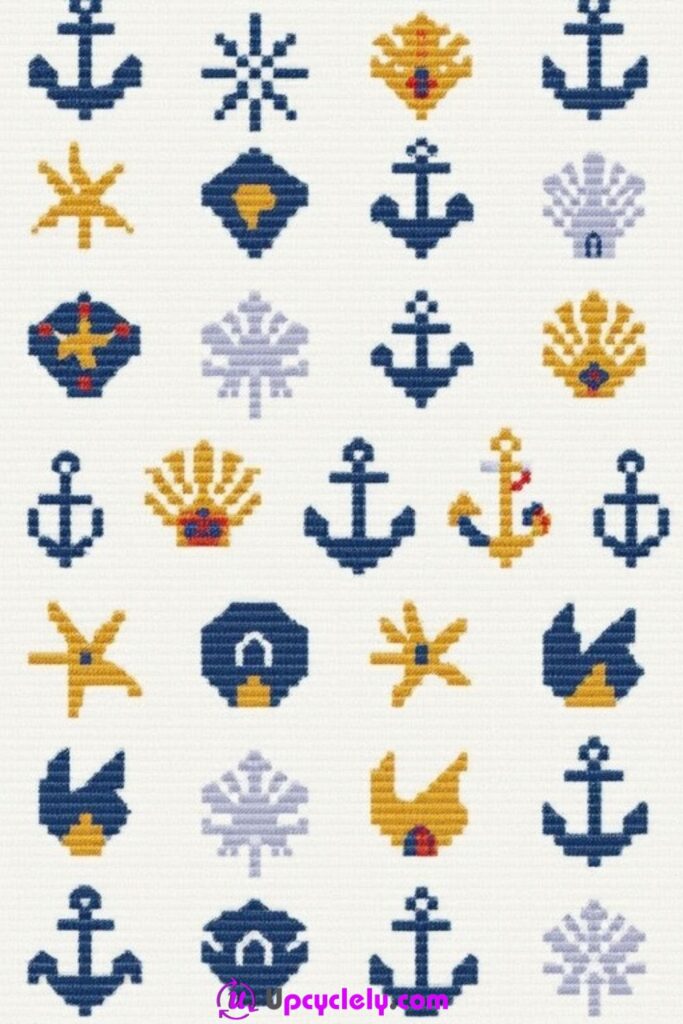
Materials Needed:
- Aida cloth (light blue or white)
- Embroidery threads in dark blue, yellow, red, and gold
- Cross-stitch needles
- Embroidery hoop
- Scissors
- Nautical pixel-pattern guide (anchors, stars, shells)
Steps:
Step 1: Begin by securing your Aida cloth in the embroidery hoop and marking the grid layout using a washable fabric marker. This pattern requires even spacing, so accurately mapping out the grid will save time and ensure alignment.
Step 2: Using dark blue thread, start stitching the anchors. These symbols repeat in the pattern, so focus on precision to keep them uniform. Work down each column of anchors before moving on to the next symbol.
Step 3: Stitch the nautical stars with yellow and gold threads. To add depth, consider layering a darker shade of yellow for the inner parts of the stars while keeping the outer edges bright. Pay attention to creating symmetrical points.
Step 4: Finish with the shells and decorative details like other small symbols in red and light blue. Use counted cross-stitch techniques for clean, defined shapes. Once complete, trim excess fabric and carefully inspect the backside for secure threads.
Pro Tip:
When stitching repeating patterns, use a ruler or grid lines on the fabric to maintain consistent spacing across the layout.
Simple Mountain Scene
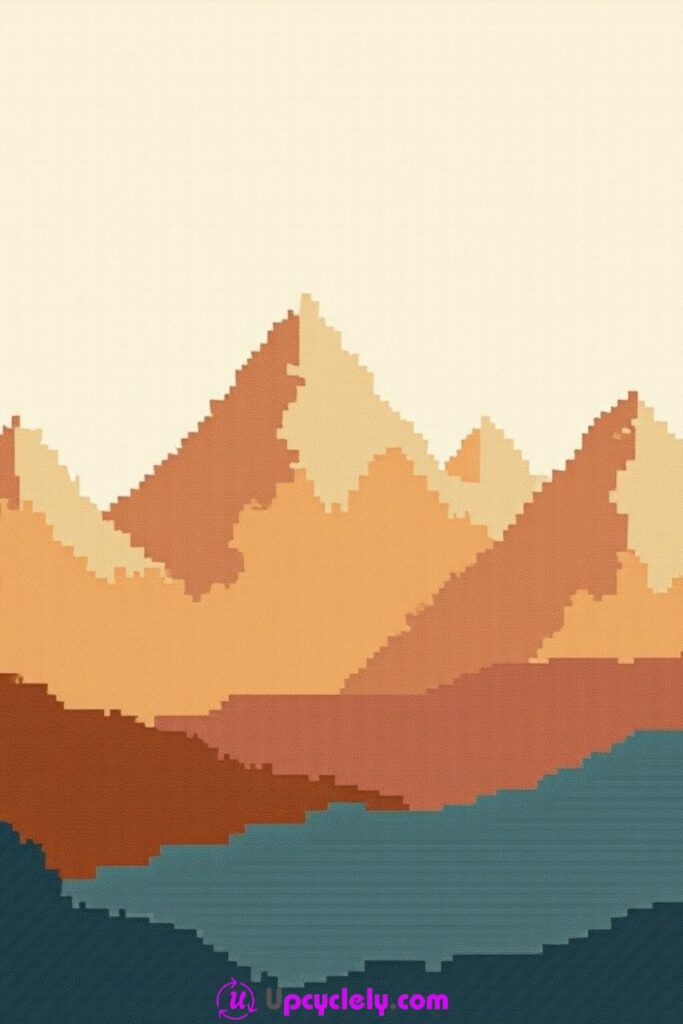
Materials Needed:
- Aida cloth (cream or tan)
- Embroidery threads in shades of orange, red, tan, teal, and blue
- Cross-stitch needles
- Embroidery hoop
- Scissors
- Mountain scene pixel-pattern chart
Steps:
Step 1: Prepare your fabric in the hoop, then identify the center to start from the tallest mountain peak. Use a combination of orange and red threads to create layered triangular shapes for the mountain slopes. Work from the summit downward.
Step 2: Add shading and dimension by stitching with tan threads where the slopes meet. Combine this with backstitching for sharper details along the edges of the peaks.
Step 3: Move to the base of the mountains and stitch the foreground using teal and blue threads for the lower landscape. Alternate thread shades to create a layered effect that mimics shadows and depth.
Step 4: Once the entire mountain scene is complete, double-check for smooth transitions between colors. Flip the fabric and secure all loose threads before cutting away any excess material.
Pro Tip:
Blend two thread colors together (e.g., red and orange) for a gradient effect to give your mountain layers a more natural, artistic look.
Stitched Quotes with Floral Accents
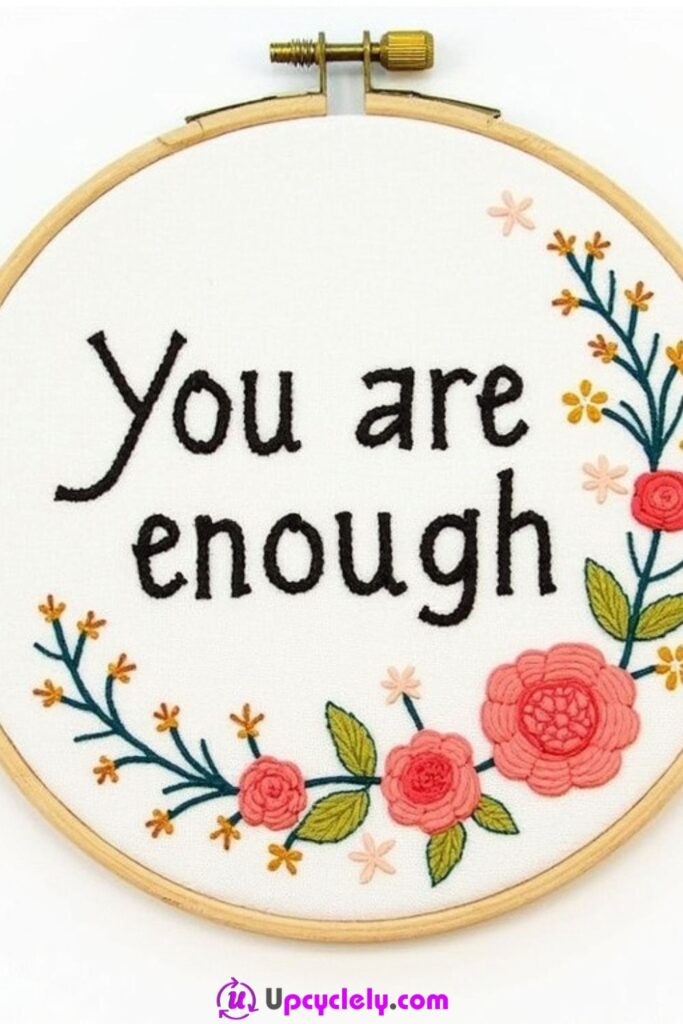
Materials Needed:
- Aida cloth (white or cream)
- Embroidery threads in black, pink, red, yellow, and green
- Cross-stitch needles
- Embroidery hoop
- Scissors
- Motivational quote and floral design pattern
Steps:
Step 1: Secure your fabric in the hoop and lightly trace the quote’s placement in the center. Using black thread, stitch the text carefully. If the font is cursive or complex, backstitching works well for precise curves.
Step 2: Start adding the floral embellishments. Use pink and yellow threads for the flowers, and stitch around the edges of the quote to frame it beautifully. Work outward from the center to maintain balance.
Step 3: Stitch the greenery. Use simple cross-stitches for the leaves along the vines, alternating light and dark green for dimension. Add small touches like dots or seeds around the flowers for extra detail.
Step 4: Once all elements are done, inspect your work for symmetry. Trim the fabric neatly, leaving enough room to frame the piece within the hoop or a decorative frame.
Pro Tip:
Stitch the text before the flowers to avoid accidentally crowding your design or running out of space for the quote.
Succulent Plants
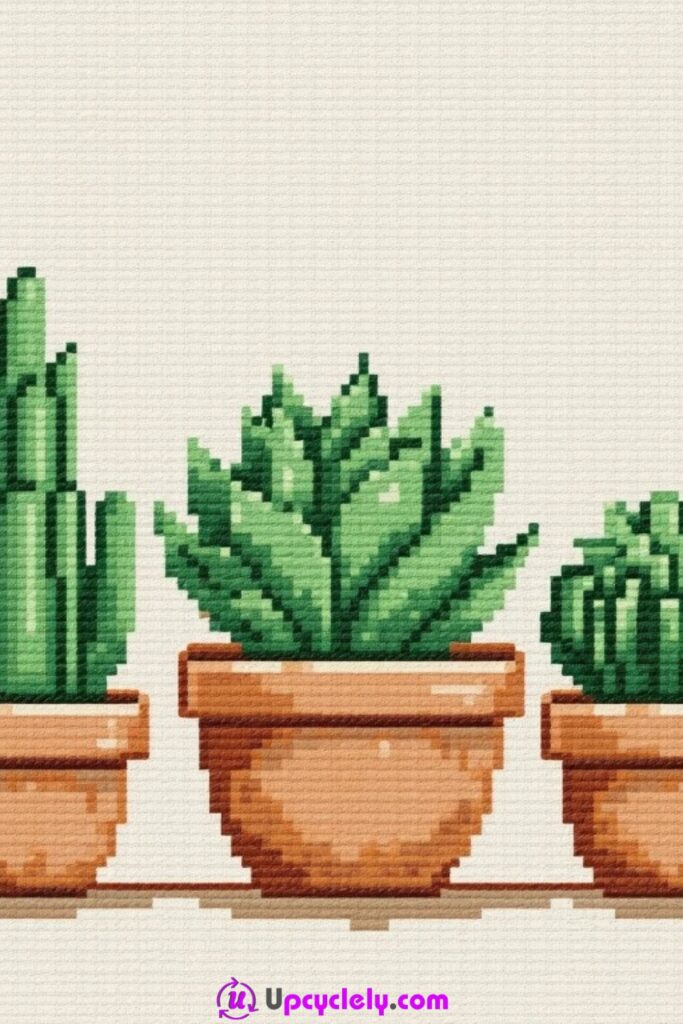
Materials Needed:
- Aida cloth (light beige or white)
- Embroidery threads in green, terracotta, yellow, and light brown
- Cross-stitch needles
- Embroidery hoop
- Scissors
- Succulent and cactus pixel-art pattern
Steps:
Step 1: Place your cloth in the hoop and determine the placement for the three potted plants. Begin with the pots by stitching them in terracotta-colored thread, layering two shades for added texture.
Step 2: Work on the columnar cactus to the left using vertical green stitches. Add darker green highlights along the edges to show depth and dimension.
Step 3: Move to the central succulent. Use circular rows of green stitches, working outward from the middle to mimic the rosette pattern. Alternate light and dark green threads for a realistic effect.
Step 4: For the small cactus on the right, stitch short, rounded segments to match its shape. Finish by adding yellow highlights for any flowers or spines that accentuate the design. Iron the fabric on low to smooth out any wrinkles.
Pro Tip:
Use metallic or pearl-finished threads for the flowers on the succulents to add a subtle sparkle that catches the light.
Cross-Stitch Habits That Can Lead to Miscounts, Bulky Backs, or Distorted Fabric
Cross-stitch problems are often small at first and obvious only after several rows have been built on top of them. A one-square error can shift a whole repeat, while thread carried too far across the back can make a neat front difficult to finish. The following habits are worth catching early, especially when you are reusing fabric or mixing short leftover floss lengths.
Starting Without Checking the Final Size
A chart that fits the hoop may still leave too little fabric for a frame, hem, or backing. Count the design dimensions and leave finishing allowance before the first stitch rather than trimming the cloth closely at the start.
Pulling the Hoop or Stitches Too Tight
Excess tension can distort the fabric grid and make crosses sit unevenly. Keep the cloth comfortably taut and pull thread only until the stitch lies flat against the surface.
Carrying Thread Across Long Empty Areas
Long floats can show through pale fabric, snag during finishing, and add unnecessary bulk. End the thread and restart closer to the next motif when the gap is large.
Ignoring One Suspected Miscount
A questionable square rarely fixes itself later. Stop, compare the nearby landmarks with the chart, and correct the count before filling a large area around it.
Mixing Thread Strands Inconsistently
Changing from two strands to three midway through a filled shape can alter coverage and texture. Test the strand count at the beginning and keep it consistent unless the design deliberately calls for a change.
Using Bulky Knots on Pieces That Need to Lie Flat
Large knots can create bumps in bookmarks, cards, sewn panels, and tightly framed pieces. Weave tails under nearby stitches so the back remains flatter.
Trimming the Fabric Before Finishing Is Decided
A motif may need extra cloth for lacing, hemming, hooping, or sewing. Keep the surrounding fabric until the final mounting method has been confirmed.
Adding Too Many Accent Colours
Leftover thread is tempting, but every scrap does not need to enter the same design. Choose a controlled palette and save unrelated colours for another small motif.
Pressing Directly on the Front of Raised Stitches
Hard pressure can flatten texture or distort the fabric. Press from the back through a clean cloth and use a method suitable for the fabric and thread.
Frequently Asked Questions
Is cross-stitch suitable for a complete beginner?
Yes. Aida cloth and a small chart with large, clearly counted areas are usually the easiest starting point. Choose one compact motif and practise consistent X-shaped stitches before moving to a full sampler.
Can I use leftover embroidery floss from other projects?
Usually, provided the thread is still strong, clean, and suitable for the fabric. Short lengths are particularly useful for flowers, eyes, sprinkles, small symbols, and other accent areas.
Do I need an embroidery hoop for every cross-stitch project?
Not always, but a hoop can help beginners keep the fabric evenly supported and make counting easier. Narrow bookmarks or very stiff Aida may be comfortable to stitch without one if the fabric remains controlled.
How can I avoid losing my place on a large chart?
Work from a reliable center point and complete small nearby sections rather than jumping widely around the pattern. Temporary grid marks or counting pins can also help when they are compatible with the fabric and can be removed safely.
Why does the back of my cross-stitch become bulky?
Long carried threads, large knots, and many overlapping thread tails are common causes. End colours when they travel too far and weave short tails under nearby stitches instead of building thick knots.
Should I wash finished cross-stitch before framing it?
Only if the fabric, floss, and any markings are suitable for washing. When you are uncertain about reused or vintage materials, use a gentler finishing method rather than assuming every thread is colourfast.
What can I make from very small cross-stitch scraps?
Small motifs can become bookmarks, card inserts, patches, labels, ornaments, key fob inserts, or tiny framed pieces. Leave enough fabric around the stitching for whatever finishing method you choose.
Let Small Cross-Stitch Motifs Become Useful Finished Pieces
The most useful lesson in these cross-stitch craft ideas is that a small scrap can still become a finished object with a clear purpose. The grid gives you structure; the real choice is how much detail the motif needs and how you will use it once it leaves the hoop.
Begin with one design that fits the fabric and thread already in front of you. Count carefully, keep the back manageable, and choose the finish before trimming. Which small motif would you like to stitch first?