Small craft supplies have a habit of multiplying in drawers: a handful of buttons, short ribbons, leftover felt, paper offcuts, wooden sticks, beads, shells, and bits of yarn that seem too useful to throw away. I don’t think those odd leftovers need to become permanent clutter. They can be the starting point for cheerful little projects, especially when the idea is simple enough to finish without buying a whole new set of materials.
What I like most about cute craft ideas is the freedom to work at a small scale. A tiny pouch can use one scrap of felt, a picture frame can begin with sticks from another project, and a wall hanging can make use of fabric strips that would otherwise be too narrow for sewing. The trick is to let the material decide what kind of project it can handle rather than forcing every scrap into the same technique.
These projects are playful, but the practical details still matter. Paper needs the right support, hot glue needs careful handling, wearable charms need secure findings, and decorative items for children or pets should be checked for loose small parts. Once those basics are sorted, the fun part is balancing colour, texture, and scale without covering every surface simply because another embellishment will fit.
Sort Small Craft Materials by Strength, Purpose, and Condition
Before cutting or gluing anything, sort the materials by what they can realistically do. A slightly creased sheet of paper may still be excellent for layered flowers, while brittle ribbon or cracked wooden sticks are better removed from the project pile. Small-scale crafts depend on clean edges and secure joins, so weak scraps often cause more frustration than they save.
I know it can feel wasteful to reject a leftover piece, but reuse works best when the material can survive its new job. Separate structural pieces from decorative pieces, and set aside anything with sharp splinters, loose coatings, rust, strong odours, mould, or damage that cannot be cleaned safely.
· Group paper, fabric, felt, yarn, wood, beads, buttons, and hardware separately.
· Check ribbons and cords for fraying before using them in hanging or wearable pieces.
· Smooth rough wooden edges and discard cracked sticks that could split further.
· Wash or wipe reusable items only in a way that suits the material.
· Keep tiny beads, buttons, pins, magnets, and charm findings away from young children and pets.
Test Adhesives, Heat, Paint, and Finishes Before Assembly
Cute crafts often mix materials that behave very differently. Hot glue can work well on some rigid decorative pieces but may melt delicate plastics or create stiff lumps on fabric. Water-based glue can wrinkle thin paper, paint can bleed into unfinished wood, and a finish that looks clear on one material may cloud another.
Test a small offcut whenever you are unsure. Then choose the least aggressive method that still gives the project enough strength. Follow the product label for ventilation, heat, curing, and surface compatibility instead of assuming every glue, paint, or sealer works the same way.
· Protect the table before using paint, ink, hot glue, glaze, or sealers.
· Use heat-resistant support and keep fingers clear of hot-glue nozzles and fresh glue.
· Reserve craft-only tools and trays for polymer clay when the product instructions require it.
· Let painted, glued, or sealed pieces cure according to the product directions before handling heavily.
· Test removable adhesives first when working on frames, walls, or items you may want to change later.
Plan Safe Display, Wear, and Everyday Handling
A project can look finished before it is actually ready to use. Hanging pieces need reliable loops, wearable charms need closed findings, coasters need a finish appropriate to moisture, and decorative wooden spoons should not automatically be treated as cooking utensils simply because they started as kitchen tools.
Think about where the finished craft will live and who may handle it. I’d rather simplify a design than add a loose bead, feather, shell, or tiny charm that creates an avoidable problem. This is especially important for mobiles, necklaces, light garlands, and anything placed in a child’s room.
· Check hanging knots and loops before putting a mobile or wall piece overhead.
· Keep paper and fabric decorations away from hot bulbs, flames, and heat sources.
· Use only manufacturer-approved materials around electrical light strings.
· Treat decorated food-contact items as display-only unless the complete finish system is approved for that use.
· Recheck small attachments after the craft has been handled, moved, or stored.
Faux Stained Glass with Tissue Paper
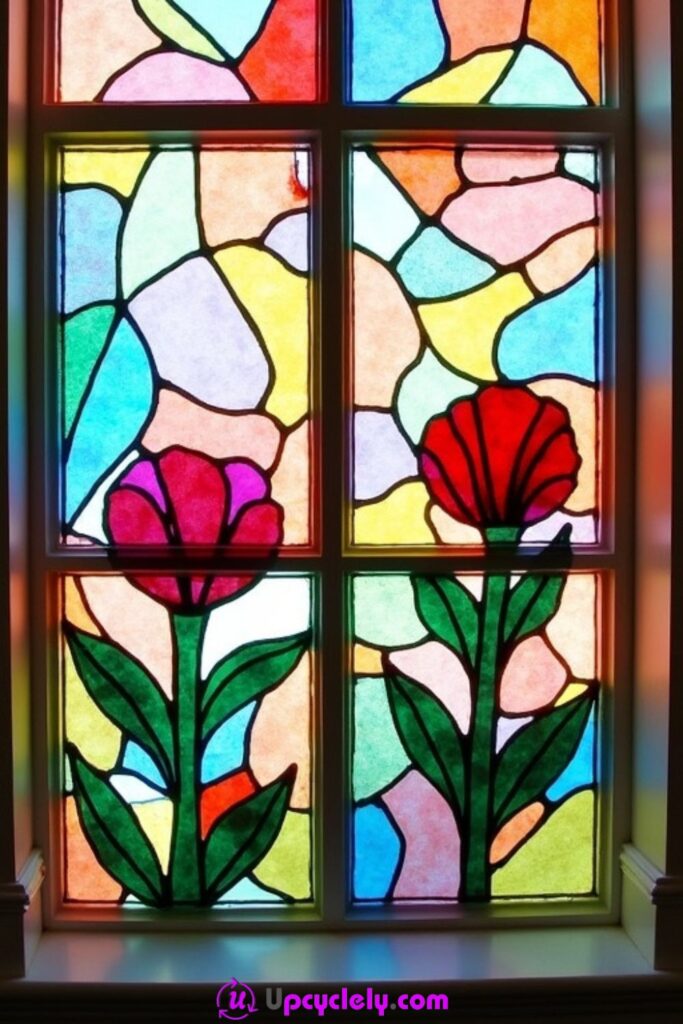
Tissue-paper stained glass works because light does most of the visual work. Thin coloured paper layered over a clear sheet can turn an ordinary frame into a bright window decoration without requiring real glass-cutting skills. Reused tissue from gift wrapping is especially useful when it is still clean and not badly crushed.
The strongest designs usually have a clear network of dark lines separating larger colour areas. I would avoid making every piece tiny; a few broader shapes let sunlight pass through and stop the surface from looking like confetti trapped behind a frame.
Materials and Tools
· Clean picture frame with intact clear insert or transparency sheet
· Clean tissue-paper offcuts in several colours
· Craft glue suitable for the clear surface
· Small paintbrush or foam brush
· Scissors
· Black craft tape or another non-sharp dark outlining material
· Protective paper for the work surface
Steps for This Cute Craft Project
1. Clean and plan the clear panel. Remove the insert from the frame and clean both sides so dust cannot become trapped under the paper. Sketch a loose mosaic on scrap paper first, keeping the largest shapes away from the frame edge where they may be hidden.
2. Cut and arrange the tissue pieces. Trim reused tissue into triangles, arches, or irregular blocks and place them dry on the panel before gluing. Overlap only a few edges if you want blended colour; too many layers can turn bright tissue unexpectedly muddy.
3. Attach the colour in controlled sections. Brush on only enough compatible adhesive to hold the tissue flat, then smooth gently from the centre outward. Work across the panel instead of coating the whole surface at once, because thin paper becomes fragile when it is saturated.
4. Add the dark divisions and reassemble. Once the paper layer is stable, apply narrow black tape or painted lines to define the sections. Trim the edges cleanly, return the panel to the frame, and hang it where it receives light without being exposed to heat or moisture.
For me, the black divisions matter almost as much as the colour. They give the eye somewhere to stop, so the tissue can stay loose and irregular without looking unfinished.
Variation: Use only two or three related colours for a calmer window panel, or make a small sun-catcher from a reused transparent food-container lid that has been thoroughly cleaned and has no sharp edges.
Button Art Wall Hanging
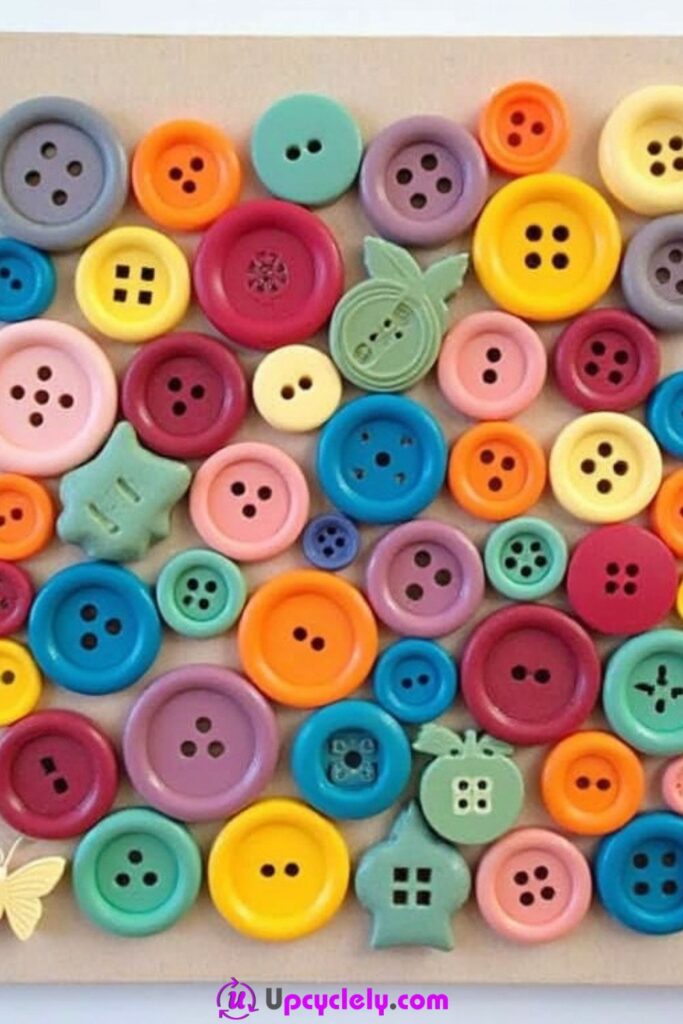
A jar of unmatched buttons can become a surprisingly graphic wall piece when the shapes are arranged as one clear silhouette. Hearts, initials, simple flowers, clouds, or geometric forms work well because the button holes and varied rims already add plenty of small detail.
A firm backing is important here. Foam board, a reused frame backing, or a small canvas can all work, but the surface should stay flat once the weight of the buttons is added. I’d arrange every button before gluing; colour balance is much easier to adjust while the pieces can still move.
Materials and Tools
· Assorted clean buttons
· Firm canvas, board, or reused frame backing
· Pencil and eraser
· Ruler or paper template
· Adhesive suitable for buttons and backing
· Tweezers for small pieces
· Optional frame or hanging hardware appropriate to the backing
Steps for This Cute Craft Project
1. Choose a simple outline and prepare the base. Lightly mark the main shape, leaving a clean margin around it. If the board is reused, make sure it is flat, dry, and free from flaking paper or old adhesive.
2. Build the arrangement without glue. Place the largest buttons first, then fill around them with medium and small ones. Mix hole patterns and finishes, but repeat a few colours across the design so one bright area does not pull all the attention.
3. Secure the buttons in stages. Lift and glue a small group at a time so you do not lose the layout. Use just enough adhesive for a firm bond and keep it from squeezing through the button holes or spreading across the visible surface.
4. Check the edges and hanging method. Let the work cure flat, then gently test any buttons near the perimeter. Fit the finished piece into a frame or attach hardware suited to the board’s weight rather than relying on a decorative ribbon alone.
I don’t think every gap needs to disappear. A little backing visible between buttons can keep the shape readable and prevent the surface from becoming heavy.
Variation: Sort buttons by one colour family for a tonal design, or use broken jewellery pieces and large beads only as occasional accents rather than trying to fill the whole outline with them.using tweezers helps ensure precision and keeps your fingers glue-free.
Button Embellished Pillow
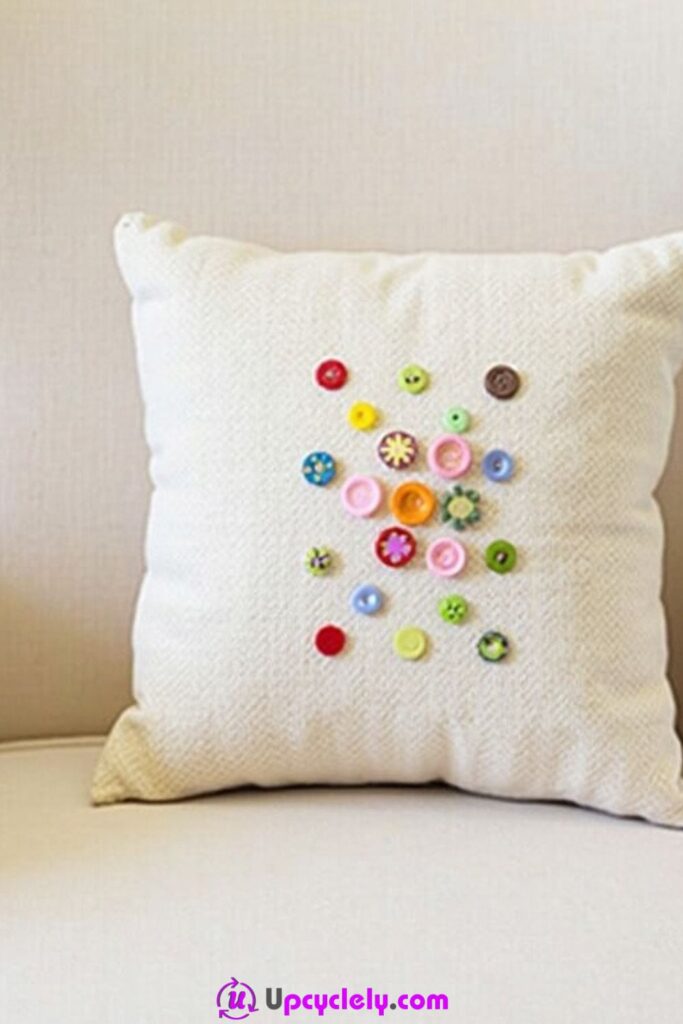
A plain cushion cover gives spare buttons a useful decorative surface, but the attachment method matters more than the pattern. Buttons that are only glued to a pillow can catch on clothing or loosen with flexing, so sewing is generally the more durable option when the cover will actually be used.
Keep the button area away from the section where someone’s face or arm is likely to rest. A border, corner cluster, or simple central motif on a decorative cushion can show off the buttons without turning the entire surface into a row of hard bumps.
Materials and Tools
· Removable pillow cover or sturdy fabric cushion cover
· Assorted clean buttons
· Strong sewing thread and hand needle
· Fabric chalk or removable marker
· Ruler or paper template
· Thimble if useful
· Optional fabric adhesive only for light decorative positioning
Steps for This Cute Craft Project
1. Wash and inspect the cover. Clean the fabric as appropriate, check seams, and insert a piece of card inside so you do not accidentally stitch the front to the back. Mark the basic design lightly while the cover lies flat.
2. Arrange the buttons before threading the needle. Place larger buttons at focal points and smaller ones where the design needs detail. Check the arrangement from a normal viewing distance, because a pattern that looks balanced close up can feel lopsided across a sofa.
3. Sew the main buttons securely. Stitch through sound fabric, using enough passes to hold the button without pulling the cloth into puckers. Knot threads on the inside and keep long floats from crossing the back where they could snag during washing.
4. Finish and test the cushion. Add smaller buttons only where they improve the shape, then remove the card and flex the cover gently. Reattach any loose piece before replacing the cushion insert and follow care methods that suit both the fabric and embellishments.
The part I would keep simple is the centre. Too many hard buttons in the main resting area can turn a soft cushion into something nobody actually wants to lean on.
Variation: Decorate only the envelope flap on a pillow cover, create one oversized flower from five or six buttons, or use removable button brooches on a display-only cushion for seasonal changes.
Cupcake Liner Flowers
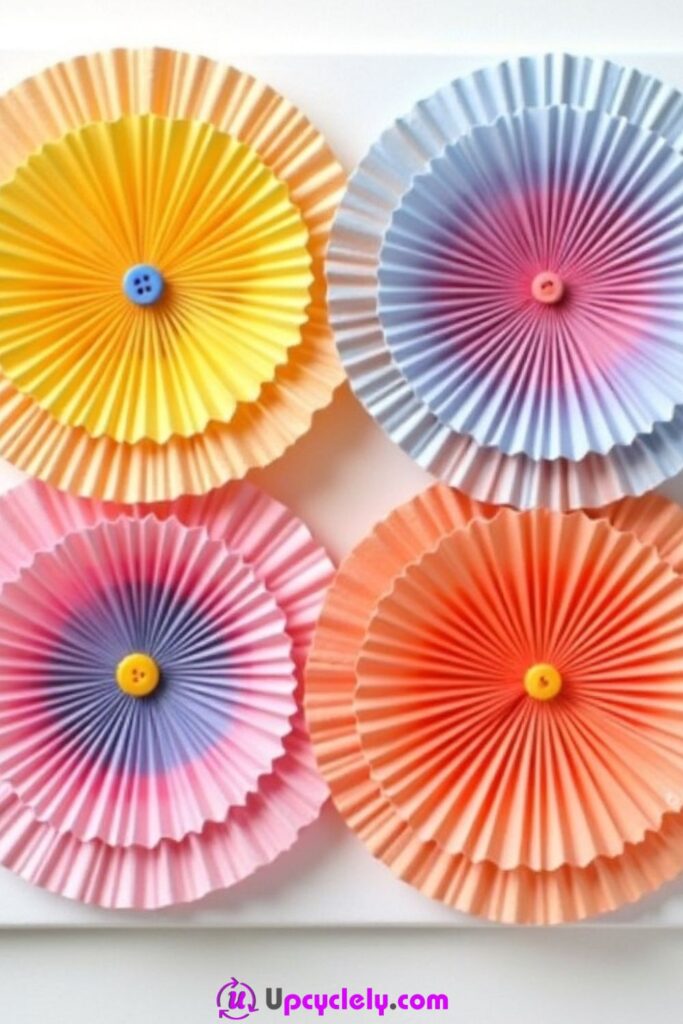
Cupcake liners already have pleated edges, which makes them useful for quick layered flowers. Clean unused liners left from a baking pack can be mixed with paper scraps, buttons, or punched circles to create wall cards, garlands, gift toppers, or framed arrangements.
Because the paper is thin, the backing decides how long the project stays neat. I’d mount the finished flower onto card rather than trying to hang several unsupported liners from their centres. That extra layer keeps the petals from sagging when the paper absorbs a little adhesive.
Materials and Tools
· Unused paper cupcake liners
· Scrap cardstock or reused card backing
· Buttons, paper circles, or other lightweight centres
· Scissors
· Craft glue
· Pencil or round tool for shaping petals
· Optional frame, card blank, or garland string
Steps for This Cute Craft Project
1. Flatten and sort the liners. Choose two or three sizes or colours for each flower and press them gently under a book if they are deeply folded. Decide where the flowers will sit before cutting, especially if they need to fit inside a frame.
2. Shape the petals. Make short, evenly spaced cuts toward the centre without cutting through it, or simply pinch the pleats for a softer flower. Curl selected edges around a pencil so the layers do not all sit flat on top of one another.
3. Stack and secure the layers. Put the largest liner at the back, offset the smaller ones, and glue only the centre area. Add a lightweight button or paper circle, pressing just long enough to hold without crushing the pleats.
4. Mount and finish the design. Glue each flower to firm card and let it dry flat. Add drawn stems, paper leaves, or a few smaller buds, but leave enough open space around the flowers for the layered edges to remain visible.
I like these most when the paper still looks like paper. Heavy paint, thick glitter, and too much glue can flatten the pleats that make the liners useful in the first place.
Variation: Use plain white liners and add water-based colour only around the edges, or make tiny flowers from mini liners for cards and gift tags.
DIY Pom-Pom Animals with Felt Ears
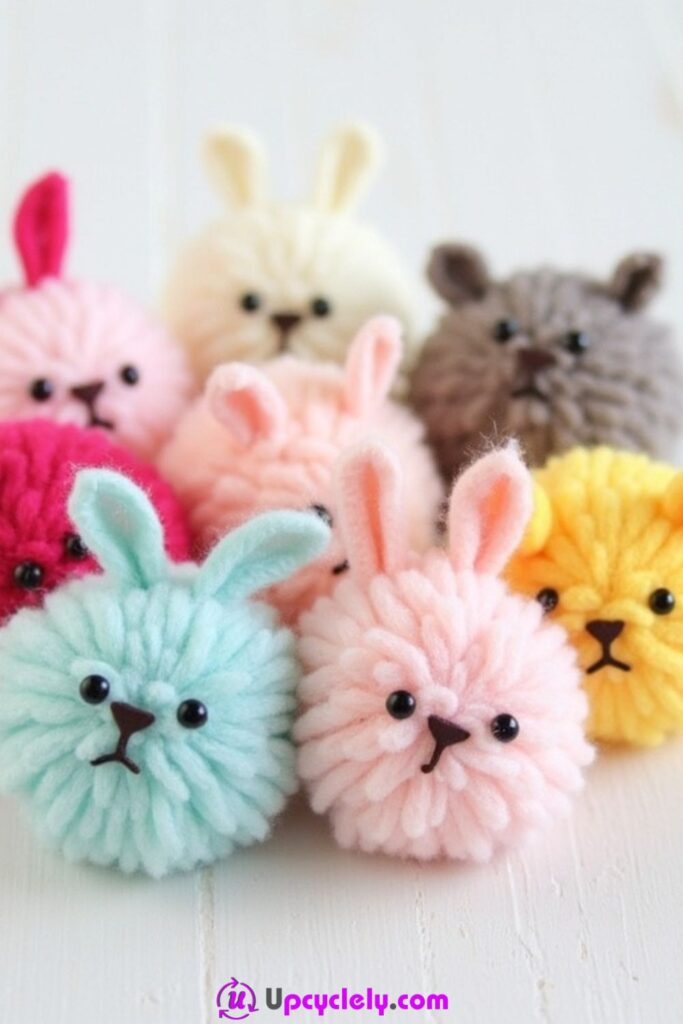
Pom-pom animals are a good use for short lengths of leftover yarn because the fluffy body hides colour changes and small joins. A round pom-pom can become a rabbit, bear, cat, chick, or imaginary creature with only a few felt shapes added.
The main challenge is keeping the small pieces secure. If the animals are for display, tiny beads or eyes may be appropriate; if young children or pets can reach them, larger stitched felt features are a safer choice than loose small parts.
Materials and Tools
· Leftover yarn
· Pom-pom maker or reusable cardboard templates
· Sharp craft scissors
· Felt offcuts for ears and facial features
· Strong thread and needle or suitable craft adhesive
· Optional large safety-conscious decorative features
· Small comb or fingers for fluffing
Steps for This Cute Craft Project
1. Make a dense pom-pom. Wrap enough yarn around the maker or cardboard so the finished body feels full, then tie the centre very firmly before cutting the loops. Keep the tying tails long until the animal is assembled because they can help secure extra parts.
2. Trim the basic body shape. Rotate the pom-pom and snip only obvious long strands, taking small amounts at a time. A slightly oval trim can suggest a head or body, but over-trimming quickly turns a soft pom-pom into a tiny yarn golf ball.
3. Cut and attach the felt features. Make ears slightly larger than you think you need because some of their base will disappear into the yarn. Stitch or glue them deep into the pom-pom, then add eyes, nose, or cheeks using a method suited to who will handle the finished animal.
4. Check every attachment. Tug gently on ears and features once the adhesive or stitching is secure. Trim stray yarn around the face, fluff the body again, and keep the finished animal as decoration if it contains beads, wire, magnets, or other small hard pieces.
I know it is tempting to give each animal ten little accessories, but the face usually reads better with just ears, eyes, and one small nose.
Variation: Use fabric scraps for floppy ears, make monochrome animals from one yarn colour, or attach a finished pom-pom creature to a key hook only when all hardware is secure and the item is not intended for a small child.
Mini Macramé Plant Hangers for Tiny Planters
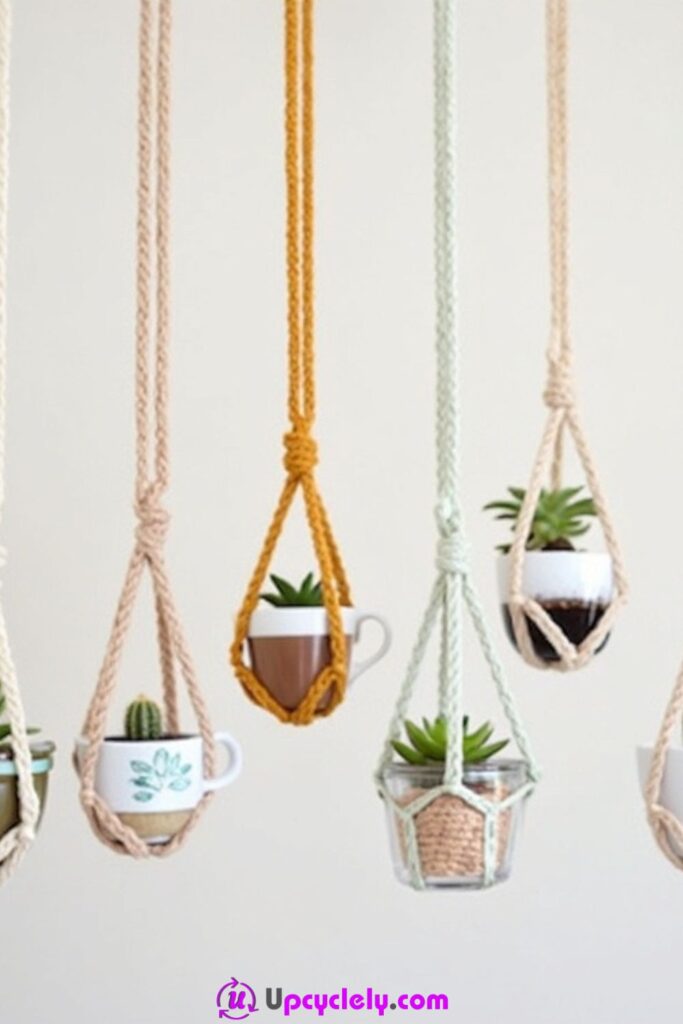
Mini macramé hangers turn short pieces of cord into useful display supports for very small pots, jars, or lightweight containers. The knots do not need to be complicated; even repeated square knots and simple gathering knots can create a convincing miniature hanger.
Scale is what makes this project work. Thick rope can overwhelm a tiny planter, while very thin thread may not provide enough grip. Choose cord that bends easily, holds a knot, and suits the weight of the container rather than copying a full-size plant hanger with the same proportions.
Materials and Tools
· Cotton cord, yarn, or another knot-friendly fibre
· Small lightweight planter or clean reused container
· Small wooden or metal ring
· Scissors
· Ruler or measuring tape
· Optional beads with holes large enough for the cord
· Secure ceiling or wall hook appropriate to the final load
Steps for This Cute Craft Project
1. Measure the planter and cut matching cords. Make the strands generously longer than the finished hanger because knots use more length than expected. Fold or attach them evenly through the ring so the working ends begin at similar lengths.
2. Create the upper structure. Tie a secure gathering knot below the ring, then divide the cords into equal groups. Work simple repeated knots, checking that both sides stay level rather than tightening one strand far more than the others.
3. Form the cradle around the empty planter. Tie adjacent groups together to create a net, then test the container before completing the bottom knot. Adjust the knot positions until the pot sits upright and cannot slide through the gaps.
4. Finish and hang cautiously. Tie a firm base knot, trim the ends, and test the hanger over a table before placing it higher. Use only a suitable hook and keep the total weight modest, especially if the reused container is glass or ceramic.
For me, symmetry matters less than security. A slightly uneven knot is easy to ignore; a planter leaning out of its cradle is not.
Variation: Make a hanger for an artificial plant, use a tiny metal cup instead of pottery, or add one bead above the cradle rather than threading heavy decorations onto every strand.
Feather and Bead Mobile
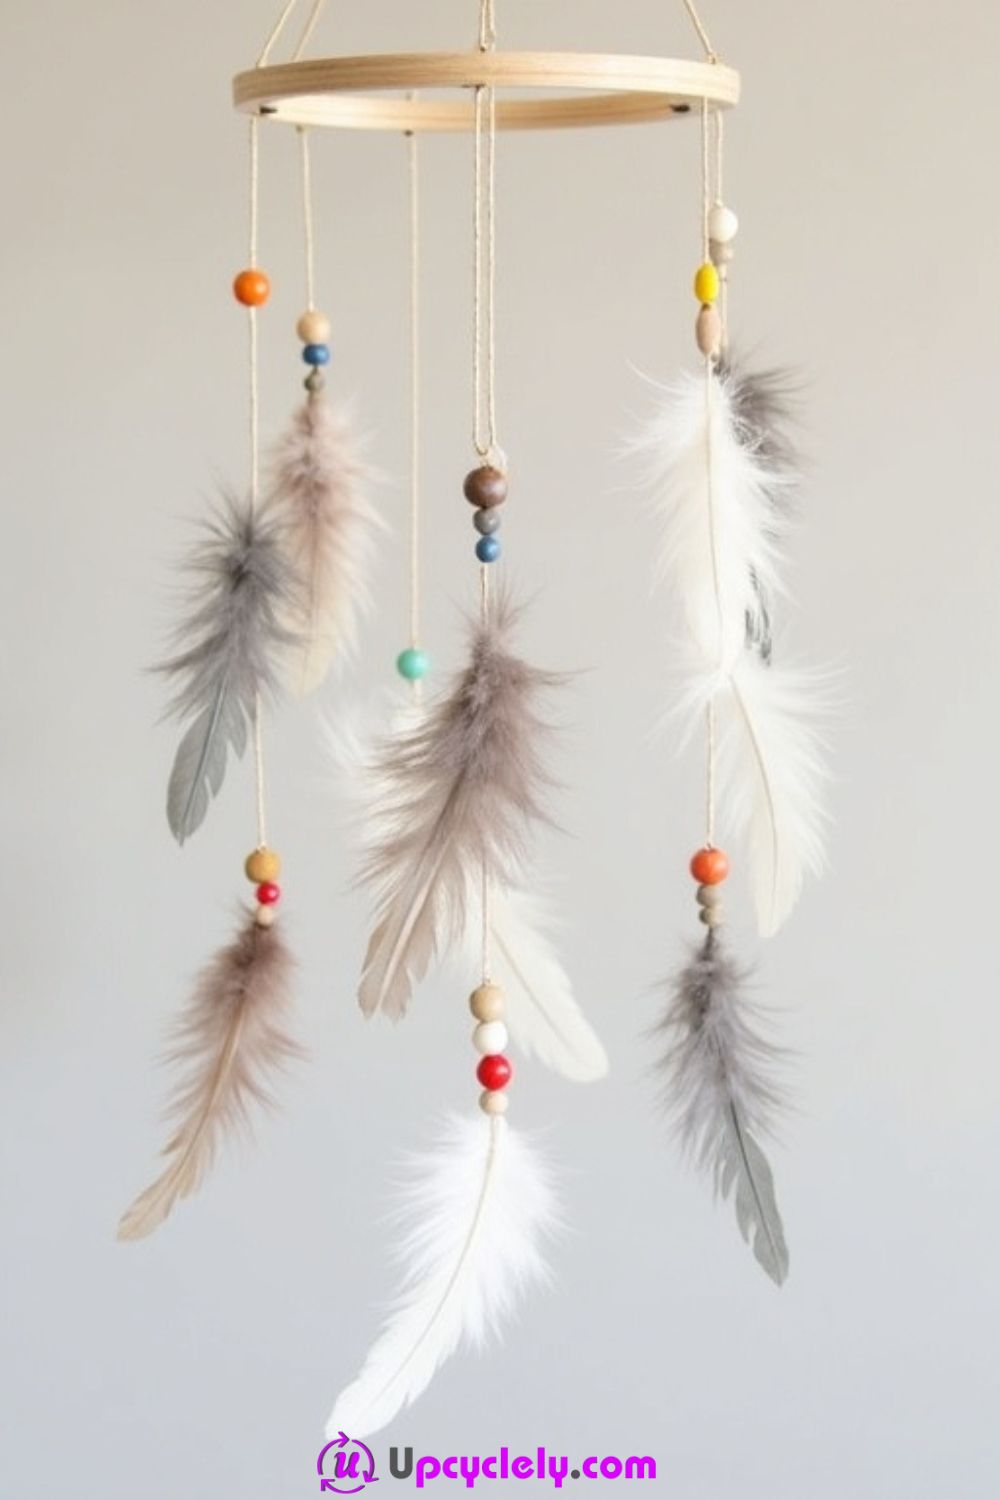
A feather-and-bead mobile combines light materials that move easily, so even a small draft can change the way the piece looks. Leftover cord, an embroidery hoop, a smooth ring, or a thin branch can become the support, while beads help add weight and spacing to individual strands.
Balance is more important than making every strand identical. I would vary the lengths but distribute the heavier beads around the hoop so one side does not tip. Natural feathers should be clean and legally obtained; craft feathers are an easy alternative when provenance is uncertain.
Materials and Tools
· Light wooden hoop, ring, or smooth branch
· Clean craft feathers
· Assorted lightweight beads
· Strong thread or fine cord
· Scissors
· Needle if required for threading
· Appropriate hanging cord and secure hook
Steps for This Cute Craft Project
1. Plan the strand lengths. Lay the hoop flat and position cut cords around it before tying anything. Alternate long and short strands and note where larger beads will sit so the visual weight is spread around the support.
2. Thread the beads with stop knots. Add only a few beads to each strand and tie small knots beneath them so they cannot slide onto the feather. Pull each knot tight and trim only after you are sure the spacing feels balanced.
3. Attach the feathers securely. Tie around the feather shaft or use a small wrapped thread connection rather than relying on a large blob of glue. Vary feather lengths and leave space between them so the mobile can move without constantly tangling.
4. Create the top hanger and test the balance. Add three or four equal cords from the hoop to one central loop, lift the mobile over a table, and adjust strand positions until it hangs level. Install it away from fans, flames, heaters, cots, and places where children or pets can pull it down.
The empty air between the strands is part of the design. I’d stop before the hoop becomes so crowded that the feathers spend all day arguing with one another.
Variation: Replace feathers with folded paper leaves, use wooden beads only, or build the mobile from a reclaimed embroidery hoop that is too worn for stitching but still structurally sound.
Kawaii Polymer Clay Food Charms

Tiny food charms are useful for leftover polymer clay because each piece needs only a small amount of colour. A miniature slice of toast, strawberry, cupcake, dumpling, or fruit can become a zipper pull, bag charm, or jewellery component once the attachment point is planned from the beginning.
The important distinction is that polymer clay is a craft material, not edible dough. Keep tools, trays, and work surfaces separate as directed by the clay manufacturer, and follow the exact curing instructions rather than guessing at temperature or timing.
Materials and Tools
· Polymer clay scraps compatible with one another
· Clay-only shaping tools or toothpicks
· Craft-only work tile or tray
· Eye pins or other compatible charm findings
· Small pliers
· Optional clay-compatible glaze
· Manufacturer instructions for curing and finishing
Steps for This Cute Craft Project
1. Condition and portion the clay. Work each colour until it is pliable, then set aside tiny portions for details. Keep the pieces larger than extremely tiny crumbs, because features that are too small can break or disappear during assembly.
2. Build the food shape from broad forms first. Make the base, topping, or fruit body before adding faces and texture. Use a tool to press shallow lines and dimples rather than attaching dozens of fragile protruding details.
3. Insert the finding before curing when appropriate. Seat the eye pin or loop deeply enough to be supported by clay, following the method recommended for the material and hardware. Place the charm on a dedicated craft surface and cure it exactly as the product directs.
4. Cool, inspect, and finish. Do not handle the charm heavily until it has cooled fully. Check the attachment point, add a compatible glaze only if wanted, then connect the finished charm to a chain or zipper pull with properly closed jump rings.
I’d keep the face simple. Two eyes and one tiny mouth often read more clearly than a miniature expression made from six pieces that may not survive everyday handling.
Variation: Make flat fridge-style decorative pieces without metal findings, create a matching fruit set, or use one neutral clay colour and paint details only if the clay system supports that finish.
LED String Light Garland with Paper Flowers
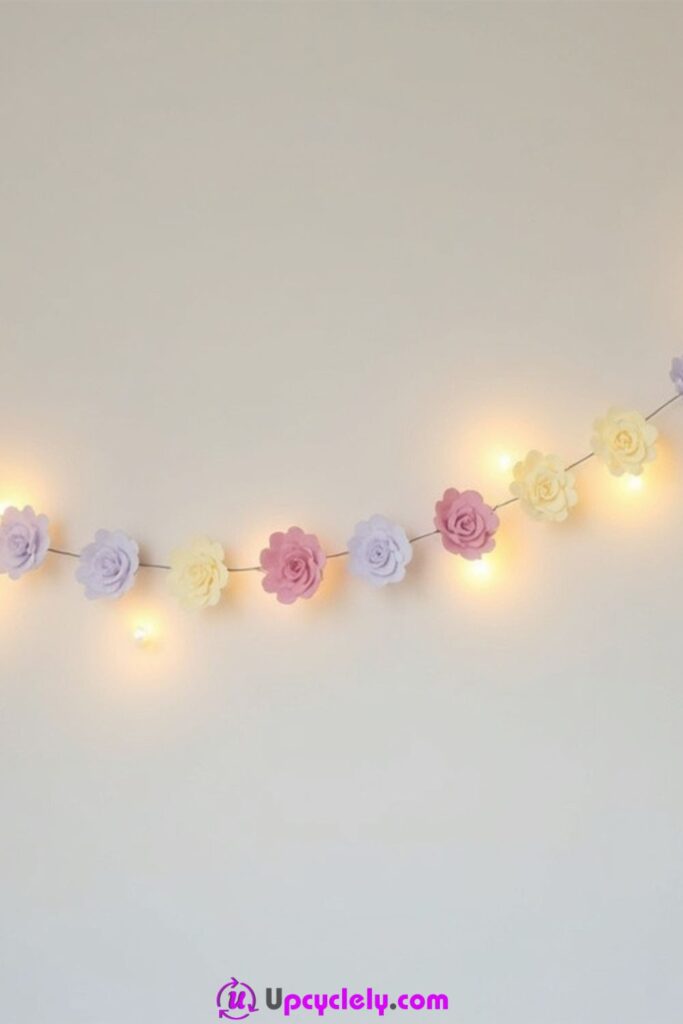
Paper flowers can soften the look of an LED light string, but this is one project where decoration has to respect the electrical product. Use only cool-running LED lights in good condition and keep added paper away from damaged wires, plugs, battery compartments, or any part the manufacturer says must remain uncovered.
Lightweight paper works best because the garland should not pull on the wire. Small flowers spaced between the lights can look just as effective as covering every bulb, and they are easier to inspect if the string needs to be stored or reused later.
Materials and Tools
· Intact manufacturer-approved LED string lights
· Lightweight paper scraps or vellum suitable for crafting
· Scissors
· Pencil and simple flower template
· Low-mass attachment method suitable for the light string
· Optional hole punch
· Wall clips or hooks appropriate to the installation surface
Steps for This Cute Craft Project
1. Inspect the lights before decorating. Check the wire, plug, battery case, and bulbs for damage, then test the string. Do not decorate a light set that is frayed, overheating, or behaving unpredictably.
2. Cut lightweight flowers. Use two or three simple petal shapes and make centre openings only large enough to sit near the light without pinching the wire. Curl the petals gently with a pencil so the flowers have depth without needing heavy layers.
3. Attach the flowers without covering critical parts. Position each paper piece according to the light manufacturer’s guidance, keeping ventilation and access points clear. Space the flowers so the wire still bends naturally and the decorations do not slide into plugs or battery compartments.
4. Hang and recheck the garland. Use suitable clips rather than staples or pins through the wire. Turn the lights on while supervised, check that the paper remains cool and clear of heat sources, and store the garland loosely so the flowers are not crushed.
The good thing is that the lights already provide the focal points. There’s no need to turn every centimetre of wire into a paper bouquet.
Variation: Decorate only every second or third light, use translucent paper leaves instead of flowers, or make a non-lit paper garland with the same flower shapes if you prefer to avoid combining paper with electrical items.
Mini Felt Pouches
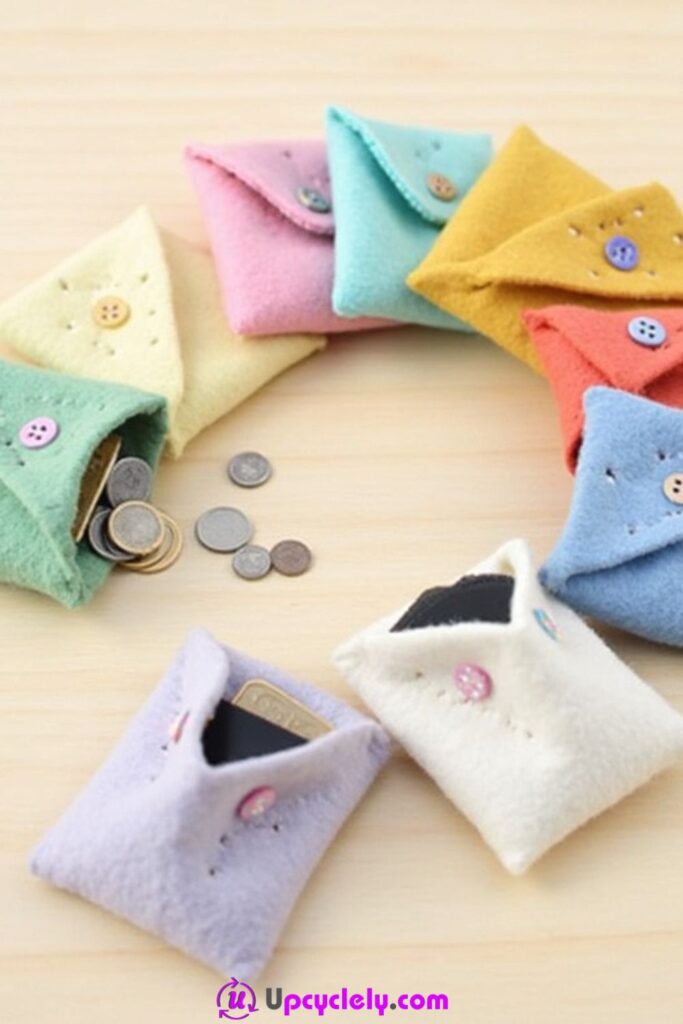
Felt pouches are forgiving because the fabric does not fray heavily at a cut edge, which makes small scraps practical for coins, earbuds, sewing notions, jewellery, or gift packaging. A simple folded rectangle can become a useful pouch with only two side seams and a flap.
The pouch will last longer if the opening method suits its size. A small button and loop can work, but for very tiny pouches I prefer a tab, snap, or wrap tie that does not require pulling hard on the felt every time it opens.
Materials and Tools
· Felt offcuts in sound condition
· Scissors
· Ruler
· Needle and strong thread or sewing machine if suitable
· Fabric clips or pins
· Button, snap, cord, or felt tab for closure
· Optional embroidery thread and small decorative scraps
Steps for This Cute Craft Project
1. Choose a simple fold and cut the felt. Place the item you want the pouch to hold on the fabric and allow room around it for seams and movement. Fold the felt before cutting the flap so you can check that the proportions feel right.
2. Secure the sides. Clip the layers together and stitch from the lower corner toward the opening with a running stitch, blanket stitch, or another sturdy seam. Keep the stitches far enough from the edge that the felt cannot tear through under light tension.
3. Add the closure. Position a button, snap, loop, or tie only after the pouch is sewn, because the final thickness can change where the flap lands. Reinforce the attachment area with extra stitches or a small felt patch inside if needed.
4. Decorate lightly and test the pouch. Add embroidery or one small appliqué without stitching through the pocket opening by mistake. Fill and empty the pouch several times, then trim loose thread ends and reshape the flap if it is pulling to one side.
For me, the nicest felt pouches still feel soft. If the front is covered with beads and buttons, the little bag can lose the simple flexibility that made felt a good choice.
Variation: Use contrasting blanket stitch as the decoration, add a wrist loop for a larger pouch, or turn very small felt scraps into card pockets instead of forcing them into a full bag shape.
Scrapbook Paper Wall Art
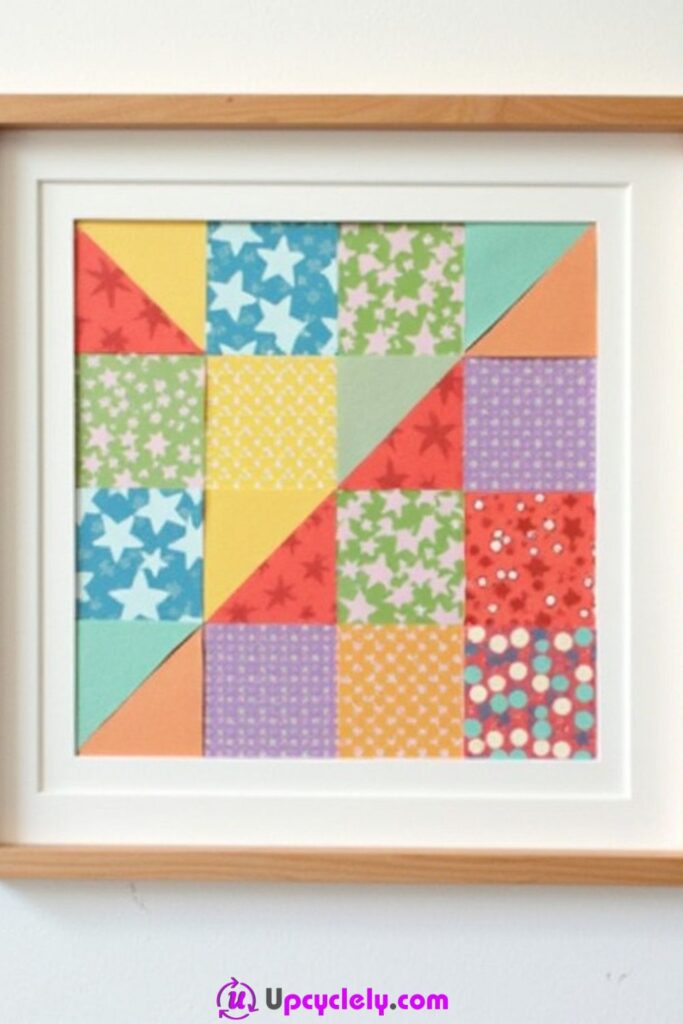
Patterned paper leftovers can become wall art when they are treated like a small collection rather than random scraps. Repeated squares, circles, arches, or leaf shapes help different prints sit together, especially if the backing provides one consistent border around the whole arrangement.
A dry layout is essential. I would move the paper around several times before gluing, placing the loudest prints first and using quieter patterns as breathing space. The first arrangement rarely ends up being the best one, and that is completely normal.
Materials and Tools
· Scrapbook paper offcuts and clean printed-paper scraps
· Firm reused frame backing or cardstock
· Frame with intact hardware if desired
· Ruler
· Scissors or craft knife with cutting mat
· Glue stick or archival-style paper adhesive suited to the materials
· Optional paper templates
Steps for This Cute Craft Project
1. Choose one repeated shape and prepare the backing. Measure the visible area of the frame, then decide how many paper pieces can fit without leaving awkward slivers at the edges. Cut a paper template before trimming your best scraps.
2. Cut and sort the patterned pieces. Keep the shapes consistent but vary the print scale. Group bold motifs, tiny patterns, and solids separately so you can spread them across the composition instead of accidentally clustering all the busiest pieces together.
3. Arrange the full design dry. Start from the centre or one clear axis and adjust the spacing until the margins feel even. Step back, rotate a few pieces, and remove any pattern that dominates the group.
4. Attach and frame. Glue one row or cluster at a time, smoothing from the centre outward. Let the backing dry flat under clean weight if appropriate, then place it in the frame and check that no paper edge is caught or folded under the frame lip.
I’d rather repeat a simple shape than cut twelve different decorative silhouettes. Consistent geometry gives mixed paper patterns a reason to belong together.
Variation: Make a monochrome collage from old envelopes and packaging, use circles punched from wrapping paper, or build one large abstract shape instead of a grid.
Painted Wooden Spoons
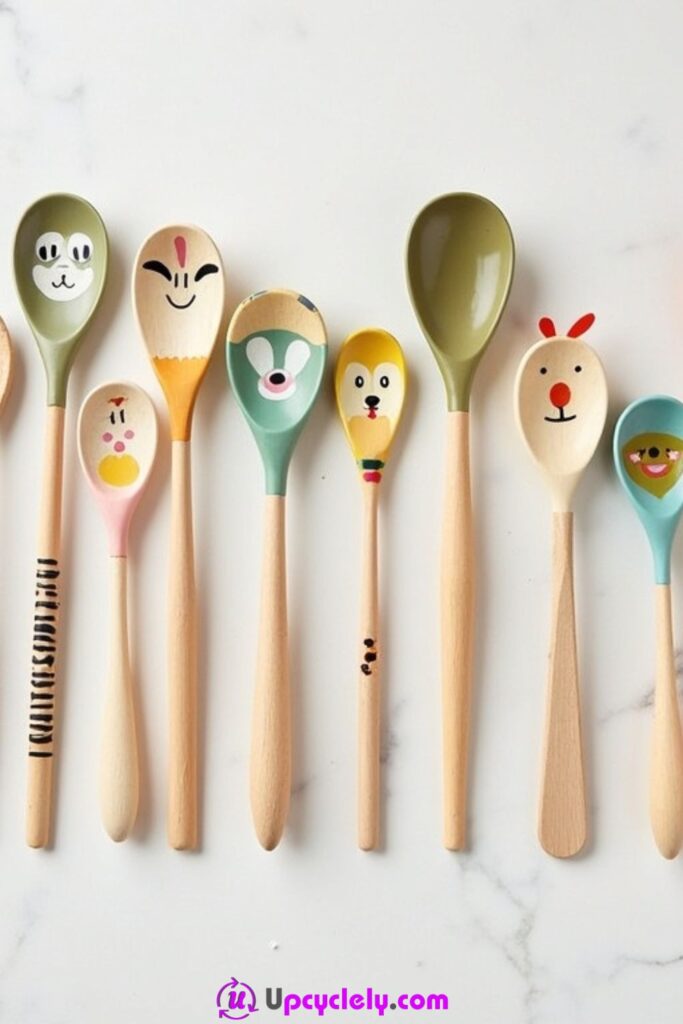
Plain or retired wooden spoons can become cheerful decorative objects with paint, but their future use needs to be decided first. If a spoon will be displayed, used as a plant marker, or hold dry craft supplies, there is much more freedom than there is with a utensil that will touch hot food or be washed repeatedly.
I would keep decorative paint away from bowls and food-contact surfaces unless the entire paint-and-finish system is explicitly approved for that use. An old spoon with cracks, deep splits, or rough fibres should be retired rather than disguised under paint.
Materials and Tools
· Sound wooden spoons intended for decorative reuse
· Fine sandpaper if the wood is rough
· Lint-free cloth
· Craft paint compatible with wood
· Small paintbrushes
· Painter’s tape for simple bands
· Compatible clear finish only when appropriate for the intended use
Steps for This Cute Craft Project
1. Inspect and prepare the wood. Check for cracks, splinters, loose fibres, or old residue. Lightly smooth only the areas that need it, remove all dust, and decide which parts will remain natural wood before adding tape or pencil guides.
2. Paint the broad shapes first. Add colour to the handle, end, or other decorative zones using thin controlled layers. Keep the design simple enough that the wood grain can still read, and let each layer settle according to the paint directions before adding detail.
3. Add faces, stripes, or small motifs. Use a fine brush and rotate the spoon rather than resting a hand on wet paint. Correct only the most visible edges; repeated brushing over nearly dry paint can create ridges.
4. Finish for the chosen purpose. Apply a compatible sealer only if the product and intended use call for one. Treat the spoon as decorative unless the complete system is specifically approved for food contact, heat, and cleaning.
One detail I wouldn’t skip is deciding the spoon’s job before painting. A display piece and a cooking utensil have very different finish requirements.
Variation: Paint only the handles for a set of display spoons, turn old spoons into labelled herb markers, or hang several decorative spoons together as kitchen wall art.
Popsicle Stick Picture Frames
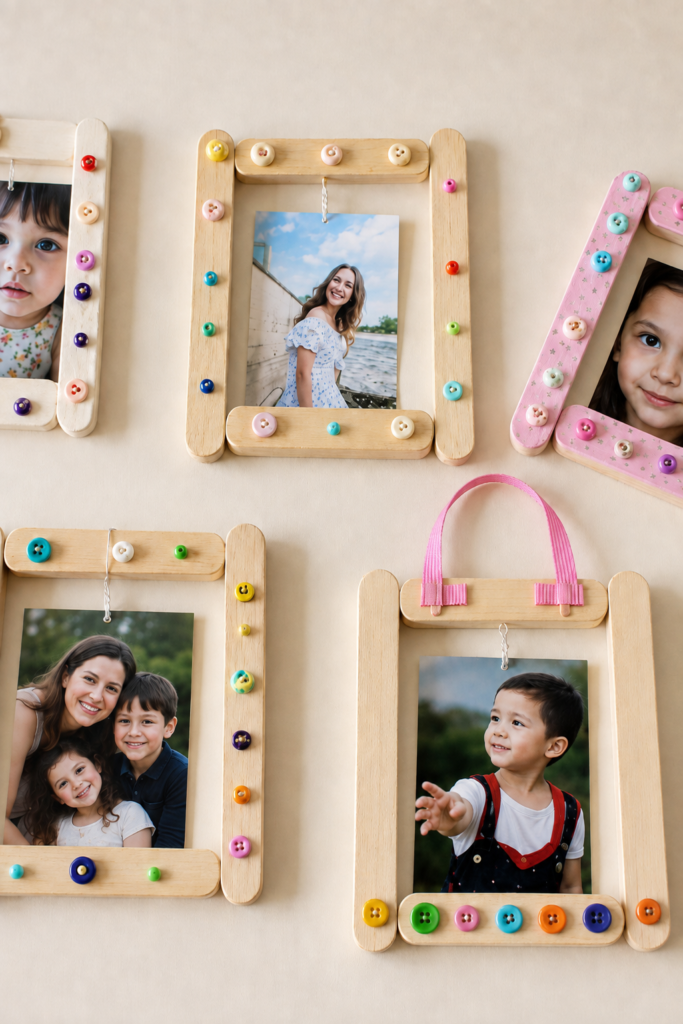
Craft sticks are useful for small frames because their straight edges create a structure without complicated measuring. Clean reclaimed sticks from unused craft supplies or purchased craft sticks can be painted, wrapped, or layered around a photo opening.
The frame becomes much sturdier with a proper backing. I would not rely on four sticks alone to hold a photograph long term; a piece of card behind them keeps the corners square and gives the photo a clean surface to sit against.
Materials and Tools
· Clean craft sticks
· Cardboard or chipboard backing
· Craft glue or low-temperature hot glue used carefully
· Paint or markers
· Small photo or printed art
· Scissors or craft knife for adult use
· Optional ribbon, paper shapes, or lightweight embellishments
Steps for This Cute Craft Project
1. Lay out the frame dry. Arrange four sticks around the photo and decide whether the corners will overlap or meet flush. Mark the visible opening on the backing card before gluing so you know the picture will not be covered too heavily.
2. Build and reinforce the frame. Glue the sticks at the corners and add short reinforcement pieces across the back if needed. Keep the frame flat while the adhesive cures so one corner does not lift and create a permanent twist.
3. Paint and decorate after the structure is stable. Use thin paint layers and add only lightweight decorations. Keep beads or bulky pieces away from the photo opening and hanging point where they could interfere with assembly.
4. Fit the photo and add a display method. Attach the backing so the photo can be replaced if possible, then add a stand or ribbon loop appropriate to the frame’s weight. Test the loop over a soft surface before hanging the frame on a wall.
I like leaving some of the stick shape visible. Once every edge is hidden under thick decorations, the simple handmade construction disappears.
Variation: Build a hexagonal frame from angled layers, use old maps or paper strips to wrap the sticks, or make a magnetic version only with securely enclosed magnets kept away from small children.
Ribbon Flowers
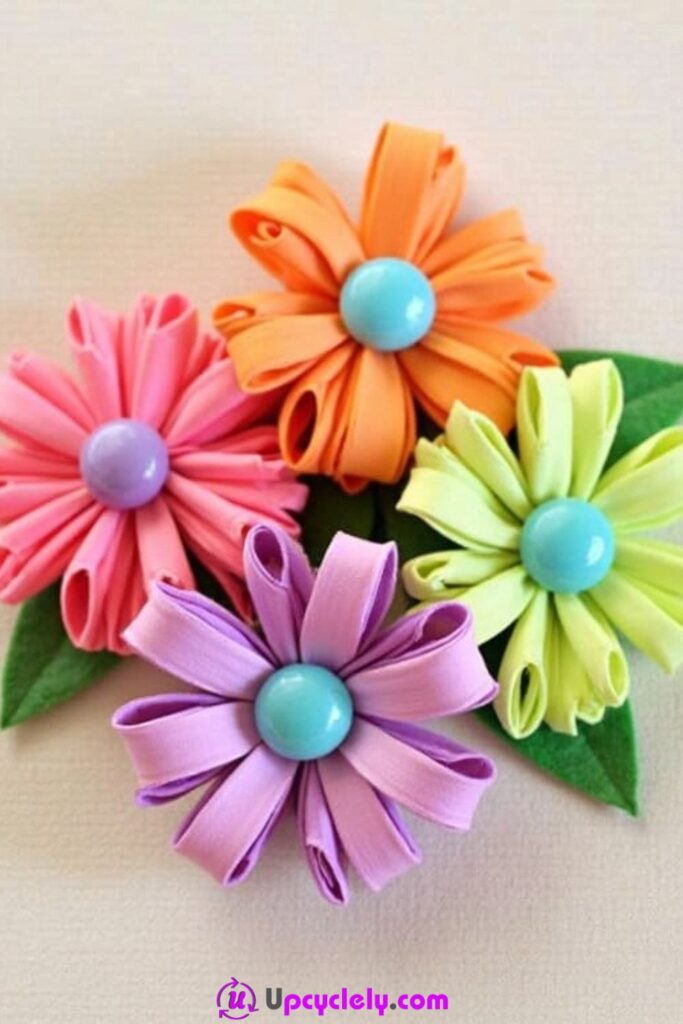
Short ribbon lengths can become soft flower embellishments for gift wrapping, bags, headbands, cards, or framed craft pieces. Loop petals are especially practical because each petal uses the same simple fold and the centre hides most of the joins.
Ribbon edges can fray, so choose a finishing method that suits the fibre. Some synthetic ribbons may be heat-sealed, but that should only be done with care and ventilation when the material is known to permit it. Fabric glue or stitched folds are safer general options when the fibre is uncertain.
Materials and Tools
· Ribbon offcuts in compatible widths
· Sharp fabric scissors
· Needle and thread or suitable fabric adhesive
· Small felt circles for backing
· Button or fabric-covered centre
· Fabric clips or tweezers
· Optional brooch, hair clip, or gift-wrap base
Steps for This Cute Craft Project
1. Cut matching petal lengths. Decide on five, six, or eight petals and cut them as evenly as practical. Lay the pieces in a circle first to see whether the ribbon width creates the flower size you want.
2. Form each petal. Fold the ribbon into loops or soft points and secure the base with a few stitches or a tiny amount of adhesive. Keep the petal bases narrow so they can overlap without creating a thick hard lump in the centre.
3. Join the petals into a circle. Stitch or glue the bases onto a small felt disc, rotating the flower as you work. Check the spacing before securing the final petal; it is easier to correct a gap now than after the centre is covered.
4. Add the centre and intended attachment. Sew or glue on a button or fabric circle, then attach the finished flower to a clip, card, bag, or gift only with hardware suited to that use. Trim loose fibres and allow adhesives to cure fully.
The loops do not need to match with machine precision. Slight differences can make the flower softer, as long as one petal is not dramatically larger than the rest.
Variation: Layer narrow and wide ribbon petals, use one fabric-covered button as the centre, or make two tiny flowers from very short scraps instead of one oversized bloom.
Rope and Fabric Wall Hanging
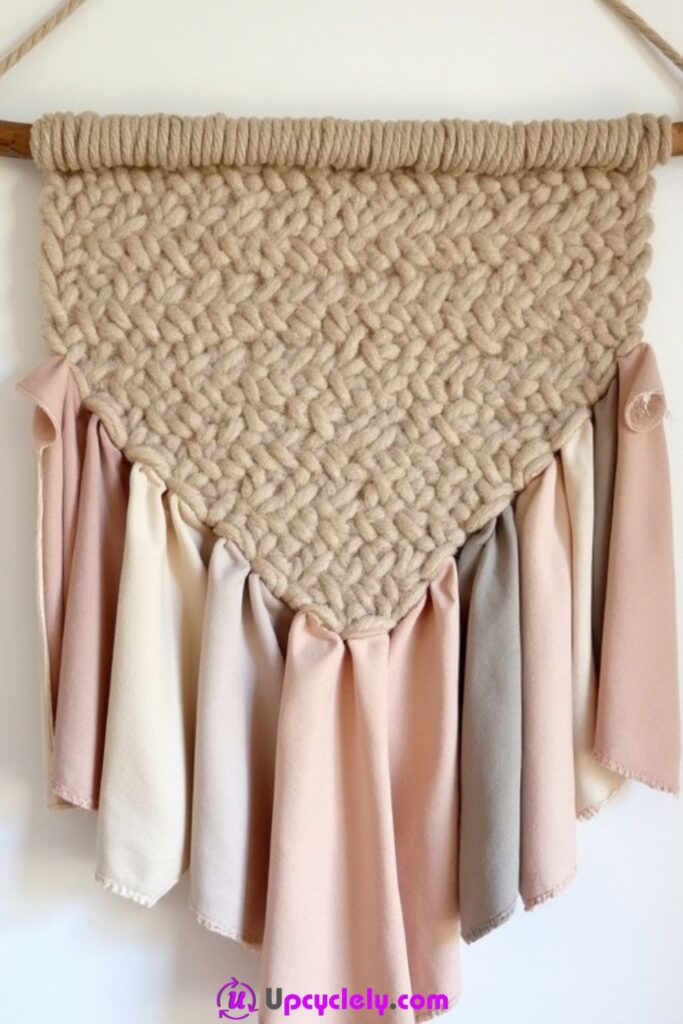
A rope-and-fabric wall hanging is a useful destination for narrow textile strips that are too small for larger sewing projects. A smooth branch, old dowel, or spare curtain rod can become the top support, while knots and layered fabric provide most of the texture.
The fabric strips do not have to match. What matters is repeating a few colours and controlling the overall silhouette. I’d vary length and texture but keep the top attachment method consistent so the piece feels intentional rather than like a collection of loose samples.
Materials and Tools
· Sound wooden dowel, smooth branch, or lightweight rod
· Cotton rope or sturdy yarn
· Fabric strips and ribbon offcuts
· Scissors
· Ruler or measuring tape
· Optional wooden beads
· Strong hanging cord and suitable wall hook
Steps for This Cute Craft Project
1. Prepare the support and sort the fibres. Smooth any rough wood and remove loose bark that may shed. Arrange the rope and fabric by length, reserving the strongest cords for the structural knots and the softer scraps for the decorative fringe.
2. Build the upper rope section. Attach matching cords to the rod and work a simple pattern of knots or crossings. Keep checking the width so the structure does not narrow or widen unexpectedly as the tension changes.
3. Add the fabric strips. Tie or loop them across the lower edge, alternating widths and textures. Step back often and move a few strips rather than trimming immediately; the weight of the fabric may change the final line once the piece hangs.
4. Shape the lower edge and install securely. Trim the fringe into a straight line, soft curve, or shallow V. Add a strong hanger to the rod, test the finished piece over a table, and use wall hardware suited to the total weight.
For me, the mix looks best when one material is allowed to be quiet. If the rope, fabric, beads, and ribbon are all competing, the eye has nowhere to rest.
Variation: Use old T-shirt strips for a softer fringe, keep everything in natural tones, or make a small version from an embroidery hoop instead of a dowel.
Tiny Terrarium Necklaces
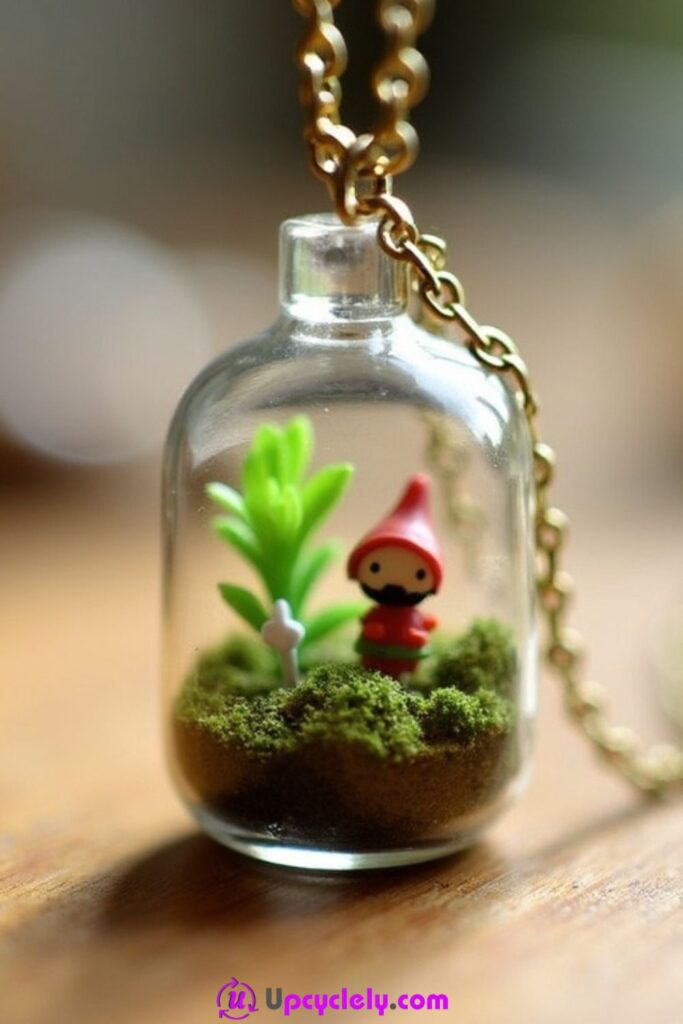
Tiny bottle necklaces turn miniature containers into enclosed decorative scenes. Because the bottle sits close to clothing and moves while worn, the contents should be dry, lightweight, and securely contained; damp moss, soil, or living plants are not practical for a sealed wearable pendant.
Reused miniature bottles can work if they are clean, smooth, and free from chips. I would keep the scene simple enough that one small element remains visible through the glass rather than filling the bottle with so many pieces that it becomes a colourful rattle.
Materials and Tools
· Small intact glass vial or craft bottle
· Dry faux moss, paper fibres, or clean decorative filler
· Tiny non-sharp decorative element
· Tweezers
· Secure cork or stopper
· Pendant bail or loop designed for the bottle
· Jewellery pliers and chain or cord
· Compatible adhesive if required by the hardware
Steps for This Cute Craft Project
1. Inspect and clean the bottle. Check the rim and sides for chips or cracks, then allow the interior to dry completely. Test the stopper before adding anything so you know it fits snugly and does not wobble loose.
2. Build the scene with dry materials. Place a small layer of filler in the base using tweezers, then add one focal piece. Rotate the bottle as you work to check that the scene can be seen from the front and does not press awkwardly against the glass.
3. Secure the stopper and pendant hardware. Use only the attachment method intended for the bottle or finding, keeping adhesive away from the visible glass. Let the connection cure fully, then pull gently on the loop before adding the chain or cord.
4. Finish as wearable jewellery. Close jump rings completely with pliers and check the necklace length. Because the pendant is glass and may contain tiny parts, keep it away from young children and remove it for rough activity or situations where it could strike a hard surface.
I’d choose one tiny focal point rather than five. The bottle is already small, and a little empty space makes the miniature scene easier to read.
Variation: Fill the vial with tiny rolled paper stars, dried paper confetti, or a miniature paper flower, or turn it into a display ornament instead of wearable jewellery.
Seashell Wall Hanging
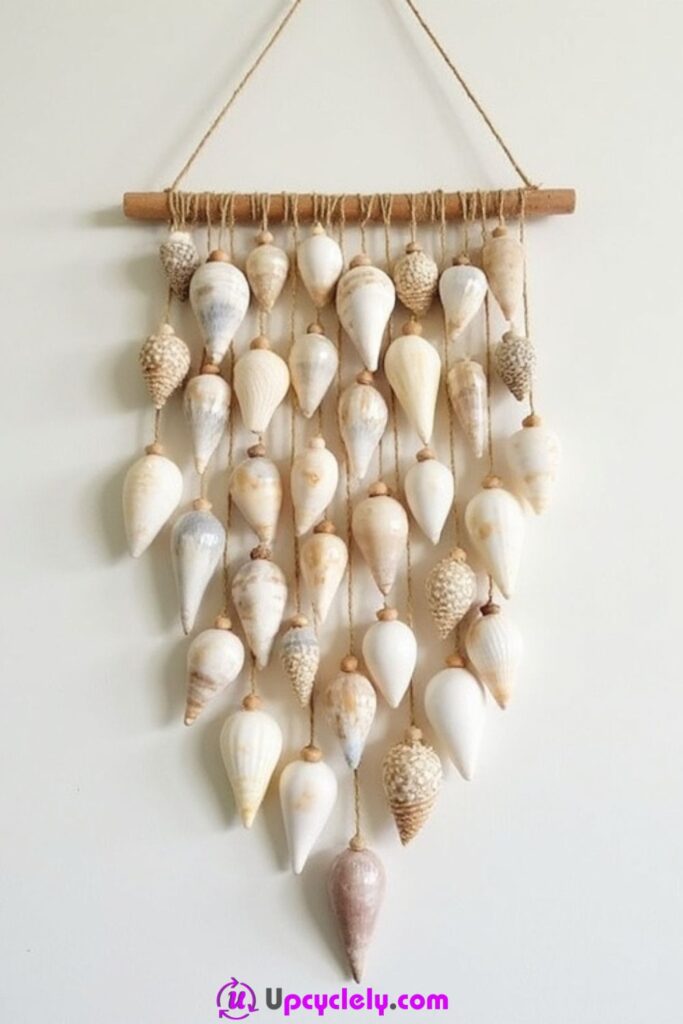
Collected shells can become a light coastal wall hanging when their shapes are arranged vertically instead of crowded into one heavy cluster. Shells with natural holes are easiest to use, while drilling shells can create sharp fragments and should only be attempted with suitable tools, eye protection, and experience.
If the shells came from an unknown source, clean and dry them before crafting and check local collection rules when gathering natural material. Cracked or razor-sharp edges are not worth keeping just because the shell has an interesting colour.
Materials and Tools
· Clean dry shells with safe edges and existing holes where possible
· Smooth dowel, branch, or lightweight rod
· Strong twine or cotton cord
· Scissors
· Optional wooden beads
· Needle or threading tool if useful
· Secure hanging cord and wall hook
Steps for This Cute Craft Project
1. Sort the shells by weight and shape. Place heavier pieces near the bottom of each strand and set aside any shell with a dangerous crack. Lay out the complete hanging on a table so you can balance long and short rows before tying.
2. Prepare the support strands. Cut several cords and tie them firmly to the rod with even spacing. Leave extra length at the bottom until the shell positions are finalized so you do not run short while adjusting the composition.
3. Thread and knot the shells. Pass cord through existing holes and tie a stopper knot beneath each shell. Add beads sparingly and rotate shells so their most interesting surfaces face outward rather than twisting behind the strand.
4. Create the top hanger and test the piece. Add a strong cord between both ends of the rod, lift the wall hanging over a soft surface, and adjust any strand that pulls the support sideways. Install it where swinging shells will not strike glass, doors, or people.
I don’t mind if the rows finish at different heights. Natural shells already vary, and forcing them into a perfect grid can make the whole piece feel unnecessarily stiff.
Variation: Mix shells with driftwood beads, use only a few large shells on wide-spaced cords, or make a tabletop hanging from a small frame when wall installation is not practical.
Stamped Wooden Coasters
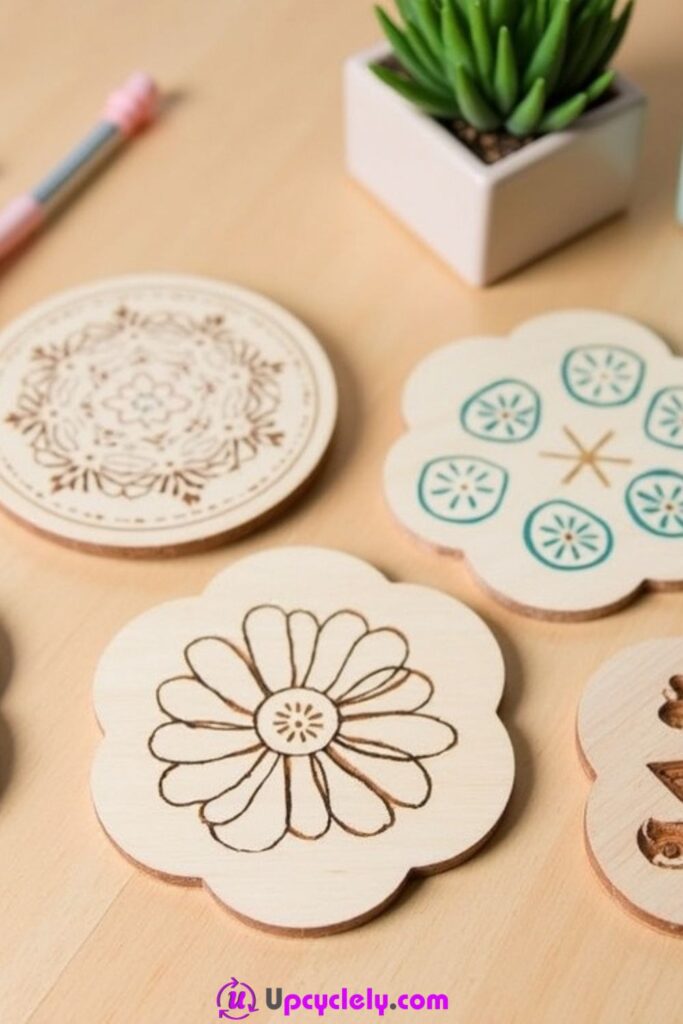
Plain wooden coasters can be refreshed with stamps when the surface is smooth enough to take a clean impression. Leftover unfinished wood squares, small sealed wood rounds, or worn decorative coasters may all work differently, so the ink and finish should be tested before committing to a full set.
Moisture protection is the practical part of this craft. Decorative ink alone may not tolerate condensation, and not every varnish behaves the same way over ink. Match the stamp medium, wood, and protective finish as one system and follow their curing directions.
Materials and Tools
· Sound wooden coasters or clean wood blanks
· Fine sandpaper if preparation is needed
· Lint-free cloth
· Rubber stamps
· Ink or paint suitable for wood and chosen finish
· Test wood offcut if available
· Compatible clear protective finish
· Brush or applicator specified by the finish
Steps for This Cute Craft Project
1. Prepare and test the wood. Smooth only rough areas, remove dust, and make a sample stamp on an offcut or the underside of one coaster. Check whether the design bleeds into the grain and whether the chosen finish changes the ink colour.
2. Plan the stamp placement. Decide whether the motif will sit in the centre, repeat around the edge, or overlap. Mark light alignment guides if needed, especially when creating a matching set where small placement differences become noticeable.
3. Stamp with even pressure. Load the stamp lightly and press straight down without rocking. Let each impression dry or cure as directed before overlapping colours, then touch up only if the medium supports small corrections.
4. Protect and cure the coasters. Apply the compatible finish in the recommended number and thickness of coats, keeping the base level so drips do not create bumps. Allow the set to cure fully before placing cold or warm drinkware on it, and follow the finish manufacturer’s care instructions.
The test piece is worth the extra minute. Wood grain can make the same stamp look crisp on one coaster and fuzzy on the next, so it helps to know what the surface is doing before you stamp the centre.
Variation: Use one small botanical motif on every coaster, create a mixed set with the same border but different centres, or add cork to the underside if it is compatible with the finished wood and adhesive.
Cute Craft Choices That Can Lead to Loose Parts, Warped Paper, or Cluttered Results
Small projects often look forgiving, but tiny scale can magnify weak joins and messy finishing. A loose bead on a necklace, a warped paper panel, or an overloaded mobile is more noticeable because there is very little else to distract from it. These are the problems I would check before calling a craft finished.
Using the Same Glue for Every Material
Paper, felt, wood, glass, ribbon, and polymer clay do not respond to adhesive in the same way. Test the bond on an offcut and choose a product designed for the surfaces instead of assuming a hot-glue gun is the universal answer.
Adding Small Parts Without Considering Who Will Handle Them
Buttons, beads, charms, magnets, and tiny eyes can loosen. Keep them away from young children and pets, and use larger stitched or enclosed alternatives when the finished craft may be handled frequently.
Saturating Thin Paper With Adhesive
Tissue and scrapbook paper can buckle, tear, or dry with shiny glue patches when they become too wet. Apply adhesive in controlled amounts, work from the centre outward, and let the backing dry flat.
Making Hanging Loops Decorative Instead of Structural
A pretty ribbon is not automatically a safe hanger. Use cord, knots, hooks, and wall hardware that suit the finished weight, and test mobiles and wall pieces over a table before installing them overhead.
Ignoring Heat and Electrical Safety
Paper flowers and fabric decorations should never be treated as harmless additions to any light string. Use intact LED products only as directed by the manufacturer and keep craft materials away from damaged wires, plugs, flames, heaters, and hot bulbs.
Painting Functional Items Without Deciding Their Future Use
A decorated spoon or coaster may need different finishes depending on whether it is display-only, exposed to moisture, or expected to contact food. Decide the purpose first and use only a complete material system approved for that use.
Overdecorating Small Surfaces
Tiny crafts become visually crowded quickly. Choose one focal detail, repeat a limited palette, and leave some plain space instead of adding another bead, button, glitter layer, or ribbon simply because it fits.
Skipping a Final Pull, Flex, and Handling Check
A craft can appear secure while lying flat on the table. Gently test loops, closures, buttons, knots, jump rings, and glued parts after curing so weak areas are found before the item is worn, hung, gifted, or used.
Frequently Asked Questions
Which cute craft ideas are easiest for beginners?
Cupcake liner flowers, simple scrapbook paper wall art, basic popsicle stick frames, and uncomplicated felt pouches are good starting points because the shapes are easy to correct. Begin with one material and one attachment method rather than a project that mixes glass, jewellery findings, heat, and several adhesives.
Can I use household leftovers instead of buying new craft supplies?
Often, yes, if the material is clean, sound, and suitable for the new purpose. Paper offcuts, ribbon ends, buttons, yarn, felt, cardboard, jars, and old frame backings can all be useful, but damaged or contaminated materials are better discarded than hidden inside a craft.
Is hot glue the best adhesive for these projects?
Not automatically. Hot glue is useful for some rigid decorative pieces, but it can create bulky joins, melt certain materials, or be unsuitable for washable fabric and fine paper. Match the adhesive to the surfaces and test it first.
How can I make small craft projects look less cluttered?
Limit the colour palette, repeat one or two shapes, and leave visible background around the focal details. I’d remove one embellishment before adding another if the project already has several competing textures.
Can children make these cute craft projects?
Some can be adapted for children, but adult supervision and material choice matter. Avoid hot glue, sharp tools, small beads, magnets, glass pieces, jewellery findings, and electrical projects unless the activity is age-appropriate and closely supervised.
How should I store finished paper and fabric crafts?
Keep them dry, out of crushing pressure, and away from direct heat or prolonged dampness. Use shallow boxes, tissue between delicate layers, or hooks that support the item without sharply creasing ribbon, paper, or cord.
What is the best way to make a handmade craft gift-ready?
Check every attachment, remove stray glue and loose threads, and include simple care information when the item needs gentle handling. For wearable, electrical, food-adjacent, or breakable pieces, be clear about decorative-only use and any practical limitations.
Let Small Leftovers Become Something Worth Keeping
Cute craft ideas do not need expensive materials or complicated techniques to feel satisfying. A few buttons can become wall art, narrow fabric strips can turn into a hanging, and a small piece of felt can become a useful pouch. The best results usually come from matching the material to a job it can handle, then stopping before decoration gets in the way of that purpose.
I especially like projects that leave room for change. A colour can be swapped, a motif can be simplified, and a larger idea can often be reduced to fit the scraps already available. That is what makes these 18 cute craft ideas useful for mindful making: they give ordinary leftovers a reason to stay in circulation without pretending every scrap must become something elaborate. Choose one project that fits the materials already in your drawer, prepare those pieces properly, and give yourself permission to keep the first version simple. Which small leftover—buttons, ribbon, paper, yarn, felt, shells, or wood—would you most like to turn into something useful next