Reclaimed barn wood often arrives carrying far more than attractive grain and weathered colour. Dust can sit deep inside the grooves, old nails may hide beneath dark marks, and years of outdoor exposure can leave mud, cobwebs, loose fibres, or questionable stains across the surface. That history is part of the material’s appeal, but not everything attached to an old board deserves a place inside your home.
I prefer cleaning reclaimed wood in a way that keeps its age visible. The goal isn’t to scrub every board until it resembles newly milled timber. Nail holes, saw marks, faded colour, and worn edges can stay. Dirt, loose debris, unsafe metal, and unstable material cannot.
Learning how to clean reclaimed barn wood is mainly about using the gentlest effective method. Begin with inspection, remove hidden hazards, clean the boards while they are dry, and introduce water only when it is genuinely needed. Then give the timber enough time to dry before cutting, sanding, sealing, or bringing it indoors.
Before You Start Cleaning Old Barn Wood
Find out where the boards came from whenever possible. Wood taken from an ordinary dry barn wall may need very different treatment from timber exposed to animal waste, fuel, pesticides, floodwater, or industrial chemicals. I don’t think an attractive grey surface is worth gambling with when the board’s contamination history appears questionable.
Mould also deserves more than a quick wipe. Wood is porous, so extensive growth can reach into cracks and fibres where surface cleaning may not solve the problem. EPA guidance explains that porous mouldy materials can be difficult or impossible to clean fully, especially when moisture damage is severe. (EPA mould guidance)
Useful Tools and Materials
· Sturdy work gloves
· Safety glasses with side protection
· Dust mask or suitable respiratory protection
· Sawhorses or a stable outdoor work surface
· Flashlight
· Strong magnet or handheld metal detector
· Claw hammer
· Nail puller or locking pliers
· Flat scraper
· Stiff nylon brush
· Hand wire brush for sound, unpainted wood
· Vacuum with a suitable dust filter
· Bucket
· Mild detergent
· Clean water
· Sponge or soft scrubbing brush
· Absorbent cloths
· Fans and drying spacers
· Fine sandpaper for limited finishing work
· Clear sealer or finish suitable for the intended project
Inspect Reclaimed Rafters and Remove Old Nails
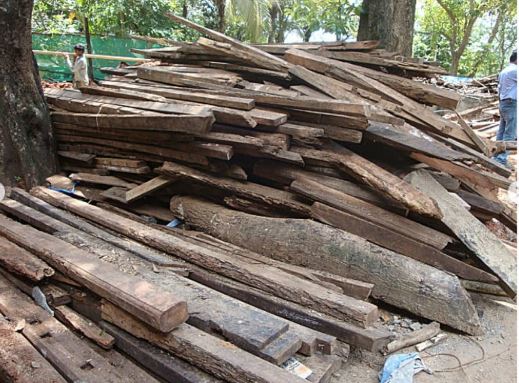
Old roof rafters and structural boards frequently contain nails that are difficult to see against dark grain, rust marks, and old holes. The reclaimed timber in this project is examined carefully before being cut, with attention given to metal left behind during its earlier use.
Metal inspection belongs at the beginning of the cleaning process rather than the end. A wire brush can catch on a protruding nail, while a saw or planer may strike a broken fastener hidden beneath the surface. Even a board that looks clear from one side may contain bent nails driven through from the back.
Materials and Tools
· Reclaimed boards
· Thick work gloves
· Safety glasses
· Flashlight
· Strong magnet or metal detector
· Claw hammer
· Nail puller
· Locking pliers
· Wooden block for leverage
· Marker or chalk
Step-by-Step Method
1. Lay each board where both faces remain visible. Support the timber across sawhorses rather than inspecting it inside a dark stack. Look along the edges, ends, cracks, and former fixing points, then turn the board over and repeat the inspection from the other side.
2. Use a magnet to locate less obvious metal. Move it slowly across the surface and mark every place where it reacts. Check those positions closely for broken nail heads, staples, screws, fencing wire, or small fragments sitting below the surface.
3. Pull accessible nails without splitting the board. Grip the fastener with a hammer, nail puller, or locking pliers, and place a scrap block beneath the tool to spread the pressure. Work gradually rather than forcing the nail sideways through fragile fibres.
4. Mark metal that cannot be removed safely. Do not forget about a fragment simply because it sits below the surface. Circle the area clearly and plan to cut around it, exclude that section, or keep the board away from machinery that could strike it.
I’d inspect every board twice: once before cleaning and once before cutting. Dirt can hide a nail during the first check, while cleaning often reveals metal that initially looked like an ordinary dark mark.
A puncture from dirty material needs prompt attention. Tetanus is a serious infection associated with bacteria found in the environment, and vaccination is the primary protection. Anyone who receives a puncture wound should clean it and obtain appropriate medical advice, particularly when vaccination status is uncertain. (CDC tetanus guidance)
Dry-Brush the Boards Before Adding Water
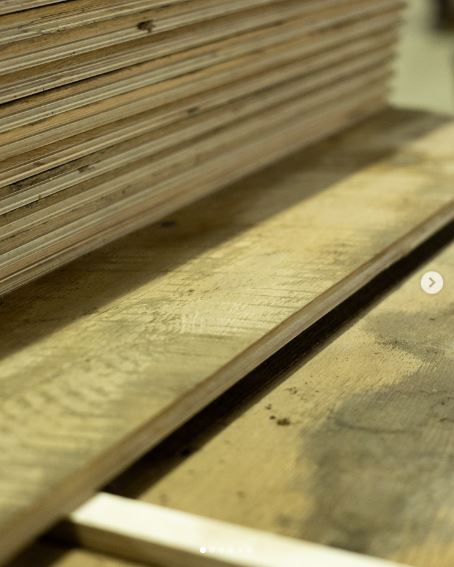
The reclaimed planks in this project move through a wire-brushing process that removes surface debris while retaining the aged character of the timber. It is a commercial setup, but the same basic principle can be adapted carefully with hand tools at home.
Dry cleaning first prevents ordinary dust from turning into muddy paste. It also allows you to judge whether the board needs washing at all. Some pieces become suitably clean after vacuuming, scraping, and brushing, especially when they will be used for decorative shelving, wall panels, or picture frames.
A nylon brush is the gentler starting point. A wire brush can be useful on robust, unpainted boards, but aggressive pressure may remove the soft weathered layer that gives barn wood its texture.
Materials and Tools
· Stable workbench or sawhorses
· Stiff nylon brush
· Hand wire brush, when appropriate
· Flat scraper
· Vacuum
· Safety glasses
· Gloves
· Dust protection
· Small pointed brush for cracks
Step-by-Step Method
1. Vacuum the loose material first. Run the nozzle along the grain, nail holes, splits, and rough edges. Removing cobwebs and dust at this stage makes it easier to see which areas need brushing and which sections may already be unstable.
2. Scrape only what is loose. Hold a flat scraper at a shallow angle and lift dried mud, fragile residue, and flaking material without digging into the sound wood. Stop if the surface begins splintering or if the scraper reaches an old painted coating that has not been tested.
3. Brush in the direction of the grain. Begin with nylon bristles and moderate pressure. Use a wire brush only on strong, unpainted areas that need more help, keeping the movement controlled so the weathered ridges remain intact.
4. Vacuum again and reassess the board. Once the surface dust is removed, check for newly exposed nails, insect holes, soft areas, mould-like growth, or stains. Separate questionable boards before continuing with the rest of the stack.
The part I would keep simple is the pressure. If you find yourself leaning your whole weight onto the brush, the tool may be removing more history than dirt.
Power-driven wire wheels can throw debris and remove material very quickly. Anyone using one should follow the tool manufacturer’s instructions, use the proper guard, secure the workpiece, and wear suitable eye and face protection.
Wash Heavily Soiled Fence and Corral Boards Carefully
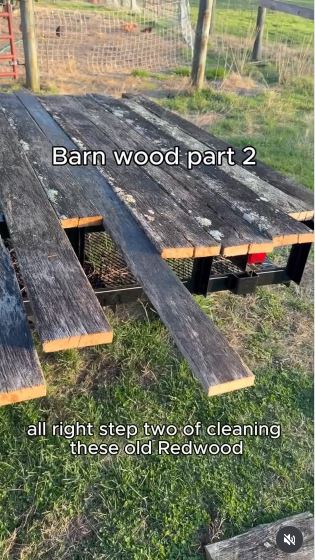
The weathered boards in this project came from an old farm structure and were cleaned as part of an effort to recover usable lengths rather than letting the building material continue deteriorating.
Water should be the next step, not the first. Barn wood absorbs moisture through open grain, cracks, nail holes, and exposed ends. Saturating it can increase drying time, raise the grain, encourage movement, and make weak boards harder to handle.
For ordinary soil, mild detergent and clean water are a more controlled starting point than a harsh chemical mixture. Do not combine different cleaning chemicals. A product that suits one type of stain may react dangerously with another cleaner or change the colour of the wood.
Materials and Tools
· Mild detergent
· Two buckets
· Clean water
· Sponge
· Nylon scrubbing brush
· Spray bottle or gently flowing hose
· Absorbent cloths
· Gloves and eye protection
· Sawhorses
· Drying spacers
Step-by-Step Method
1. Test a small hidden area. Mix a modest amount of detergent with water and clean one short section. Let the test area begin drying so you can see whether the wood changes colour, develops fuzzy fibres, or loses more patina than expected.
2. Clean one face without soaking the board. Apply the solution with a damp sponge or brush and scrub along the grain. Work in manageable sections, paying extra attention to grooves while preventing water from pooling in deep splits.
3. Remove the cleaning residue. Wipe the surface with a separate cloth dampened with clean water, or use a very gentle rinse when working outside. Turn the board and repeat only when the first side has been cleaned successfully.
4. Move the timber into a drying setup immediately. Stand or stack the boards with spacers between them so air can reach both faces. Keep them sheltered from rain and direct harsh heat while they release moisture.
I know a stronger cleaner can feel like a quicker answer, but old timber does not always respond predictably. I’d rather repeat a mild wash than bleach away the colour that made the board worth saving.
When mould is suspected, address the moisture source and decide whether the board is suitable for reuse before treating it as a routine cleaning job. EPA guidance recommends detergent and water for appropriate hard surfaces, complete drying, and professional advice or disposal when porous material is extensively affected. (EPA mould cleanup guidance)
Recheck Cleaned Lumber for Hidden Metal and Damage
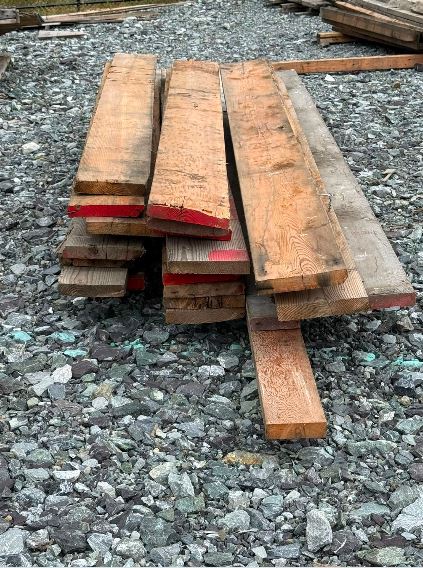
This reclaimed-lumber stack shows an honest part of working with old timber: even after cleaning and metal removal, a few embedded fragments may remain. The project treats that as something to manage rather than pretending that every recovered board is automatically ready for machinery.
Cleaning often reveals defects that dust had concealed. You may find deep insect tunnels, internal rot, large splits, oil stains, soft edges, or nails broken beneath the surface. At this point, sort the boards according to what they can safely become.
A short damaged board might still supply picture-frame pieces, small blocks, or decorative trim. A longer sound plank may suit shelving or furniture. Timber with widespread softness, contamination, or structural weakness should not be forced into a load-bearing project merely because its surface looks interesting.
Materials and Tools
· Cleaned and dried boards
· Magnet or metal detector
· Flashlight
· Chalk or marker
· Measuring tape
· Awl or small screwdriver for cautious condition checks
· Straightedge
· Separate storage areas for each condition grade
Step-by-Step Method
1. Repeat the metal scan after cleaning. Move the magnet over both faces, edges, and ends. Mark every remaining reaction clearly, even when you cannot see the metal itself.
2. Check for softness and structural damage. Press suspicious areas gently with an awl or screwdriver without stabbing sound wood unnecessarily. Separate boards that crumble, flex unexpectedly, or show deep decay around fastener holes.
3. Assign each board a realistic use. Reserve the straightest and strongest pieces for furniture or shelves. Use shorter, irregular, or thinner sections for wall art, frames, signs, drawer fronts, or other light-duty projects.
4. Label restricted cutting areas. Mark embedded metal, unstable cracks, and unusable ends. Keep these markings visible during storage so you do not rediscover the problem with a saw blade later.
For me, sorting is where reclaimed wood becomes easier to work with. A mixed pile can feel unpredictable, but separate stacks for furniture boards, decorative pieces, and offcuts turn it into usable material.
Do not use heavily weakened barn wood for seating, steps, structural shelving, children’s furniture, or other applications where failure could cause injury. The rustic appearance should never decide the load a board is expected to carry.
Clean Antique Pine Without Erasing Its Patina
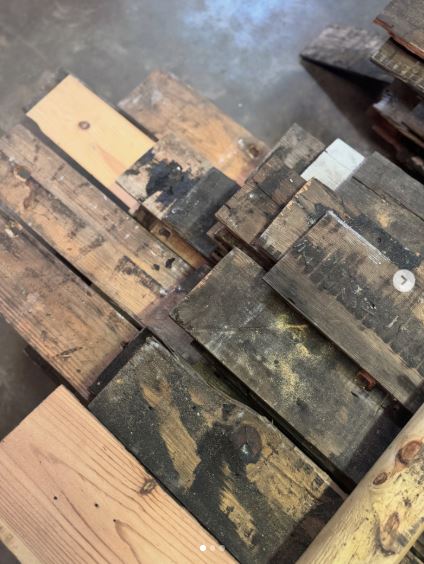
The before-and-after antique pine project demonstrates why cleaning should not automatically mean sanding everything smooth. The reclaimed boards retain their natural texture and signs of age while appearing cleaner and more ready for a new use.
Patina includes colour changes, worn high points, oxidation, tool marks, and subtle differences in texture. Dirt simply sits on top of those features or fills them. Learning to tell the difference helps you preserve the parts that give the timber character.
Begin with the driest, least aggressive method and stop when the result is clean enough for the intended project. A wall panel does not need the same smoothness as a desk top. A decorative shelf can keep more raised grain than a table that will be wiped regularly.
Materials and Tools
· Clean antique pine boards
· Soft and stiff nylon brushes
· Vacuum
· Cabinet scraper, when appropriate
· Fine sandpaper
· Sanding block
· Clean cloth
· Clear sample finish
· Scrap section for testing
Step-by-Step Method
1. Decide what should remain visible. Examine the grey areas, saw marks, nail holes, worn edges, and colour variation before changing them. Photograph the board so you can compare your progress and avoid cleaning one section far more aggressively than the rest.
2. Remove dirt from the texture rather than flattening it. Vacuum and brush along the grain, using a small brush in deep marks. Scrape isolated residue carefully instead of sanding the entire face to match one stubborn area.
3. Sand only where touch or function requires it. Smooth sharp splinters, rough cut ends, and high fibres that could catch clothing or make cleaning difficult. Feather those areas into the surrounding texture rather than creating pale, polished islands.
4. Test the proposed finish. Apply a small amount to an offcut or the back of the board because clear coatings can deepen colour significantly. Continue only when you are comfortable with how the finish changes the aged pine.
The edges do not need to become perfectly straight, and the surface doesn’t need to feel like new cabinet timber. What matters is that it is clean, stable, and suitable for how people will touch or use it.
A matte or low-sheen finish may preserve a quieter reclaimed appearance, while a more polished coating can deepen the colour and highlight grain. Always select the finish according to the project rather than choosing it only from a photograph.
Finish Cleaned Barn Wood for Its New Purpose
This project focuses on the difference between a rough pile of reclaimed wood and the finished result it can eventually produce. The transformation depends less on making the timber look new and more on giving each board enough patient preparation to become usable.
Do not apply a finish until the wood has dried fully and stabilised in the environment where it will be worked. Moisture trapped beneath a coating or inside a newly assembled project can lead to movement, uneven colour, and adhesion problems.
Choose the level of protection according to the final object. Wall cladding and decorative signs receive less handling than tables, benches, shelves, or bathroom storage. A coating that suits a dry display piece may not be appropriate for frequent wiping or moisture exposure.
Materials and Tools
· Completely dry reclaimed wood
· Fine sandpaper
· Vacuum
· Tack-free cleaning cloth
· Test offcut
· Suitable clear finish or sealer
· Brush, cloth, or applicator recommended for the product
· Gloves and ventilation required by the finish
· Felt pads for finished furniture
Step-by-Step Method
1. Let the wood adjust before final cutting. Store the cleaned boards with airflow around them and protect them from new moisture. Once they feel stable and dry, bring them into the workshop and allow them to settle before making precise furniture parts.
2. Complete only the necessary surface work. Trim unusable ends, soften splinters, and sand the areas that require regular contact. Vacuum the dust from cracks and grain before applying any finish.
3. Test the finish on matching wood. A clear product may make pale grey boards appear brown, amber, or much darker. Apply it to an offcut or hidden face, then judge the result after it has dried rather than while it is still wet.
4. Seal and assemble according to the project. Apply controlled coats following the manufacturer’s instructions and allow adequate curing. Add protective pads beneath objects and use appropriate fasteners for shelving or furniture.
I’d rather leave a board slightly more textured than bury it under a thick glossy coating. The small marks are the reason reclaimed timber looks different from a newly purchased plank.
Clean offcuts can still become hooks, small shelves, ornaments, picture frames, drawer pulls, or repair pieces. Keep them organised by thickness so the smallest usable sections do not disappear back into another mystery pile.
Common Mistakes to Avoid
Assuming Every Old Board Is Safe to Bring Indoors
Timber from agricultural or industrial buildings may have been exposed to waste, chemicals, fuel, pesticides, or floodwater. When its history is doubtful or it carries a persistent chemical smell, oily residue, or extensive biological contamination, do not treat it as an ordinary decorative board.
Sanding Painted Wood Before Testing It
Old paint may contain lead. Dry sanding or aggressive scraping can spread contaminated dust. Test questionable painted coatings and follow appropriate lead-safe procedures before disturbing them.
Using Water Before Removing Loose Dirt
Wet dust becomes mud and works deeper into cracks. Vacuum, scrape, and brush first, then decide whether washing is still necessary.
Soaking the Boards
Reclaimed timber can absorb water unevenly through cracks and end grain. Use controlled moisture, clean one section at a time, and begin drying immediately after washing.
Removing Every Sign of Age
Deep sanding may erase saw marks, grey colour, and raised grain along with the dirt. Clean until the timber is safe and practical, not until it looks newly manufactured.
Missing Broken Fasteners
A nail without a visible head can still damage tools and cause injury. Scan every board before and after cleaning, then mark any fragment that cannot be removed.
Finishing Damp Wood
A surface may feel dry while deeper sections still hold moisture. Give washed boards enough airflow and time before cutting, joining, or sealing them.
Using Weak Boards for Heavy-Duty Projects
Interesting texture does not equal structural strength. Keep cracked, rotten, or insect-damaged pieces away from seating, stairs, load-bearing shelves, and children’s furniture.
Frequently Asked Questions
Can reclaimed barn wood be cleaned with soap and water?
Yes, mild detergent and controlled water can help with ordinary dirt when the wood is structurally sound. Dry-brush and vacuum it first, avoid soaking the board, and dry it thoroughly after cleaning.
Should I pressure-wash barn wood?
A pressure washer can remove dirt quickly, but it may also drive water deeply into the grain, tear soft fibres, and remove patina. A brush and controlled rinse give beginners more control. Test any stronger method on an expendable piece first.
How can I tell whether old barn wood contains lead paint?
Appearance alone cannot confirm it. Painted reclaimed wood from an older or unknown building should be tested using an appropriate method or assessed by a qualified professional before sanding, scraping, or cutting through the coating.
Can mouldy barn wood be saved?
A small amount of surface growth on sound material may be manageable, but extensive mould in porous wood can be difficult to remove completely. Correct the moisture problem and obtain professional advice when growth is widespread, the board smells strongly, or the contamination extends into deep cracks.
How do I clean barn wood without removing the grey colour?
Begin with vacuuming and a nylon brush. Use a wire brush or sandpaper only on areas that genuinely require them, and test every method on the back or an offcut before working across the visible face.
Do I need to seal reclaimed wood after cleaning?
Not every decorative board requires the same finish, but a suitable coating can make frequently handled surfaces easier to maintain. Choose one that fits the project’s location and expected wear, and test how it changes the colour before treating the whole piece.
What should I do with boards that still contain metal?
Mark the metal clearly and keep that section away from saws, planers, routers, and other cutting equipment. Remove the affected portion when possible or reserve the board for a use that does not require machining through the marked area.
Keep the Character and Remove What Doesn’t Belong
Understanding how to clean reclaimed barn wood begins with accepting that the goal is not perfection. The most useful boards will still show their nail holes, weathered colour, worn edges, and uneven grain after cleaning. Those features belong to the timber’s history.
What doesn’t belong is hidden metal, loose dirt, unsafe paint dust, unstable fibres, excessive moisture, or contamination you cannot identify. Inspect first, work dry whenever possible, introduce water carefully, and let the wood dry before deciding how much sanding or finishing it truly needs.
Begin with one sound board rather than tackling an entire stack at once. Once you see how that particular timber responds to brushing, washing, and a test finish, the rest of the process becomes much easier to judge. What would you like your cleaned barn wood to become first?