Storage shelves earn their place in a room when they solve a real problem without making the wall, corner, or work area feel heavier than it needs to. A spare timber board can become a towel shelf, an underused alcove can take a compact vertical unit, and reclaimed boards can hold books or plants instead of remaining stacked in a garage. The most convincing shelves are rarely the ones with the most decoration. They are the ones that suit the wall, the objects they need to hold, and the amount of space people actually have around them.
I’m especially drawn to shelving projects that reuse sound wood, metal supports, baskets, crates, or existing furniture parts rather than replacing useful materials automatically. I don’t think every old board should become a shelf just because it is available, though. A piece that is split, badly warped, damp, insect-damaged, or too weak for its intended load needs a different future. The same care applies to walls: a pretty bracket cannot compensate for an unsuitable fixing point.
These storage shelves ideas range from simple single-board shelves to closet systems, kitchen shelving, plant displays, industrial pipe-style arrangements, and tall units for small spaces. The visual style changes from one idea to the next, but the practical questions stay surprisingly consistent: what will the shelf hold, where will the weight transfer, how will moisture affect it, and can everything be reached safely? Once those points are settled, reused materials can be cleaned, repaired, cut, finished, and arranged with far more confidence.
Check the Wall, Shelf Material, and Intended Load
A shelf can look lightweight while carrying books, glassware, folded towels, plants, or storage baskets that become much heavier in use. Before choosing brackets or drilling holes, decide what will live on the shelf and inspect both the support surface and the shelf material. Sound structure matters more than matching a photograph exactly.
· Check reclaimed boards for deep splits, rot, severe warping, loose laminations, protruding fasteners, or soft areas. Remove old nails and staples, and smooth sharp or splintered edges before the board comes indoors.
· Identify the wall type before selecting fixings. Solid masonry, timber framing, and hollow walls need different approaches, and heavy shelves may require secure attachment to structural support rather than decorative plugs alone.
· Consider the combined weight of the shelf, brackets, containers, books, plants, and anything else that may be added later. If the load or wall construction is uncertain, use appropriate professional advice rather than guessing.
· Keep shelves away from locations where doors, heads, shoulders, or moving furniture will repeatedly strike them. In children’s areas, secure tall furniture and keep heavy objects on lower levels.
· For bathrooms, laundry rooms, and kitchens, choose materials and finishes that suit humidity, splashes, and regular cleaning. Reclaimed wood may need extra attention at end grain, screw holes, and previously damaged areas.
Plan Height, Spacing, and Everyday Reach
Good shelving is not simply a row of boards placed wherever empty wall is available. The height of the lowest shelf, the distance between levels, the depth of the boards, and the clearance around furniture all affect whether the finished storage is comfortable to use. I know it can feel tempting to mark holes immediately, but a taped paper outline on the wall often reveals awkward spacing before a drill does.
· Measure the tallest objects that need to fit and allow comfortable clearance above them. Storage baskets need room to slide out; plants need space for leaves; kitchen glasses need enough height to lift without hitting the shelf above.
· Check reach from the normal standing or seated position. Everyday items belong where they can be reached safely, while rarely used lightweight objects can sit higher.
· Use painter’s tape, scrap paper, or cardboard strips to mock up shelf length and depth. Step back from the wall and check how the shelves relate to mirrors, windows, switches, sockets, desks, sofas, appliances, and door swings.
· Keep frequently handled objects away from shelf edges. Deep baskets and bookends can help, but they do not replace sensible spacing and secure installation.
· For a tall freestanding unit, check the floor for unevenness and plan anti-tip restraint where appropriate before filling the shelves.
Prepare Reused Wood, Metal, and Storage Containers
Reused materials often have more character than new flat-pack boards, but they also bring old finishes, dirt, paint, labels, rust, or hidden fasteners with them. Preparation should make the material safer and easier to live with while keeping the marks that give it character. There is no need to sand every reclaimed board until it looks factory-new.
· Clean wood with a method suitable for its finish and let it dry fully before sanding or coating. Avoid creating airborne dust from unknown old coatings; if lead paint or another hazardous finish is possible, use appropriate testing and safe-removal guidance.
· Smooth splinters and sharp corners, then repair minor sound defects only when the repair will genuinely restore safe use. Do not rely on filler to strengthen rotten or structurally split timber.
· Degrease reusable metal brackets or pipes, remove loose rust, and check threads, welds, and fixing holes. Replace components that are cracked, severely corroded, or distorted.
· Wash baskets, jars, and containers before placing them on finished shelves. Choose containers with stable bases and avoid putting fragile glass at exposed edges or above busy walkways.
· Apply paint, oil, wax, or another finish only when it suits the material and location. Follow the product instructions for ventilation, application, and curing rather than using one finishing method for every reclaimed surface.
Budget-Friendly Storage
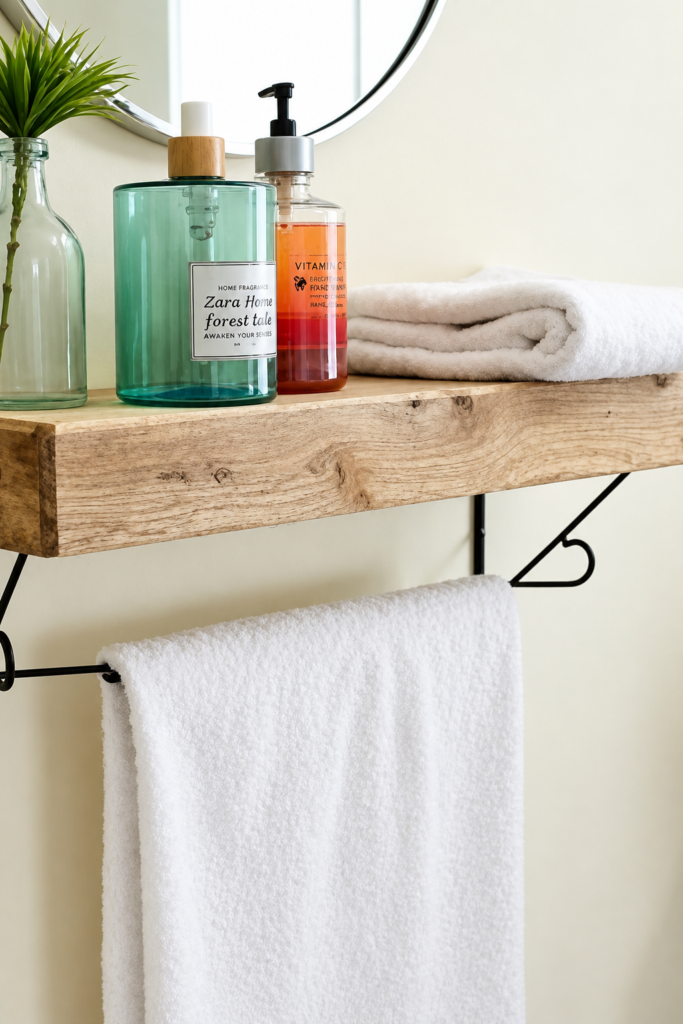
A single wooden shelf with a dark towel rail below is one of the clearest examples of doing more with very little material. The board provides a landing place for small bottles, jars, a plant cutting, or folded cloths, while the rail uses the empty space underneath. In a compact bathroom or utility corner, that combination can replace a bulkier cabinet without making the room feel crowded.
This is also a sensible place to reuse a sound offcut from another furniture project. The board does not need to be wide, but it should be deep enough for the objects you actually plan to store. If the shelf sits near a sink, I would keep absorbent end grain protected and avoid placing unsealed reclaimed timber where it will stay wet. The rail should be fixed independently or through a properly designed bracket system rather than simply screwed into weak board edges.
Materials and Tools
· Sound reclaimed timber board or suitable shelf offcut
· Two or more brackets appropriate to the shelf and wall
· Wall fixings suited to the actual wall construction
· Towel rail or sturdy reused metal bar with suitable supports
· Tape measure, level, pencil, and stud/structure locating method as appropriate
· Drill, screwdriver, and eye protection
· Sandpaper and a moisture-suitable finish if needed
Steps for This Storage Shelf Idea
1. Measure the usable wall area. Mark the shelf length and check that a towel can hang below without touching the basin, toilet, floor, or nearby fittings. Tape a temporary outline to the wall and view it from the doorway so the shelf does not project awkwardly into the room.
2. Prepare the board and rail. Clean the timber, remove sharp edges, and lightly smooth the surfaces that will be handled. Check the rail and its supports for rust, loose joints, or sharp burrs. Finish the wood only after confirming that the coating is suitable for a humid room.
3. Fix the shelf to sound support. Locate suitable fixing points and install the brackets level using hardware appropriate to the wall and expected load. Secure the board so it cannot slide or lift. If the wall construction or fixing strength is uncertain, stop and use a safer fixing method rather than loading the shelf experimentally.
4. Add the rail and edit the storage. Attach the towel rail securely, then load the shelf gradually with lightweight everyday items. Keep glass containers away from the edge and leave some open surface. Then hang the towel and check that it can be removed without pulling on the shelf above.
The part I would keep simple is the styling. A small shelf loses its usefulness quickly if every centimetre becomes decorative display space, so I would leave enough room to set down one everyday item without rearranging the whole scene.
Variation: Use a narrow reclaimed shelf in an entryway with hooks underneath for keys and reusable bags, or replace the towel rail with a short hanging rod for cleaning cloths in a utility area.
Creative Shelving for Bathrooms

A shelf beneath a mirror works because it places storage exactly where small bathroom items are already used. Towels, a small plant, candle containers, or a tray of toiletries can sit within reach while the open shelf keeps the wall visually lighter than a closed cabinet. The arrangement also creates a strong horizontal line beneath an oval or round mirror, which helps the two pieces feel connected rather than randomly placed.
Bathrooms bring moisture, steam, cosmetics, and frequent wiping into the equation. I would choose a board that can tolerate that routine and keep anything heat-related or flame-related well away from towels, curtains, shelves, and other combustible materials. Battery-operated lights can create a similar mood without introducing an open flame into a cramped storage zone.
Materials and Tools
· Moisture-suitable shelf board or sealed reclaimed timber
· Brackets or concealed supports compatible with the board and wall
· Appropriate wall anchors or structural fixings
· Level, tape measure, pencil, drill, and screwdriver
· Fine abrasive and suitable finish for exposed wood
· Small tray, basket, or washable containers for toiletries
· Optional battery-operated decorative light instead of open flame
Steps for This Storage Shelf Idea
1. Position the shelf around the mirror and basin. Measure the mirror, tap clearance, and the space needed to use the sink comfortably. Mark the shelf height so tall bottles do not obscure the mirror and people will not hit the shelf while leaning forward.
2. Prepare a bathroom-ready surface. Clean and smooth reused wood, paying attention to old screw holes and end grain. Apply the selected finish according to its instructions and allow it to cure fully before installation in a humid room.
3. Install on appropriate supports. Set the brackets level and secure them into suitable support for the wall type. Fit the board and check it for movement before adding storage. A shelf beneath a mirror is handled often, so wobble that seems minor during installation can become irritating quickly.
4. Organize by frequency of use. Place daily items in a shallow tray or washable container, folded towels toward the centre, and decorative pieces only where they do not block access. Keep fragile or hot items away from edges and textiles, then remove anything that makes the shelf difficult to wipe clean.
For me, bathroom shelving looks calmer when similar small items are grouped instead of lined up individually. One tray is easier to lift for cleaning than seven little bottles that all need moving one at a time.
Variation: Use a deeper shelf with two small baskets beneath it for rolled washcloths, or make a rental-friendly version with a freestanding over-sink unit if drilling is not permitted.
Creative Wall Shelving Idea

Staggered wooden shelves held by dark pipe-style supports create a strong framework for books, plants, and decorative objects. The appeal comes from the contrast: warm timber softens the industrial metal, while the uneven shelf positions stop the arrangement from looking like a standard bookcase. It can fill a broad wall without using much floor space.
Pipe-style shelving needs more planning than its open appearance suggests. Each support should line up with sound fixing points, the pipe components must be suitable for the load, and the shelf boards need enough support to resist sagging. Plants add another practical concern because wet pots can stain timber and water can reach walls or metal. I would use saucers or waterproof trays and keep trailing growth away from switches and heaters.
Materials and Tools
· Several sound timber shelves of suitable thickness
· Pipe-style brackets or a purpose-made metal support system
· Wall fixings appropriate to the wall and expected load
· Tape measure, long level, pencil, and locating tools
· Drill, driver, and eye protection
· Sandpaper plus suitable wood/metal finish if required
· Plant saucers, bookends, and stable storage objects
Steps for This Storage Shelf Idea
1. Draw the whole arrangement first. Measure the wall and sketch each shelf height and length, including the gaps between staggered boards. Use tape on the wall to test the composition. Check that lower shelves do not project into circulation space and that upper shelves remain reachable for safe maintenance.
2. Prepare the reclaimed materials. Clean the boards, remove splinters and old fasteners, and check them for straightness. Inspect metal parts for damaged threads, cracks, or severe corrosion. Finish components before assembly where that gives easier access to all surfaces.
3. Install the support framework accurately. Mark fixing points with a level and secure the support system using hardware designed for the wall type. Assemble pipe components firmly without forcing damaged threads. Before adding shelves, check that the framework is square, stable, and evenly supported.
4. Fit boards and load gradually. Secure each board to its supports so it cannot slide. Add heavier books or pots near strong support points rather than concentrating weight in long unsupported spans. Then balance books, plants, and objects with enough empty space to make dusting and watering practical.
I’d resist the urge to fill every staggered shelf just because the structure is dramatic. The metal framework already creates plenty of visual lines, so fewer, larger objects usually let the wood and construction read more clearly.
Variation: Replace black pipe with salvaged steel brackets for a simpler version, or use only three staggered shelves on a narrow wall instead of extending the system across an entire room.
Custom Shelving for Closets

Closet shelving works best when it is planned around categories rather than equal-looking compartments. Hanging clothes need vertical clearance, shoes work well on shallower shelves, bags need broader spaces, and small accessories are easier to control in drawers or bins. A custom layout can reuse an existing wardrobe carcass or sound boards while giving every type of item a more logical home.
The first job is editing what the closet actually needs to store. There is little value in building six shoe shelves for three pairs while long coats end up folded over a rail. I would measure the real contents, leave a little growing room, and keep the heaviest storage low. Any tall built-in or freestanding carcass should be secure and stable before it is filled.
Materials and Tools
· Existing wardrobe, closet alcove, or cabinet carcass in sound condition
· Reclaimed or new shelf boards suitable for interior storage
· Shelf cleats, pins, brackets, or adjustable support hardware
· Clothes rail and fixings if needed
· Baskets, boxes, or reused drawers
· Tape measure, level, pencil, drill/driver, and saw if cutting is required
· Edge banding, finish, or liner where useful
Steps for This Storage Shelf Idea
1. Inventory the closet contents. Group clothing, footwear, bags, linens, and accessories, then measure the tallest and widest items. Decide which categories need hanging, open shelves, drawers, or baskets. This prevents a visually tidy design that does not suit the actual wardrobe.
2. Mark the storage zones. Use the closet width and height to allocate a hanging section, shoe shelves, bag shelves, and small-item storage. Keep heavy boxes low and frequently used pieces between knee and shoulder height where possible.
3. Build and secure the supports. Fit cleats, pins, or brackets level and make sure the closet structure can accept them. Cut boards accurately, smooth edges, and test every shelf before loading. If reusing an old wardrobe, reinforce loose joints rather than attaching new shelves to a weak carcass.
4. Add containers and adjust after use. Place accessories in labelled or visually distinct bins and leave ventilation around footwear. Use the closet for several days, then move adjustable shelves if one category feels cramped. A custom system should be allowed to change with the contents rather than remain frozen around an early guess.
The most useful closet shelf is often the one with a little extra headroom. When every compartment is built to the exact height of today’s stack, one thicker jumper or taller bag can disrupt the whole arrangement.
Variation: Add removable shelf dividers for folded clothing, use reclaimed drawers as open cubbies, or create a simpler half-height system beneath an existing hanging rail.
Easy Shelf Building Idea

Two straight wooden shelves on a light wall can be enough to organize books, a tablet, small plants, and a few working objects without turning the room into a display wall. The simplicity makes this a good first shelf-building project because the measurements are easy to understand and the finished result depends more on level installation than complicated joinery.
A pair of matching boards can come from a longer reclaimed plank if the timber is sound. Cut both ends square, soften the edges, and decide whether visible brackets suit the room or whether a concealed system is more appropriate. Concealed supports are not automatically easier; they need accurate alignment and the wall must still provide reliable support.
Materials and Tools
· Two sound boards cut to matching or intentionally varied lengths
· Suitable brackets or a compatible floating-shelf support system
· Wall fixings selected for the wall type and load
· Tape measure, level, pencil, and square
· Saw if boards need cutting
· Drill/driver, screwdriver, and eye protection
· Sandpaper and chosen finish
Steps for This Storage Shelf Idea
1. Choose the shelf spacing. Measure the books, devices, or planters that will sit between the two shelves. Tape both shelf positions onto the wall and check the overall composition from the desk or doorway before drilling.
2. Cut and finish the boards. Square the ends, smooth splinters, and round only the edges that need softening. If using reclaimed timber, keep attractive saw marks or old holes where they are harmless. Apply a finish suitable for the room and allow it to cure.
3. Install the lower shelf first. Locate reliable fixing points, attach the brackets level, and secure the board. Test for movement before using the lower shelf as a visual reference for the upper one. Avoid measuring the second shelf only from the floor if the room itself is not perfectly level.
4. Add the upper shelf and organize lightly. Install the second shelf parallel or intentionally offset, then place the heaviest objects nearest secure support points. Use bookends where needed and protect timber beneath plant pots. Leave enough open space that the shelves still look intentional rather than like overflow storage.
This is where accuracy saves more effort than decoration. If the two shelves are visibly out of level, another plant or framed print will not distract the eye for long.
Variation: Use one longer shelf over a desk and one shorter shelf above it, or finish two reclaimed boards differently so the pair feels related without being identical.
Plant Storage Shelves

A tall shelf filled with plants turns storage into a living display, but the plants make the practical requirements very different from ordinary bookshelves. Pots bring water, soil, changing weight, and foliage that grows beyond the shelf edges. A leaning ladder-style unit can look light, yet it still needs reliable footing and may need restraint so watering or brushing past it does not shift the frame.
I would arrange plants by light and watering needs before thinking about colour or pot style. A sun-loving plant placed beautifully in a dark lower corner is not a useful storage decision. Heavy ceramic pots belong low, trailing plants can sit higher if they are secure, and every pot should have a stable saucer or waterproof tray to protect the shelves.
Materials and Tools
· Stable leaning or freestanding shelf unit, reused where structurally sound
· Plant pots with stable bases
· Waterproof saucers or trays
· Anti-tip restraint where appropriate
· Protective shelf liners or moisture-resistant finish
· Pruning scissors and watering tool for maintenance
· Small baskets for plant-care supplies
Steps for This Storage Shelf Idea
1. Check stability and light. Place the empty unit on a firm, level surface and confirm that it cannot rock. Secure it as appropriate for its design. Observe the available daylight through the day and decide which shelf positions suit the plants rather than forcing every plant into the same conditions.
2. Protect the shelf surfaces. Clean the unit and repair loose joints. Add suitable trays, liners, or a moisture-resistant finish where water may collect. Make sure trays are large enough to catch normal drainage without projecting dangerously beyond the shelf.
3. Arrange from heavy to light. Put the largest and heaviest pots on lower shelves, medium plants in the middle, and lighter trailing plants higher up. Keep foliage clear of electrical outlets, hot surfaces, and walkways. Leave room to lift every pot out for cleaning.
4. Create a maintenance routine. Water plants away from the shelving when that reduces spills, wipe trays before replacing them, and rotate pots only if the plants benefit. Then inspect the shelf periodically for moisture damage, loosened joints, or a change in stability as plants grow.
Plant shelves look wonderfully full in photographs, but I prefer enough space to get two hands around each pot. If a plant cannot be removed without knocking three neighbours over, everyday care becomes a balancing act.
Variation: Use one reclaimed bookcase for low-light plants with grow lighting installed only according to electrical safety guidance, or dedicate a single wall shelf to propagation jars and lightweight cuttings.
Floating Bookshelf Design

Floating shelves keep the floor clear and let books, framed art, small plants, and keepsakes form a relaxed reading-area display. Because the support hardware is hidden or visually minimal, the shelf board itself becomes the main line on the wall. That clean look is useful in small rooms, but it also means poor alignment or sagging is more noticeable.
Books are dense, so a floating shelf intended for reading material should not be treated like a lightweight picture ledge. The support system, shelf thickness, span, and wall fixing all need to suit the load. I would rather use a shorter, securely supported shelf than stretch one board across a wide wall simply because the empty space is available.
Materials and Tools
· Boards or purpose-made floating shelves suitable for the intended load
· Compatible hidden support system or discreet brackets
· Correct wall fixings and structural support
· Long level, tape measure, pencil, and locating tools
· Drill/driver and eye protection
· Bookends or shelf lips where needed
· Saucers or mats for plants and framed items
Steps for This Storage Shelf Idea
1. Plan around the books first. Measure the tallest books and estimate how many will actually live on each shelf. Mark the shelf positions around nearby seating, art, and lighting, keeping enough clearance to reach the books comfortably.
2. Prepare the boards and supports. Check reclaimed timber for straightness and sound structure, then cut and finish it as needed. Lay out the concealed supports precisely so the holes in the shelf align without forcing or splitting the timber.
3. Fix the support system securely. Attach the hardware to suitable structural support for the wall type, checking level before tightening fully. Test the supports and shelf fit with no load first. Correct movement or misalignment now rather than hoping the books will hold everything in place.
4. Load books gradually and style around them. Start with books near the strongest support areas, add bookends where a row might slide, and place only lightweight decorative objects in less supported areas. Keep plant moisture isolated from timber and do not stack objects where they could fall over seating.
What matters here is restraint. Floating shelves already create a light visual effect, and a dense row of objects from end to end can make them feel much heavier than the room needs.
Variation: Use shallow floating ledges for front-facing books and art, or create two short shelves beside a reading chair instead of one long shelf over a sofa.
Homemade Storage Solution

A grid of open square and rectangular compartments gives homemade shelving the flexibility of a bookcase and the visual rhythm of cubby storage. Different openings can hold books, plants, boxes, speakers, craft supplies, or display objects without requiring every possession to fit the same shelf height. It is particularly useful when reused boards are available in several shorter lengths rather than one long piece.
The challenge is keeping the grid square and strong. Every vertical divider affects the shelves above and below it, so random placement can create weak joints or awkward unsupported spans. A homemade cubby unit should be assembled on a flat surface, checked diagonally for square, and anchored or restrained when its height and location create a tipping risk.
Materials and Tools
· Sound boards, plywood, or reclaimed cabinet panels suitable for shelving
· Back panel or bracing where the design requires it
· Screws, dowels, or other suitable joinery hardware
· Wood glue compatible with the material if used as part of the joint
· Square, tape measure, pencil, clamps, and level
· Saw, drill/driver, and eye protection
· Baskets or boxes sized to selected compartments
Steps for This Storage Shelf Idea
1. Design the cubby grid from the contents. List the objects that need storing and assign a few practical compartment sizes. Draw the full unit with vertical dividers aligned where they can transfer load. Avoid creating a wide unsupported shelf simply to make one oversized opening.
2. Cut and label every component. Measure twice and mark each panel so similar-looking pieces do not get swapped during assembly. Smooth cut edges and dry-fit the main frame on a flat floor or workbench before adding glue or screws.
3. Assemble square and add bracing. Build the outer frame first, then fit vertical dividers and smaller shelves. Use a square and compare diagonal measurements as you work. Add a back or other bracing when the construction needs it to resist racking.
4. Secure, finish, and assign storage. Anchor or restrain the completed unit as appropriate, especially if it is tall or located where children may climb. Add baskets to visually busy compartments, keep heavy objects low, and leave selected cubbies open so the grid remains easy to read.
The first grid sketch is usually too ambitious. I would rather build fewer, stronger compartments than squeeze in extra dividers that create tiny spaces no basket, book, or useful object actually fits.
Variation: Reuse drawer boxes as individual wall cubbies, or build a low two-row unit that doubles as storage beneath a window without creating a tall furniture piece.
Industrial-Style Shelving Idea

Industrial-style shelving uses the same warm-wood and dark-metal contrast as pipe-supported wall shelves, but it can be arranged as a more regular, furniture-like unit. The repeated metal uprights give the shelves visual structure, while books, baskets, mugs, and plants soften the harder lines. Reclaimed boards often suit this style because small marks and colour variation look intentional rather than out of place.
The finish should still be safe to touch and easy to clean. Rust flakes, sharp pipe threads, oily residues, and splintered timber are not decorative character. Clean metal thoroughly, cap or position exposed ends safely, and make sure the unit cannot twist when pushed from the side.
Materials and Tools
· Reclaimed timber shelves in sound condition
· Industrial-style metal uprights, pipe fittings, or purpose-made frame
· Compatible feet, flanges, or wall restraints
· Appropriate screws and wall/floor fixings where required
· Level, square, tape measure, and pencil
· Drill/driver, spanners, and eye protection
· Wood and metal finishes suitable for indoor use
Steps for This Storage Shelf Idea
1. Set the proportions before assembly. Choose shelf height and spacing around the objects you want to store. Lay the boards on the floor with the metal frame components beside them to confirm the overall width and rhythm before tightening anything.
2. Prepare every reused surface. Degrease metal, remove loose corrosion, and inspect threads or welded areas. Clean and smooth the boards without erasing all character. Finish the wood and metal as required, allowing coatings to cure fully.
3. Assemble the frame square. Build the uprights on a flat surface and tighten fittings gradually so one side does not pull out of alignment. Fit shelves and check them with a level. Add wall restraint or other stabilization appropriate to the design.
4. Load for stability and visual balance. Place heavier books, baskets, and containers lower and closer to the frame supports. Use plants and lighter objects higher up. Keep enough room around objects to dust the metal and wipe the timber without dismantling the display.
Industrial shelving can become visually busy very quickly because the frame itself is already bold. I’d use repeated materials perhaps books, two basket types, and a few plants rather than a different decorative object on every level.
Variation: Use salvaged angle brackets and dark-painted timber instead of pipe, or create a narrow industrial shelf for a kitchen corner using three boards rather than a full wall unit.
Open Shelving Unit

Open kitchen shelving puts plates, bowls, glasses, cookbooks, and a few decorative pieces where they can be reached without opening cabinet doors. The clean appearance depends on sensible editing because the contents remain visible all the time. Everyday pieces that are used and washed regularly make more sense here than fragile objects that simply collect cooking dust.
Kitchen shelves also need careful placement around heat, steam, sinks, and cooking grease. I would not mount timber directly where a burner, kettle, or other hot appliance can damage it. Glassware should sit securely, and shelves above work areas need enough clearance that people are not reaching past hot pans or striking their heads while cooking.
Materials and Tools
· Moisture- and kitchen-suitable shelf boards
· Strong brackets or compatible open-shelf supports
· Wall fixings appropriate to the wall and load
· Tape measure, level, pencil, drill, and driver
· Suitable finish that can be wiped clean
· Stable dish stacks, baskets, or plate supports as needed
· Non-slip mats or shelf liner where appropriate
Steps for This Storage Shelf Idea
1. Map the cooking and washing zones. Mark where steam, splashes, heat, extractor equipment, and head movement occur. Place shelves where contents remain reachable without interfering with cooking. Check the height with the tallest regular user in mind.
2. Prepare wipeable shelf surfaces. Clean and smooth reused wood, then apply a finish suitable for the kitchen location. Avoid coating food-contact surfaces with products not intended for that use; shelves normally hold dishes, but spills and contact still make cleanability important.
3. Install into reliable support. Fit brackets level and secure them to appropriate wall structure. Attach the boards so they cannot shift, then test the shelves before loading. Dishes and glassware create concentrated weight, so the support system should be chosen for the real contents.
4. Arrange by use, not only appearance. Keep daily plates and bowls on the easiest shelf, lighter glasses where they are stable, and rarely used decorative pieces higher. Leave small gaps between groups so items can be lifted without knocking neighbours. Then remove anything that becomes dusty or awkward to reach.
Open kitchen shelving is easiest to live with when it holds things that move. A plate used every day does not have much time to gather dust; a decorative jug untouched for six months definitely does.
Variation: Use one short open shelf for mugs and a second for cookbooks, or combine a reclaimed shelf with a hanging rail underneath for utensils that are safe to suspend.
Storage for Home Office

Shelves above a desk can collect workbooks, files, small boxes, framed pieces, and reference objects while leaving the work surface clear for a laptop and notebook. Cubby-style shelving is especially useful because categories can be separated without filling the desk with organizers. The arrangement works best when the storage supports concentration instead of becoming another wall of visual reminders.
Anything above a desk should be secure because people sit beneath it for long periods. Heavy files, printers, or unstable stacks belong on appropriately designed lower storage rather than a high shelf over a chair. Cables and charging devices also need a deliberate route so cords are not pinched behind shelving or draped across working space.
Materials and Tools
· Wall shelves or cubby unit suited to the office load
· Correct wall fixings or furniture restraint
· File boxes, magazine holders, or reused storage bins
· Bookends and label system if useful
· Tape measure, level, pencil, and drill/driver
· Cable clips or routing accessories appropriate to the setup
· Soft pads for framed objects or electronics
Steps for This Storage Shelf Idea
1. Separate active work from archive storage. List what you reach for daily, weekly, and rarely. Keep active notebooks and reference books within easy reach, while archived papers can move to labelled boxes or lower cabinets. This reduces the temptation to place everything on the shelf simply because space exists.
2. Position shelving around the desk. Mark the desk height, monitor sightline, lamp position, and seated reach. Keep shelves high enough to avoid head contact but low enough for safe access. Avoid placing heavy items directly above the normal seated position.
3. Install and organize by category. Secure the shelves or cubbies to reliable support, then add files, books, supplies, and personal objects in clear groups. Use boxes for visually messy small items and bookends for upright references.
4. Tidy cables and test the workflow. Route charging leads away from shelf brackets, chair wheels, and sharp edges. Work at the desk for a few days, then move anything that repeatedly interrupts reach or creates visual clutter. The shelf should reduce desk chaos, not relocate it a few centimetres upward.
I like leaving one office cubby deliberately empty. It gives temporary papers somewhere to land while they are being used, which is much more realistic than pretending a working desk will stay perfectly cleared all day.
Variation: Mount two narrow ledges for notebooks and reference books, or reuse small wooden crates as wall cubbies for craft or home-office supplies after securing them properly.
Recycled Material Storage Shelves

Recycled-material shelving has the most character when the reused source remains visible: old boards may show saw marks, filled nail holes, colour variation, or softened edges from earlier use. A five-tier shelf can combine those boards with a repaired frame and hold plants, books, mugs, and small keepsakes without pretending the material started life as new furniture.
Reuse still begins with selection. Timber from unknown industrial use, boards with chemical contamination, badly rotted wood, or pieces carrying hazardous old coatings may not belong inside a home. I would choose material with a known or reasonably safe history, clean it carefully, and preserve only the marks that are harmless.
Materials and Tools
· Reclaimed boards or salvaged shelving with a suitable history
· Reusable frame, brackets, or uprights in sound condition
· Replacement screws or fasteners where old hardware is unreliable
· Cleaning tools and abrasive appropriate to the material
· Suitable finish or sealer if desired
· Level, square, drill/driver, and eye protection
· Baskets, books, and plant trays for organization
Steps for This Storage Shelf Idea
1. Select salvage for structure first. Choose boards that are dry, reasonably straight, and free from severe rot or structural splitting. Remove protruding fasteners and reject pieces with contamination or coatings that cannot be handled safely.
2. Clean without erasing every mark. Wash or brush dirt away using a method suitable for the timber, then sand splinters and sharp corners. Keep sound dents, saw marks, and old holes if they contribute character without weakening the shelf.
3. Repair and assemble securely. Replace rusted or stripped fasteners, strengthen loose frame joints, and assemble the shelves level. Add bracing or wall restraint when the unit needs it. A rustic appearance should never mean a frame that rocks under normal use.
4. Use containers to control visual clutter. Group small objects in baskets or boxes, place heavier pieces low, and protect timber under plant pots. Leave some reclaimed surface visible so the material itself remains part of the design rather than disappearing beneath storage.
The part I enjoy most about reclaimed shelves is the evidence of earlier use, but I draw the line at splinters and mystery residue. Character should be something you can live with safely, not something you have to work around every day.
Variation: Combine mismatched reclaimed boards with one freshly painted frame, or turn a short salvaged ladder into a display shelf only if its structure can be adapted and stabilized safely.
Shelving for Laundry Rooms

Laundry-room shelves make the biggest difference when they move detergents, stain treatments, cloths, and sorting baskets off appliance tops. Two sturdy shelves can create a clear working zone above a washer and dryer, with everyday containers lower and spare supplies higher. The room feels calmer because repeated packaging becomes grouped instead of scattered across several surfaces.
This is a functional storage area, so safety labels and original containers matter. I would not decant chemicals into unlabelled decorative jars simply to make a shelf look coordinated. Products should be stored according to their labels, kept away from children and pets, and separated where instructions require it. Shelves must also stay clear of appliance vents, service access, and heat-producing equipment.
Materials and Tools
· Moisture-resistant shelf boards or suitable reused shelving
· Strong brackets and wall fixings appropriate to the load
· Clearly labelled bins or baskets
· Original product containers or safely labelled storage as required
· Tape measure, level, pencil, drill, and driver
· Washable shelf liner if useful
· Small tray for drips or frequently used items
Steps for This Storage Shelf Idea
1. Check appliance clearance and access. Measure the machines, lids or doors, valves, vents, and service points before marking shelves. Leave enough room to operate and maintain the appliances without removing the shelving each time.
2. Install shelves for the real supply weight. Laundry liquids and bulk containers can be heavy, so use suitable support and avoid long weak spans. Fit the boards level and secure them against movement before adding anything.
3. Group products by task and safety. Keep daily detergent and stain treatment within easy adult reach, less-used refills higher, and sorting supplies in baskets. Preserve labels and follow storage directions rather than transferring products purely for appearance.
4. Build cleaning into the layout. Use trays under bottles that may drip and leave enough clearance to wipe the shelf. Review expired or empty products regularly. Then keep appliance tops as clear as possible so the new shelves actually solve the original clutter problem.
Laundry shelves do not need to look like a boutique. I’d choose clear labels and easy wiping over a row of matching containers that make it harder to tell one product from another.
Variation: Add a hanging rail beneath the lowest shelf for empty hangers or air-drying light garments, provided it does not obstruct appliance access or create a snagging hazard.
Shelving Units for Small Spaces

A narrow five-tier unit can turn an unused corner into storage for books, plants, boxes, and decorative objects without demanding much floor area. In a small room, the vertical shape matters because it draws storage upward rather than outward. A light-coloured unit can visually recede, while varied books and greenery stop it from feeling purely utilitarian.
Tall, narrow furniture is also easier to tip than a low wide cabinet. I would treat restraint as part of the design, especially in homes with children, pets, or busy walkways. Heavy books and pottery belong at the bottom, while lightweight baskets and soft objects can move higher.
Materials and Tools
· Narrow freestanding shelving unit or sound reused bookcase
· Anti-tip restraint appropriate to the furniture and wall
· Level or shims appropriate to the floor and unit
· Baskets or boxes sized to the shelves
· Bookends and plant saucers
· Cleaning and repair supplies for reused furniture
· Basic hand tools for tightening joints and restraint hardware
Steps for This Storage Shelf Idea
1. Choose a corner with usable vertical space. Measure the floor footprint, skirting boards, nearby doors, and the full shelf height. Check that the unit will not block switches, heating equipment, or curtains and that upper shelves can be reached safely.
2. Inspect and stabilize the empty unit. Tighten loose joints, repair only sound components, and confirm that all feet sit firmly. Use appropriate restraint for the unit and wall so the furniture cannot tip when a basket or book is pulled forward.
3. Load from the bottom upward. Place heavy books and large pots low, medium storage in the centre, and light decorative objects higher. Keep frequently used items between comfortable reach levels and avoid creating top-heavy arrangements.
4. Edit for breathing room. Alternate closed baskets with books, plants, or open space rather than filling every shelf edge to edge. Then stand at the doorway and check whether the unit still feels narrow or has become visually bulky because too many objects project beyond its sides.
Small rooms benefit from storage, but they also need somewhere for the eye to rest. One half-empty shelf can make the whole unit feel lighter without giving up much useful capacity.
Variation: Use a slim ladder shelf, stack secure modular cubes vertically, or repurpose a narrow bookcase with new baskets and a repaired back panel.
Small Room Shelving Ideas
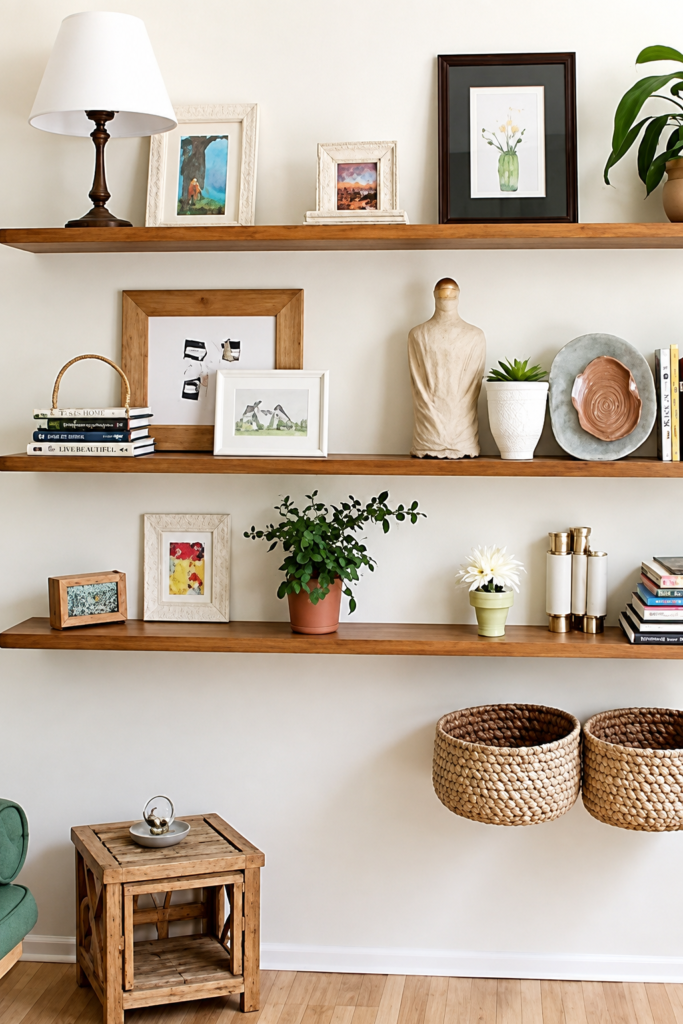
Wall shelves above a reading chair use a section of wall that might otherwise hold only one picture. Books, framed art, small plants, and baskets can be layered vertically while the chair keeps the floor function focused on seating. The combination feels intimate because storage and display are gathered around one activity rather than spread across the whole room.
Shelves above seating need careful placement. Objects should not be able to slide or fall onto the person below, and the lowest shelf must clear head movement when someone stands up. Heavy or fragile pieces are better stored elsewhere. Woven baskets below or beside the chair can hold soft items such as throws, magazines, or craft materials without adding risk overhead.
Materials and Tools
· Wall shelves sized to the available space
· Reliable brackets and wall fixings
· Bookends or small front lips where useful
· Lightweight baskets for lower storage
· Tape measure, level, pencil, drill, and driver
· Soft pads or museum-style putty where appropriate for lightweight decor
· Plant saucers if greenery is included
Steps for This Storage Shelf Idea
1. Map the seated and standing clearance. Position the chair first and sit in it, then stand naturally and reach around the area. Mark shelves high enough to avoid head contact and far enough from the chair back that objects are not brushed during normal movement.
2. Choose light overhead contents. Plan framed prints, a small number of books, lightweight plants, or stable decorative items. Keep dense books, heavy ceramics, and large glass objects away from shelves directly over seating.
3. Install securely and add edge control. Fix the shelves into appropriate support and test them before loading. Use bookends, lips, or stable arrangements where objects might slide. Make sure frames lean or stand securely rather than balancing loosely against the wall.
4. Use baskets for the messier layer. Store throws, magazines, chargers, or craft supplies in baskets at floor level or on a low safe shelf. This lets the wall shelves remain calmer while still giving the small room useful everyday capacity.
I don’t think every storage problem in a small room should move overhead. Shelves can hold the lighter, neater layer, while baskets lower down handle the awkward objects that would look or feel unsafe above a chair.
Variation: Build one long shelf above the chair with a picture ledge beside it, or use a corner shelf arrangement that keeps the central wall visually quieter.
Wall-Mounted Shelves

Three wall-mounted wooden shelves above a sofa create a gallery-like storage zone for books, plants, and framed art while preserving clear floor space. Repeating the same shelf material helps the arrangement feel connected even when the objects vary. Natural timber and greenery can soften a neutral room without needing a large cabinet.
Because people sit below these shelves, installation and object choice matter more than the styling. Heavy pottery, unstable frames, and tall top-heavy pieces should not balance above a sofa. Secure shelves to appropriate structural support, use stable objects, and consider how doors, vibration, or accidental knocks could affect the display.
Materials and Tools
· Three shelf boards or matching/reclaimed boards
· Brackets or support system suited to each shelf
· Wall fixings appropriate to construction and load
· Level, tape measure, pencil, drill, and driver
· Bookends and stable frame supports
· Plant trays or saucers
· Optional light baskets for small items
Steps for This Storage Shelf Idea
1. Lay out the three shelf lines. Use tape to mark each shelf on the wall and check their relationship to the sofa width, artwork, and ceiling height. Make sure the lowest shelf clears seated and standing movement and that the top shelf can still be reached safely.
2. Prepare and match the boards. Cut boards to the selected lengths, smooth edges, and decide whether they will match exactly or retain individual reclaimed marks. Finish them consistently enough that the three levels read as one installation.
3. Install one shelf at a time. Fix the lowest shelf level first, then measure the next shelf from that reference while still checking with a level. Secure every board so it cannot shift and verify each shelf before moving upward.
4. Style for stability. Use books and small frames near secure support points, low plants in stable pots, and lightweight objects higher. Keep the arrangement balanced across the wall and remove anything that could fall easily onto the seating area.
A sofa wall already has a strong horizontal shape, so the shelves do not need to copy it perfectly. Slightly different lengths can feel more relaxed as long as the installation still looks deliberate and balanced.
Variation: Use two long shelves instead of three, or mix one timber shelf with two shallow picture ledges for a lighter display-focused arrangement.
Stylish Shelf Design

A dark full-height shelving unit can act almost like an architectural feature. Books, sculpture, vases, and framed art sit inside a strong grid, and the darker finish makes empty compartments feel as intentional as the filled ones. This style works well when storage and display need to share one wall rather than being spread through the room.
The risk is turning every opening into a stage. A large unit already has visual weight, so I would choose a few focal objects and let books or closed boxes handle the practical storage. Integrated lighting can look effective, but electrical work should use properly rated components and safe installation; improvised wiring does not belong behind enclosed shelves.
Materials and Tools
· Large shelving unit, built-in frame, or sturdy reused bookcase
· Wall restraint or built-in fixing appropriate to the unit
· Paint or finish suitable for the shelving material if refinishing
· Books, stable art objects, and closed storage boxes
· Level and tools for adjustment/anchoring
· Soft pads for decorative objects
· Purpose-made lighting system only if installed safely and as instructed
Steps for This Storage Shelf Idea
1. Decide what the unit needs to store. Separate practical storage from display pieces before styling. Allocate lower compartments to heavy books or boxes and central eye-level spaces to the strongest visual objects. Leave some openings intentionally quiet.
2. Repair and refinish the structure. Tighten joints, repair a sound back panel, and prepare surfaces before painting or finishing. If the existing material is laminated or coated, use products and preparation methods compatible with that surface rather than assuming ordinary wall paint will bond well.
3. Secure the unit before loading. Level the furniture and add appropriate restraint or built-in fixing. Check that shelves are seated correctly and not bowed. Any lighting should be installed with cables protected from pinching and heat, following the manufacturer’s instructions.
4. Build the display in layers. Place the largest books and objects first, then add smaller pieces only where they improve balance. Repeat a few materials or shapes across the unit. Keep shelves accessible enough to dust and remove books without dismantling a decorative arrangement.
The empty compartments are doing more work than they seem. If every cubby contains a vase, frame, plant, stack of books, and ornament, the dark shelving disappears behind the things it is supposed to frame.
Variation: Paint only the back panels of an existing bookcase dark, or create one dramatic central display bay while keeping the remaining shelves mostly practical.
Vertical Shelving Design

A slim vertical shelf with several tiers makes good use of wall height while keeping its footprint small. Baskets can hide everyday clutter, books provide weight and colour, and plants soften the mix of timber and metal. This is especially useful in an awkward corner where a wide cabinet would obstruct movement.
The vertical proportions make load placement important. A basket pulled from an upper shelf shifts the centre of gravity forward, and a heavy planter placed high can make the unit less stable. I would secure the furniture first, then keep dense objects low and light storage higher.
Materials and Tools
· Tall narrow shelving unit or sound reclaimed frame
· Anti-tip restraint suitable for the unit and wall
· Baskets with stable bases and easy-grip handles
· Bookends and plant saucers
· Level and floor shims if suitable
· Tools for tightening joints and restraint hardware
· Optional labels for closed baskets
Steps for This Storage Shelf Idea
1. Choose the vertical location carefully. Measure the wall height, floor width, skirting, switches, curtains, and door swing. Make sure the shelving can be approached directly rather than squeezed behind furniture, because upper baskets need safe two-handed access.
2. Stabilize the empty frame. Check every joint and shelf connection, level the unit, and fit appropriate anti-tip restraint. Do not rely on the weight of stored objects to make a narrow shelf feel stable.
3. Assign loads by weight and frequency. Put heavy books and larger containers on the bottom levels, everyday baskets in the middle, and light decorative or soft items higher. Keep plant pots secure and use trays to protect shelf surfaces.
4. Label and review the baskets. Use simple labels where closed storage would otherwise become a guessing game. After a week of use, move frequently accessed items lower if people are repeatedly stretching or using a chair to reach them.
Vertical storage only helps if the upper levels are genuinely useful. If reaching a basket requires a risky stretch every morning, that shelf is not saving space—it is creating a new problem.
Variation: Use a narrow bathroom tower for towels, a slim office unit for files and baskets, or stack modular cubes only when the system is designed to connect and restrain safely.
Storage Shelf Choices That Can Lead to Sagging, Damage, or Clutter
A shelf can be straight, freshly finished, and nicely styled yet still become frustrating or unsafe if the support, spacing, material, or contents were chosen badly. Most shelf problems are easier to prevent before drilling, loading, or painting. These are the decisions I would check most carefully across the storage ideas above.
Fixing Shelves Without Identifying the Wall
A fixing that works in solid masonry may not be suitable for a hollow wall, and a decorative plug cannot be assumed to support a shelf full of books or dishes. Identify the wall construction and use a support method appropriate to both the wall and the intended load.
Using Weak Reclaimed Timber Because It Looks Rustic
Deep rot, severe splits, active insect damage, loose laminations, and badly warped boards are structural problems, not decorative texture. Select sound material first, then preserve only the marks that do not weaken or contaminate the shelf.
Making Long Spans With Too Little Support
A shelf may begin level and gradually sag when books, pots, or liquid containers are added. Reduce the unsupported span, use stronger material, or add properly positioned supports rather than relying on a thin board to behave like a beam.
Placing Heavy or Fragile Objects Above Seating
Shelves over sofas, desks, beds, and reading chairs deserve extra caution. Keep dense or breakable objects away from exposed overhead positions, secure the shelf properly, and choose lightweight stable decor for those areas.
Ignoring Moisture Around Plants and Wet Rooms
Water collects beneath pots, around bathroom bottles, and near laundry supplies. Use trays, suitable finishes, and wipeable surfaces, and inspect reclaimed timber periodically so a small repeated spill does not become swelling, staining, or decay.
Building Around Appearance Instead of Reach
A high basket may look tidy but become impractical if it needs a chair every day. Store frequently used objects between comfortable reach levels and reserve high shelves for lightweight, rarely used items that can be accessed safely.
Overloading the Top of Tall Furniture
Heavy books and ceramic planters make a narrow unit top-heavy. Keep dense objects low, secure tall furniture with appropriate anti-tip restraint, and do not assume a loaded shelf is stable simply because it has not tipped yet.
Turning Open Shelves Into Unmanaged Clutter
Open shelving exposes every object, so adding more containers can sometimes create more visual and cleaning work. Group small items, leave gaps, and remove objects that do not need to live on the shelf.
Using Decorative Containers That Hide Important Labels
In laundry or cleaning areas, transferring chemicals into unlabelled matching jars can create confusion and unsafe use. Keep products in suitable labelled containers and follow their storage instructions rather than styling away essential information.
Finishing Unknown Old Coatings Without Checking Them
Aggressive sanding can release dust from old paint or coatings that may be hazardous. If the history of a painted reclaimed piece is unknown, use appropriate testing and safe handling guidance before disturbing the surface.
Forgetting Service Access and Moving Parts
Shelves above appliances, desks, sinks, or doors can block vents, lids, wiring, valves, or normal movement. Mock up the shelf depth and height before installation and test the full movement of nearby equipment and furniture.
Assuming More Styling Makes Better Storage
Plants, frames, baskets, books, and ornaments all compete for the same surface. Keep the shelf’s primary job clear and stop adding objects once everyday use becomes awkward. A little empty space is useful storage capacity, not wasted design.
Frequently Asked Questions
Can a beginner build simple storage shelves?
Yes, a short straight shelf with visible brackets can be a manageable first project when the wall type and fixing method are understood. Keep the span modest, use sound material, and spend more time marking level positions than adding decorative details.
Can I use reclaimed wood for wall shelves?
Reclaimed wood can work well when it is dry, structurally sound, reasonably straight, and free from unsafe contamination. Remove old fasteners, smooth sharp edges, and investigate unknown old coatings before sanding or refinishing them.
How do I know which wall anchors to use?
The correct fixing depends on the wall construction, shelf system, and expected load. Identify whether you are fixing into suitable timber structure, masonry, or a hollow-wall system, then follow the hardware manufacturer’s guidance or seek qualified help when the load is significant or the structure is uncertain.
How deep should a storage shelf be?
There is no single depth that suits every shelf. Measure the actual books, baskets, dishes, towels, or pots you plan to store and choose enough depth for stable support without projecting unnecessarily into the room.
How can I stop wooden shelves from sagging?
Use a board and support arrangement suitable for the span and load, add supports where needed, and keep dense objects near strong support points. If a shelf is already visibly sagging, unload it and correct the structure rather than hiding the bend with more objects.
Are floating shelves suitable for heavy books?
They can be when the shelf, concealed support system, wall fixing, and span are specifically appropriate for that load. Because the hardware is hidden, it is especially important not to assume that every floating shelf is designed for dense rows of books.
What is the best way to protect shelves under plants?
Use stable waterproof saucers or trays, wipe spills promptly, and choose a finish that suits the shelf material and room. Leave enough clearance to lift pots out so water and soil do not accumulate where they cannot be seen.
Should tall shelving units be attached to the wall?
Many tall or narrow units benefit from anti-tip restraint, especially where children, pets, uneven floors, or frequent basket use could shift the furniture. Follow the furniture or restraint system instructions and use a fixing method appropriate to the wall.
How do I make open shelves look less cluttered?
Group small objects into baskets or trays, repeat a few materials or colours, and leave some shelf surface visible. Practical editing usually works better than buying more decorative organizers for items that could simply be stored elsewhere.
Can shelves be installed above a washer, dryer, or stove?
Only when the shelf location preserves the clearances, vents, service access, heat protection, and operating space required by the appliance. Check the appliance instructions and avoid placing shelving where heat, steam, or moving doors and lids could create a problem.
Let Storage Shelves Solve the Space You Actually Have
The most useful storage shelves ideas begin with the room rather than the shelf. A bathroom needs wipeable, moisture-aware storage; a home office needs clear reach and safe overhead placement; a plant shelf needs stable trays and room for watering; and a small room needs vertical storage that does not become top-heavy. Once the practical purpose is clear, reused wood, repaired frames, metal supports, baskets, and existing furniture can all become part of a more thoughtful solution.
I like shelf projects because they can be scaled down so easily. You do not need to build a full wall unit to improve storage. One sound reclaimed board, two suitable supports, and a carefully chosen location may solve the problem better than another large piece of furniture. More experienced DIYers can move into cubby systems, industrial frames, or custom closets, but the same habits still matter: check the material, identify the support, measure the objects, and load the finished shelf sensibly.
Start with the area that annoys you most and decide what actually needs to live there. Then choose the simplest shelf that can hold those items safely and still leave the room comfortable to use. Which unused wall, corner, closet section, or pile of reclaimed boards could become your next practical storage project?