Children rarely need complicated art supplies to enjoy painting. A broad brush, a few washable colors, a sturdy sheet of paper, and permission to experiment can be enough to keep small hands busy for a surprisingly long time. What matters is giving them a starting point that feels clear without turning the activity into a test of how closely they can copy an adult example.
I especially like painting activities that leave room for children to make their own choices. A rainbow can have uneven bands. A handprint animal can look wonderfully odd. Ocean waves do not need to behave like real waves, and a flower made from fingerprints can have as many petals as a child decides it needs. I don’t think those differences need correcting; they are usually the part worth keeping.
These easy painting ideas for kids work best when the process stays simple, the materials suit the child’s age, and the setup allows a little mess without turning cleanup into the main event. The goal is not a flawless finished page. It is to help children notice color, shape, movement, texture, and the pleasure of making something with their own hands.
Set Up a Painting Space That Can Handle a Little Mess
A calm setup makes children’s painting far easier for everyone. I know it can feel tempting to put every paint color, brush, marker, and decoration on the table at once, but a smaller selection usually helps children focus. It also means you can spend more time watching the painting happen and less time rescuing the floor.
· Cover the table with reusable cloth, an old sheet, scrap cardboard, or another washable protective layer.
· Keep a damp cloth, paper towels, and a small bowl of clean water within easy reach before paint is opened.
· Use only paints and art materials labelled as suitable for the child’s age, and supervise younger children closely.
· Choose sturdy paper, card, canvas board, or paper plates that can tolerate wet paint without collapsing immediately.
· Put children in old clothes, a paint shirt, or an apron so they can concentrate on the activity rather than protecting an outfit.
· Create a separate drying area where finished work can lie flat without being moved every few minutes.
Offer Fewer Colors First, Then Add More if Needed
Too many open colors can turn into one muddy mixture before a child has had a chance to notice what each shade can do. There is nothing wrong with enthusiastic mixing, but I’d rather begin with a handful of colors and add another pot when the child asks for it. That keeps the activity open-ended without making the palette overwhelming.
· Start simple with two to four colors for younger children or first attempts.
· Place a small amount of paint on a washable palette, plate, or reused container lid instead of giving access to the whole bottle.
· Give each strong color its own brush when possible, or remind children to rinse brushes before changing colors.
· Include white when a project benefits from lighter shades, such as ocean waves or a night sky.
· Let children test mixed colors on scrap paper before adding them to the main painting.
· Keep spare paint nearby rather than overcrowding the work area from the beginning.
Keep the Project Child-Led Even When You Demonstrate a Technique
A quick demonstration can help a child understand a stamp, handprint, drip, or brush motion, but the example should not become a rulebook. If an adult completes half the project to make it look tidy, children quickly learn that the finished appearance matters more than their own decisions. These activities are much more useful when the child gets to choose where marks go and when the painting feels finished.
· Demonstrate the action once on scrap paper, then hand the tool back to the child.
· Use prompts such as “What color would you like next?” instead of telling the child exactly where to paint.
· Expect uneven lines, mixed colors, fingerprints, drips, and unusual shapes; they are normal parts of children’s art.
· Help only with tasks that are genuinely difficult or unsafe, such as cutting a paper plate for a younger child.
· Pause before adding adult-drawn details and ask whether the child wants to add them first.
· Write the child’s name and date on the back rather than changing the front to make the artwork look more polished.
Rainbow Splash
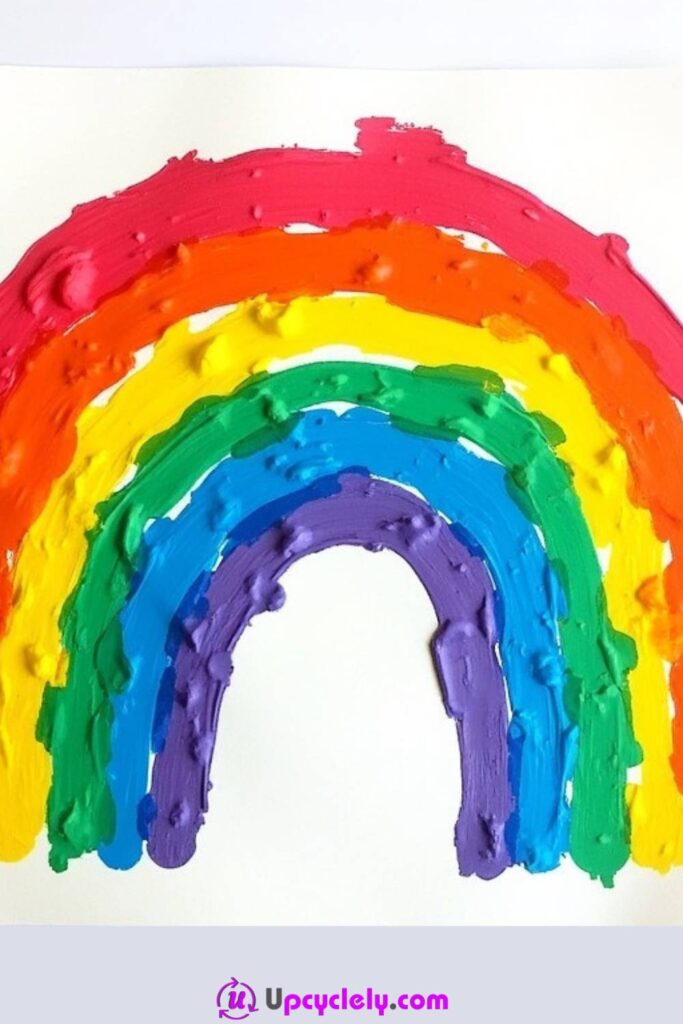
A rainbow gives children a clear idea to begin with, but it does not need much drawing skill. The curved bands are forgiving, the colors can be placed in a familiar sequence or rearranged completely, and broad brushstrokes make the page fill up quickly. That quick visual progress is useful for younger children who may lose interest if a project depends on tiny details.
The part I like here is the freedom inside a recognisable shape. A child can paint one thick arc after another, let the edges overlap, add splashes around the outside, or turn the whole thing into a loose color study. If the red slips into the orange or the blue becomes wider than every other band, nothing has gone wrong. The rainbow still reads clearly because the overall sweep of color does most of the work.
This project is also a good chance to talk casually about color order, light and dark paint, and what happens where two wet bands touch. Keep the conversation light. Children do not need a formal lesson while they are painting; simply noticing that yellow and blue make a greener edge can be more memorable than stopping the activity to explain color theory.
Materials and Tools
· Sturdy white paper, card, or small canvas board
· Washable paints in several bright colors
· One or more broad paintbrushes
· Palette, reused lids, or shallow containers for paint
· Water cup and cloth for rinsing brushes
· Old shirt or apron
· Optional scrap paper for testing brush pressure
Steps
1. Prepare a simple color station. Place small amounts of paint where the child can reach them without leaning across the picture. If you are using several colors, line them up in the order the child wants to use. Test the brush on scrap paper first so very watery paint does not surprise them on the main sheet.
2. Paint the first broad curve. Show the child how a single sweeping brush movement can make an arc, then let them choose where the rainbow begins. There is no need to pencil perfect guidelines. A slightly wobbly first band gives the next colors a natural shape to follow and keeps the painting from feeling overly controlled.
3. Build the remaining bands. Add the other colors one at a time, rinsing the brush between shades or switching brushes if that is easier. Let small overlaps happen. If the child wants to leave white gaps between colors, that works too; the aim is a clear sweep of color rather than perfectly touching stripes.
4. Add splashes or background marks if the child wants them. Once the main rainbow feels complete, use a smaller amount of paint to dot, flick, dab, or brush around it. Keep splashing controlled by using only a little paint and protecting the surrounding area. Then move the painting to the drying space before the wet bands are accidentally smeared by another project.
For me, the key is not correcting the curve. A child who paints a square-ish rainbow, a very tall rainbow, or six uneven stripes has still understood the activity. The marks show how their hand moved, and that is more interesting than an adult-perfect arch.
Variations and Alternatives
· Use only three colors for a simpler toddler version.
· Paint the rainbow with sponge dabs instead of brushstrokes.
· Try a muted or pastel palette rather than traditional bright shades.
· Add raindrops, clouds, or a painted ground after the rainbow dries.
Colorful Balloons

Balloon painting works well because children already understand the basic shape. An oval, circle, or slightly lopsided blob can all become a balloon as soon as a string appears underneath. That takes away the pressure to draw accurately and lets the child spend more time choosing colors, spacing the shapes, and deciding how crowded the page should feel.
A pencil outline can help an older child who wants a neater result, but it is not essential. Younger children can simply paint rounded shapes directly with a medium brush. Once the paint dries, they can add strings with a thin brush, crayon, or marker. I’d keep those finishing lines loose; perfectly straight strings would actually make the picture feel less lively.
This is also an easy painting to personalise for a birthday or celebration. A child can choose the recipient’s favourite colors, paint a balloon for each family member, or add a simple number inside one large shape. The project stays uncomplicated while still giving children a reason to think about who the picture is for.
Materials and Tools
· White or pale paper/card
· Washable paint in several colors
· Medium round brush or small flat brush
· Thin brush, crayon, or marker for strings
· Pencil and eraser if outlines are wanted
· Palette and water cup
· Optional white paint for small highlights
Steps
1. Decide where the balloon group will sit. Place the paper vertically or horizontally and ask the child whether the balloons should float high, fill the whole page, or gather in one corner. Older children can make a few light pencil ovals first. Younger children can skip this and begin with paint.
2. Paint one balloon at a time. Use enough paint to fill each rounded shape without soaking the paper. Encourage the child to vary size and color rather than trying to make identical balloons. Then leave a little open space between some shapes so the strings will still be visible later.
3. Let the paint settle before adding fine details. If the balloon shapes are very wet, move the page aside for a short drying break rather than drawing through them immediately. Once the surface no longer smears easily, add simple knots and strings. A few crossing strings can make the group feel more natural.
4. Finish with highlights or a small message. A tiny white brush mark can suggest shine, but it is optional. Children can also add confetti dots, a birthday number, or a short handwritten message. Stop when the page feels balanced rather than filling every empty area simply because paint is still available.
I know children often want every balloon to be a different color, and that is completely fine. If the page starts to feel busy, the simplest fix is not to repaint anything; just leave a little more white space around the last few balloons.
Variations and Alternatives
· Make a bunch of three oversized balloons for very young painters.
· Use sponge daubers or cotton pads to stamp balloon shapes.
· Paint a single large balloon and decorate the inside with dots or stripes.
· Turn the strings into curling lines with a crayon after the paint dries.
Drip Paint Masterpiece
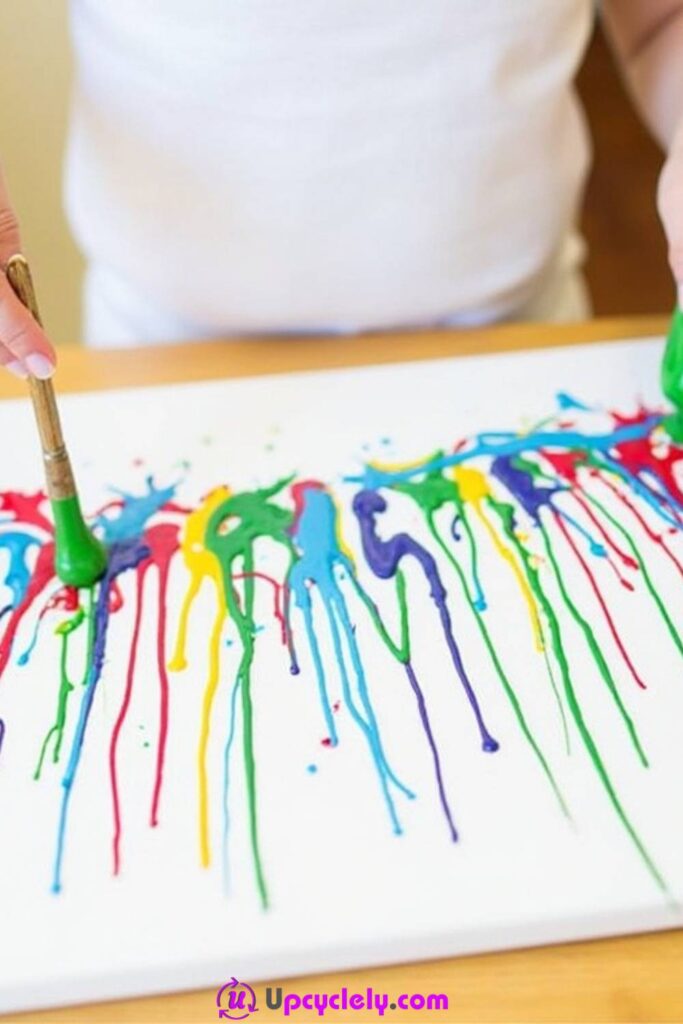
Drip painting feels exciting because the child cannot control every part of the result. Paint moves under gravity, colors meet on their own, and a small tilt can send one line in a completely different direction. That unpredictability makes the process especially useful for children who become frustrated when representational drawing does not look the way they expected.
The practical side matters here. Thin printer paper can buckle quickly, and very runny paint can travel straight off the page. A sturdy sheet, shallow tray, and modest amount of thinned paint make the activity far easier to manage. You want the paint fluid enough to move, not so watery that the page becomes a puddle.
Children can explore cause and effect by changing the angle of the board. Hold the top edge higher and the paint moves faster. Turn the page and a vertical drip becomes a sideways path. Two wet colors that meet may mix at the edge. Those small discoveries are the real point of the project, so there is no need to turn the finished marks into a recognisable picture afterward.
Materials and Tools
· Thick paper, card, or small canvas board
· Washable liquid paint or paint that can be thinned slightly
· Small cups or reused containers
· Droppers, brushes, or small spoons for placing paint
· Tray or protected work surface
· Old apron or paint shirt
· Cloth and water for cleanup
Steps
1. Protect the area and test the paint flow. Place the paper inside a shallow tray or on a well-covered table. Mix or thin only a small amount of paint at first, then place one drop on scrap paper and tilt it. If it does not move at all, add a little more fluidity; if it races like water, use thicker paint.
2. Place the first drips near one edge. Use a dropper, loaded brush, or spoon to add small pools of color rather than pouring large amounts. Lift one side of the paper and let gravity pull the paint downward. Ask the child to watch where the line slows, widens, or changes direction.
3. Rotate the surface to change the paths. Turn the paper and add a second or third color from another side. Then tilt again so some lines cross. This is where the project becomes interesting, because the child can influence the direction without being able to predict every final shape.
4. Stop before the whole page becomes saturated. Drip painting can quickly move from lively streaks to one large wet area. When enough lines have formed, set the work flat to dry. Resist the urge to keep adding paint just to use what is left; spare paint can go onto a second sheet or scrap card.
The part I would watch most carefully is paint quantity. Children usually enjoy the movement so much that more feels better, but a few well-spaced drips often create stronger patterns than half a cup of paint sliding off the paper.
Variations and Alternatives
· Use only two colors and watch what happens where they meet.
· Drip paint over a dry painted background for a layered effect.
· Try vertical streaks on corrugated cardboard for extra texture.
· Use a straw only for gentle blowing across paint if the child is old enough and can do so safely without drawing paint toward the mouth.
Fingerprint Flowers
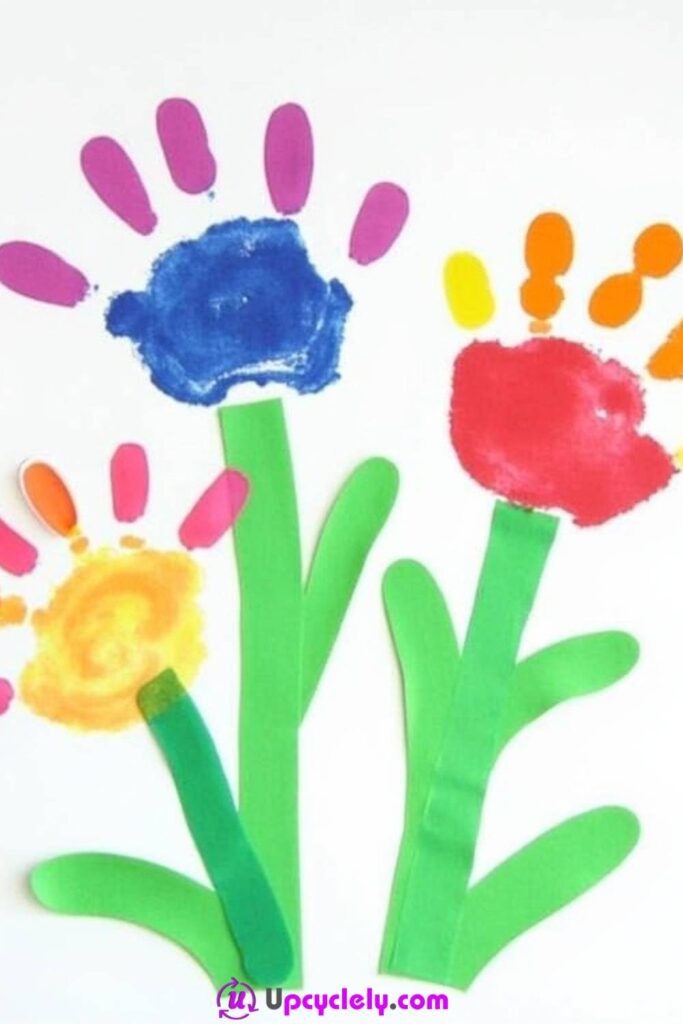
Fingerprint flowers are small enough to feel manageable and personal enough to become a keepsake. Each fingertip leaves a slightly different mark depending on how much paint is used and how firmly the child presses. That makes repetition interesting: even when the same motion is used again and again, the flowers never look exactly alike.
A simple stem-first approach helps children understand where the prints will go, but the stems do not need to be straight. Paint or draw several green lines, then add clusters of fingerprints at the top. Older children may enjoy building daisies with petals around a center; younger children can simply make colorful clusters and decide afterward which ones look like flowers.
Because the activity involves direct contact with paint, choose products labelled for the child’s age and have a cleaning cloth nearby. A thin, even layer of paint on the fingertip usually prints more clearly than dipping the whole finger into a deep puddle. That tiny adjustment makes the process easier without turning it into a perfection exercise.
Materials and Tools
· Paper or cardstock
· Child-suitable washable paint
· Small shallow palette or reused lids
· Thin brush for stems and centers
· Water cup
· Damp cloth or wipes for cleaning fingers
· Optional marker or crayon for extra details after drying
Steps
1. Create a loose stem layout. Paint several simple green stems or let the child draw them with a crayon. Vary the height and direction so the page feels like a small garden rather than a row of identical flowers. Add leaves now or wait until the fingerprints are finished.
2. Prepare a thin layer of fingertip paint. Spread a small amount of paint on a flat palette so the child can touch the pad of one finger into it. If the first print is heavy and shapeless, blot once on scrap paper. Then use the next print for the flower.
3. Build flowers from repeated prints. Press fingerprints around an imaginary center or create loose clusters at the tops of the stems. Clean the finger before changing colors so the child can choose whether shades stay separate or blend. The petals do not need equal spacing.
4. Add centers and small details after the prints settle. Use a thin brush to dot flower centers and add any missing leaves. Older children can include insects, grass, or tiny buds. Then move the page to dry before adding marker lines, because drawing through wet fingerprint paint can tear the paper or smear the petals.
I’d keep the first flower very simple and let the child decide what happens next. Once they understand that a fingerprint can become a petal, they usually begin inventing their own shapes without needing another demonstration.
Variations and Alternatives
· Use thumbprints for large flowers and little-finger prints for small buds.
· Make one oversized flower as a card front or framed keepsake.
· Create a field of flowers without stems for an abstract pattern.
· Add fingerprint leaves in two shades of green.
Flower Stamps
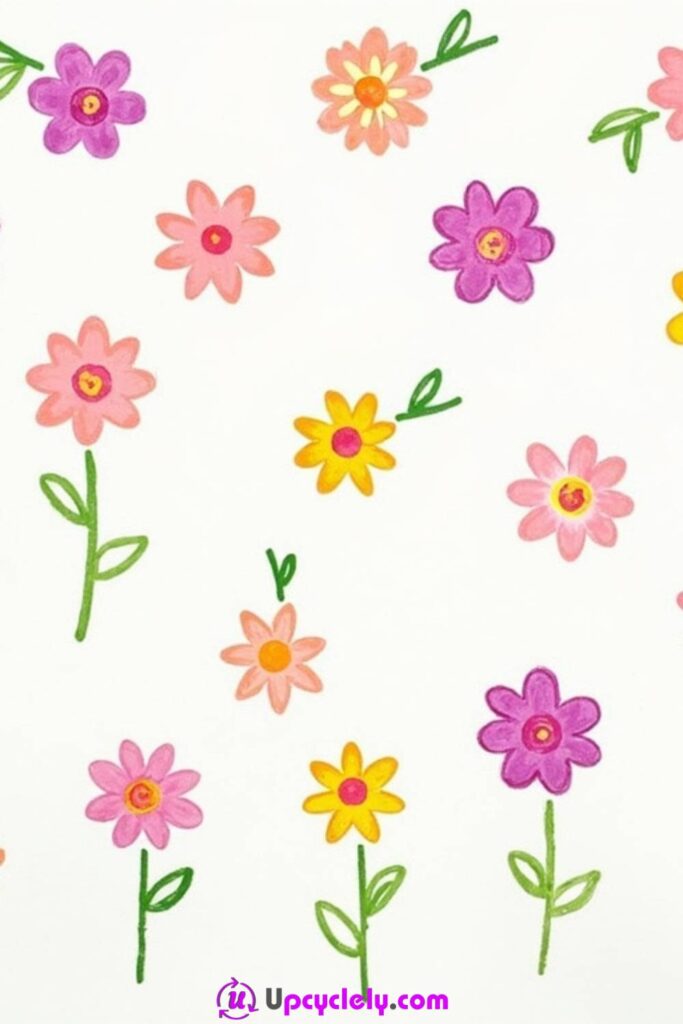
Stamp painting gives children a different kind of control than brushing. Instead of dragging paint across the page, they load a shape, press it down, lift it, and see an immediate print. That sequence is satisfying and easy to repeat, especially for children who enjoy pattern-making or who are still learning how much pressure to use with art tools.
The stamp does not need to be a purchased craft item. A clean sponge cut into a simple flower, the end of a reused cardboard tube shaped into petals, or another safe textured object can make interesting prints. Real flowers can sometimes be used for texture too, though they are delicate and may collapse quickly, so I’d treat them as an optional experiment rather than the main tool.
What makes this project useful is the chance to compare prints. A stamp with too much paint leaves a thick blob. A stamp with very little paint shows more texture. Pressing once gives a clear shape; pressing again without reloading creates a paler second print. Children can discover those differences on their own simply by repeating the action.
Materials and Tools
· Sturdy paper or card
· Washable paint in a few colors
· Flower-shaped stamps, simple sponge stamps, or other safe stamping tools
· Shallow paint trays or reused lids
· Thin brush for stems and leaves
· Scrap paper for test prints
· Water and cloth for cleanup
Steps
1. Choose and test the stamping tool. Press the stamp lightly into a shallow layer of paint rather than sinking it into a deep puddle. Make one test print on scrap paper and look at the result together. If the shape disappears under too much paint, blot or reload more lightly.
2. Build a small group of flower prints. Stamp several flowers with enough space around them for stems or leaves. Rotate the tool between prints if the shape allows it. Then try a second print without adding more paint so the child can see how the color becomes lighter.
3. Change color or pressure deliberately. Clean or switch the stamp before using a very different color. Encourage the child to compare a firm press with a gentler one instead of aiming for identical marks. The variation gives the finished page more movement and helps the child notice how pressure changes a print.
4. Paint stems, leaves, or a background. Once the stamped areas are stable enough not to smear immediately, add stems with a thinner brush. Children can connect some flowers and leave others floating. A few green dabs or a painted ground line are enough; there is no need to fill every gap.
One detail I wouldn’t skip is the scrap-paper test. Children quickly understand what “too much paint” means when they can compare two prints side by side, and that works better than repeatedly telling them to use less.
Variations and Alternatives
· Make a repeating border around a piece of card.
· Use one stamp shape in several shades of the same color.
· Create wrapping paper from reused brown packing paper and flower prints.
· Combine sponge flowers with fingerprint centers.
Handprint Animals
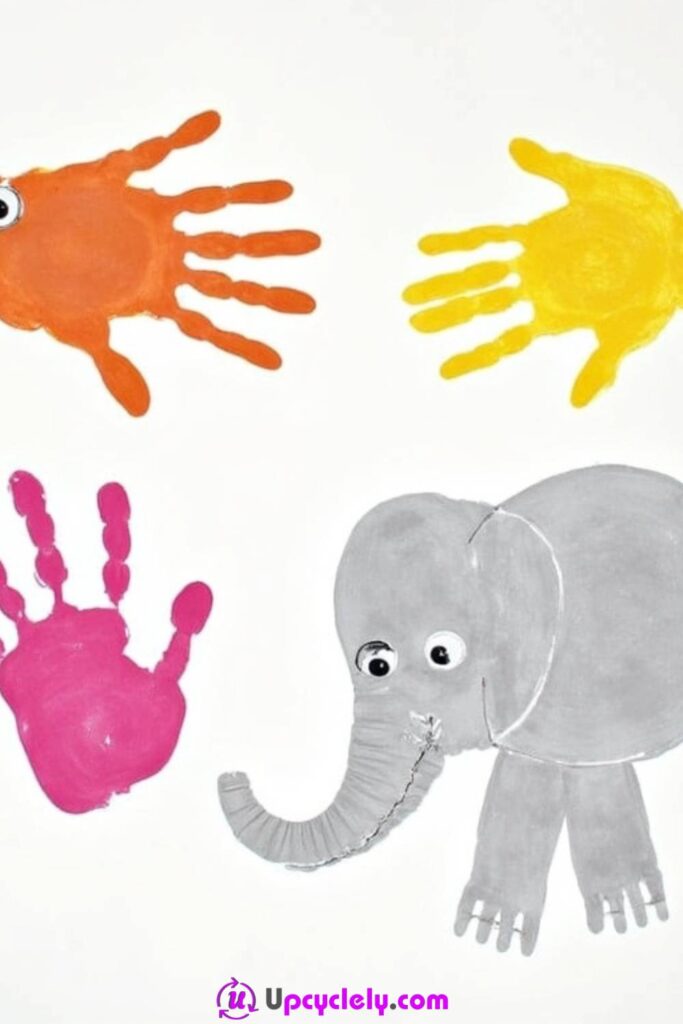
Handprint animals begin with a shape children already know very well: their own hand. A palm can become a body, fingers can suggest legs, feathers, tentacles, or a tail, and the thumb can point toward a head. The exact animal often appears after the print is on the paper, which makes the activity feel more like invention than copying.
This is also one of those projects where waiting matters. A fresh handprint is usually too wet for small eyes, ears, whiskers, or wings. If children add those details immediately, the lines disappear into the damp paint. Letting the base print dry first creates a natural break in the activity and gives the child time to decide what creature the shape might become.
Younger children may simply enjoy making the handprint and choosing one or two finishing marks. Older children can add habitats, speech bubbles, names, or a whole group of creatures. The animal does not need anatomical accuracy. A purple elephant with five finger-legs is still doing exactly what a children’s painting should do: turning a familiar shape into an imaginative idea.
Materials and Tools
· Sturdy paper or canvas board
· Child-suitable washable paint
· Wide brush or sponge for applying paint to the hand
· Palette or shallow tray
· Thin brush, crayons, or markers for dry details
· Water and cloth for immediate hand cleaning
· Optional scrap paper for a practice handprint
Steps
1. Choose a hand position before adding paint. Ask the child to spread or close their fingers depending on the animal idea, or simply make a natural hand shape and decide on the creature later. Place the paper so the wrist and fingers will fit comfortably without the child stretching across the table.
2. Apply a thin, even coat of paint. Brush paint across the palm and fingers rather than dipping the entire hand into a deep container. This gives more control and usually produces a clearer print. Then press the hand onto the paper, hold it still briefly, and lift straight up instead of sliding.
3. Clean hands and let the print dry. Wipe and wash the painted hand before touching other supplies. Move the print aside while it dries enough for details. This pause prevents accidental handprints from appearing on the chair, table edge, and everything else within reach — a surprisingly ambitious second artwork.
4. Turn the print into an animal. Add a head, eye, beak, tail, ears, fins, or other simple features with a small brush or drawing tool. Let the child decide what the handprint has become. Then add a few habitat marks if wanted, keeping the original hand shape easy to see.
For me, the strongest handprint animals still look like handprints. I don’t think they need so many added details that the original shape disappears; the transformation is more fun when you can see both the hand and the creature at once.
Variations and Alternatives
· Turn fingers into fish fins, octopus arms, bird feathers, or animal legs.
· Use two overlapping handprints for wings or a larger body.
· Make a family set with different hand sizes on separate pages.
· Add the child’s name and date on the back as a keepsake.
Nature Handprints
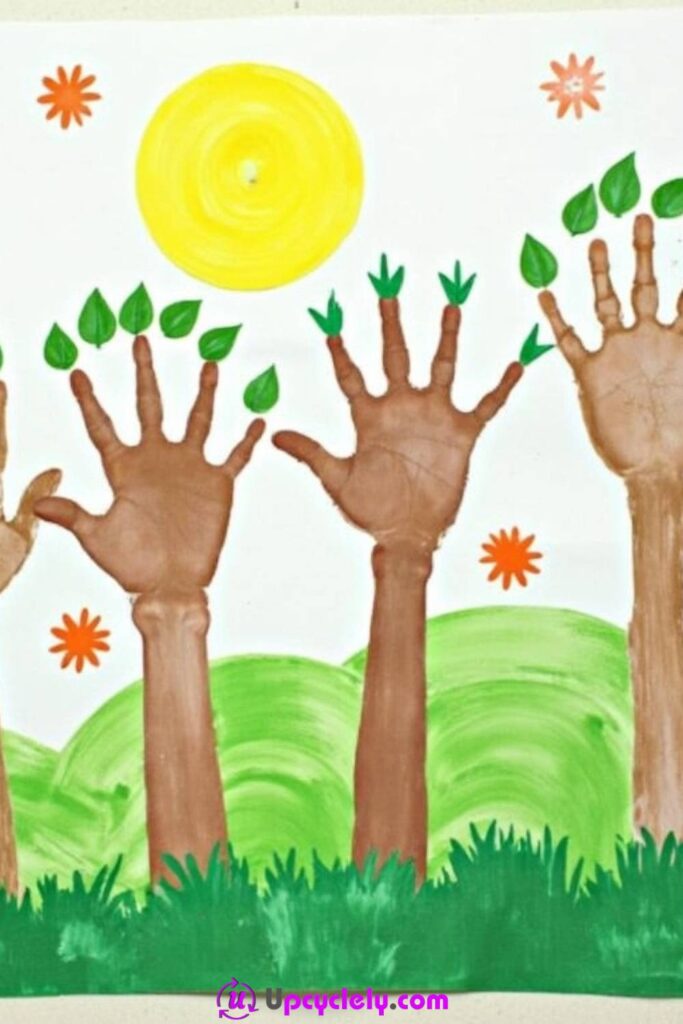
Nature handprints use the same personal mark in a different way. Instead of turning the print into an animal, the palm and fingers become part of a tree, plant, or flower scene. The fingers naturally spread like branches, which gives children a useful starting shape without requiring them to draw a complicated tree outline first.
A brown handprint can form the trunk and branches, then fingertip dabs or brush marks can build leaves around it. Another option is to use a green handprint as foliage and paint the trunk separately. There is no single correct arrangement, and seasonal colors make the same idea feel completely different. Fresh greens suggest spring, mixed reds and yellows feel autumnal, while white dots over bare branches can become a winter picture.
I like this activity because it can grow gradually. The handprint creates the main structure quickly, then the child can spend as much or as little time as they want adding leaves, flowers, grass, birds, or sky. That makes the project adaptable for children with different attention spans without changing the basic technique.
Materials and Tools
· Thick paper or canvas board
· Child-suitable washable paint
· Brown, green, and optional seasonal colors
· Wide brush for the handprint
· Small brush, fingertip paint, or sponge for leaves
· Water and cloth for hand cleanup
· Optional crayons or markers for dry finishing details
Steps
1. Plan the main handprint direction. Decide whether the fingers will point upward like branches, sideways like a wind-blown tree, or outward as a large leafy shape. Turn the paper before painting the hand so the child can press comfortably without twisting their wrist.
2. Make the trunk or canopy print. Apply an even layer of paint to the hand and press it firmly onto the page without sliding. Lift straight up, clean the hand, and look at the shape before deciding what to add. A patchy print can still work well because bark and foliage are not perfectly even.
3. Build leaves, flowers, or seasonal marks. Use fingertip dots, sponge dabs, or small brush marks around the fingers. Mix two or three related colors rather than one flat green if the child wants more variation. Then add flowers, fruit, snow, or falling leaves to match the season or story they have in mind.
4. Finish the ground and small details. Paint a simple ground line, grass marks, or sky only if the child wants the scene to feel fuller. After the paint dries, add a few drawn details such as birds, insects, or a name. Keep the handprint visible as the main structure rather than covering it completely.
The slightly broken edges of a handprint actually suit a tree. If one finger does not print fully, I’d leave it rather than repainting the whole branch. Real branches are irregular too, and the imperfect print keeps the child’s mark obvious.
Variations and Alternatives
· Use autumn reds, ochres, and oranges for a fall tree.
· Add white fingertip dots to make a snowy winter scene.
· Make several small handprint trees as a forest.
· Use a traced hand rather than painted skin for a less messy version.
Ocean Waves
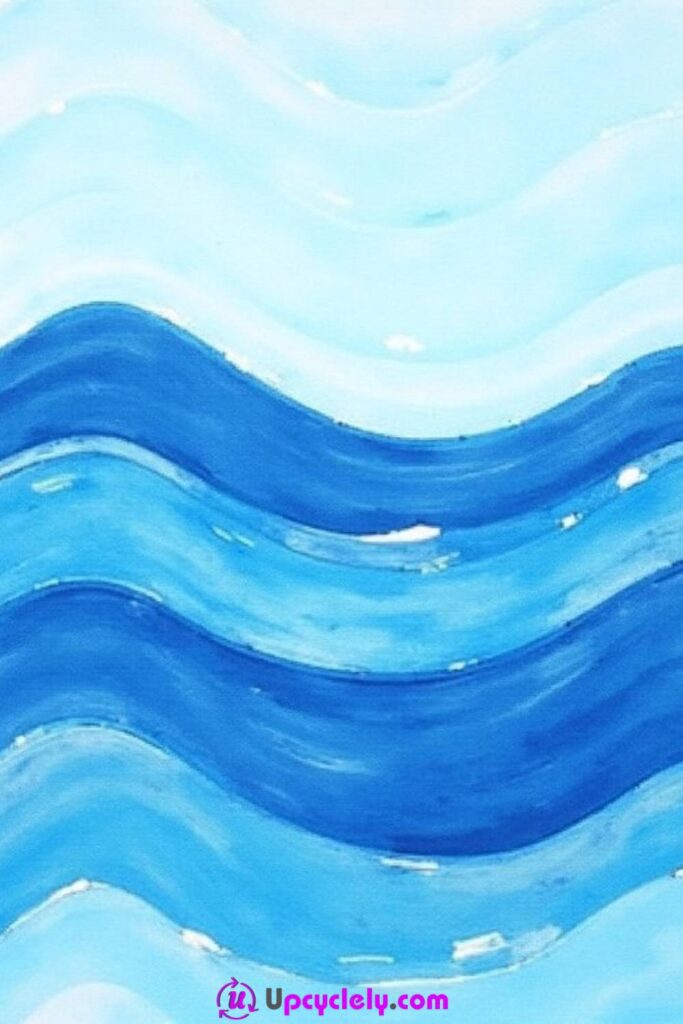
Ocean painting is a useful change of pace because it is built from movement rather than small objects. Long sideways strokes, curved sweeps, and patches of lighter paint can suggest water even when no wave is drawn precisely. Children can focus on how the brush feels in their hand and how one blue changes when white is mixed into it.
A limited palette makes this activity easier. Two blues plus white are enough to create noticeable variation without filling the table with paint. Children can use darker color lower on the page, lighter marks near the tops of waves, or ignore realism altogether and build striped water from whatever shades they enjoy. What matters is the repeated horizontal motion and layered color.
Thick paper helps because the project often uses broader, wetter strokes than the flower ideas. If the page begins to curl, place it flat while it dries rather than trying to press it down while wet. Once dry, it can be mounted onto reused cardboard if the child wants a firmer finished piece.
Materials and Tools
· Thick white or pale paper
· Washable blue paint in one or two shades
· White paint
· Medium and broad brushes
· Palette or reused plate for mixing
· Water cup and cloth
· Optional small sponge for foam texture
Steps
1. Create a simple base of blue movement. Load a broad brush with one blue and make loose sideways strokes across the page. Encourage the child to curve some strokes and overlap others. Leaving small areas of paper visible can make the water feel lighter, so there is no need to cover every inch immediately.
2. Mix a lighter shade. Add a little white to some blue on the palette and compare the new color with the original. Then brush the lighter shade over selected areas rather than mixing it everywhere. This creates visible layers and helps children notice how a small change in paint affects the whole scene.
3. Add wave tops and foam marks. Use white or very pale blue with a smaller brush or sponge. Dab and sweep along the top edges of a few darker strokes. The marks can be broken and uneven; repeated short touches often look more wave-like than one continuous white outline.
4. Decide whether the sea needs anything else. Children can leave the painting as an abstract ocean or add a horizon, sun, boat, fish, or sky after the water settles. Then stop before the lighter highlights are completely mixed into the darker base. A few distinct layers make the movement easier to see.
I’d avoid demonstrating one “correct” wave shape. Children usually make more energetic water when they are told to move the brush like the sea rather than copy a neat row of curls.
Variations and Alternatives
· Paint only with blue, white, and one small accent color.
· Use a sponge for choppy water and a brush for calmer sections.
· Create a sunset ocean by adding a warm sky above the blue.
· Paint on reused corrugated cardboard so the ridges add texture.
Paper Plate Fish
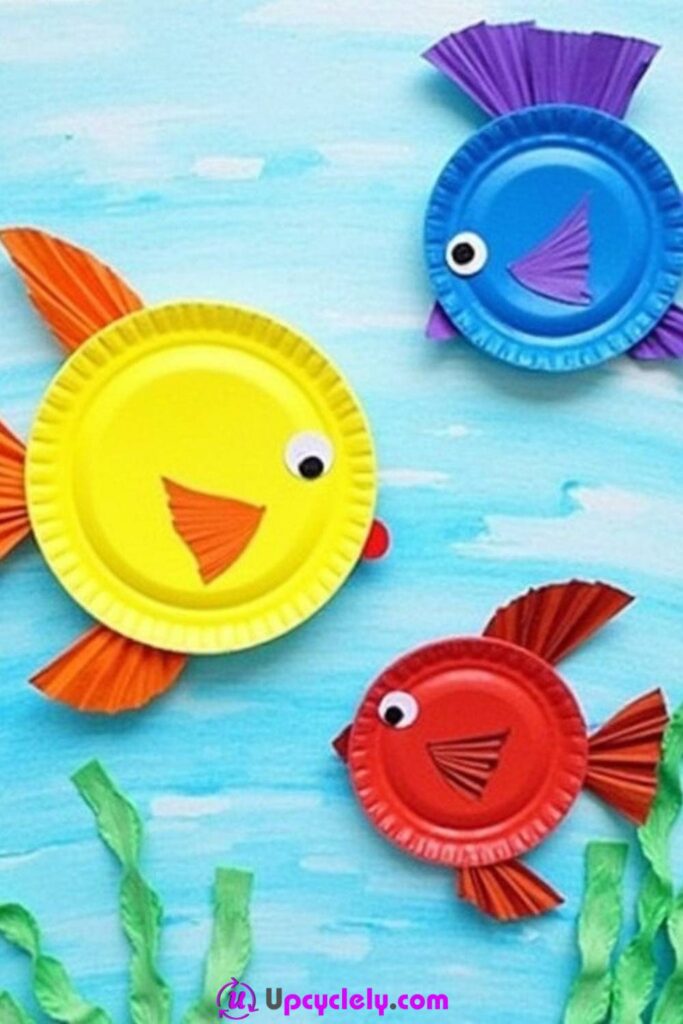
Paper plate fish sit somewhere between painting and simple construction, which is why they can hold a child’s attention in a different way. The plate already provides the round body, so the painting can focus on color, stripes, spots, scales, and fins rather than drawing the entire fish from scratch. Once dry, a few paper additions turn the flat painted circle into a recognisable creature.
If the project involves cutting, match the task to the child’s age and ability. An adult can pre-cut a tail shape or make the first cut in a plate for a younger child, while older children may be able to handle child-safe scissors with supervision. The painting itself should remain theirs; there is no need for an adult to create a perfectly symmetrical fish before handing it over.
I also like this idea for using leftover pieces from other crafts. Small card scraps can become fins, old paper can be painted and cut into scales, and a reused plate that is clean and suitable for crafting can become the body. Just keep tiny decorative parts away from children who may still put small objects in their mouths.
Materials and Tools
· Paper plate or clean craft-safe reused plate
· Child-suitable washable paint
· Brushes or sponge pieces
· Scrap paper or card for fins and tail
· Child-safe scissors where age-appropriate, with adult supervision
· Craft glue suitable for paper
· Crayon or marker for dry details
· Optional large craft eye only for children old enough to use small parts safely
Steps
1. Paint the main plate before assembling anything. Place the plate face up and let the child choose the body color or pattern. Broad brushstrokes, stripes, dots, or sponge marks all work. Painting first is easier than trying to work around fins and glued pieces later, so finish the main surface and then set it aside.
2. Prepare the tail and fins while the plate dries. Use scrap card or painted paper for simple shapes. Younger children can choose from pre-cut pieces, while older children can draw and cut their own with supervision. Keep the shapes large enough to handle easily and avoid unnecessary tiny decorations.
3. Attach the paper pieces securely. Once the plate is dry enough to handle, glue the tail to the back edge and add one or two fins. Press the joins gently and let them set before lifting the fish repeatedly. Then add a mouth, eye, or gill marks with a drawing tool if the child wants them.
4. Add final painted texture. Small dots, scale marks, or a contrasting fin color can make the fish feel more complete. If the plate has been cut to create an open mouth, make sure rough paper edges are tidy. Display the fish on a wall, string several as a school-of-fish garland, or keep it flat as a painted craft piece.
The plate does not need to become a complicated model. One tail, one eye, and a bold painted pattern are often enough. Extra decorations are only useful if the child enjoys adding them, not because the fish needs more craft supplies to count as finished.
Variations and Alternatives
· Use half a plate for a smaller fish body.
· Paint several plates in related colors and display them as a group.
· Cut fins from reused packaging card instead of fresh colored paper.
· Skip small craft eyes and simply paint or draw the eye.
Starry Night Sky
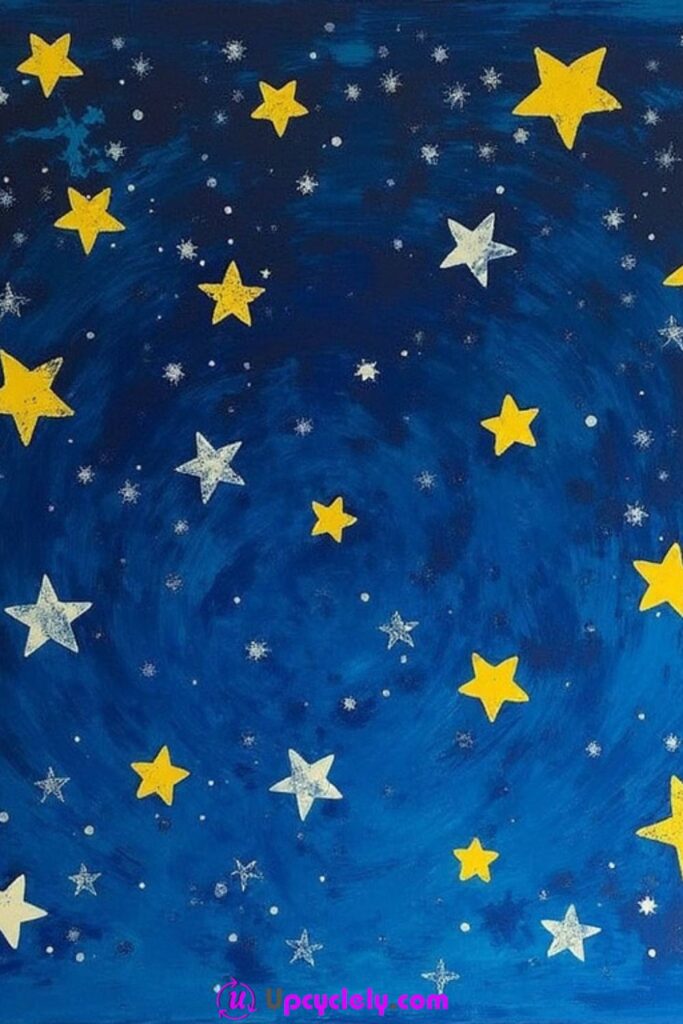
A night sky gives children permission to work with dark paint, which can feel very different from the bright rainbow and flower activities. Deep blue, purple, or even a mix of several darker shades can cover much of the page, while stars are added later as small points of contrast. The order matters because pale stars show more clearly over a settled dark background than when everything is mixed wet at once.
The background does not need to be a flat block of navy. Children can blend loose patches of blue and purple, leave lighter streaks, or drag a little white into the wet paint to suggest clouds or distant glow. Then, once that layer is dry enough, dots and starbursts can sit on top without disappearing into the background.
This project can remain abstract or become a full scene. A child might paint only sky, add a simple moon, include a black ground silhouette, or place a small house at the bottom. I’d keep the main focus on contrast: dark space around lighter marks. That makes even very simple dots read as stars.
Materials and Tools
· Thick paper, card, or small canvas board
· Child-suitable washable dark blue and optional purple paint
· White or pale yellow paint
· Broad brush for the background
· Small brush, cotton swab, or sponge tip for stars
· Palette and water cup
· Optional scrap card for testing pale marks over dark paint
Steps
1. Paint the night background in broad layers. Use dark blue as the main color and add purple or lighter blue in selected areas. Let the child move the brush freely rather than trying to create a perfectly even coat. Visible brush texture can make the sky feel deeper once the star marks are added.
2. Let the background become touch-dry before adding stars. Move the painting to the drying area and clean the main brush. If stars are added while the background is very wet, the white paint may blend into pale blue smears. Waiting creates clearer contrast and gives the project a natural two-stage rhythm.
3. Add stars with different mark sizes. Use the tip of a small brush, cotton swab, or another safe dabbing tool to place dots across the sky. Mix tiny stars with a few larger ones instead of making a regular grid. Then add one or two simple crossed brush marks if the child wants brighter-looking stars.
4. Finish with a moon or ground silhouette if wanted. A pale circle can become a moon, while a dark strip along the bottom can suggest land or rooftops. These details are optional. Stop while the sky still has open dark space, because the contrast between empty areas and star clusters is what makes the finished painting feel spacious.
I know it can be hard for children to wait for a background to dry, so this is a good two-session activity. Paint the sky first, go do something else, then come back for the stars. The pause is part of the process, not lost time.
Variations and Alternatives
· Use navy and purple for a softer twilight effect.
· Add a crescent moon cut from reused paper after the paint dries.
· Create stars by stamping small dots with a cotton swab.
· Paint a simple skyline or tree silhouettes along the bottom edge.