Home accents are often made from objects that already have the right shape for a second job. A tire is already a sturdy ring, denim pockets are already small containers, a ladder already has evenly spaced rungs, and a cheese grater already has hundreds of openings. I think that is why these projects are so satisfying: the most interesting part is not hiding what the object used to be, but noticing which part of its original design can still be useful.
I prefer upcycling ideas that can live comfortably in a real home rather than looking good for one photograph and becoming awkward afterward. That means checking strength, sharp edges, moisture, cleaning, wall fixings, and everyday handling before adding decoration. I don’t think every reused object needs paint, trim, or a dramatic makeover. Sometimes the original material already provides the texture, color, or character the finished piece needs.
The projects below keep the same sixteen home-accent ideas while giving each one a more practical, detailed approach. Some are small decorative pieces and others need careful structural work, but they all begin with the same question: what useful quality does this old item still have, and how can that quality be carried into its next purpose?
Choose Old Items for What They Can Still Do Safely
Before planning a new use, look at the condition of the original object rather than only its appearance. A tire shelf, ladder rack, drum table, or wooden bookshelf may look full of potential, but the finished project will only be as dependable as the material underneath. Dry wood, sound joins, stable metal, intact fabric, and clean containers give you a much better starting point than an object that is already failing.
I know it can feel wasteful to reject something you hoped to save, but upcycling is not a reason to keep unsafe material in service. Deeply cracked tires, badly rusted graters, split ladder rungs, rotten wood, cracked glass, or ceramics with unstable edges are better left out of a household project. A weaker item may still provide small decorative parts, but it should not be asked to carry weight simply because it is available.
Match the Fastener, Adhesive, and Finish to the Material
One attachment method will not suit every home accent. Fabric wants stitching or upholstery fasteners at stress points; wood usually needs screws or brackets when it carries weight; glass and smooth metal need adhesives made for non-porous surfaces; and small decorative pieces such as bottle caps can often be fixed with a controlled amount of strong craft adhesive. The join should be chosen for the job, not because one glue happens to be on the table.
Surface preparation matters for the same reason. Clean away grease before painting or gluing metal. Sand splinters and rough wood without automatically stripping every old mark. Wash textiles and let them dry fully before cutting. Remove sticky label residue from tins and bottles. Then test paint, adhesive, or sealant on a hidden area if the material is unfamiliar. That small test is far easier to undo than a full coat that refuses to bond.
Plan Where the Finished Accent Will Live Before You Build It
A home accent has to work in a particular place. An herb planter may deal with water and sunlight, a floor mat needs grip, a towel holder is touched constantly, a wall organizer gets loaded unevenly, and a coffee table may be bumped from several directions. Deciding where the piece will live before you build it helps you choose the right finish, backing, hardware, and level of decoration.
Cleaning is worth planning too. Small bottle caps, textured sweater fabric, leather strips, pierced tin, and mosaic grout all collect dust differently. In a busy kitchen or entryway, I would rather keep the finish easy to wipe than add another layer of trim. Planters should have a way to manage drainage without damaging furniture, and anything mounted overhead should be fixed so it can be checked later rather than hidden behind permanent decoration.
DIY Tire Shelving Unit
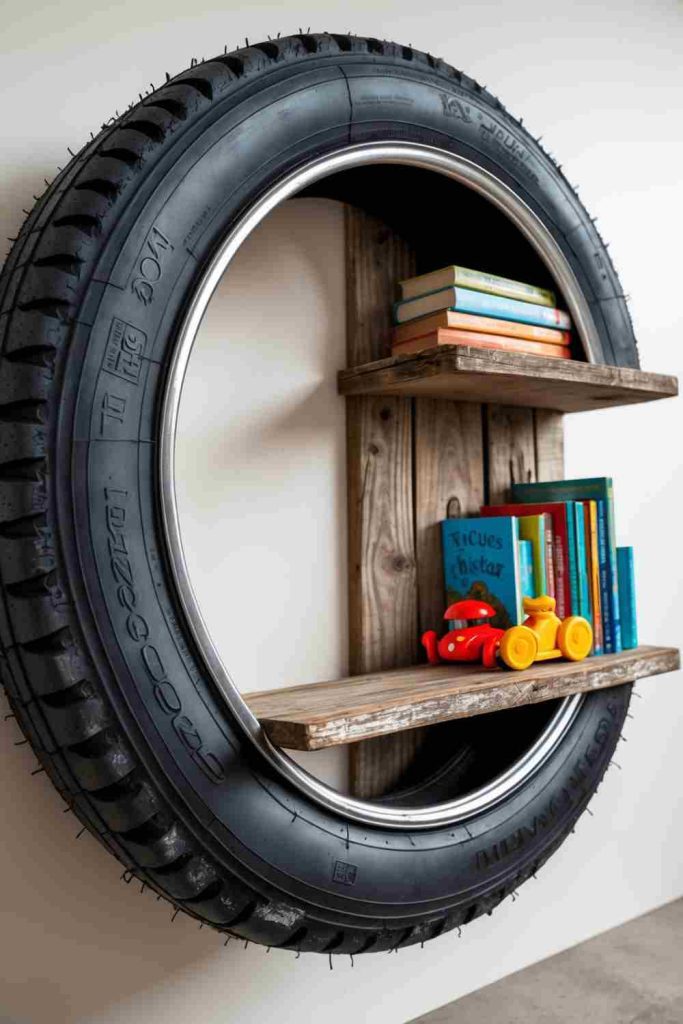
A tire shelving unit works because the tire already provides a strong circular frame. Adding two straight wooden shelves through the center creates useful horizontal surfaces while leaving enough of the tire visible for the old material to remain part of the design. The result can work in a child’s room, workshop, hobby corner, or casual reading space when the tire is clean, sound, and mounted correctly.
Materials and Tools
· Clean tire in sound condition
· Two boards wide enough for the intended storage
· Measuring tape and pencil
· Saw and sandpaper
· Screws, brackets, or bolts suited to the shelf construction
· Heavy-duty wall fixings appropriate to the wall type
· Optional compatible paint or finish
· Eye protection and gloves
Steps for This Home Accent Project
1. Prepare the tire and choose its orientation. Scrub away dirt and residue, then let the tire dry completely. Check both sidewalls and the inner rim for deep cracks, exposed reinforcement, or damage that would make it unsuitable indoors. Stand it in the position you plan to use so you can decide where the shelves should cross the circle.
2. Measure and fit the shelf boards. Measure the inside width at each shelf position instead of assuming both boards will be identical. Cut the wood slightly long, test the fit, and then trim gradually. Sand the ends and exposed edges so the shelves sit neatly against the rubber without leaving splinters where books or hands will contact them.
3. Secure the shelves to a solid part of the assembly. Use brackets, bolts, or another mechanical fixing appropriate to the tire and board thickness. The shelves should not depend on friction alone. Check that each board is level and that the tire does not twist when you press lightly on one side, then tighten the hardware before moving to the wall.
4. Mount and load the unit gradually. Use wall anchors or screws selected for the wall construction and the combined weight of tire, timber, and contents. Level the unit before fully tightening the fixings. Add only light objects first and observe the shelf for movement before placing books, toys, or planters on it.
A practical detail I would keep in mind: For me, the circular outline is already the strongest decorative feature, so I would keep the shelf finish fairly simple.
Variation: A smaller tire can become a single-shelf display, while a larger tire can sit on a low stand instead of being wall-mounted.
DIY Denim Pocket Wall Organizer
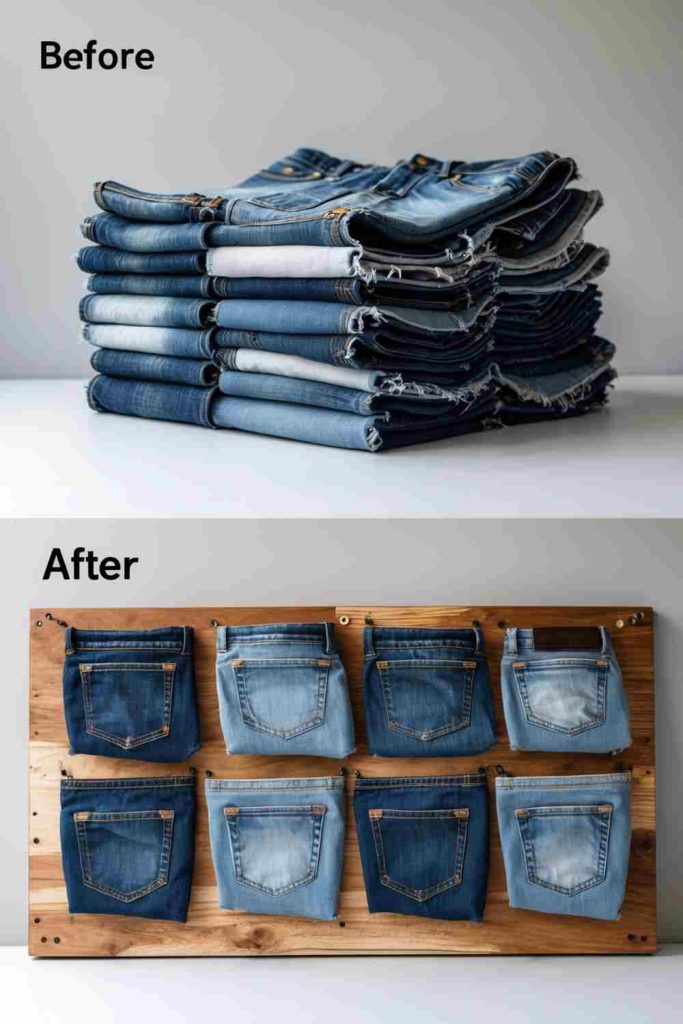
Old jeans often wear out at the knees or hems while the pockets remain thick and usable. Removing those pockets and attaching them to a board turns a familiar clothing detail into shallow wall storage for mail, notes, pens, craft tools, or keys. The project is especially useful because the pocket shape already does the organizing; the board simply gives the fabric enough structure to hang neatly.
Materials and Tools
· Old jeans with intact pockets
· Sturdy wood panel, plywood offcut, or firm board
· Fabric scissors
· Staple gun with suitable staples, small tacks, or strong fabric-compatible adhesive
· Sandpaper and optional paint or stain for the board
· Wall hanging hardware
· Measuring tape and pencil
Steps for This Home Accent Project
1. Cut the pockets with a useful border. Wash and dry the jeans first, then cut around each pocket rather than cutting directly on the seam. Leaving a narrow denim border gives you material for stapling or tacking. Trim away bulky layers that will prevent the pocket from sitting flat, but keep the stitched edge intact so the opening remains strong.
2. Prepare the backing board. Smooth splinters and rough corners, wipe away dust, and finish the board only if it needs it. Mark the wall-hanging points on the back before covering the front with pockets. This saves you from pushing tools around finished fabric later and helps you keep structural fixings separate from decorative attachments.
3. Arrange before attaching. Lay the pockets on the board and test several layouts. Allow enough space for your hand to reach inside each one, especially if the pockets are deep. Then secure the top corners and sides with staples, tacks, or an appropriate adhesive, checking that the pocket opening remains flexible rather than being flattened shut.
4. Mount and organize lightly. Attach the board to the wall with hardware suited to its weight and the wall surface. Fill the pockets gradually with small items and watch for pulling at the top corners. If one pocket will hold keys or another slightly heavier object, reinforce that pocket mechanically rather than adding more glue around the edge.
A practical detail I would keep in mind: I like mixing different pocket shapes rather than trying to make them match exactly.
Variation: Use one large back pocket as a bedside phone holder, arrange several small pockets on a narrow board beside a desk, or mount the pockets to a fabric-covered panel if you want a softer look.
DIY Cheese Grater Earring Holder
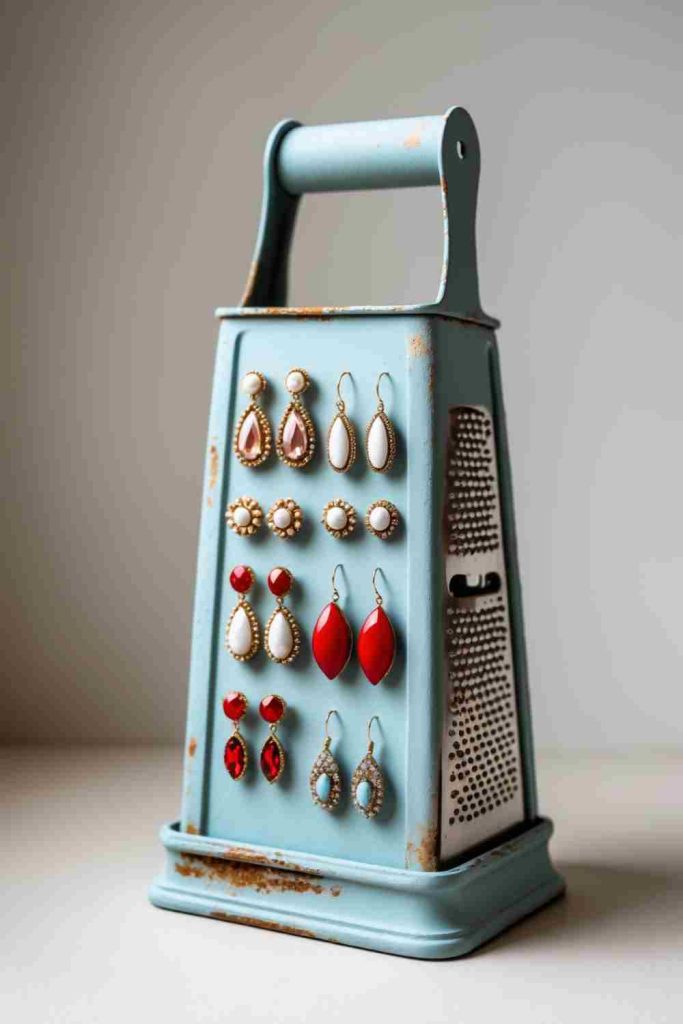
A box-style cheese grater has exactly the kind of perforated surface that dangling earrings need. Once the grater is retired from food use, its holes can hold hooks neatly while the upright shape keeps pairs visible instead of tangled in a drawer. The handle can also provide a convenient place for a ribbon, a few bracelets, or simply an easy way to move the holder.
Materials and Tools
· Clean box grater in sound condition
· Fine abrasive pad or metal file for isolated rough spots
· Optional metal-compatible paint
· Drop cloth and ventilation if painting
· Small felt pads or non-slip feet
· Optional ribbon or removable tray for the base
Steps for This Home Accent Project
1. Retire the grater from food use and clean it carefully. Wash away grease and residue, rinse well, and dry every side, especially around folded seams. Check the punched holes with care; if any metal is bent outward or feels sharp enough to catch skin, smooth the area or choose another grater. Once used for paint or jewelry storage, keep it out of food service.
2. Decide whether the original finish is worth keeping. A clean stainless or aged metal surface can look good without paint. If you do want color, prepare only as much as the chosen coating requires and work in a ventilated area. Avoid filling the holes with thick paint, because those openings are the practical part of the project.
3. Stabilize the base. Add felt pads or small non-slip feet if the grater rocks or scratches the surface beneath it. A shallow tray can catch earring backs and small studs. Test the holder on the dresser or vanity before loading it so you know it cannot tip easily when one side is touched.
4. Hang jewelry with spacing in mind. Place longer earrings lower down and lighter pairs higher up so they do not overlap. Keep sharp hooks facing inward where possible. Then turn the grater and use another face for additional pairs rather than crowding a single side until pieces snag each other.
A practical detail I would keep in mind: The holes already create a strong pattern, so I don’t think this one needs much extra decoration.
Variation: Use only one face for earrings and the others for clip-on pieces or lightweight necklaces.
DIY Wooden Bookshelf Makeover
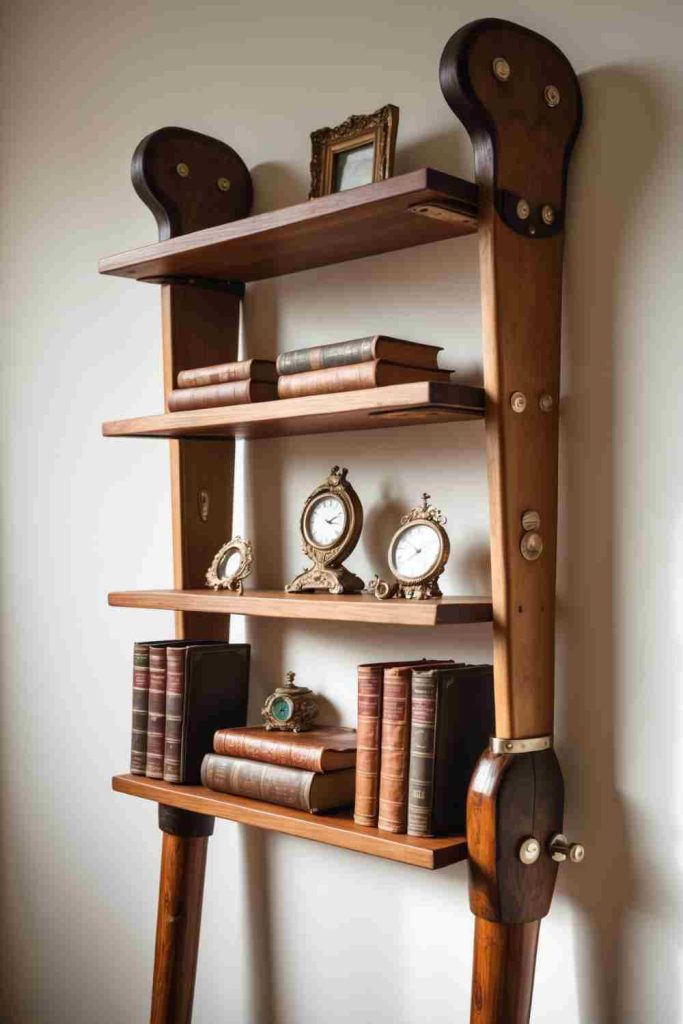
A small wooden bookshelf does not need to be rebuilt to feel different. Cleaning the piece, repairing weak joints, refreshing selected surfaces, and styling the shelves with a little breathing space can turn an overlooked unit into a purposeful home accent. The project works particularly well with a compact shelf that still has a sound frame but carries scratches, dull color, or an outdated finish.
Materials and Tools
· Sound wooden bookshelf
· Mild cleaner and cloths
· Sandpaper for rough areas
· Wood glue or screws for minor repairs as appropriate
· Compatible paint, stain, or clear finish if desired
· Brushes or rollers
· Wall restraint hardware if the unit is tall or top-heavy
· Books and a limited number of decor pieces
Steps for This Home Accent Project
1. Check the structure before changing the color. Remove everything from the shelves and inspect corners, shelf supports, feet, and the back panel. Tighten loose hardware and repair joints before sanding or painting. A fresh finish can hide small marks, but it cannot stop a shelf from racking sideways or make a loose support safe for books.
2. Clean and prepare only the surfaces that need attention. Wash away dust and grime and let the wood dry. Sand splinters, chipped areas, or glossy surfaces only as required by the finish you choose. If the existing coating is sound and you like its age, there is no need to erase every scratch simply to make the project look new.
3. Apply the finish in a controlled way. Protect the floor and follow the coating instructions for ventilation and preparation. Work from top to bottom so drips are easier to catch, and keep shelf edges smooth because they receive regular contact from books and objects. Then let the finish cure fully before returning weight to the shelves.
4. Restyle with balance and access in mind. Put heavier books lower down and keep the upper shelves lighter. Mix vertical and horizontal stacks only where they are easy to remove, then add a few frames, clocks, boxes, or small objects without filling every empty space. If the unit could tip, secure it with appropriate furniture restraint hardware.
A practical detail I would keep in mind: I know it can be tempting to fill a refreshed shelf immediately, but the open areas are part of the makeover.
Variation: Paint only the back panel, line the rear surface with removable paper, or keep the outside wood natural and refresh just the shelves.
DIY Cassette Tape Planters
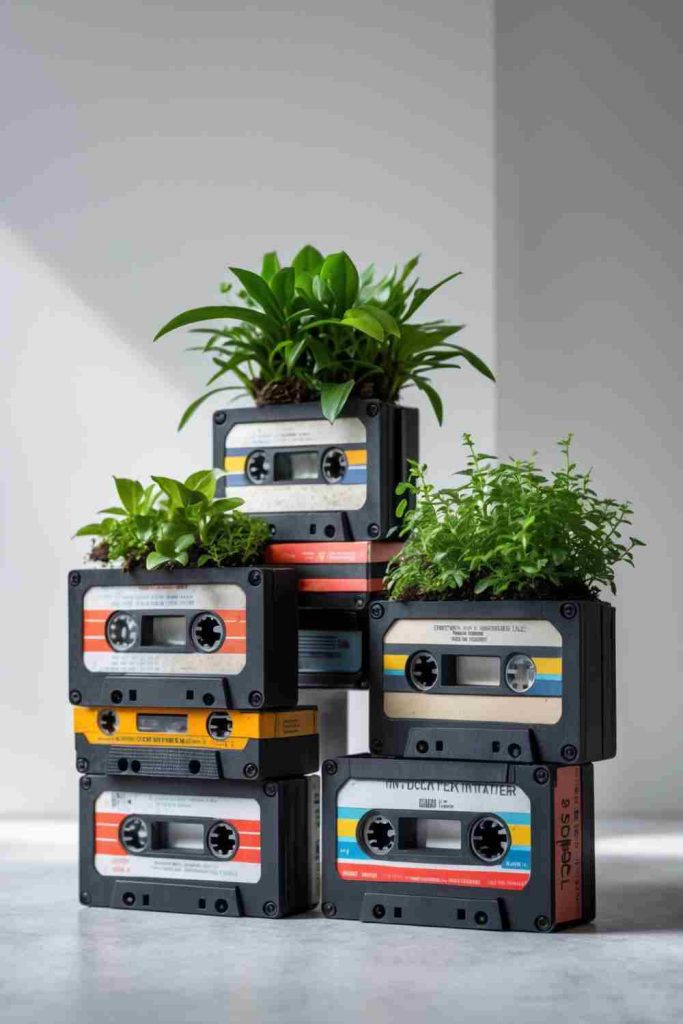
Cassette tapes make a graphic planter shell because their square proportions, clear windows, screws, labels, and retro colors already read like decoration. The practical trick is to use the tapes as an outer structure rather than expecting them to contain wet soil directly. A small removable pot or waterproof liner protects the tapes and makes watering much easier.
Materials and Tools
· Old cassette tapes
· Small lightweight inner plant pot or waterproof container
· Strong adhesive suitable for the cassette plastic
· Clamps, tape, or elastic bands for temporary holding
· Small plant and appropriate potting mix
· Tray or saucer to protect furniture
· Optional felt pads
Steps for This Home Accent Project
1. Sort and clean the tapes. Choose cassettes with intact shells and no sharp broken corners. Wipe away dust and old adhesive residue without soaking paper labels you want to keep. Lay the tapes together dry to decide which label faces should be visible and which sides can be hidden inside the structure.
2. Build the shell around the inner pot size. Arrange four tapes into a square or rectangular sleeve and test the removable pot inside before gluing. Leave enough clearance to lift the plant out for watering. Bond one joint at a time, supporting the corners with tape or clamps so the shape stays square while the adhesive sets.
3. Protect the cassette structure from moisture. Place the potted plant inside only after all joints are stable. Use a saucer or waterproof inner container so draining water never sits against the cassette cases. If the nursery pot has holes, remove it for watering and let it drain before returning it to the decorative shell.
4. Finish the display without overloading it. Set the planter on a level surface and keep the plant size modest. Check the glued corners occasionally, especially if the planter sits near a sunny window where materials may warm. Replace the inner plant pot rather than forcing more soil into the cassette shell as the plant grows.
A practical detail I would keep in mind: The cassette labels are the decoration here.
Variation: Make a pencil cup or small storage box with the same cassette construction if you would rather avoid moisture completely.
DIY Plastic Bottle Pouf
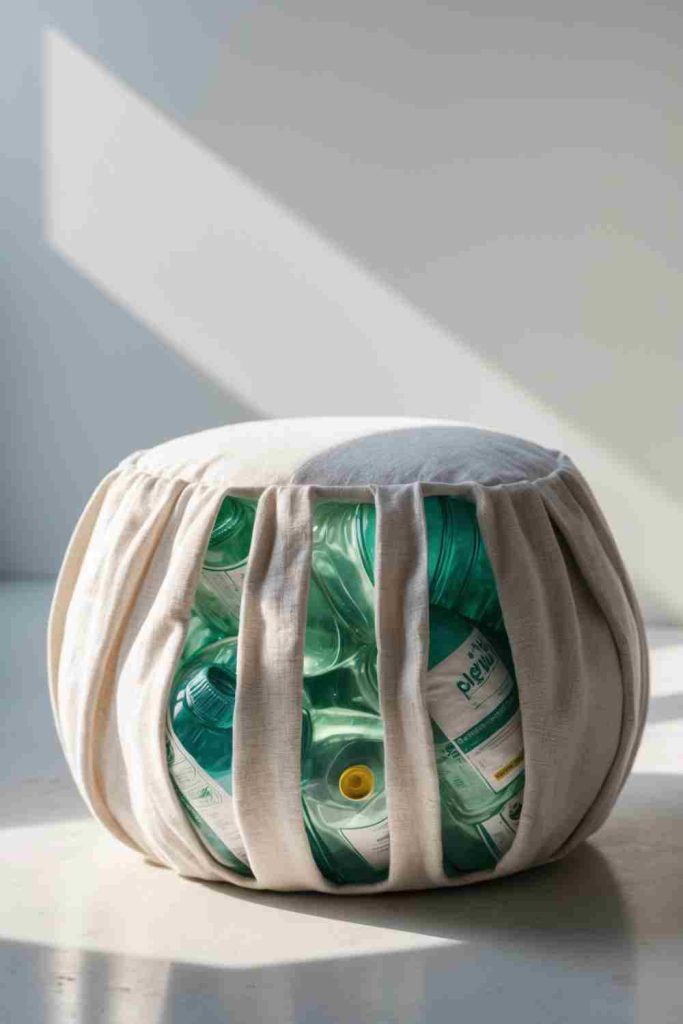
A plastic bottle pouf turns a group of matching empty bottles into the lightweight core of a low seat or footrest. The bottles are bundled tightly, covered with a firm top and bottom layer if needed, padded, and then enclosed in durable fabric. The idea can save a surprising number of bottles at once, but the finished piece should be treated as light household seating rather than a step stool or structural chair.
Materials and Tools
· Clean plastic bottles of similar size with caps
· Strong packing tape or cord
· Two sturdy cardboard or thin plywood discs sized to the core, optional but useful
· Old blankets, foam offcuts, or other clean padding
· Durable upholstery-weight fabric
· Fabric scissors
· Needle and strong thread or sewing machine
· Non-slip material for the base if needed
Steps for This Home Accent Project
1. Build a compact bottle core. Arrange the bottles upright in a tight circle or rectangle with their caps on. Wrap the group in several controlled bands of tape or strong cord so individual bottles cannot shift sideways. Press gently around the outside and replace any bottle that buckles before continuing.
2. Create a flatter top and bottom. Place a firm disc over the top and, if useful, beneath the base so the pressure is spread across more than a few bottle caps. Secure the discs to the bundled core without crushing the bottles. Check that the unit sits level and does not rock before adding soft material.
3. Add padding and make the cover. Wrap the sides and top with clean padding, keeping the thickness even so the shape does not become lumpy. Cut the fabric with enough allowance to join it securely underneath or along a hidden seam. Stitch the cover rather than relying only on hot glue at areas that will flex during use.
4. Test it as a footrest before treating it as a seat. Place the pouf on a non-slip surface and press down gradually from different directions. Listen and feel for shifting bottles or collapsing areas. If the core moves, open the cover and reinforce it rather than assuming the outer fabric will hold everything together.
A practical detail I would keep in mind: This is one project where the hidden construction matters more than the decorative fabric.
Variation: Make a smaller version as a footstool, or add a removable washable slipcover instead of permanently closing the fabric.
DIY Wooden Roller Towel Holder
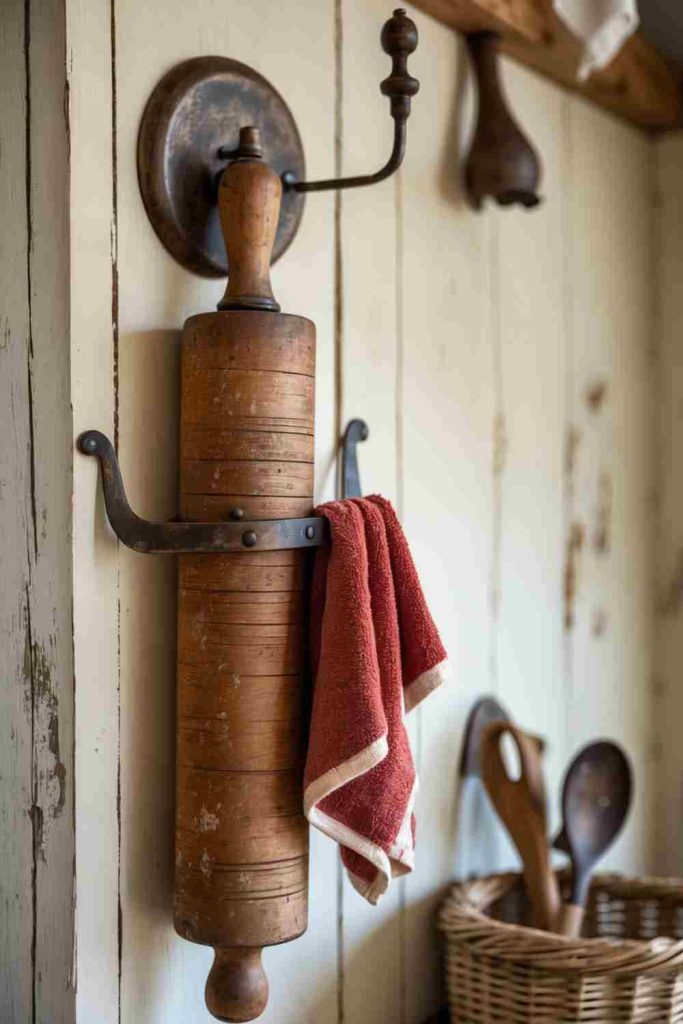
An old wooden roller or rolling pin can become a towel bar because its long cylindrical body is already comfortable for draping fabric. With two wall brackets holding the ends, the old kitchen tool gains a new job without losing its recognizable shape. A fixed installation is simplest, although a carefully spaced bracket system can allow the roller to turn if that movement is useful.
Materials and Tools
· Old wooden roller or rolling pin
· Two sturdy wall brackets or supports
· Screws and wall anchors suited to the wall type
· Measuring tape and level
· Sandpaper for rough areas
· Optional compatible wood finish
· Towel or lightweight cloth for testing
Steps for This Home Accent Project
1. Clean and inspect the wooden roller. Remove grease, dust, and old residue, then let the wood dry. Check the handles or ends for cracks and make sure the central roller is not splitting. Lightly sand any rough grain that could catch fabric, but keep the original shape and patina if the surface is otherwise stable.
2. Plan the bracket spacing. Hold the roller against the wall at the intended height and mark where the supports need to sit. Leave enough clearance for a towel to hang without rubbing a countertop or floor. Use a level before drilling so the roller does not look tilted once the brackets are fixed.
3. Mount the supports securely. Choose anchors appropriate to tile, masonry, plasterboard, or timber framing rather than using the same screw for every wall. Install both brackets and test them by hand before inserting the roller. The supports should prevent the roller from lifting out accidentally during normal towel use.
4. Fit the roller and test the movement. Set the roller into position and check whether it should remain fixed or turn freely. Drape a towel over it and pull gently from each side. Then adjust any retaining screws or stops so the roller stays centered and the brackets do not loosen under repeated handling.
A practical detail I would keep in mind: The part I like is that the old kitchen-tool shape stays obvious.
Variation: Mount a shorter roller beside a sink for a hand towel, use a longer one in a laundry room, or hang lightweight scarves from it in a bedroom if you do not need another bathroom fitting.
DIY Vintage Tin Herb Planters
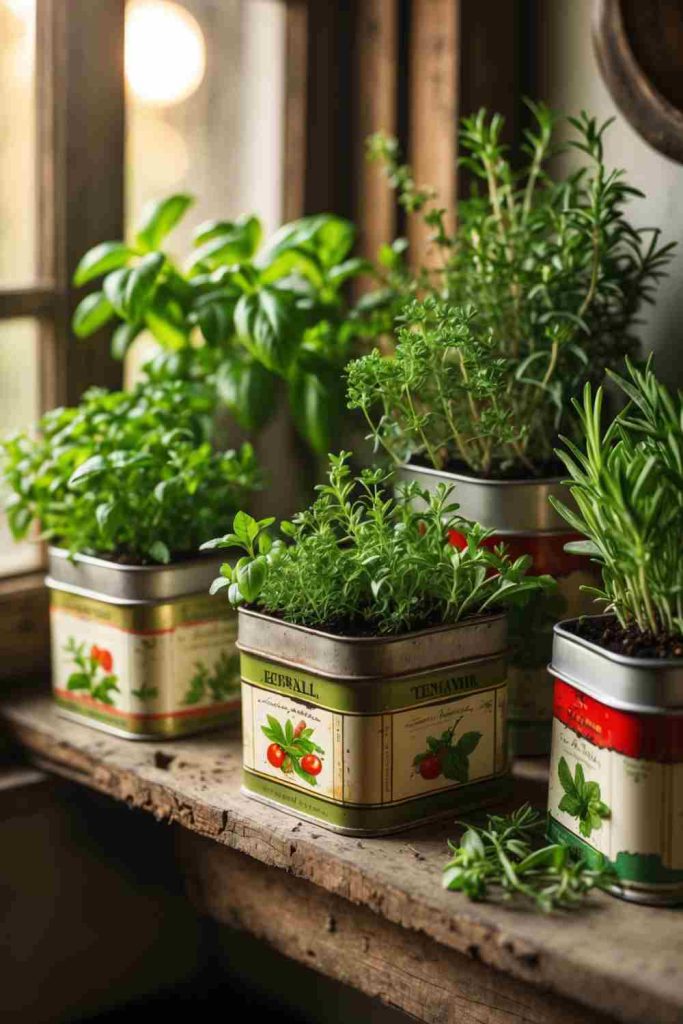
Decorative food tins and old tea tins make attractive herb containers because their printed sides already provide color and pattern. The main issue is water management. Instead of filling a valuable or thin vintage tin directly with wet soil, I prefer using a removable nursery pot inside whenever the size allows. That keeps the label drier and makes it easier to check drainage.
Materials and Tools
· Clean tins in sound condition
· Small draining nursery pots that fit inside, preferred
· Herb plants and appropriate potting mix
· Waterproof saucers or tray
· Gloves
· Optional drill and suitable bit for non-collectible tins
· Metal file for smoothing any new holes
· Simple removable labels
Steps for This Home Accent Project
1. Match the tin to the planting method. Check the inside for rust, sharp seams, or residues and decide whether the tin should act as a cachepot or a direct planter. If a small nursery pot fits inside, use that method first. It allows excess water to drain away from the decorative metal and keeps the herb easy to remove.
2. Prepare drainage only if the tin itself will hold soil. For a modern expendable tin, drill a few small holes in the base while wearing appropriate protection and supporting the metal securely. File any sharp edges and place the tin on a saucer. Do not rely on a layer of stones as a substitute for drainage if excess water has nowhere to leave the container.
3. Pot the herb without crowding the rim. Use a plant suited to the container size and keep the crown at an appropriate level. Leave enough space at the top to water without washing soil over the label. If using an inner pot, lift it out for watering and let it drain before putting it back inside the tin.
4. Choose a practical display position. Place the herbs where they receive suitable light and where drips cannot damage the surface below. Group different tins on one tray if you want a collected look. Then check the containers regularly for standing water, rust, or roots that have outgrown the inner pot.
A practical detail I would keep in mind: The old graphics already do the decorative work, so I would keep tags and accessories removable.
Variation: Use tins for seed packets, dried herb bundles, or kitchen utensils if you do not want to manage moisture.
DIY Bottle Cap Mirror Frame
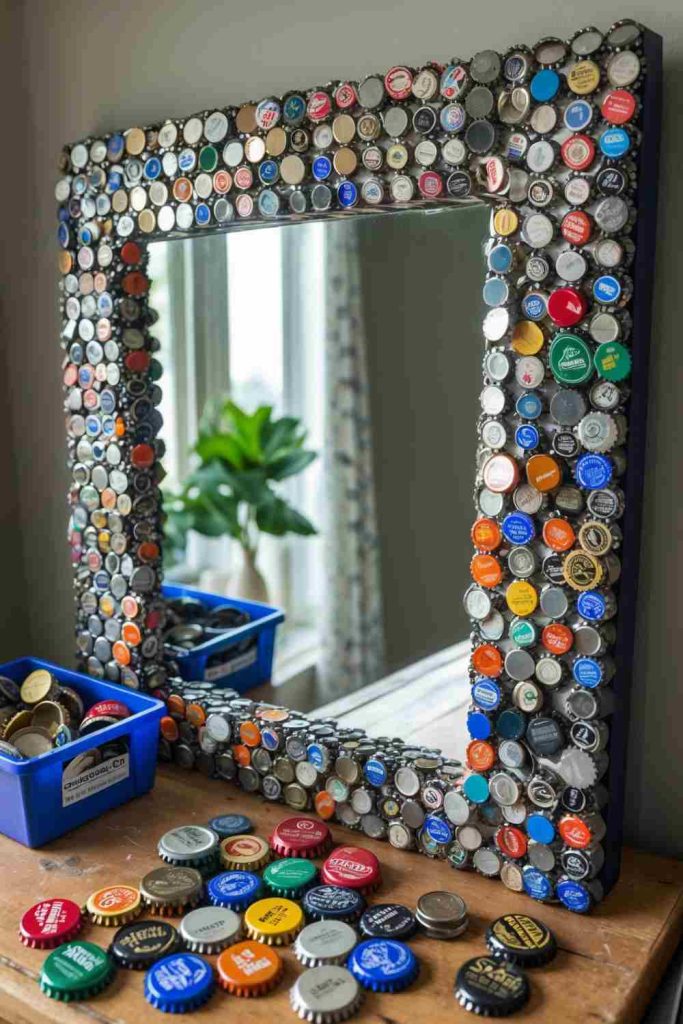
Bottle caps create a strong border around a plain mirror because they are small, repetitive, and easy to arrange in rows or loose color patterns. The frame gives each cap a stable base, while the circular metal shapes add texture without changing the mirror itself. This project is most successful when the caps stop at the frame and do not project into the reflective area or beyond the outer edge where they could snag hands or cleaning cloths.
Materials and Tools
· Clean bottle caps without sharp bends
· Plain mirror with a sturdy frame
· Adhesive compatible with the frame and cap material
· Painter’s tape or paper to protect the mirror surface
· Pencil or removable spacing marks
· Optional paint for the base frame
· Optional clear protective coating compatible with the materials
Steps for This Home Accent Project
1. Prepare the caps and mirror frame. Wash and dry the caps, rejecting any with rust or dangerous bends. Clean the frame and make sure the mirror is secure in its backing. Cover the glass near the work area so stray adhesive cannot smear the reflective surface while you arrange and attach the caps.
2. Plan the cap pattern before gluing. Lay the mirror flat and place the caps around the frame. Begin at corners or another obvious reference point and adjust spacing so the final gaps are reasonably consistent. If the frame is narrow, test whether the caps will overhang safely before committing to the design.
3. Attach in small sections. Lift only a few caps at a time and apply a controlled amount of adhesive to the back. Press them into position without allowing glue to squeeze onto the visible front. Then continue around the frame, checking alignment from a distance every few rows rather than correcting the whole border at the end.
4. Inspect the finished edge before hanging. After the adhesive has set according to its instructions, test each cap gently for movement. Remove excess adhesive and make sure no cap projects into a place where it could catch fingers. Refit or choose wall hardware rated for the full finished weight, which may be noticeably heavier than the plain mirror.
A practical detail I would keep in mind: I would stop the design before it becomes crowded.
Variation: Use caps only at the corners, create alternating color bands, or combine a few caps with flat washers or other safe circular metal pieces if you do not have enough for a complete border.
DIY Broken Ceramics Mosaic Table
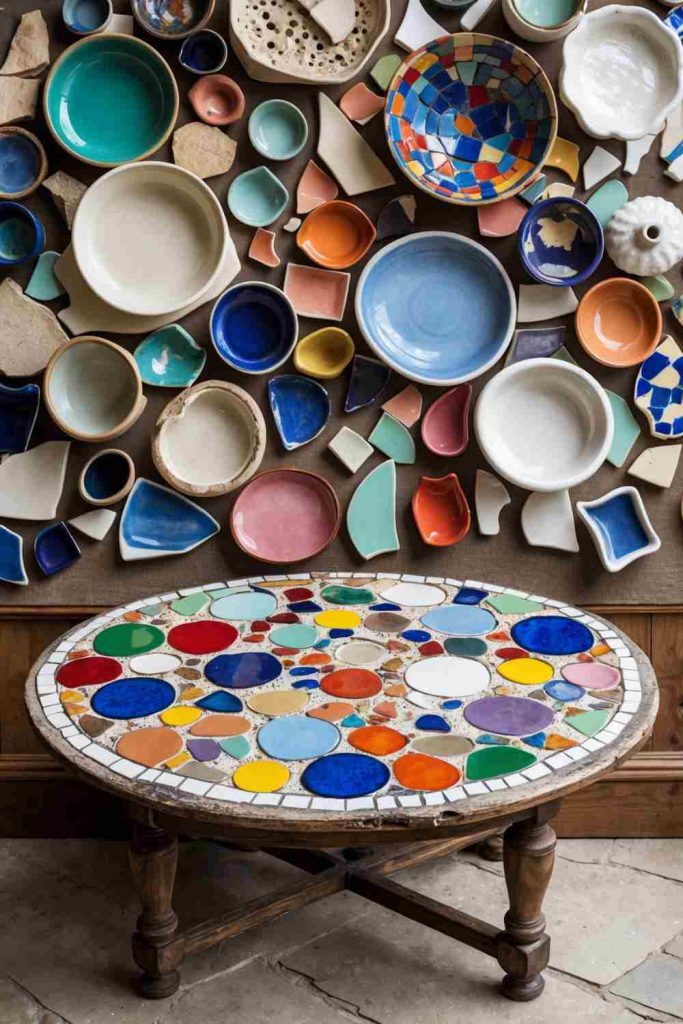
Broken plates, bowls, and mugs can become a mosaic tabletop when the pieces are selected for safe edges, arranged on a solid base, bonded with a suitable tile adhesive, and grouted into a reasonably even surface. The project preserves patterns that may be too damaged for tableware but still attractive as fragments. It is one of the more involved ideas here because sharp ceramic and an uneven tabletop both need careful control.
Materials and Tools
· Broken ceramic pieces from non-valuable damaged ware
· Sound table with a firm top
· Safety glasses and protective gloves
· Tile nippers or another controlled shaping tool
· Tile adhesive suitable for the tabletop
· Grout
· Grout float or spreader
· Sponge and clean water
· Compatible sealer if required for the chosen grout and use
Steps for This Home Accent Project
1. Prepare the table and sort the ceramics. Check that the table does not rock and that the top is strong enough for the added mosaic weight. Clean the surface and sort ceramic pieces by color and size. Discard fragments with unstable splintered edges, and use protective equipment whenever you need to reshape a piece.
2. Create the layout dry. Arrange larger fragments first and use smaller pieces to bridge awkward spaces. Leave workable grout gaps rather than fitting every edge tightly. Step back several times to check the overall balance, then photograph or lightly mark the arrangement so you can rebuild it accurately after lifting sections for adhesive.
3. Bond the mosaic in manageable areas. Spread adhesive over a small portion of the table and press the corresponding fragments into place. Keep the top surfaces as even as practical so cups and decor will not rock later. Then continue section by section, cleaning adhesive from the face before it hardens and following the product instructions for setting.
4. Grout, clean, and inspect the surface. Work grout into the gaps, then wipe the ceramic faces with a damp sponge without pulling material out from between pieces. Once the surface has cured as directed, check for sharp projections or loose fragments before using the table. Apply a compatible sealer if the grout system or intended use calls for one.
A practical detail I would keep in mind: A mosaic does not need tiny fragments everywhere.
Variation: Start with a tray, plant stand, or small side table before attempting a large coffee table.
DIY Snare Drum Coffee Table
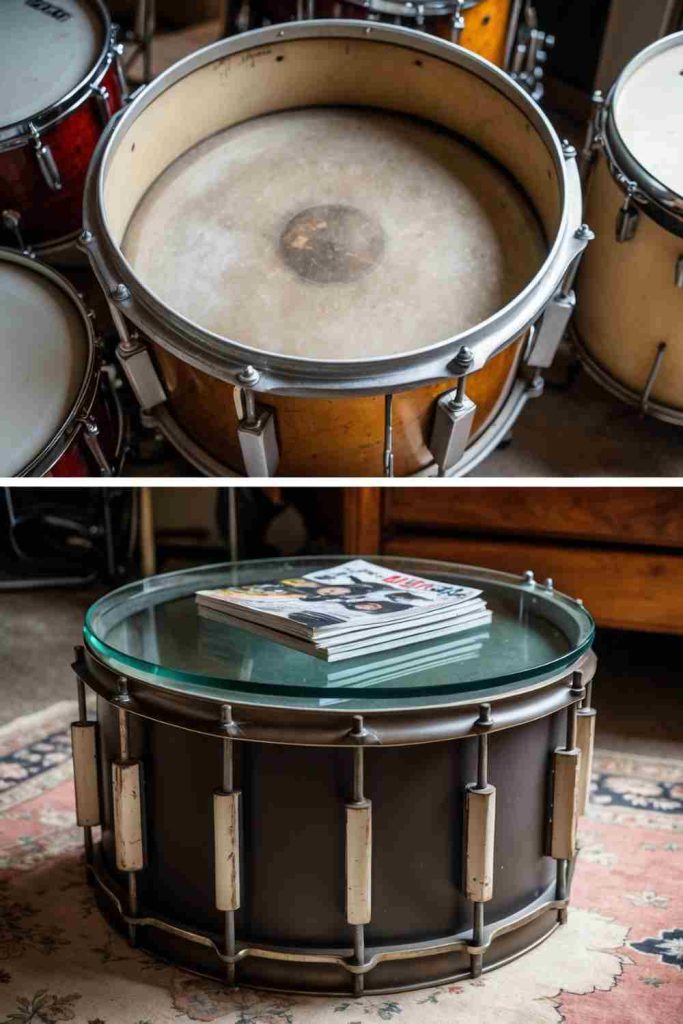
An old snare drum can provide a ready-made circular base for a small coffee or side table. The drum shell, lugs, and metal hardware become the visual detail, while a separate glass or solid top creates the flat surface. The idea works best when the drum itself is stable and the top is supported with purpose-made pads or a secure method that prevents sliding without damaging the shell.
Materials and Tools
· Old snare drum with a stable shell and hardware
· Furniture-grade round glass top with finished edges, or a suitable wooden top
· Clear non-slip furniture pads or suitable supports
· Mild cleaner and cloths
· Small tools for tightening loose drum hardware
· Optional protective floor pads
Steps for This Home Accent Project
1. Inspect the drum as a furniture base. Clean the shell and hardware and check that nothing is loose enough to rattle or fall away. Set the drum on the floor and press gently from different sides to see whether it rocks. Tighten appropriate hardware and add floor pads if the lower rim could scratch the surface beneath it.
2. Choose a safe tabletop. Use a round top large enough to be useful but not so wide that a light bump creates excessive leverage. If choosing glass, have it made or selected for furniture use with polished edges. A wooden disc is a simpler alternative when glass handling or breakage is a concern.
3. Add supports that prevent slipping. Place clear non-slip pads evenly around the upper rim so the tabletop does not rest directly on metal hardware. Set the top in place and check that each support makes contact. Avoid a single thick pad that creates rocking; several evenly spaced points usually provide better support.
4. Test the table before styling it. Push lightly at different edges and make sure the top remains centered. Keep heavy objects near the middle during the first test and avoid sitting or leaning on the tabletop. Then add only the amount of decor the small surface can comfortably hold without hiding the drum underneath.
A practical detail I would keep in mind: The drum hardware already provides plenty of detail.
Variation: Use a wooden top for a warmer look, or convert a smaller drum into a bedside table or plant stand.
DIY Wooden Ladder Pot Rack
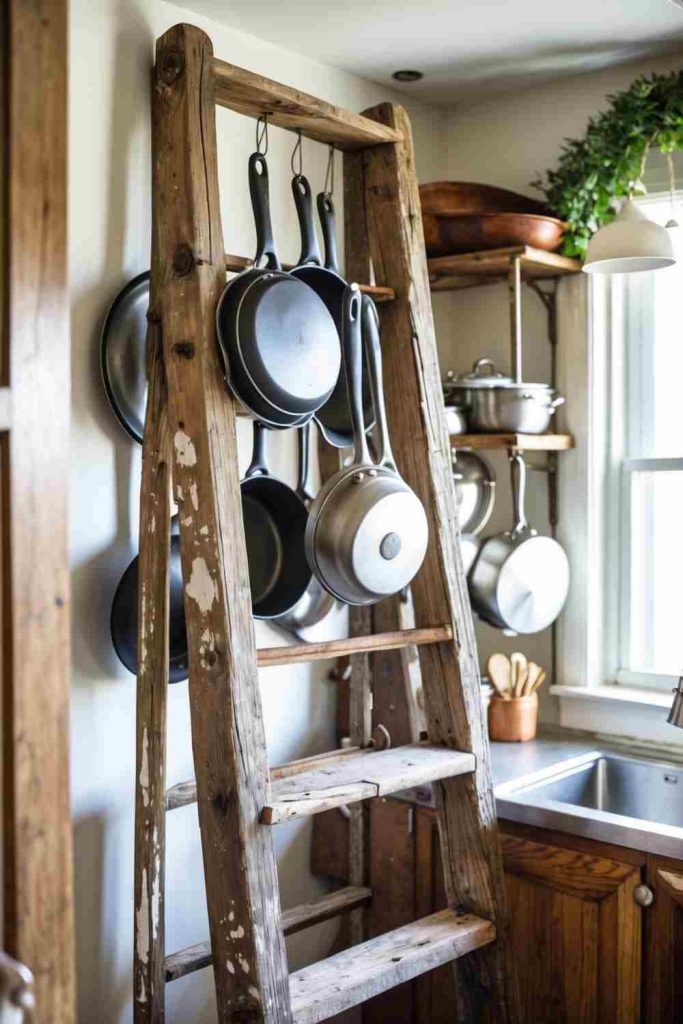
A sturdy old wooden ladder can become a pot rack because its rungs already provide evenly spaced hanging points. Mounted vertically on a wall, it can hold utensils, pans, baskets, or towels. Suspended horizontally, it can become an overhead rack, but that version needs much more careful structural planning because the ladder, hardware, and cookware are all carried above people.
Materials and Tools
· Sound wooden ladder with sturdy rungs
· Cleaning brush and cloths
· Sandpaper for splinters
· Optional compatible wood finish
· S-hooks or cup hooks rated for the intended items
· Heavy-duty brackets, screws, and wall anchors appropriate to the wall
· Level and measuring tape
· Stud finder or equivalent wall-location tool where relevant
Steps for This Home Accent Project
1. Inspect every rung and side rail. Clean the ladder and look for rot, deep splits, loose joints, or old fasteners that could fail under load. Sand rough contact areas and repair only when the ladder remains structurally sound. If the history of the wood is questionable or the ladder flexes significantly, use it as lightweight decorative storage rather than a cookware rack.
2. Plan the layout around the items you actually hang. Measure your largest pans and test their handles against the rung spacing. Mark hook locations so pieces do not collide or hang over a heat source or doorway. Then decide the mounting height based on comfortable reach rather than placing the ladder high simply because it looks dramatic.
3. Mount the ladder with structural fixings. Use brackets and anchors selected for the wall construction and the full expected load. Level the ladder and fasten it at several stable points rather than relying on one top hook. If you choose an overhead installation, use hardware rated for suspended loads and seek experienced help if you are unsure about ceiling structure.
4. Add hooks and load gradually. Install hooks that cannot slide off the rungs during normal use. Hang lighter utensils first, then add pans one at a time while watching for movement in the ladder and wall fixings. Keep the heaviest items closest to the strongest supported areas instead of concentrating weight at one end.
A practical detail I would keep in mind: I know overhead racks can look impressive, but accessibility and safety matter more.
Variation: Use the ladder for mugs, tea towels, baskets, or lightweight kitchen tools if your cookware is too heavy.
DIY Leather Belt Floor Mat
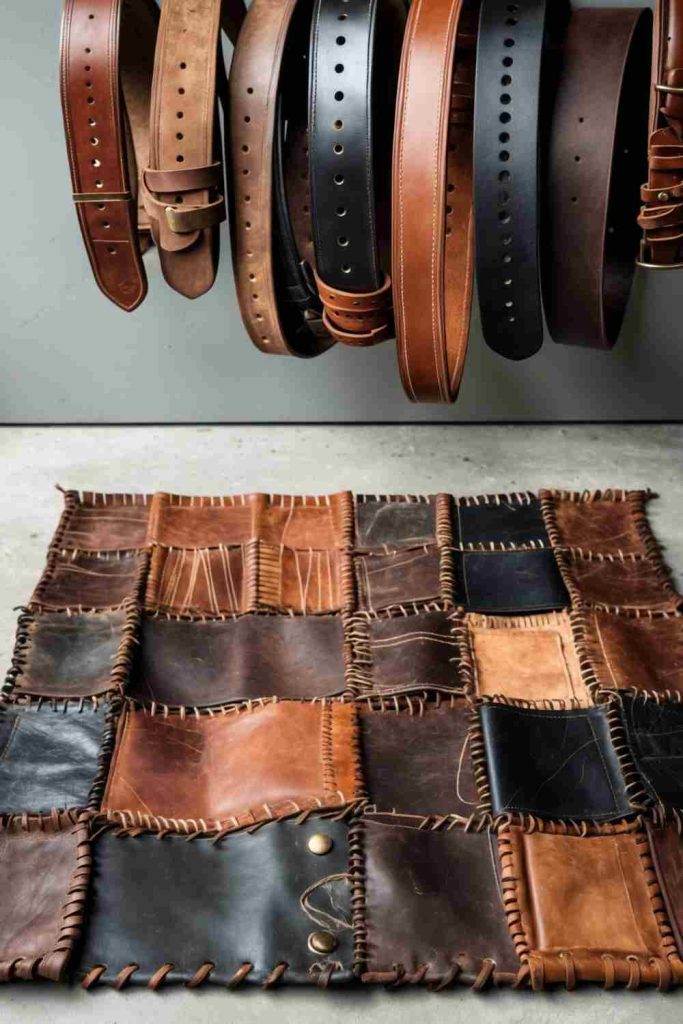
Old leather belts can form a dense striped floor mat when the wearable parts are cleaned, trimmed, arranged side by side, and fixed to a supportive backing. Different shades of brown, black, tan, and worn edges naturally create variation, so the design does not depend on buying matching material. The practical challenge is making the surface flat enough to walk on and the underside grippy enough not to slide.
Materials and Tools
· Old leather or faux-leather belts in usable condition
· Strong scissors or leather-cutting tool
· Ruler and marking tool
· Heavy-duty backing fabric or non-slip mat base
· Strong thread and leather needle, rivets, or adhesive suitable for the materials
· Clamps or weights for flattening
· Edge-smoothing tool if needed
Steps for This Home Accent Project
1. Clean, flatten, and sort the belts. Wipe away surface dirt and allow the belts to dry. Remove buckles and thick hardware unless they are being used outside the stepping area. Lay the straps flat under light weight if they have strong curves from storage, and reject cracked sections that break when flexed.
2. Plan the size on top of the backing. Arrange belts side by side and vary color and texture until the stripes feel balanced. Mark a finished rectangle based on the usable strap lengths rather than forcing every belt to reach the same dimension. Leave enough backing around the edges to trim cleanly after the straps are attached.
3. Secure the straps so they cannot curl independently. Stitch, rivet, or bond each belt to the backing using a method suited to the material. Work from one side across the mat and keep checking the alignment. Avoid thick blobs of adhesive that create bumps underfoot, and reinforce strap ends where lifting is most likely.
4. Trim and test the floor grip. Cut the finished edges straight and check for hard corners or exposed hardware. Place the mat on its intended floor and push it gently with your foot. If it slides, add a suitable non-slip layer before regular use rather than assuming the weight of the leather will hold it in place.
A practical detail I would keep in mind: A little difference in belt width can make the surface more interesting, but the top should still feel reasonably even.
Variation: Make a smaller mat for a bedside area, use shorter belt sections as a table runner on a protected surface, or create a wall panel if the straps are too stiff or uneven for safe floor use.
DIY Old Book Planter
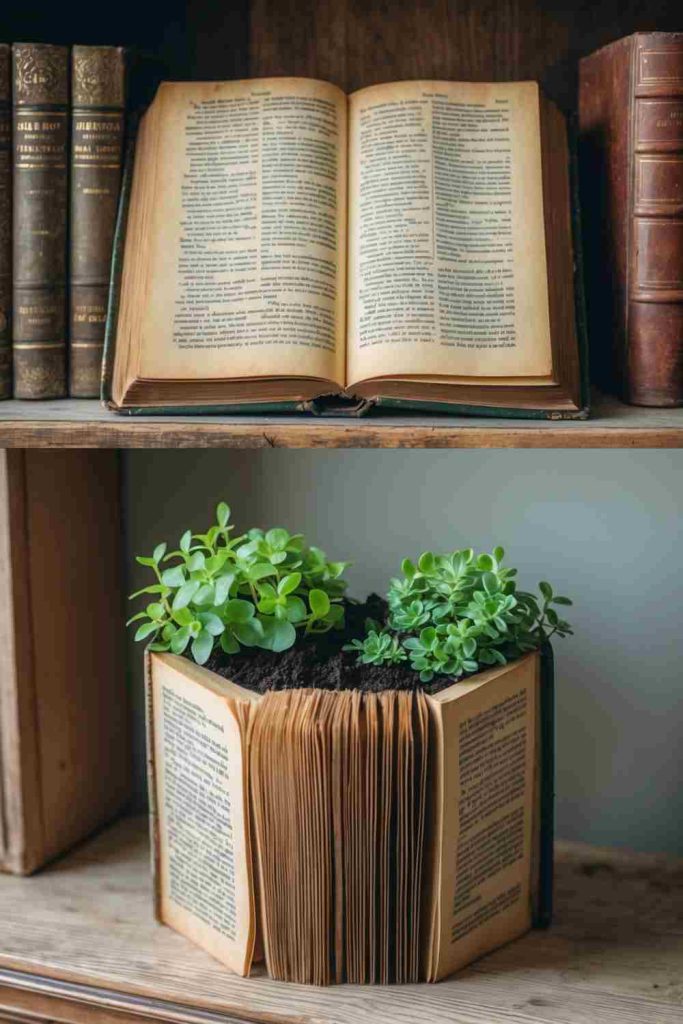
An old hardcover book can be turned into a small planter by hollowing a recess through part of the page block and protecting that cavity from moisture. The contrast is what makes the idea memorable: a solid rectangular book becomes a container for a small plant while the cover and page edges remain visible. It should only be attempted with a damaged or unwanted book that has no value as a readable or collectible item.
Materials and Tools
· Unwanted thick hardcover book
· Cutting mat
· Sharp craft knife with spare blades
· Metal ruler
· PVA or bookbinding-style adhesive for stabilizing page edges if needed
· Small waterproof liner or removable plant pot
· Tiny plant or succulent suited to the container
· Protective gloves suitable for careful cutting work
Steps for This Home Accent Project
1. Choose a book that can genuinely be sacrificed. Use a worn, damaged, or duplicate book rather than cutting a volume that still has reading, historical, or sentimental value. Open it and decide how many front pages you want to preserve above the cavity. Clamp or weight the book so the page block stays stable while you mark the opening.
2. Cut the recess gradually. Place the book on a cutting mat and use a metal ruler to guide shallow passes with the craft knife. Do not try to slice through a deep block of pages at once. Remove small layers, then square the corners as you go, keeping fingers behind the cutting path and replacing a dull blade rather than forcing it.
3. Protect the paper from the plant. Once the recess is deep enough, brush away paper dust and strengthen loose page edges only where necessary. Fit a small waterproof liner or, preferably, a removable pot inside the cavity. Keep water and damp soil away from the book itself, and choose a plant that does not need a large root volume.
4. Style it where moisture can be controlled. Place the book planter on a tray or protected shelf away from splashing. Remove the inner pot to water and let it drain fully before returning it to the book. Then keep the surrounding decor simple so the unusual relationship between pages and plant remains the main detail.
A practical detail I would keep in mind: I would not try to make the book behave like a ceramic flowerpot.
Variation: Use the hollow as storage for dried flowers, pens, or keepsakes if you prefer a completely dry version.
DIY Spoon Flower Wall Art
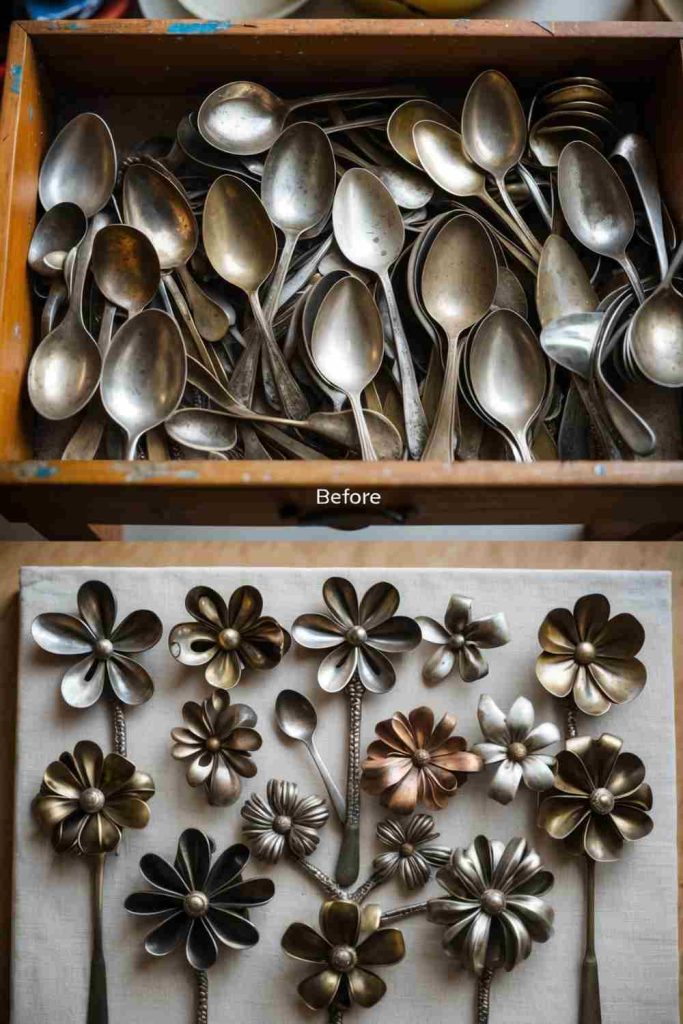
Old metal spoons can become flower-like wall art by using the bowls as petals and the handles as stems, outlines, or decorative lines. The repeated shape makes the concept readable even when every spoon is not identical. This is a more tool-intensive upcycle because flattening, bending, drilling, or cutting metal can create sharp edges and flying fragments, so the safest version uses as much of the original spoon shape as possible.
Materials and Tools
· Old metal spoons in sound condition
· Protective gloves and eye protection
· Pliers and a rubber or wooden mallet
· Metal-cutting tool only if the design truly requires cutting
· Metal file for smoothing altered edges
· Sturdy wood or metal backing
· Mechanical fasteners or adhesive suitable for metal and the backing
· Wall hanging hardware
Steps for This Home Accent Project
1. Clean and sort the spoons by shape. Remove food residue and tarnish only as much as you want, then group spoons with similar bowl sizes. Check for cracks, badly corroded metal, or razor-like edges. Decide whether the flower can be built with intact spoons before reaching for cutters; preserving the original shape is usually safer and easier.
2. Form the petals with controlled bends. Use pliers or a protected mallet to adjust handles and bowl angles a little at a time. If flattening is necessary, support the spoon on a suitable work surface and wear eye protection. Smooth any new edge immediately so sharp metal never becomes part of the finished artwork.
3. Arrange complete flowers on the backing. Place the spoon bowls around a center point and experiment with spacing before securing them. Create one or two larger flowers first, then fill the remaining area with smaller forms or stems. Keeping some open background visible usually makes the metal shapes easier to read.
4. Attach and mount the artwork securely. Fasten each piece using a method appropriate to the weight and materials, then test every spoon for movement. Fit hanging hardware to the backing rather than to a decorative spoon. Use wall fixings rated for the finished panel and hang it where people will not brush against projecting metal edges.
A practical detail I would keep in mind: The repeated spoon bowls already say “flower,” so I’d keep the center and background restrained.
Variation: Create one single large flower instead of a cluster, use intact teaspoons for a smaller piece, or arrange spoons as a sunburst mirror border if you want a design that requires less bending.
DIY Sweater Slipcovers for Stools
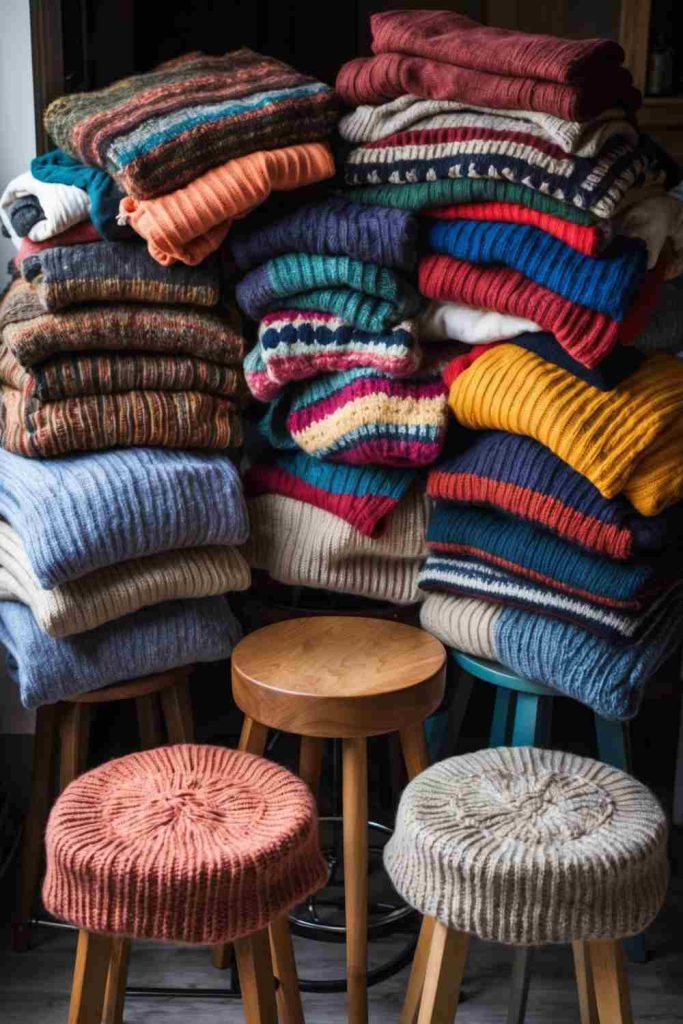
A sweater with a dated fit or damaged sleeves may still have enough strong knit fabric across the body to cover a stool seat. Stretching that fabric over an existing top brings cable patterns, ribbing, stripes, or soft color into the room without buying new upholstery material. The project works best on a stool whose frame and seat are already structurally sound; the sweater is a cover, not a repair for unstable furniture.
Materials and Tools
· Clean old sweater with sound knit fabric
· Stable stool with removable or accessible seat underside
· Fabric scissors
· Pins or clips
· Staple gun and suitable staples, or upholstery tacks
· Optional thin batting if the seat needs light smoothing
· Screwdriver for removing the seat if appropriate
· Fabric backing strip for reinforcing weak knit edges
Steps for This Home Accent Project
1. Choose a strong section of the sweater. Wash and dry the sweater according to its care needs, then lay it flat. Place the stool seat over the body area and avoid elbows, cuffs, moth holes, or stretched sections. Decide where the knit pattern should sit before cutting, leaving enough fabric to wrap underneath the seat on every side.
2. Prepare the stool rather than hiding problems. Check the legs, joints, and seat attachment and tighten loose hardware before adding fabric. If the top is rough, remove sharp staples or splinters that could cut the knit. Add only a thin layer of batting if needed to smooth the surface; too much padding can make a small stool feel unstable.
3. Stretch and fasten opposite sides gradually. Center the sweater piece and secure one point underneath, then move to the opposite side and add light tension. Repeat on the other two sides before filling in between. Keep checking the top so the knit pattern stays straight and the fabric does not pull so tightly that stitches open around the staples.
4. Finish the underside and test the seat. Trim excess fabric only after the cover is secure, leaving enough margin that the knit cannot slip free. Fold raw edges inward or cover them with a backing strip if needed. Reattach the seat, then sit gently and check for shifting before putting the stool back into regular use.
A practical detail I would keep in mind: I don’t think every wrinkle needs to be pulled out of a textured knit.
Variation: Use sweater fabric only on a removable seat cushion, make matching covers for two small stools from one large sweater, or choose a no-cut slipcover style for a stool that is used mainly as a plant stand.
Home Accent Upcycling Mistakes That Can Make a Good Idea Harder to Live With
Small home-accent projects can look forgiving because many of them use inexpensive or discarded materials, but the same shortcuts can make a finished piece awkward, weak, or difficult to maintain. I would check these issues before calling any of the sixteen projects complete.
Decorating before checking the structure
Paint, fabric, rope, labels, and trim can disguise wear without solving it. Inspect wood joints, tire condition, ladder rungs, stool frames, drum shells, and wall-mounting points first. If the base object is weak, move it to a lighter decorative role or choose another object rather than asking the new finish to hold it together.
Using craft adhesive where mechanical support is required
Glue is useful for cassette shells, bottle-cap borders, and some decorative metal pieces, but it is not a substitute for bolts, screws, brackets, or anchors when a project carries weight. Tire shelves, pot racks, wall organizers, tables, and mounted towel bars need fixings chosen for the actual load and the material beneath them.
Ignoring moisture in planter projects
Cassette planters, vintage tins, and book planters can fail quickly when the decorative outer material is treated like a waterproof pot. Use removable inner containers, provide real drainage where appropriate, and protect shelves or furniture underneath. If water begins collecting in a decorative shell, change the planting setup instead of simply watering less often.
Leaving sharp edges where hands can reach them
Cheese graters, cut ceramic, modified spoons, bottle caps, drilled tins, and old metal hardware all deserve a final hand-safety check. File, cover, reposition, or discard any edge that can catch skin or cloth. A decorative piece should be safe to clean as well as safe to look at.
Overloading reclaimed wall storage
Old materials often look stronger than they are. Add weight gradually to a ladder rack, tire shelf, denim organizer, or mounted roller and include the stored items when thinking about anchors. The safest shelf is not the one that survives the first installation; it is the one that remains stable after regular use and movement.
Making floor pieces without testing grip and stability
Poufs, leather mats, stools, and coffee tables all interact with the floor. Test for sliding, rocking, uneven pressure, and loose fabric before daily use. Add non-slip material or repair the base instead of assuming the object’s weight will keep it in place.
Adding decoration after the useful part is already finished
It can be surprisingly hard to stop once an upcycle begins. Extra tassels, paint, trim, labels, and ornaments can make small home accents busier and harder to clean. Step back once the function works and add another detail only if it improves the piece rather than simply filling an empty area.
Frequently Asked Questions
Which of these upcycled home accents are easiest for beginners?
The cheese grater earring holder, denim pocket organizer, bottle-cap mirror border, and vintage tin cachepots are approachable because they use familiar materials and limited construction. Choose a version that asks you to learn one new technique at a time. A small successful project is more useful than starting with a heavy wall rack if you are not comfortable with structural fixings yet.
Do I need to repaint every reused object?
No. A sound original finish can be part of the appeal, especially on wooden rollers, old books, cassette tapes, tins, drums, and leather belts. Clean first, repair what needs attention, and only paint when the existing surface is unsuitable or the new color genuinely helps the piece fit the room.
What should I use instead of hot glue for load-bearing projects?
Use mechanical fasteners such as screws, bolts, brackets, anchors, staples, or upholstery tacks where the material and project call for them. The exact choice depends on what is being joined and how much weight or movement it will experience. Hot glue can be useful for lightweight decoration, but it should not be treated as universal structural hardware.
How can I make planter upcycles last longer indoors?
Keep water away from decorative materials whenever possible. Use draining nursery pots inside cassette shells, tins, and hollowed books, lift the inner pot out for watering, and let it drain before replacing it. A tray or saucer beneath the display also protects furniture and makes leaks easier to notice.
Are old tires, ladders, and pallets automatically safe to reuse indoors?
No. Their history and condition matter. Avoid materials with strong chemical or oil odors, deep cracks, exposed reinforcement, rot, severe staining, or damage that cannot be repaired confidently. Cleaning improves appearance, but it does not make questionable material automatically suitable for living spaces.
Let the Old Object Keep One Useful Part of Its Story
The most convincing upcycled home accents do not erase their starting material. The tire still reads as a tire, the denim pocket still looks like clothing, the cassette tape still carries its old label, and the rolling pin still has the shape that once made it useful in a kitchen. What changes is the job each object is asked to do.
For me, that is the best place to begin with any of these sixteen ideas. Choose one object that is still sound, decide what practical quality is worth keeping, and build the new function around that strength. Then add only the finish, hardware, or decoration the new use genuinely needs. This approach keeps the project manageable and reduces unnecessary materials.