Old bags and leftover fabric often remain useful long after their original style has stopped working. A tote may have strong handles but a stained front, a leather handbag may still close properly while its surface looks plain, and small pieces of lace, denim, handkerchief cotton, or upholstery fabric may be too good to discard but too small for a larger sewing project. Bags are especially suitable for careful upcycling because one repaired or decorated section can change the whole object without rebuilding every part.
I like bag projects that begin with function rather than decoration. The strap needs to stay secure, the lining should protect the outer work, and the finished shape should still suit what the bag will carry. Then buttons, embroidery, patchwork, fringe, beads, or leather scraps can add character without making the bag awkward to hold. I don’t think every rescued material needs to look new; a little wear can sit comfortably beside neat stitching when the weak areas have been repaired.
Before choosing an idea, inspect the base bag and decide whether it is strong enough for continued use. Decorative glue cannot rescue a failing handle, and a delicate handkerchief patch should not be asked to support groceries. Once the structure, materials, and intended load are clear, these upcycling bag ideas can turn overlooked textiles and accessories into pieces that feel personal, useful, and worth carrying again.
Inspect the Bag Before Adding Decoration
A bag can look sound while hiding stress around the strap anchors, base corners, zip ends, and handle folds. Check those areas first, because decorative work may cover damage and make future repairs harder. A strong original structure gives the upcycled surface a fair chance to last.
· Empty the bag completely and inspect the lining, base, side seams, corners, closures, handles, strap anchors, and hardware under good light.
· Repair split stitching, weak handle tabs, loose rivets, torn lining, or cracked structural panels before attaching lace, buttons, fringe, beads, or patches.
· Clean the bag by a method suited to its known material, and avoid soaking leather, coated fabric, cardboard stiffeners, or unknown vintage components.
· Test whether zips, snaps, buckles, and magnetic closures still work while the bag is empty and again after a light test load.
· Remove loose decorations and sharp broken hardware rather than hiding them beneath new material.
· Decide whether the bag will carry produce, daily essentials, a phone, books, or only lightweight evening items, because the intended load changes the reinforcement needed.
· Retire a bag from load-bearing use when the main body, handle anchors, or frame has deteriorated beyond a reliable repair.
Match the Attachment Method to the Surface
Leather, mesh, canvas, thin handkerchief cotton, and sequined fabric do not respond to the same needle or adhesive. I know it can feel tempting to use one familiar glue for everything, but a small hidden test is much less frustrating than a visible stain or a patch that peels away after the first outing.
· Use sewing for handles, pocket edges, linings, patchwork seams, and other areas that will be pulled or washed repeatedly.
· Choose needles appropriate to the material, such as a suitable leather needle for genuine leather or a sturdy sharp needle for dense canvas.
· Place a backing patch behind buttons, studs, beads, and strap anchors so the force is spread across more than one small hole.
· Use clips instead of ordinary pins on leather or coated surfaces when permanent pinholes would remain visible.
· Test adhesive on a hidden area for staining, stiffness, colour change, poor grip, or damage to a surface finish.
· Keep glue away from zip teeth, magnetic snaps, hinges, drawstrings, and flexible seams that need to move.
· Allow finishes to set according to their own instructions rather than guessing a universal drying or curing time.
Plan Weight, Comfort, and Safe Everyday Use
The finished bag should remain comfortable after it is filled. Heavy buttons, long fringe, metal studs, and thick patchwork can change the way a small bag hangs, while an unlined embellishment may scratch a phone or catch on clothing. Planning the inside is just as important as arranging the outside.
· Reinforce handles and straps independently of decorative fabric so ornament does not become the main load-bearing layer.
· Keep metal prongs, wire ends, knots, and rough bead backs covered by a lining or protective patch.
· Avoid loose buttons, beads, sequins, tassels, and studs on bags intended for young children or where pets may chew them.
· Check that fringe, straps, and drawstrings cannot catch under wheels, drag on the ground, or interfere with walking.
· Use washable or removable components when the bag will carry produce, gym items, lunch containers, or other things likely to cause moisture and stains.
· Distribute weight across a comfortable strap width and test the bag with a modest load before trusting it with valuable belongings.
· Keep food-contact items inside suitable clean containers rather than relying on decorative paint, glue, or reclaimed fabric as a direct food surface.
Transform a Mesh Bag into a Rustic Produce Carrier
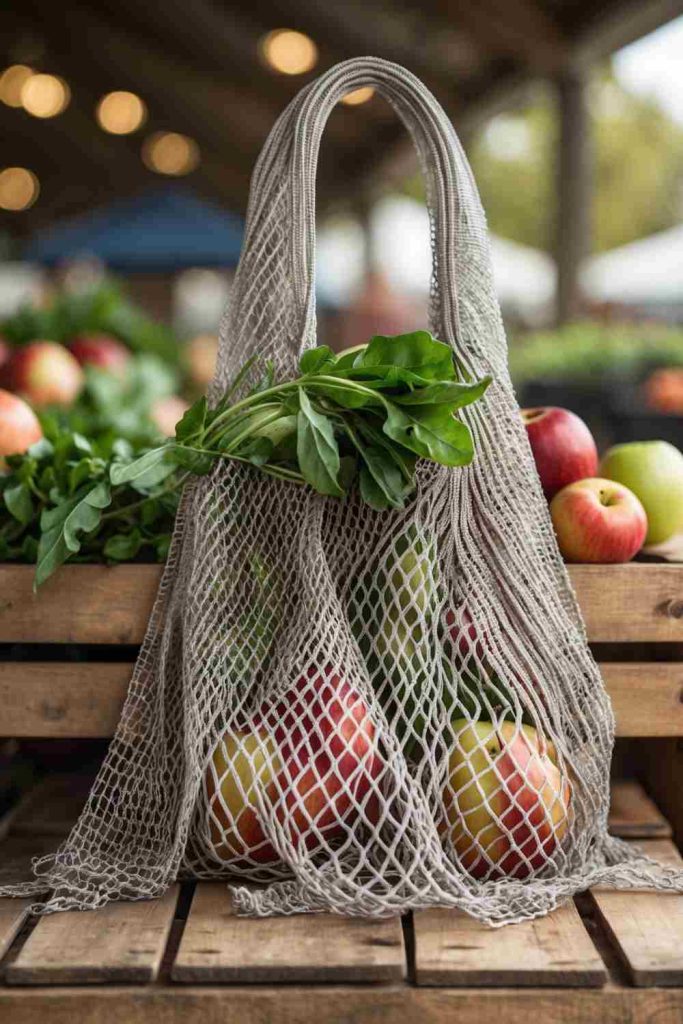
A mesh shopping bag already provides airflow and expands around awkward shapes, but an older one may have thin handles, stretched openings, or a finish that feels too plain to use regularly. Wrapping the handles, repairing the mesh, and adding a restrained fabric detail can turn it into a practical produce carrier without hiding the open structure that makes it useful.
The carrier should stay lightweight. Thick beads and heavy patches can pull the mesh out of shape, while a narrow handle may become uncomfortable when the bag is full. Reinforce the areas that carry weight first, then keep the rustic decoration flexible and washable.
Materials and Tools
· Clean mesh bag with sound main body
· Strong thread and a blunt or suitable hand-sewing needle
· Sturdy cotton tape, twill tape, twine, or reclaimed fabric strips for handle wrapping
· Small washable fabric patches for repairs or decoration
· Scissors, clips, and washable marker
· Optional lightweight wooden beads placed away from load points
· Optional removable washable inner produce pouches
Steps for This Upcycled Bag Project
1. Inspect the mesh under gentle tension and mark stretched knots, broken strands, and weak handle joins. Mend small openings with strong thread by following the existing net pattern rather than pulling the hole tightly closed. If the base or handle anchor has widespread damage, keep the bag for lightweight storage instead of produce carrying.
2. Wrap or bind each handle with cotton tape, twine, or a long reclaimed fabric strip. Keep the wrapping even and secure both ends with stitching that passes through the original handle several times. Test the grip against the hand, because a decorative knot in the wrong place can become uncomfortable surprisingly quickly.
3. Add one or two lightweight fabric patches over repaired areas or stitch a narrow band around the upper edge. Leave the mesh free to expand and avoid blocking large sections with stiff adhesive. If using wooden beads, attach them to a short decorative loop that cannot carry the bag’s weight or swing into produce.
4. Wash or wipe the completed carrier as the materials allow, then test it with a small load of rounded produce. Check the base, handle joins, and repaired mesh after carrying. Avoid sharp packaging, glass, and very heavy items that can cut strands or concentrate force in one opening.
For me, the handle is the part worth improving most. A comfortable wrapped grip makes the bag feel finished, while too many decorations can make useful mesh harder to clean.
Variation: Add removable cloth pouches for small items, create a simple drawstring produce bag from a reclaimed net curtain, or use the repaired mesh carrier for yarn and lightweight beach accessories.
Transform a Brown Leather Handbag with Elegant Lace Details
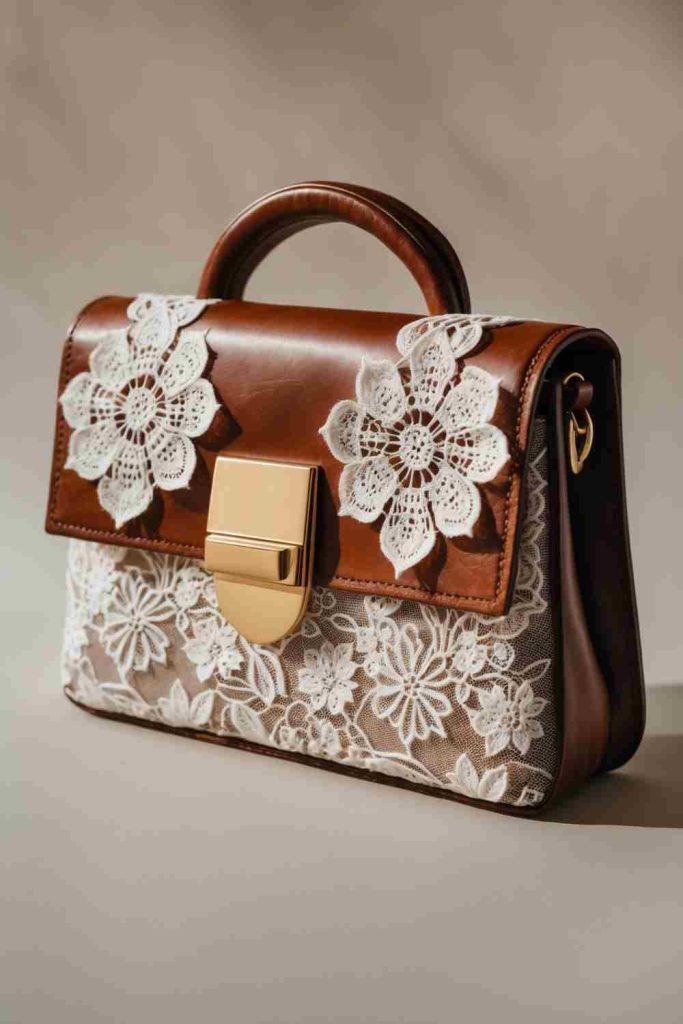
A brown leather handbag and cream lace create a strong contrast between smooth structure and delicate pattern. Lace can refresh a scuffed flap, frame a pocket, or soften a plain front panel without covering the whole bag. The best placement usually follows an existing seam, edge, or closure rather than floating randomly across the surface.
Leather needs cautious handling because needle holes and adhesive marks may be permanent. The bag should be cleaned with a method suited to its finish, and the lace should be tested in several positions before anything is attached. A removable or partly stitched appliqué is often easier to repair than a large glued panel.
Materials and Tools
· Structurally sound brown leather or faux-leather handbag
· Lace trim, reclaimed lace panel, or securely finished appliqué
· Paper templates or tracing paper for testing placement
· Clips, removable low-tack tape, or another non-marking holding method
· Suitable leather needle and strong thread, or compatible adhesive used after testing
· Small backing patches for stitched attachment points
· Scissors and fine hand-sewing tools
Steps for This Upcycled Bag Project
1. Empty the handbag and examine the leather finish, lining, closure, and handle anchors. Clean only by a method appropriate to the known material and allow the surface to return to its normal feel. Test the lace against the bag in daylight, then create a paper outline so the final shape does not cover a zip, snap, logo, or flexible fold.
2. Trim the lace along stable motifs rather than cutting through loose threads. Secure any unraveling edges with fine stitching and place small backing patches inside the lining where hand stitches will pass through. If using adhesive, test it beneath the flap or on another hidden area for staining and stiffness before applying it to the design.
3. Attach the main lace section from the centre outward. Use small spaced stitches around strong lace edges, or apply a thin controlled layer of compatible adhesive while keeping the leather flexible. Smooth gently without stretching the lace, and keep attachment points away from hinge lines where the flap bends repeatedly.
4. Check the inside for rough thread ends and cover them neatly. Open and close the handbag several times, then carry a light test load to see whether the lace catches on clothing or lifts at the edges. Remove excess decoration rather than adding pearls or beads where they would rub against the hand.
I’d keep the lace slightly smaller than the leather panel beneath it. That border allows the original material to frame the detail and makes the result look considered rather than covered up.
Variation: Use a detachable lace panel secured through existing hardware, add narrow lace only around a pocket edge, or place a single vintage motif on a removable bag charm.
Craft a Stylish Patchwork Wallet with Leather Scraps
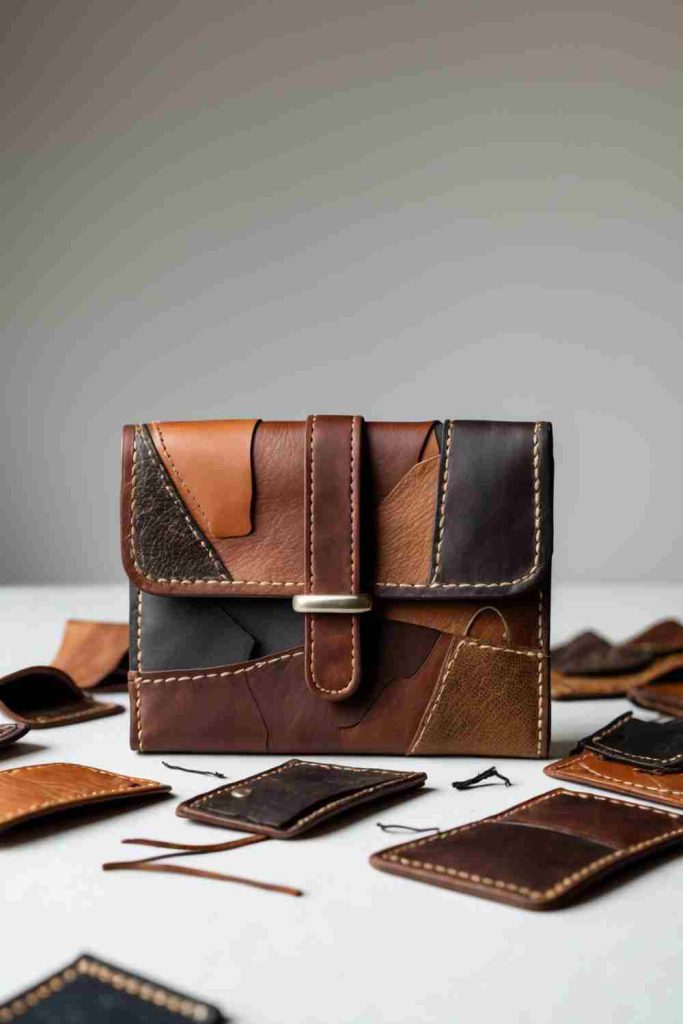
Small leather offcuts can become a compact wallet when their strongest areas are joined over a stable lining. Patchwork works particularly well here because scratches, colour variation, and different grain patterns look intentional once the pieces are arranged in a clear shape. The project also makes use of scraps that are too narrow for a larger bag panel.
A wallet opens and closes frequently, so the fold, card slots, and edge finish need more attention than the decoration. Thick leather pieces can create an uncomfortable stack, while soft scraps may stretch around cards. Sorting by thickness before cutting keeps the finished wallet manageable.
Materials and Tools
· Leather or faux-leather scraps with sound surfaces
· Sturdy lining fabric or thin leather base
· Paper wallet template and card-sized test pieces
· Suitable leather needle, strong thread, and thimble or sewing machine capable of the layers
· Clips, ruler, craft knife or sharp scissors, and cutting mat
· Edge paint, binding, or turned lining for a neat perimeter if suitable
· Low-profile snap, tab, or button-and-loop closure
Steps for This Upcycled Bag Project
1. Choose a simple wallet format and make the complete shape in paper first. Insert old cards or card-sized paper to test slot depth, fold allowance, and closure position. Sort the scraps by thickness, placing the firmest pieces near edges and fold supports while avoiding several heavy seams in the same area.
2. Arrange the scraps over the lining or base, then trim them into a balanced patchwork. Butt edges together for a flatter surface or overlap only where the extra thickness will not interfere with folding. Mark every piece in order, and test the planned seam on leftover material before sewing the main panel.
3. Join the patchwork with strong controlled stitching and attach it to the lining. Construct card pockets separately, checking that their openings remain wide enough after seam allowances are turned. Reinforce the closure area with an internal patch and keep metal parts away from the cards unless the chosen hardware is appropriate.
4. Finish the perimeter, fold the wallet, and work the hinge gently rather than forcing a sharp crease through thick leather. Load only a few cards at first, then inspect the seams and slot edges. Trim rough thread ends and smooth any corner that could scratch a hand or damage a pocket.
The patchwork becomes easier to use when the colour changes are lively but the construction stays simple. I would rather make two roomy card slots than squeeze in several tight ones that distort the leather.
Variation: Create a slim card holder, a coin pouch with a fabric lining, or a passport cover using one patchwork front and one plain flexible back.
Decorate a Handbag with Vibrant Colorful Buttons
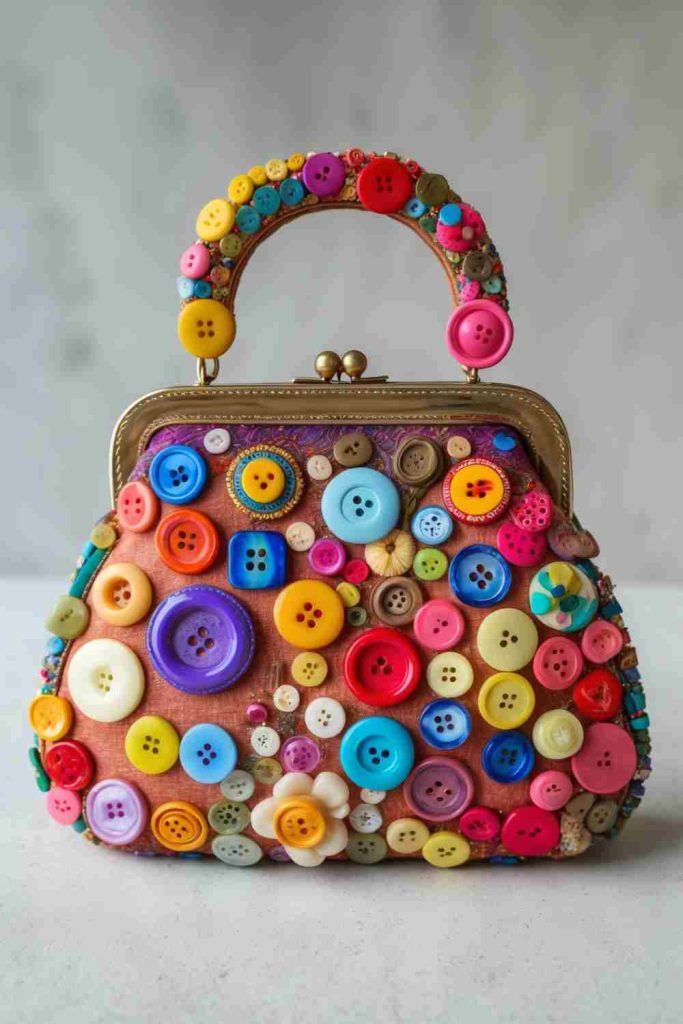
A plain fabric handbag can carry a colourful button arrangement without requiring a complete reconstruction. Buttons may form flowers, circles, scattered colour groups, or a border around a pocket. The strongest designs leave some original fabric visible and keep the heaviest clusters away from flexible folds and strap anchors.
Buttons need secure stitching because a bag is handled, brushed against clothing, and placed on surfaces. Glue alone may not suit washable or frequently flexed fabric. The backs of the stitches should also be protected so they do not catch the lining or items inside the bag.
Materials and Tools
· Structurally sound fabric handbag
· Assorted reclaimed buttons without cracks or sharp edges
· Strong thread and suitable hand-sewing needle
· Small felt or woven backing patches
· Removable fabric marker or paper layout template
· Scissors, thimble, and clips
· Optional lining patch to cover the finished stitching
Steps for This Upcycled Bag Project
1. Sort the buttons by weight, thickness, and hole type before choosing colours. Reject brittle, cracked, rusty, or sharp pieces. Lay the bag flat and arrange the buttons on a paper outline first, keeping the design clear of zips, pockets, base corners, and areas that bend sharply when the bag opens.
2. Transfer only a few anchor points to the fabric. Place a backing patch inside the bag beneath each heavy group so the outer fabric is not carrying every button through a tiny area. Begin with the largest buttons, then add smaller ones to complete the pattern without overcrowding the surface.
3. Sew each button with several secure passes and finish the thread independently or in small groups. This prevents one broken thread from releasing the whole design. Keep knots flat, avoid pulling so tightly that the bag fabric puckers, and do not use long thread floats inside the lining.
4. Cover the stitch backs with a neat lining patch if they remain exposed. Flex the bag, close it, and carry a light test load while watching for loose buttons or distorted fabric. Keep this embellished bag away from young children and pets who may pull or swallow small parts.
A handful of well-spaced buttons usually has more impact than covering every centimetre. The empty fabric lets the different colours and shapes read clearly.
Variation: Sew buttons onto a detachable fabric panel, create a single button-flower pocket detail, or use flat fabric-covered buttons for a softer and lighter finish.
Create a Multi-Colored Tote Bag with Fabric Scraps
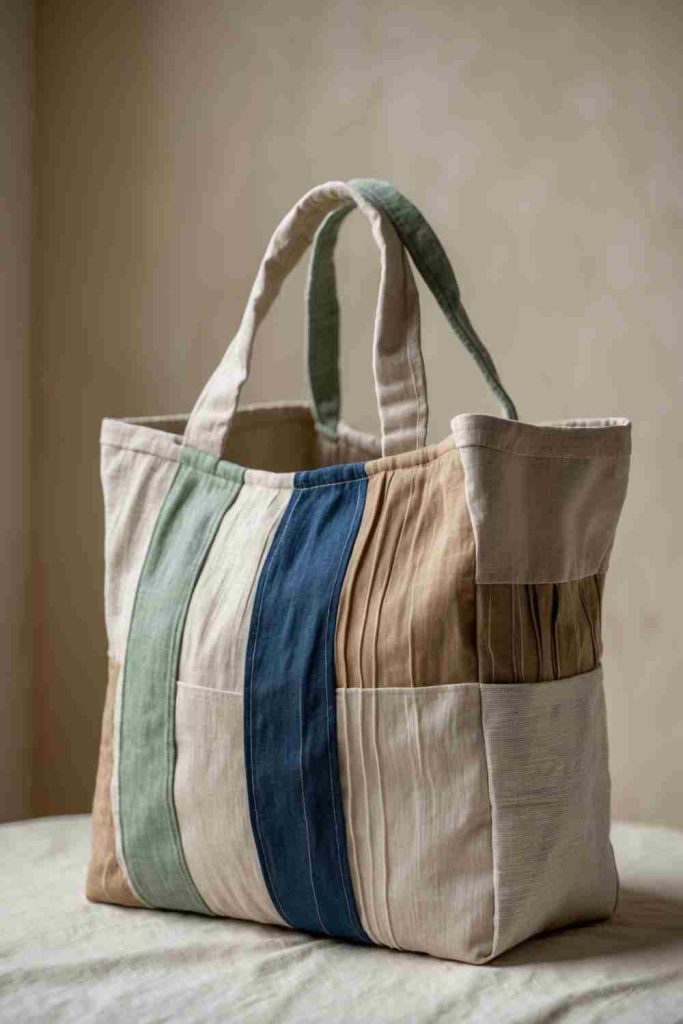
Fabric scraps can become the entire outer layer of a tote when they are first joined into organised panels. Long strips, narrow rectangles, and leftover pocket pieces work well because their irregular origins disappear once they are repeated across the front and back. A strong lining carries the load while the patchwork provides colour.
The handles and base should never depend on weak decorative scraps. Dense woven fabric, canvas, or another sturdy reclaimed textile can reinforce the shape. Combining fabrics with similar washing behaviour also reduces twisting and colour transfer after the first clean.
Materials and Tools
· Washed woven fabric scraps in a coordinated range
· Durable lining and base fabric
· Strong handle webbing or reinforced fabric handle strips
· Sewing machine or hand-sewing tools with strong thread
· Ruler, scissors or rotary cutter, pins or clips, and marker
· Optional lightweight interfacing for thin scraps
· Optional reused pocket and magnetic or snap closure suited to the design
Steps for This Upcycled Bag Project
1. Wash and sort the scraps by weight, stretch, and colourfastness. Choose a tote size that suits the amount of sound fabric and make paper front, back, and base templates. Arrange strips or panels on a flat surface, using a few quieter pieces to separate the busiest prints.
2. Sew the scraps into larger patchwork sheets with consistent seam allowances. Press only as the fabrics allow, then trim each sheet to the paper template. Add interfacing or quilt the sheet to a backing when thin pieces need support, and reinforce any reused pocket before attaching it.
3. Construct the outer bag and lining separately. Box or reinforce the base if the tote will carry more than light items. Insert the handles through several layers, stitch secure boxes or crossed patterns at the anchors, and keep decorative seams away from the points carrying the greatest force.
4. Join the lining to the outer bag, turn it neatly, and topstitch the opening. Test the handles with a modest evenly distributed load, then inspect the base corners and patchwork seams. Clean the tote by the most cautious method required by any fabric in the mix.
The bag feels more deliberate when the patchwork panels repeat one colour across several scraps. That small visual link can hold together prints that would look unrelated on their own.
Variation: Use shirt sleeves as narrow colour panels, add a reinforced bottle pocket inside, or make a smaller library bag from fewer scraps and one strong plain base.
Transform a Black Leather Handbag with Gold Studs
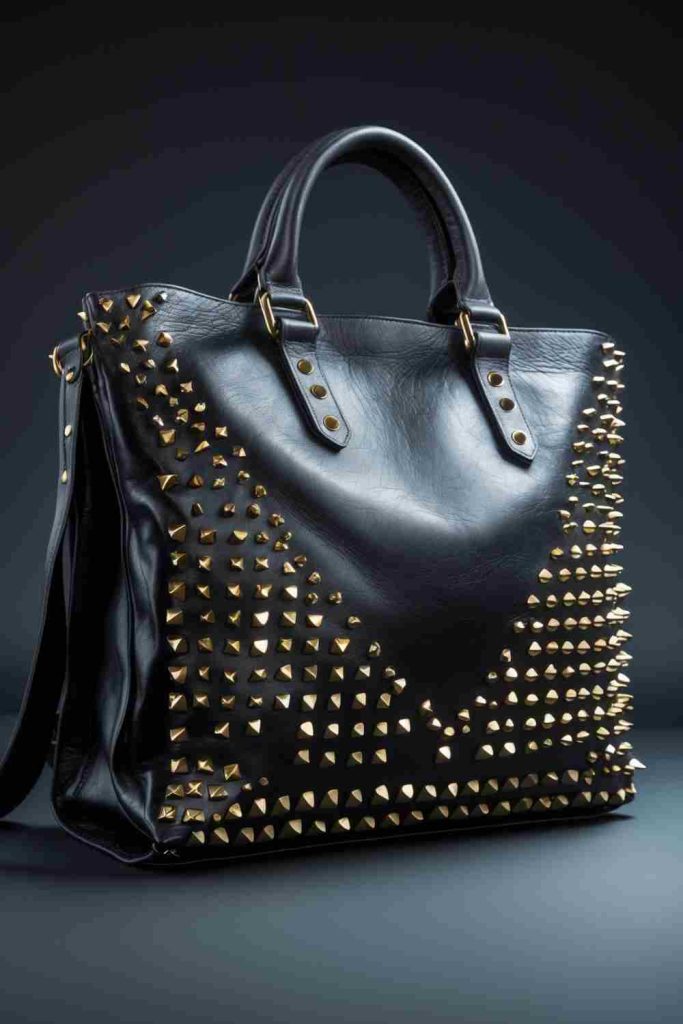
Gold studs can give a plain black handbag a sharper geometric finish, especially when they follow a flap edge, form a restrained V, or repeat an existing seam. The contrast is strong, so a small number of evenly placed studs may be enough. Keeping the pattern away from handles and high-flex areas protects both the design and the leather.
Prong-backed studs require careful setting. Every prong must fold flat and be covered inside the bag so it cannot scratch a hand, phone, or lining. Adhesive-backed pieces are easier to place but still need a surface test and may not suit a heavily handled leather finish.
Materials and Tools
· Black leather or faux-leather handbag in sound condition
· Studs with smooth finished faces and suitable backs
· Paper pattern, ruler, and removable marker or low-tack template
· Stud-setting tool or small smooth pliers appropriate to the hardware
· Protective backing material for the inside
· Clips and work-surface protection
· Compatible adhesive only if the stud type requires it
Steps for This Upcycled Bag Project
1. Check the bag structure and decide whether the surface can accept permanent holes. Make the stud pattern on paper and tape the template temporarily to the bag without marking the finish. Open and close the bag around the template to confirm the design does not cross a hinge, pocket, or magnetic closure.
2. Test one stud in a hidden or sacrificial material sample. For prong studs, make only the required openings and support the leather while pressing the prongs through. Fold every prong fully inward with the proper tool, keeping the front aligned and avoiding excessive force that could crease the bag.
3. Work outward from a central reference point so the spacing remains controlled. Check alignment after every few studs rather than finishing an entire row before looking. Place a protective lining or backing patch over the metal backs and stitch or secure that patch without trapping the closure mechanism.
4. Run a cloth gently across the front and inside to find raised edges. Carry the bag with a light load and check whether any stud rotates, catches clothing, or presses through the lining. Remove and repair an unsafe fitting rather than relying on extra surface glue around it.
The metal already makes a strong statement, so I’d stop before the bag becomes difficult to handle. A clean row often looks more polished than several competing shapes.
Variation: Add studs to a removable leather-look strap pad, use flat metal washers sewn to a fabric bag, or create one reinforced studded pocket panel rather than piercing the main handbag.
Elevate a Plain Clutch with Beads and Sequins
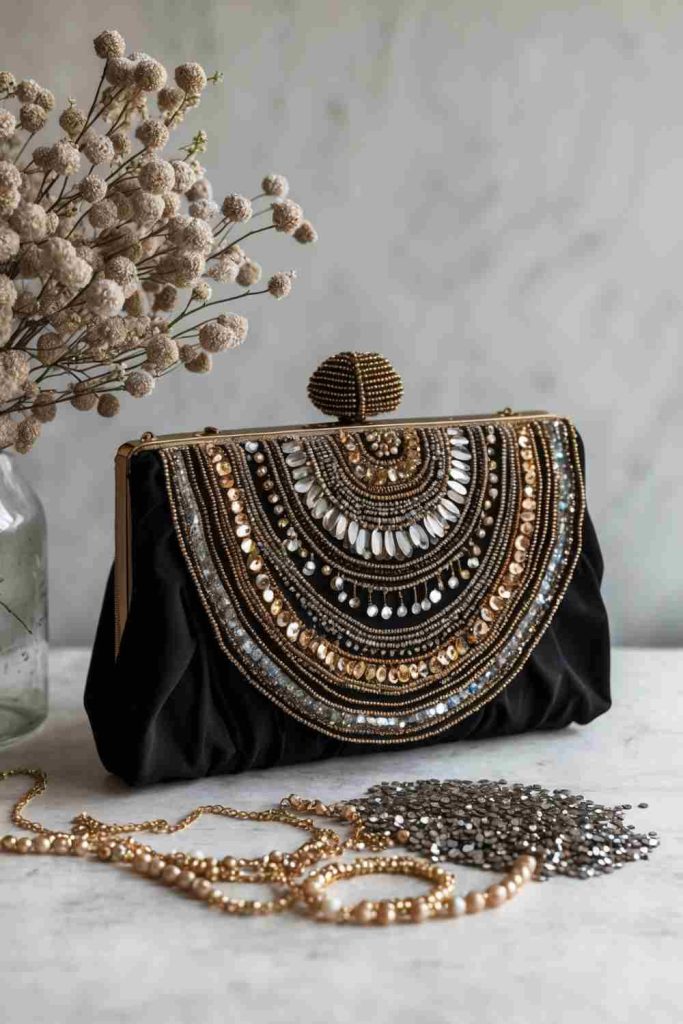
A plain clutch provides a small controlled surface for bead and sequin work. Curved bands, a central floral motif, or a border along the flap can create an evening look while leaving enough smooth fabric for comfortable handling. Lightweight embellishments are better suited to a clutch than thick clusters that make the bag difficult to close.
The design must remain flexible around the opening and protected on the inside. Beads can snag delicate clothing, and loose sequins are small-part hazards. Sewing is usually more repairable than a fully glued surface, particularly when the clutch fabric can accept a needle.
Materials and Tools
· Plain fabric clutch with working closure
· Lightweight beads and sequins without sharp edges
· Strong beading thread and suitable fine needle
· Paper motif template or removable fabric marker
· Small backing or lining patch
· Embroidery hoop only if the clutch panel can be safely separated or supported
· Scissors, bead tray, and good task lighting
Steps for This Upcycled Bag Project
1. Plan the motif on paper at the actual clutch size. Mark the closure, hinge, side folds, and the area normally held by the hand, then keep dense beadwork clear of those zones. Sort beads by size and reject pieces with rough holes that could cut thread.
2. Support the fabric with a removable backing or work from the lining access if possible. Begin at the centre of the design and sew beads in small secure groups, fastening the thread regularly. Attach sequins with flat centred stitches so their edges do not stand upright and catch.
3. Continue the design in balanced sections, checking the clutch shape after each area. Do not pull the thread tightly enough to pucker the panel. Cover knots and thread paths with a lining patch, keeping the inside smooth and leaving the closure completely free.
4. Open, close, and hold the clutch as it will be used. Brush a soft fabric across the beadwork to identify snags, then reinforce any loose piece. Store the clutch where embellishments will not be crushed, and keep it away from young children and pets.
A clutch benefits from one clear focal area. I would rather finish a small curved motif neatly than spread beads thinly across the whole surface and create more places for them to catch.
Variation: Embellish a detachable flap cover, sew a beaded vintage trim along one edge, or use flat embroidery and only a few beads for a lighter everyday version.
Transform a Plain Tote Bag with Floral Embroidery
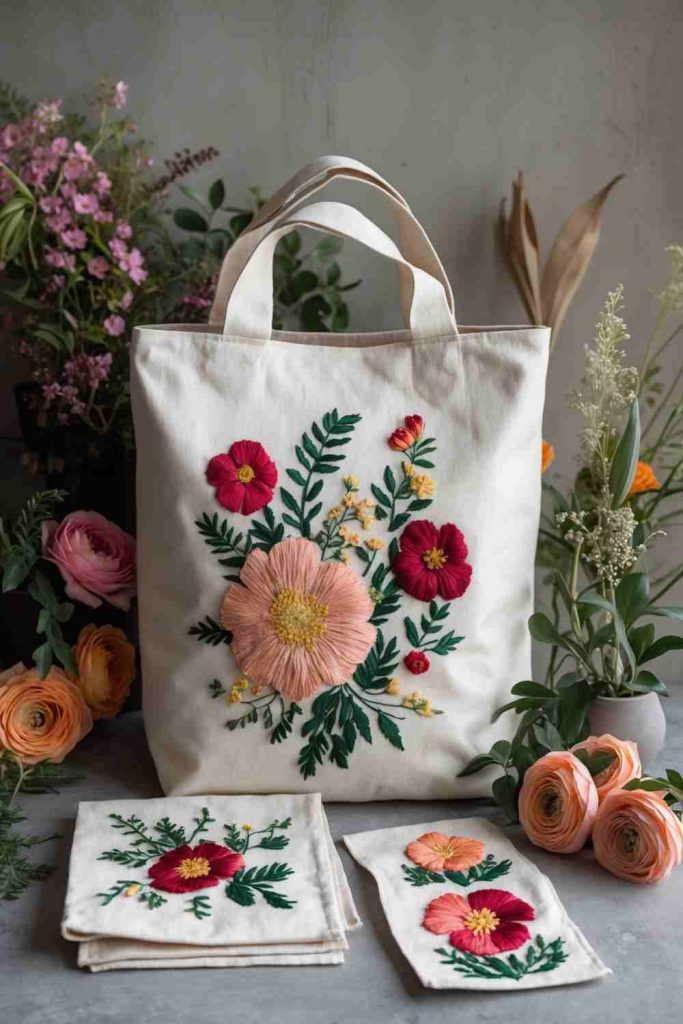
A plain tote becomes a useful embroidery canvas because its flat woven surface can hold stems, leaves, and simple flowers without changing the bag’s basic shape. A small corner garden, pocket-border motif, or vertical spray often looks more natural than centring one rigid design on the whole front.
The bag should be lined or protected behind the embroidery so thread ends do not catch belongings. The motif must also avoid handle anchors, side seams, and pockets unless those areas are deliberately opened and rebuilt. Beginners can create a strong result with only a few reliable stitches.
Materials and Tools
· Plain woven tote bag in sound condition
· Embroidery thread from leftover supplies
· Embroidery needles appropriate to the fabric
· Washable or removable fabric marker and paper motif
· Embroidery hoop if it can be placed without distorting seams
· Small backing fabric or fusible support if suitable
· Scissors, thimble, and clips
Steps for This Upcycled Bag Project
1. Wash and press the tote as its fabric allows, then slide paper inside to test motif placement. Mark pockets, handle stitching, lining seams, and the base fold. Draw a simple floral layout with open space between elements, keeping the most detailed area where the fabric lies flat.
2. Add a temporary backing if the tote fabric is thin and place the hoop without trapping handles or side seams. Stitch the main stems and outlines first, using backstitch, stem stitch, or another controlled method. Keep tension even so the fabric remains flat after the hoop is removed.
3. Build flowers and leaves with a limited stitch range. Secure threads in short sections rather than carrying long strands across the inside. Check repeatedly that no pocket has been stitched closed and that the needle has not caught both layers of a lined tote unintentionally.
4. Remove marks and stabilizer as their instructions allow, then cover the thread backs with a neat lining patch if needed. Load the tote lightly and inspect whether embroidery near the base or handles is being stretched. Wash gently according to the combined materials.
Floral embroidery does not need to fill the tote. A stem that seems slightly incomplete often feels more natural than a dense block of perfectly repeated flowers.
Variation: Embroider directly onto a reclaimed pocket before sewing it to the tote, use visible mending stitches around a stain, or make a detachable embroidered panel for seasonal changes.
Turn a Plain Leather Bag into a Boho Fringe Beauty with Fabric
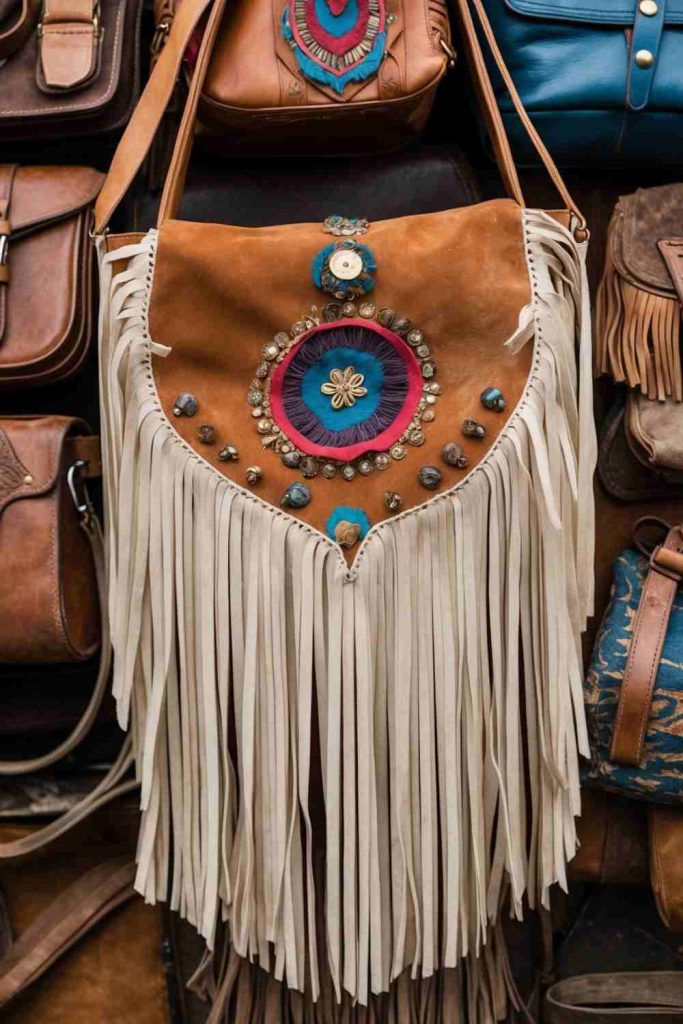
A plain leather bag can take on a softer boho character through a patterned fabric panel and a measured line of fringe. The fabric introduces colour, while the fringe adds movement along an edge that is already structurally supported. Keeping both additions removable or lightly attached makes future repairs easier.
Fringe length matters. Strands that reach the ground, tangle with zips, or catch around hands make the bag less practical. The leather should continue carrying the weight, with fabric and fringe treated as decoration rather than replacement structure.
Materials and Tools
· Plain leather or faux-leather bag with secure handles
· Patterned reclaimed fabric or a finished textile motif
· Lightweight fringe trim in sound condition
· Paper templates and measuring tape
· Clips and non-marking temporary positioning method
· Suitable leather needle and strong thread, or tested compatible adhesive
· Backing strip or removable panel base
Steps for This Upcycled Bag Project
1. Measure the front panel and lower edge, then create paper templates for the fabric motif and fringe line. Test the proportions with the bag hanging naturally, not only lying flat. Shorten the fringe until it clears the ground and does not cross a zip, clasp, base corner, or hand grip.
2. Finish the fabric motif edges with a narrow hem, lining, binding, or stable appliqué method. Mount delicate fabric on a stronger backing so it can be stitched at a few controlled points. Test any adhesive or needle hole on a hidden area before working on the visible leather.
3. Attach the fabric panel first, beginning at the centre and keeping it clear of fold lines. Add the fringe along an existing seam or reinforced backing strip rather than piercing an unsupported leather edge repeatedly. Secure trim ends so they cannot unravel or pull free.
4. Hang the bag, open it, and walk with a light load. Trim any strand that catches against clothing or hardware, and cover rough attachment points inside. Brush or separate the fringe gently after storage instead of pulling on tangled sections.
The movement of fringe already adds plenty of detail. I don’t think the centre panel needs beads, buttons, tassels, and several prints as well; one strong fabric usually gives the bag enough identity.
Variation: Make a removable fringe charm for the handle, use a narrow woven belt as the central panel, or add short fabric tassels only at the side seams.
Create a Colorful Patchwork Tote Bag with Fabric Scraps
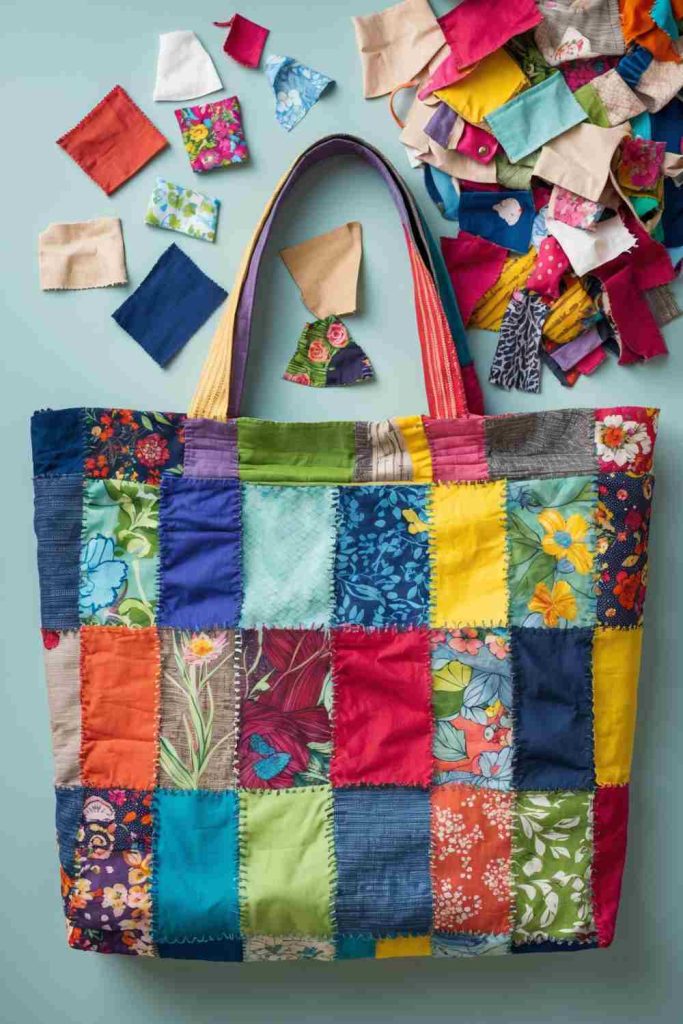
This patchwork tote uses smaller shaped pieces across a prepared base rather than building the entire bag from long strips. Squares, triangles, curved remnants, and tiny printed offcuts can form a mosaic on the front while a plain back and lining keep construction manageable. The contrast between irregular colour and a stable shape gives the project its character.
Every patch needs a finished or secured edge. Raw woven scraps may fray, and overlapping too many layers can make the bag stiff. A quilted front panel works well because the backing supports both the stitches and the varied fabric weights.
Materials and Tools
· Small washed woven fabric scraps
· Sturdy base fabric for the front panel
· Plain back, lining, and base reinforcement
· Paper shape templates or ruler and rotary cutter
· Sewing machine or hand-sewing tools with strong thread
· Pins, clips, scissors, and removable marker
· Strong handles or webbing and optional lightweight batting
Steps for This Upcycled Bag Project
1. Prepare a full-size front-panel template and draw a simple patchwork map. Sort scraps by weight and place the thinnest pieces over backing or lightweight batting. Arrange colours with some repetition, then photograph or label the layout before moving anything to the sewing area.
2. Finish or turn the patch edges, or join them into small units before placing them on the base. Stitch from the centre outward so the panel remains flat. Avoid stacking several seam allowances at one point, and trim internal bulk only after each patch is securely sewn.
3. Quilt or topstitch the completed patchwork to the base, then trim it to the exact tote shape. Construct the plain back, reinforced bottom, and lining. Insert handles through the structural layers and reinforce their anchors without depending on the decorative patches.
4. Assemble the tote and check the top edge for uneven thickness. Carry a light test load, inspect the patch corners, and reinforce any edge that lifts. Store the bag without crushing raised seams, and clean it according to the most delicate scrap used.
Irregular scraps still need a visual rule. Repeating one background colour or one shape across the panel keeps the surface lively without making it feel accidental.
Variation: Patch only one pocket, use visible hand stitching around each shape, or create a reversible tote with calm plain fabric on the other side.
Design a Patchwork Tote Bag with Handkerchiefs
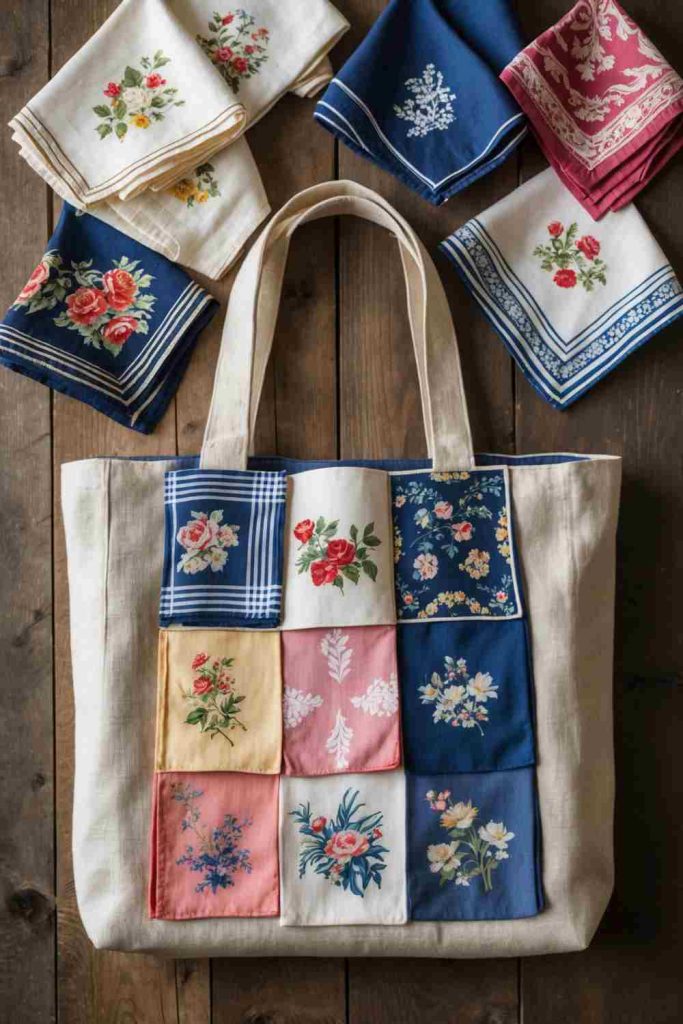
Vintage and unused handkerchiefs often carry delicate borders, floral corners, or printed motifs that disappear when they remain folded in a drawer. Joining selected sections over a strong tote base allows those details to be seen without asking the thin handkerchief fabric to support the bag’s contents.
Handkerchief cotton may be soft, worn, or slightly transparent. It should be washed carefully, tested for colour transfer, and backed before cutting. Preserving a finished border can reduce sewing and retain more of the original character.
Materials and Tools
· Clean sound handkerchiefs or lightweight scarf sections
· Strong tote base and lining fabric
· Lightweight washable interfacing or backing fabric
· Paper window templates for selecting motifs
· Fine sharp needle, suitable thread, and sewing tools
· Scissors or rotary cutter, ruler, pins, and marker
· Strong handles and optional plain binding
Steps for This Upcycled Bag Project
1. Inspect every handkerchief against light for thinning, stains, and tiny holes. Wash only as the material allows and test strong colours for transfer. Use paper windows to select floral corners and borders, keeping fragile edges out of handle anchors and the lower bag corners.
2. Back the chosen sections with lightweight support before cutting. Arrange them over a full-size tote panel and leave enough plain base visible to separate busy prints. Preserve finished hems where they improve the layout, but trim bulky folded corners that would create uneven stacks.
3. Join or appliqué the backed pieces to the structural panel with fine controlled stitching. Secure all raw edges and avoid stretching the handkerchief fabric. Construct the bag, lining, and handles from stronger material, treating the handkerchief patchwork as the visible surface rather than the load-bearing body.
4. Press only with protection and heat suitable for the fabrics. Carry a light test load and watch for strain around appliqué edges. Wash gently, support the bag while damp, and repair a loose patch promptly before the fine fabric tears further.
The nicest part of a handkerchief is often one corner, not the whole square. Cropping around that small motif can give the tote more breathing room and preserve the remaining fabric for another project.
Variation: Use whole handkerchiefs as removable pocket panels, create a drawstring gift bag, or frame the most delicate pieces and use only sturdy duplicates on the tote.
Additional Upcyclely Idea: Turn Old Jeans into a Pocketed Crossbody Bag
An old pair of jeans provides durable denim, ready-made pockets, belt loops, and topstitched details that can become a compact crossbody bag. The back pocket offers instant organisation, while the leg fabric can form the body and flap. This idea is added by Upcyclely to complete the twelve-project title and is not presented as one of the published image-based headings.
Denim seams can become very bulky, especially where hems, pocket corners, and side seams overlap. The strap anchors need reinforcement through several strong layers, and reused metal hardware should be smooth, rust-free, and appropriate for the intended load.
Materials and Tools
· Clean jeans with sound denim and useful pockets
· Strong lining fabric and optional lightweight interfacing
· Crossbody strap from reclaimed webbing, a sturdy belt section, or reinforced denim
· Suitable heavy needle, strong thread, and capable sewing machine or hand tools
· Seam ripper, scissors, ruler, clips, and fabric marker
· Smooth rings, sliders, or clips if adjustable hardware is used
· Optional zip or magnetic closure suited to the bag design
Steps for This Upcycled Bag Project
1. Wash the jeans and inspect the denim around pockets, knees, crotch, hems, and belt loops. Choose a bag size that can be cut from sound leg panels. Unpick a back pocket carefully if it will be repositioned, preserving the original topstitching and removing every loose rivet or sharp metal fragment.
2. Make paper templates for the front, back, flap, gusset, and lining. Position the pocket where it remains level when the bag hangs, then stabilize its corners. Avoid placing several original denim seams in the same final corner, because bulky intersections can prevent accurate stitching and create hard pressure points.
3. Construct the outer body and lining separately. Reinforce the strap anchors with internal denim or webbing patches that extend well beyond the attachment point. Add rings or hardware only after checking that all edges are smooth, and cover internal metal backs so they cannot scratch belongings.
4. Join the lining and outer bag, finish the opening, and attach the strap. Test the bag with a light load before adding more weight, watching the anchors, pocket corners, and flap closure. Adjust the strap so the bag sits securely without swinging excessively or pressing hardware into the body.
The existing pocket does most of the decorative work. I’d keep the rest of the crossbody bag fairly plain so the familiar denim stitching remains the focus and the structure stays easy to inspect.
Variation: Make a small phone pouch from one leg, use a belt loop as a key clip inside, or combine denim with a lined shirt-fabric flap for a lighter contrast.
Bag Upcycling Choices That Can Cause Weak Straps, Snags, or Uncomfortable Weight
An upcycled bag may look complete before it has been tested in motion. The real problems often appear when the bag is opened repeatedly, placed on the floor, filled unevenly, or carried against clothing. The following mistakes are easier to prevent before the final lining is closed.
· Decorating a bag before repairing weak handles, torn lining, split corners, or unreliable closures can hide structural damage and make later repairs harder.
· Relying on lace, handkerchief cotton, decorative patchwork, or glue as the main load-bearing layer can cause stretching and sudden separation.
· Attaching handles through one thin fabric layer concentrates all the weight in a small area; extend reinforcement well beyond each anchor.
· Placing buttons, beads, studs, or thick seams where the hand grips the bag can make it uncomfortable and increase snagging.
· Leaving stud prongs, wire ends, knots, or rough bead backs uncovered can scratch the user and damage items inside the bag.
· Using long fringe or straps without testing movement can create tripping, tangling, and catching hazards.
· Combining unwashed fabrics with different shrinkage or colourfastness can distort patchwork and transfer dye to lighter panels.
· Overloading a small clutch, mesh bag, handkerchief tote, or decorative crossbody asks the original material to perform beyond its safe role.
· Using strong adhesive over flexible folds, zip areas, or leather finishes without testing may create stains, stiffness, peeling, or damaged surfaces.
· Leaving small decorations loosely attached makes the bag unsuitable around young children and pets who may pull or swallow them.
Frequently Asked Questions
Which old bags are suitable for upcycling?
Choose a bag whose main structure, handles, base, and closure remain sound or can be repaired reliably. Surface wear, a plain colour, a small stain, or an outdated detail may be manageable. A badly cracked frame, failing strap anchor, mould, or widespread material breakdown is a reason to repurpose only the safe components.
Should I sew or glue decorations onto a bag?
Sewing is usually more repairable and better suited to washable fabric, handles, pockets, and flexible areas. A compatible adhesive can help with certain decorative surfaces, but it should be tested first and should not replace structural stitching where the bag carries weight.
Can leather handbags be sewn on a normal machine?
Some domestic machines can handle limited leather layers with the right needle, thread, settings, and material thickness, while others cannot. Test scraps first and avoid forcing the machine. Hand stitching or professional leather repair may be more suitable for thick seams and valuable bags.
How do I reinforce handles on an upcycled tote?
Extend a strong webbing or fabric reinforcement several centimetres into the bag and stitch it through the structural outer layer and lining support. Use a secure box, crossed, or similarly strong stitch pattern appropriate to the materials. Test the bag gradually rather than loading it fully at once.
Can I wash a bag made from mixed reclaimed fabrics?
Only by a method suitable for the most delicate fabric, lining, interfacing, trim, thread, and adhesive in the project. Prewashing scraps reduces surprises. Structured leather, cardboard stiffeners, metal frames, and unknown vintage materials may make full washing inappropriate.
How can I stop beads, buttons, and sequins from snagging?
Use smooth pieces, place them away from grip areas and side edges, and stitch each securely with covered thread backs. Brush a soft fabric over the completed surface to locate raised edges. A detachable embellished panel can protect the main bag and simplify repairs.
Are upcycled bags safe for children?
Small buttons, beads, studs, sequins, long cords, and detachable hardware may be unsuitable for young children. A child’s bag needs secure age-appropriate construction, short safe straps, smooth interiors, and no loose small parts. Decorative adult examples should not be assumed safe for children.
What can I use for an upcycled bag lining?
Sound cotton shirts, curtain offcuts, pillowcase fabric, and other clean tightly woven textiles can work when their weight suits the bag. Avoid brittle, transparent, or colour-bleeding fabric. Add pockets and reinforcement before the lining is installed so the outer decoration remains undisturbed.
Let the Strongest Part of an Old Bag Lead the New Design
The most reliable upcycling bag ideas begin by identifying what already works. A secure leather flap can frame lace, a sound tote can support embroidery or buttons, and strong denim can carry a pocket into a new crossbody shape. Reused decoration becomes more convincing when the original bag still opens, closes, carries, and cleans in a practical way.
Start with one manageable change and test it before adding another. Repair the structure, choose an attachment method that suits the surface, protect the lining, and keep the final weight comfortable. Then leftover fabric, lace, handkerchiefs, studs, beads, buttons, and old jeans can become useful details rather than materials waiting indefinitely in a drawer.
Which bag or fabric scrap do you already own that could become your first carefully tested upcycling project?