An old container often becomes more interesting as a vase once you stop asking whether it was designed to hold flowers in the first place. A worn metal canister, a glass jar, a boot, a teapot, or even a milk carton can already have the shape and height needed for a floral display. The useful part is often there; it simply needs a little cleaning, colour, texture, or a hidden water container to make the new purpose work well.
I’m drawn to vase upcycling because it can be as simple or as decorative as you want it to be. I don’t think every project needs to hide the original object. In many cases, the old shape is exactly what makes the finished arrangement memorable. A little wear on metal can suit a vintage display, while bright paint can make an ordinary carton feel intentional rather than temporary.
The most successful versions also stay practical. Fresh flowers still need clean water, lightweight bases still need stability, and decorative wraps should not make a container awkward to handle. I know it can feel tempting to focus only on the finish, but the vase still has a job to do. That practical balance is what keeps an upcycled vase looking good after the first photograph.
Check the Container Before You Decorate It
A vase project is much easier when the original object is still structurally suitable for its new job. Before paint, fabric, glue, flowers, or stones are added, spend a few minutes checking the base and opening.
· Make sure glass is free from cracks and sharp chips.
· Check metal containers for jagged edges, loose seams, and heavy rust before handling them.
· Wash jars, cartons, cans, teapots, and other containers thoroughly and let them dry before decorating.
· Use a separate waterproof jar or bottle inside any object that should not hold water directly, such as a boot, book, brick structure, or paper carton.
· Test whether the finished base will sit flat before adding a heavy flower arrangement.
· Keep the opening wide enough to insert, remove, and refresh flowers without damaging the decoration.
Choose Flowers That Suit the Shape of the Vase
The container and the flowers need to work together visually. A tall, narrow shape usually looks better with fewer upright stems, while a wider base can carry a fuller arrangement without appearing top-heavy.
· Use shorter stems for teapots, jars, and low metal containers.
· Choose taller stems for narrow cylinders or sturdy vertical bases.
· Balance very colourful containers with a simpler flower palette when the vase itself already has a strong pattern.
· Use greenery to soften hard materials such as brick, metal, or painted wood.
· Trim stems gradually instead of cutting everything to the same length at once.
· For faux flowers, bend or shorten stems carefully so the arrangement still looks relaxed rather than rigid.
Plan for Water, Weight, and Everyday Use
A decorative vase becomes frustrating if it leaks, tips over, or cannot be cleaned. I would settle those practical details before spending time on the finishing touches.
· Use an inner glass jar whenever you are unsure whether the outer container is watertight.
· Add pebbles only when the base can comfortably support the extra weight.
· Keep glue, fabric, twine, and paper decorations away from standing water.
· Place lightweight upcycled vases where they are unlikely to be knocked by curtains, pets, or passing elbows.
· If the vase will sit on wood, add a small coaster or felt pad underneath to protect the surface.
· Make sure removable liners can still be lifted out easily for cleaning and refilling.
Chic Upcycled Vase Idea for Stunning Floral Displays
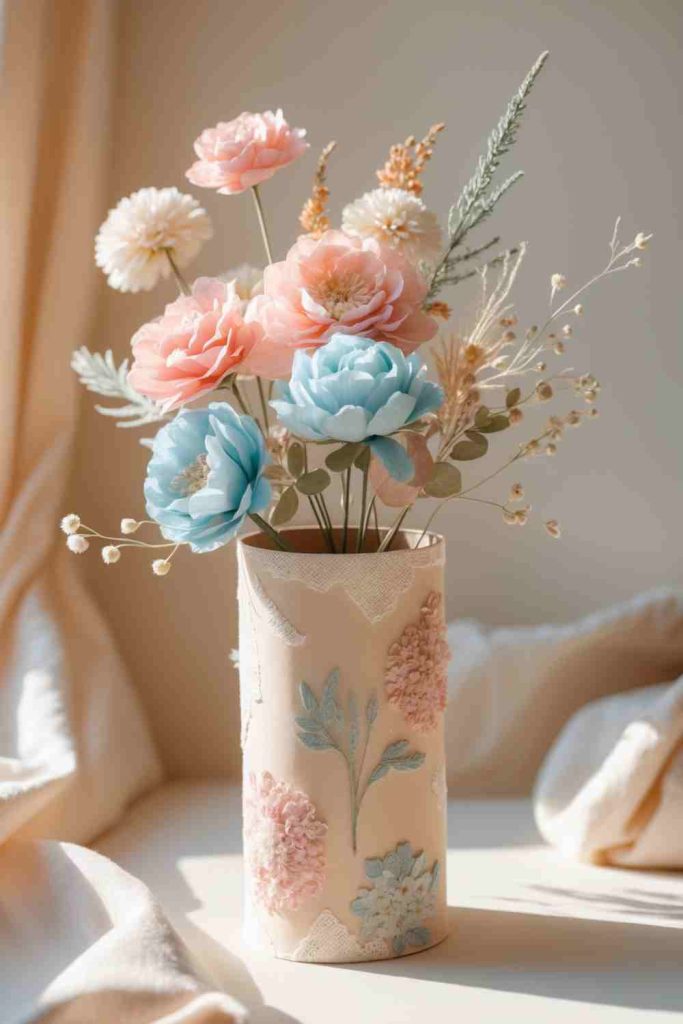
A plain or dated vase can become much softer and more decorative with a restrained painted finish. This style works especially well when the original vessel already has a useful silhouette but its colour or surface no longer fits the room. Rather than changing the shape, the makeover relies on fresh colour and small decorative details to make the vase feel considered again.
Pastel tones suit this type of arrangement because they allow the flowers to remain the main feature. Small painted dots, simple stencil details, or a narrow band of texture can add interest without turning the vase into a busy craft project. The part I would keep simple is the decoration around the widest area; once flowers are added, the composition already has plenty going on.
Materials and Tools
· Old ceramic or glass vase
· Mild soap and soft cloth
· Fine sandpaper if the surface is very glossy
· Primer or suitable base coat if needed
· Acrylic or suitable craft paint
· Small brush or simple stencil
· Fresh, dried, or faux flowers
Steps
1. Clean and inspect the vase first. Remove dust, residue, and any greasy marks, then dry it completely. If the outer surface is extremely smooth, lightly key the area you plan to paint so the new finish has a better surface to grip.
2. Choose a limited colour palette and apply the base colour in thin, even layers rather than one heavy coat. Let each layer settle before adding more paint. Then step back and check whether the original shape already looks finished before deciding that it needs extra pattern.
3. Add only a few decorative details where they will still be visible after flowers are arranged. A small stencil, a dotted border, or a delicate painted motif can be enough. I’d rather repeat one simple element neatly than cover the whole vase with unrelated decorations.
4. Once the finish is fully set, fill the vase appropriately and arrange the flowers with mixed heights. Rotate the vase as you work so the painted details and the fullest part of the bouquet face the same general viewing direction.
For me, the strongest version of this idea is one where the makeover feels like an update rather than a disguise. Keeping some visual breathing room around the pattern helps the vase look calmer.
A beginner can skip the stencil entirely and use one solid matte colour. If you want a slightly more romantic finish, tie a removable ribbon around the neck rather than gluing extra decoration permanently.
Vintage Upcycled Vase Idea for Timeless Elegance
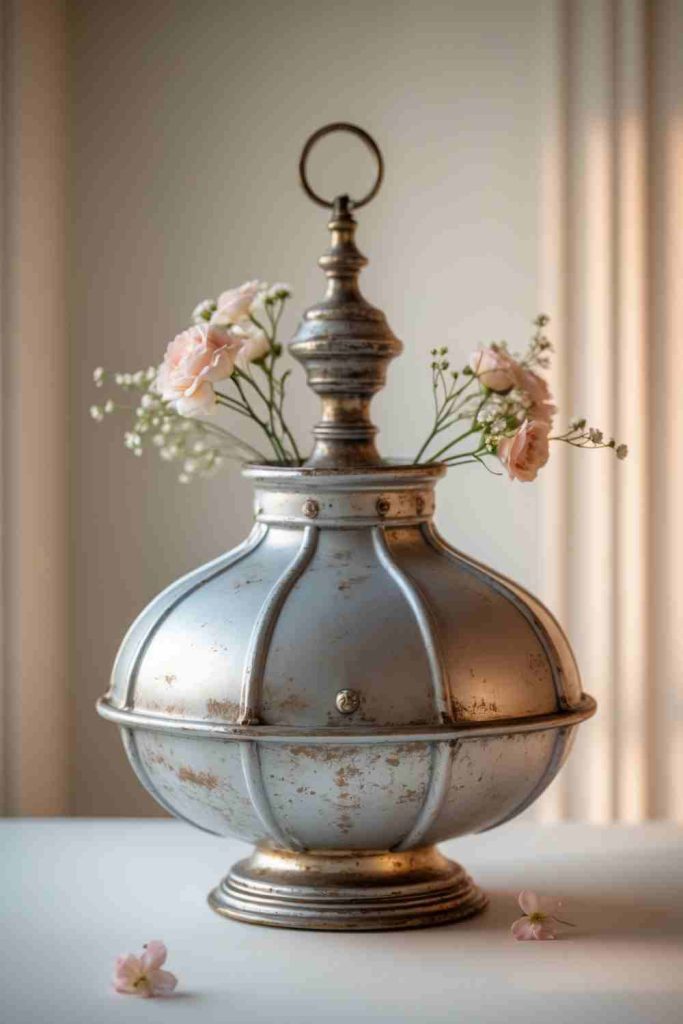
Old metal tins, jugs, and canisters often make convincing vintage-style vases because age is part of their appeal. Small scratches, softened colour, and a little patina can give the arrangement character that a newly purchased container simply does not have. The aim here is not to make the metal look brand new; it is to make sure it is clean, safe to handle, and suitable for holding the floral arrangement.
A waterproof inner jar is useful if the metal is not watertight or if you want to protect an aged interior. This also makes changing the water much easier. Soft flowers, airy filler stems, and muted greenery tend to sit nicely against an older metal finish because they balance the harder surface.
Materials and Tools
· Old metal tin, jug, or canister
· Soft brush or cloth
· Mild cleaner
· Small waterproof jar or liner if needed
· Optional clear protective finish for the exterior
· Floral foam for faux or suitable arrangements if desired
· Flowers and greenery
Steps
1. Clean the container gently without scrubbing away every mark that gives it character. Remove loose dirt and anything sharp, then check the seams and rim. If the inside is questionable, use a separate jar rather than pouring water directly into the old metal vessel.
2. Decide how much of the aged surface you want to preserve. If the exterior is stable but slightly chalky, a suitable clear protective finish may help, but test it on a hidden spot first because some coatings can darken old metal noticeably.
3. Place the inner water container or floral support inside and make sure it cannot slide around. A little packing material around the liner can help centre it, but keep anything absorbent above the water line so it does not stay damp.
4. Build the flower arrangement from the largest blooms outward, then add smaller filler stems and greenery. Turn the container as you work and keep the arrangement loose enough that the aged vessel remains visible instead of disappearing beneath flowers.
I don’t think genuine wear needs to be painted over here. Clean and stable is more important than spotless and new-looking.
If you do not have an aged metal container, a secondhand enamel jug or plain tin can give a similar relaxed feel without needing artificial distressing.
Bright & Creative Upcycled Vase Idea
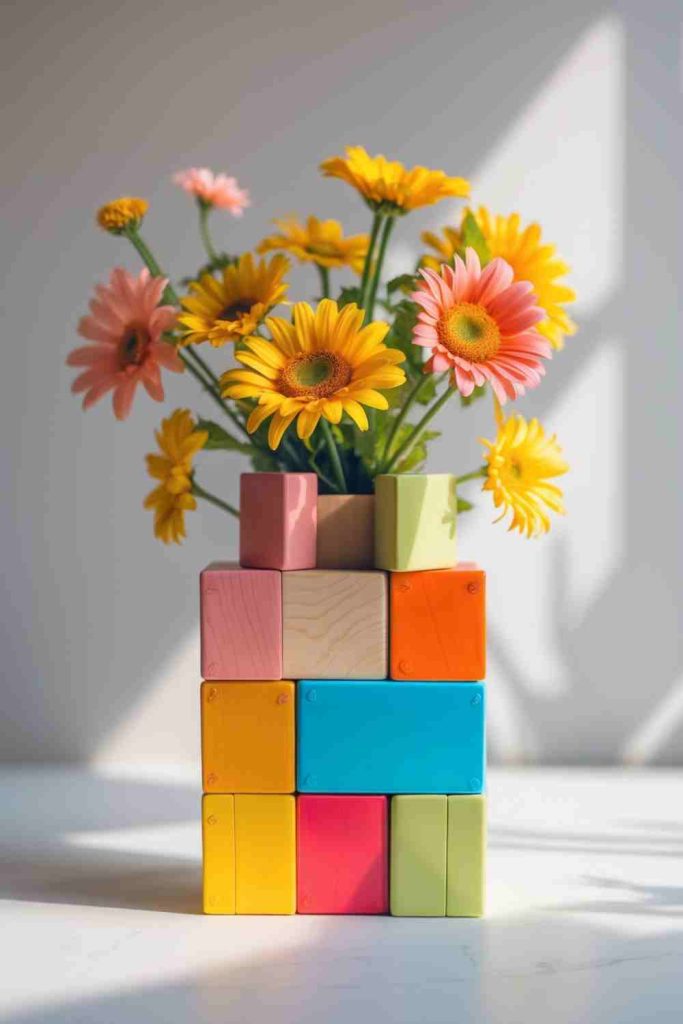
Unused wooden building blocks can become a playful vase base when they are stacked around or beneath a small jar. The colour and geometry do most of the decorating, so there is very little need for additional embellishment. This is one of those ideas where planning the structure matters more than adding fancy craft materials.
The inner jar should remain the actual water-holding vase. That keeps the wooden pieces dry and makes the arrangement much easier to refill. A block structure also needs a broad, level base because a tall bouquet can shift the centre of gravity surprisingly quickly.
Materials and Tools
· Clean wooden building blocks
· Small glass jar or narrow vase
· Wood glue or another suitable adhesive if a permanent base is wanted
· Flat work surface
· Flowers with reasonably light stems
· Optional felt pad for the bottom
Steps
1. Sort the blocks by size and test several arrangements without glue. Build a base that feels wide enough for the jar and tall flowers you intend to use. Push the structure lightly from different directions to see whether it rocks before committing to the final layout.
2. If you want the block base to stay permanent, secure the pieces a layer at a time and keep checking that the structure remains square. Avoid filling every gap with glue; a tidy joint usually looks better and is easier to control.
3. Place the jar inside or on the finished block structure and check that it can still be removed for washing. If the jar sits in a recess, leave enough finger room to lift it out instead of trapping it permanently inside the blocks.
4. Add water to the jar away from the wooden base, then insert the flowers and return the jar to the structure. Keep the bouquet fairly light and spread the stems rather than creating one heavy cluster that pulls the vase to one side.
What matters here is stability. Bright blocks already create enough visual interest, so I would spend more time testing the base than adding extra decoration.
For a calmer version, use unfinished wooden blocks in natural tones. You can also build a lower base for a single-stem jar if you want something less colourful for a shelf or desk.
Elegant Upcycled Vase Idea with Turquoise Sand & Pebbles
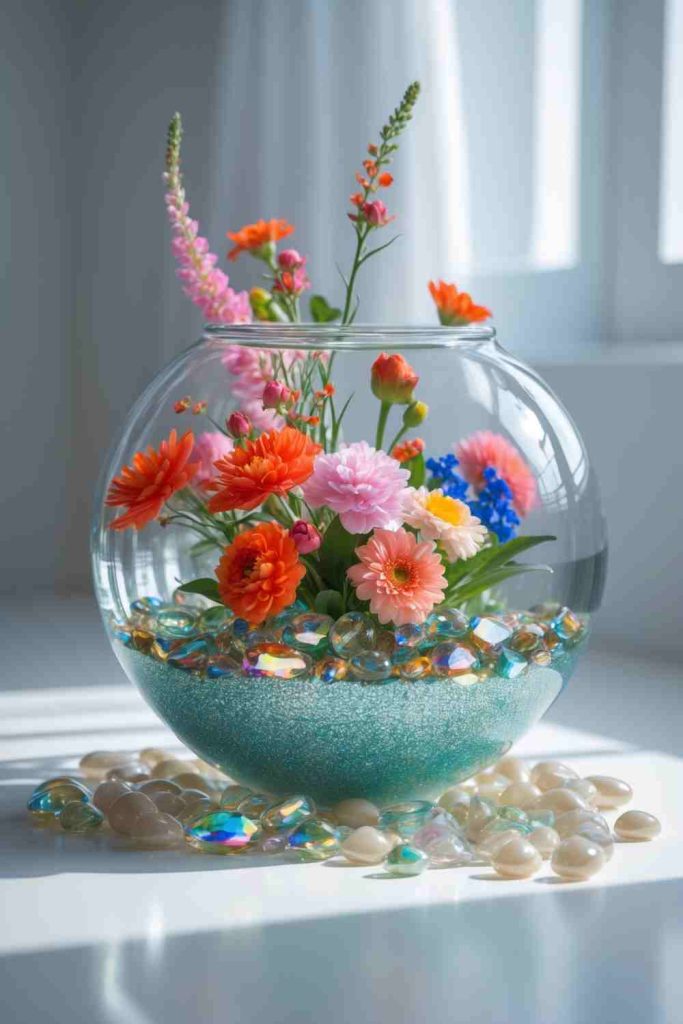
A clear vase can be refreshed without painting it at all. Coloured sand and smooth pebbles create a layered base that is visible through the glass, so the decoration sits inside the vase rather than on the outside. This approach is especially useful for plain glass vessels that feel a little empty when only a few stems are added.
The main practical question is whether you are using fresh flowers. Water can disturb fine sand, so I prefer using an inner narrow jar for fresh stems whenever the decorative layers are important to the finished look. That way the sand and stones stay in place and can be reused.
Materials and Tools
· Clear glass vase
· Decorative sand
· Smooth pebbles or small stones
· Small inner jar for fresh flowers if preferred
· Spoon or small scoop
· Flowers and greenery
Steps
1. Wash and dry the glass thoroughly because fingerprints and water marks become obvious once decorative layers are added. Set the vase on a level surface and decide how deep you want the sand layer to be before pouring anything in.
2. Add the sand slowly with a spoon or scoop, then place the stones on top one at a time rather than dropping them from height. This protects the glass and gives you more control over the pattern. Keep the layers low enough that the vase still has visual space for the stems.
3. For fresh flowers, place a slim water-filled jar inside the decorative vase if it fits the design. This keeps the sand dry and makes water changes simple. If you are using dried or faux stems, you can arrange them directly among the stones if the base is stable enough.
4. Insert the flowers and adjust the height so the arrangement does not overpower the decorative base. Rotate the vase in natural light to check that the most attractive sand and pebble area faces outward.
The coloured base should support the flowers rather than compete with them. If the sand is very bright, I’d keep the flower palette a little more restrained.
Natural sand, river pebbles, sea glass, or small shells can create a softer version. Just avoid collecting protected natural materials from places where removal is not permitted.
Luxurious Upcycled Vase Idea with Roses & Ferns
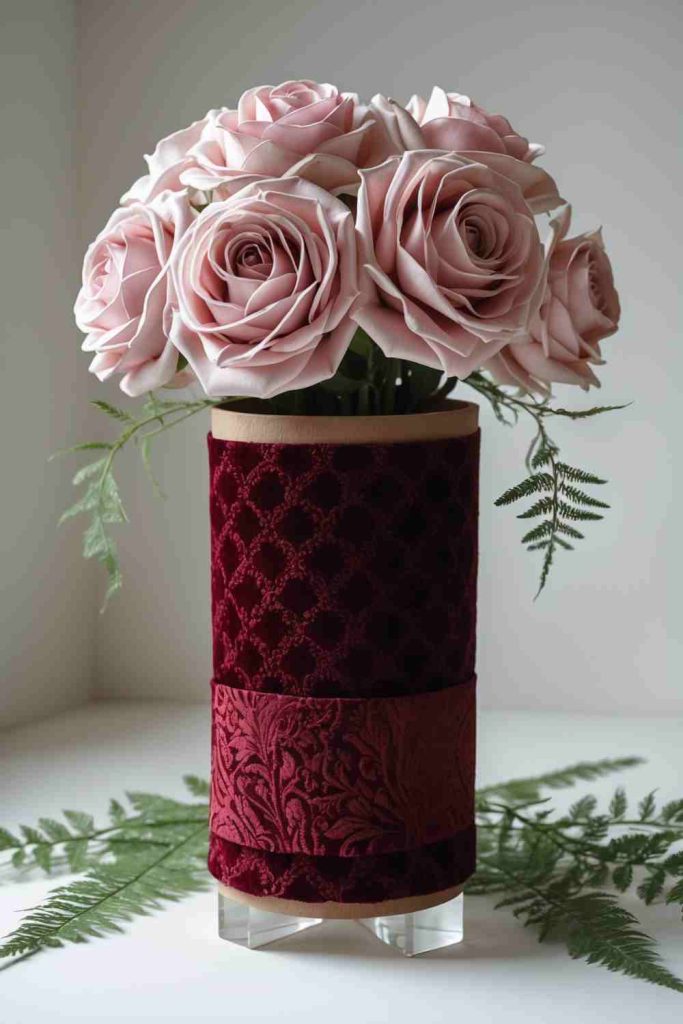
Wrapping a plain cylindrical vase or jar with textured fabric can change its character quickly. Velvet, quilted fabric, or another substantial textile adds depth and makes a simple container feel richer, especially when paired with soft roses and broad greenery. The key is keeping the fabric smooth enough that the vase still looks intentional rather than padded unevenly.
Because fabric and water do not make good neighbours, I would protect the textile by keeping the water inside the original jar or a removable liner. The outer wrap should stay dry and sit far enough below the rim that drips can be wiped before they soak into the material.
Materials and Tools
· Plain cylindrical vase or sturdy jar
· Textured fabric such as velvet or quilted cloth
· Fabric scissors
· Suitable adhesive or removable fastening method
· Optional ribbon or trim
· Roses or other soft blooms
· Fern leaves or greenery
Steps
1. Clean the vase and measure the fabric around the widest part before cutting. Leave enough overlap for a neat seam, but avoid a large bulky flap at the back. Test the placement with clips or removable tape first so you know where the top and bottom edges will sit.
2. Attach the fabric gradually, smoothing it as you work so bubbles and folds do not build up. Keep the upper edge below the lip of the vase. Then inspect the seam from the main viewing angle and rotate it toward the back if possible.
3. Add a small amount of trim only if the fabric needs a finished edge. A narrow ribbon or simple band is usually enough. I know it can feel tempting to add more because the project is meant to feel luxurious, but too much trim can quickly make the vase look costume-like.
4. Fill the water container and arrange roses at slightly different heights, then add fern or other greenery around the outer edges. Keep a cloth nearby while arranging so any drips can be wiped before they reach the textile wrap.
I would choose one strong texture and let it carry the design. The fabric, flowers, and greenery already provide three different visual layers.
A removable fabric sleeve is a practical alternative to permanent glue. It can be washed or changed seasonally, and the vase underneath remains reusable for a completely different look later.
Unique Book-Upcycled Vase Idea
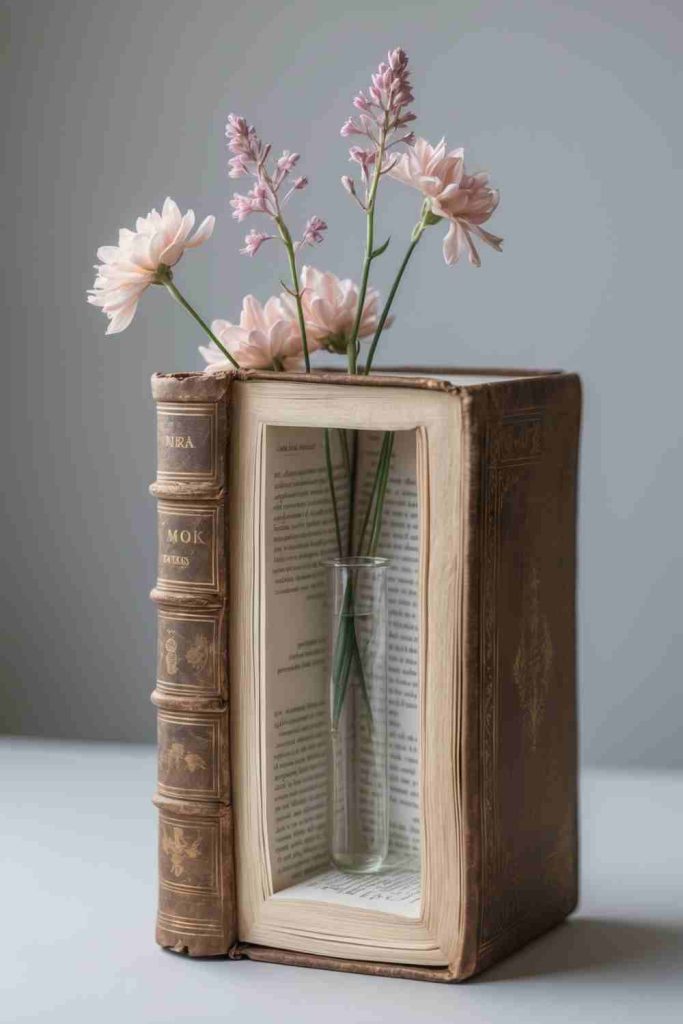
An old hardcover book can become a sculptural outer holder for a small vase, but this project needs more care than the simpler container makeovers. The book should be one you are genuinely comfortable altering, not a valuable or sentimental copy. A clear inner vase remains the practical part that holds water, while the book provides the visual structure around it.
Cutting a cavity into paper creates a lot of loose fibres and requires a sharp tool, so this is one project where patience and safety matter. Work slowly, protect the surface underneath, and keep the opening just large enough for the vase rather than removing more pages than necessary.
Materials and Tools
· Old hardcover book that is suitable for altering
· Small narrow glass vase or jar
· Cutting mat
· Metal ruler
· Sharp craft knife
· Pencil
· Clamps or heavy books for holding pages flat
· Flowers
Steps
1. Choose the vase first, then place it on the closed book and mark the approximate cavity needed. Keep a generous paper border around the opening so the remaining pages still have enough strength to support the book shape.
2. Open the cover and secure a section of pages so they stay aligned. Cut the cavity gradually through a few pages at a time, keeping fingers away from the blade path and using a cutting mat underneath. Then test the vase periodically instead of trying to reach the final depth in one session.
3. Once the cavity is deep enough, remove loose paper fibres and test the inner vase. It should sit upright without forcing the book open. If the fit is slightly loose, use a discreet removable support rather than adding excessive glue around the glass.
4. Fill the inner vase separately and lower it into the book only after wiping the outside dry. Arrange lighter stems so the book does not become top-heavy, and place the finished piece where it will not be exposed to splashes or constant handling.
One detail I wouldn’t skip is checking that the book has no value before cutting it. There are plenty of damaged or unwanted books that can be used without sacrificing something worth preserving.
For an easier version, stack two or three old books and place a bud vase on top instead of cutting into them. You keep the book-and-flower look with no blade work at all.
Minimalist Upcycled Vase Idea with Natural Charm
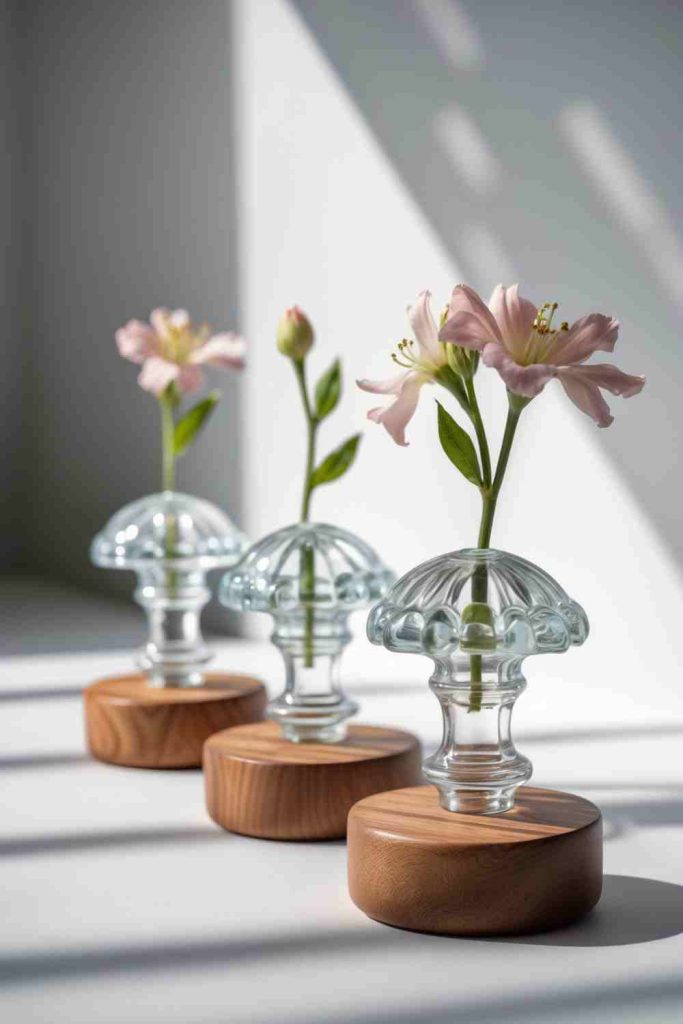
A small glass jar paired with a simple wooden base creates a quiet vase that works well with single stems. The contrast between clear glass and natural wood is enough to make the piece feel finished, so this project does not need paint, pattern, or extra trim. It is a useful approach for jars that are too plain to display alone but have a nice proportion for a small bouquet.
The main thing to consider is whether you really need to glue the two materials together. A removable glass jar sitting in a shallow wooden holder is easier to wash. Permanent attachment can work, but only if the glass remains easy to clean and the adhesive is suited to both surfaces.
Materials and Tools
· Small glass jar or bud vase
· Wooden coaster, block, small bowl, or reclaimed timber base
· Fine sandpaper for rough wood
· Suitable glass-and-wood adhesive if permanent attachment is wanted
· Optional felt pads
· One or a few simple flower stems
Steps
1. Clean the glass and prepare the wood by smoothing any splinters or rough edges. Set the jar on the base without adhesive and check the proportions from several angles. A base that is slightly wider than the jar usually feels more stable and visually balanced.
2. Decide whether the jar needs to be fixed permanently. If you use adhesive, test a small amount and follow the product directions for the two materials. Then centre the jar carefully because even a small offset becomes noticeable in a minimalist design.
3. Add felt pads underneath if the wooden base may scratch a table or windowsill. Keep the finish natural unless the wood is badly mismatched; the point of this version is the simple relationship between glass, wood, and flowers.
4. Fill the jar with a modest amount of water and add one to three stems. Turn the flower heads so they sit naturally rather than symmetrically. A little unevenness usually helps a minimalist arrangement feel less stiff.
For me, restraint matters most here. If the glass and wood already look good together, there is no need to add another decorative material.
A cork coaster, small offcut of reclaimed wood, or shallow wooden candle lid can work as the base. Several small versions displayed together can also make a stronger arrangement than one oversized piece.
Bold & Bright Brick Vase Upcycling Idea
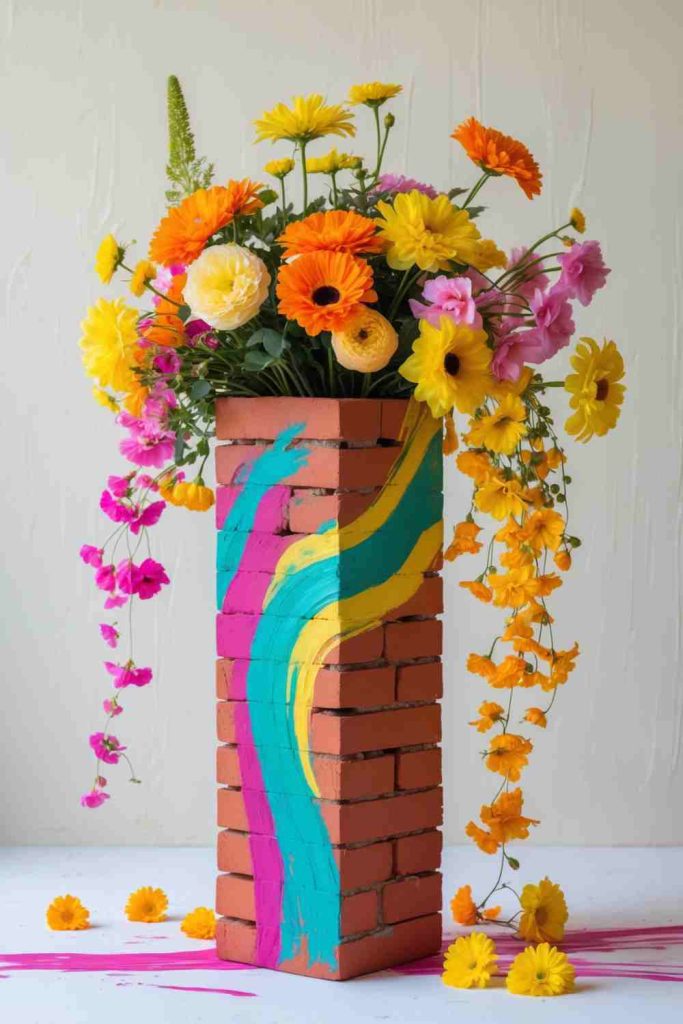
A brick-based vase is more sculptural than the average jar project. The rough masonry provides weight and texture, while bright painted patterns can make the finished piece feel playful rather than industrial. Because bricks are heavy, this idea suits a stable table, patio surface, or sheltered outdoor spot better than a delicate shelf.
The brick structure should not be expected to hold water directly. A hidden cylindrical jar or bottle does that job. I would also avoid stacking bricks too high; a low, stable column is safer and usually looks more convincing with flowers.
Materials and Tools
· Clean brick or small stable brick stack
· Stiff brush
· Acrylic or masonry-suitable craft paint for decoration
· Brushes
· Strong construction adhesive only if stacking permanently
· Hidden waterproof jar or bottle
· Flowers and greenery
Steps
1. Brush the brick clean and remove loose grit before painting. Test the chosen arrangement on a flat surface and make sure the hidden water container can fit inside or behind the structure without forcing the bricks into an unstable position.
2. Paint the decorative pattern in broad simple shapes. Wavy stripes, colour blocks, or repeated marks suit the rough surface better than tiny details. Let the texture show through rather than trying to create a perfectly smooth painted finish.
3. If more than one brick is used, secure the structure only with a method suitable for the weight and intended location, and keep the overall height modest. Then fit the waterproof container so it can be removed for refilling without dismantling the display.
4. Add flowers with enough height to balance the visual weight of the brick, but keep the bouquet centred. Place the finished vase on a strong level surface and avoid locations where it could be knocked or where the heavy base could damage delicate furniture.
The weight is both the advantage and the limitation. It gives the vase stability, but it also means this is not a piece I would move around casually once it is filled.
A single painted brick with a narrow jar positioned in one of its openings is the simplest version. It keeps the bold look while reducing weight and construction work.
Creative Carton Vase DIY
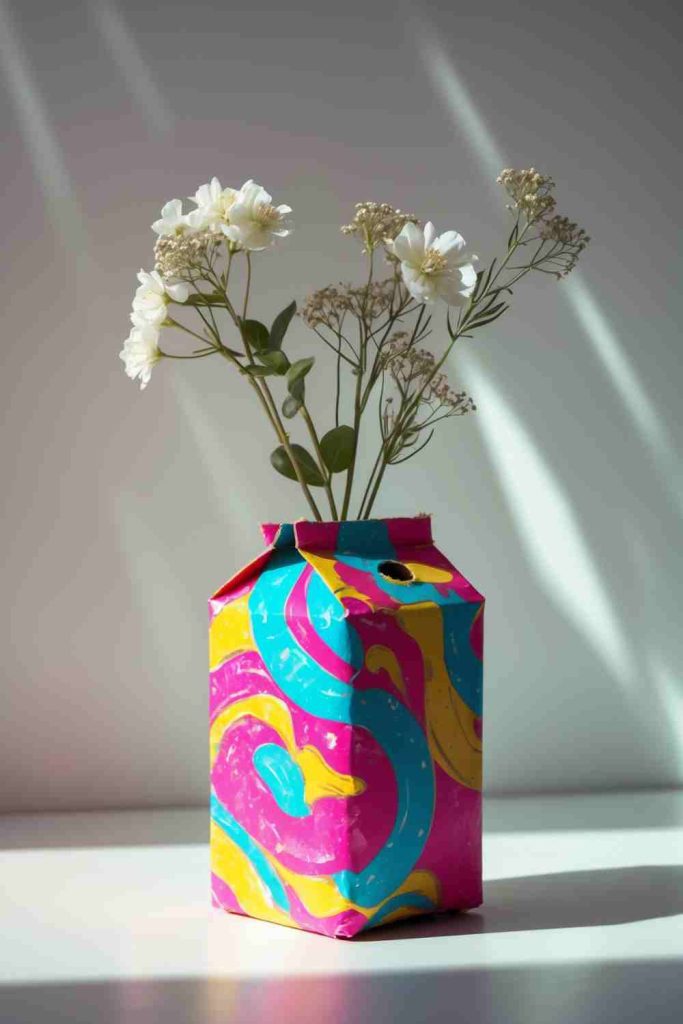
An empty drinks carton has a straightforward vase shape once the top is trimmed, and its flat sides are easy to paint. The important point is treating the carton as a decorative outer sleeve rather than trusting it as a long-term water vessel. A small jar inside makes the project far more practical and protects the painted paperboard from moisture.
This is a good surface for simple abstract patterns, stripes, or colour blocks because the sides act like little panels. The top edge deserves extra attention; a clean, level cut makes the project look much more deliberate.
Materials and Tools
· Clean empty milk or juice carton
· Scissors or craft knife used carefully
· Ruler and pencil
· Acrylic or craft paint suitable for the surface
· Brushes
· Small glass jar or reused bottle for water
· Flowers
Steps
1. Rinse the carton thoroughly and let it dry completely. Mark a straight cutting line near the top and trim the opening carefully. If the edge feels uneven, refine it before painting because a rough top line is difficult to hide later.
2. Lightly prepare the outside if necessary, then paint the main background and allow it to set before adding patterns. Keep the design large enough to read clearly on the flat panels. Then rotate the carton as you work so the pattern feels connected around all four sides.
3. Place a small jar or bottle inside the carton and check that it sits below the top edge. The liner should be easy to lift out, fill at the sink, wipe dry, and return to the carton without wetting the painted exterior.
4. Arrange the flowers in the liner, then place it inside the carton. Keep the bouquet light enough that the paperboard outer sleeve is not crushed or distorted, and wipe away any water immediately if it reaches the rim.
I’d spend most of the effort on a neat top edge and a clean paint pattern. Those two details do more for the finished look than extra glued-on decorations.
Instead of paint, you can wrap the outer carton with leftover paper or fabric, provided the material stays dry. A narrow carton also works nicely as a simple kitchen windowsill vase.
Rustic Boot Vase DIY
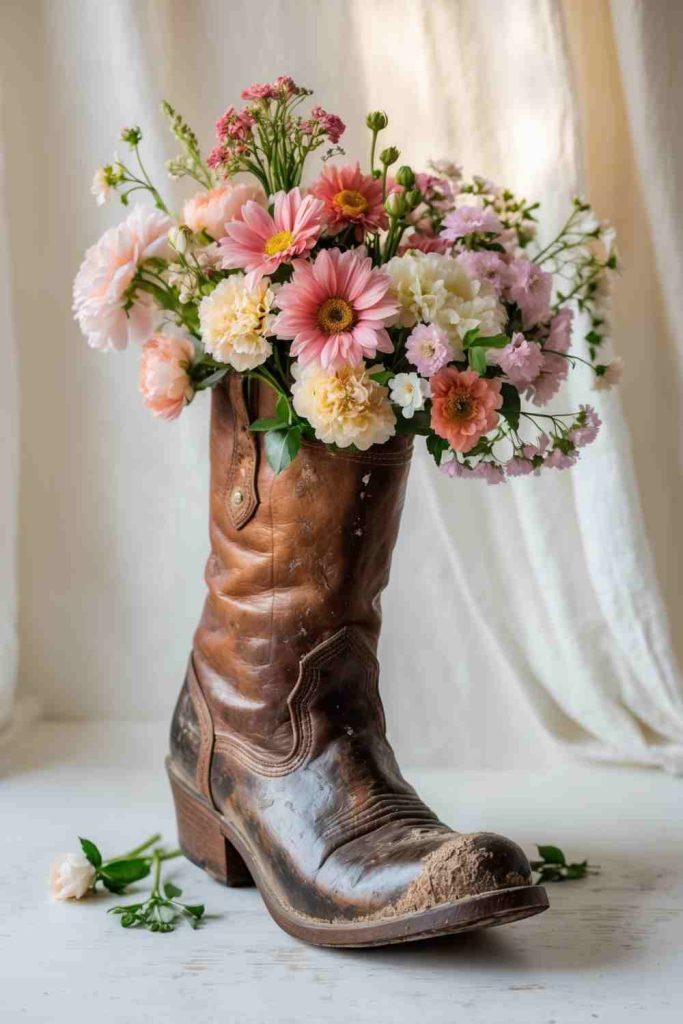
A worn boot can become a rustic flower holder without losing the features that make it recognisable. Creases, stitching, buckles, and aged leather or faux leather provide all the texture, so the boot itself needs very little decoration. The practical part happens inside, where a jar or other waterproof container protects the footwear from standing water.
Sturdy ankle or cowboy-style boots tend to work best because they can stand upright without additional support. Before using one, make sure the sole is stable and the boot is clean enough to bring into the intended display area.
Materials and Tools
· Old sturdy boot
· Soft brush and cloth
· Small waterproof jar, bottle, or liner that fits inside
· Optional packing material to steady the liner
· Fresh, dried, or faux flowers
· Protective tray or coaster if used indoors
Steps
1. Clean the outside of the boot according to its material and remove loose dirt from the sole. Check that it stands upright without rocking. Then test several jars inside until you find one that sits securely while leaving enough room to remove it later.
2. Place the liner inside and add a little dry packing material around it only if needed for support. Keep the material below the rim and away from water. The liner should remain vertical even when the boot is moved slightly.
3. Fill the jar separately and wipe it dry before lowering it into the boot. Add flowers gradually, beginning with the taller stems and using the shorter flowers to fill the front and sides. Then rotate the boot so its most interesting stitching or buckle faces outward.
4. Set the finished vase on a tray, porch table, mantel, or other stable surface. If you are using fresh flowers indoors, remove the jar for every water change rather than trying to pour water directly into the boot.
The boot already carries plenty of personality. I don’t think extra ribbon, paint, or glued decoration improves this particular idea unless the original surface is extremely plain.
For a lower-maintenance arrangement, use dried grasses and faux stems instead of fresh flowers. This also avoids the need for a water container inside the boot.
Vintage Teapot Vase DIY
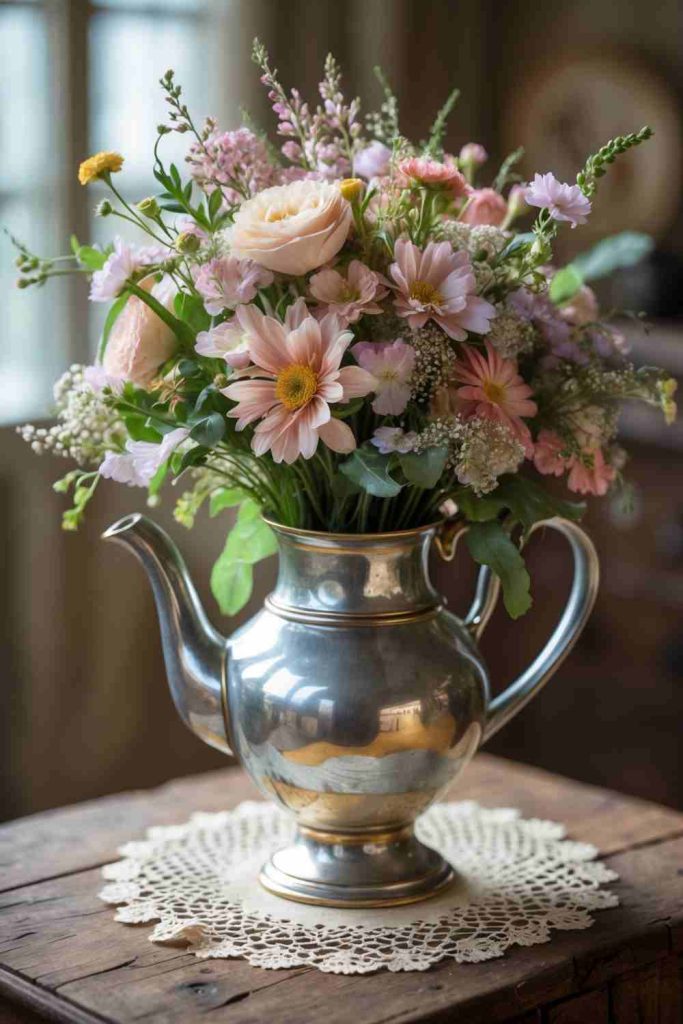
An unused teapot already has a handle, spout, stable base, and water-holding body, so it is one of the most natural objects to repurpose as a vase. Vintage metal, ceramic, or enamel finishes can all work. The flowers should complement the teapot rather than hide the spout and handle, which are the details that make the display distinctive.
Before using a teapot for fresh flowers, check whether the interior is sound and watertight. If it is very old, stained, or uncertain, a narrow liner inside is an easy way to avoid direct contact between water and the original surface.
Materials and Tools
· Old teapot
· Mild cleaner and soft cloth
· Small inner jar if needed
· Flower scissors or pruners
· Mixed flowers and greenery
· Optional doily or coaster underneath
Steps
1. Clean the teapot inside and out, then inspect the base, handle, lid area, and spout. Decide whether it can safely hold water directly or whether an inner liner would make the arrangement easier to maintain.
2. Trim the flowers gradually with the teapot beside you so you can judge the final height. Keep some stems shorter near the spout side and allow a few slightly taller stems toward the back. Then rotate the arrangement to make sure the handle remains visible.
3. Add greenery between the blooms rather than placing it all around the outer edge. This helps connect the different flower heights and keeps the arrangement from looking like a dense ball sitting on top of the teapot.
4. Place the teapot on a surface that suits its material and use a coaster or doily if you are concerned about moisture underneath. Refresh fresh flowers by lifting them out and cleaning the vessel rather than simply topping up old water repeatedly.
I like a teapot arrangement best when the spout and handle can still be seen. They are not awkward details to hide; they are the reason the vase feels different from an ordinary container.
A chipped teapot can still work for dried flowers if the damage is not sharp or structurally unsafe. Small creamers and coffee pots can create matching miniature versions.
Chic Painted Mason Jar Vase
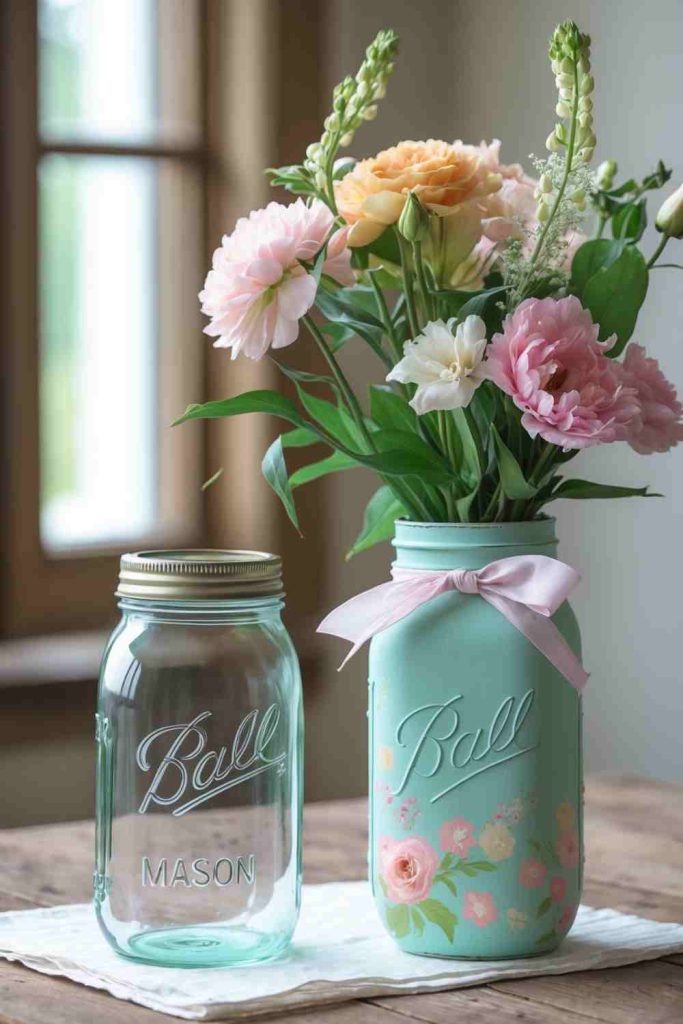
A Mason jar is a familiar vase base, but careful painting can make it feel much less ordinary. The embossed glass, threaded neck, and simple cylinder give you a useful structure for colour, small floral motifs, and removable ribbon. Because the jar is already watertight, the makeover can stay focused on the outside.
The surface needs to be very clean before paint is added. Grease or adhesive from an old label can cause patchy coverage, so preparation matters more than applying a thick layer of colour. Small hand-painted details usually look better when they are spaced rather than covering every inch of glass.
Materials and Tools
· Clean Mason jar or similar glass jar
· Label remover or mild cleaning solution
· Suitable glass primer if needed
· Acrylic or glass-suitable craft paint
· Small detail brush
· Ribbon or twine
· Flowers
Steps
1. Remove labels and adhesive completely, wash the jar, and dry it thoroughly. Handle the clean surface by the rim as much as possible so skin oils do not transfer back onto the areas you plan to paint.
2. Apply the base colour in thin coats with a brush or sponge, allowing the finish to settle between applications. Keep the threaded rim relatively clean if you want to tie ribbon around it later. Then inspect the coverage in daylight before adding decorative motifs.
3. Paint a small number of flowers, leaves, dots, or simple marks with a fine brush. Keep the motifs spaced so the jar still has some plain surface. Once the paint is fully set according to the product directions, tie on a removable ribbon or twine detail if desired.
4. Add water and arrange the flowers, keeping wet stems away from the painted outer surface. When refreshing the arrangement, wipe the jar gently rather than soaking or scrubbing decorative paint unless the finish is known to tolerate it.
I know a plain jar can feel like it needs lots of decoration, but one base colour and a few hand-painted details are usually enough to make it feel intentional.
For a simpler version, paint only the lower half of the jar and leave the top clear. You can also skip paint entirely and add a removable fabric sleeve around the middle.
Rustic Tin Can Vase DIY
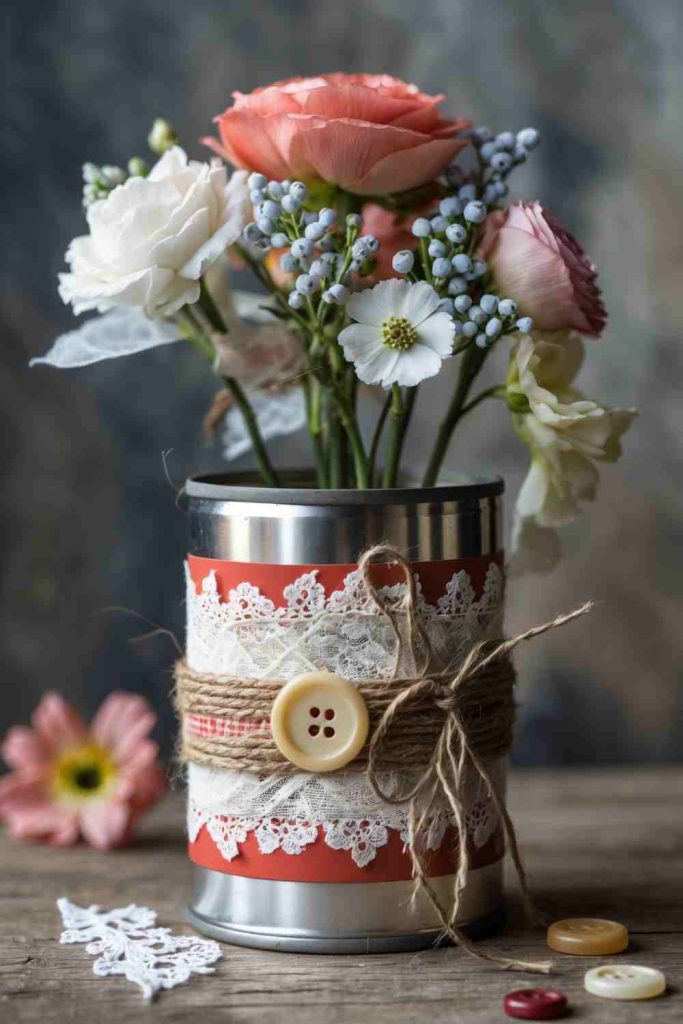
A clean tin can becomes much softer once its industrial surface is wrapped with lace and twine. This is a straightforward vase idea because the can already has the correct cylindrical form, but the rim needs to be safe and the decoration needs to stay dry. If the inner metal is in good condition, the can may hold a small water jar or liner rather than water directly.
Lace works best as a narrow band rather than a full thick wrap, because too much fabric around a small can can make it bulky. Twine adds a contrasting rough texture and also helps visually secure the lace layer.
Materials and Tools
· Clean tin can with a safe smooth rim
· Lace trim
· Jute twine
· Suitable craft glue
· Scissors
· Small waterproof jar or liner if needed
· Flowers and greenery
· Optional button
Steps
1. Wash the can and remove the label and adhesive. Inspect the top edge carefully and do not use a can with a sharp exposed rim. If necessary, choose a can opened with a smooth-edge opener or use a separate inner container that keeps hands away from the metal edge.
2. Measure the lace around the can before cutting and overlap the ends only slightly. Secure it in a neat horizontal band, then wrap twine over or around the lace. Keep glue minimal so it does not soak through and leave dark marks on the fabric.
3. Tie the twine at the front or side and add a small button only if it sits securely and does not make the decoration too heavy. Let the outer details set fully, then place the waterproof liner inside if you are using fresh flowers.
4. Arrange the flowers with enough greenery to soften the metal shape, but avoid hiding the lace-and-twine detail completely. Set the can on a coaster if there is any chance of moisture collecting underneath.
The textures are already doing the decorative work here. I’d stop once the lace, twine, and flowers feel balanced rather than adding several more rustic embellishments.
Burlap ribbon, a strip of old linen, or leftover cotton can replace lace. For a cleaner version, wrap only twine around the lower third of the can and leave the upper metal exposed.
Vase Upcycling Mistakes That Can Make a Good Idea Look Unfinished
One common problem is decorating before deciding how the vase will actually hold water. Paper cartons, books, boots, fabric-wrapped containers, and brick structures all benefit from a separate waterproof liner. Planning that liner first prevents last-minute solutions that are difficult to remove or clean.
Another mistake is adding too much weight high in the arrangement. A narrow jar, wooden block base, or lightweight carton can tip once it is filled with dense flowers. Test the empty vase, then add water and flowers gradually while checking stability from every side.
Surface preparation also matters. Paint applied over grease, label adhesive, loose rust, or dusty glass can lift or look patchy. A few minutes of cleaning often does more for the final result than an extra decorative layer.
Finally, avoid covering every original detail. A teapot should still look like a teapot, a boot should still show its stitching, and an aged tin should be allowed to keep some of its character. Upcycling becomes more interesting when the original object remains recognisable.
Frequently Asked Questions
Can I use any old container as a vase?
Not every container should hold water directly, but many can work as an outer vase if you add a clean waterproof jar inside. Check for cracks, sharp edges, instability, and materials that may be damaged by moisture before deciding how to use the object.
What is the easiest upcycled vase idea for a beginner?
A painted Mason jar, tin can with a fabric wrap, or teapot vase is usually straightforward because the original shape already works well with flowers. Choose an idea that does not require cutting heavy materials or building a complicated base for your first attempt.
Do I need to seal painted vases?
That depends on the surface, paint, and how the vase will be handled. If the decorative finish is on the outside, use a product suited to that material and follow its directions. I would avoid adding unnecessary coatings unless they genuinely help protect the finish.
How can I use paper or fabric around a vase without ruining it with water?
Keep the water inside a removable glass jar or bottle and wipe the outside dry before placing it inside the decorative sleeve. Position fabric and paper below the rim so routine drips are less likely to reach them.
Can I use faux flowers in these upcycled vases?
Yes. Faux and dried flowers are especially useful for containers that should stay dry, such as books, boots, cartons, and heavily fabric-covered pieces. You may still want a little dry filler inside to keep stems upright.
How do I stop an unusual vase from tipping over?
Choose a wider base, keep the flower arrangement reasonably centred, and avoid very heavy top growth. A removable inner jar can sometimes add useful low weight, but always test the completed arrangement before placing it near an edge.
How should I clean an upcycled vase?
Remove the flowers and inner liner first whenever possible. Clean the water container separately, then wipe the decorative outer surface using a method suitable for its material. Avoid soaking paper, fabric, old books, wood, or finishes that are not designed for repeated washing.
Let the Original Object Shape Your Next Upcycled Vase
The most useful lesson with upcycle vases is that you rarely need to rebuild an object completely. A jar already holds water, a teapot already has a stable body, a boot already has height, and even a carton already offers four flat sides for decoration. The better question is what small change will make that existing shape useful again.
Start with one container you already have and solve the practical details first: stability, water, cleaning, and a safe rim. Then add only the colour, texture, or flowers the object actually needs. That approach keeps the project manageable and makes the finished vase feel like a thoughtful reuse rather than a craft added for the sake of decoration. Which forgotten container in your home could become your next upcycled vase?