Old jeans are one of those materials that rarely become useless all at once. A waistband can still be strong when the knees are worn through, a back pocket may look better with age, and the long flat sections of a trouser leg can provide more usable fabric than many bought craft pieces. That is why I find denim especially satisfying to reuse: you can let the strongest part of the garment decide what it becomes next instead of trying to save every centimetre.
For me the most successful denim projects are the ones that respect what the fabric already does well. Denim is sturdy, textured, easy to combine with other fabrics, and forgiving enough for visible stitching. It can become a small accessory, a storage piece, a home textile, or even a new garment without losing the character of the original jeans. I don’t think every faded seam needs to be hidden either. Sometimes the pocket outline, contrast stitching, or worn blue surface is exactly the detail that makes an upcycle feel intentional.
The practical part matters just as much as the appearance. Before cutting, I would check fibre strength, seam bulk, stretch, intended load, and how the finished piece will be cleaned. Then the old jeans become useful material rather than simply a source of decoration.
Sort the Jeans by Fabric Strength, Stretch, and Useful Details
Before cutting, decide which sections of each pair are genuinely worth keeping. Rigid denim works differently from stretch denim, and a worn knee should not be used for a load-bearing handle simply because the colour looks interesting. I know it can feel tempting to begin with the most faded section, but condition should decide the project before colour decides the design.
· Check knees, inner thighs, seat, pocket corners, hems, belt loops, and waistband areas for thinning or broken fibres.
· Keep long, relatively flat leg panels for covers, bunting, quilts, baskets, and bags.
· Save sturdy back pockets for organizers, pillow fronts, book covers, storage bins, or tote bags.
· Separate stretch denim from rigid denim so pieces that behave very differently are not forced into the same structural seam.
· Wash second-hand or long-stored jeans before cutting so shrinkage, odour, and hidden damage appear before the project begins.
· Set aside thick original seams when you want texture, but avoid stacking several bulky seams in one fold or corner.
Harvest Pockets, Belt Loops, Seams, and Flat Panels Before Cutting Randomly
A pair of jeans contains more than plain fabric. Pockets are ready-made storage, belt loops can become tabs or hangers, waistbands provide strong finished edges, and side seams add structure. I would remove or map those features first because once the jeans are cut into small scraps, many of the most useful details are lost.
· Use a seam ripper when you want to preserve a pocket or belt loop neatly rather than cutting through the surrounding denim.
· Open one leg along a seam when a broad flat panel is needed for a laptop sleeve, book cover, placemat, or quilt block.
· Keep zippers, buttons, and metal hardware only when they remain smooth, functional, and suitable for the new use.
· Trim away brittle, stained, or excessively stretched areas instead of forcing them into the project.
· Label piles by likely use—flat panels, pockets, strips, thick seams, and small decorative scraps—so cutting later becomes more deliberate.
Match the Construction Method to Weight, Washing, Heat, and Everyday Use
Denim can feel almost indestructible in a pair of jeans, but a new object asks the fabric to behave differently. A tote handle carries weight, a coaster meets moisture, a dog toy is pulled and chewed, and a pot holder is exposed to heat. The original jeans were not designed for all of those jobs, so the new construction needs to compensate.
· Reinforce handles, hanging straps, organizer loops, and other load-bearing seams with multiple lines of stitching where appropriate.
· Use a suitable needle and thread for thick denim, and reduce seam bulk before turning corners or folding several layers.
· Add purpose-made heat-resistant material to any pot holder or heat-handling project; denim alone should not be assumed to provide adequate protection.
· Use washable linings or removable inserts when the finished item will collect soil, food spills, pet saliva, or outdoor dirt.
· Inspect pet projects frequently and remove them if fabric, knots, or stuffing begin to break loose.
· Decide the cleaning method before attaching decorations, adhesives, metal pieces, or mixed fabrics that may need gentler care than the original jeans.
DIY Denim Braided Headband
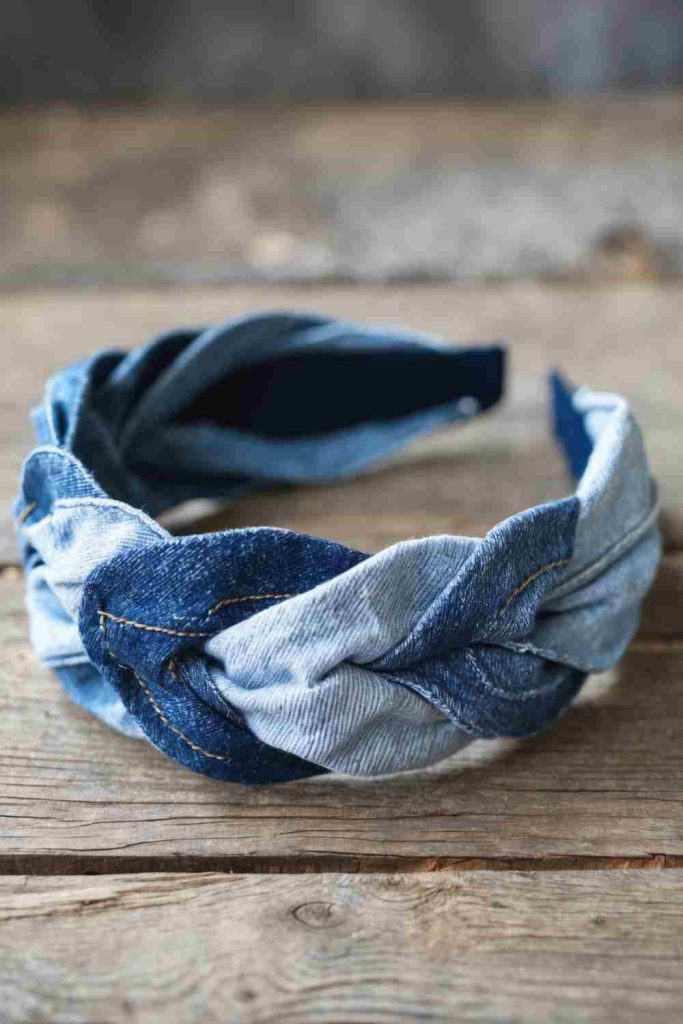
A braided headband is one of the easiest ways to use long denim strips because the fabric can stay narrow and slightly frayed without needing a large pattern. Soft, worn leg fabric usually feels better against the head than thick waistband or seam sections. The braid gives several denim shades one clear structure, so even scraps from different jeans can look connected rather than random.
Materials and Tools
· Soft denim leg scraps
· Fabric scissors
· Measuring tape
· Needle and strong thread
· Pins or clips
· Optional soft elastic or fabric-covered band
Steps for This Denim Upcycle
1. Cut strips with enough length to test the fit. Choose a relatively flat, soft section of denim and cut three long strips of similar width. Avoid heavy side seams because they create hard ridges in the braid. Leave a little extra length at both ends so the final fit can be adjusted after braiding.
2. Secure one end and make an even braid. Stack the strips, stitch or knot the starting end, and anchor it to a stable surface. Braid firmly but do not stretch one strip harder than the others. Pause occasionally to flatten twisted fabric so the front of the braid stays consistent.
3. Shape the headband around the actual head. Wrap the braid gently around the head at the position where it will be worn. Mark the comfortable joining point rather than pulling it tight. If you want flexibility, insert a short piece of soft elastic at the back instead of sewing the denim into a fixed ring.
4. Finish the ends without creating a bulky lump. Trim excess length, fold raw ends inward where practical, and stitch them securely. Check the join with your fingers and place it toward the back of the head. Remove loose threads that could catch in hair, but keep a little natural denim texture if you like the handmade finish.
For me, the braid itself provides enough detail. I’d resist adding heavy beads near the temples or behind the ears, where they can turn a comfortable accessory into something you stop wearing.
Variation: Mix one strip of denim with two strips of soft cotton from an old shirt for a lighter headband with more colour.
Upcycle Jeans into Chic Denim Bunting
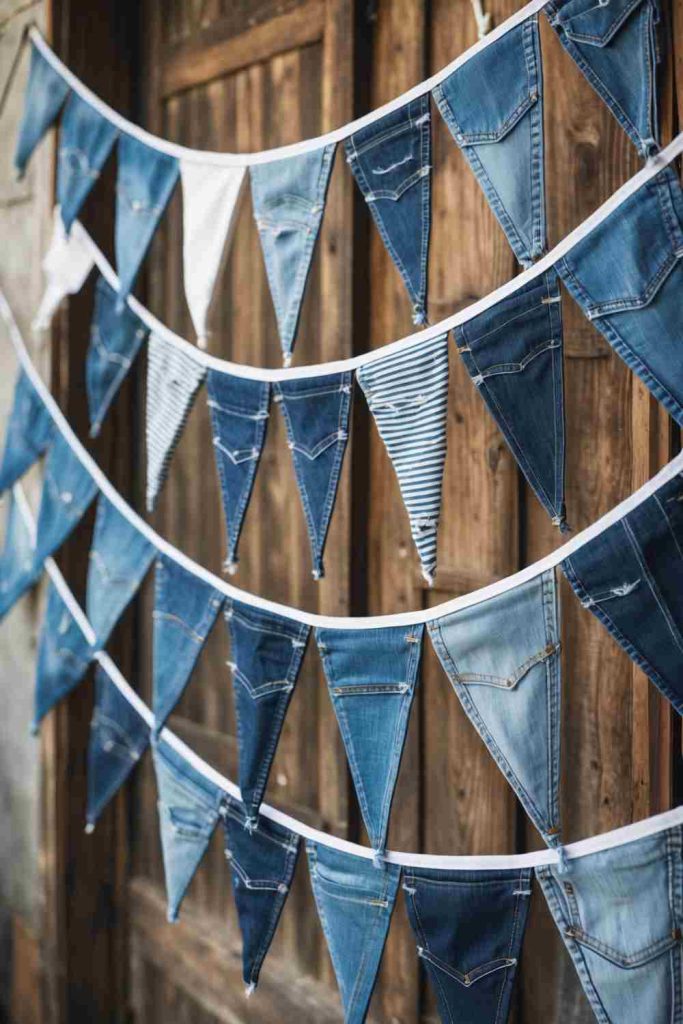
Denim bunting works well because small triangular pieces can include different washes, pockets, seams, or worn patches without needing to match. The hanging line gives those separate pieces a repeated shape, which keeps the finished decoration visually organised. It is also a good project for using medium-size scraps that are too small for bags or covers.
Materials and Tools
· Denim scraps in several shades
· Card or paper triangle template
· Fabric scissors
· Strong cotton tape, ribbon, or cord
· Pins or clips
· Sewing machine or hand-sewing needle and thread
Steps for This Denim Upcycle
1. Make one template before cutting the denim. Choose a triangle size that suits the place where the bunting will hang and make a paper or card template. Trace it onto usable denim, rotating the template around pockets and stains so each piece captures the strongest part of the fabric. Cut enough triangles to test the full length before attaching anything.
2. Decide how raw the edges should look. For a casual finish, leave the denim edges raw and run a line of stitching just inside the border to control further fraying. For a neater version, back each triangle with lighter fabric or fold a narrow top edge where it will meet the hanging tape.
3. Arrange the order before sewing. Lay all triangles beneath the cord or tape and move them until light and dark denim feels balanced. I don’t think the shades need to alternate perfectly, but repeated heavy seams should not all collect on one side. Mark the spacing so the line stays consistent during sewing.
4. Attach securely and test the hanging points. Stitch the top of each triangle to the tape, keeping the weight centred. Leave enough free tape at both ends for tying or hanging. Lift the finished bunting from both ends before trimming threads so weak joins become obvious while it is still easy to repair them.
The old pocket stitching and faded areas are useful decoration already. I would let those details show rather than covering every flag with extra trim.
Variation: Make seasonal bunting by adding removable felt shapes or ribbon ties instead of permanently changing the denim triangles.
Upcycle Jeans into Festive Denim Christmas Stockings

A stocking uses denim in a way that suits its strength: the fabric can carry small gifts, keep its shape when hanging, and support decorative stitching without needing a complex fitted pattern. Old back pockets can become useful front compartments for notes, tags, or small treats, while contrast top cuffs soften the heaviness of the denim.
Materials and Tools
· Old jeans with stable leg panels
· Paper stocking template
· Fabric scissors
· Pins or clips
· Sewing machine or strong hand-sewing thread
· Fabric scrap for cuff or lining if desired
· Ribbon or denim strip for hanging loop
Steps for This Denim Upcycle
1. Create a generous template and place it around useful jean details. Draw a stocking shape on paper and check that the opening is wide enough for the intended contents. Position the template over flat denim so thick seams do not land directly in tight curves. If you want to feature a pocket, place it deliberately on the front piece before cutting.
2. Cut two mirrored pieces and prepare decoration first. Cut a front and back with consistent seam allowance. Add any pocket, appliqué, embroidery, or fabric patch before the stocking is assembled because flat pieces are easier to sew. Keep heavy decoration away from the top edge where the hanging loop and cuff will already add bulk.
3. Sew the stocking body with reinforced curves. Place the outer sides together, pin around the edge, and stitch from one side of the opening to the other while leaving the top open. Clip or reduce seam allowance carefully around tight curves without cutting through the stitching. Turn right-side out and check that the toe and heel are smooth.
4. Build a strong hanging point and finish the opening. Fold a denim strip or use sturdy ribbon for the loop and sew it into a reinforced section near the top seam. Add a cuff or lining if desired, then test the stocking with some weight inside before hanging it. If the loop pulls the fabric into a narrow point, widen the reinforcement rather than simply adding more stitches to weak denim.
I like denim stockings most when they still look like they came from jeans. A visible pocket or original seam tells that story immediately.
Variation: Use children’s outgrown jeans for smaller stockings and keep the original pocket as the main front detail.
Upcycle Jeans into Trendy Denim Bracelets
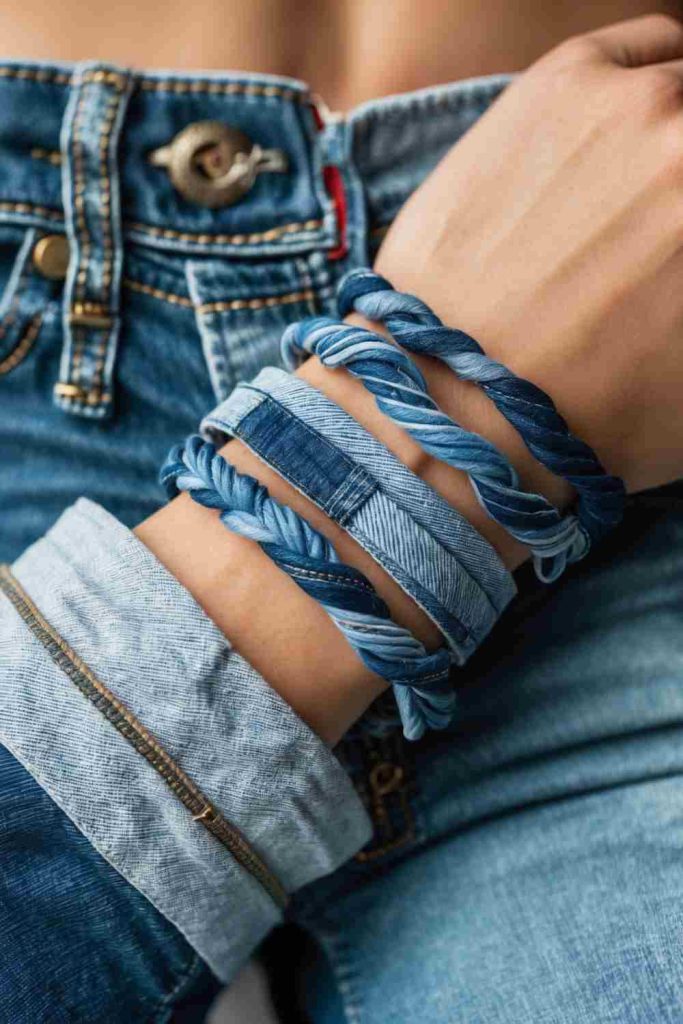
Bracelets are useful for the narrowest leftover strips, but comfort matters more than decoration. Denim that was soft enough for a knee or thigh panel usually wraps better than thick waistband pieces. A simple folded strip, braid, or layered cuff can be made from very little fabric and still show the colour variation of old jeans.
Materials and Tools
· Soft denim strips
· Fabric scissors
· Measuring tape
· Needle and thread
· Small snap, button-and-loop closure, or suitable fastener
· Optional embroidery thread
Steps for This Denim Upcycle
1. Measure for movement rather than a tight fit. Wrap a soft measuring tape around the wrist and add enough ease for comfortable movement plus room for the closure. Cut the denim longer than the final size so the ends can be folded inward. Test the strip around the wrist before adding decoration.
2. Choose a simple structure. For a flat cuff, fold the long edges inward and stitch them down. For a braid, cut three narrower strips and braid them before joining the ends. Keep bulky original jean seams out of the centre of the bracelet because they can press into the skin.
3. Add lightweight details while the bracelet is flat. Use embroidery, small fabric patches, or a line of contrast stitching instead of stacking heavy hardware. Then bend the strip into a circle and check whether the decorated section still flexes naturally.
4. Attach a closure and check the inside surface. Sew on a snap or button-and-loop system securely, or create a simple tie closure. Turn the bracelet over and remove scratchy knots or loose fibres. Wear it briefly before final trimming so you can adjust the length if the closure sits awkwardly.
A bracelet is close to the skin all day, so I’d rather keep the inside smooth than make the outside more elaborate.
Variation: Use the narrow finished edge from a jeans pocket as a ready-made bracelet strip with minimal sewing.
Upcycle Jeans into Stylish Denim Coasters
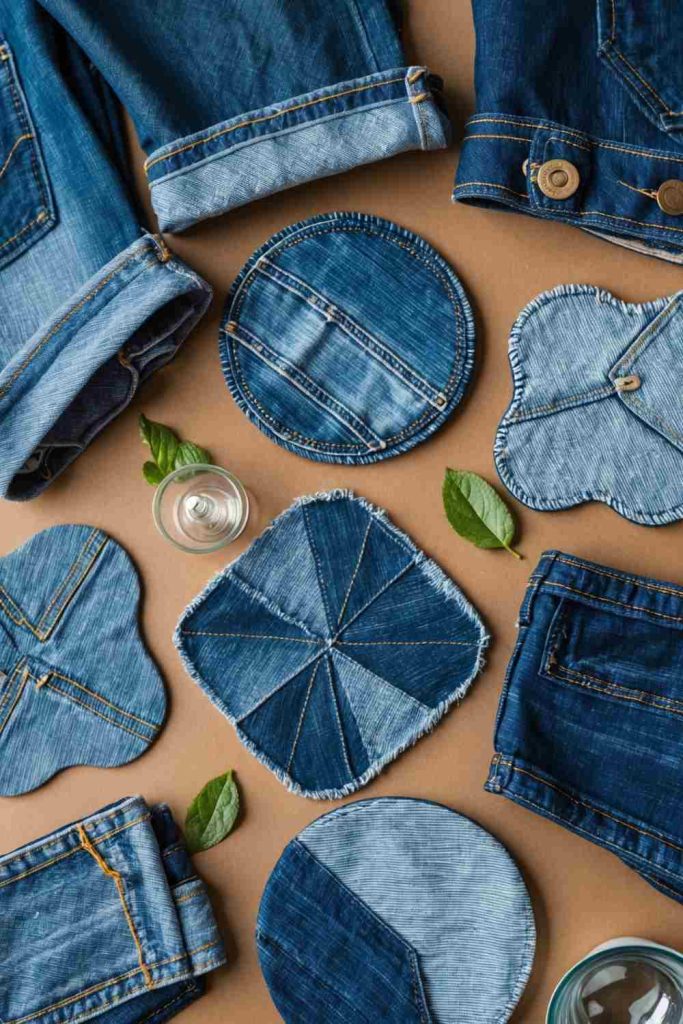
Denim coasters use small squares or circles that would otherwise become difficult-to-store scraps. The fabric can absorb minor condensation, but a single thin layer may curl or transfer moisture to the table, so a stable backing or multiple layers make the finished coaster more practical.
Materials and Tools
· Clean denim scraps
· Absorbent or stable backing fabric
· Fabric scissors
· Template or ruler
· Pins or clips
· Sewing machine or hand-sewing needle and thread
Steps for This Denim Upcycle
1. Cut matching layers from stable sections. Trace one coaster shape onto denim and backing material. Avoid placing very thick seams through the centre, where a glass needs to sit flat. Cut two or more layers and stack them to test thickness before sewing.
2. Secure the layers before finishing the edge. Pin or clip the stack so the fabric cannot shift. Stitch around the perimeter and add a small line of quilting or a central cross if the layers bubble. Keep the surface reasonably flat rather than adding raised buttons or hardware.
3. Choose a controlled edge finish. Leave a narrow raw denim edge if you want a frayed look, but stitch inside it so the coaster does not keep unravelling. For a cleaner finish, bind the edge with fabric or turn the layers before topstitching, depending on thickness.
4. Test with the actual drinkware. Place a glass or mug on the coaster and make sure it sits level. Check whether moisture reaches the table after use, then adjust future coasters with a more absorbent or water-resistant backing if needed. Wash and dry the finished set according to the most delicate layer you used.
The most useful coaster is the one that stays flat. I don’t think a decorative pocket seam is worth including if it makes the glass wobble.
Variation: Combine four small denim squares into one patchwork coaster so tiny offcuts can be used without making the finished piece flimsy.
Upcycle Jeans into Beautiful Denim Flowers
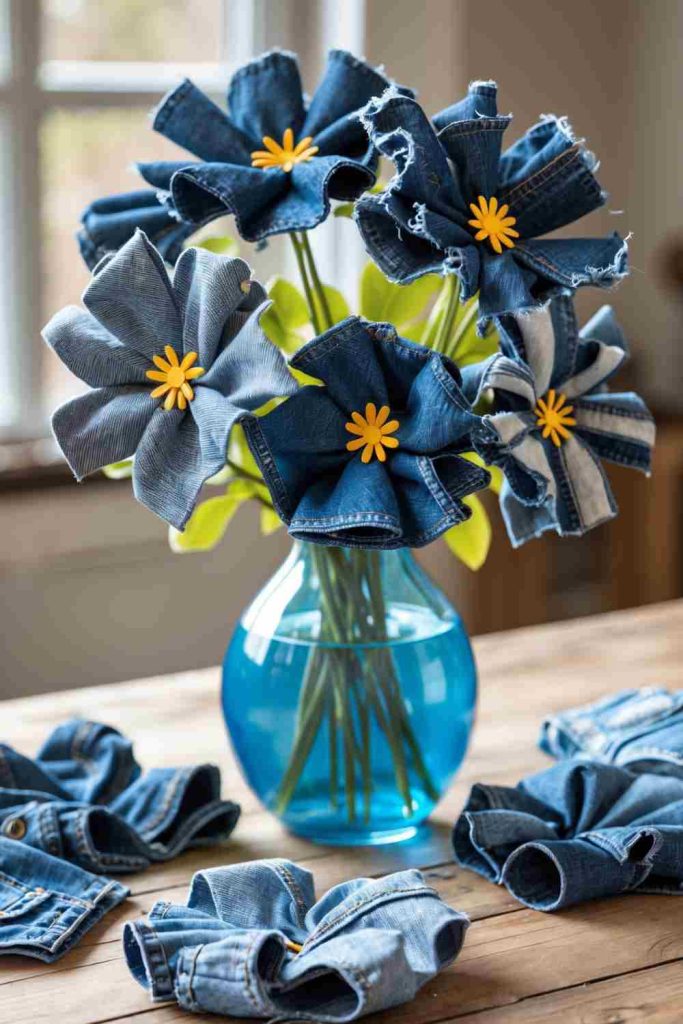
Denim flowers are forgiving because frayed edges can become part of the petal texture. They work well as brooches, wreath details, gift toppers, bag decorations, or removable accents on other upcycled projects. The main challenge is controlling thickness at the centre, where several petals overlap.
Materials and Tools
· Denim scraps in one or more washes
· Paper petal template
· Fabric scissors
· Needle and strong thread
· Small fabric circle for backing
· Optional button or stitched centre
Steps for This Denim Upcycle
1. Cut petals from the flattest usable scraps. Create one or two simple petal templates rather than several complicated shapes. Cut enough petals for a full circle, mixing washes if desired. Avoid thick original seams unless a single seam line is being used deliberately as texture.
2. Shape the petals before stacking them. Pinch or fold the base of each petal slightly and secure that fold with a few stitches. This gives the flower depth without forcing every layer to sit directly on top of the next. Lay the petals in a circle and adjust spacing before joining them.
3. Build from the outside toward the centre. Stitch the first ring of petals to a small backing circle, then add a second smaller layer if you want a fuller flower. Keep checking the back so thread tension does not pull the shape crooked. Add a lightweight centre only after the petal structure feels stable.
4. Finish according to how the flower will be used. For a brooch, sew the flower to a suitable pin backing. For home decor, attach it to fabric, a wreath base, or a stem only after checking that the centre can support the connection. Trim only the loose threads you do not want; a little controlled fraying can remain visible.
Different denim shades give the petals enough variation on their own. I’d keep the centre simple rather than adding several kinds of beads and buttons at once.
Variation: Cut narrow denim spirals and roll them into rose-like flowers when you have long scraps but not enough fabric for large petals.
Upcycle Jeans into a Stunning Denim Flower Bouquet
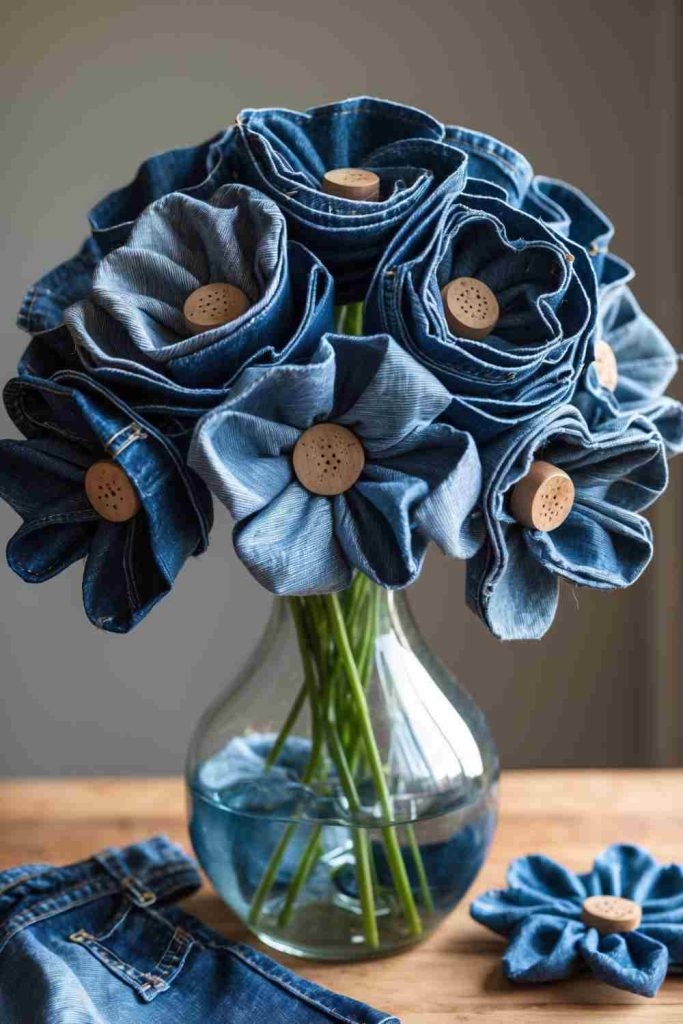
A bouquet turns several small denim flowers into one larger decorative piece. The success of the arrangement depends less on making every bloom identical and more on varying scale, wash, and stem height. Because denim is heavier than paper or thin fabric, the stems and flower bases need enough support to keep the heads upright.
Materials and Tools
· Several finished denim flowers
· Strong craft stems or suitable floral wire
· Floral tape or fabric strips
· Needle and thread
· Small backing circles
· Vase or container for arranging
Steps for This Denim Upcycle
1. Make a small family of flowers rather than identical copies. Create several denim flowers in two or three sizes and mix light, medium, and dark washes. Keep the centres relatively light so the stems do not have to carry unnecessary weight. Lay all finished blooms together before deciding which ones need stems.
2. Reinforce the base of each bloom. Sew a small fabric circle behind the flower centre so the stem attachment has a stable area. If the flower is very layered, reduce bulk at the back rather than simply pushing the stem into the middle. The back should feel firm but not like a hard knot.
3. Attach stems securely and wrap the joins. Fix each stem to the reinforced base using a method suitable for the materials, then cover the connection with floral tape or a narrow fabric strip. Tug lightly on the stem before moving on; a flower that twists now will be worse once arranged.
4. Arrange by height and visual weight. Place the taller stems first, then fill gaps with medium and small flowers. Rotate the bouquet so dark denim does not collect on only one side. Once the balance feels right, trim or bend stems as appropriate and place the bouquet in a stable container.
I know it can feel tempting to keep adding flowers, but a little space between blooms helps the denim shapes remain visible.
Variation: Mix denim flowers with fabric leaves cut from an old green shirt for a softer, lighter bouquet.
Create Gorgeous Denim Jewelry from Upcycled Jeans
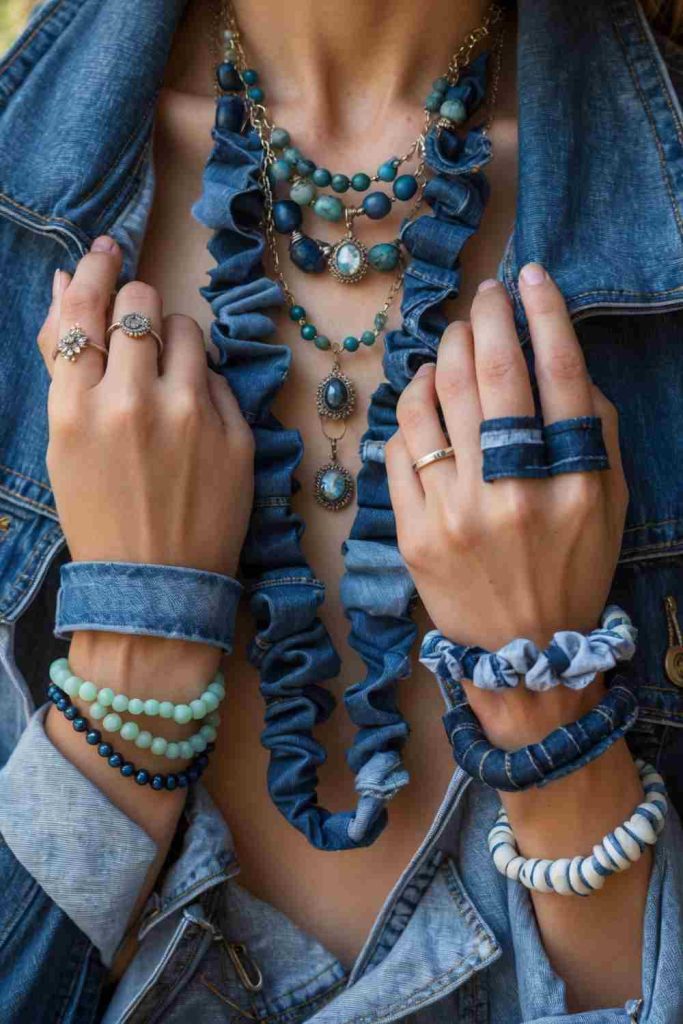
Small denim scraps can become pendants, earrings, fabric beads, or layered necklace components, but jewellery needs to stay light enough to wear comfortably. The fabric is already textured, so simple geometric pieces or rolled strips often work better than very complicated shapes loaded with metal embellishments.
Materials and Tools
· Lightweight denim scraps
· Fabric scissors
· Needle and thread
· Jewellery findings appropriate to the design
· Small pliers
· Optional lightweight beads or embroidery thread
Steps for This Denim Upcycle
1. Choose the type of jewellery before cutting. Decide whether you are making a pendant, earrings, fabric beads, or a bracelet component. Cut test shapes from paper first if symmetry matters. For earrings especially, keep the denim layers thin so the finished pair does not become heavy.
2. Stabilise or finish the denim shape. Fold raw edges inward, stitch around them, or deliberately fray a controlled border depending on the design. For rolled beads, wrap narrow strips tightly and stitch through the roll so the layers cannot unwind. Keep glue away from areas that must remain flexible unless the product is suited to that use.
3. Add findings through a secure attachment point. Do not force hooks or jump rings through a weak frayed edge. Reinforce the top of a pendant or earring with stitches or a small folded tab, then use pliers to close metal rings completely. Check every cut metal edge before wearing the piece.
4. Wear-test before adding extra decoration. Try the finished item for weight, movement, and skin comfort. If earrings pull noticeably or a pendant flips constantly, simplify the design rather than adding more components. Trim thread ends and make sure no backing or knot scratches the skin.
Denim jewellery already has contrast between soft fabric and metal findings. For me, that is enough to make a small piece interesting without covering it in decoration.
Variation: Use narrow rolled denim beads on a simple cord necklace instead of cutting flat pendants.
Upcycle Jeans into Unique Denim Pillow Covers
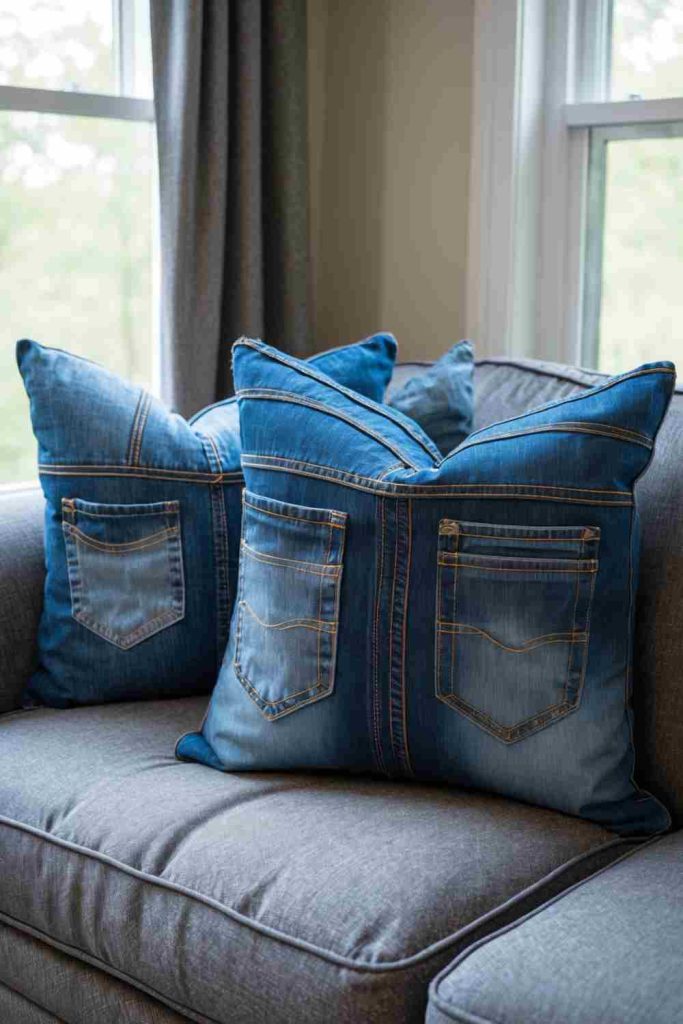
A pillow cover is one of the best places to show off pockets, faded knees, and contrast seams because the fabric lies mostly flat and does not need to flex like clothing. The main practical issue is bulk. Waistbands and several intersecting jean seams can create hard ridges, so choose decorative details carefully.
Materials and Tools
· Large flat denim panels
· Pillow insert for sizing
· Fabric scissors
· Measuring tape
· Pins or clips
· Sewing machine with suitable needle or strong hand-sewing thread
· Optional lighter fabric for back panel or lining
Steps for This Denim Upcycle
1. Measure the insert and map the jean features. Measure the pillow insert without compressing it and decide whether the cover will have an envelope, zipper, or stitched opening. Position pockets and faded areas on the front panel before cutting. Avoid placing a very thick side seam exactly where it will meet another seam at the corner.
2. Cut the front and back with usable seam allowance. Harvest one broad denim panel for the front and either denim or a compatible fabric for the back. If the denim pieces are smaller, join them into patchwork first and press the seams flat. Check the final panel against the pillow insert before assembly.
3. Sew the cover and reduce corner bulk. Place outer sides together and stitch around the planned edges. At corners, trim excess seam allowance carefully without weakening the stitches. If using an envelope back, overlap the panels enough that the insert does not show when the pillow is used.
4. Turn, insert, and check comfort. Turn the cover right-side out, work the corners gently, and add the pillow. Sit or lean against it and notice whether any original jean hardware, thick seam, or pocket rivet creates an uncomfortable pressure point. Remove or reposition hard details if the pillow is intended for regular use.
A jeans pocket on the front can be genuinely useful for a remote or small note, but I’d keep metal rivets away from the main area where someone rests their head or back.
Variation: Use denim only for the front and a softer reclaimed shirt fabric for the back to reduce weight and bulk.
Upcycle Jeans into a Creative Denim Plant Holder
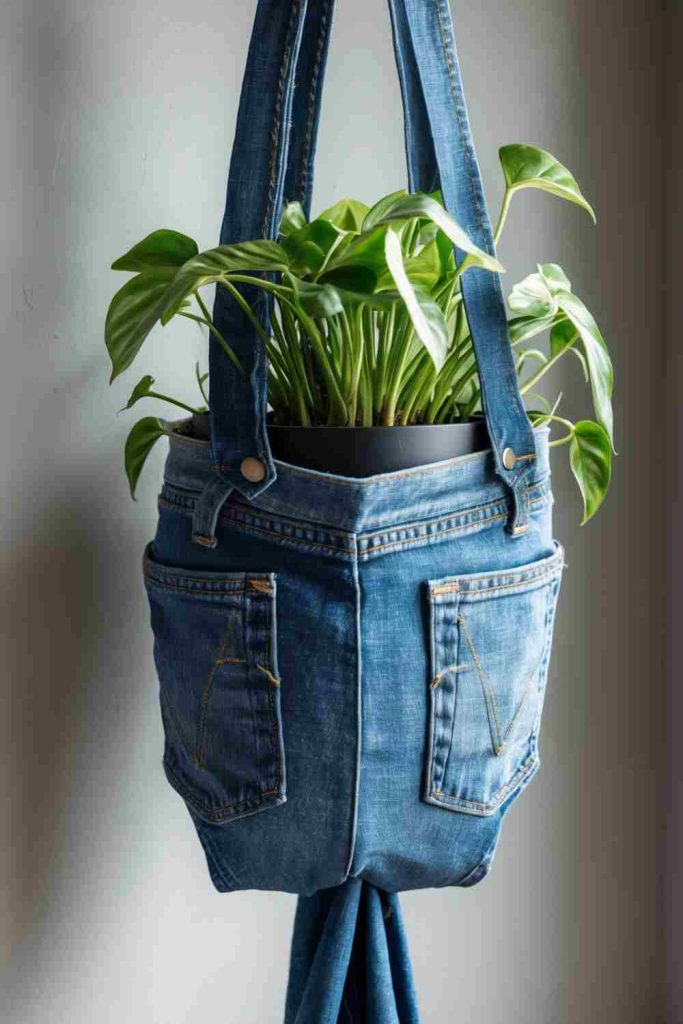
Denim makes an attractive outer sleeve for a plant pot, especially when a pocket or waistband is left visible, but the fabric should not replace the waterproof pot itself. Soil and repeated watering can keep denim damp, stain furniture, and weaken stitching. The safest approach is to treat the jeans as a decorative holder around a separate container with drainage.
Materials and Tools
· Strong denim section or upper jeans portion
· Waterproof plant pot with drainage
· Saucer or waterproof liner
· Fabric scissors
· Needle and strong thread or sewing machine
· Optional rope or reinforced denim straps for hanging version
Steps for This Denim Upcycle
1. Choose a pot before shaping the denim. Measure the actual plant pot and decide whether the denim will sit on a surface or hang. Cut a jeans leg or hip section large enough to surround the pot with a little ease. Keep original pockets only if they do not force the pot into an uneven shape.
2. Create a stable base or sleeve. For a standing holder, sew a bottom panel to the denim cylinder or fold and stitch the lower edge so the pot cannot slide through. For a simple sleeve, leave the base open and let the pot sit directly on its saucer. Do not rely on fabric glue alone for a heavy hanging planter.
3. Reinforce straps if the holder will hang. Use strong webbing, rope, or multiple-layer denim straps and attach them across a wide area of fabric. Stitch load-bearing joins several times and test the empty holder first. Then add the pot and check the hanger over a protected surface before placing it permanently.
4. Keep water inside the real pot system. Insert the plant in its waterproof pot and make sure drainage water is caught by a saucer or liner rather than soaking the denim. Remove the pot for watering if that is easier. Let the fabric dry completely if it ever becomes damp.
I like the look of a pocket on a plant holder, but the denim should remain the decorative outer layer. The actual pot still needs to do the messy work of holding soil and water.
Variation: Turn one jeans leg into a simple non-hanging cachepot sleeve and roll the top edge into a cuff.
Turn Old Jeans into a Stunning Denim Rug
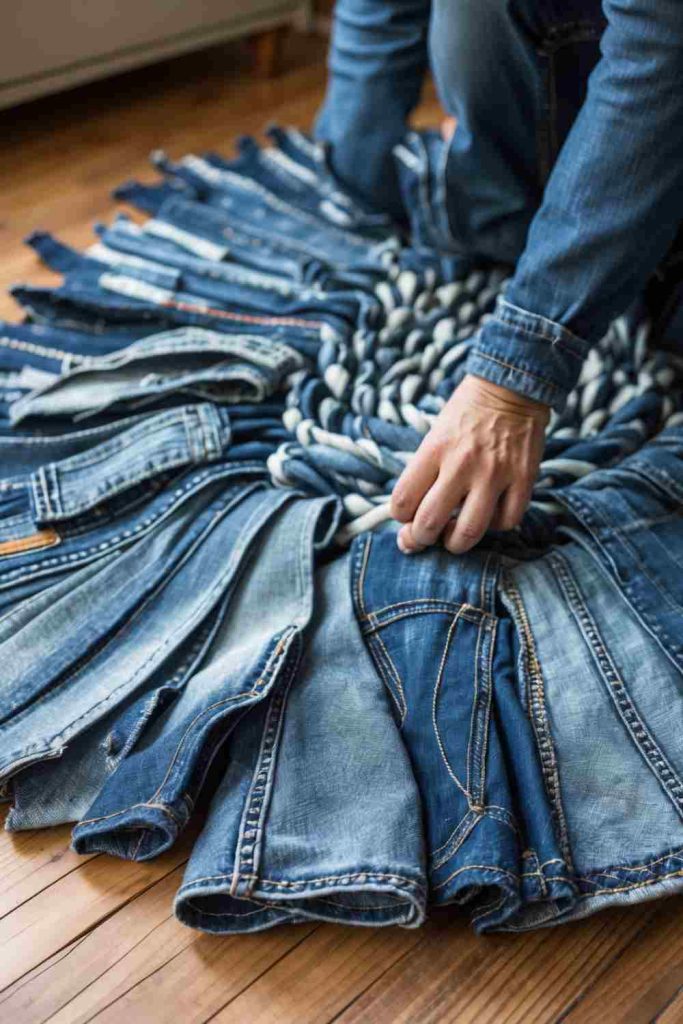
A denim rug can use large quantities of worn jeans, but it needs more planning than a small patchwork project. Thick seams can create uncomfortable ridges underfoot, while inconsistent stretch can make a rug ripple. A flat pieced, braided, or strip-based design works best when the fabric pieces are prepared to behave similarly.
Materials and Tools
· Several pairs of old jeans
· Heavy fabric scissors or rotary cutter and mat
· Strong thread
· Sewing machine suited to heavy layers or sturdy hand-sewing setup
· Measuring tape
· Optional non-slip rug backing
Steps for This Denim Upcycle
1. Prepare consistent fabric strips or panels. Open the jeans and remove excessively thick hems, waistbands, and damaged sections unless they are part of a deliberate textured design. Cut strips or patchwork pieces to a consistent width. Sort stretch denim separately so one section does not pull more than the rest.
2. Build a small flat sample first. Join a few pieces using the same seam or braid method planned for the rug. Lay the sample on the floor and check whether it curls, twists, or creates uncomfortable lumps. Adjust seam allowance and pressing before committing the rest of the denim.
3. Construct outward while checking flatness. Add strips, rows, or braided sections gradually and place the growing rug on a flat surface often. Alternate denim shades if you want a pattern, but prioritise even tension. If the rug begins forming a bowl shape or waves, correct that section immediately rather than hoping the backing will hide it.
4. Finish the perimeter and add grip if needed. Trim the rug to its final shape, secure the edge against fraying, and attach a suitable non-slip backing or use a separate rug pad where appropriate. Check that corners lie flat and that no hard rivets or metal pieces remain in walking areas.
This is a project where patience matters more than collecting more jeans. If the first few rows do not lie flat, adding another metre of denim will not solve the problem.
Variation: Make a small bedside mat from six to eight joined leg panels before attempting a room-size rug.
Upcycle Jeans into a Stylish Denim Tote Bag
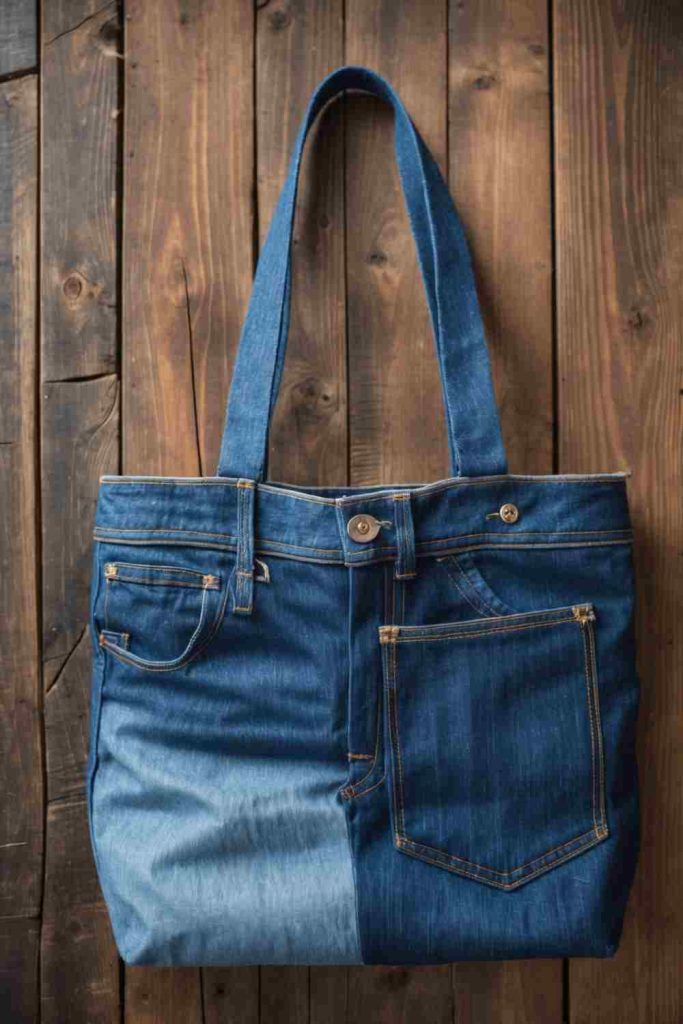
Jeans are almost pre-designed for tote bags: the fabric is sturdy, back pockets can stay functional, and a leg provides long sections for handles. The most important difference between a decorative bag and a useful one is reinforcement. Handles and the lower corners need to carry weight without pulling through the old fabric.
Materials and Tools
· Strong denim panels
· Fabric scissors
· Pins or clips
· Sewing machine with denim needle or strong hand-sewing thread
· Measuring tape
· Optional lining fabric
· Optional magnetic snap or button
Steps for This Denim Upcycle
1. Cut body panels from the strongest denim. Choose flat sections without thinning at the seat or knees. Cut two matching rectangles or build each side from patchwork, keeping seam bulk away from the top corners. If you want original pockets, position them before the body panels are finalised.
2. Sew the bag body and strengthen the base. Place the outer sides together and stitch the side and bottom seams with a durable seam finish. Reinforce the bottom corners or box them out if you want depth. Turn the bag temporarily and check the shape before trimming seam allowances.
3. Build handles from multiple layers. Fold long denim strips so raw edges are enclosed, then stitch along both sides to create firm handles. Position them symmetrically and extend the handle ends well below the top edge of the bag. Sew a box-and-cross or another strong reinforcement pattern so the load spreads through a wider area.
4. Add lining or closure and load-test gradually. Insert a washable lining if desired, keeping it clear of the handle stitching. Add a simple closure if it suits the design. Then fill the bag gradually with ordinary items and inspect the top edge, handle joins, and lower seams before using it for heavier loads.
A back pocket is one of the rare decorations that improves the tote rather than just changing its appearance, so I would preserve it whenever the fabric around it is still strong.
Variation: Use the upper hip section of the jeans as the bag body so the waistband becomes the finished top edge and the pockets remain intact.
Upcycle Jeans into a Durable Denim Dog Toy
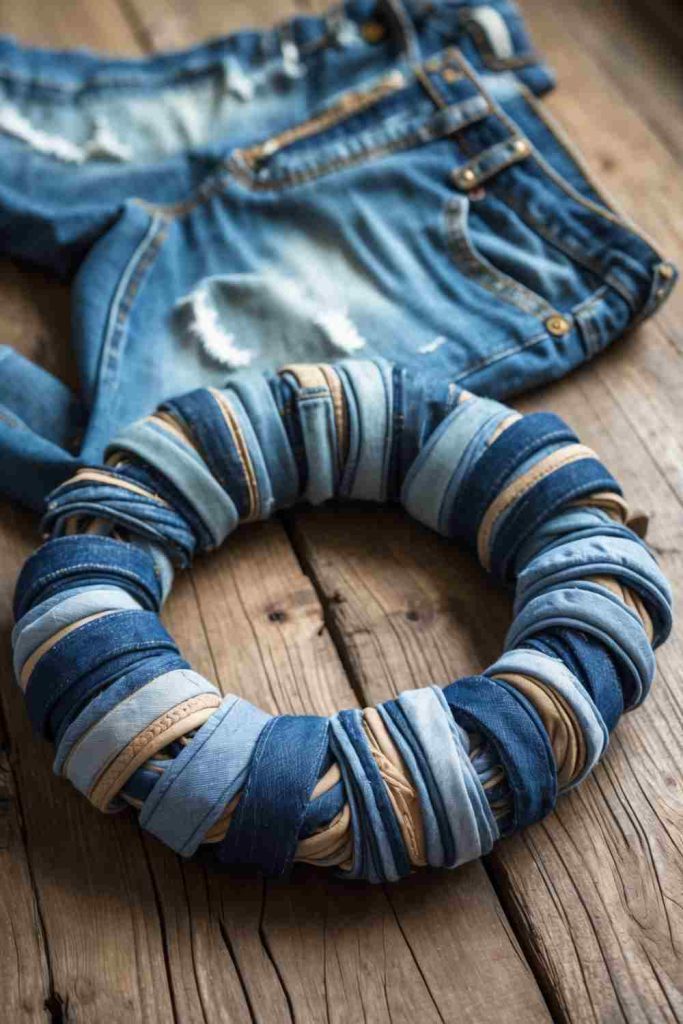
Denim can be useful for supervised tug or chew-style toys because it is tougher than many light clothing fabrics, but it is not indestructible. Dogs can tear fibres, swallow loose threads, or reach stuffing, so the finished toy needs regular inspection and should be removed as soon as it begins breaking apart.
Materials and Tools
· Clean sturdy denim without metal hardware
· Heavy fabric scissors
· Strong thread and suitable needle
· Optional clean fabric strips for stuffing rather than loose fibrefill
· Sewing machine if making a stuffed shape
Steps for This Denim Upcycle
1. Remove every hard or unsafe jean component. Use only clean fabric sections and cut away zippers, rivets, buttons, studs, and metal pieces completely. Avoid brittle or chemical-stained denim. For a tug toy, cut several wide strips from strong leg fabric; for a stuffed toy, cut two simple broad shapes without narrow projections.
2. Create a compact structure with no loose ends. For a braid, knot or stitch the starting end securely, braid tightly, then secure the opposite end. For a stuffed shape, sew the perimeter with reinforced stitching and keep the opening small. Do not add decorative buttons, plastic eyes, or other detachable pieces.
3. Close and inspect every seam. If stuffing is used, choose a material that cannot easily bunch into hard lumps and avoid overfilling. Stitch the opening several times and trim loose threads. Pull firmly on the toy before offering it to the dog so weak seams fail in your hands rather than during play.
4. Use only with supervision and retire it early. Watch how the dog interacts with the toy. If strips begin shredding, knots loosen, or stuffing becomes visible, remove the toy rather than trying to extend its life indefinitely. Wash it as appropriate and inspect it again after every cleaning.
I’d rather make a plain, tightly constructed dog toy than decorate one. Anything added for appearance can become another thing the dog may pull off.
Variation: Make a simple three-strip tug toy without stuffing for easier inspection and washing.
Upcycle Jeans into Handy Denim Fabric Baskets
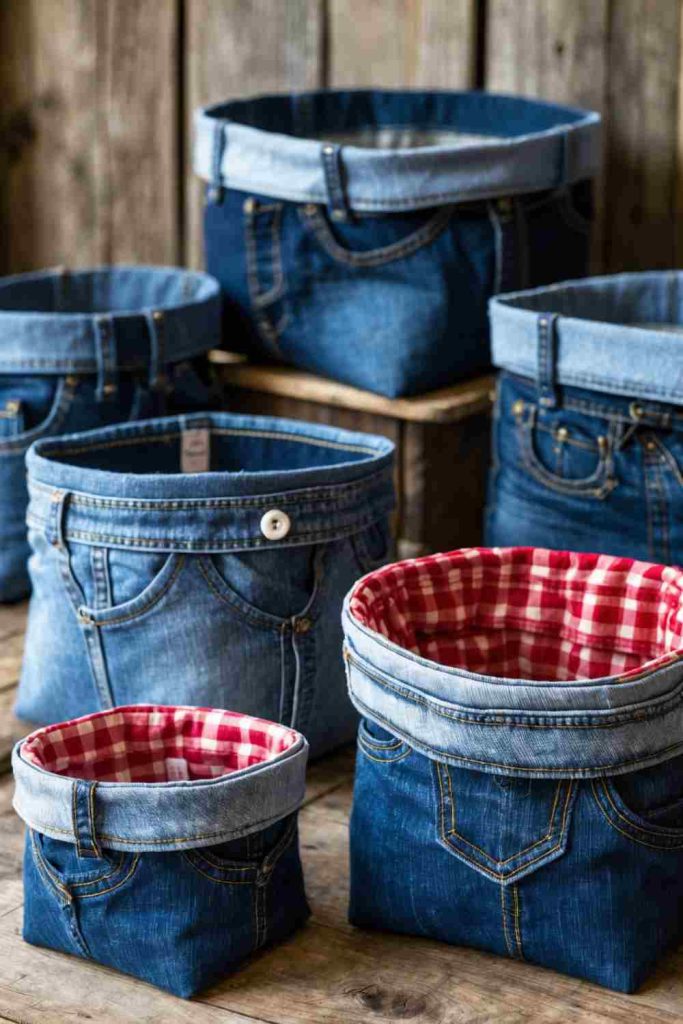
Fabric baskets are a practical use for jeans because the denim provides enough body to hold a shape while pockets and belt loops can become useful details. The main challenge is keeping the base square or circular rather than letting thick seams pull the basket to one side.
Materials and Tools
· Flat denim panels
· Fabric scissors
· Pins or clips
· Sewing machine or sturdy hand-sewing supplies
· Measuring tape
· Optional lining fabric
· Optional lightweight stabiliser
Steps for This Denim Upcycle
1. Choose the basket size from the available panels. Measure the widest usable denim area before deciding dimensions. Cut one body strip and a matching base shape, or create panels from patchwork first. Keep original jean seams away from corners where several layers already meet.
2. Form the side wall with a strong vertical seam. Join the body strip into a loop with outer sides together. Press or finger-flatten the seam allowance and test the loop around the base piece. If the denim is very soft, add a compatible stabiliser or lining before attaching the bottom.
3. Attach the base slowly around the full perimeter. Pin or clip the base evenly to the side wall, matching quarter points so extra fabric does not collect in one area. Stitch in short sections and keep checking the opposite side. Trim bulk only after you are satisfied the basket stands evenly.
4. Finish the top and add useful reclaimed details. Turn the basket right-side out and fold the top edge into a cuff, bind it, or attach a lining. Reuse a pocket on the outside for labels or small tools, and add belt loops only as light tabs rather than pretending they are heavy-duty handles unless reinforced properly.
The basket does not need to be perfectly rigid. A little softness actually suits denim, as long as the base stays flat and the opening remains usable.
Variation: Use a single wide jeans leg for a small cylindrical basket and roll the top down into a thick cuff.
Upcycle Jeans into a Trendy Denim Book Cover

A removable denim book cover protects a notebook or journal while making good use of one flat leg panel. It is also a natural place to reuse a pocket for pens or small notes. The fit needs enough ease for the book to close without pulling, especially around the spine.
Materials and Tools
· Flat denim panel
· Book or journal for fitting
· Fabric scissors
· Measuring tape or ruler
· Pins or clips
· Needle and thread or sewing machine
· Optional lining fabric
Steps for This Denim Upcycle
1. Measure the book while it is open and closed. Lay the book open on the denim and measure the full width across both covers and the spine. Add enough fabric at both sides to fold into inner flaps. Avoid a thick jean seam exactly along the book spine because it can make the cover stiff.
2. Create the inner cover flaps. Fold the left and right edges over the book covers and pin the top and bottom of each flap while the book is still in place. Leave a little ease so the book can close naturally. Remove the book before stitching so it is not accidentally caught in the seam.
3. Sew the flap edges and reduce bulk. Stitch the top and bottom of each folded flap, then trim or grade thick seam allowances where necessary. Turn and press gently if the denim allows it. Slide the book back in and check whether the covers sit fully inside the flaps.
4. Add details only after the fit works. Attach a harvested pocket, narrow bookmark strip, or small embroidered label once the basic cover opens and closes smoothly. Keep bulky decoration away from the spine and the lower edges where the book rests on a desk.
I like leaving faded stitch lines visible on a book cover. They show the previous life of the fabric without affecting how the cover works.
Variation: Line the denim with soft shirt fabric if the inside feels rough against a delicate journal cover.
Transform Old Jeans into a Chic Denim Skirt
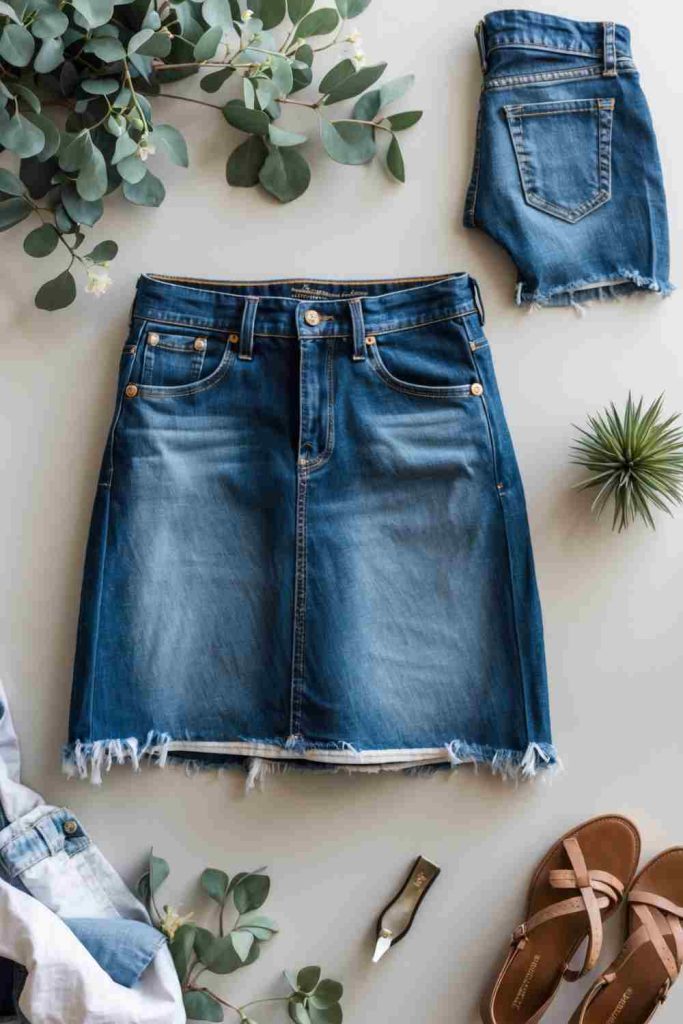
Turning jeans into a skirt keeps the fitted waistband, fly, pockets, and upper hip structure while replacing the separate legs with a more open lower shape. It is more involved than a simple craft because fit and movement matter, but it can be an efficient way to reuse jeans that still fit well at the waist.
Materials and Tools
· Jeans that fit comfortably at waist and hips
· Seam ripper
· Fabric scissors
· Pins or clips
· Sewing machine with denim needle or strong hand-sewing setup
· Chalk or removable marker
· Optional denim insert from the removed legs
Steps for This Denim Upcycle
1. Choose the finished length before opening seams. Try the jeans on and mark the intended skirt length with enough extra fabric for the hem or raw edge. Remove the jeans and cut both legs below that mark. Save the lower leg fabric because it may be needed to fill the front and back openings.
2. Open the inner leg seams carefully. Use a seam ripper to open the inseams upward until the fabric can lie flatter as a skirt shape. Do not cut blindly through the crotch seam, because that area controls fit. Spread the front and back separately and decide how much overlap or insert fabric is needed.
3. Pin the front and back into a wearable shape. Overlap the opened edges or place a triangular denim insert behind the gap. Pin from the waist downward, then try the garment on carefully before permanent stitching. Sit and walk to check that the skirt is not pulling across the hips or opening too far at the front or back.
4. Sew structural seams and finish the hem. Stitch the pinned front and back lines securely, reinforcing the points where the old inseam transitions into the new skirt seam. Trim internal bulk only after the fit has been checked again. Finish the lower edge with a hem, controlled fray, or facing depending on the style you want.
The waistband and pockets already make the piece look recognisably like denim, so I’d focus most of the effort on getting the new centre seams smooth and comfortable.
Variation: Use a contrasting denim wash as the triangular front insert instead of overlapping the original legs.
Upcycle Jeans into a Stylish Denim Bottle Holder
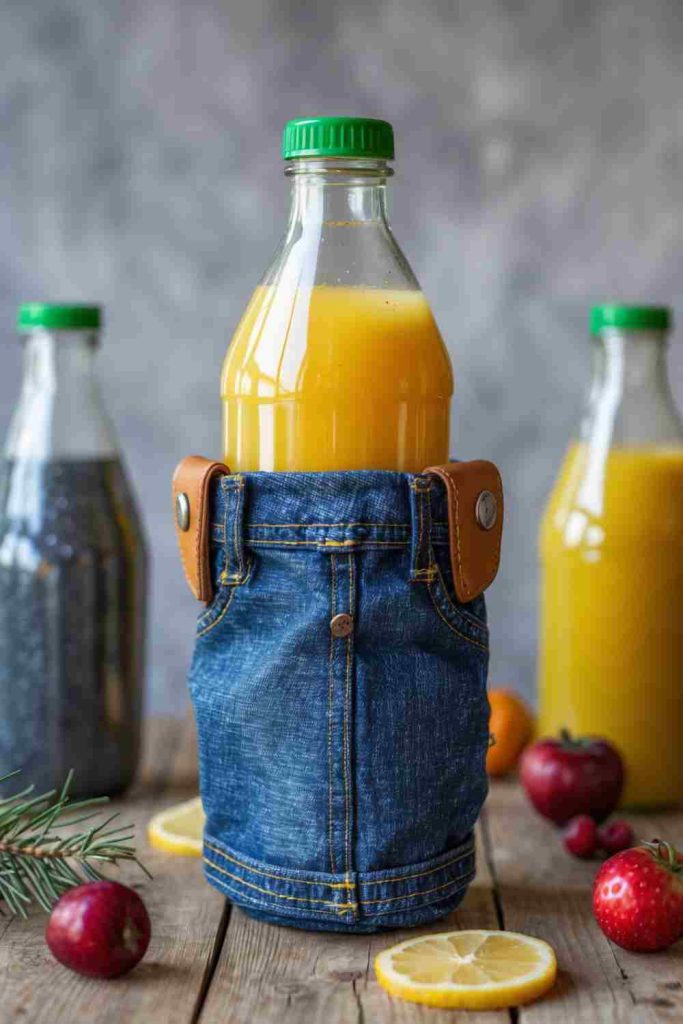
A denim bottle holder is essentially a fitted sleeve with a base and, if needed, a carrying strap. The project suits a strong trouser leg because the tubular shape already reduces construction. The strap and bottom seam are the areas that need the most reinforcement because they support the bottle’s weight.
Materials and Tools
· Strong jeans leg section
· Bottle for measuring
· Fabric scissors
· Pins or clips
· Needle and strong thread or sewing machine
· Optional lining
· Strong strap material or reinforced denim strips
Steps for This Denim Upcycle
1. Fit the sleeve around the real bottle. Wrap a jeans leg or flat denim panel around the bottle and leave enough ease for it to slide in without forcing. Mark the height so the bottle remains easy to remove. If using a pre-existing leg tube, choose a section with a circumference close to the bottle size.
2. Create a reinforced bottom. Turn the tube inside out and sew the lower edge closed, or attach a circular base if you want the bottle to sit upright more neatly. Reinforce the seam and trim excess bulk carefully. Turn right-side out and place the empty bottle inside to check the shape.
3. Build and attach the carrying strap. Use a strong cord, webbing, or a denim strap folded into several layers. Sew each strap end across a wide reinforced patch rather than attaching it with only a few stitches at the top edge. Check that the strap does not interfere with removing the bottle.
4. Load-test before regular use. Fill the bottle normally and carry the holder over a protected area for a short test. Inspect the strap joins and bottom seam for stretching. If the denim elongates or the seam opens, reinforce it before taking the holder outside.
I would keep the strap simple and strong. Decorative hardware is not useful if it creates a weak point on an object that may carry a full bottle.
Variation: Reuse a jeans pocket as a small front sleeve for keys or a folded napkin, provided it does not interfere with the bottle fit.
Upcycle Jeans into Trendy Denim Keychains
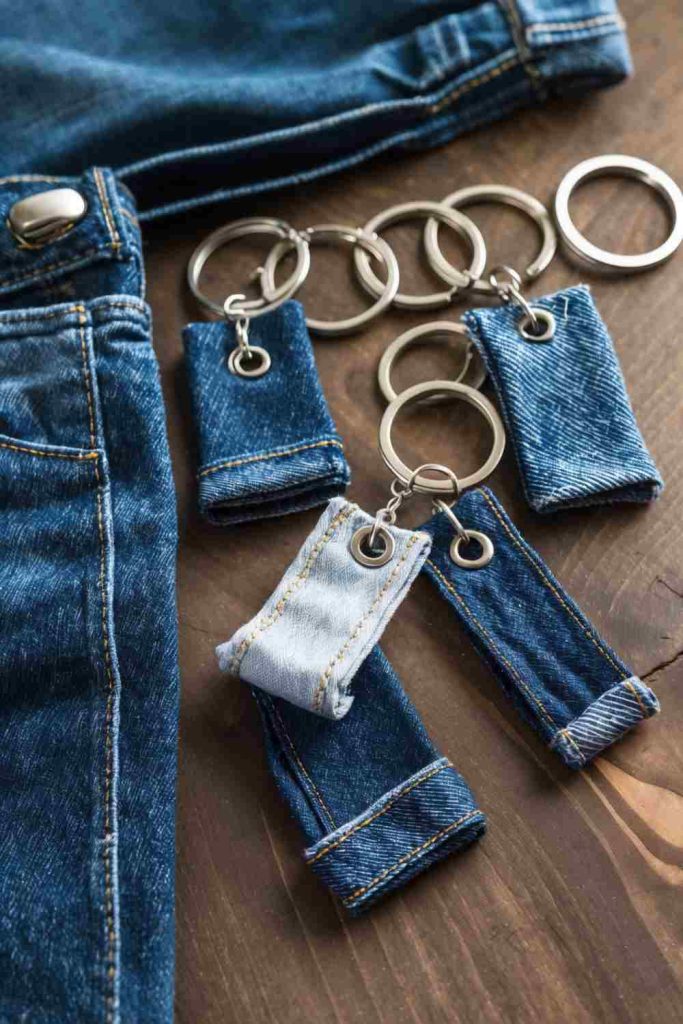
Keychains are ideal for very small denim offcuts, especially sturdy pieces from pockets or seams. Because keys add metal weight and move constantly, the fabric loop that holds the ring should be stronger than the decorative body of the keychain.
Materials and Tools
· Small denim scraps
· Fabric scissors
· Needle and strong thread
· Key ring or split ring
· Optional eyelet or reinforced fabric tab
· Small pliers if hardware requires them
Steps for This Denim Upcycle
1. Cut a compact shape with enough fabric for reinforcement. Choose a simple rectangle, folded loop, heart, or small tag shape. Keep the piece large enough to stitch securely but not so large that it becomes bulky in a pocket. If the denim is thin, double the layers.
2. Finish the shape before adding hardware. Fold raw edges inward or stitch around the perimeter to control fraying. Add embroidery or a small fabric initial while the piece lies flat. Keep beads and fragile decorations away from the hardware end where they are likely to knock against keys.
3. Create a strong ring attachment. Fold a narrow denim tab around the key ring or insert a suitable reinforced eyelet if you know how to install it safely. Stitch through several layers and extend the seam well into the body of the keychain so the pull is distributed.
4. Pull-test and trim carefully. Hold the keychain body and tug firmly on the ring several times. Check for thread movement or stretching around the attachment point. Only then trim thread ends and begin using it with keys.
This is a good place to use the little scraps that are too small for almost everything else, but the ring connection still needs to be treated like a structural seam.
Variation: Fold a preserved belt loop around a key ring and stitch its ends into a small denim patch for a very quick keychain.
Upcycle Jeans into Durable Denim Pot Holders
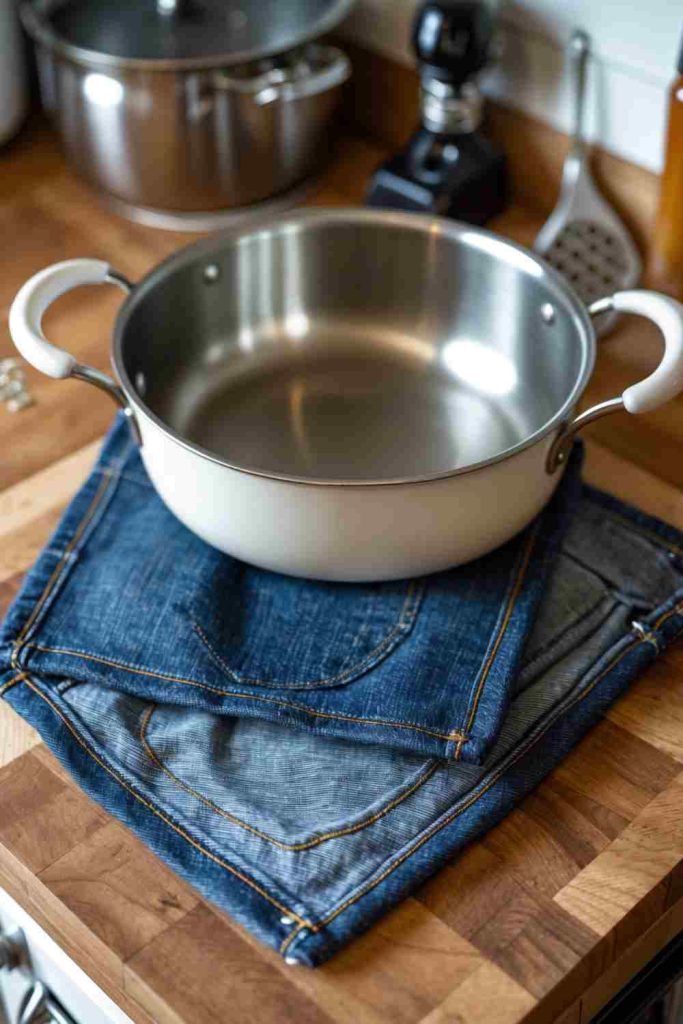
Denim can form the outer fabric of a pot holder, but it should not be treated as sufficient heat protection by itself. A safe heat-handling project needs purpose-made heat-resistant batting or another material specifically intended for that use, and the finished item should be built and tested according to that material’s directions.
Materials and Tools
· Clean denim without metal rivets in the handling area
· Purpose-made heat-resistant batting or insulating material
· Cotton backing or lining fabric suitable for the use
· Fabric scissors
· Pins or clips
· Sewing machine or strong hand-sewing setup
· Binding fabric if desired
Steps for This Denim Upcycle
1. Plan the size around safe hand coverage. Choose a simple square or mitt-style shape large enough to protect the hand from nearby hot surfaces. Cut matching denim outer pieces and the required insulating layers according to the heat-resistant material’s instructions. Remove metal rivets, studs, or zippers from the area entirely.
2. Layer and quilt the materials securely. Stack the denim, insulation, and backing in the correct order and clip rather than pin if the layers are very thick. Stitch through the layers so insulation cannot shift or bunch during washing. Keep quilting lines reasonably even and avoid compressing the insulation more than the product directions allow.
3. Finish every edge and add a hanging loop only if strong. Bind or enclose the raw edges so loose fibres cannot reach hot surfaces. If adding a loop, stitch it into a reinforced corner but keep it away from the main gripping area. Check that the finished holder remains flexible enough to grip cookware securely.
4. Use conservatively and retire damaged pieces. Follow the insulating material’s care and use guidance. Do not use a pot holder that is wet, scorched, thin, or damaged, and do not assume that extra denim layers automatically equal safe heat protection. Replace the item if the insulation shifts or the stitching opens.
The denim is the attractive outer layer here; the hidden heat-resistant material is what makes the project practical. I would never trade that inner function for a thinner, prettier result.
Variation: Use dark denim on one side and a lighter reclaimed cotton on the other, while keeping the same proper insulating core.
Upcycle Jeans into a Stylish Denim Laptop Sleeve
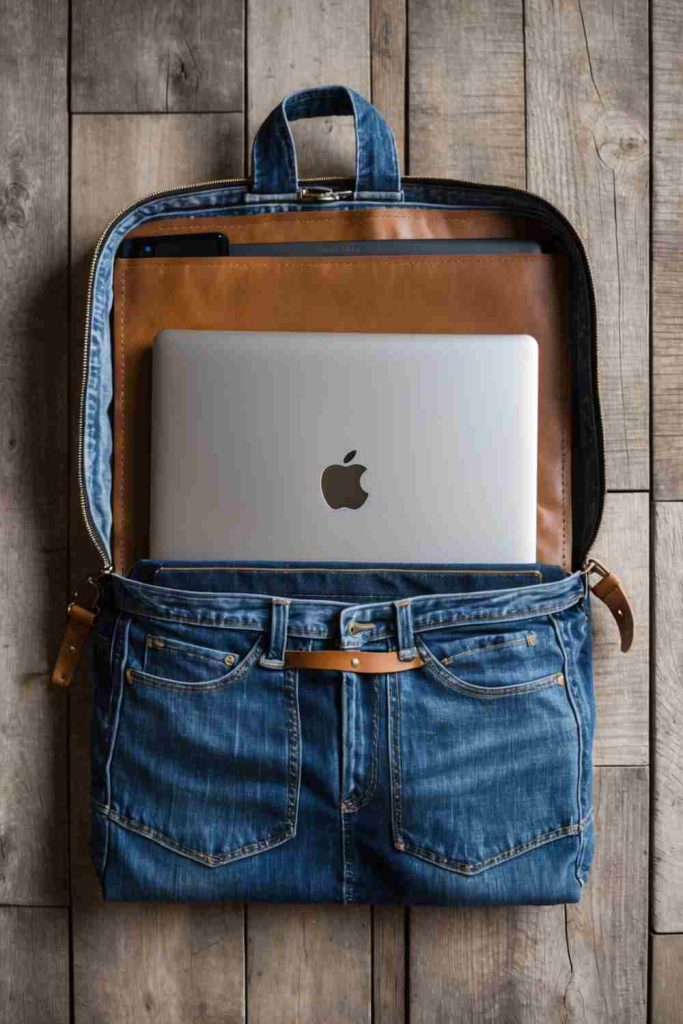
A laptop sleeve needs flat protective layers, a smooth interior, and a closure that does not press hard hardware against the device. Denim works well as the outer shell, but cushioning should come from a soft lining or padding rather than relying on thick jean seams.
Materials and Tools
· Large flat denim panels
· Laptop for measuring
· Soft lining fabric
· Suitable padding or batting
· Fabric scissors
· Pins or clips
· Sewing machine with denim needle or sturdy hand-sewing tools
· Soft closure such as fabric flap or suitable zipper installed away from the device surface
Steps for This Denim Upcycle
1. Measure the laptop with realistic ease. Measure width, height, and thickness, then add enough room for padding and seam allowance. Cut a paper test rectangle or wrap the laptop in the proposed layers to confirm the sleeve will not be too tight. Avoid using a thick waistband seam across the main face of the sleeve.
2. Build a padded outer and smooth inner layer. Cut matching denim, padding, and lining pieces. Baste or quilt the padding lightly to the denim so it cannot shift. Keep the lining smooth and free from rivets, metal buttons, or thick knots that could scratch the laptop.
3. Assemble the sleeve and shape the corners. Place the main layers together according to the chosen construction method and sew the side and bottom seams. Grade bulky seam allowances carefully. Turn the sleeve right-side out and test the empty shape before inserting the laptop.
4. Add a secure, device-friendly closure. Use a soft flap, protected zipper, or other closure that will not rub directly against the computer. Insert the laptop slowly and check that it slides without force. Close the sleeve, carry it briefly, and inspect whether the corners and opening remain supported.
A laptop sleeve is not the place to celebrate every original jeans rivet. I would keep metal hardware away from the device and let the denim texture provide the visual interest.
Variation: Use a jeans back pocket on the outside for a charging cable, but line it so metal pocket rivets cannot contact the laptop.
Upcycle Jeans into a Cozy Denim Patchwork Quilt
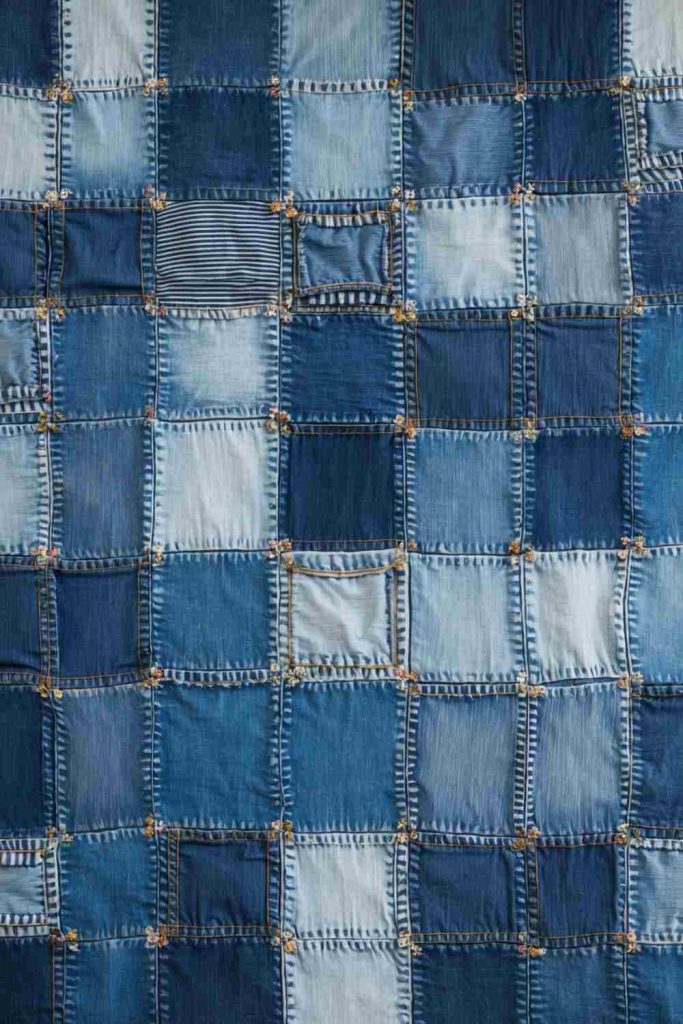
A denim quilt can use many pairs of jeans at once, but comfort depends on controlling weight and seam bulk. Mixing rigid denim with very stretchy pieces can distort the finished quilt, and stacking original jean seams at block intersections can make the surface hard. A planned patchwork grid is easier to manage than completely random scraps.
Materials and Tools
· Washed denim panels from several jeans
· Fabric scissors or rotary cutter and mat
· Quilting ruler or template
· Strong sewing thread
· Sewing machine suited to denim
· Backing fabric
· Optional lightweight batting depending on intended weight
Steps for This Denim Upcycle
1. Sort denim by weight and stretch. Group rigid jeans together and keep very stretchy denim for a separate project or smaller accent blocks. Cut away thick waistbands, zippers, and damaged sections. Choose a block size that fits the available flat panels so unnecessary piecing is reduced.
2. Cut blocks accurately and plan the colour distribution. Use a ruler or template to cut repeated squares or rectangles. Lay them on the floor or a large table and move the washes around until dark and light denim feels balanced. Keep thick pocket pieces away from areas where several seams will intersect.
3. Join blocks into rows while managing seam bulk. Sew individual blocks into rows, pressing or finger-flattening seam allowances in alternating directions so intersections nest more neatly. Then join the rows and check that the quilt remains square rather than pulling diagonally.
4. Add backing and finish the edges for the intended use. Choose backing fabric that balances the weight of the denim. Add batting only if the finished quilt still feels manageable and the materials suit the intended washing method. Quilt or tie the layers securely, then bind the outer edge and inspect every seam before regular use.
Denim already makes a substantial quilt. I’d avoid adding heavy decorative layers simply because there is space for them; comfort improves when the inside and seams stay relatively smooth.
Variation: Make a smaller lap quilt with a soft flannel backing before committing enough denim to cover a full bed.
Upcycle Jeans into a Cool Denim Phone Case
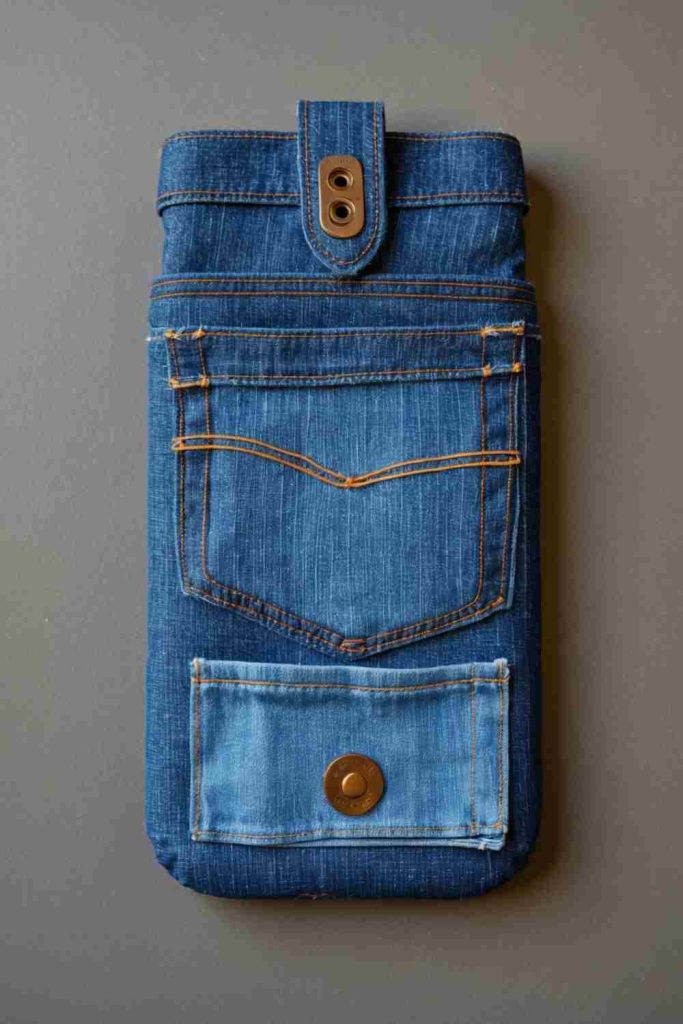
A denim phone pouch or slip case can be made from surprisingly little fabric, but the inside needs to stay smooth. Decorative metal hardware, thick seams, and loose grit trapped in pockets can scratch a device, so the old jeans should be simplified before becoming a case.
Materials and Tools
· Flat denim scrap
· Phone for measuring
· Soft lining fabric
· Thin protective padding if desired
· Fabric scissors
· Needle and thread or sewing machine
· Soft closure such as fabric flap
Steps for This Denim Upcycle
1. Measure the phone with the everyday case included if one is used. Place the phone on paper or fabric and allow ease around the sides and top. Include space for lining and padding rather than tracing the device exactly. Cut two denim panels or one folded piece from a flat section without rivets.
2. Add a smooth lining and optional padding. Cut matching lining pieces and baste them to the denim so nothing shifts during assembly. If padding is added, keep it thin enough that the phone can still slide in easily. Check that no knots or raw metal parts remain inside.
3. Sew the sides and bottom with compact seams. Join the outer edges securely, trim excess seam allowance, and turn the pouch carefully. Insert a non-breakable object of similar size first to test the opening. Adjust any tight corner before putting the phone inside.
4. Finish the top without hard hardware pressing on the screen. Add a soft flap, fabric loop, or other lightweight closure if needed. Avoid a bulky button or exposed snap directly over the display area. Test insertion and removal several times so the case protects without gripping the phone too tightly.
This project benefits from restraint. A clean denim pocket with a soft lining is more useful than a heavily decorated case that can scratch the device it is meant to protect.
Variation: Use an existing jeans coin pocket as the outer layer of a larger padded sleeve for earbuds or a small music player.
Upcycle Jeans into a Charming Denim Picnic Blanket
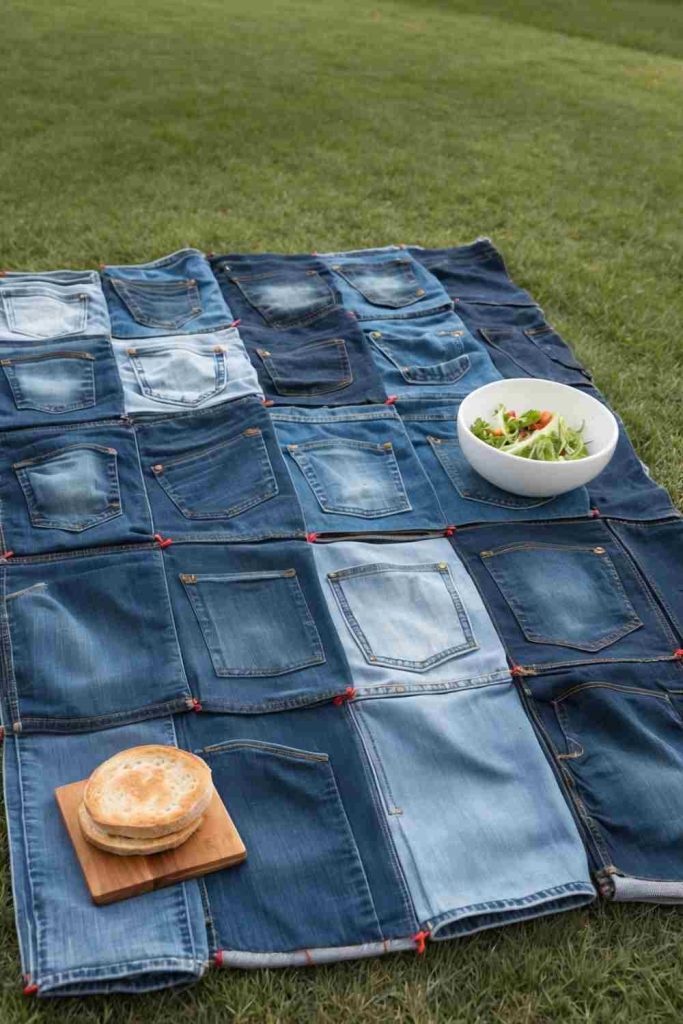
A picnic blanket is essentially a large patchwork textile that needs to lie flat, tolerate outdoor dirt, and fold without becoming unbearably heavy. Denim gives durability on the top surface, while a lighter backing can make the finished blanket easier to carry and more comfortable to sit on.
Materials and Tools
· Large denim panels or patchwork blocks
· Fabric scissors or rotary cutter
· Strong thread
· Sewing machine suited to denim
· Large backing fabric
· Optional water-resistant layer suitable for the intended use
· Binding fabric or sturdy edge finish
Steps for This Denim Upcycle
1. Plan the finished size from the amount of usable denim. Measure the flat leg panels you have and sketch a simple block layout. Large rectangles reduce seam bulk and sewing time. Mix washes for interest, but keep very thick pocket or waistband sections away from the central sitting area.
2. Join panels into broad rows. Sew blocks into rows and flatten seam allowances so they do not create hard ridges. Join the rows while checking that the rectangle remains square. If the panel becomes too heavy to handle comfortably, reduce the final size rather than forcing the sewing machine through awkward folds.
3. Add a practical backing. Choose a soft washable backing for indoor-outdoor use, or add an appropriate water-resistant layer if that suits your needs. Baste the layers securely so they do not shift. Quilt or tie them at intervals to keep the large surfaces connected.
4. Bind the edge and create a realistic folding method. Finish the full perimeter with strong binding or another durable edge. Fold the blanket several times and check the final bundle size before adding any carrying strap. If it is too heavy to carry comfortably, use the project as a porch or garden mat instead of a travel blanket.
A picnic blanket should be comfortable before it is decorative. I’d keep thick jean pockets near the outer edge where they can hold a napkin or small item without creating a lump underneath someone.
Variation: Use denim only for a patchwork border around a large lighter fabric centre to reduce weight.
Upcycle Jeans into a Handy Denim Shoe Organizer
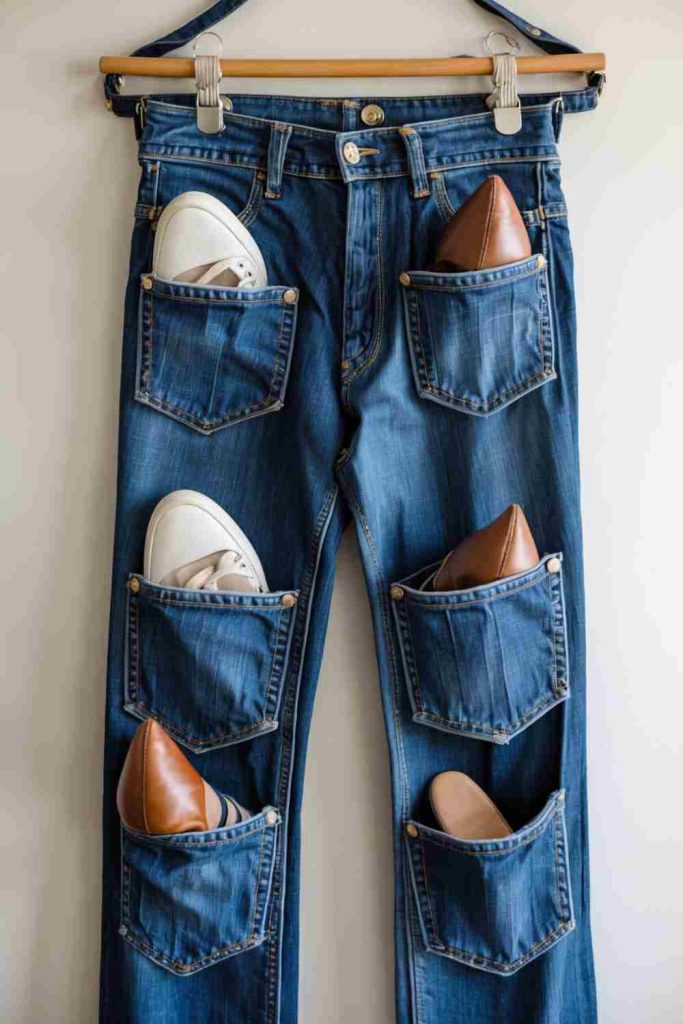
Old jean pockets are already shaped like storage compartments, which makes them ideal for a hanging shoe or accessory organizer. The challenge is supporting repeated weight across the top edge. A wall organizer should hang from a strong backing and secure hardware rather than relying on a single thin strip of denim.
Materials and Tools
· Large strong denim backing panel or heavy fabric base
· Several harvested jean pockets
· Fabric scissors or seam ripper
· Pins or clips
· Sewing machine or strong hand-sewing setup
· Sturdy hanging loops or rod casing
· Appropriate wall hardware for the finished weight
Steps for This Denim Upcycle
1. Build a stable backing before attaching pockets. Piece together large denim panels if necessary and reinforce the top edge with an extra layer. Decide whether the organizer will hang from a rod, hooks, or another secure system. Measure the available wall or door space before fixing pocket positions.
2. Arrange pockets according to what they will hold. Lay out large pockets lower down for heavier shoes and smaller pockets higher up for accessories or slippers. Leave enough vertical space for items to enter and exit without catching on the pocket above. Mark each position after testing with a real shoe.
3. Stitch pockets across strong edges. Sew the sides and bottom of each pocket securely while leaving the top opening clear. Extend stitches into sound backing fabric and reinforce corners where weight concentrates. Do not rely on decorative topstitching from the original jeans if the pocket has been cut away from its supporting fabric.
4. Install and load gradually. Attach the organizer using wall or door hardware appropriate to the weight and surface. Add items one row at a time while checking the top edge and hanging points. If the backing bows or stitches stretch, reduce the load and strengthen the support before continuing.
The pockets make this project satisfying because very little extra design work is needed. Their original function simply moves from a pair of jeans to the wall.
Variation: Use the same pocket-panel idea for scarves, craft tools, cleaning cloths, or children’s accessories instead of shoes.
Upcycle Jeans into Stylish Denim Storage Bins
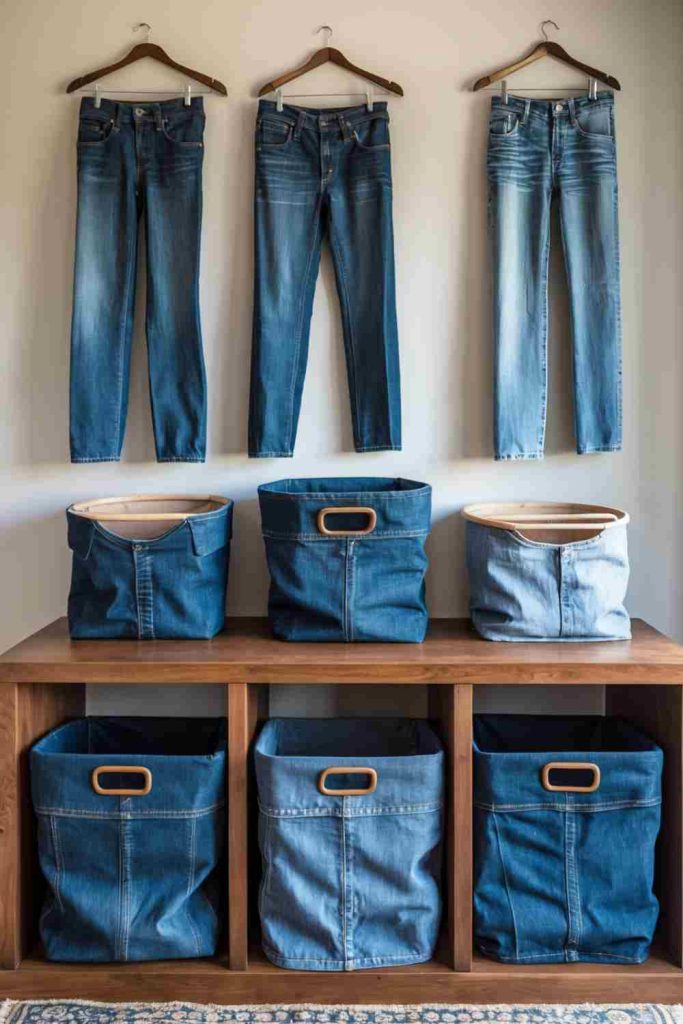
Denim storage bins can handle books, craft supplies, bathroom items, or soft accessories, but the fabric usually needs lining or stabilising if you want the walls to stand upright. A soft collapsible bin is also valid; the structure should match what you plan to store rather than copying a rigid box shape unnecessarily.
Materials and Tools
· Large denim panels
· Fabric scissors
· Pins or clips
· Sewing machine or strong hand-sewing supplies
· Lining fabric
· Optional stabiliser or recycled cardboard insert kept removable
· Optional pocket pieces
Steps for This Denim Upcycle
1. Choose the bin structure from the intended contents. A basket for towels can stay soft, while a bin for upright books needs more support. Measure the shelf or space first, then cut front, back, side, and base panels with consistent seam allowance. Avoid stacking original jeans seams in the corners.
2. Build the denim shell. Join side panels one by one and attach the base with careful corner matching. Reinforce the lower corners because stored objects push outward there. Turn the shell right-side out and check its basic dimensions before adding lining.
3. Add lining and optional removable support. Sew a lining in the same shape and insert it into the denim shell. If additional stiffness is needed, create removable cardboard or plastic support panels inside the lining rather than permanently trapping material that cannot be washed. Keep all support edges smooth.
4. Finish the top and label or pocket the exterior. Fold the lining and denim together into a clean top edge or bind them. Add a preserved jeans pocket as a label holder or small external compartment. Fill the bin gradually and make sure shelves or handles can support the final weight.
I don’t think every denim bin needs to stand like a cardboard box. A slightly relaxed shape suits fabric and makes the bin easier to wash or fold away.
Variation: Use one jeans waistband as the top rim of a small bin, with flat leg panels forming the sides.
Upcycle Jeans into Adorable Denim Stuffed Animals
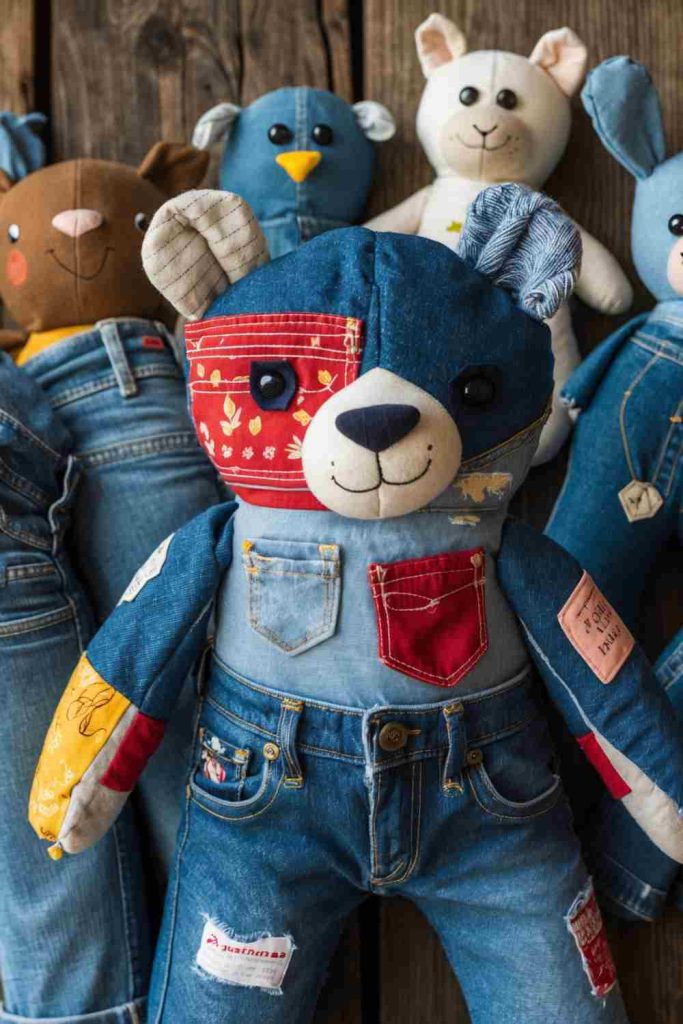
Stuffed animals can use small denim patches, pockets, and different washes, but the fabric is heavier than many toy textiles. A simple silhouette with broad limbs is easier to turn and stuff than narrow fingers, tails, or ears. If the finished toy is intended for a young child, avoid detachable buttons, beads, or other small decorations and construct it with age-appropriate safety in mind.
Materials and Tools
· Soft or medium-weight denim scraps
· Paper animal pattern
· Fabric scissors
· Pins or clips
· Needle and strong thread or sewing machine
· Suitable stuffing material
· Embroidery thread for stitched facial features
Steps for This Denim Upcycle
1. Choose a simple pattern that suits thick fabric. Use a broad bear, whale, rabbit, cat, or other shape without very narrow projections. Cut a paper pattern first and check whether the smallest parts will still be easy to turn through the seam allowance. Place pattern pieces on denim so weak worn areas are excluded.
2. Add facial details before assembly. Embroider eyes, nose, or simple markings onto the front piece while it lies flat. Avoid hard buttons or beads if the toy may be used by a young child. Keep the stitching compact and tie off securely on the back.
3. Sew the body and turn carefully. Place the outer sides together and stitch around the perimeter, leaving a practical opening for turning and stuffing. Clip curved seam allowances where needed without cutting the stitches. Turn the animal right-side out and use a blunt tool to ease out corners rather than forcing them.
4. Stuff evenly and close the opening strongly. Add stuffing a little at a time so the shape stays soft and balanced. Do not overpack narrow areas. Fold the opening inward and close it with strong small stitches, then pull gently on limbs and ears to check the seams before the toy is used.
Different denim washes can make the animal interesting without any extra decoration. A light belly panel or darker ears often gives enough contrast on its own.
Variation: Use a preserved jeans pocket as the body of a very simple flat stuffed creature, adding only broad fabric ears and embroidered features.
Denim Upcycling Decisions That Can Create Weak Seams, Excess Bulk, or Impractical Results
Cutting the Best Structural Pieces Before Planning the Project
Waistbands, pockets, flat leg panels, and long strips are difficult to recreate once chopped into small scraps. Map the useful features first, then cut in an order that preserves the strongest fabric for handles, bases, covers, or other load-bearing areas.
Treating Stretch and Rigid Denim as If They Behave the Same
Stretch denim can pull, curl, and grow under weight while rigid denim stays comparatively stable. Keep very different fabrics out of the same structural seam unless you deliberately stabilise the stretch piece and test how the layers behave together.
Stacking Too Many Original Jeans Seams in One Corner
Side seams, hems, waistbands, and pocket edges can become extremely bulky when several meet. Trim or relocate heavy details before sewing so corners can turn cleanly and the finished item does not contain hard ridges.
Using Glue as the Main Structural Join for Heavy Projects
Adhesive may help with positioning or light decoration, but a tote handle, hanging planter, organizer, rug, or loaded storage bin needs construction suited to repeated weight and movement. Sew and reinforce structural areas whenever the materials allow it.
Assuming Denim Alone Makes a Safe Pot Holder
Denim is not a substitute for purpose-made heat-resistant insulation. Heat-handling projects need appropriate protective layers and should be used according to the insulating material’s instructions, with damaged or wet pieces removed from service.
Leaving Metal Hardware Where It Can Scratch, Press, or Snag
Rivets, zipper teeth, studs, and buttons may be harmless on jeans but awkward on a pillow, laptop sleeve, phone case, pet toy, or floor rug. Remove or relocate hardware when the new use puts it against skin, devices, pets, or walking surfaces.
Forgetting How the Finished Item Will Be Washed
A project may combine denim with glue, lining, padding, paint, floral wire, or other materials that need different care. Decide on cleaning before assembly and use the most cautious compatible method for the finished object.
Using Every Scrap Simply Because It Is Available
Good upcycling still involves editing. Brittle, contaminated, overstretched, or dangerously damaged fabric does not become useful merely because it came from jeans. Use the strong parts and let unsuitable material go.
Skipping a Real-World Test Before Final Trimming
Try the bracelet on, load the tote, insert the laptop, hang the organizer, fold the picnic blanket, or place the actual pot inside the holder before cutting away adjustment room. Testing early keeps small fit problems from becoming permanent construction problems.
Frequently Asked Questions
What parts of old jeans are most useful for upcycling?
Flat leg panels are the most versatile because they can become bags, covers, quilt blocks, bunting, baskets, and home textiles. Pockets, belt loops, waistbands, and strong seams are also useful when their original function can be reused rather than merely added as decoration.
Should I wash old jeans before cutting them?
Usually, yes. Washing reveals shrinkage, weak fibres, odours, and stains before you invest time in construction. Let the jeans dry fully, then inspect high-wear areas again because damage can become easier to see after cleaning.
Can I mix stretch denim with rigid denim?
You can, but it needs more planning. Use compatible fabrics in structural areas where possible, or stabilise the stretch denim and keep it to smaller accent panels so one section does not distort the finished project.
Do I need a heavy-duty sewing machine for denim projects?
Not every small project requires one, but thick layers can challenge lightweight machines and needles. Use a needle and thread suited to denim, reduce unnecessary seam bulk, sew slowly through thick transitions, and follow your machine manufacturer’s guidance rather than forcing the fabric.
What can I make from jeans that are too worn to become another garment?
Strong remaining sections can become coasters, flowers, keychains, patchwork blocks, small baskets, book covers, toy components, or decorative panels. Cut around brittle knees, stretched seat fabric, or damaged inner thighs instead of expecting every part to carry stress.
How can I stop denim projects from becoming too bulky?
Remove thick original hems and waistbands from folded corners, grade seam allowances, avoid stacking several seams at one intersection, and mix denim with a lighter lining or backing where appropriate. A thinner, well-constructed layer is often more useful than several heavy layers added for perceived durability.
Can I make no-sew denim projects?
Some decorative projects can use suitable fabric adhesive, tying, weaving, or folding, but heavy or load-bearing items usually benefit from sewing. If a project carries weight, hangs overhead, protects a device, handles heat, or is used by a pet, choose a construction method that suits the actual stress rather than avoiding stitches at all costs.
Let the Strongest Parts of Old Jeans Decide What They Become Next
The useful thing about old denim is that one pair of jeans does not have to become one new object. A strong back pocket may become part of an organizer, the lower legs may turn into bunting or a book cover, and narrow leftovers can become flowers, keychains, or jewellery. That approach makes more sense to me than forcing a badly worn garment into a project that needs fabric strength it no longer has.
These 26 upcycle jeans denim ideas also show why preparation matters as much as creativity. Sorting fabric by strength, managing seam bulk, reinforcing load-bearing joins, choosing safe materials for heat or pet use, and planning how an item will be washed are what turn a clever idea into something you can actually use. Start with one pair of jeans, identify the best surviving section, and choose a project that suits that material rather than fighting it.
Which part of your next worn-out pair of jeans looks too useful to throw away?