Fabric scraps have a habit of surviving long after the original sewing project is finished. A sleeve is shortened, a pillowcase tears at one end, or a favorite T-shirt stops being wearable, and suddenly there are pieces that feel too useful to discard but too small or awkward to return to the fabric cupboard without a plan.
Sewing is one of my favorite ways to make those leftovers work harder. I don’t think every project needs fresh yardage, especially when strong seams, good fabric sections, old garments, and small remnants are already waiting at home. The trick is choosing a new use that suits what the fabric can still do.
Upcycled sewing ideas work best when construction comes before decoration. A bag handle needs reinforcement, a child-facing soft item needs secure details, and a plant holder needs a separate waterproof pot. I know the colorful part is more tempting, but a few practical checks at the beginning usually make the finished project easier to use, wash, repair, and keep.
Sort Fabric Scraps by Strength, Stretch, and Intended Use
Not every scrap belongs in every sewing project. A stable cotton remnant can make a crisp bookmark or basket panel, while jersey from an old T-shirt behaves better in a soft project where stretch is expected. Before cutting, I would group fabric by how it moves, how strong it feels, and whether it can handle washing or repeated wear.
· Separate stable woven fabrics from stretchy knits before planning patchwork seams.
· Check old garments for thinning, sun damage, brittle fibers, loose seams, and holes that may spread.
· Reserve the strongest fabric for handles, straps, hanging points, corners, and other high-stress areas.
· Keep heavily painted, unknown-treated, or strongly scented textiles away from food-contact and child-facing projects.
· Use delicate vintage pieces as reinforced accents rather than structural sections when their fibers are weak.
· Set aside very small scraps for bookmarks, tags, pincushions, applique, and other low-yardage projects.
Wash, Press, Stabilize, and Test Before Cutting
Reused textiles may have already stretched, shrunk, softened, or twisted during years of use. Cleaning and pressing them before measuring gives you a more honest idea of the fabric you actually have. Stabilizing slippery, stretchy, or loosely woven sections can also prevent a simple sewing project from becoming harder than it needs to be.
· Wash or clean reclaimed fabric in a way that suits the fiber before enclosing it inside a new project.
· Press seams and scraps flat so measurements are taken from the fabric rather than from wrinkles or old folds.
· Test a small piece before using fusible interfacing, adhesive, heat, or an unfamiliar stitch setting.
· Stabilize T-shirt jersey and other stretchy panels before cutting precise quilt blocks or structured pieces.
· Trim frayed edges only after deciding how much seam allowance the project needs.
· Check reused zippers, elastic, buttons, cord, webbing, and other notions for wear before sewing them in permanently.
Plan Seams, Closures, Stuffing, and Safe Use Before You Sew
Many small sewing projects become difficult at the finishing stage because the closure, lining, hanging point, or stuffing method was left until the end. I would decide how the object needs to open, wash, carry weight, or be handled before sewing the main body. That makes it much easier to place reinforcement where it belongs and keep rough edges away from skin, books, pets, or children.
· Choose structural sewing instead of glue for joins that will be pulled, flexed, washed, or loaded.
· Plan linings before closing pouches, baskets, and cases that will hold pointed or small objects.
· Keep drawstring channels, zippers, book hinges, and wearable seams free from unnecessary bulk.
· Use secure embroidered details instead of loose small embellishments where young children or pets may reach the item.
· Keep plant soil and drainage inside a proper pot rather than relying on sewn fabric as a waterproof container.
· Load-test handles, straps, hanging loops, and wall supports gradually before trusting them in regular use.
Upcycled Sewing Ideas: Turn Fabric Scraps into a Stylish Patchwork Jacket
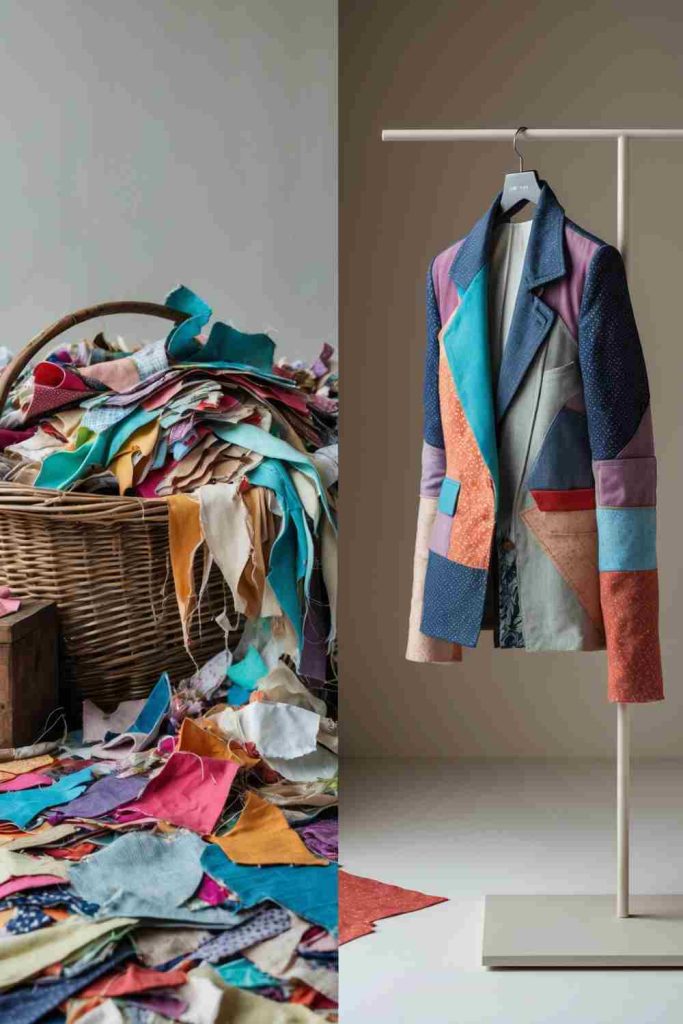
A patchwork jacket is one of those projects that can use genuinely mixed leftovers rather than demanding a perfectly coordinated fabric bundle. Small cotton prints, worn shirt panels, denim offcuts, and sturdy remnants can all contribute, but the jacket still needs a dependable base so the finished garment hangs properly instead of feeling like a loose collage.
I would treat the scraps as the decorative layer and let an existing jacket or a reliable garment pattern provide the structure. That makes fit easier to control and gives you time to arrange color, scale, and texture before committing to seams. Fabrics with very different stretch should not be forced into the same area without stabilizing them first.
Materials and Tools
· Fabric scraps in sound condition
· An old jacket that fits, or a suitable jacket pattern
· Sewing machine or hand-sewing needle
· Strong all-purpose thread
· Fabric scissors or rotary cutter and mat
· Pins or clips
· Optional lightweight interfacing and lining fabric
Steps for This Upcycled Sewing Project
1. Sort the scraps by behavior. Separate woven cottons, denim, stretch knits, and delicate pieces before cutting. Choose the strongest fabrics for shoulders, side seams, and other areas that move often, while lighter scraps can sit in lower-stress decorative panels.
2. Build patchwork panels first. Arrange scraps on a flat surface and join them into larger sections rather than attaching tiny pieces one at a time to the jacket. Press each seam as you go, then trim the finished panel so its edges are stable and easy to handle.
3. Fit the patchwork to the garment. Use the existing jacket pieces or pattern sections as guides. Pin the patchwork in place and check grain, stretch, pocket access, and sleeve movement before sewing. Then secure the panel with seams or topstitching that suits the base fabric.
4. Finish the inside as carefully as the outside. Trim bulky seam allowances, reinforce stress points, and cover rough internal edges with lining, binding, or neat seam finishes. Try the jacket on and move your arms before adding any final buttons, trims, or extra patches.
For me, the jacket works best when one or two fabrics repeat in several places. I don’t think every patch needs to match, but a repeated color or texture stops the surface from feeling accidental.
Variation: Use the same approach only across the back yoke, pockets, or sleeves of an existing jacket if a full patchwork garment feels too involved.
Upcycled Sewing Ideas: Turn Fabric Scraps into Stylish Fabric Baskets
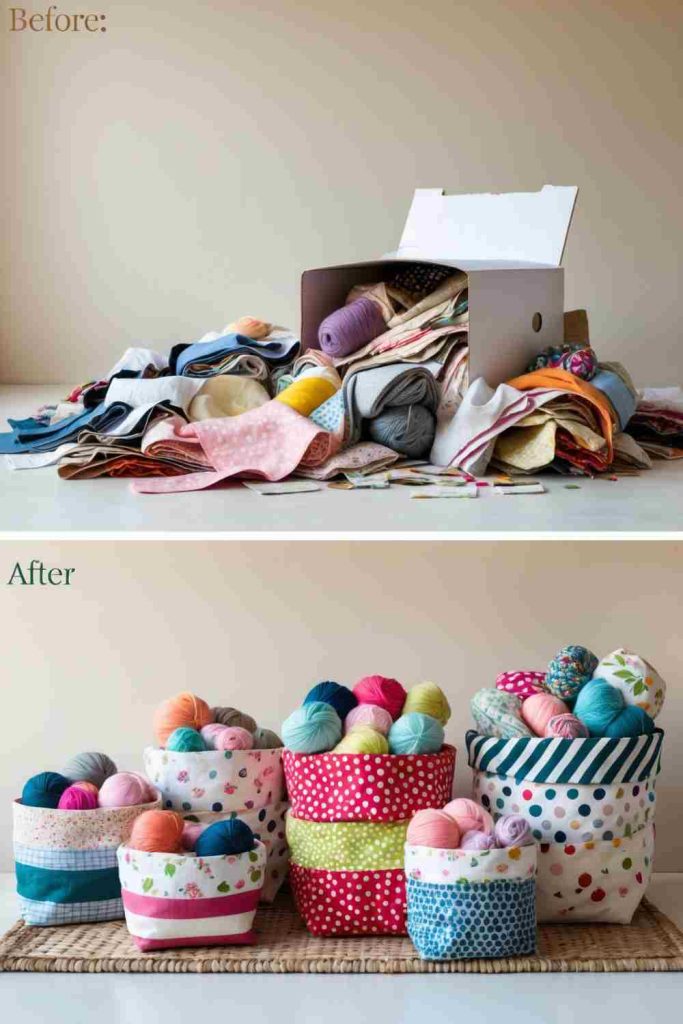
Fabric baskets are useful because they can absorb medium-sized scraps that are too large to throw away but too irregular for a garment. The key is remembering that a basket has to stand, hold its opening, and survive being picked up, so soft patchwork alone may need extra support.
A lined basket also gives you two opportunities to reuse material: stronger scraps can form the outer shell, while an old pillowcase, curtain offcut, or plain cotton can become the lining. I would decide the basket’s job first. A soft yarn basket for fabric is different from a container expected to hold pens, bottles, or heavier tools.
Materials and Tools
· Medium-weight fabric scraps
· Reused cotton or lining fabric
· Interfacing, batting, or another suitable stabilizer
· Sewing machine or needle
· Thread
· Scissors and ruler
· Pins or clips
Steps for This Upcycled Sewing Project
1. Piece the outer fabric. Join scraps into panels larger than the basket sides and base you need. Press the seams flat and trim the panels square only after the patchwork is complete; this is much easier than trying to make every original scrap identical.
2. Add structure. Attach interfacing or another stabilizing layer to the outer panels. If the basket will be folded or washed often, use a support that can flex without cracking and keep bulky seams away from the corners.
3. Sew the outer basket and lining. Construct the outer shell with firm seams, then sew the lining separately. Box or shape the lower corners as needed so the basket sits flat, checking that both layers are close enough in size to nest without bunching.
4. Join and finish the rim. Place the lining inside, turn the raw upper edges inward, and stitch around the rim. Add short handles only if the fabric and stitching can support them, then load the basket gradually instead of assuming a decorative handle can carry heavy contents.
I know it is tempting to keep adding interfacing until a basket stands like cardboard, but a little flexibility often makes it easier to use and store. The important part is a flat base and a rim that does not collapse immediately.
Variation: Make a set of nesting baskets from related scraps, using the same lining fabric in each one to visually connect the different patchwork exteriors.
Upcycled Sewing Ideas: Transform Fabric Scraps into Spiral Wall Art
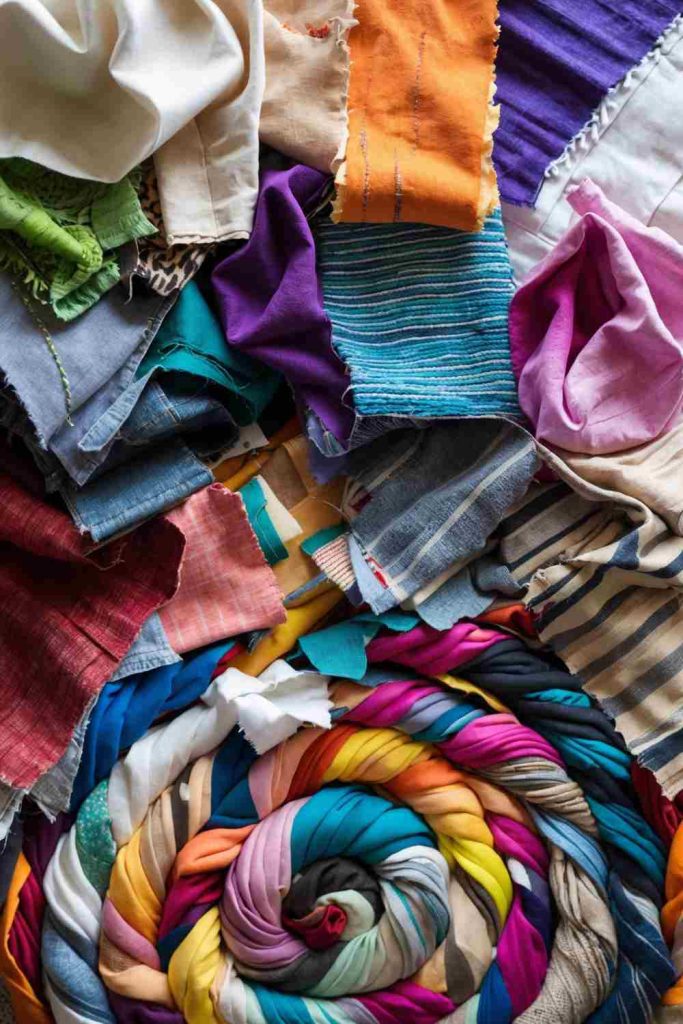
Spiral wall art gives narrow fabric strips a purpose without asking them to carry weight or fit the body. That freedom makes it a good destination for selvedges, uneven strips, and colors that may not suit a practical sewing project. The spiral becomes more interesting when small changes in print and texture appear gradually rather than in harsh blocks.
The backing matters more than it first appears. A fabric coil attached to thin paper can buckle, while an over-heavy base makes hanging awkward. I would use a firm but manageable backing and decide whether the design will be stitched, couched, or partly adhered before building the full spiral.
Materials and Tools
· Long fabric strips or joined scrap strips
· Sturdy reused fabric, canvas, or firm board for backing
· Needle and strong thread
· Fabric scissors
· Pins or temporary clips
· Optional fabric adhesive for positioning
· Hanging hardware suited to the finished weight
Steps for This Upcycled Sewing Project
1. Prepare continuous strips. Trim loose threads and join short scraps into longer lengths. Press bulky seam joins open or angle them so one thick lump does not appear in the spiral, then roll the strips loosely so they are easier to control.
2. Map the spiral before permanent attachment. Mark a small center point and coil the first section outward on the backing. Pin or tack several turns in place and step back to check spacing. A loose trial helps you see whether the color changes feel balanced.
3. Secure the fabric in stages. Stitch the strips to the backing with small hidden or decorative stitches, working from the center outward. If adhesive is used only for positioning, keep it light so the finished surface does not become stiff or visibly saturated.
4. Finish the edge and hanging method. Tuck the final strip end beneath the previous turn and secure it firmly. Trim the backing neatly or bind its edge, then attach hanging hardware that suits the base material and total weight before placing the piece on the wall.
The first coil rarely needs to be perfect. I would rather keep the spacing slightly organic than keep pulling the fabric so tight that the backing puckers toward the center.
Variation: Create several smaller spirals from related scraps and mount them as a group instead of making one large piece.
Upcycled Sewing Ideas: Transform Fabric Scraps into Decorative Book Covers
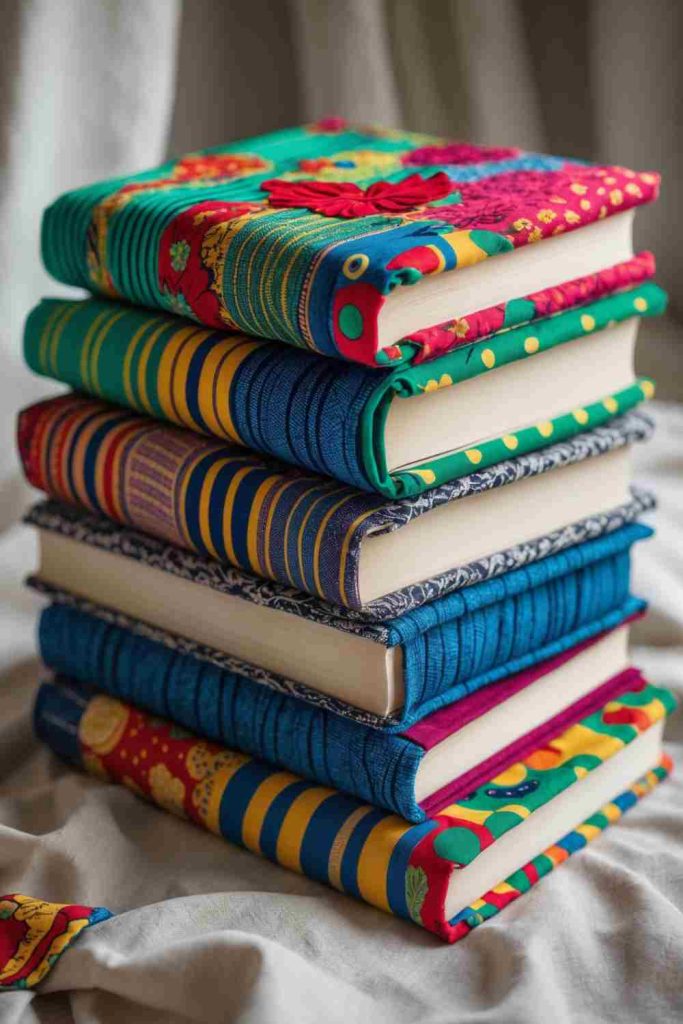
Reusable fabric book covers are a more flexible sewing project than permanently gluing fabric to a book. A removable cover protects a notebook or journal, allows the fabric to be washed when appropriate, and can move to another book of a similar size later.
This is a good place for decorative scraps because the cover does not need much yardage, but the fabric should still be stable enough to handle repeated opening. I would avoid thick seams directly along the book’s hinge because extra bulk there can make the cover pull or stop the book from closing comfortably.
Materials and Tools
· Fabric scraps large enough for the outer cover
· Optional lining fabric
· Lightweight interfacing if needed
· Book or notebook for fitting
· Sewing machine or hand needle
· Thread and scissors
· Iron and pins or clips
Steps for This Upcycled Sewing Project
1. Measure the actual book. Wrap a flexible tape or scrap paper around the closed book, including the spine, and note the height. Add enough allowance for seams and inner flaps, but do not rely on a generic measurement because spine widths vary considerably.
2. Piece and stabilize the cover fabric. Join smaller scraps into a flat panel and press the seams. Add lightweight interfacing only if the fabric is very soft, keeping the hinge area flexible enough to fold with the book.
3. Create the inner flaps. Fold the short ends toward the inside to form pockets for the front and back covers. Pin the book in place temporarily to confirm the flap depth, then sew the upper and lower seams with the fabric inside out.
4. Turn, press, and test. Clip bulky corners, turn the cover right side out, and press carefully. Slide the book covers into the flaps and open the book fully. If the spine pulls tight, reduce bulk rather than forcing the fabric to stretch.
One detail I would keep simple is the spine. Decoration can sit across the front and back, but the hinge needs room to move every time the book opens.
Variation: Add a narrow fabric loop for a pen or a stitched ribbon bookmark, keeping both details away from the closing edge so they do not create a lump inside the book.
Upcycled Sewing Ideas: Turn Old Denim Jeans into Chic Hanging Planters
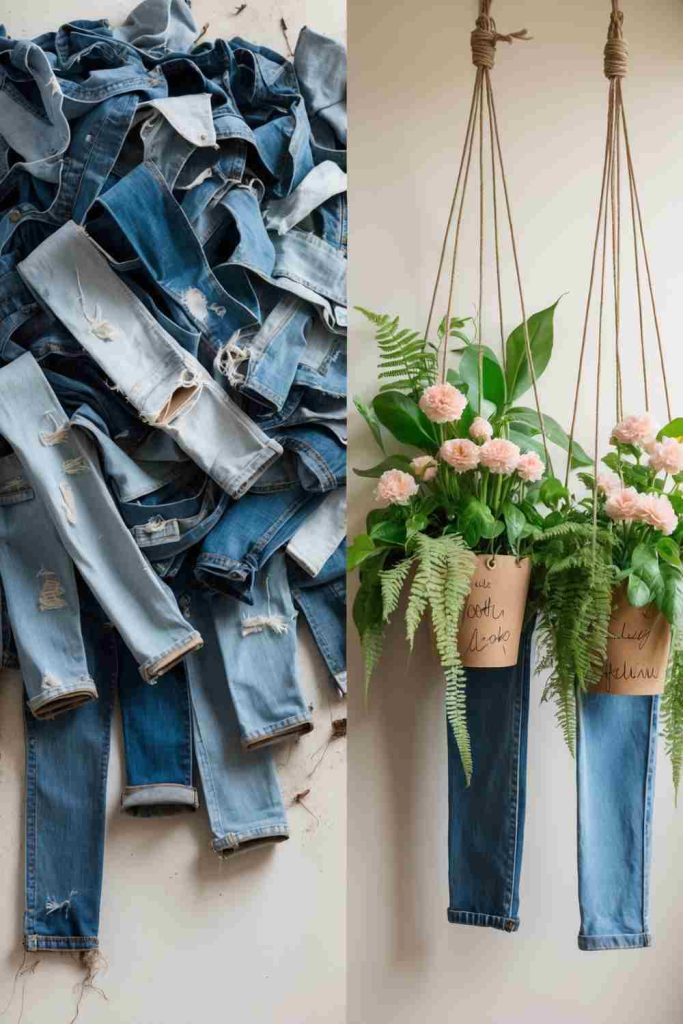
A denim hanging planter uses one of the strongest parts of old jeans: the leg fabric. The denim becomes a decorative outer sleeve rather than the actual soil container, which is important because wet compost against fabric can create staining, moisture problems, and unnecessary weight.
I would keep the plant in a separate pot with its normal drainage and make the denim holder removable. The hanging straps and upper seam are structural, so they need much more attention than decorative embroidery or patches. This is one project where a cute finish should never replace a proper load check.
Materials and Tools
· Sound denim cut from old jeans
· Plant pot with its own drainage system
· Strong thread
· Heavy-duty needle or suitable sewing machine needle
· Scissors
· Sturdy cord, webbing, or sewn denim straps
· Secure ceiling or wall hook suited to the load
Steps for This Upcycled Sewing Project
1. Cut a sleeve around the pot. Use the actual empty pot as the guide and cut a denim tube with enough room to slide the container in and out. Keep the top below any lip you need to grip for watering.
2. Close and reinforce the lower end. Turn the denim inside out and sew the bottom with a strong seam. Add a second line of stitching or a reinforcing patch if the pot has a firm base that will repeatedly press against one area.
3. Attach balanced hanging supports. Mark opposite points around the top and attach straps or cords through reinforced tabs rather than through raw holes in the denim. Keep each support the same effective length so the planter hangs level.
4. Test before adding the plant. Hang the empty holder first, then place the empty pot inside. Add weight gradually and watch the seams, straps, and wall or ceiling fixing. Remove the denim cover for watering whenever that makes moisture control easier.
The hanging point is the part I would inspect most closely. Denim is strong, but one small punched hole can still tear if the entire loaded pot is pulling from it.
Variation: Use a jeans pocket as a decorative front panel for a small plant label or lightweight gardening note, while keeping the structural straps separate.
Upcycled Sewing Ideas: Turn Fabric Scraps into a Stylish Twisted Headband
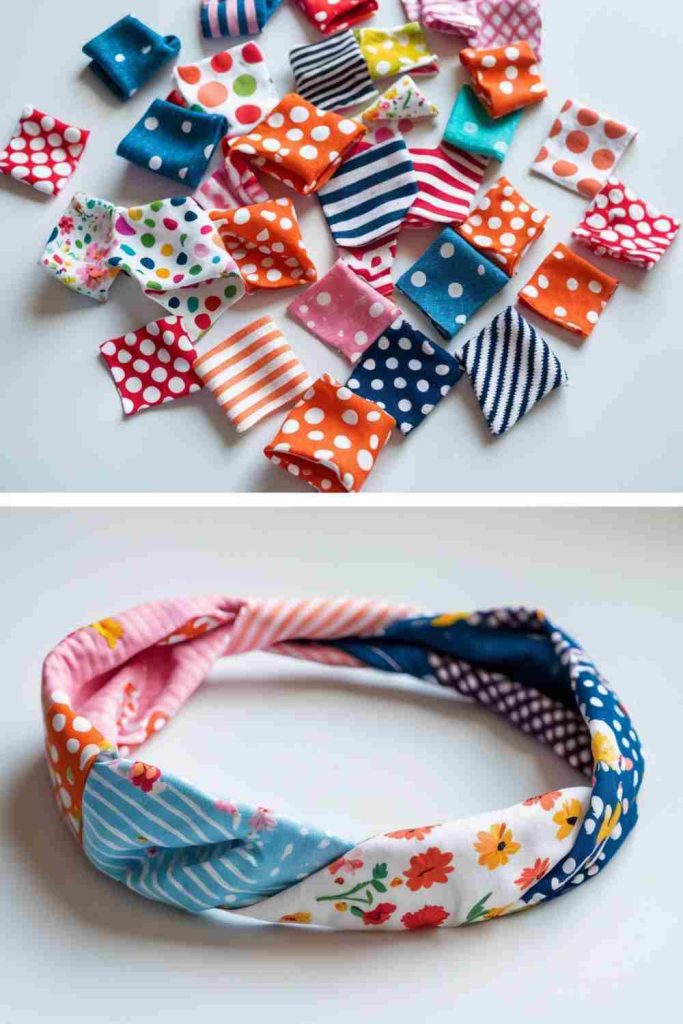
A twisted headband can use long narrow scraps from shirt hems, jersey sleeves, or leftover garment panels. Comfort matters more than exact pattern matching, so soft fabric with a little give is usually easier to wear than a stiff decorative textile.
The twist should sit smoothly rather than creating a bulky knot at the forehead. I would make a quick test band from basted fabric first, especially if the scraps have different stretch. A headband that looks neat on the table can feel completely different once it is stretched around the head.
Materials and Tools
· Soft fabric scraps or knit strips
· Sewing machine or hand needle
· Matching or contrasting thread
· Fabric scissors
· Pins or clips
· Small piece of elastic if the design needs it
· Iron if suitable for the fabric
Steps for This Upcycled Sewing Project
1. Prepare even fabric bands. Cut two or more strips with similar width and compatible stretch. Join smaller pieces first if necessary, positioning seams away from the center front where extra thickness would be most noticeable.
2. Sew and turn the bands. Fold each strip lengthwise with right sides together and sew the long edge. Turn the tubes right side out and press or finger-shape them flat without stretching one side longer than the other.
3. Form the twist. Cross the finished bands at the center, fold them around each other, and align the raw ends. Put the piece around your head or a similar form before final sewing so the twist sits flat rather than standing up like a knot.
4. Close the back securely. Join the ends directly or add a short elastic section for adjustment. Cover any scratchy seam allowance and test the finished headband for pressure behind the ears before trimming the last thread tails.
For me, the best twist looks slightly relaxed. Pulling the center too tight can make the headband narrow exactly where you want the fabric to look full.
Variation: Use two coordinating scraps for the front twist and a plain, softer fabric at the back where comfort matters most.
Upcycled Sewing Ideas: Create Vibrant Quilted Rolls from Fabric Scraps
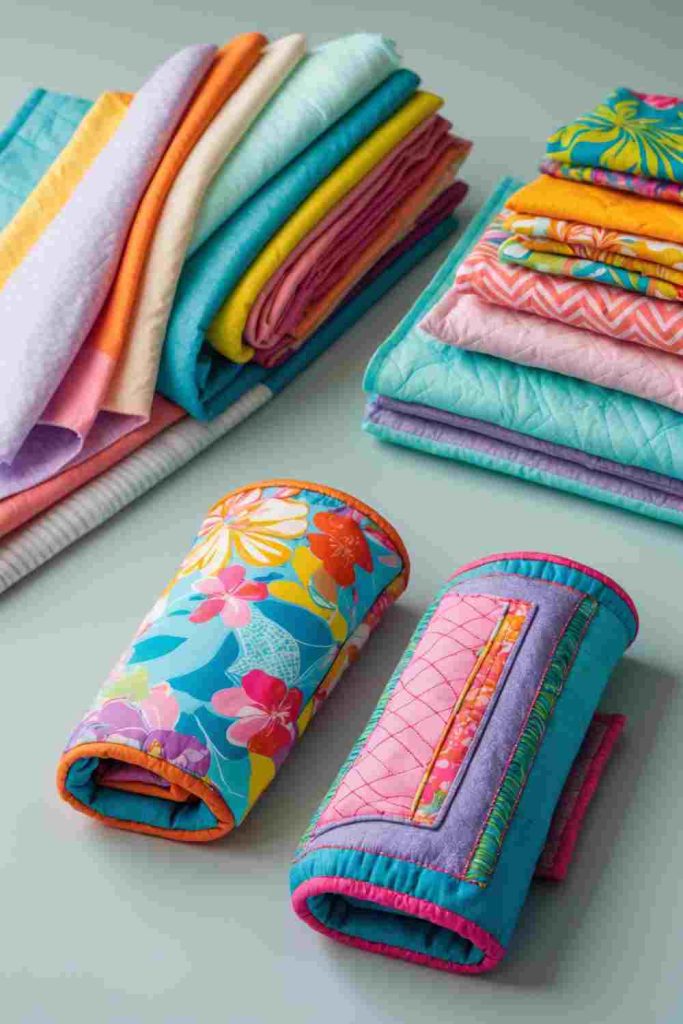
A quilted roll can become a draft stopper, soft bolster, tool roll insert, or decorative cylindrical cushion depending on how it is filled and finished. Patchwork works particularly well on a long shape because narrow scraps and leftover batting can be assembled in sections without needing one large unbroken piece.
Before sewing, decide whether the roll needs to be washable, firm, soft, or removable from its cover. I would make a separate inner form for anything that may need cleaning. That way the patchwork shell can be repaired or washed without wrestling with loose stuffing every time.
Materials and Tools
· Fabric scraps for patchwork
· Backing fabric
· Leftover batting or another suitable quilt layer
· Inner roll or clean stuffing material
· Sewing machine or hand-sewing tools
· Thread and scissors
· Optional ties, zipper, or buttons for a removable cover
Steps for This Upcycled Sewing Project
1. Make a long patchwork panel. Join scraps into strips or blocks until the panel is long enough to wrap around the intended roll. Press seams flat and avoid stacking several bulky seam intersections in one line.
2. Quilt the layers together. Place the patchwork over batting and backing, then stitch through the layers with straight, curved, or simple grid lines. Quilt from the center outward so excess fullness can move toward the edges rather than collecting in one bubble.
3. Shape the cylinder. Wrap the quilted panel around the inner roll or test filling and mark the seam position. Sew the long seam, leaving an opening or closure method if the cover needs to be removable.
4. Close the ends neatly. Add circular end pieces, gathered ends, or tied closures according to the intended use. Check that the ends cannot release filling and that any decorative ties are secure rather than purely ornamental.
I would keep the quilting fairly simple on a busy scrap surface. Too many tiny stitched patterns can make an already colorful roll feel visually crowded and harder to repair later.
Variation: Turn the same quilted panel into a draft stopper filled with clean textile offcuts, provided the finished tube can be closed securely and kept dry.
Upcycled Sewing Ideas: Make Colorful Fabric Bookmarks from Scraps
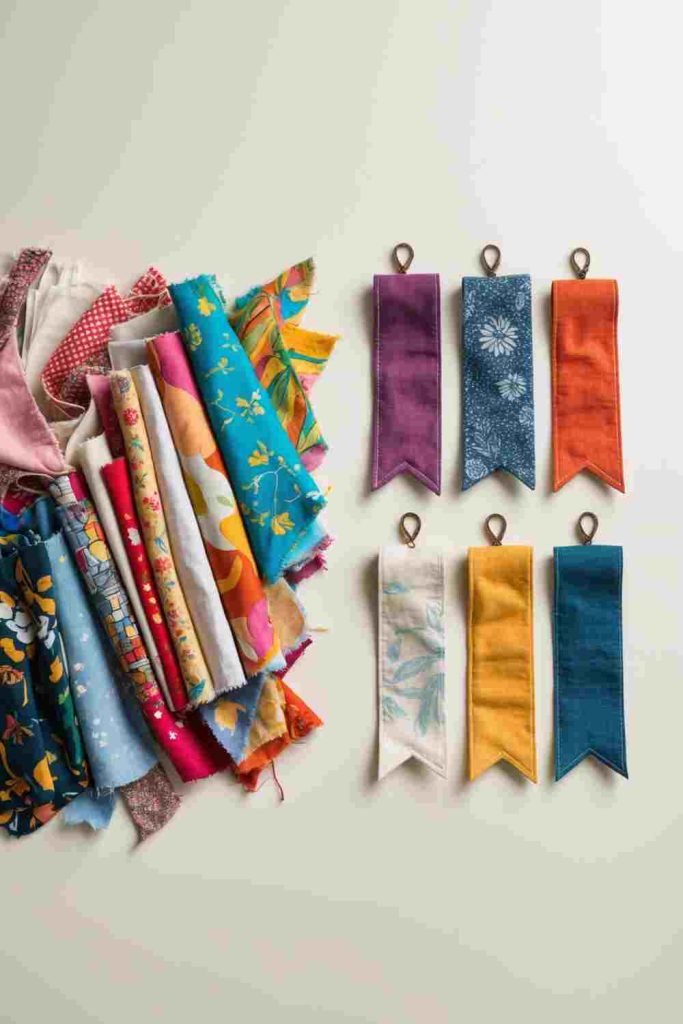
Fabric bookmarks are ideal for narrow leftovers, but a good bookmark should stay thin enough to sit inside a closed book without distorting the pages. That means bulky buttons, thick seam knots, and several layers of heavy interfacing are usually better saved for another craft.
A little structure helps the strip slide between pages, especially when the scrap fabric is soft. I would use one light stabilizing layer or a firm backing and keep most of the decoration at the top where it can remain visible outside the book.
Materials and Tools
· Small cotton or linen fabric scraps
· Lightweight interfacing or firm backing fabric
· Sewing machine or hand needle
· Thread
· Sharp scissors
· Iron
· Optional ribbon or flat fabric tab
Steps for This Upcycled Sewing Project
1. Build a stable bookmark panel. Piece tiny scraps together or cut two matching rectangles. Add a light stabilizer if the fabric folds too easily, but keep the total thickness modest enough for a book to close normally.
2. Sew the outer edges. Place the layers right sides together and sew around them, leaving a small turning opening. Trim the corners carefully, turn the piece, and press it flat without stretching the long edges.
3. Topstitch for a clean finish. Close the turning gap as you topstitch around the perimeter. Keep the stitching close to the edge so the center remains flat, and correct any twisting before the final side is sewn.
4. Add a lightweight top detail. Insert a ribbon, fabric loop, or narrow scrap tab at the top if desired. Test the bookmark in a closed book and remove anything that creates a noticeable bump between the pages.
The thinner the center section is, the more useful the bookmark becomes. I’d let the fabric print provide most of the decoration instead of asking the book to close over extra embellishments.
Variation: Make a coordinated set from different remnants and repeat the same backing fabric or topstitch color so the bookmarks feel related without being identical.
Upcycled Sewing Ideas: Craft Colorful Pincushions from Fabric Scraps
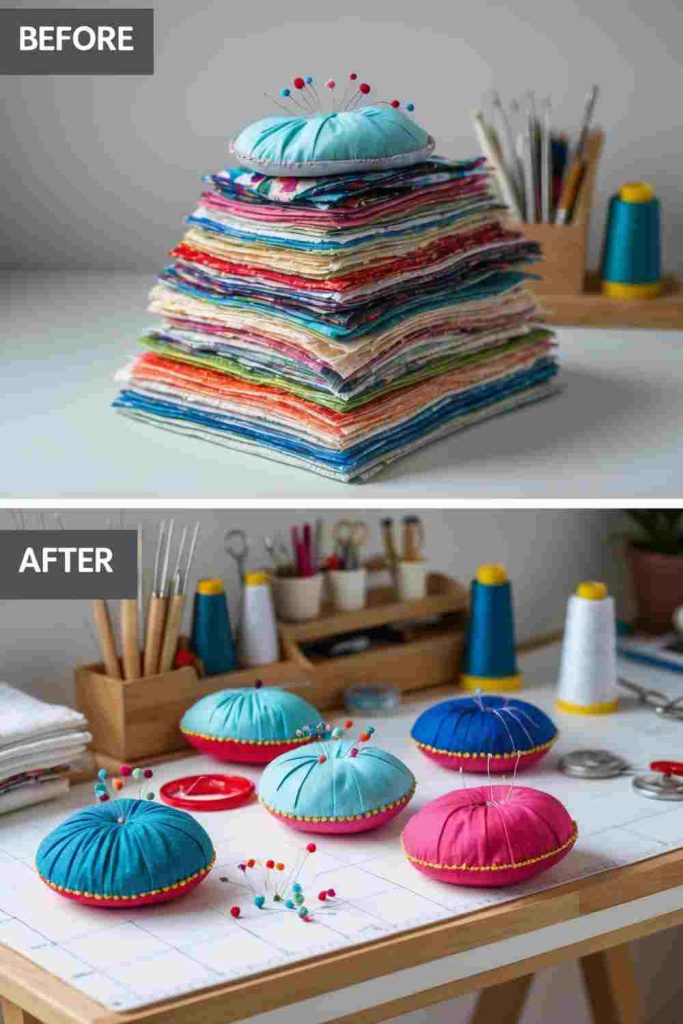
A pincushion can use scraps too small for almost anything else, but the outer fabric and filling should suit sharp pins. Loosely woven cloth can let points work through unexpectedly, and very coarse stuffing may make pins difficult to insert.
I would choose a tightly woven scrap for the working surface and save decorative lace or loose weave for an outer accent only. If the pincushion will sit beside a sewing machine, a flat weighted base can be more practical than a very round shape that rolls away at the worst moment.
Materials and Tools
· Tightly woven fabric scraps
· Clean suitable stuffing
· Needle and strong thread
· Fabric scissors
· Pins or clips
· Optional felt or heavier fabric for the base
· Optional embroidery thread for surface details
Steps for This Upcycled Sewing Project
1. Cut a simple shape. Choose two circles, squares, or another manageable pair of shapes. If using patchwork, piece the top first and press it flat so the final cushion does not have thick seam ridges under the pin surface.
2. Sew most of the perimeter. Place the pieces right sides together and stitch around the edge, leaving a turning opening. Reinforce the beginning and end of the seam because that area will be handled while stuffing.
3. Turn and fill evenly. Turn the cushion right side out and push the corners or curves into shape gently. Add filling in small amounts so it reaches the edges without creating one hard lump in the center.
4. Close and inspect. Hand-sew the opening with small secure stitches. Run your fingers around the entire cushion to check for weak seams, then test several pins slowly to make sure points do not emerge unexpectedly through the sides or base.
I don’t think a pincushion needs heavy decoration to feel finished. A few neat seams or a small stitched center are often safer and easier to use than beads or loose trims near sharp pins.
Variation: Sew a small fabric loop to one side so the pincushion can hang beside a workstation when it is not in use.
Upcycled Sewing Ideas: Make Beautiful Drawstring Bags from Fabric Scraps
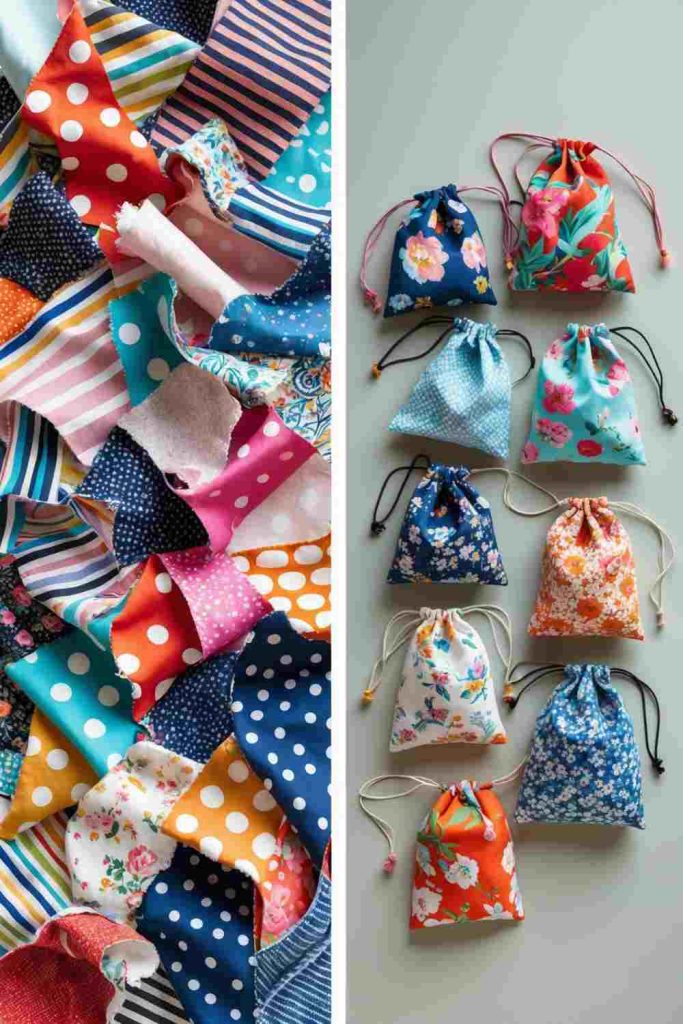
Drawstring bags are forgiving projects because the basic shape is simple and the size can follow the scraps you already have. They work for fabric storage, small gifts, travel items, or reusable wrapping, but the casing and lower corners receive more strain than the flat center panels.
A patchwork front paired with a plain reused lining is often easier than making every layer from tiny pieces. I would keep the drawstring channel free from thick patch seams so the cord can slide instead of catching each time the bag opens.
Materials and Tools
· Fabric scraps or pieced fabric panels
· Optional lining fabric
· Sewing machine or hand needle
· Thread
· Scissors
· Cord, ribbon, twill tape, or fabric ties
· Safety pin or bodkin for threading
Steps for This Upcycled Sewing Project
1. Piece the main panels. Join scraps into two rectangles or one larger panel that can fold into a bag. Press the seams and square the edges only after the patchwork is complete, keeping bulky intersections away from the future casing.
2. Sew the body. Place the fabric right sides together and sew the side and bottom seams, stopping below the casing area if the drawstring exits at the sides. Finish raw edges so repeated opening does not encourage fraying.
3. Form the drawstring channel. Fold the upper edge inward twice or use a separate casing strip. Stitch around the top with enough space for the chosen cord to move freely, then confirm the entry openings are secure and not exposing raw fabric.
4. Thread, close, and test. Pull the cord through the channel and knot or secure its ends. Open and close the bag several times with light contents inside. Reinforce the casing openings if the fabric puckers or the cord begins cutting into the edge.
The casing is the part I would keep uncomplicated. A decorative top edge is lovely until the drawstring has to fight through four thick seams every time the bag closes.
Variation: Use two cords entering from opposite sides to create a more even closure, or add a flat reclaimed fabric label to identify what is stored inside.
Upcycled Sewing Ideas: Craft Plush Nursery Letters from Fabric Scraps
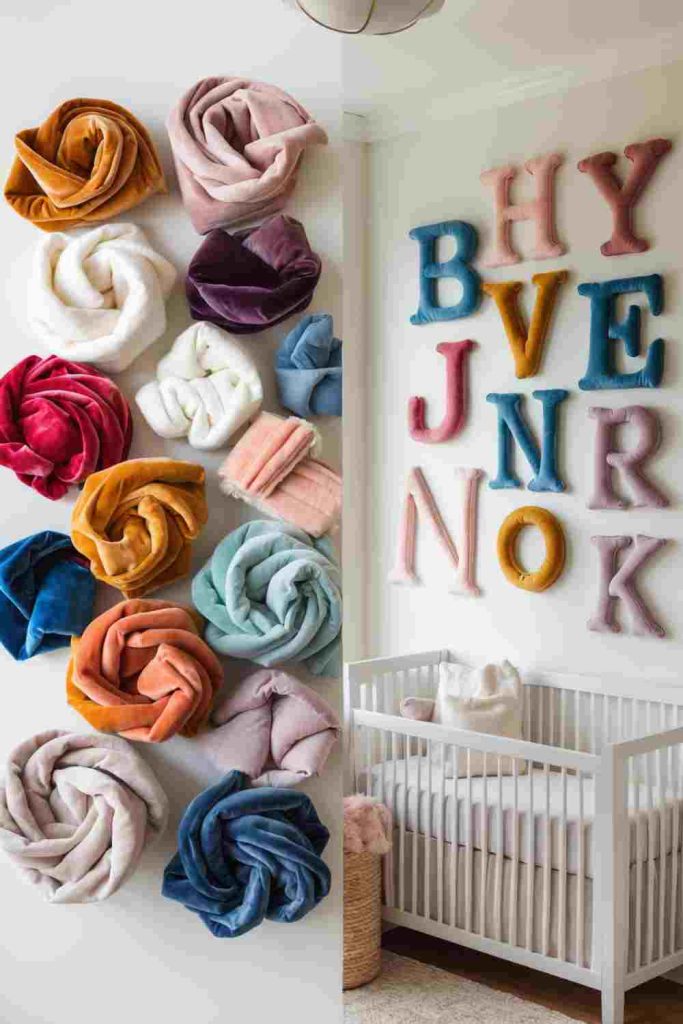
Soft fabric letters can turn favorite scraps into room decor, but anything intended for a nursery deserves a restrained approach to embellishment. Loose buttons, beads, sequins, and poorly secured trims are not worth adding to an item that may end up within reach of a young child.
The letter shape should remain readable after sewing and stuffing. I would choose broad, simple letterforms rather than very narrow serifs or tiny internal corners, especially for beginners. Tightly woven washable fabrics are easier to turn, fill, and keep tidy than fraying decorative scraps.
Materials and Tools
· Washable fabric scraps
· Paper or card letter templates
· Sewing machine or hand needle
· Strong thread
· Fabric scissors
· Clean suitable stuffing
· Optional plain backing fabric
Steps for This Upcycled Sewing Project
1. Choose and trace a simple letter. Create a broad template with enough width for seams and stuffing. Trace two mirrored pieces or one front and one back, placing any favorite motif where it will remain visible after the seam allowance is sewn.
2. Sew around the shape. Place the fabric right sides together and stitch around the outer edge, leaving a turning opening in an accessible straight section. Clip curves and internal corners carefully without cutting the stitching.
3. Turn and fill gradually. Turn the letter right side out and shape the corners with a blunt tool. Add small amounts of stuffing into narrow sections first, then fill the wider areas so the surface stays even rather than lumpy.
4. Close and check every seam. Hand-sew the opening securely and inspect the full perimeter. Keep the finished piece as decor unless its construction, materials, and intended placement are appropriate for direct child handling, and avoid loose decorative parts.
For nursery projects, I’d rather rely on color and print than add detachable decoration. The fabric itself can do plenty of visual work without creating extra small parts.
Variation: Create one initial for wall or shelf decor, or make a small name set using the same backing fabric so mixed front scraps still feel coordinated.
Upcycled Sewing Ideas: Craft Embroidered Tags & Bookmarks from Fabric Scraps
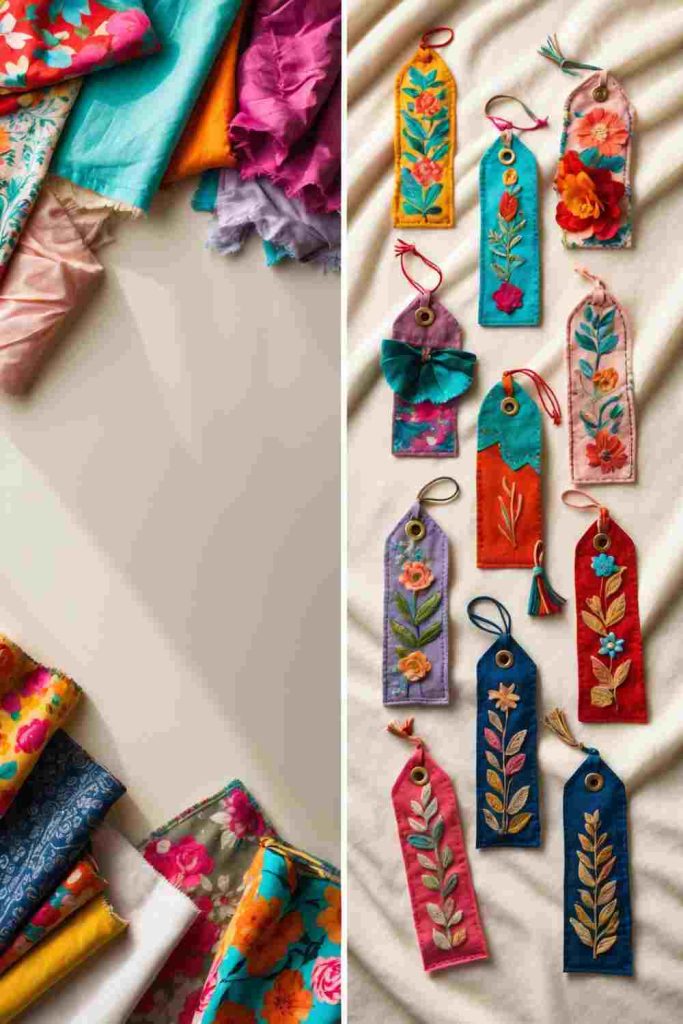
Embroidered tags and bookmarks are useful for the tiny pieces that remain after larger sewing projects. A few simple stitches can give plain scraps enough identity to become gift tags, labels, or reading markers without covering the fabric completely.
The purpose should decide the finish. A reusable gift tag can be slightly firmer and include a hanging loop, while a bookmark needs to stay flat. I would complete the embroidery before assembling the backing so knots and thread tails can be hidden inside the finished piece.
Materials and Tools
· Small fabric scraps
· Embroidery thread
· Hand-sewing and embroidery needles
· Small hoop if helpful
· Backing fabric or lightweight stabilizer
· Scissors
· Ribbon, twine, or fabric loop for tags
Steps for This Upcycled Sewing Project
1. Plan a small stitched motif. Choose initials, a leaf, a line pattern, or another compact design that fits the scrap. Mark it lightly if needed and keep stitches away from the future seam allowance so they are not cut off during assembly.
2. Embroider before backing. Work the design with moderate tension so the fabric stays flat. Secure thread ends on the wrong side without large knots, and press from the back with a protective cloth if the fabric and thread can tolerate it.
3. Add support and finish the edges. Layer the embroidered piece with backing fabric or stabilizer. Sew and turn it, bind the edges, or use another neat finish appropriate to the size. Keep a bookmark thin and a tag sturdy enough to hang.
4. Attach the loop or final detail. Add a flat ribbon or fabric loop at the top if the item will hang. Test the finished piece for loose thread ends and make sure the loop is stitched into a strong section rather than only through one decorative surface layer.
Small embroidery looks more deliberate when there is some empty fabric around it. I know it can feel tempting to fill every corner, but one restrained motif usually reads more clearly.
Variation: Use a piece of an old shirt cuff or hem as the base so an existing stitched edge becomes part of the finished tag.
Upcycled Sewing Ideas: Transform Fabric Scraps into Adorable Stuffed Bears
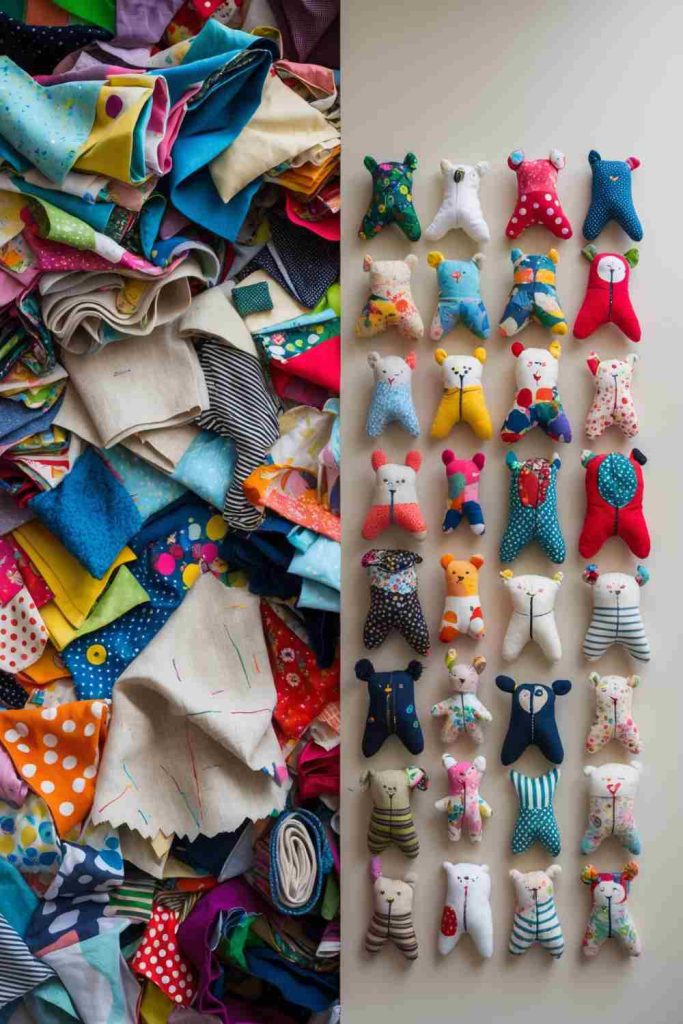
A scrap-fabric bear can combine several remnants in one keepsake, but the sewing becomes more demanding around curves, limbs, and tight turning points. The strongest scraps should sit at the seams and areas that will be handled most, while fragile vintage fabric is better used as a reinforced decorative patch.
Safety depends on who will receive the finished bear. I would use embroidered facial features rather than loose buttons for a young child and keep every seam closed securely. For a decorative bear intended for adults, more surface detail is possible, but the internal construction still needs to hold the stuffing.
Materials and Tools
· Strong woven fabric scraps
· Bear pattern or simple template
· Sewing machine or hand-sewing needle
· Strong thread
· Fabric scissors
· Clean suitable stuffing
· Embroidery thread for facial details
Steps for This Upcycled Sewing Project
1. Prepare stable pattern pieces. Piece scraps together first if necessary, then place the bear pattern over the completed patchwork. Avoid putting a weak seam directly through a narrow neck, ankle, or arm connection where turning and stuffing create extra stress.
2. Sew the body carefully. Pin matching pieces right sides together and sew around the outline, leaving a turning opening. Shorten the stitch length slightly around tight curves if appropriate, then clip seam allowances carefully so the shape can turn smoothly.
3. Turn and stuff in stages. Turn the bear through the opening and shape the limbs gently. Fill small areas first, then the body, keeping the stuffing even and leaving enough flexibility for the seams to remain relaxed rather than strained.
4. Close and add secure features. Hand-sew the opening with strong hidden stitches. Add embroidered eyes, nose, and other details where safety requires soft features, then inspect every seam and thread tail before the bear is handled.
The personality comes from the fabric mix, so I would not chase perfect symmetry. A different scrap on each ear or paw can look intentional as long as the construction stays balanced.
Variation: Use one meaningful garment as the main fabric and reinforce it from behind, turning a worn shirt or dress into a keepsake bear without depending on fragile cloth alone.
Upcycled Sewing Ideas: Make Rustic Bread Bags from Fabric Scraps
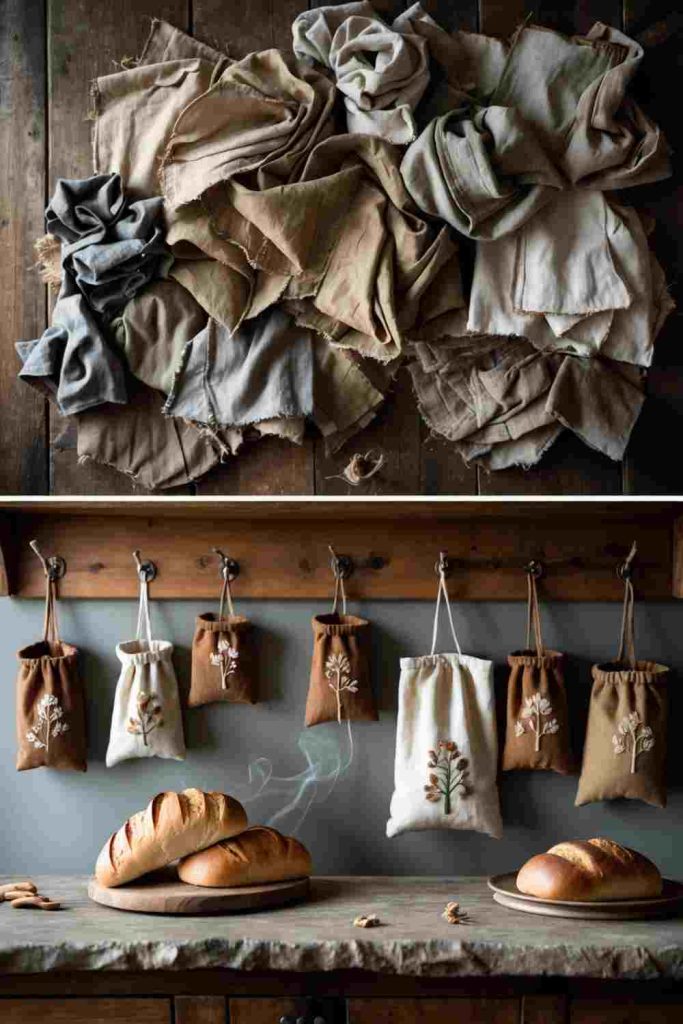
A reusable bread bag can be sewn from clean, washable fabric that is appropriate for contact with food packaging or the outer surface of baked goods. This is not the place for mystery-treated textiles, heavily painted cloth, or fabrics with strong odors that cannot be removed.
Breathability and washability are more useful than heavy decoration. I would choose plain cotton or linen from a known household textile and keep any patchwork seams flat. If you are uncertain about a reclaimed fabric’s previous treatment, use it for the outer decorative layer and add a suitable known lining.
Materials and Tools
· Clean washable cotton or linen fabric
· Optional suitable lining fabric
· Sewing machine or hand needle
· Thread
· Fabric scissors
· Cotton cord or fabric drawstring
· Iron
Steps for This Upcycled Sewing Project
1. Choose fabric you can identify and clean. Wash the textile before cutting and inspect it for stains, coatings, mildew, or persistent odors. Avoid unknown chemically treated or painted fabric for areas that may directly contact food.
2. Cut and sew the bag body. Use a simple rectangle or two-panel construction sized to the bread you normally store. Sew the side and bottom seams with a clean finish so crumbs do not collect in loose fraying edges.
3. Create a smooth upper casing. Fold the top edge to make a channel for cord, keeping thick patchwork seams away from the drawstring path. Stitch the casing securely and leave reinforced openings for the cord to exit.
4. Thread and test the closure. Insert washable cord or a sewn fabric tie and close the bag around a clean empty container first. Make sure the opening can loosen fully for washing and drying, and launder the bag according to the fabric’s needs.
I’d keep the inside as plain as possible. Decorative patchwork can live outside, while the interior benefits from smooth seams and fabric that is easy to wash thoroughly.
Variation: Add a small exterior pocket for a reusable bread label or note, keeping it separate from the food-contact area.
Upcycled Sewing Ideas: Make Colorful Quilted Coasters from Fabric Scraps
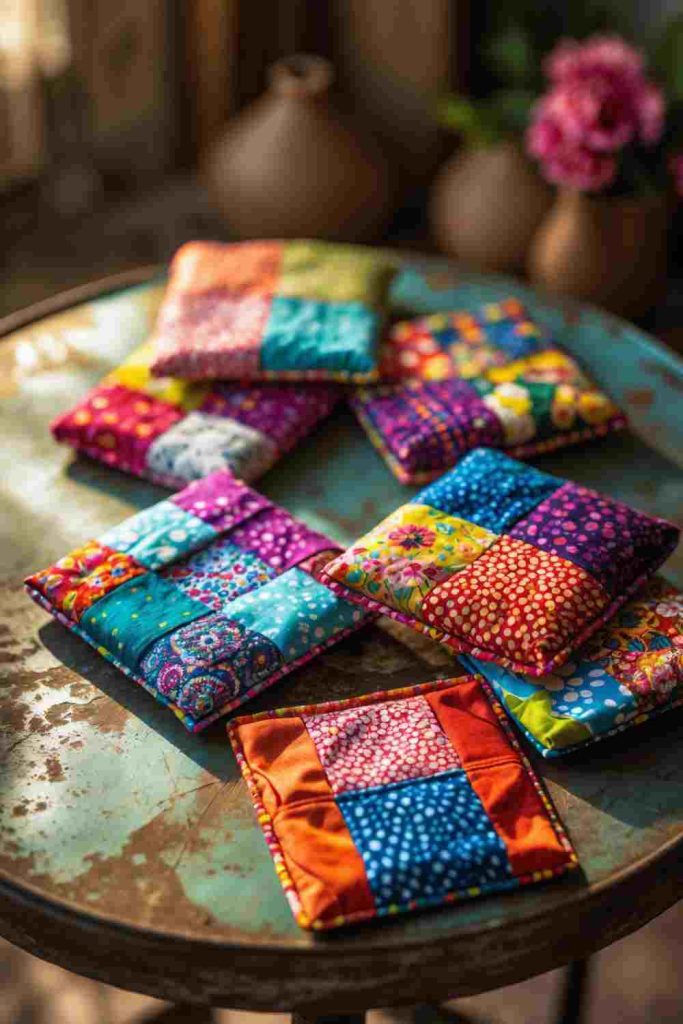
Quilted coasters are small enough to use narrow strips, but they still need a flat center so a cup does not wobble. The best scraps are washable and stable, and the inner layer should add modest protection without making the coaster pillowy.
I would avoid beads, thick knots, and tall decorative stitching in the center. Color can come from the patchwork itself, while quilting lines hold the layers together and stop small scraps from shifting after washing.
Materials and Tools
· Washable fabric scraps
· Thin cotton batting or suitable reused quilt layer
· Backing fabric
· Sewing machine or hand needle
· Thread
· Scissors or rotary cutter
· Iron
Steps for This Upcycled Sewing Project
1. Piece a small top panel. Join scraps into a square or another simple shape slightly larger than the intended coaster. Press every seam flat and trim the panel only after the patchwork is stable.
2. Layer the coaster. Place backing, batting, and patchwork top together in the order required by your chosen construction method. Smooth the layers so no fold or lump sits in the central cup area.
3. Quilt through all layers. Sew a few straight, diagonal, or gently curved lines across the coaster. Begin near the center and work outward so the fabric stays flat, then check that none of the quilting creates a raised ridge.
4. Trim and finish the edge. Square the coaster and bind, turn, or neatly stitch the perimeter. Press it flat and place a cup on top to check stability before making the rest of the set.
A coaster is one of those projects where restraint helps. I would rather use three secure quilting lines than cover the center with texture that makes the mug rock.
Variation: Use the same backing fabric on every coaster while changing the scrap layout on top for an easy coordinated set.
Upcycled Sewing Ideas: Create Colorful Fabric Party Banners from Scraps

Fabric bunting can reuse bright offcuts again and again, which makes it more practical than single-use paper decoration when it is sewn securely. Triangles are traditional, but rectangles, half-circles, or irregular pennants can make better use of the actual scrap shapes you have.
The top tape carries the whole banner, so it should be stronger than the pennants. I would also think about where the banner will hang. Indoor cotton scraps may not suit long-term outdoor weather, and loose strings should always be kept away from places where children or pets can become tangled.
Materials and Tools
· Colorful fabric scraps
· Strong bias tape, twill tape, or reused fabric strip for the header
· Sewing machine or hand needle
· Thread
· Fabric scissors
· Template for consistent pennant shapes
· Iron and pins or clips
Steps for This Upcycled Sewing Project
1. Cut efficient pennant shapes. Arrange a paper template over the scraps to reduce waste. If fabric frays heavily, sew paired pennants right sides together and turn them, or finish the raw edges before attaching them to the header.
2. Plan the color sequence. Lay all shapes on the floor or table and move them around before sewing. Leave consistent gaps if you want a calm rhythm, or overlap slightly only if the fabric and header can support the extra bulk.
3. Attach to a strong header. Fold bias tape or a fabric strip over the pennant tops and stitch through all layers. Reinforce the first and last sections because those areas take the tension when the banner is tied or hung.
4. Finish safe hanging ends. Leave enough header at both ends for secure knots or loops and finish the raw edges. Hang the banner from stable points, avoiding heat sources and places where long cords could become a hazard.
The colors usually look better after they are rearranged once or twice. I’d decide the sequence before the sewing machine is running because unpicking a whole banner is a very slow way to change your mind.
Variation: Make a shorter seasonal banner and sew small fabric letters onto only a few pennants, leaving most scraps plain so the message remains easy to read.
Upcycled Sewing Ideas: Turn an Old Sweater into a Cozy Pet Bed

An old sweater can provide a soft outer shell for a small pet bed, but the garment needs to be checked for weak knit, loose threads, decorative beads, and anything a pet could pull free. The bed should also be sized for the animal rather than simply using the largest sweater available.
I would make the filling removable whenever possible because pet bedding needs regular cleaning. If the sweater fabric is badly felted or worn through at the elbows, those sections can still be reinforced from inside instead of becoming the load-bearing base.
Materials and Tools
· Clean old sweater in sound condition
· Washable cushion insert or clean suitable filling
· Strong hand-sewing needle or machine suited to the knit
· Strong thread
· Fabric scissors
· Optional sturdy lining fabric
· Pins or clips
Steps for This Upcycled Sewing Project
1. Inspect and prepare the sweater. Remove loose decorations and repair weak holes before stuffing anything. Wash the sweater in a way that suits the fiber and confirm there are no long loose threads or fasteners that could be chewed or caught.
2. Create the outer bolster. Close the neckline securely and fill the sleeves with a washable inner roll or contained stuffing. Shape the sleeves around the body area and pin them temporarily so you can judge the finished bed size.
3. Build the center cushion. Place a removable cushion or enclosed filling inside the sweater body. Fold or sew the lower edge closed around it, keeping the seam accessible if you want the cover to come apart for washing.
4. Join and inspect the final shape. Secure the sleeve bolster around the center with strong stitching at several points. Check the entire bed for exposed pins, loose threads, hard closures, or seams the pet can easily pull open before use.
For a pet bed, washable construction matters more than decorative perfection. I’d rather see a simple seam that opens for cleaning than a complicated finish that traps the stuffing permanently.
Variation: Use a removable pillow insert in the center and keep the stuffed sleeve ring separate, making both parts easier to wash and repair.
Upcycled Sewing Ideas: Transform an Old Pillowcase into a Patchwork Tote Bag
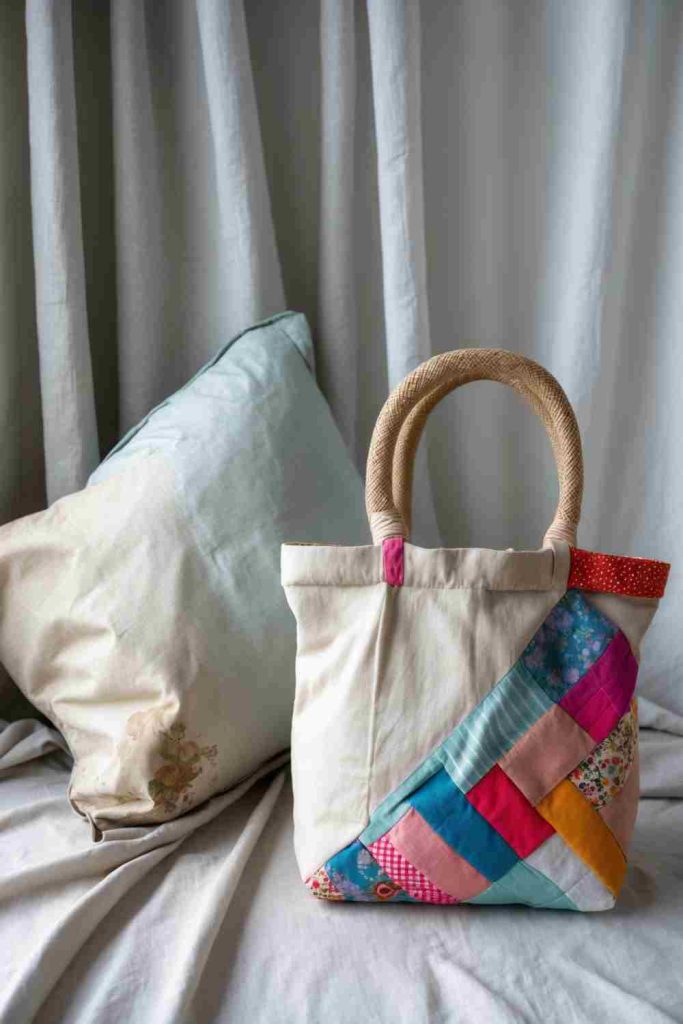
A pillowcase already gives you a large sewn fabric tube, so it can shorten the basic construction of a tote. The fabric, however, was never designed to carry heavy loads, which means the handles and upper edge need reinforcement if the bag will hold more than lightweight items.
Patchwork can strengthen decorative areas, but it should not be mistaken for structural reinforcement unless the added pieces are sewn securely through a stable base. I would add a stronger lining or facing around the top before attaching handles, especially with a thin cotton pillowcase.
Materials and Tools
· Clean old pillowcase
· Fabric scraps for patchwork
· Stronger reused fabric for lining or reinforcement
· Sewing machine or hand needle
· Strong thread
· Fabric scissors
· Sturdy fabric or webbing for handles
Steps for This Upcycled Sewing Project
1. Check and reshape the pillowcase. Inspect the existing seams and remove any weak stitching. Cut the pillowcase to the tote proportions you want, preserving a strong factory seam where useful rather than automatically cutting every edge apart.
2. Add the patchwork panel. Piece scraps into a decorative panel and press it flat. Sew it to the front of the tote body with secure edges, keeping extra bulk away from the future handle attachment points.
3. Reinforce the top and bottom. Add lining, facing, or reinforcement fabric where the handles will sit. Sew the lower edge or box the corners if needed, then check that the base can support the intended contents without relying on one old pillowcase seam.
4. Attach and load-test the handles. Sew each handle through the reinforced upper section with a strong box or crossed stitch pattern. Add light weight first and inspect for pulling before using the tote for heavier everyday items.
Handle attachment is the part I would not rush. A lovely patchwork front does not help much if the thin pillowcase fabric tears exactly where the straps begin.
Variation: Use the pillowcase as a lined lightweight library or craft bag and keep the handles short, which reduces leverage on the upper edge.
Upcycled Sewing Ideas: Turn Old T-Shirts into a Memory Quilt
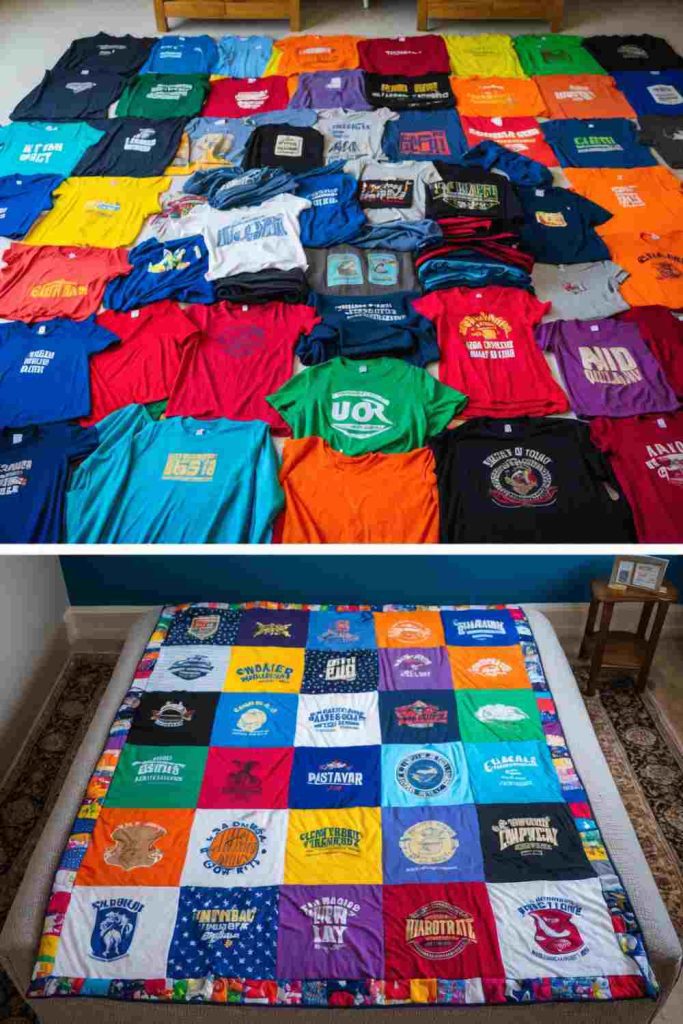
A T-shirt memory quilt preserves printed panels that may be sentimental even after the garments themselves are worn out. The challenge is that jersey stretches in every direction, while quilt construction works more easily when blocks behave consistently. Stabilizing the shirt panels before joining them makes the finished quilt much easier to manage.
I would choose the most meaningful graphics first rather than trying to include every shirt. Some thin or damaged fabric may need a larger stabilizer backing, and a shirt with a cracked print can still work if the surrounding knit remains strong enough to sew without tearing.
Materials and Tools
· Clean old T-shirts with usable printed areas
· Lightweight fusible or sew-in stabilizer appropriate for the fabric
· Backing fabric
· Batting if making a traditional quilt
· Sewing machine or hand-sewing equipment
· Thread and fabric scissors or rotary cutter
· Ruler and cutting mat
Steps for This Upcycled Sewing Project
1. Select and stabilize the shirt panels. Cut generously around each design, then apply a suitable stabilizer to the back before final trimming. This reduces stretching and allows the blocks to be squared without pulling the knit out of shape.
2. Plan the layout on a flat surface. Arrange the stabilized panels by color, size, or memory rather than immediately sewing the first two together. Use filler blocks from plain shirt fabric or another reused textile where necessary to balance different graphic sizes.
3. Join blocks into larger sections. Sew blocks into rows with consistent seam allowances, pressing carefully so prints are not damaged by excessive heat. Then join the rows and check that the quilt top stays reasonably square before adding backing layers.
4. Layer, quilt, and bind. Add batting and backing if desired, baste the layers, and quilt with a pattern that does not distort the knit panels. Finish the perimeter with binding and inspect all old shirt fabric for weak areas that may need reinforcing before regular use.
Memory quilts do not need to be visually perfect to feel meaningful. I’d rather leave one slightly faded print in place than replace it with something newer that has no connection to the story of the quilt.
Variation: Make a smaller lap quilt, wall hanging, or cushion cover from only a few important shirts if a full bed-size quilt feels too large for the available fabric.
Sewing Upcycling Choices That Can Cause Stretching, Weak Seams, or Awkward Finishes
Mixing Stretchy and Stable Fabrics Without Support
Jersey, denim, cotton, and loosely woven fabric do not respond to stitching in the same way. If they are joined without stabilizing or careful placement, one section may stretch while another stays rigid, creating ripples and distorted seams. Use compatible fabrics in structural areas or stabilize the more flexible material first.
Putting Weak Fabric at a High-Stress Point
Old cloth can look fine until a handle, strap, corner, or hanging loop begins pulling on it. Move worn fabric away from load-bearing areas and reinforce those points with stronger backing or a more dependable reused textile.
Cutting Before the Final Layout Is Clear
Small scraps can disappear quickly if everything is trimmed to exact sizes too early. Arrange and piece larger panels first, then square or shape them once the patchwork is stable. That leaves more room to correct an uneven seam or change the composition.
Leaving Bulky Seams in Hinges, Casings, and Wearable Areas
A thick seam across a book spine, headband center, drawstring channel, or phone-facing surface can make the item uncomfortable or difficult to use. Redirect bulky joins to flatter areas and grade or press seam allowances where appropriate.
Treating Decorative Stitching as Structural Stitching
Topstitching and embroidery can secure a surface, but they should not automatically be trusted to hold a heavy tote handle, planter strap, or loaded basket. Use dedicated reinforced seams where the project carries weight.
Closing a Project Before Testing the Hardware
Zippers, elastic, cords, buttons, and hanging loops are much easier to replace before a lining or final seam is closed. Test each component in position, then finish the surrounding construction once it moves correctly.
Using Loose Embellishments on Child or Pet Items
Buttons, beads, sequins, and dangling trims can come loose under chewing, pulling, or repeated handling. Use stitched fabric details or embroidery where a safer soft feature is more appropriate, and inspect seams regularly.
Ignoring Cleaning and Moisture
A fabric plant sleeve, pet bed, bread bag, or cup-related project needs a realistic cleaning plan. Keep removable parts removable, avoid trapping damp filling, and choose washable fabrics for items likely to get dirty.
Overstuffing Soft Projects
Too much filling strains seams and can distort letters, pincushions, bears, or pet beds. Add stuffing gradually, shape it into the corners, and stop before the fabric looks stretched or the seam allowances begin pulling open.
Trying to Use Every Scrap in One Project
Upcycling does not require squeezing every leftover color and texture into a single object. A smaller selection often makes construction easier and the finished design clearer. Save the remaining pieces for the next project rather than overloading this one.
Frequently Asked Questions
Can beginners try these upcycled sewing ideas?
Yes. Bookmarks, drawstring bags, pincushions, bunting, and simple fabric baskets are approachable places to begin because the shapes are forgiving. More fitted or load-bearing projects such as jackets, hanging planters, and memory quilts benefit from slower planning and basic seam confidence.
Do I need a sewing machine for upcycled fabric projects?
Not always. Small pieces, tags, repairs, bookmarks, and some stuffed items can be sewn by hand with strong, even stitches. A machine becomes useful when you have long seams, multiple quilt layers, heavy denim, or many repeated pieces, but the construction still matters more than the tool.
Should I wash fabric scraps before sewing with them?
Usually, if the fabric can be washed safely and its history is known. Cleaning removes dirt and helps reveal shrinkage, stretching, or weakness before the fabric is trapped inside a finished project. Very delicate vintage material may need gentler handling rather than a normal wash cycle.
How can I stop T-shirt fabric from stretching while I sew?
Use a suitable stabilizer when you need precise shapes, especially for memory quilts. Avoid pulling the knit through the machine, support the fabric as it feeds, and test your stitch and needle choice on a scrap before working on the important printed panel.
What can I use instead of new stuffing?
Clean textile offcuts can work in some decorative soft projects when they are enclosed securely, though they create a firmer and sometimes lumpier result than conventional filling. For washable pet beds or items that need an even soft shape, a removable existing cushion insert can be easier to clean and maintain.
How do I make upcycled bags and baskets more durable?
Put stronger fabric at the base, upper rim, handles, and other stress points, then reinforce those seams separately from decorative topstitching. A lining or stabilizer can also help, but it should support sound fabric rather than hide material that is already failing.
How should I care for finished upcycled sewing projects?
Follow the needs of the most delicate material used in the project. Remove inserts, pots, or hardware when possible, repair loose seams before washing, and avoid assuming mixed reclaimed fabrics will all tolerate the same heat, detergent, or drying method.
Let the Fabric You Already Have Decide the Next Sewing Project
The most useful upcycled sewing ideas begin with an honest look at the fabric rather than a shopping list. Strong denim can carry weight, soft jersey can become something comfortable, tiny cotton scraps can handle detailed work, and sentimental T-shirts can be stabilized before they become part of a quilt. Matching the material to the job is what turns a leftover into something worth keeping.
I would start with one manageable project and let the condition of the fabric guide the design. A neat bookmark, a small basket, or a drawstring bag can teach you just as much about reuse as a large quilt or patchwork jacket. Which forgotten textile in your cupboard could become your next sewing project?