Everyday objects often reach an awkward middle stage where they are no longer useful in their original form but still contain perfectly workable material. A torn T-shirt can hold strong strips of cotton, an old shutter may still have sound slats, and a worn guitar can keep a memorable outline long after it stops being playable. That is where thoughtful upcycling becomes more useful than simply decorating something for the sake of it.
I’m most interested in upcycling ideas that respect what an object can still do. I don’t think every old item deserves to be saved, but I do think it is worth checking the fabric, wood, metal, hardware, and shape before deciding it has reached the end. Sometimes the best second use is practical storage; sometimes it is a small decorative piece that preserves the character of something you no longer need.
The important part is matching the new job to the old material. A wall rack needs reliable fixings, a candle container needs heat-safe construction, and an outdoor marker needs finishes that suit weather exposure. I know it can feel tempting to jump straight to paint, glue, or cutting, but a few minutes of inspection usually makes the finished project safer, neater, and easier to live with.
Sort Reusable Materials Before You Decide What to Make
Upcycling works best when the material leads the project instead of the project forcing a damaged object into a job it cannot handle. Before choosing a finish or buying hardware, separate pieces that are genuinely reusable from parts that are cracked, badly corroded, contaminated, brittle, or structurally unreliable. This is especially important when one article mixes fabric, wood, metal, ceramics, electronics, and old household fittings.
· Wash or clean fabric, cans, keys, hardware, and wooden pieces in a way that suits the material before enclosing dirt beneath paint, glue, stitching, or sealant.
· Check reclaimed wood for hidden nails, loose splinters, rot, insect damage, unstable joints, and old finishes that should not be sanded or disturbed casually.
· Reject cracked teacups, chipped glass, badly weakened metal, or sharp-edged containers when the damage could worsen during use.
· Test old leather belts, denim, cords, and fabric strips for strength before asking them to carry weight or hold a hanging item.
· Keep sentimental, collectible, or potentially valuable cameras, musical instruments, keys, and jewellery intact unless you are comfortable permanently altering them.
· Separate purely decorative materials from structural parts so an attractive but weak piece is not accidentally used where screws, load, heat, or movement demand more strength.
Match Tools, Fasteners, and Finishes to Each Material
A mixed-material project can fail simply because one tool or adhesive is expected to work on everything. Fabric wants flexible joins, wood benefits from proper pilot holes and suitable screws, and metal edges may need filing before they are safe to handle. I would choose the attachment method only after deciding whether the finished object will flex, carry weight, get wet, sit outdoors, or be cleaned regularly.
· Use sewing or other flexible textile joins for rugs, denim organizers, and fabric projects that will bend, wash, or carry repeated tension.
· Pre-drill old wood when screws are close to an edge, and choose wall anchors and mounting hardware for the actual wall type rather than relying on decorative hooks alone.
· Wear eye protection when drilling keycaps, gears, metal parts, old wood, or hardware that may throw chips, fragments, or rust particles.
· Smooth cut metal, drilled plastic, and exposed wire ends before the finished object is handled, worn, hung, or placed near children and pets.
· Use coatings, paints, adhesives, and sealers only on materials and in conditions the product instructions support, with ventilation where required.
· Keep decorative paint, unknown finishes, and craft adhesives away from direct food-contact areas unless the complete finished system is specifically suitable for that use.
Plan Weight, Heat, Weather, and Everyday Use Before Assembly
The finished purpose should decide how much reinforcement a project needs. A key holder carries very little compared with a coat rack; a candle introduces heat that a simple trinket cup never sees; and a plant holder may encounter water even when the decoration itself is indoors. Planning those conditions before assembly helps you avoid making a project that looks finished but needs to be rebuilt after the first week of use.
· Estimate the loaded weight of shelves, hanging organizers, wall racks, planters, and hooks, then choose supports that suit that weight with a sensible margin.
· For candle projects, use candle-safe containers and components, keep flammable trims away from the flame area, and never assume an old decorative vessel is automatically suitable for heat.
· For outdoor projects, consider drainage, rust, UV exposure, water absorption, and whether the chosen finish is intended for exterior conditions.
· Keep small magnets, jewellery findings, sharp keycaps, pins, loose brooches, and similar parts away from young children and pets.
· Load-test reused straps, handles, wall hooks, and hanging loops gradually before trusting them with valuables or heavy objects.
· Make decorative conversions reversible when possible if the original object still has value, useful parts, or a realistic chance of repair.
Transform Old Fabrics into a Stunning Braided Rug
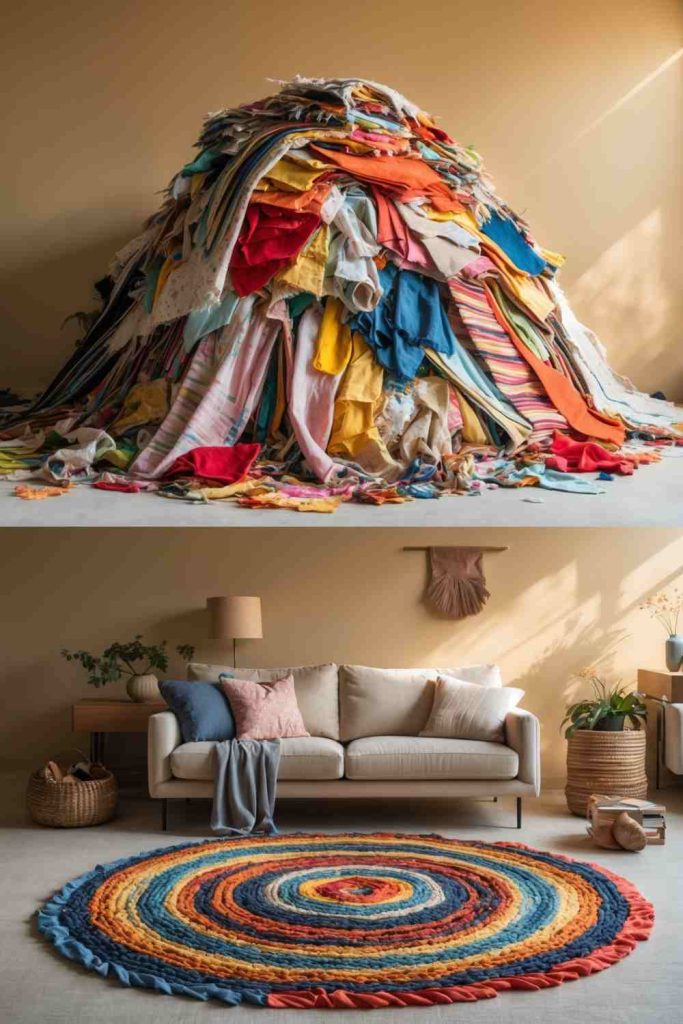
Long fabric strips are one of the most forgiving ways to reuse worn T-shirts, sheets, and other soft textiles because small stains or faded areas disappear into the braid. The finished rug gains its shape from repetition rather than from perfectly matched fabric, so a mixed pile of cotton remnants can look intentional once the colours are distributed evenly.
The part that matters most is the connection between the coils. A braid may feel strong in your hands but still shift underfoot if the spiral is only held with scattered stitches. I would treat this as a sewing project first and a decorative project second, then add a suitable non-slip layer underneath if the rug will sit on a smooth floor.
Materials and Tools
· Old T-shirts, sheets, or sturdy fabric scraps
· Fabric scissors or a rotary cutter with a safe cutting mat
· Strong hand-sewing thread or durable machine thread
· Large needle suited to the fabric thickness
· Clips or pins for controlling the coil
· Optional rug pad or non-slip underlay appropriate for the floor
Steps for This Upcycling Project
1. Prepare consistent fabric strips. Wash the textiles first, remove hard seams or damaged patches, and cut the usable material into long strips of similar width. Join short pieces with low-bulk sewn overlaps or another secure textile join. Arrange the colours before braiding so one shade does not accidentally dominate the whole outer edge.
2. Braid with steady tension. Work with three strips at a time and braid firmly without stretching the fabric hard. Add new strips at staggered points so several joins do not create one thick lump. Lay the braid on the floor occasionally; it should feel flexible enough to coil without twisting back on itself.
3. Coil and stitch the rug. Begin a tight centre spiral on a flat work surface, then stitch neighbouring braid rows together as the coil expands. Catch substantial fabric with each stitch rather than only a loose edge. Then turn the rug over every few rounds to check that the stitching is not pulling the surface into a bowl.
4. Finish for safe floor use. Secure the final braid end underneath with several stitches and trim loose threads only after the join is stable. Press or shape the rug if the fabric allows it, then test it on the intended floor. Add a suitable non-slip underlay if the rug moves easily under a normal step.
I like the colour variation in a scrap-fabric rug, but I would keep the surface itself fairly even. Raised knots and bulky braid joins may look handmade in a basket; under a foot, they become the detail you notice for the wrong reason.
Variation: Make a smaller oval mat for a bedside area or reading corner. Using one repeated dark strip in every third braid can visually connect otherwise unrelated fabric scraps.
Turn an Old Wooden Shutter into a Stylish Magazine Rack
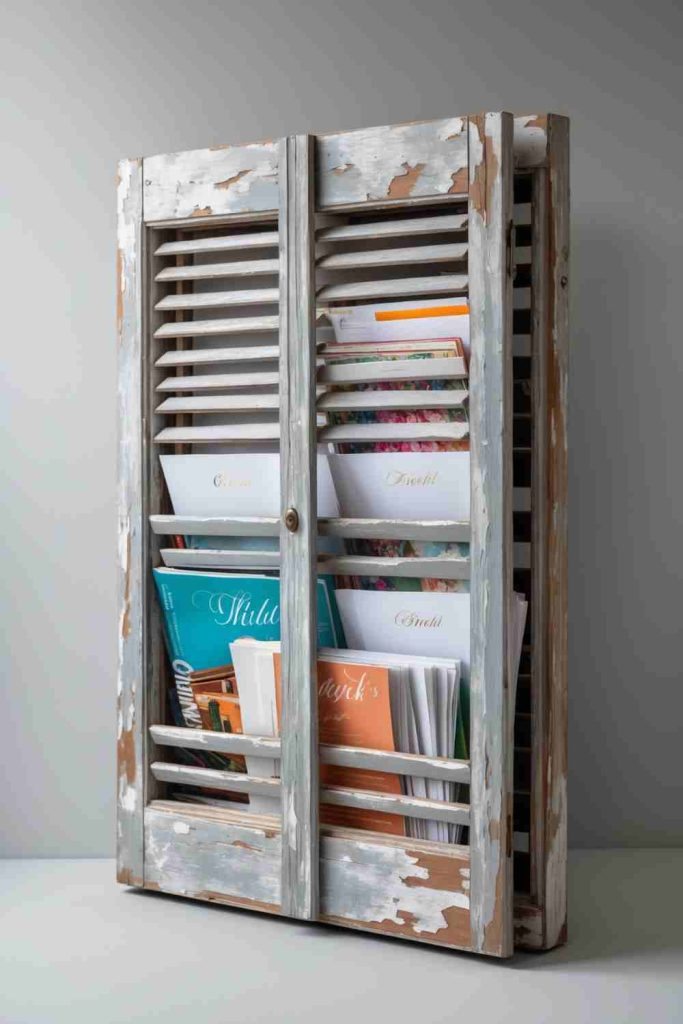
A louvred wooden shutter already has the angled slots that a magazine rack needs, which makes this conversion more about inspection and mounting than complex construction. Papers, slim notebooks, and magazines can tuck behind the slats while the shutter stays narrow against a wall.
Older shutters can hide loose paint, cracked rails, rusty hinges, or weak louvres, so I would not rush into sanding. First decide whether the existing finish is safe to disturb and whether the frame is sound enough to mount. Once the structure checks out, a careful clean and a restrained refinish can preserve the aged character without leaving rough edges around paper.
Materials and Tools
· Old wooden shutter with sound frame and slats
· Soft brush, cloth, and appropriate cleaner
· Fine abrasive only when the existing finish is suitable to sand
· Paint or finish suitable for the prepared surface, if desired
· Wall-mounting hardware and anchors suited to the wall
· Drill, screwdriver, level, and eye protection
Steps for This Upcycling Project
1. Inspect the shutter before refinishing. Check every rail, slat, hinge, and corner for movement. Tighten or repair loose joints before adding weight, and remove hardware that no longer serves a purpose. If the finish is old or unknown, avoid aggressive sanding until you know it is appropriate to disturb.
2. Clean and smooth handling areas. Remove dust from between the louvres and wipe the surfaces clean. Smooth only splintered or rough areas that could catch magazine covers or hands. If you repaint, keep the louvre gaps clear so a thick coating does not glue movable slats together or narrow the storage slots.
3. Plan the mounting points. Hold the shutter at the intended height and mark a level position. Use the solid frame rails for attachment rather than relying on thin louvres. Choose anchors and screws for the wall material and the expected loaded weight, then pre-drill the shutter if needed to reduce splitting.
4. Mount and load gradually. Secure the shutter, check it for movement, and add only a few lightweight magazines at first. Spread the contents across several slats rather than overloading one section. Then step back and check that paper edges are not being pinched by rough wood or protruding screws.
I’d let the shutter do most of the visual work here. Once the louvres are clean and useful again, extra baskets, signs, and ornaments can make a slim storage idea feel busier than it needs to be.
Variation: Use a shorter shutter near an entryway for mail and lightweight notebooks, or mount two narrow shutters side by side when the wall has more width than depth.
Turn Vintage Teacups into Elegant Candles

An unused teacup can become a compact candle container without losing the pattern, handle, or delicate shape that made it worth keeping. This works especially well for orphaned cups that no longer have a matching saucer, but decorative value alone is not enough: the vessel also has to be suitable for candle heat and free from cracks or chips.
I would never assume that every vintage cup is candle-safe simply because it once held tea. Unknown ceramic condition, hairline cracks, metallic decoration, or previous damage can change the risk. If the cup is uncertain or sentimental, using it as a holder for a removable battery-operated LED candle keeps the look while avoiding permanent alteration and open-flame heat.
Materials and Tools
· Sound cup suitable for the intended candle use, or a cup used only as an LED holder
· Candle wax and wick system intended to work together if making a real candle
· Heat-safe pouring container and appropriate melting setup
· Wick-centering support
· Protective work surface and heat-resistant gloves as needed
· Optional battery-operated LED candle for a no-flame version
Steps for This Upcycling Project
1. Choose the cup carefully. Inspect the rim, base, handle, and glaze for chips, cracks, crazing, or repairs. Set aside cups with uncertain structural condition for decorative LED use instead. Wash and dry a suitable cup thoroughly so wax or adhesive is not placed over residue.
2. Prepare the wick system. Use a wick and wax combination intended for container candles and follow the component instructions rather than guessing a wick size. Centre the wick on the cup base and support it upright. Keep decorative trims, ribbons, and paper away from the interior heat zone.
3. Melt and pour with controlled heat. Melt the wax using an appropriate candle-making method and handle hot containers on a protected surface. Pour steadily without splashing the rim or handle. Leave the cup undisturbed while the candle sets according to the materials you are using, rather than moving it while the wax is still soft.
4. Finish and use cautiously. Trim and maintain the wick according to the candle system instructions before lighting. Place the cup on a stable, heat-resistant surface away from drafts and flammable objects, and never leave a burning candle unattended. If the vessel behaves unexpectedly, stop using it as a flame candle.
The teacup pattern already gives this project plenty of character. I don’t think it needs extra lace, paper, or loose trim near the flame area; keeping the top simple is both cleaner and more sensible.
Variation: Use a damaged-but-stable decorative cup only as a container for a removable battery-operated LED candle, preserving the visual idea without wax or open flame.
Turn Old Denim Jeans into a Practical Hanging Organizer
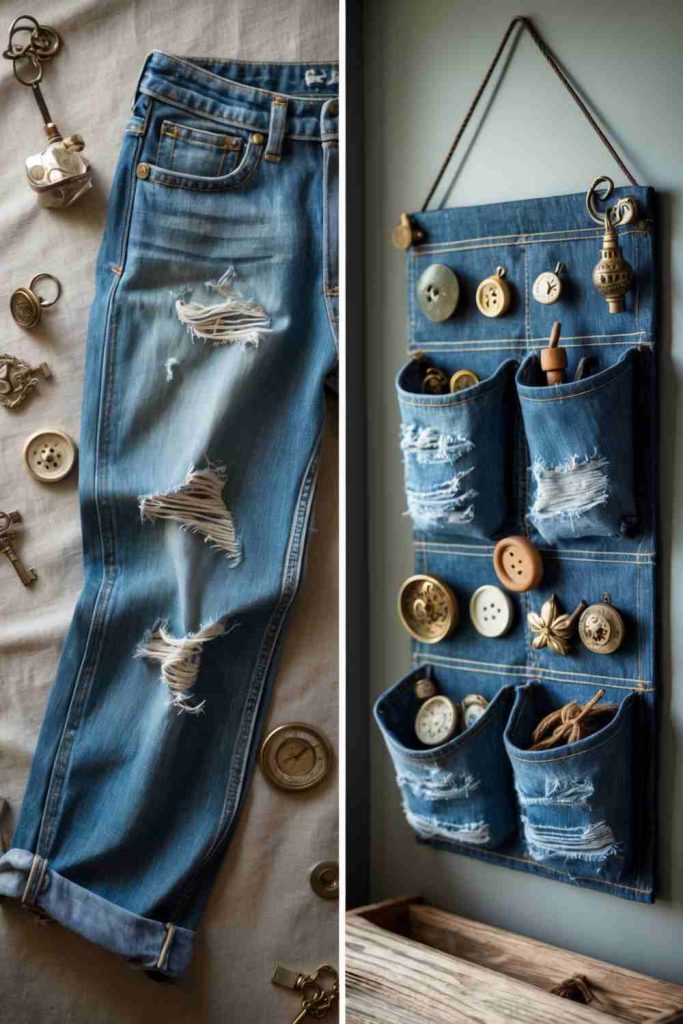
Denim pockets are already engineered to hold small everyday objects, so reusing them in a wall organizer makes more sense than cutting new pockets from fresh fabric. The strongest version keeps sturdy sections of the jeans back pockets, waistband, and flat leg panels and uses them where the organizer will carry repeated pulling.
The top support deserves the most attention. A panel full of scissors, cords, notebooks, or craft tools can become heavier than it looks, and soft denim may stretch around narrow hanging loops. I would spread the load across a dowel, reinforced casing, or several attachment points rather than asking two small fabric tabs to carry everything.
Materials and Tools
· Old jeans with strong denim and usable pockets
· Fabric scissors
· Strong thread and sewing needle or sewing machine
· Pins or clips
· Wooden dowel, sturdy hanger, or another broad top support
· Optional lining or backing fabric for extra structure
Steps for This Upcycling Project
1. Salvage the strongest denim sections. Wash the jeans, then inspect seams, pockets, and worn knees. Cut a broad rectangular base from a sound leg or joined panels and save intact pockets separately. Keep original topstitching where it adds strength, but remove bulky seam allowances that would make pocket edges difficult to sew.
2. Arrange the pockets by use. Lay the base flat and place larger pockets lower down for heavier items, with smaller pockets above for light supplies. Test access with the objects you expect to store. Leave enough space above each pocket that a hand can reach inside without pulling hard on the stitching.
3. Sew for repeated pulling. Stitch pocket sides and bottoms securely, reinforcing upper corners where hands will tug most often. Add a backing or double layer at high-stress areas if the denim feels thin. Then create a broad top casing or several reinforced loops that distribute the weight across the organizer.
4. Hang and load in stages. Insert the dowel or support, mount it with hardware appropriate for the wall, and check that the panel hangs flat. Add light contents first, then increase the load gradually. If the top edge stretches or bows, reduce the contents and reinforce the support rather than hiding the movement with more decoration.
Original jean pockets save a lot of unnecessary sewing, and they usually look better than perfectly matched rectangles. For me, the useful wear marks are part of the appeal as long as the fabric around them is still strong.
Variation: Use one trouser leg as a narrow organizer beside a desk, or combine pockets from several pairs of jeans to create a deliberately mismatched family storage panel.
Transform an Acoustic Guitar into a Stylish Shelving Unit
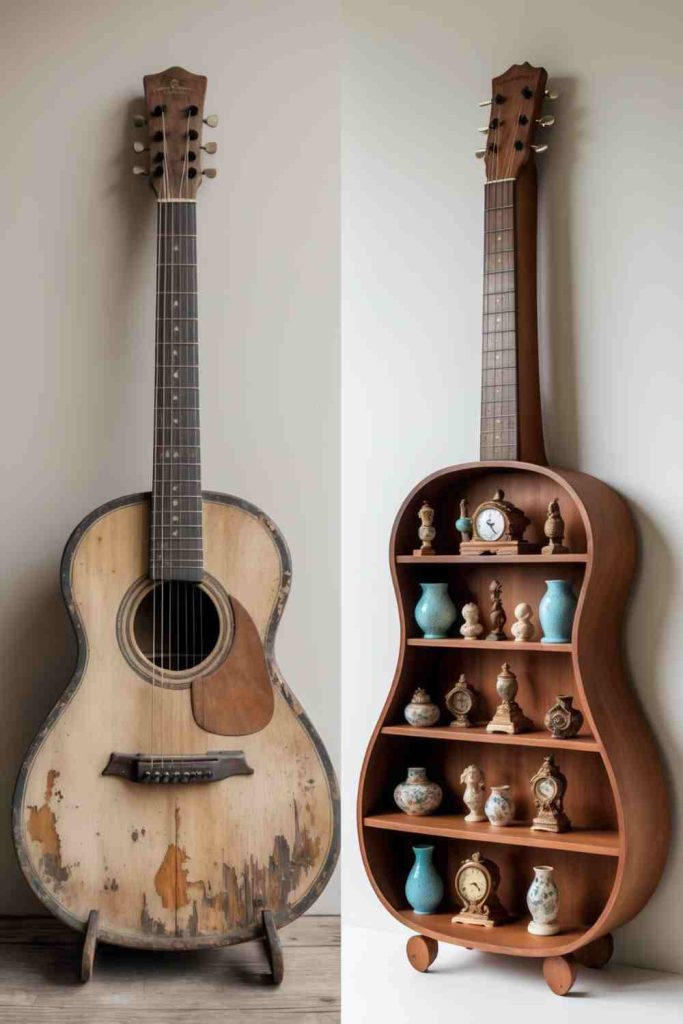
A guitar-shaped shelf keeps the outline of an instrument that may be beyond practical repair, turning the hollow body into a small display space. This is a permanent alteration, so the first decision should be whether the guitar truly has no realistic musical, sentimental, or resale value before any panel is removed.
The body of an acoustic guitar is light and curved, not designed to become a heavy cabinet. Small shelves can hold lightweight objects if they are supported carefully, but books, ceramics, or dense collections may overload the thin structure. I would preserve the shell, keep the interior load modest, and use a mounting system that supports the guitar without relying on fragile decorative wood.
Materials and Tools
· Non-playable acoustic guitar suitable for permanent alteration
· Appropriate hand tools or cutting tools with eye protection
· Fine abrasive for smoothing newly cut edges
· Thin lightweight shelf material
· Small brackets, blocks, or another light shelf-support method
· Wall-mounting hardware suited to the final weight
Steps for This Upcycling Project
1. Confirm the instrument is suitable to alter. Check whether the guitar could reasonably be repaired, donated, or kept intact first. Remove strings and loose hardware that could snag during work. Inspect the neck-to-body joint and shell for splits so you understand which areas can tolerate handling and which need reinforcement.
2. Open the body carefully. Mark the panel or access area before cutting and protect the decorative face from accidental tool contact. Use the least aggressive tool that gives controlled cuts, wearing eye protection and supporting the body so it cannot twist. Smooth all newly exposed wood edges after the opening is complete.
3. Fit lightweight internal shelves. Measure the interior at each proposed shelf height because the body narrows and curves. Cut thin shelves to fit without forcing the sides outward, then support them at several points using a method appropriate for the guitar’s construction. Keep each shelf level and avoid placing screws through delicate visible areas without a sound reason.
4. Mount and decorate lightly. Choose mounting points that support the body securely and suit the wall surface. Test the empty unit before adding objects, then load only light pieces such as small photos, lightweight ornaments, or tiny plants in separate containers. Stop if the body flexes, the neck shifts, or the mounting hardware moves.
I’d rather see a guitar shelf hold three light objects comfortably than be packed like a bookcase. The instrument shape is already the focal point; the shelving should support that shape rather than ask it to behave like thick furniture.
Variation: Keep the guitar intact and use a purpose-built floor or wall stand to display it with lightweight removable shelf inserts around, rather than cutting a repairable instrument.
Create a Sleek Wall Shelf from Old Leather Belts
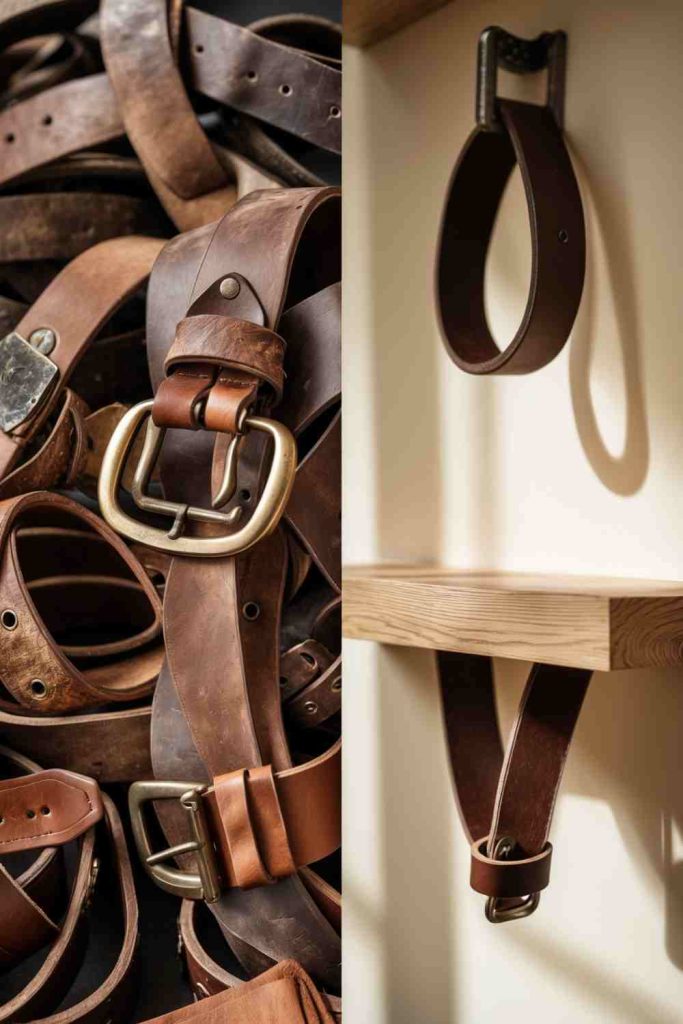
Old leather belts can form visible shelf loops when the leather is still strong enough to take tension. The idea works because the belts become both support and design detail, but cracked, dry, delaminating, or heavily stretched leather should stay decorative rather than carrying a shelf.
The wall fixings and belt attachment points are more important than the plank finish. I would use a light shelf and modest display load, secure each belt through strong sections, and make sure the hardware cannot pull through an old punched hole. If the leather condition is uncertain, use hidden structural brackets and let the belts act only as a visual accent.
Materials and Tools
· Two or more sturdy reused leather belts
· Lightweight wooden shelf board in good condition
· Screws, washers, and wall anchors suited to the wall
· Drill and screwdriver
· Level and measuring tape
· Leather hole punch if new reinforced holes are needed
Steps for This Upcycling Project
1. Test the belts for strength. Flex each belt along its full length and inspect both surfaces around old holes, buckle folds, and stitched joins. Reject leather that cracks, flakes, or tears under light tension. Choose two belts with similar stretch so the shelf is less likely to tilt as weight is added.
2. Prepare the shelf board. Sand rough edges on the board and apply a suitable finish if desired. Mark the belt positions so the loops will sit evenly and keep the board from sliding sideways. A light board is preferable because every kilogram of shelf material is extra load before anything is displayed.
3. Mount the belt loops securely. Mark a level line on the wall and fix the belts with hardware suited to the wall and the expected load. Use washers or another broad bearing surface so screws do not pull through the leather. Then form matched loops and check that both support points sit at the same height.
4. Insert and test the shelf. Slide the board into the loops and check front-to-back stability before decorating it. Add a small amount of weight, watch for leather stretch, and confirm the wall fixings stay tight. If the shelf shifts easily, add hidden restraint rather than relying on friction alone.
Belts look wonderfully simple here, but simplicity can hide the load path. I would spend more time on the wall anchors and leather condition than on making the belt colours match perfectly.
Variation: Use old belts as decorative fronts on a shelf that is actually carried by discreet structural brackets, which is a safer option when the leather is attractive but too aged for load-bearing use.
Transform a Wooden Canoe into a Stunning Bookshelf
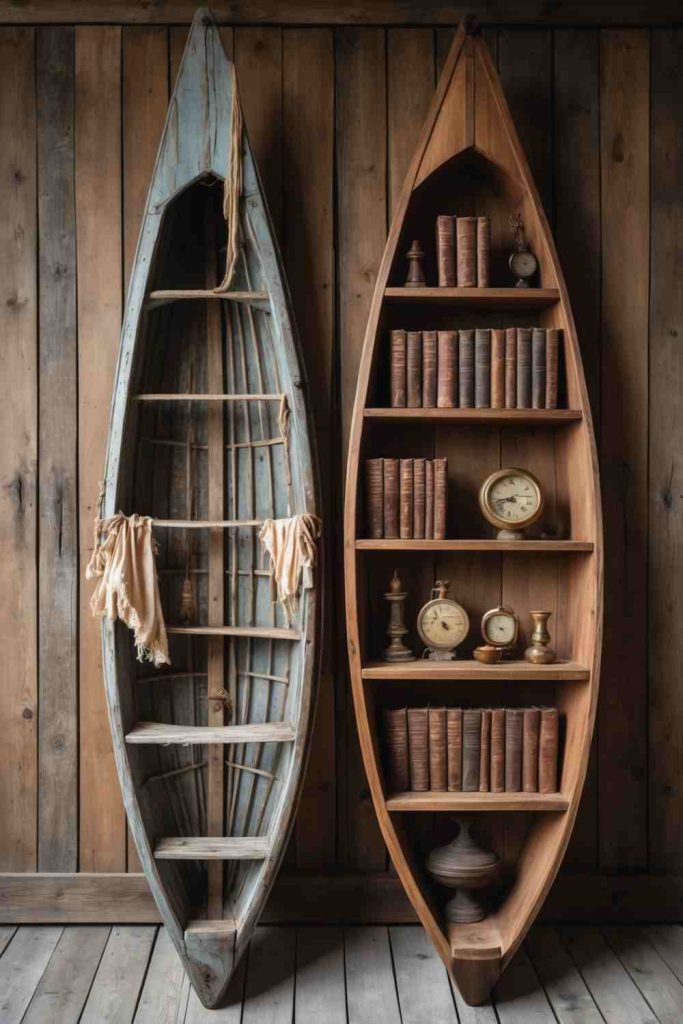
A canoe bookshelf is a large-scale conversion that preserves the tall, tapered outline of an old wooden hull while using its interior for display. Because canoes can have historic, collectible, or repairable value, I would only alter one that is genuinely unsuitable for safe boating and not worth restoring as a watercraft.
Once used vertically indoors, the hull still needs a stable base, secure anchoring, and shelves that do not force its curved sides apart. Books are surprisingly heavy, so this project should be treated more like furniture construction than simple craft. Lightweight decor is easier on the structure; if real book storage is planned, the shelf supports and anti-tip strategy need particular attention.
Materials and Tools
· Old wooden canoe appropriate for permanent indoor conversion
· Stable base or anti-tip support system
· Shelf boards cut to the interior profile
· Brackets, cleats, or another suitable shelf support method
· Drill, saw, level, and eye protection
· Wall restraint hardware appropriate for the finished unit
Steps for This Upcycling Project
1. Assess the hull and intended position. Inspect ribs, planking, joints, and ends for rot or loose sections. Decide whether the canoe will stand full-height, be cut, or be displayed in another orientation, and check that the room can support it safely. Plan anti-tip restraint before installing shelves, not after the unit is loaded.
2. Create stable shelf templates. Measure each level separately because the interior width changes continuously. Make cardboard templates before cutting valuable shelf material, then transfer the shape to the boards. Leave enough clearance that shelves fit without spreading the hull or scraping decorative interior surfaces.
3. Support the shelves structurally. Attach shelf supports to sound structural areas rather than thin decorative planking where possible. Keep fasteners appropriate for the material and pre-drill to reduce splitting. Check every shelf with a level and test it by hand before proceeding to the next one.
4. Secure the unit and load conservatively. Anchor or restrain the finished canoe so it cannot tip forward, following a method suitable for the wall and floor conditions. Add lightweight objects first and keep the heaviest items low. If using books, limit the load to what the shelf supports and hull can safely carry without visible movement.
The canoe shape is dramatic enough without filling every shelf. I’d leave breathing room between objects so the ribs, curves, and original craftsmanship remain visible instead of disappearing behind storage.
Variation: Use a short damaged section of a canoe as a low wall shelf or display niche, preserving the recognisable curve without turning an intact restorable canoe into furniture.
Turn Wooden Door Panels into Chic Key & Bag Holders
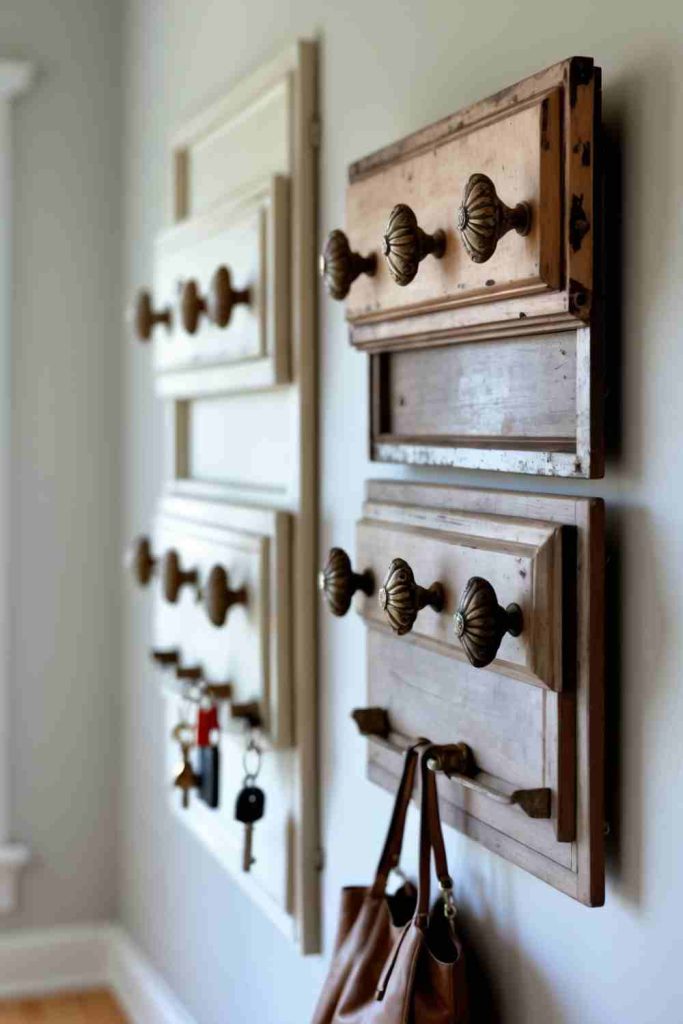
A solid door panel can become a wall-mounted hanging board because it already offers a broad, rigid surface for knobs and hooks. Smaller reclaimed panels are especially practical: they keep the carved or recessed detail of an old door without asking the wall to carry an entire heavy door slab.
Keys are light, but handbags, coats, and filled totes are not. The hardware needs to be screwed into sound wood and the panel itself needs secure wall attachment. I would also be cautious with very old painted surfaces; cleaning and stabilising may be preferable to heavy sanding when the finish is unknown.
Materials and Tools
· Sound reclaimed wooden door panel or cut section
· Appropriate cleaner and fine abrasive if the finish is safe to disturb
· Hooks, knobs, or handles rated for the intended use
· Screws suitable for the hook hardware and panel thickness
· Wall anchors or fasteners suited to the wall and expected load
· Drill, screwdriver, measuring tape, and level
Steps for This Upcycling Project
1. Choose and prepare a sound panel. Inspect the wood for cracks, soft areas, loose moulding, and unstable finish. Clean it carefully and repair structural damage before adding hooks. If you want a new finish, prepare the surface in a way appropriate for its age and coating rather than automatically sanding everything back.
2. Lay out the hanging hardware. Place keys and bags against the panel to judge spacing before drilling. Keep heavier-use hooks over thicker solid sections and leave enough clearance that bags do not overlap every neighbouring hook. Mark all centres and check the arrangement visually from a normal standing height.
3. Install hooks and rear mounting points. Pre-drill where necessary and attach each hook or knob firmly without driving screws through the back unintentionally. Add a rear mounting system that spreads load across the panel. Avoid relying on one central picture hook if the board may carry several bags.
4. Mount and test in stages. Fix the panel level to suitable wall anchors or studs where required. Pull gently on each hook and add light items first, then increase to normal use while watching the panel and wall fixings. If the board shifts or bows, reduce the load and improve the mounting rather than adding more hooks.
Old panel detail makes an excellent backdrop, so I would choose simple hooks and let the wood carry the character. Too many ornate knobs can compete with the moulding and make it harder to grab a key quickly.
Variation: Use a narrow door rail with three hooks for an entryway key station, or leave original hardware holes visible as part of the reclaimed look rather than filling every mark.
Turn an Old Camera Lens into a Unique Clock
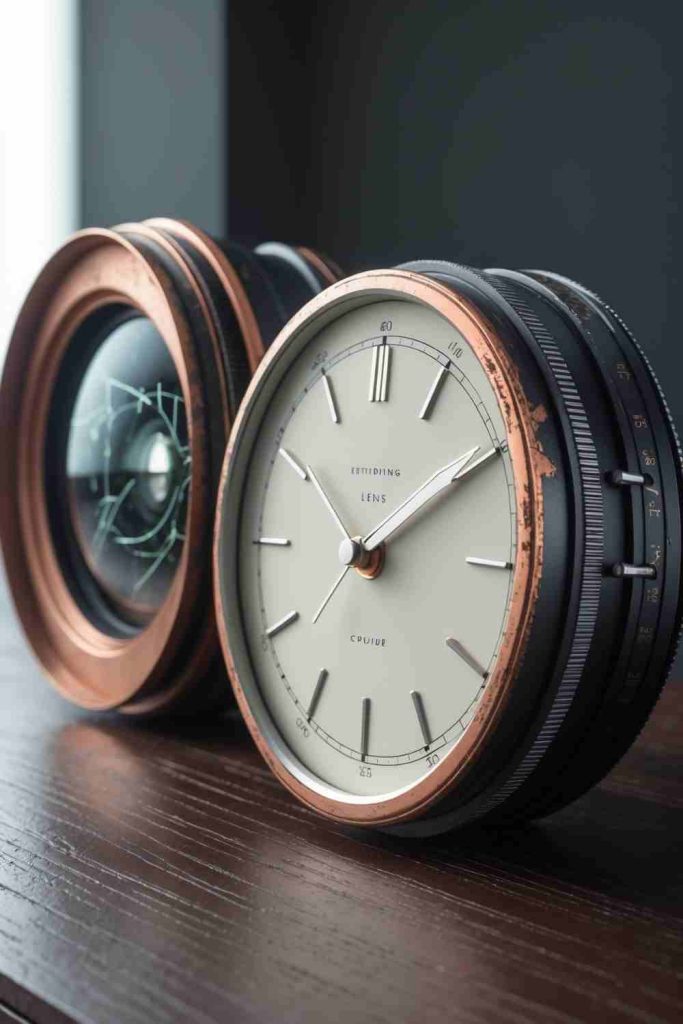
An unusable camera lens can become a compact clock face because its rings, markings, and circular geometry already resemble a precision dial. This should only be done with a lens that is genuinely beyond sensible photographic use; many older lenses still have repair, collector, or resale value even when they look obsolete.
The safest route is to avoid cutting glass or forcing a clock movement through components that were never designed to be drilled. I would first look for an existing central opening or create a stand-mounted design where the clock movement sits behind a separate plate, allowing the lens to remain mostly intact.
Materials and Tools
· Non-functional camera lens suitable for permanent repurposing
· Small clock movement and hands compatible with the chosen mounting method
· Thin backing plate or stand if needed
· Small hand tools appropriate for the lens exterior
· Protective gloves and eye protection for disassembly work
· Adhesive or mechanical fasteners suitable for the non-glass parts, if required
Steps for This Upcycling Project
1. Decide how much of the lens will remain intact. Research the lens enough to confirm it is not a valuable repair candidate, then inspect how the front and rear assemblies separate. Remove only components necessary for the clock mechanism. Avoid breaking, drilling, or grinding optical glass to create a shortcut.
2. Build a separate support for the movement. Fit the clock movement to a thin backing disc, plate, or stand positioned behind the lens. Centre the movement relative to the visible front so the hands read naturally. Make sure the battery compartment remains accessible after assembly.
3. Align the hands and decorative face. Attach the clock hands according to the movement instructions and rotate them through a full cycle by hand to confirm they do not rub on the lens rim or each other. Use existing lens markings as visual interest rather than adding a crowded set of numbers unless they improve readability.
4. Stabilise and test the clock. Secure the lens body to its backing or stand without placing stress on glass elements. Run the clock on a stable surface before mounting it vertically. Check that the movement stays accessible, the hands remain free, and no loose optical or metal component can fall out.
The engraved lens markings already look precise, so I’d keep the added clock graphics minimal. The more the finished piece still reads as a camera lens, the stronger the transformation feels.
Variation: Mount an intact non-working lens in front of a separate clock face or shadow-box backing so the optical assembly does not need to be permanently altered.
Transform a Wooden Frame with Corrugated Metal into a Key Holder
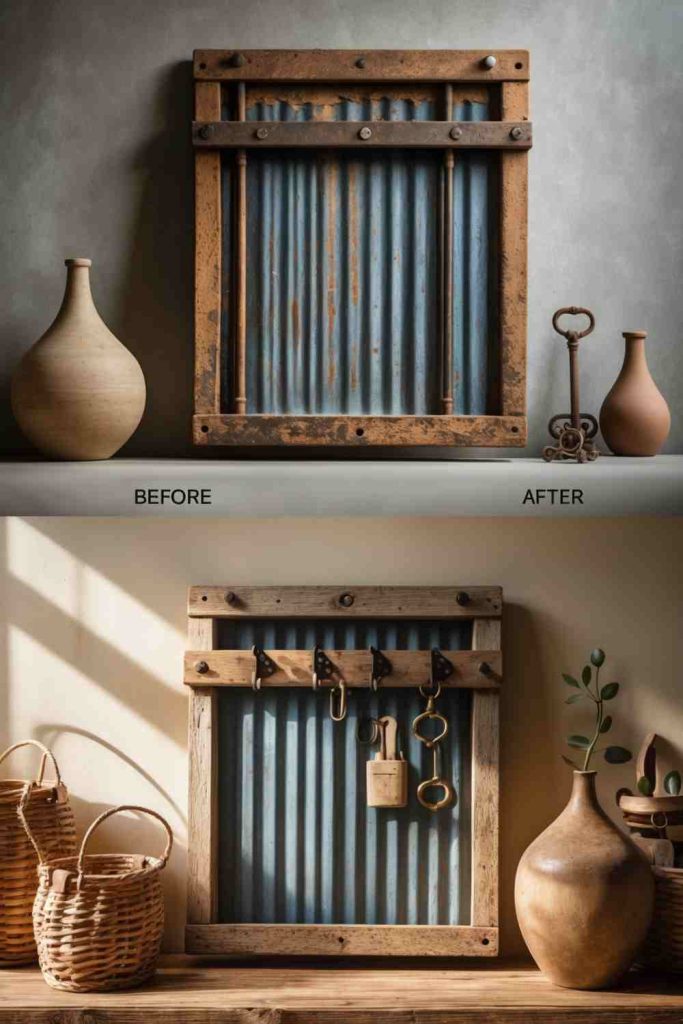
A wooden frame paired with corrugated metal creates a useful contrast between warm wood and an industrial backing. As a key holder, the frame does not need to be deep or heavily built, but the metal edges must be contained safely and the hooks should attach to material strong enough to resist repeated pulling.
Thin corrugated sheet can flex, and its cut edges can be sharp. I would capture the metal behind the frame or fold and cover the perimeter rather than leaving raw sheet accessible. If the hooks need to carry anything heavier than keys, fastening them through into a wooden rail or backing is more reliable than depending on thin metal alone.
Materials and Tools
· Reclaimed wooden frame in sound condition
· Corrugated metal sheet with safely contained edges
· Wooden backing or rail for hook support if needed
· Small hooks and suitable screws
· Wall-mounting hardware
· Drill, screwdriver, metal-safe gloves, and eye protection
Steps for This Upcycling Project
1. Prepare the frame and metal safely. Clean the frame and inspect its corners for movement. Size the corrugated sheet so all raw edges sit behind wood or another protective border, and wear suitable gloves while handling cut metal. Remove burrs or sharp points before assembly.
2. Add structural backing where needed. If the hooks cannot screw into solid wood, place a narrow wooden rail behind the corrugated sheet at the hook height. Mark the rail position from the front so fasteners pass through the metal and into sound wood. This keeps the visible metal while giving the hardware a stronger grip.
3. Install the hooks and close the frame. Space the hooks according to the size of keyrings rather than simply dividing the frame evenly. Pre-drill the support rail if needed and tighten each hook without deforming the corrugated sheet. Secure the metal and backing inside the frame so nothing rattles or shifts.
4. Mount and check handling edges. Attach the completed holder to the wall with hardware suited to the frame weight and wall type. Run a hand around the accessible perimeter to confirm no sharp metal protrudes. Then hang a few keyrings and check that the frame remains flat against the wall during repeated use.
The corrugation is already a strong texture, so I would keep labels and extra decoration restrained. A key holder works best when the hooks are easy to see and grab without visual clutter.
Variation: Use perforated metal, an old mesh panel, or a small piece of decorative tin behind the frame, provided every cut edge is enclosed and the hooks still fasten into a sound support.
Transform Vintage Keys into a Beautiful Wind Chime
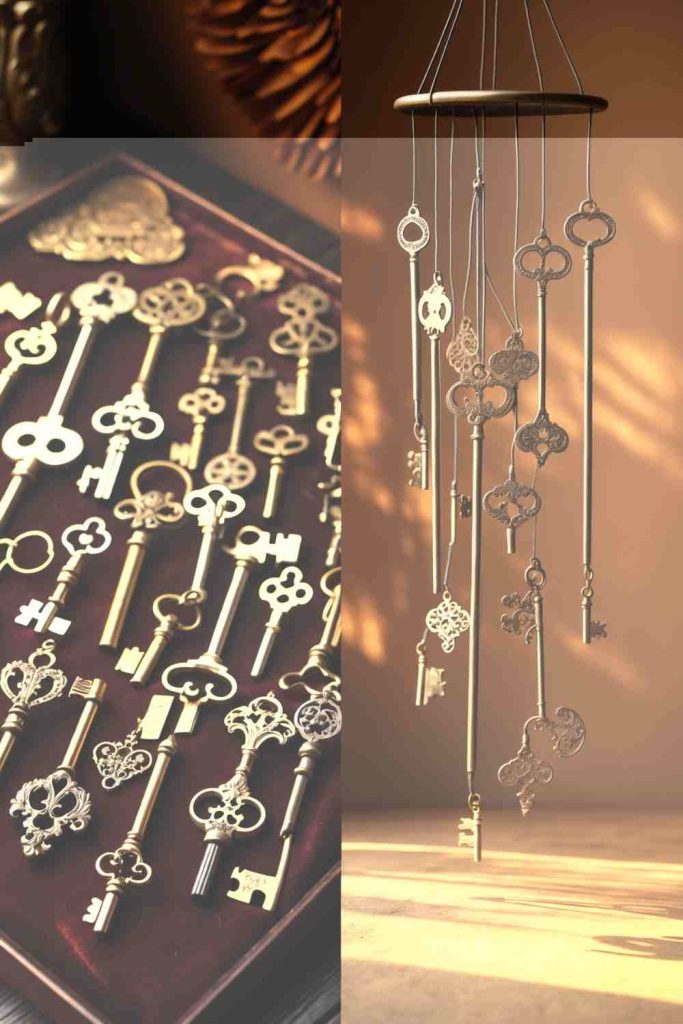
Old keys make natural hanging elements because they are small, durable, and visually varied. Suspended at different lengths, they can move and tap together in a breeze while preserving shapes that might otherwise sit forgotten in a drawer.
Not every key should be used casually. Keys that still open a lock, identify a property, belong to a collectible set, or carry personal information are better kept secure. For a decorative wind chime, I would use obsolete loose keys, smooth any sharp or corroded edges, and choose a hanging point where falling metal could not injure someone.
Materials and Tools
· Obsolete vintage or spare keys with no security use
· Strong ring, reclaimed hoop, or sound hanging frame
· Weather-appropriate cord, wire, or line for the intended location
· Pliers and wire cutters if using wire
· Strong top hanging loop
· Optional small spacer beads that will tolerate outdoor conditions
Steps for This Upcycling Project
1. Select and clean safe keys. Confirm the keys no longer serve an active lock and remove any identifying tags. Clean loose dirt and unstable rust without erasing patina you want to keep. Check teeth and broken edges for sharp points that could snag fingers or cut cord.
2. Arrange the sound and spacing. Lay the keys beneath the ring and vary their lengths before tying anything. Place some close enough to touch gently but avoid packing them into one dense cluster. If you want a quieter chime, increase the spacing or use fewer keys rather than adding soft materials that trap moisture.
3. Attach each key securely. Tie or wire each key through its bow using a connection suited to the material and outdoor exposure. Pull firmly on every attachment before moving to the next. Then connect the hanging lines around the frame in balanced positions so the ring does not tilt heavily to one side.
4. Hang in a sensible location. Create a strong top loop and test the chime at low height first. Choose a sheltered or appropriate outdoor spot where it will not strike windows, scratch walls, or fall over a walkway. Recheck the cords periodically if sun, rain, or wind may weaken them.
I like wind chimes with a little irregularity, and old keys naturally provide it. There’s no need to force every key to match when the different profiles are exactly what make the piece interesting.
Variation: Make a small indoor hanging mobile with only three or four keys and use it where air movement is gentle, avoiding outdoor weathering altogether.
Create a Wall-Mounted Rack with Wooden & Metallic Slats
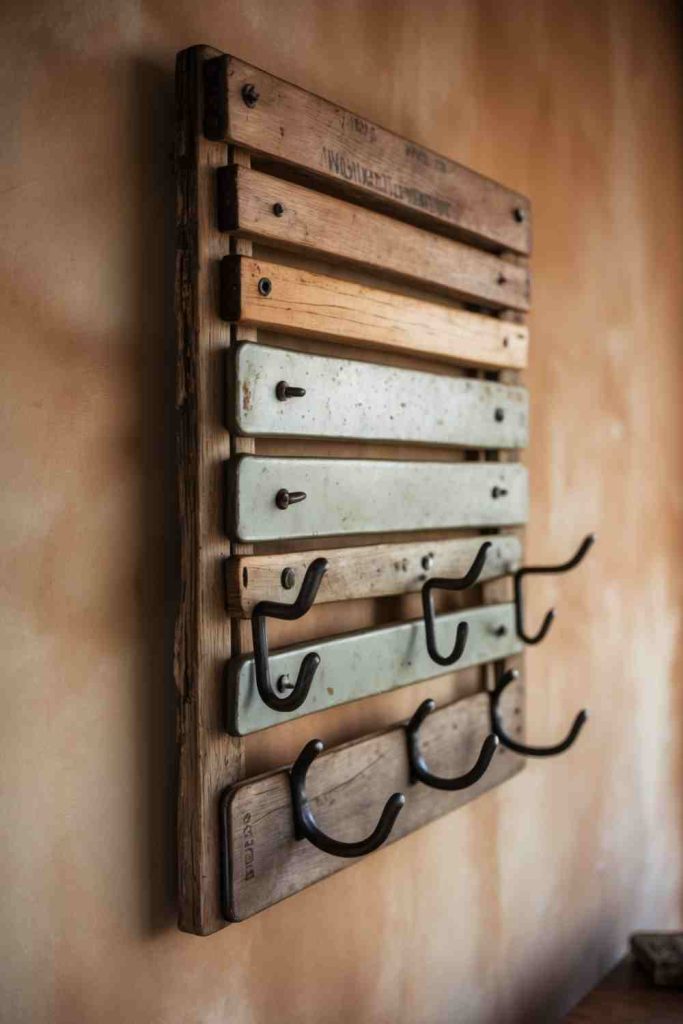
Alternating wooden and metallic slats can turn leftover narrow pieces into a wall rack with enough visual rhythm to look deliberate rather than improvised. The rack works best when one hidden structural rail carries the real load and the mixed slats act as the visible face.
Metal and wood behave differently under drilling and temperature changes, so I would not rely on a row of thin decorative pieces to hold coats independently. A sound backing frame, smooth metal edges, solid hook locations, and suitable wall anchors make the difference between wall art with hooks and a dependable everyday rack.
Materials and Tools
· Reclaimed wooden slats in sound condition
· Metal slats with deburred, safely finished edges
· Strong horizontal backing rails or frame
· Hooks and screws suited to the intended load
· Wall anchors or fasteners appropriate for the wall
· Drill, screwdriver, level, eye protection, and gloves for metal handling
Steps for This Upcycling Project
1. Prepare the mixed slats. Clean all pieces and sand splintered wood where appropriate. Deburr metal edges and corners so they cannot cut hands or clothing. Lay the slats out in alternating order and adjust widths until the composition feels balanced before any holes are drilled.
2. Build a structural backing. Place one or more strong rails behind the slats and mark where each visible piece will attach. Secure the slats to the backing using fasteners suited to each material, keeping the front alignment even. The backing should remain stiff when the assembled panel is lifted from both ends.
3. Position hooks over strong areas. Mark hook locations where screws can pass through or beside the decorative slats into solid backing. Pre-drill as needed and tighten each hook without crushing thin metal or splitting narrow wood. Leave enough spacing for coats or bags to hang without covering neighbouring hooks.
4. Mount and load-test the rack. Use a level and fasten the backing into suitable wall structure or rated anchors. Pull down gently on each hook, then add light items before normal loads. If the panel moves away from the wall, improve the mounting rather than simply tightening decorative screws in the front.
The mixed-material pattern is strongest when the alignment is calm. I’d let the wood grain and metal finish create the contrast instead of adding several competing paint colours on top.
Variation: Use only a few reclaimed metal strips as accents between mostly wooden slats, which reduces sharp-edge preparation while keeping the industrial contrast.
Turn Metal Faucet Fixtures into a Unique Hook Rack
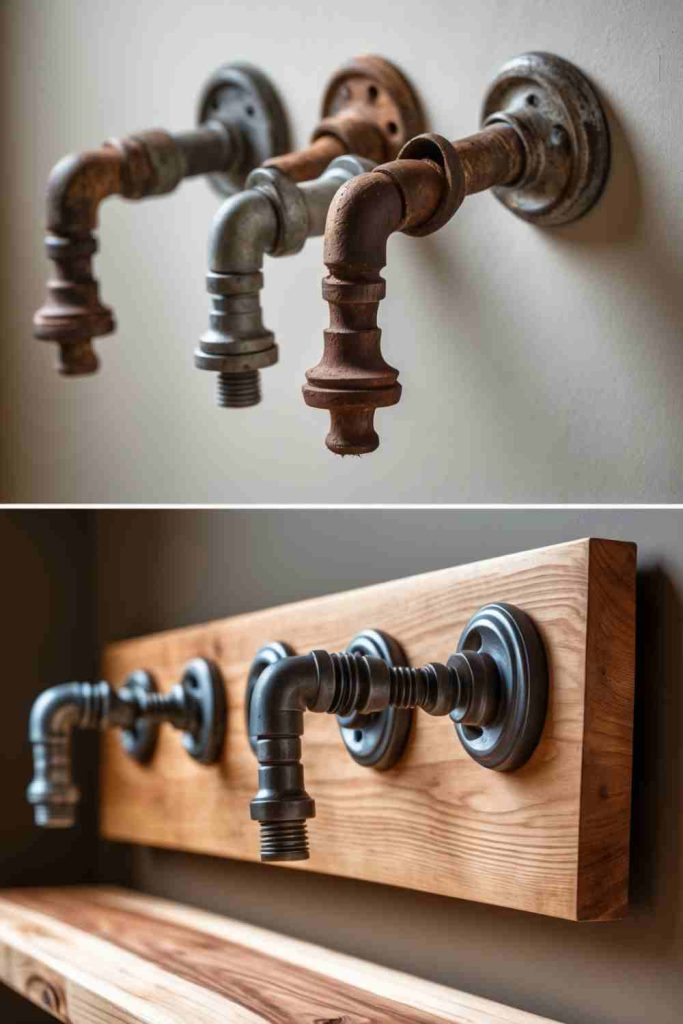
Old faucet handles and small plumbing fixtures can become memorable hook-like details on a reclaimed board, especially when the shapes already suggest knobs or handles. The challenge is that plumbing parts were designed to thread into valves and pipes, not necessarily to support coats from a wall, so the attachment method needs more thought than the novelty of the hardware.
I would use pieces with smooth edges and secure them through appropriate adapters, bolts, or a hidden backing rather than depending on a shallow decorative screw. Corroded fixtures can also leave residue on fabric, so clean and stabilise the metal before deciding whether the rack will hold towels, coats, or only lightweight accessories.
Materials and Tools
· Old faucet handles or small plumbing fixtures in sound condition
· Reclaimed wooden mounting board
· Bolts, threaded adapters, washers, or other secure attachment hardware
· Wall-mounting fasteners suited to the expected load
· Drill, screwdriver, wrench or pliers as appropriate
· Brushes, gloves, and eye protection for cleaning old metal
Steps for This Upcycling Project
1. Choose fixtures that can be mounted safely. Inspect each metal piece for cracks, sharp corrosion, loose inserts, and protruding threads. Clean away unstable dirt or rust and decide how the part will attach to the board. Set aside fixtures that cannot be secured without leaving sharp hardware exposed on the front or back.
2. Prepare and mark the wooden board. Clean and smooth the board, then position the fixtures at useful spacing. Consider the size of coat loops or towels rather than placing the handles only for visual symmetry. Mark the centre of each attachment and leave enough wood around drilled holes to prevent splitting.
3. Attach the fixtures with mechanical support. Drill the necessary holes and use bolts, washers, threaded fittings, or another secure method appropriate for the hardware shape. Tighten from the back where possible and trim or cap exposed threads safely. Test each fixture by pulling in the direction it will be loaded.
4. Mount the rack for its real load. Fix the board to suitable wall structure or rated anchors and check that it sits flat. Add lightweight items first, then progress toward the intended use while watching both the fixture attachments and wall fasteners. Keep heavy coats off a decorative rack unless the full assembly is built for that load.
This is one of those projects where the unusual hardware is already the decoration. I’d keep the wooden board simple and spend the effort on making every fitting solid and comfortable to grab.
Variation: Use faucet handles as knobs on a key board or small towel rail where loads are lighter, especially if the reclaimed hardware is visually interesting but not suited to heavy coats.
Transform an Old Umbrella into a Unique Plant Stand
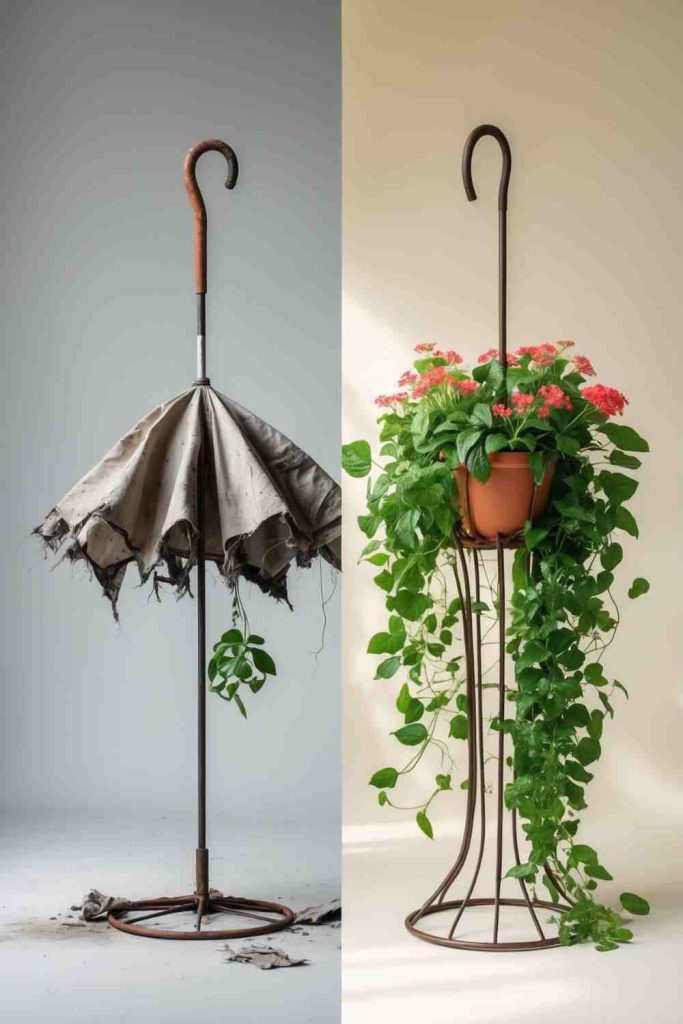
An umbrella frame has a graceful radial structure, but it was designed to open overhead rather than stand upright under the weight of soil and a planter. Reusing one as a plant display therefore needs a separate stable base and a lightweight planting strategy, not just an inverted umbrella balanced on its handle.
I would keep water away from parts that can trap moisture and corrode, and I would avoid placing a heavy ceramic pot high on a narrow centre shaft. The frame can support decorative vines, air plants, lightweight hanging pots, or a shallow removable container when the stand itself is stabilised independently.
Materials and Tools
· Old umbrella with sound frame and handle
· Stable weighted base or separate support structure
· Lightweight removable planter or plant containers
· Mechanical ties or clamps suited to the frame
· Protective caps for sharp spoke ends if exposed
· Optional rust-resistant finish suitable for the prepared metal
Steps for This Upcycling Project
1. Strip and inspect the umbrella. Remove badly torn fabric if the design does not need it, then inspect the shaft, ribs, runner, and spoke ends. Cap or remove sharp points and reject a frame with broken joints that could collapse suddenly. Decide whether the umbrella will remain partly open or fully fixed in one position.
2. Create an independent stable base. Secure the handle or centre shaft into a weighted pot, custom stand, or other support that resists tipping. Test the empty frame by pushing gently from several directions. The plant container should not be the only thing preventing the umbrella from falling over.
3. Attach a lightweight plant display. Use a shallow removable planter, small hanging pots, or light plant mounts distributed around the frame. Keep the centre of gravity low where possible and avoid loading one side heavily. Make sure water can drain without sitting inside metal joints or soaking a base that is not moisture-resistant.
4. Test placement and watering access. Move the stand to its intended location and check clearance around paths, furniture, and windows. Add plants gradually and confirm the frame does not flex or tilt. Then plan a watering routine that allows containers to be removed or drained without repeatedly stressing the umbrella mechanism.
The umbrella shape is delicate, so I’d work with that lightness rather than trying to turn it into a pedestal for one heavy pot. Small trailing plants make much more sense to me here.
Variation: Use the opened umbrella frame as a wall-mounted trellis or decorative plant support with very light vines, avoiding a freestanding load altogether.
Transform Wooden Spoons into Painted Garden Markers

Wooden spoons that are no longer suitable for kitchen use can become broad garden labels, giving you more writing space than a narrow plant stake. The spoon bowl provides a natural sign face while the handle can slide into soil, so the conversion needs very little cutting.
Outdoor exposure is the main challenge. Reused wooden spoons may swell, split, or shed old finishes in wet soil, and paint that is purely decorative indoors may not last outside. I would dedicate the spoons to non-food use permanently, prepare the wood, and choose an exterior-appropriate decorative system without placing questionable coatings near edible plant parts.
Materials and Tools
· Old wooden spoons retired from food use
· Appropriate cleaner and fine abrasive for bare safe-to-sand wood
· Paint or marker system suitable for the intended outdoor conditions
· Small brushes if painting by hand
· Exterior-appropriate clear finish if compatible with the decoration
· Gloves and protected work surface as needed
Steps for This Upcycling Project
1. Retire and prepare the spoons. Choose spoons that are sound enough for soil but no longer wanted for cooking. Wash, dry, and lightly smooth rough bare wood where appropriate. Remove food residue and make sure there are no splinters along the handle before the spoon is handled around the garden.
2. Plan simple readable labels. Choose plant names or symbols that can be read from standing height and sketch the layout lightly. Keep lettering bold rather than filling the bowl with tiny decoration. If several spoons will sit together, repeat one border or colour to make the set feel connected.
3. Apply the decorative finish. Paint or mark the spoon using products suitable for the prepared material and intended environment, following their instructions for coats and curing. Keep the lower section that enters soil simple so thick coatings are not constantly scraped away during insertion and removal.
4. Place without damaging roots. Push the spoon into loose soil near the plant label area rather than forcing it through dense root systems. Leave enough handle above ground to remove the marker easily. Check the wood periodically and replace a spoon that splits, softens, or develops sharp splinters.
Garden labels need to be readable before they need to be decorative. I’d use the spoon bowl for one clear plant name and save elaborate painting for a border that won’t compete with the information.
Variation: Use the spoons indoors in herb pots or seed-starting trays, where they face less weather and can keep a softer decorative finish.
Turn Metal Cans into Colorful Plant Holders
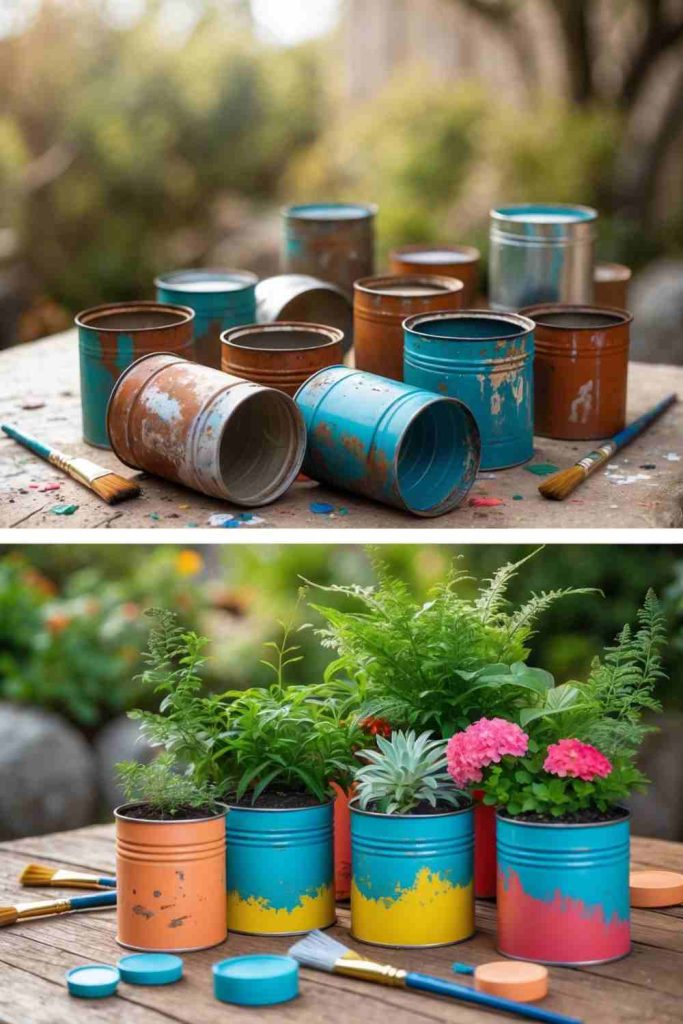
Metal cans are easy to collect and naturally sized for small plants, but the cut rim and lack of drainage can make a quick craft less practical than it first appears. A safe planter version begins by choosing cans with clean, undamaged bodies and making sure every handling edge is smooth or fully covered.
The planting setup should also separate decoration from food assumptions. Once a can is painted, drilled, or used for soil, I would treat it as a dedicated craft container rather than trying to return it to food storage. For indoor use, a removable nursery pot can sit inside the decorated can and make watering much easier to control.
Materials and Tools
· Clean empty metal cans with intact sides
· Metal file or edge-covering method for any sharp rim
· Drill or punch appropriate for drainage work, with eye protection
· Paint and primer suitable for the prepared metal if decorating
· Small nursery pots or planting material
· Saucer or liner arrangement for indoor moisture control
Steps for This Upcycling Project
1. Make the can safe to handle. Remove labels and adhesive residue, then inspect the rim and base carefully. Smooth or cover every sharp edge before painting because decoration will not make a cut metal lip safe. Reject badly dented or rust-perforated cans that could split while being handled.
2. Plan drainage and moisture control. For direct planting, add drainage holes using an appropriate controlled method and wear eye protection. Deburr the holes afterward. For a cleaner indoor option, skip direct planting and place a small removable nursery pot inside the can so excess water can be managed separately.
3. Prepare and decorate the metal. Clean and dry the exterior, then use a coating system suited to the metal and intended location, following the product instructions. Apply patterns in thin controlled layers and keep the can stable while working. Let the finish cure fully before filling or handling heavily.
4. Plant and monitor the container. Add the plant using the drainage method you planned and avoid leaving standing water trapped against unfinished metal. Place the can where it cannot be knocked onto a walkway. Recheck the rim, paint, and base over time, especially outdoors where rust can develop under damaged coatings.
The safest can planter is the one where I can forget the can was ever sharp. If a rim still makes me hesitate to reach inside, it needs more edge work before any paint or plant goes in.
Variation: Use decorated cans as outer cachepots for existing nursery containers, which keeps soil and drainage separate from the metal and makes seasonal plant changes simple.
Create a Stunning Bouquet with Vintage Brooches and Pins
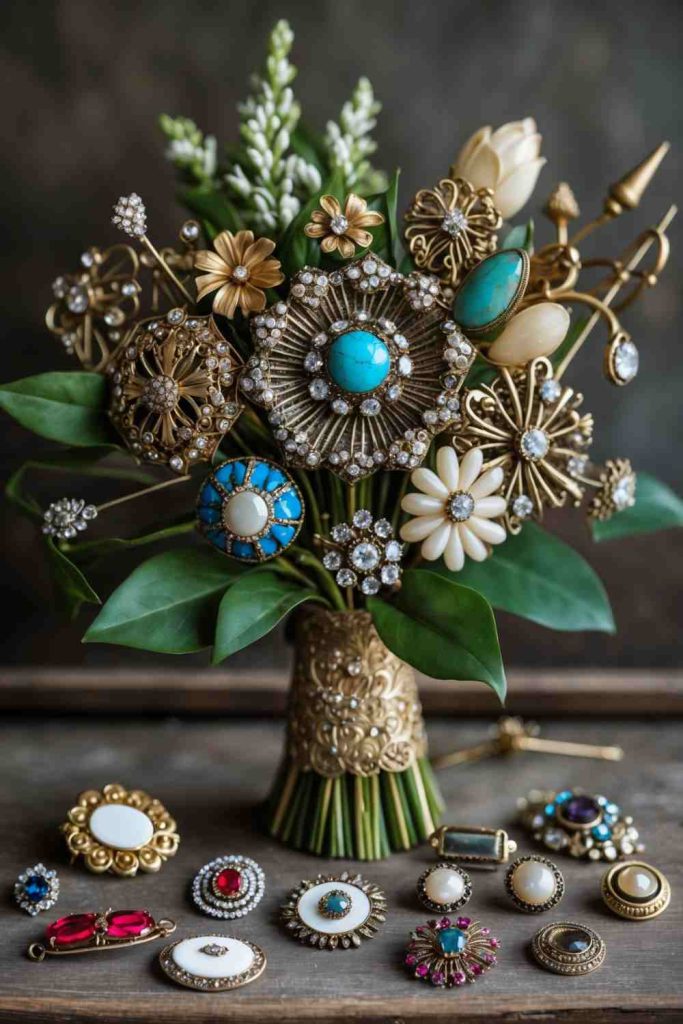
Vintage brooches can be arranged like flowers when their pins, stones, and metalwork are strong enough to handle gentle wiring. The finished bouquet preserves small decorative pieces that may no longer be worn, but it is also a project where collectible or sentimental jewellery deserves careful thought before permanent alteration.
I would avoid gluing over maker marks, clipping off original pins, or forcing fragile settings into foam. Reversible wire stems can hold many brooches without changing them permanently. The bouquet can then become table decor, a keepsake display, or a special-event arrangement while allowing individual pieces to be removed later.
Materials and Tools
· Vintage brooches or pins suitable for display
· Floral wire in a gauge that supports the pieces without damaging them
· Floral tape or fabric wrap
· Pliers and wire cutters
· Soft protective material for the brooch backs
· Ribbon or reused fabric for the finished handle
Steps for This Upcycling Project
1. Sort brooches by condition and value. Check clasps, stones, soldered joints, and decorative surfaces. Set aside valuable, highly fragile, or sentimental pieces if wiring could damage them. Group the remaining brooches by approximate size and weight so the heaviest pieces can sit lower in the bouquet.
2. Create removable wire stems. Loop floral wire through secure openings or around the brooch hardware without pinching stones or bending the original pin mechanism. Add soft protection where wire may rub plated metal. Twist the wire into a stem long enough to join the arrangement and cover sharp cut ends.
3. Build the bouquet from the centre out. Start with a few medium pieces and add brooches around them, rotating the bundle so weight stays balanced. Fill gaps with smaller pins rather than forcing large pieces to overlap. Then bind groups of stems gradually so one loose brooch cannot slide deep into the arrangement unnoticed.
4. Finish the handle safely. Wrap the stem bundle with tape and then ribbon or reused fabric, making sure no wire ends protrude. Check every brooch from the front and back for movement. Display the bouquet in a stable vase or holder where it cannot fall onto children, pets, or bare feet.
A brooch bouquet can become visually heavy very quickly. I’d leave tiny gaps between pieces so each shape is readable instead of building one solid wall of metal and stones.
Variation: Make a small removable brooch posy for a shadow box or vase using only five to seven pieces, which reduces weight and keeps the original jewellery easier to retrieve.
Turn Keyboard Keycaps into Unique Jewelry & Accessories

Loose keycaps from an unusable keyboard are already lightweight, lettered, and small enough for earrings, charms, keyrings, or playful pendants. Their printed symbols can become part of the design, especially when you choose letters or function keys with a personal meaning.
The main safety issue appears when holes are drilled or metal findings are added. Plastic can crack or produce sharp fragments, and tiny components are easy to lose. I would work with eye protection, support each keycap during drilling, smooth the hole edges, and keep the finished jewellery away from young children if small detachable parts are involved.
Materials and Tools
· Clean keycaps from a non-working keyboard
· Small drill or precision hand tool appropriate for the plastic
· Eye protection and a stable clamping or holding method
· Jump rings, earring findings, keyring hardware, or chain as needed
· Small jewellery pliers
· Fine abrasive or deburring tool for drilled plastic edges
Steps for This Upcycling Project
1. Clean and plan the key arrangement. Remove dirt from the keycaps and inspect the stems and faces for cracks. Arrange letters, numbers, or symbols before drilling so you know which edge should face upward. Keep duplicate keys in pairs if you are making earrings or symmetrical accessories.
2. Drill controlled attachment holes. Support one keycap at a time and use a small tool suited to the plastic, wearing eye protection. Drill slowly enough to reduce cracking and keep fingers clear of the bit. Stop if the plastic whitens or splits badly, then discard that piece rather than disguising a structural crack.
3. Smooth and add findings. Deburr both sides of every hole so sharp plastic cannot cut cord or irritate skin. Open jump rings with jewellery pliers, pass them through the prepared holes, and close the rings completely. Avoid leaving a gap where the keycap can work free during wear.
4. Check the finished accessory. Pull gently on each connection and feel the front and back for rough edges. For earrings, compare the weight and hanging angle of both sides. For keychains or bag charms, use stronger rings and remember that a decorative keycap may not tolerate heavy pulling or impact.
The printed characters are the best design feature, so I’d build around them rather than covering the caps with extra decoration. A simple pair of matching letters often feels more deliberate than a chain crowded with every spare key.
Variation: Use intact keycaps in a framed monogram or small desk sign instead of jewellery if you would rather avoid drilling tiny plastic pieces.
Transform Bicycle Gears into a Stylish Wall Organizer
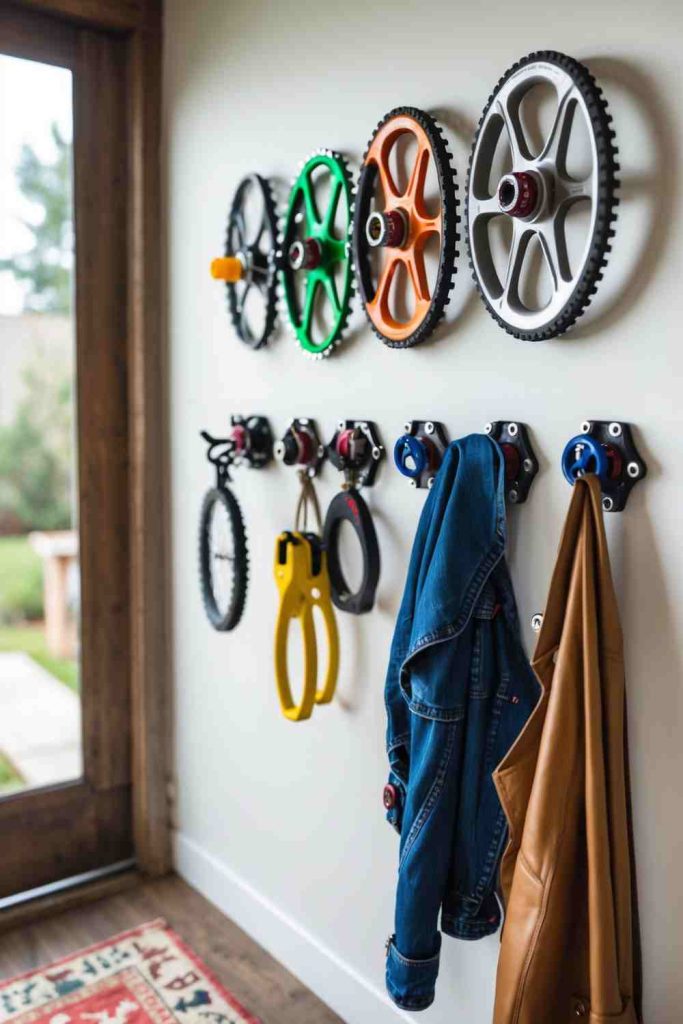
Bicycle gears and sprockets have strong circular patterns that translate naturally into industrial-style wall decor. They can frame hooks, notes, or small accessories, but used drivetrain parts may arrive greasy, sharp, rusty, or contaminated with metal debris, so proper cleaning comes before any decorative finish.
A gear itself should not be treated as a convenient wall anchor simply because it is metal. The wall organizer needs a backing or mounting method that cannot rotate, cut hanging items, or pull away under load. I would keep gear teeth out of normal hand paths and use separate purpose-built hooks for anything you expect to grab every day.
Materials and Tools
· Old bicycle gears or sprockets cleaned of drivetrain grease
· Degreaser or cleaner appropriate for the metal and residue
· Protective gloves, brush, and eye protection
· Wooden or metal backing panel if needed
· Purpose-built hooks and suitable screws
· Wall anchors or fasteners appropriate for the wall and expected load
Steps for This Upcycling Project
1. Degrease and inspect the gears. Wear gloves and remove old grease, dirt, and loose rust using methods appropriate for the metal. Check every tooth for burrs, cracks, or sharp damage. Smooth dangerous edges or reserve the gear for display behind a barrier rather than where hands and clothing can contact it.
2. Plan a safe backing layout. Arrange the gears on a solid board or other support and place functional hooks in clear spaces between them. Keep gear teeth from projecting around the edge of the organizer. Mark attachment points that prevent each gear from spinning or lifting away from the backing.
3. Attach gears and real hooks separately. Fasten the gears as decorative structural elements using bolts, screws, or brackets suited to the backing. Install purpose-built hooks into strong locations for jackets, tools, or accessories. This separates the sharp decorative profile from the load-bearing part of the organizer.
4. Mount and test the assembly. Fix the backing to suitable wall structure or rated anchors, then pull on each hook before adding belongings. Load gradually and keep heavy items low or on the strongest attachment points. Recheck any exposed metal edge that could rub a bag strap or sleeve during normal use.
The gears already create plenty of pattern. I’d keep the hooks plain and black or metal-toned rather than turning every element into a separate statement piece.
Variation: Mount cleaned gears in a shallow shadow-box organizer with hooks fixed to the wooden frame, keeping the gear teeth visually prominent but physically separated from hands and fabric.
Upcycling Decisions That Can Turn Useful Materials Into Fragile or Unsafe Projects
Choosing a New Use Before Checking the Material
A clever idea cannot repair rotten wood, cracked ceramics, brittle leather, or badly corroded metal. Check strength first, then choose a job that matches what remains. Decorative reuse is often the better choice when a material is attractive but no longer structural.
Treating Decorative Attachments as Load-Bearing Hardware
Belts, vintage knobs, faucet parts, gears, and thin metal panels can look sturdy without having reliable attachment points. Use proper backing, screws, washers, brackets, and wall anchors for the load, and let reclaimed pieces provide character rather than pretending they are engineered supports.
Ignoring Sharp Edges and Hidden Fasteners
Cut cans, corrugated sheet, drilled keycaps, gears, old wood, and plumbing parts can all leave dangerous edges. Smooth, cap, enclose, or remove those hazards before assembly. Paint and fabric do not count as a substitute for proper edge preparation.
Sanding Old Finishes Automatically
Old shutters, doors, frames, canoes, and furniture parts may carry coatings you should not disturb casually. If the finish is unknown, use a cautious cleaning and stabilising approach until you know what preparation is appropriate. The goal is safe reuse, not stripping every object back to bare material.
Adding Heat Where the Original Object Was Never Designed for It
Candle conversions need a container and wick system suitable for heat, not just an attractive vessel. Cracked, repaired, or uncertain teacups are better used with removable LED lights. Keep ribbons, paper, and loose decoration away from any open-flame heat zone.
Overloading Wall Projects
Magazine racks, belt shelves, hook panels, wall pockets, and gear organizers often become heavier after a few weeks of everyday use. Mount for the realistic loaded weight, not the empty appearance. If the wall fixing, board, strap, or frame moves during testing, reduce the load and improve the support.
Forgetting Moisture and Weather
Plant containers, garden markers, wind chimes, and outdoor displays face water, sun, and changing temperatures. Choose finishes and attachment materials for those conditions, allow drainage, and inspect the project periodically. Indoor craft paint or cotton cord may not behave well outside simply because the first day looks fine.
Permanently Altering Something That Still Has Value
Vintage cameras, guitars, canoes, keys, jewellery, and hardware can have repair, collector, or sentimental value. Before cutting, drilling, gluing, or removing original parts, consider a reversible display method. Upcycling should not turn a valuable object into a craft supply by accident.
Decorating Until the Original Function Becomes Harder to Use
A rack still needs clear hooks, a magazine holder needs open slots, a garden marker needs readable text, and a phone accessory needs smooth handling surfaces. Decoration works best when it supports the new purpose. Once embellishment interferes with grip, access, balance, or cleaning, it has gone too far.
Frequently Asked Questions
How do I decide whether an old item is safe to upcycle?
Start with structure, cleanliness, and the new job. Reject or downgrade anything that is cracked, rotten, sharply corroded, badly contaminated, or too weak for the intended load. A piece can still be useful decor even when it is no longer suitable for furniture, hanging, heat, or outdoor exposure.
Do I need to remove every old finish before repainting reclaimed materials?
No. Many projects only need careful cleaning, light preparation, and a compatible new coating. With very old or unknown finishes, avoid aggressive sanding until you know it is appropriate; preserving a stable existing surface can be safer and can keep more of the object’s character.
What is the best way to make wall-mounted upcycling projects secure?
Use the solid structural part of the project for mounting and choose fasteners for the actual wall type and loaded weight. Spread load across more than one point when possible, use a level, and test the empty project before adding belongings. Decorative loops or thin panels should not replace proper wall hardware.
Can I use any old teacup for a candle?
No. A decorative cup may be cracked, repaired, weakened, or otherwise unsuitable for candle heat. Use only a vessel and candle system appropriate for the intended use, and choose a removable battery-operated LED candle when the cup’s condition or heat suitability is uncertain.
How can I make mixed-material projects look intentional?
Repeat one visual element instead of forcing every material to match. A shared border colour, consistent hook finish, repeated spacing, or one dominant wood tone can connect fabric, metal, leather, and reclaimed hardware. I’d rather repeat a simple detail than cover every surface with the same paint.
Are upcycled plant containers safe for indoor use?
They can be, provided sharp edges are removed and moisture is controlled. A removable nursery pot inside a decorated outer container is often the easiest setup because drainage stays separate from painted or reclaimed material. Check for rust, leaks, and trapped water periodically.
When should I keep an old object intact instead of upcycling it?
Keep it intact when it is repairable, collectible, sentimental, historically interesting, or still useful in its original role. Reversible displays can often provide the same visual idea without cutting or drilling. Upcycling is most satisfying when the new use adds value rather than destroying value that was already there.
Let Everyday Objects Earn a More Useful Second Life
The strongest brilliant upcycling ideas do not begin with decoration; they begin with noticing what an old object still offers. Fabric can become structure through braiding, pockets can keep doing the job they were sewn for, hardware can become a visual feature, and a worn household piece can sometimes serve better on a wall than in a cupboard. What matters is giving the new purpose the same attention you would give a project made from new materials.
Start with one object that is genuinely ready for another use, inspect it carefully, and choose the smallest transformation that makes it useful again. I’d rather finish one safe, practical project that fits your home than rescue a whole pile of things simply because they are old. Which everyday object around you looks as though it still has one good job left in it?