Upcycling decoration ideas work best when the original object still has a useful shape, texture, or pattern worth keeping. A bottle cap already has a neat round frame, a crate is already a box, an old shutter already has rows for clipping notes, and a sweater already carries softness that new decorative fabric would have to imitate.
What I enjoy most about this kind of decorating is the practical decision-making before the glue, paint, or drill comes out. Not every discarded object deserves to become décor, but sturdy, clean materials can often earn another role with far less work than starting from scratch. I don’t think reuse has to look improvised when the proportions, finish, and function are planned properly.
The strongest projects also respect what the old material can and cannot do. Thin carton suits lightweight wall art, reclaimed timber needs structural checks, and metal or glass needs careful edge handling. That little bit of preparation makes the finished piece easier to live with, not just interesting to look at.
Sort Reusable Materials by Condition, Strength, and Intended Use
Before choosing a decoration idea, separate materials that are genuinely reusable from pieces that are only being kept because they feel wasteful to throw away. Clean, stable objects are easier to transform and usually produce a safer, neater result. I would make this decision before planning colors or buying any extra craft supplies.
· Keep wood that is dry, solid, and free from major splits or suspicious contamination.
· Reject metal with dangerous sharp damage, deep corrosion, or edges that cannot be smoothed safely.
· Use glass and ceramic only when cracks and chips do not create a handling hazard.
· Save fabric where the fibers still feel strong enough for sewing, braiding, or light upholstery.
· Choose cardboard and paper projects for dry indoor areas where moisture will not weaken them.
· Match the strength of the old object to the new job instead of assuming decoration can hide a structural problem.
Choose Fasteners, Adhesives, and Finishes for the Materials You Actually Have
Upcycling often combines materials that were never designed to sit together: metal caps with magnets, ceramic with hanging hardware, knit fabric with seams, or reclaimed wood with modern screws. The connection between those materials is usually the part that decides whether the project lasts. I’d rather use fewer secure connections than add lots of decorative pieces that can loosen later.
· Use mechanical fasteners for shelves, hooks, furniture, and other load-bearing parts whenever appropriate.
· Choose adhesive that specifically suits both surfaces being joined and follow its cure instructions.
· Test paint or coatings on a hidden area when an old finish may react unpredictably.
· Keep glue films thin enough that they do not squeeze out across visible surfaces.
· Use wall anchors and mounting hardware based on wall type and finished weight, not appearance alone.
· Keep strong adhesives, coatings, sanding dust, and sharp tools in a ventilated, controlled work area.
Plan Display, Cleaning, Moisture, Heat, and Everyday Handling Before You Build
Decoration still has to survive real rooms. A memo board gets touched often, a rug needs to stay flat, a planter has to deal with water, and a lantern needs a safe light source. Thinking about cleaning and daily handling early helps you avoid a finish that looks good for one afternoon but becomes awkward as soon as the object is used.
· Keep moisture-sensitive paper and carton projects away from damp or splash-prone areas.
· Use safer cool LED lighting in reused lanterns when an open flame is unnecessary.
· Protect floors and tabletops from planters, wet soil, or rough reclaimed bases.
· Anchor tall or top-heavy furniture projects so they cannot tip during normal use.
· Add non-slip support beneath soft rugs on smooth flooring.
· Keep small detachable parts, sharp fragments, and fragile décor away from young children and pets.
DIY Bottle Cap Magnets
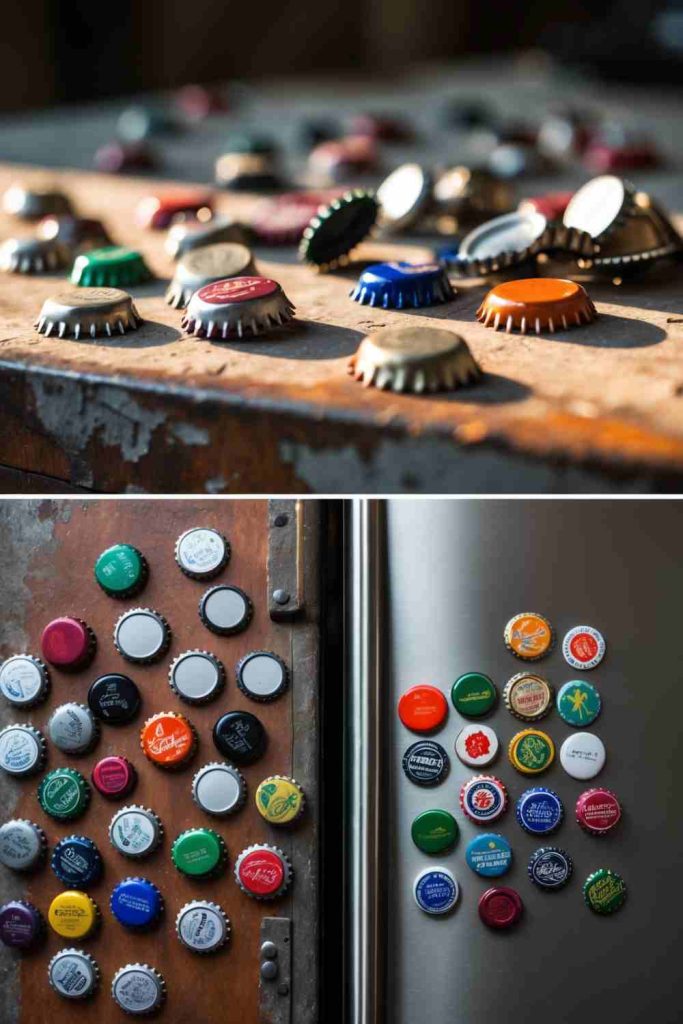
Bottle caps are small enough to disappear into a junk drawer, yet their shallow metal shape makes them surprisingly useful for tiny decorative projects. Turning them into magnets works especially well when the printed top is still attractive, or when you want a compact surface for paint, paper scraps, initials, or miniature patterns.
The main thing is balance. A magnet that sits off-center can make the cap tilt or slide, while a heavy decoration can pull it away from the surface. I would keep the front treatment fairly light and let the shape of the cap do most of the work.
Materials and Tools
· Clean, dry bottle caps
· Small craft magnets sized to the caps
· Strong adhesive suitable for metal and magnets
· Fine sandpaper for a lightly scuffed bonding area
· Paint, paper scraps, or small stickers if decorating
· Protective work surface
Steps for This Bottle Cap Magnets Project
1. Clean and sort the caps. Wash away sticky residue and dry the caps completely, especially around the inner rim. Set aside bent, rusty, or sharply damaged pieces because they will never sit neatly against a fridge or magnetic board.
2. Plan the front design. Decide whether you want to keep the original printed cap, paint it, or add a small paper insert. If you are decorating several caps as a set, arrange the colors together first so the finished group feels intentional rather than random.
3. Create a strong bond. Lightly scuff the center of the cap back if the adhesive benefits from a keyed surface, then wipe away dust. Add only enough adhesive to cover the magnet contact area, press the magnet in the center, and leave the pieces flat while the bond cures according to the adhesive instructions.
4. Check the finished magnets. Test each piece on a metal surface before using it to hold notes or photos. Then remove any magnet that shifts, re-center it, and avoid loading a tiny cap magnet with a thick stack of paper that is heavier than it can comfortably hold.
The part I like here is that a mixed collection can still look coordinated if one detail repeats, such as the same paint edge or the same small paper circle inside each cap.
Variation: Use old map scraps, wrapping paper offcuts, or tiny fabric circles inside plain caps. For a simpler beginner version, skip decoration completely and use caps with graphics you already like.
DIY Button Art
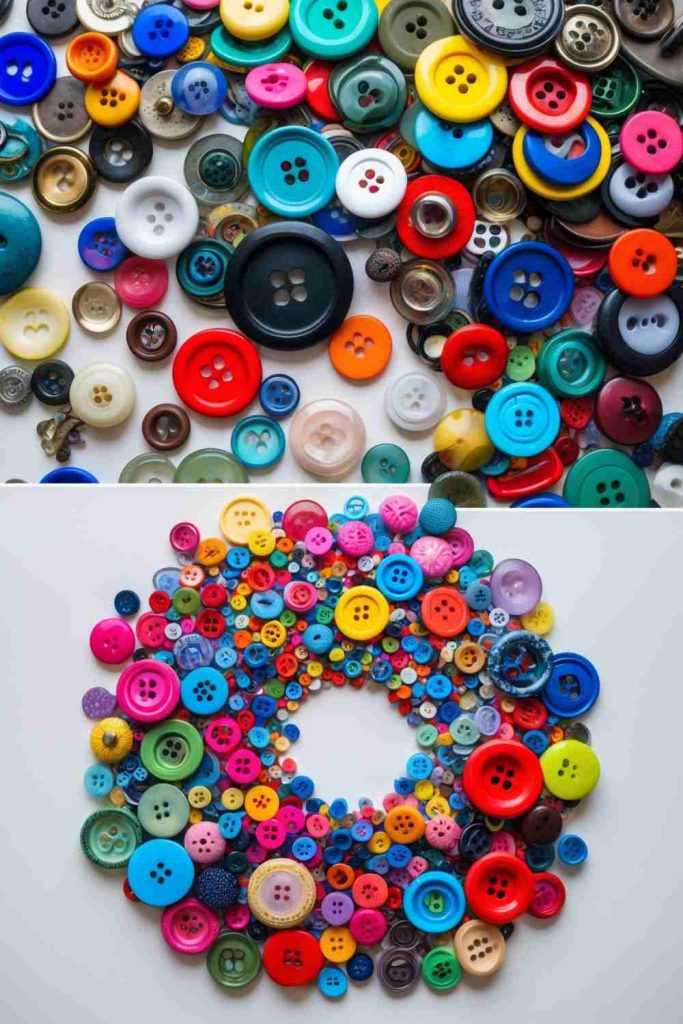
Loose buttons often survive long after the shirts, coats, and bags they came from. Grouped on a firm background, their differences in size, sheen, and color become the point of the design instead of something to hide. This works for simple silhouettes, initials, flowers, abstract color blocks, or small framed panels.
Button art looks strongest when the background and button layout are decided before the glue appears. I know it can feel tempting to start attaching the prettiest pieces immediately, but spacing the largest buttons first usually prevents awkward gaps later.
Materials and Tools
· Assorted reclaimed buttons
· Sturdy canvas board, wood panel, or thick card
· Pencil and paper for a simple layout
· Adhesive suitable for the chosen base
· Tweezers for small buttons
· Optional leftover paint for the background
Steps for This Button Art Project
1. Prepare a firm base. Choose a surface that will not curl under the combined weight of the buttons and adhesive. If you want a painted background, finish that first and let it cure fully before drawing a light guide for the main shape.
2. Arrange before attaching. Place the largest buttons along the main outline or focal areas, then use smaller ones to close gaps. Move the arrangement around until the color distribution feels balanced; the first layout rarely needs to be the final one.
3. Attach in manageable sections. Lift only a few buttons at a time so you do not lose the arrangement. Apply a controlled amount of adhesive to each piece, press it flat, and keep glue away from button faces where it can create shiny smears.
4. Finish and display. Once the bond is fully set, gently check for loose pieces by touching each button rather than shaking the panel. Frame the work or mount it with hardware suited to its weight, keeping small loose components out of reach of young children and pets.
For me, a little empty background often improves button art. Filling every millimeter can make the texture feel busy, while a clear outline gives the eye somewhere to rest.
Variation: Sort buttons by one color family for a quieter look, or mix in a few flat beads or tiny fabric circles if they are already in your craft box. Keep heavy embellishments to a minimum so the panel remains easy to hang.
DIY Tin Can Candle Holders
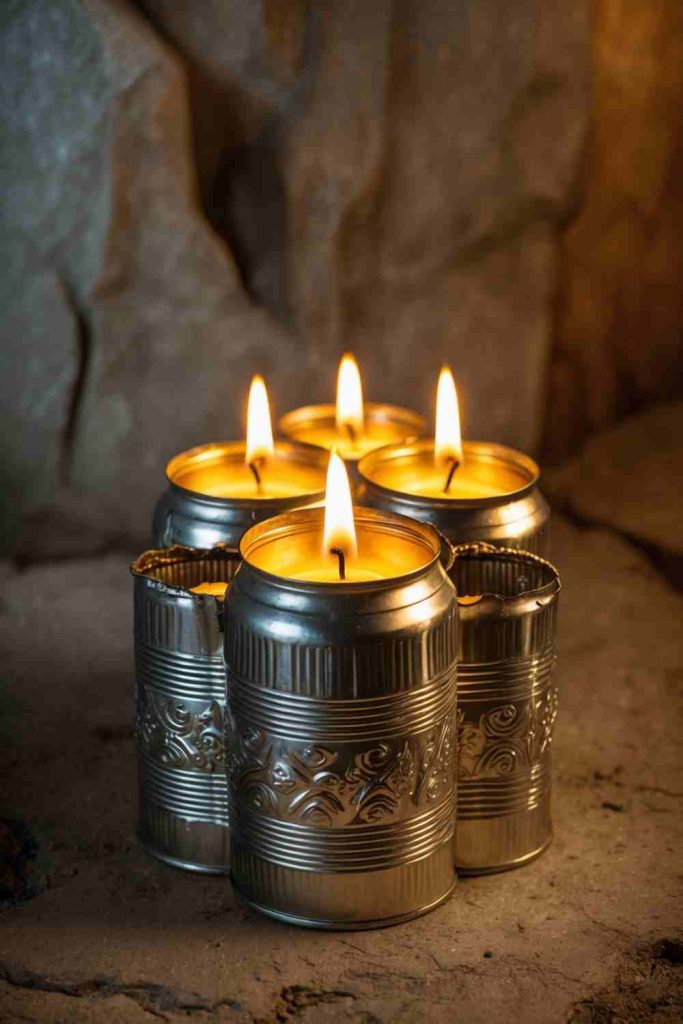
A cleaned food can can become a patterned lantern-like accent with very little added material. The pierced surface is what gives the project its character, because small holes turn a plain cylinder into a decorative light pattern without hiding the fact that the container has been reused.
Safety matters more than the pattern here. Cut rims need to be completely smooth, and I would use battery-operated LED tealights for the simplest version because they give the same dotted glow without putting an open flame inside painted or decorated metal.
Materials and Tools
· Clean tin cans with intact sides
· Metal file or edge-smoothing tool
· Marker and paper pattern
· Hammer and nail or metal punch
· Eye protection and work gloves
· Optional paint suitable for metal
· Battery-operated LED tealights
Steps for This Tin Can Candle Holders Project
1. Make the can safe to handle. Remove labels and adhesive, wash the can, and inspect the rim carefully. Smooth any sharp points before decorating; if the edge remains rough or split, choose another can rather than trying to hide the damage with paint.
2. Mark and punch the pattern. Draw a simple dot pattern with a marker, keeping enough space between holes so the metal does not weaken. Support the can securely while punching and wear eye protection; slow, evenly spaced holes usually look better than trying to force a complicated design.
3. Finish the surface. Wipe away metal dust and decide whether to leave the can bare or paint the outside. Work in a ventilated area when using coatings, keep the inside clean, and follow the product directions rather than guessing at drying or curing time.
4. Add a safe light source. Place an LED tealight inside and check that the can sits flat before displaying it. Then arrange several cans at slightly different heights if you want a larger centerpiece, keeping the metal where it will not be knocked from a shelf or table.
I don’t think this needs elaborate cutting. A simple row of dots, stars, or repeated arcs can cast a much cleaner pattern than a crowded design.
Variation: Wrap the upper rim with a removable strip of fabric or paper only when using cool LED lighting. For outdoor use, choose a finish suited to exposure and bring the holders indoors when weather could damage them.
DIY CD Mosaic Mirror
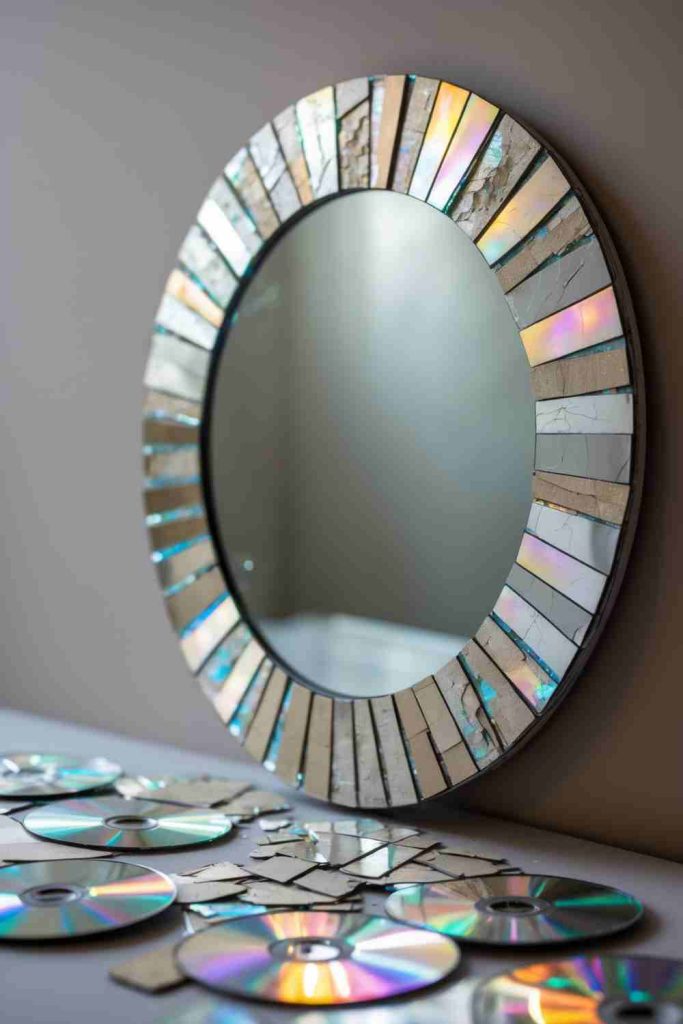
Old CDs and DVDs have an iridescent surface that shifts color as the light changes, which is why even small reused fragments can make a mirror frame feel lively. The effect is strongest when the reflective pieces surround a plain central mirror and the gaps between them stay fairly consistent.
The difficult part is handling the material safely. Disc fragments can develop sharp edges, so I would keep pieces larger rather than creating tiny shards, protect eyes and hands while cutting, and make sure every edge is firmly bonded away from the outermost rim of the frame.
Materials and Tools
· Old CDs or DVDs
· Plain mirror with a solid frame or backing board
· Heavy-duty scissors suitable for the discs
· Work gloves and eye protection
· Strong craft adhesive compatible with the surfaces
· Cardboard template for planning the mosaic
· Optional grout-like filler only if compatible with the frame
Steps for This CD Mosaic Mirror Project
1. Prepare the mirror and work area. Clean the frame or backing area and cover the mirror face so adhesive and fragments do not scratch it. Check that the frame is strong enough for the added decoration before you spend time cutting the discs.
2. Cut controlled mosaic pieces. Wear eye protection and gloves, then cut the discs into medium-sized geometric pieces rather than very small splinters. Discard cracked pieces with unstable edges and keep cut fragments contained on the work surface so they do not scatter.
3. Arrange the reflective pattern. Lay the pieces around the mirror without adhesive first. Rotate the fragments to vary the rainbow reflections, but keep the sharpest cut edges facing inward or fully supported by the frame instead of projecting beyond the outside edge.
4. Glue and inspect every edge. Attach the mosaic in small sections and leave the mirror flat while the adhesive sets. Once secure, run a careful visual check around the perimeter and remove or replace any piece that lifts, rocks, or exposes a sharp corner.
What matters here is not perfect symmetry. I’d rather repeat the spacing between pieces than force every fragment into the same shape.
Variation: Use whole narrow strips from discs instead of irregular shards for a cleaner border. If cutting brittle material feels uncomfortable, reuse reflective gift packaging or safe craft mirror tiles to create a similar light-catching effect.
DIY Wooden Crate Shelves
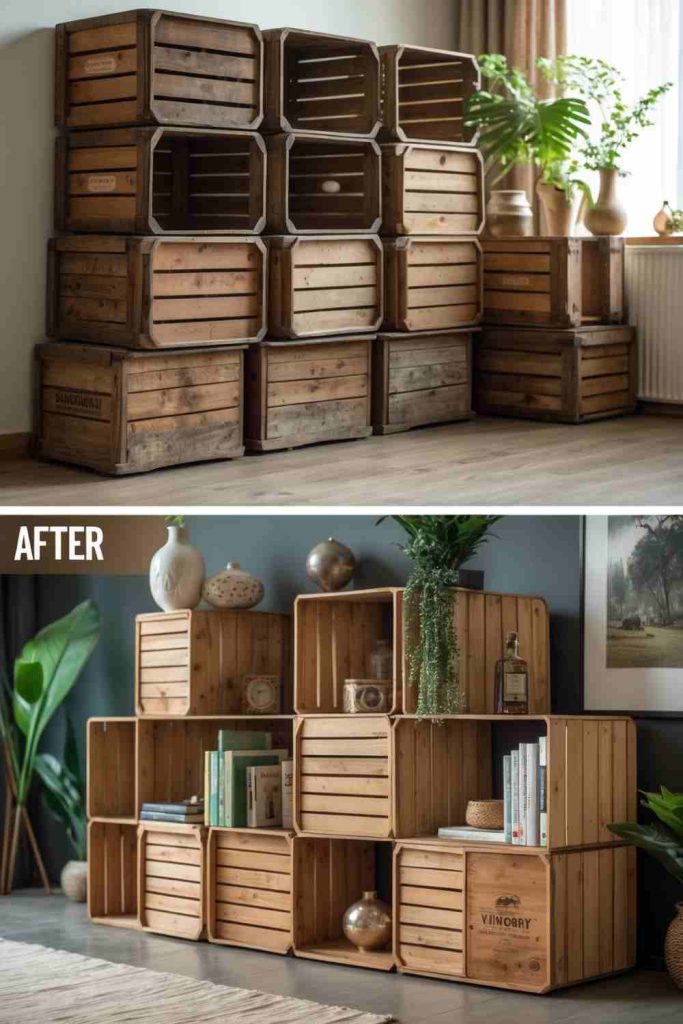
Wooden crates already have the basic ingredients of a shelf: side walls, a back or slatted base, and a box shape that can hold books, baskets, or small décor. Reusing several crates together also lets you build around an awkward wall or narrow corner without cutting every piece from scratch.
The project should begin with strength rather than paint. Check for split slats, loose fasteners, rough edges, and wobble first. A crate that looks charming but flexes under light pressure is better kept for floor-level lightweight storage than mounted overhead.
Materials and Tools
· Sturdy reclaimed wooden crates
· Sandpaper and sanding block
· Wood screws and drill or screwdriver
· Appropriate wall anchors if wall mounting
· Optional paint, stain, or clear finish
· Level and measuring tape
Steps for This Wooden Crate Shelves Project
1. Inspect and repair the crates. Remove protruding staples or nails, tighten loose boards, and reject any crate with major splits through structural corners. Sand rough edges and splinters, especially around front openings where hands will reach in often.
2. Plan the arrangement. Set the crates on the floor in the layout you want before drilling anything. Check whether shelves will be vertical, horizontal, stacked, or staggered, and leave enough open space for the objects you actually intend to store.
3. Secure the units together. Where crates touch, join them through sound wood using suitable screws rather than relying on glue alone. Keep the stack square as you work and avoid driving fasteners close to weak slat ends where the timber can split.
4. Anchor and load carefully. If the unit is wall mounted or tall enough to tip, fix it to appropriate wall structure with hardware suited to the wall type and total load. Then add lighter objects first and watch for flexing before placing heavier books or planters on the shelves.
The slightly mismatched wood tones can be part of the appeal. I’d only paint everything one color if the crates feel visually chaotic in the room.
Variation: Use a single crate as a bedside wall box or stack two low crates as floor storage. Baskets made from fabric scraps can soften the open slats and keep small items from falling through.
DIY Drawer Pull Coat Rack
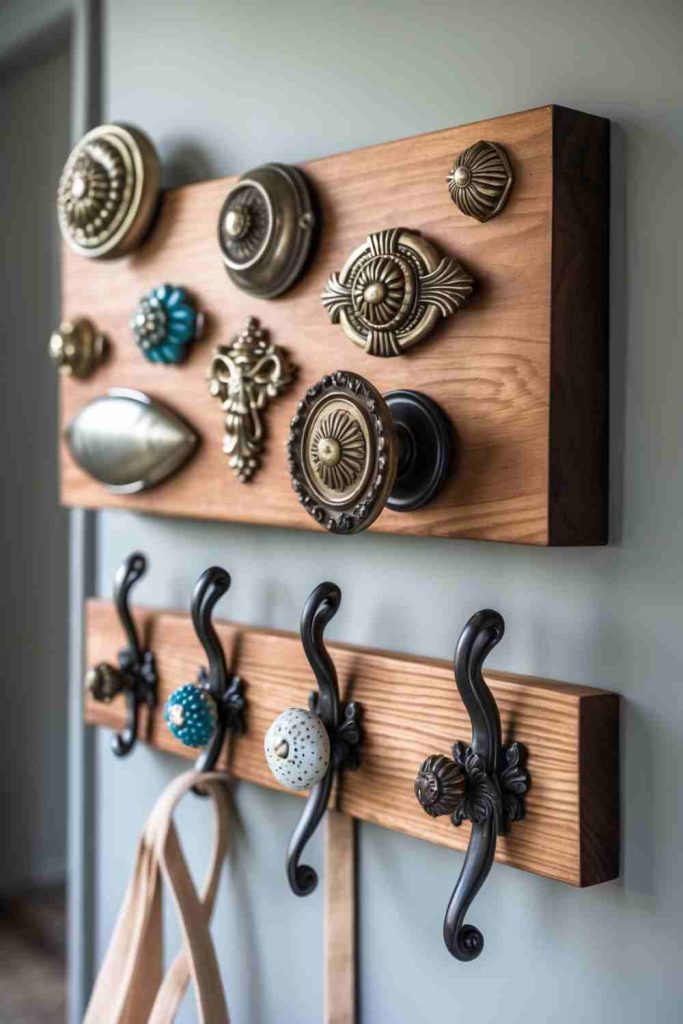
Old drawer pulls and knobs can outlast the furniture they came from, and a simple timber board gives those small pieces a new practical role. Mixing hardware works well here because the contrast feels collected rather than accidental, especially when the board itself stays simple.
Not every decorative knob is suitable for a heavy coat. I would test each pull for a comfortable grip and strong fastening point, then reserve delicate glass or ceramic pieces for scarves, keys, or lightweight bags.
Materials and Tools
· Reclaimed drawer pulls or knobs
· Sound wooden board
· Drill and suitable bits
· Bolts, screws, and washers matched to the hardware
· Sandpaper
· Optional paint or finish
· Wall-mounting hardware suited to the load
Steps for This Drawer Pull Coat Rack Project
1. Clean and sort the hardware. Remove grime and old adhesive from the pulls, then check threads, screws, and stems for damage. Group the strongest pieces for coat positions and save more delicate knobs for lighter items.
2. Prepare the mounting board. Sand the board smooth and decide whether to keep the wood natural or refinish it. Mark a straight line for the pulls, then space them far enough apart that hanging items will not crowd each other.
3. Drill and fasten each pull. Drill clean holes sized for the chosen bolts or screws and use washers where they help spread the load on the back. Tighten until the hardware is stable without over-tightening fragile knobs that could crack.
4. Mount the rack securely. Choose wall fixings based on the wall material and expected weight, not just the appearance of the hooks. Level the board, fasten it at multiple points, and test with light items before hanging heavier outerwear.
I especially like a rack where the hardware does not match perfectly but still shares one feature, such as brass tones, round shapes, or a similar scale.
Variation: Make a shorter version for jewelry or keys, where decorative knobs can be used with much lighter loads. A leftover cabinet door can replace the timber board if it is flat and strong.
DIY Egg Carton Flower Art
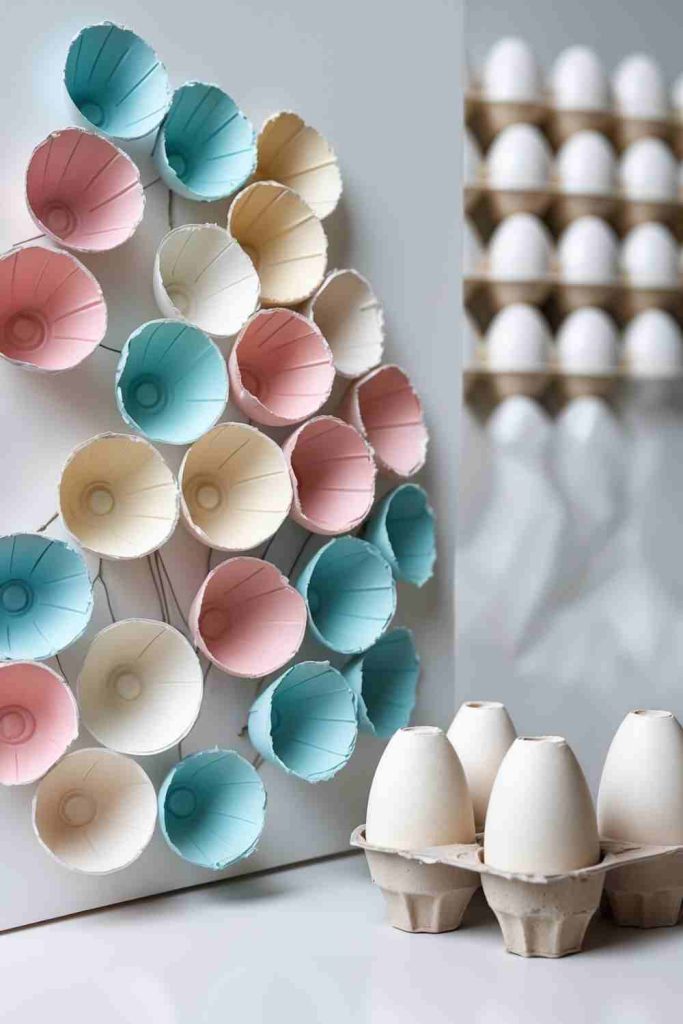
Cardboard egg cartons have a soft molded shape that is already close to a flower cup, so cutting them into petals feels more like refining a form than building one from nothing. Once painted and grouped together, the repeated cups can create surprisingly textured wall art.
The paper material is lightweight, which makes it friendly for simple panels, but it also absorbs moisture quickly. Keep the project indoors and away from damp rooms. I would also use a firm backing so the flowers do not have to support themselves.
Materials and Tools
· Clean, dry cardboard egg cartons
· Scissors
· Water-based craft paint
· Paintbrushes
· Strong card, canvas board, or thin wood backing
· Craft adhesive
· Optional buttons or paper circles for flower centers
Steps for This Egg Carton Flower Art Project
1. Cut the flower forms. Separate the egg cups and trim the top edges into simple rounded or pointed petals. Vary a few shapes so the finished group has depth, but keep each piece substantial enough that the petals do not tear easily.
2. Paint before assembling. Apply thin coats of paint rather than soaking the cardboard. Let the first color dry before adding center details or edge shading so the molded paper keeps its shape.
3. Build the composition on the backing. Lay the flowers across the board without glue, mixing larger open flowers with smaller folded pieces. Leave some visible background between clusters so the relief can cast small shadows and remain readable from across the room.
4. Glue and hang lightly. Attach each flower securely, then allow the panel to dry flat. Use hanging hardware appropriate for the backing board, and keep the piece where it will not be exposed to steam, splashes, or frequent handling.
The part I would keep simple is the color palette. The petal shapes already provide plenty of texture, so two or three related colors can be more effective than painting every flower differently.
Variation: Leave the carton in its natural kraft color and add only painted centers. Small finished flowers can also decorate a reused frame, gift box, or seasonal wreath base.
DIY Mason Jar Herb Garden
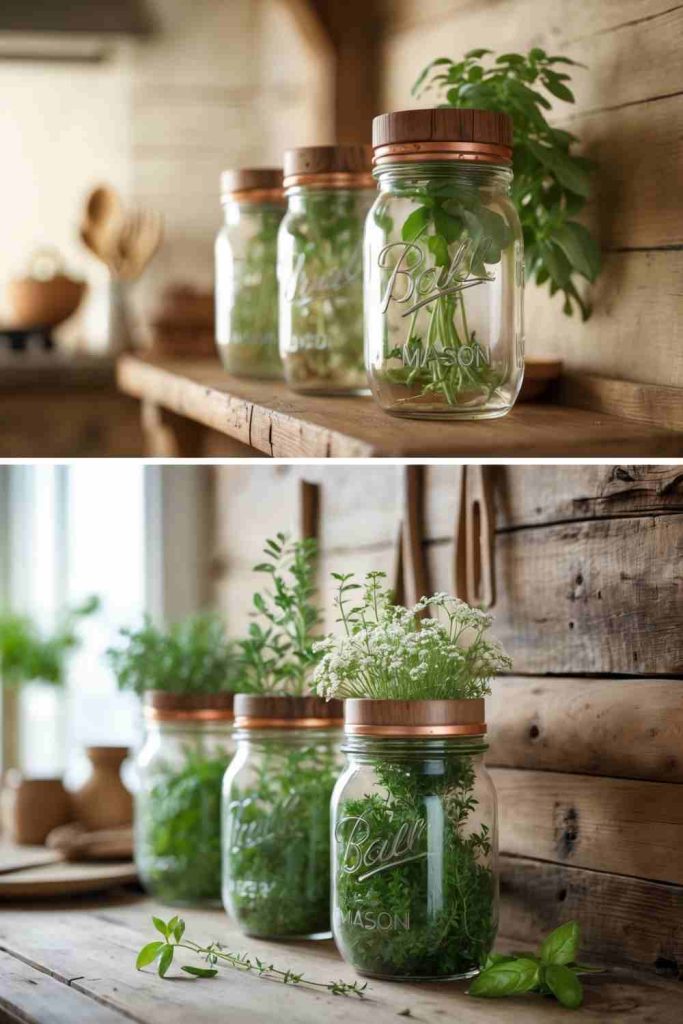
Glass jars are easy to clean, pleasant to look at, and just the right scale for small cut herbs or temporary plant displays. For living herbs, though, the lack of a drainage hole changes how the container should be used. That practical detail matters more than decorative labels.
I would treat jars as cachepots around small nursery pots whenever possible, because the inner pot can drain normally. If soil goes directly into the jar, watering needs to be very restrained and suited to the plant rather than following a one-size-fits-all schedule.
Materials and Tools
· Clean glass jars
· Small nursery pots that fit inside, when possible
· Herbs suited to the available light
· Potting mix appropriate to the herbs
· Small tray or pebbles for neat display
· Labels, twine, or leftover paint for decoration
Steps for This Mason Jar Herb Garden Project
1. Choose the planting method. Measure the jar opening and see whether a small draining pot can sit inside it. This is the easiest option because excess water can be removed; if direct planting is unavoidable, understand that the jar itself has no drainage outlet.
2. Prepare the jars and plants. Wash the jars, remove adhesive, and make sure no cracks or chips remain around the rim. Pot or repot the herbs gently, keeping the crown at an appropriate height and avoiding compacted soil.
3. Add simple labels. Mark each jar with the herb name using removable tags, chalk labels, or twine. Keep decoration away from the inside where it could contact damp soil or make the jar difficult to clean.
4. Place and water thoughtfully. Set the jars where the particular herbs receive suitable light and where water will not damage the surface beneath them. Check the soil before watering instead of pouring on a fixed schedule, and remove excess water from cachepots when it collects.
I like that the glass lets you see what is happening around the pot or soil, but it can also make overwatering obvious. Cloudy standing water is a sign to change the setup rather than decorate around the problem.
Variation: Use the jars for cut herb stems in water, or as holders for seed packets and plant labels. A row of mismatched jars can look coordinated with one repeated label style.
DIY Wooden Pallet Coffee Table
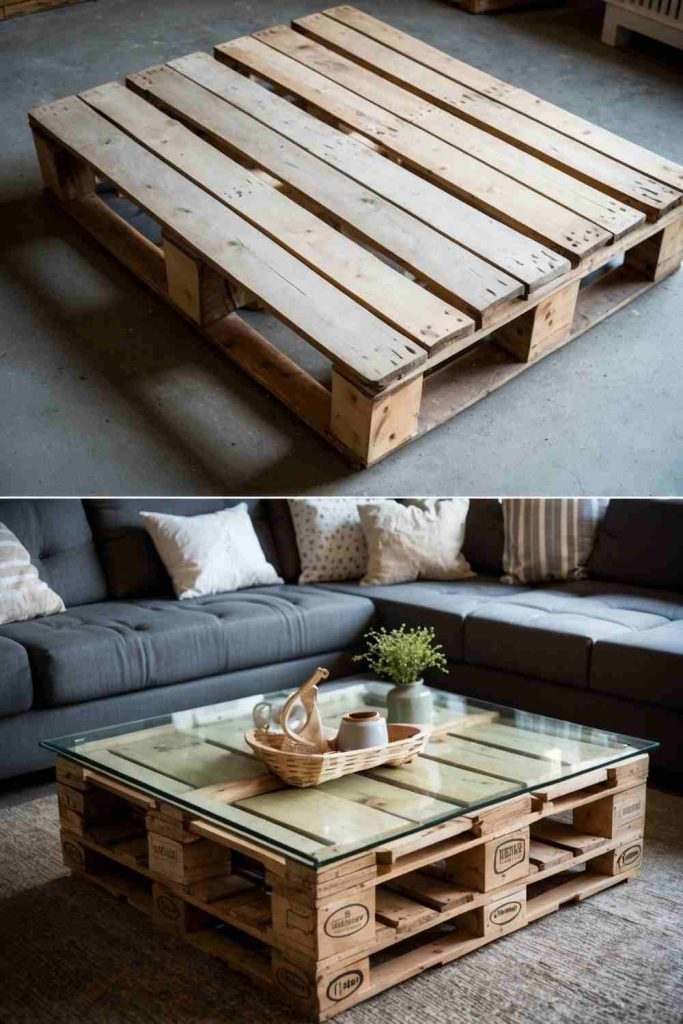
A pallet can provide the chunky, layered base of a low coffee table without starting from new lumber. Its open spaces also create natural storage for books or baskets, but only when the timber is sound, clean, and appropriate for indoor reuse.
I would be selective about the pallet itself. Avoid timber with strong chemical odors, heavy unknown stains, deep rot, or damaged boards. A known clean pallet is worth the extra search because a coffee table is touched constantly and sits in the center of daily living space.
Materials and Tools
· Clean, sound wooden pallet with known suitable history
· Sandpaper or sander
· Wood screws and drill
· Optional caster wheels rated for the load
· Wood finish suitable for indoor furniture
· Optional fitted top surface such as timber or professionally cut glass
· Eye and dust protection for sanding
Steps for This Wooden Pallet Coffee Table Project
1. Inspect and strip back roughness. Check every board, block, and fastener before sanding. Remove protruding nails or replace loose fixings, then smooth splinters and high spots while wearing appropriate eye and dust protection.
2. Decide the table height and base. A single pallet may suit a low table, while stacked pallets create more height and storage. If adding casters, use units rated for the combined table and expected load and fasten them into solid wood rather than thin slats.
3. Secure the structure and finish. Join stacked sections mechanically so they cannot slide, then apply the chosen furniture finish according to its instructions. Pay special attention to cut edges and frequently touched corners where rough timber can remain uncomfortable.
4. Add the top and test stability. If you use a separate top, make sure it cannot shift during normal use and that exposed edges are safe. Test the table on the floor for rocking, then add décor gradually rather than loading one side heavily from the start.
The open pallet gaps are useful only if they fit something you really store. I’d measure baskets and books before deciding that every cavity needs to remain open.
Variation: Use half a pallet for a narrow bench-style table, or add reclaimed boards across the top for a more continuous surface. Skip wheels if the table already sits at a comfortable height and does not need to move.
DIY Plastic Bottle Plant Watering System
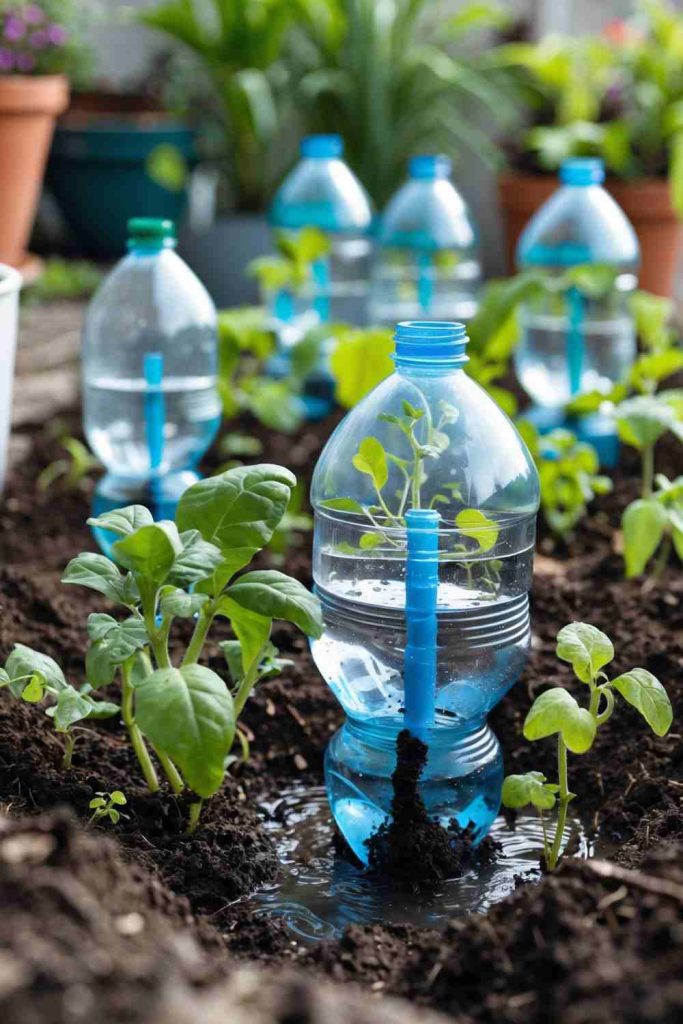
A clean plastic bottle can be reused as a simple slow-water reservoir for container plants, which is useful when you want to reuse the bottle rather than discard it immediately. The success of the idea depends on controlling the outlet, because a hole that is too large turns a slow release into one quick pour.
This should be treated as a plant-care aid, not an automatic guarantee. Soil type, bottle size, temperature, and plant needs all change the release rate. I would test the bottle in one pot first and watch the soil before repeating the setup across several plants.
Materials and Tools
· Clean plastic bottle with cap
· Small pin, awl, or nail for controlled holes
· Scissors only if reshaping is necessary
· Water
· Plant pot with healthy drainage
· Optional stake or support for a large bottle
Steps for This Plastic Bottle Plant Watering System Project
1. Clean and inspect the bottle. Wash out the previous contents and remove any residue that could enter the soil. Choose a bottle without brittle cracks, and keep the cap because it gives you the most control over a tiny release opening.
2. Make a very small outlet. Create one or two fine holes in the cap rather than cutting a large opening. Test the flow over a sink; if water runs freely, start again with a new cap or bottle instead of trying to block an oversized hole.
3. Fill and position the reservoir. Fill the bottle with water, secure the cap, and insert the capped end gently into the soil without damaging major roots. Support larger bottles so they cannot topple and pull through soft potting mix.
4. Monitor before relying on it. Check the soil after a short test period and compare it with the plant’s normal moisture needs. Then adjust the hole size, bottle position, or frequency of use rather than assuming the first setup is correct.
The practical part is the testing. I know it is easy to think a slow-drip bottle will behave the same in every pot, but compact soil and airy potting mix can respond very differently.
Variation: Use a smaller bottle for houseplants and a larger container only where the pot is stable enough to support it. For a decorative version, slide the plain bottle behind foliage rather than painting a surface that will sit in damp soil.
DIY Cozy Pillow Covers from Old Sweaters
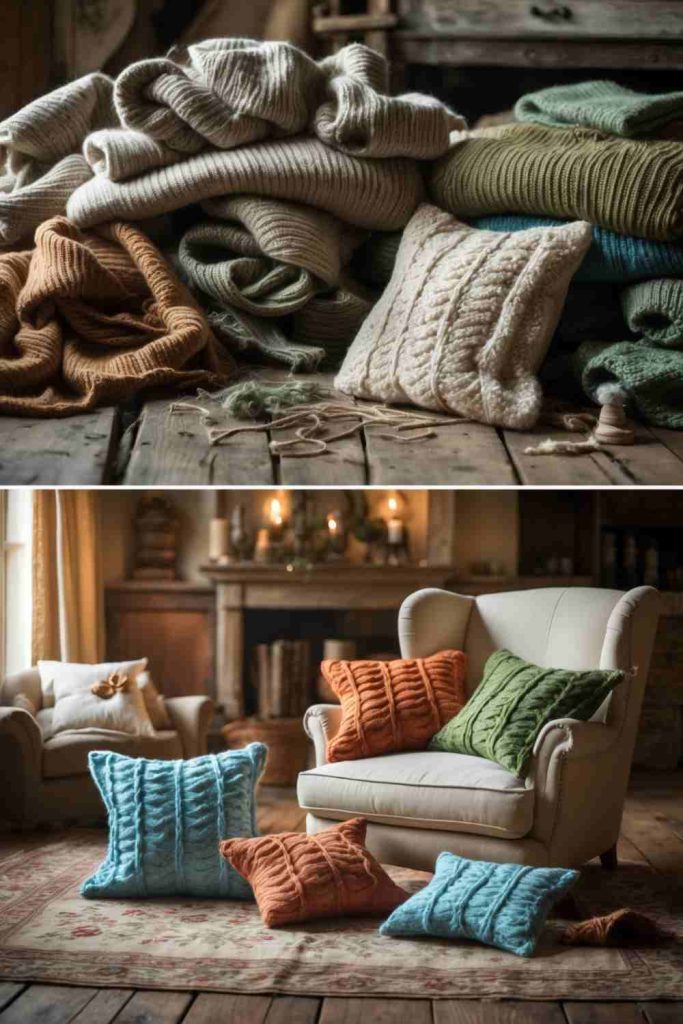
A sweater with worn cuffs or an outdated fit may still have a large section of usable knit across the body. That fabric can make a soft pillow cover while keeping cables, ribs, or colorwork visible. It is one of those projects where existing texture does almost all the decorating.
Knit fabric can stretch and unravel after cutting, so the construction needs a little more control than a woven cotton cover. I would use intact areas of the sweater, avoid weak moth-damaged sections, and stabilize cut edges as soon as practical.
Materials and Tools
· Clean old sweater with strong usable fabric
· Pillow insert
· Fabric scissors
· Pins or clips
· Sewing machine or hand-sewing needle
· Thread suited to the knit
· Optional buttons from the sweater for a closure
Steps for This Cozy Pillow Covers from Old Sweaters Project
1. Choose the strongest section. Wash or clean the sweater as appropriate and lay it flat without stretching it. Position the pillow insert over the body area and avoid seams, holes, thin elbows, or decorative details that would sit uncomfortably on the finished front.
2. Mark and cut with allowance. Trace a rectangle slightly larger than the insert so you have room for seams and the thickness of the pillow. Cut with the knit relaxed, then handle the edges gently so they do not stretch out of shape.
3. Sew the cover securely. Place the fabric right sides together and sew around the required edges using a stitch method suitable for knit fabric. Reinforce corners and any closure area, and avoid pulling the fabric through the machine because that can create wavy seams.
4. Insert and shape the pillow. Turn the cover right side out, push corners out carefully, and insert the pillow. Close the opening with stitching, reused buttons, or another secure method, then smooth the knit instead of tugging it tight over the insert.
For me, sweater texture looks best when it is not stretched flat. A slightly relaxed cover keeps cable patterns and ribbing looking like knitwear rather than printed fabric.
Variation: Use two different sweater panels for front and back, or keep an original button placket as a ready-made closure. Small sound sections can become matching mug cozies or soft drawer liners.
DIY Vintage Teacup Bird Feeder
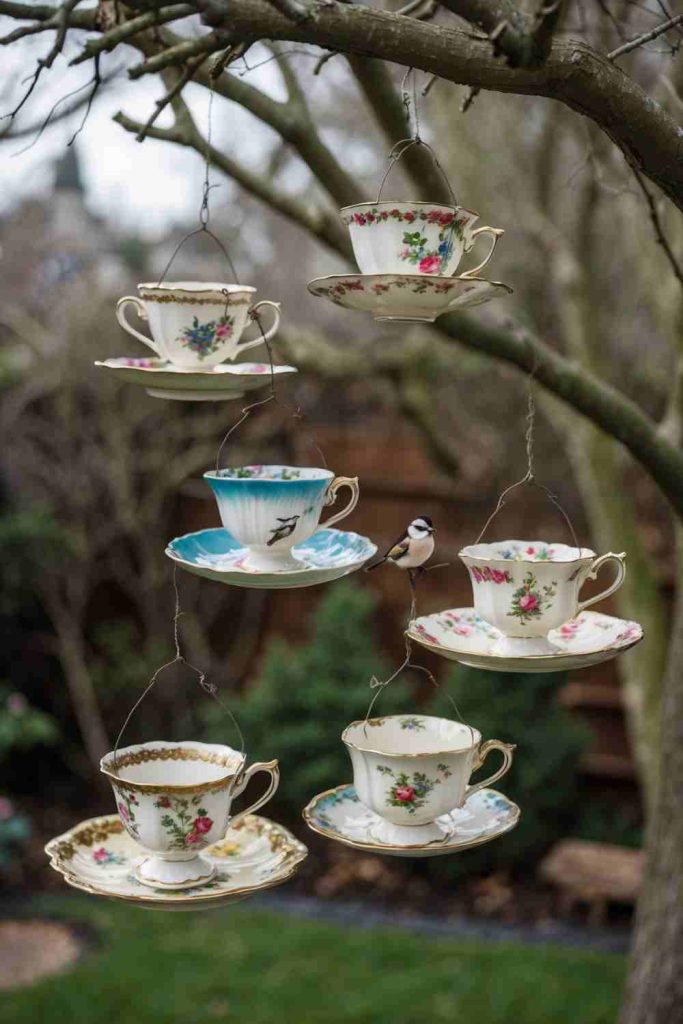
A teacup and saucer can become a small outdoor feeder while keeping the delicate shape visible instead of storing it in a cabinet. The cup works as a seed holder and the saucer catches some spill, but the assembly has to withstand outdoor movement and moisture.
I would use pieces that are already retired from food use rather than sacrificing a valuable set, and I would inspect for sharp chips first. The feeder should also hang from secure hardware rather than depending on a fragile cup handle to carry the whole load.
Materials and Tools
· Retired teacup and saucer without sharp chips
· Outdoor-suitable adhesive compatible with ceramic
· Hanging chain, wire cradle, or secure support
· Pliers
· Birdseed appropriate to local birds
· Sturdy outdoor hook or branch position
Steps for This Vintage Teacup Bird Feeder Project
1. Inspect and clean the ceramics. Wash the cup and saucer and reject pieces with cracks that travel through the body or sharp damaged rims. Dry them fully before bonding because moisture and residue can weaken an adhesive connection.
2. Choose a stable cup position. Test the cup upright or at a slight angle on the saucer and think about where seed will sit. Keep the center of mass over the saucer rather than creating a dramatically tilted arrangement that is more likely to swing or twist.
3. Bond and support the feeder. Use an adhesive specified for the materials and outdoor conditions, following its instructions for surface preparation and cure. Add a chain or wire support around the saucer or a purpose-made hanging cradle instead of trusting the cup handle alone.
4. Hang and maintain it. Place the feeder where it can be reached for cleaning and refilling, not directly above a busy walkway. Check the bond and hanging hardware regularly, remove damp old seed, and take the feeder down if cracks or instability appear.
The prettiest handle is not necessarily the strongest hanging point. I’d rather let the saucer carry the load and keep the handle as part of the look.
Variation: Set the feeder on a stable pedestal instead of hanging it, or use a single sturdy cup as a small seed dish. Mismatched cups can become a coordinated set if the hanging hardware is kept consistent.
DIY Ottoman from an Old Tire
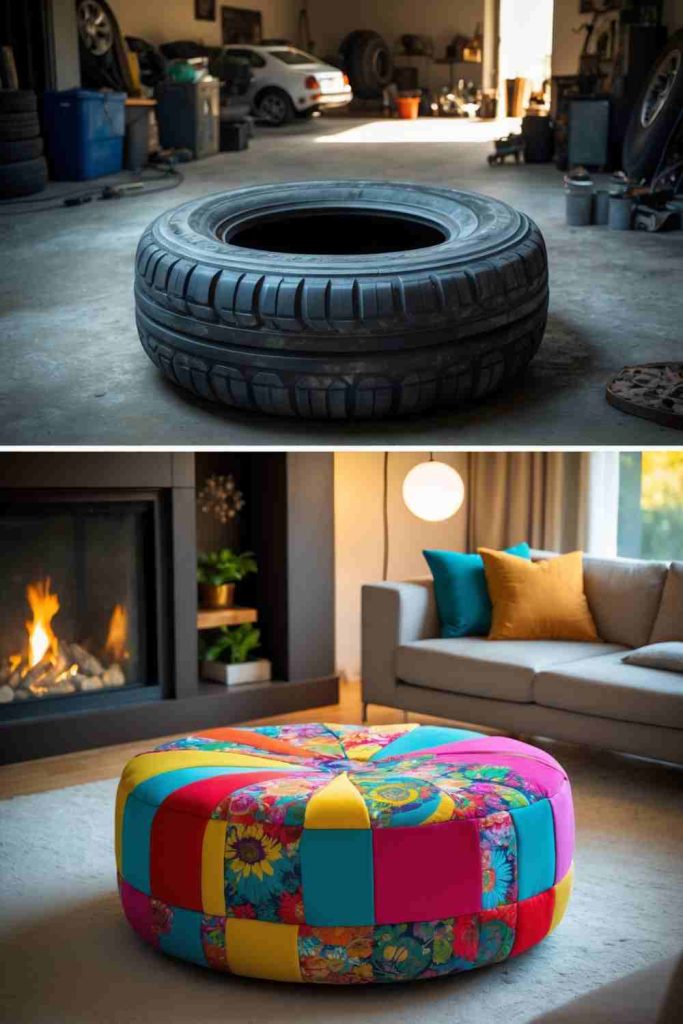
A worn vehicle tire has a strong circular form that can be hidden beneath rope, fabric, or a padded top to create a low ottoman. The shape is useful because it already resists compression, but the finished piece still needs a rigid top and secure base if anyone will sit on it.
Cleaning is essential before the tire comes indoors. I would also avoid using a badly cracked, oil-contaminated, or strongly odorous tire. Once covered, those problems are harder to notice and much harder to fix.
Materials and Tools
· Clean, sound used tire
· Plywood circles for top and/or base
· Jigsaw or professionally cut plywood
· Drill and suitable screws
· Dense cushion foam or reused firm padding
· Durable upholstery fabric or rope
· Strong adhesive suitable for chosen covering
· Eye protection for cutting and drilling
Steps for This Ottoman from an Old Tire Project
1. Clean and inspect the tire. Scrub the tire thoroughly and let it dry outside, then check the rubber for contamination, deep cracks, exposed reinforcement, or persistent odor. Choose another tire if the condition makes it unsuitable for indoor furniture.
2. Create a rigid seat structure. Cut or source a plywood circle that covers the opening and fasten it securely to stable points around the tire. If adding legs or casters, use a separate rigid base so those fasteners are carried by wood rather than thin decorative covering.
3. Pad and cover the top. Add firm cushioning and wrap it smoothly with upholstery fabric, securing the material underneath the rigid top. Keep seams and staples away from exposed edges where hands or floors could contact them.
4. Finish the sides and test. Wrap rope or fabric around the tire body in even courses, using adhesive in a ventilated space if required. Before regular use, press and shift weight across the ottoman from different directions to check that the top, base, and any legs remain stable.
I’d keep the side covering simple and spend more effort on the seat structure. Decorative rope can hide a tire, but it cannot compensate for a loose top.
Variation: Skip legs for a low floor ottoman or add a removable padded lid if the design creates safe internal storage. Reclaimed denim or heavy curtain fabric can replace new upholstery material.
DIY Colorful Rug from Old T-Shirts
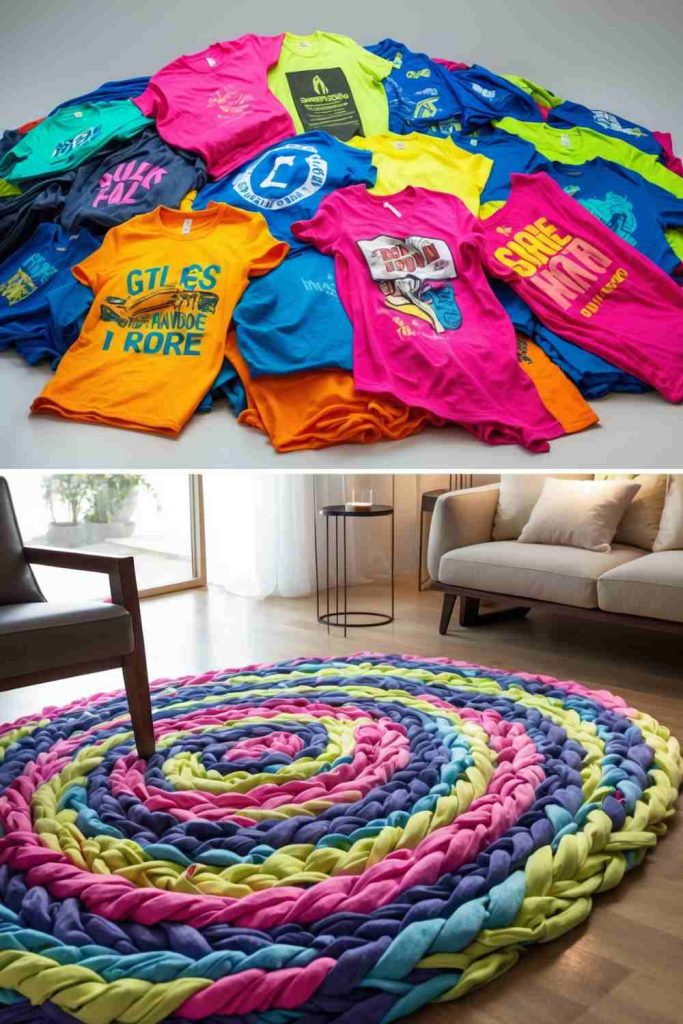
T-shirt jersey is soft, flexible, and easy to cut into long strips, making it useful for a braided rug that turns several worn garments into one larger surface. The color transitions can be planned carefully or allowed to shift gradually as each shirt runs out.
A good rug depends on consistent strip width and even braid tension more than perfect sewing. If one section is much tighter than the rest, the finished coil can cup or ripple. I would pause every few rounds and lay the work flat before adding more length.
Materials and Tools
· Clean old T-shirts with usable jersey fabric
· Fabric scissors or rotary cutter
· Clips or safety pins for holding braid ends
· Strong thread and large needle, or sewing machine suitable for the task
· Measuring guide for consistent strips
· Non-slip rug pad for the finished floor surface
Steps for This Colorful Rug from Old T-Shirts Project
1. Prepare long jersey strips. Remove thick hems and damaged areas, then cut the shirts into strips of roughly consistent width. Sort colors before braiding if you want a planned pattern, or mix them in a basket for a more irregular look.
2. Braid with steady tension. Join strips securely and braid three lengths together without pulling the jersey tight. Keep the braid firm enough to hold its shape but relaxed enough that it can bend into a coil without springing upward.
3. Coil and stitch gradually. Form the braid into a circle or oval and stitch neighboring rows together as you go. Lay the rug flat frequently; if an edge begins to wave, ease the braid tension rather than forcing the next row into place.
4. Finish the edge and make it safer. Tuck the final ends securely into the braid and reinforce the last section. Place the finished rug on a suitable non-slip pad, especially on smooth flooring, because soft jersey by itself may shift underfoot.
The small color changes are what make this feel handmade. I don’t think every strip needs to be the same length or come from shirts in a perfectly matched palette.
Variation: Make a narrow bedside mat before committing to a large rug, or create several small circles and stitch them together. Sleeves and leftover strips can become braided basket handles or ties.
DIY Rustic Bookshelf from a Vintage Ladder
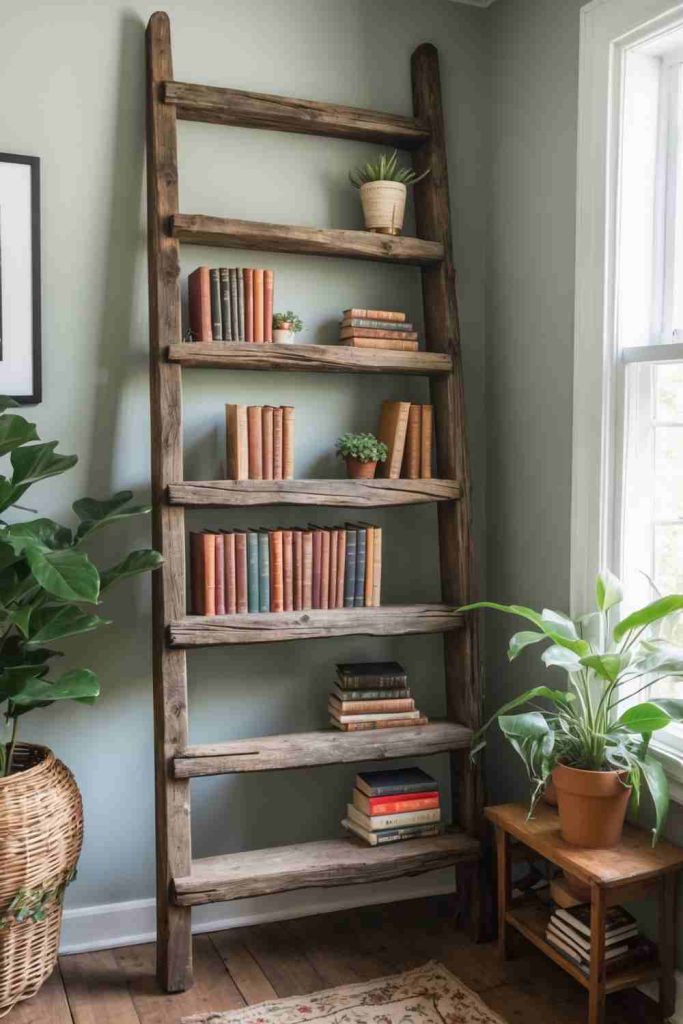
A vintage ladder can provide the vertical framework for open shelving, especially when its rungs are wide enough to support boards or brackets. The worn paint and old timber give the piece character, but an old ladder should be treated as reclaimed furniture material rather than assumed to be safe for climbing or load-bearing in its original way.
Stability is the deciding factor. I would not simply lean a tall ladder against the wall and load it with books. The shelf boards, ladder frame, and wall attachment all need to work together so the finished unit cannot slip or tip forward.
Materials and Tools
· Sound vintage ladder reserved for décor use
· Shelving boards sized to the rungs
· Sandpaper used cautiously on unknown old finishes
· Brackets or screws for securing shelves
· Wall anchors or anti-tip hardware suited to the wall
· Level and measuring tape
· Optional clear finish or paint
Steps for This Rustic Bookshelf from a Vintage Ladder Project
1. Inspect the ladder as furniture material. Check rails and rungs for rot, splits, loose joints, and insect damage. If the old finish is very worn or of unknown age, avoid aggressive dry sanding until you know how it should be handled safely; cleaning and sealing may be enough for the look you want.
2. Fit the shelf boards. Measure each intended shelf position because vintage ladders can taper. Cut or source boards that sit fully supported, then test them in place with no load before fastening.
3. Secure shelves and brace the frame. Attach the boards so they cannot slide sideways or lift when an object is removed. Add discreet brackets or mechanical fixings where needed, keeping screws away from split rung ends.
4. Anchor before loading. Fix the ladder unit to suitable wall structure with anti-tip or mounting hardware appropriate to its height and weight. Then place heavier objects lower down and keep the top shelves for lighter décor so the center of gravity stays low.
The ladder already has a strong visual rhythm, so I’d avoid crowding every rung. Leaving one open space can make the reused structure easier to recognize.
Variation: Use a short stepladder as a freestanding plant stand or side table instead of building a tall bookshelf. Narrow reclaimed boards can create display shelves for lightweight objects rather than heavy books.
DIY Picture Display from a Vintage Window Frame
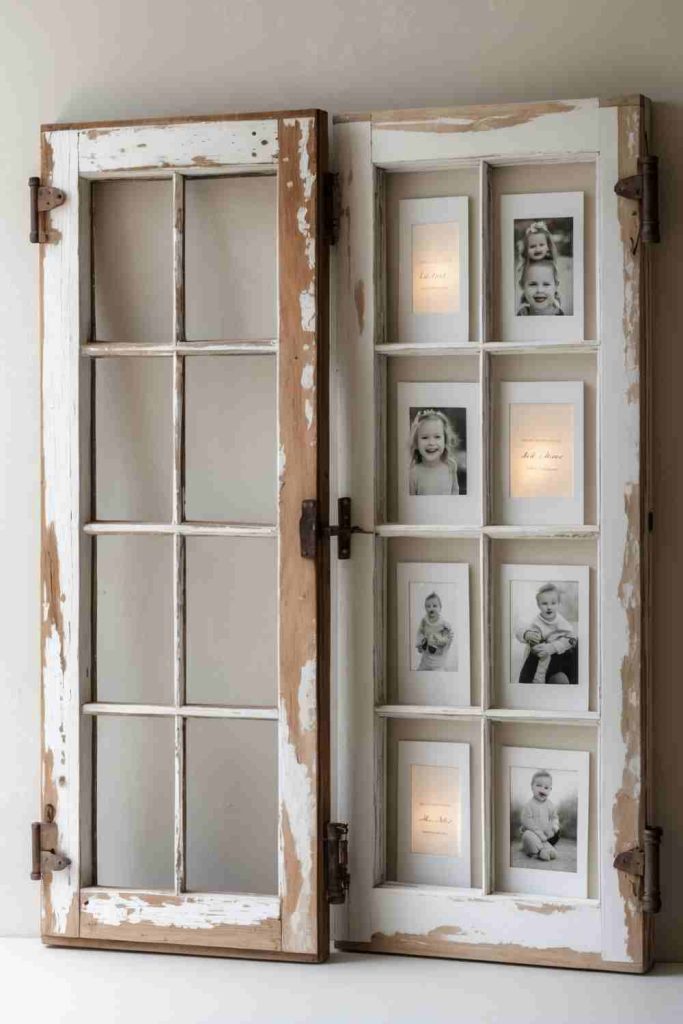
An old window frame naturally divides a wall display into panels, which makes it useful for photographs, postcards, pressed paper pieces, or small notes. The weathered wood can remain visible while the empty panes become a flexible grid instead of returning the frame to its original architectural use.
First decide what to do with any remaining glass. Loose, cracked, or sharp glazing should not stay in a decorative frame. I would either secure sound glass properly or remove it safely and use twine, backing board, or wire across the openings.
Materials and Tools
· Vintage window frame in sound condition
· Work gloves
· Twine, picture wire, or backing board
· Small screw eyes or clips
· Mini clothespins or photo corners
· Appropriate wall-hanging hardware
· Optional clear finish for stable wood
Steps for This Picture Display from a Vintage Window Frame Project
1. Inspect the frame and glazing. Check corners, joints, splinters, old fasteners, and every pane. Do not decorate around cracked glass; have unsafe glazing removed properly and smooth any exposed frame edges before continuing.
2. Clean and preserve the frame. Brush away loose dirt and wipe the wood carefully, keeping the worn character you actually like. If the finish is fragile, use a compatible clear coating rather than sanding away all the age and texture.
3. Create the photo support. Add screw eyes or small clips to strong frame sections, then stretch twine or wire across the openings without pulling hard enough to distort the frame. Test the lines with scrap paper before clipping valuable photos in place.
4. Hang the finished display securely. Use hardware rated for the frame’s full weight and suited to the wall type. Level the piece, fasten it at stable points, and keep heavy decorations off the twine so the display remains primarily a photo holder rather than a loaded shelf.
I like a mix of full photos and a few empty panes. The frame itself is part of the decoration, so it does not need to disappear behind paper.
Variation: Replace twine with a cork or fabric backing in selected panes, or use the frame as a seasonal card display. A smaller sash can become a tabletop memory board if it is given a stable stand.
Transform Old Shutters into a DIY Memo Board
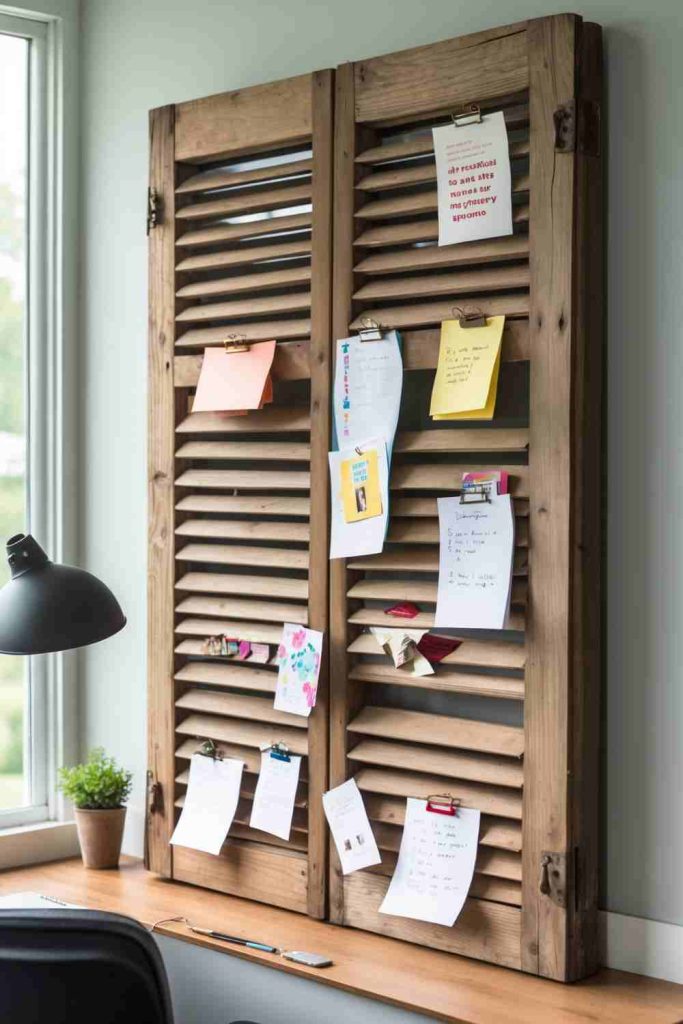
Shutters already contain parallel slats that can hold clips, hooks, cards, and hanging notes, so they adapt naturally into an entryway or desk-area organizer. The structure provides both pattern and function without needing to cover the whole piece with new material.
The slats are usually thinner than the outer rails, which means fasteners need to be chosen carefully. I would attach heavier hooks to the solid frame and use the slats mainly for clips, lightweight paper, or small decorative pieces.
Materials and Tools
· Old shutter in sound condition
· Brush and cleaning cloths
· Sandpaper or smoothing block for rough edges
· Small clips, hooks, or screw eyes
· Drill or screwdriver
· Wall anchors suited to the wall and shutter weight
· Optional paint or clear finish
Steps for This Transform Old Shutters into a Memo Board Project
1. Clean and check the shutter. Remove dust, loose hardware, and sharp splinters, then tighten any joints that make the frame rack from side to side. Decide which areas are strong enough for hooks before adding new holes.
2. Plan the organizing zones. Lay the shutter flat and decide where notes, keys, photos, or lightweight mail will go. Keep frequently used items within easy reach and leave a few slats empty so papers do not overlap into one large pile.
3. Add clips and hardware selectively. Fasten clips to slats using methods that do not split the thin wood, and place heavier hooks on the thicker perimeter rails. Test each attachment with the intended item before mounting the board on the wall.
4. Mount and use it as a system. Attach the shutter with wall hardware appropriate to its size and expected load, checking that it is level and secure. Then assign simple categories to the sections so the memo board stays useful instead of becoming another place where loose paper collects.
The best version is usually the one with fewer attachments. I’d leave enough open slats that a new note can be added without rearranging the entire board.
Variation: Add a small chalkboard panel or fabric pocket to the lower section, or mount two narrow shutters side by side for a shared family organizer. Keep added pockets lightweight unless they are fixed to the solid frame.
Upcycling Decoration Mistakes That Can Make Reused Pieces Unsafe, Weak, or Hard to Live With
Decorating Before Checking the Base Material
Paint and trim cannot strengthen rotten wood, cracked glass, split ceramic, or badly corroded metal. Inspect the old object first and change projects if the remaining material is not sound enough for its new use.
Using Glue Where the Project Needs Mechanical Support
Adhesive is useful for surface decoration, but shelves, wall racks, furniture tops, and heavy hanging pieces usually need screws, brackets, bolts, or other structural hardware. Use the connection method that matches the load rather than the easiest method to hide.
Ignoring Sharp Edges on Cans, Discs, or Old Hardware
A rough rim or exposed shard can turn an otherwise attractive project into something unpleasant to handle. Smooth, cover, reposition, or discard dangerous pieces before they become part of the finished decoration.
Loading Reclaimed Shelves and Racks Too Heavily
Old crates, ladders, shutters, and boards vary greatly in strength. Keep heavier objects low, distribute weight, and stop using a shelf or hook if the wood flexes, cracks, or loosens.
Treating Every Planter Like It Has Good Drainage
Jars, bottles, shoes, and repurposed containers may trap water. Plan drainage or use an inner pot, then water according to the plant and container rather than a fixed routine.
Using Open Flames When a Cool Light Source Will Do
Reused metal lanterns can look effective with LED tealights and do not need the added heat of a candle for the basic decorative effect. If flame is ever used in a separate project, keep the holder stable, nonflammable, and supervised.
Over-Sanding Old Decorative Finishes
Weathered frames and ladders often look interesting because some old finish remains. Aggressive sanding can remove character and may be inappropriate for an unknown old coating, so clean and stabilize first and only remove material you actually need to remove.
Skipping the Final Stability Check
A project may look finished before it is ready to use. Test wall fixings, furniture movement, rug slip, loose magnets, and hanging hardware after everything has cured so small problems are corrected before daily use.
Frequently Asked Questions
Which upcycling decoration ideas are easiest for beginners?
Bottle cap magnets, button art, egg carton flowers, and simple sweater pillow covers are manageable starting points because they use basic cutting, arranging, gluing, or sewing. Choose one project with only one unfamiliar technique rather than combining several new skills at once.
Do I need to buy special supplies for upcycled décor?
Usually not. Start with the object you already have, then add only the fastener, adhesive, thread, finish, or safety equipment needed to make that specific transformation work. Buying fewer but appropriate supplies is more useful than collecting a large craft kit you may not use.
How do I know whether reclaimed wood is safe to use indoors?
Use wood that is dry, structurally sound, and from a source you understand. Avoid pieces with strong odors, unknown chemical staining, deep rot, or unstable coatings, and clean and smooth the wood before it enters a living space.
Can I use hot glue for every decoration project?
No. Hot glue can be convenient for lightweight craft details, but it is not a substitute for screws, bolts, brackets, or material-specific structural adhesive where weight or movement is involved. Match the connection to the load and surfaces.
How can I make upcycled décor look less mismatched?
Repeat one or two elements across the project: a color family, metal finish, spacing pattern, or material. You do not need every reused piece to match exactly; consistent proportions and a limited palette usually create enough visual connection.
What should I do if an old object has damage?
Minor cosmetic wear may be part of the character, but structural cracks, sharp breaks, severe rust, rot, or unstable joints should change the plan. Repair only when the material can genuinely be made sound; otherwise reuse a safer section or choose another object.
How do I keep upcycled decorations easy to clean?
Think about dust, water, and handling before adding texture. Keep kitchen and plant projects wipeable, avoid deep glue ridges that trap dust, use removable fabric covers where practical, and make hanging pieces easy to take down when they need maintenance.
Let Everyday Leftovers Become Decorations That Still Have a Job
The most useful upcycling decoration ideas begin with an honest look at what an old object still does well. A cap can hold a magnet, a crate can hold a shelf load, a sweater can provide soft fabric, and a shutter can organize paper. Once that useful quality is identified, decoration becomes a way to support the new purpose instead of covering up the old one.
I’d start with one small project that already suits a material you have at home, then spend most of the effort on preparation, secure attachment, and a finish that fits the room. That approach keeps reuse practical and lets the original material remain visible in the final piece. Which forgotten object in your home already has a shape or texture worth using again?