Useful craft materials rarely arrive in neat matching sets. They gather slowly: a sweater with worn elbows, a jar without a lid, a few scratched discs, cardboard tubes, bottle caps, and tins that seem too sturdy to throw away. I don’t think every leftover needs to become a major project. Sometimes the most satisfying upcycle is a small object that solves an ordinary problem or adds one carefully made detail to a room.
What interests me most about upcycle crafts ideas is the moment an item stops being viewed only as waste. A spoon can become part of a mirror frame, an old shutter can organise keys and letters, and a sweater sleeve can protect a hand from a warm mug. The original material still matters, though. Its strength, shape, finish, and previous use should guide what it becomes next.
These projects work best when you prepare before decorating. Check that every object is clean, stable, and suitable for its new job, then choose attachments that will not fail after a few uses. A little planning may feel slower at the beginning, but it prevents the familiar craft-table problem of discovering halfway through that the glue, paint, or base was never quite right.
Choose Reusable Materials That Are Still Safe and Sound
Sort the objects by material before deciding what to make. Fabric should be clean and strong enough to sew, paper should be dry and free from mould, and metal should not have deep rust or sharp torn edges.
Wash jars, tins, caps, bottles, and plastic pieces thoroughly, then remove labels and adhesive residue. Anything that held hazardous chemicals should stay out of household craft projects, especially items intended for plants, food areas, children, or pets.
Look past the surface decoration and test the structure. A wooden ladder may need loose joints repaired before it carries books, while an old shutter needs firm slats before hooks can be attached.
Cardboard tubes that have been crushed or damp will not hold tools upright for long. Small flaws can often be trimmed, reinforced, or placed on the hidden side, but damaged load-bearing parts should not be disguised with paint and treated as safe.
Match Paint, Adhesive, and Fasteners to the Surface
Plastic, glass, metal, paper, wood, and knitted fabric behave very differently. Lightly scuffing a glossy plastic or metal surface may help a suitable primer or paint grip, while old paper needs very little moisture.
Fabric is usually more reliable when sewn rather than glued at stressed seams. For jars and tins, use finishes intended for the relevant surface and keep decorative coatings away from areas that touch food, drinking rims, plant soil, or animal feed.
Choose mechanical fasteners when weight or movement is involved. Screws, brackets, wire, stitching, and proper wall fixings usually provide more dependable support than a bead of craft glue.
Adhesive is useful for lightweight decoration, but it should not be expected to hold a bookshelf, hanging organiser, or outdoor object by itself. Test a small hidden area first, then allow every coating and bond to cure according to its own instructions rather than rushing the next stage.
Prepare a Clear and Safe Making Area
Protect the table before cutting, painting, drilling, or using hot glue. Keep a tray nearby for bottle caps, beads, pins, and short wire pieces so they do not scatter across the floor.
Ventilate the room when using spray products or strong adhesive, and wear suitable eye and hand protection when cutting discs, punching metal, drilling wood, or trimming rigid plastic. Unplug hot tools as soon as they are no longer needed.
Plan where wet and dry work will happen. Paint pieces in batches, leave enough room for them to dry without touching, and keep clean fabric or paper away from sanding dust.
I know it can feel tempting to assemble everything immediately, but dry-fitting the arrangement first usually improves spacing and exposes weak areas. Then you can make changes while the pieces are still easy to move.
DIY Plastic Spoon Mirror Frame
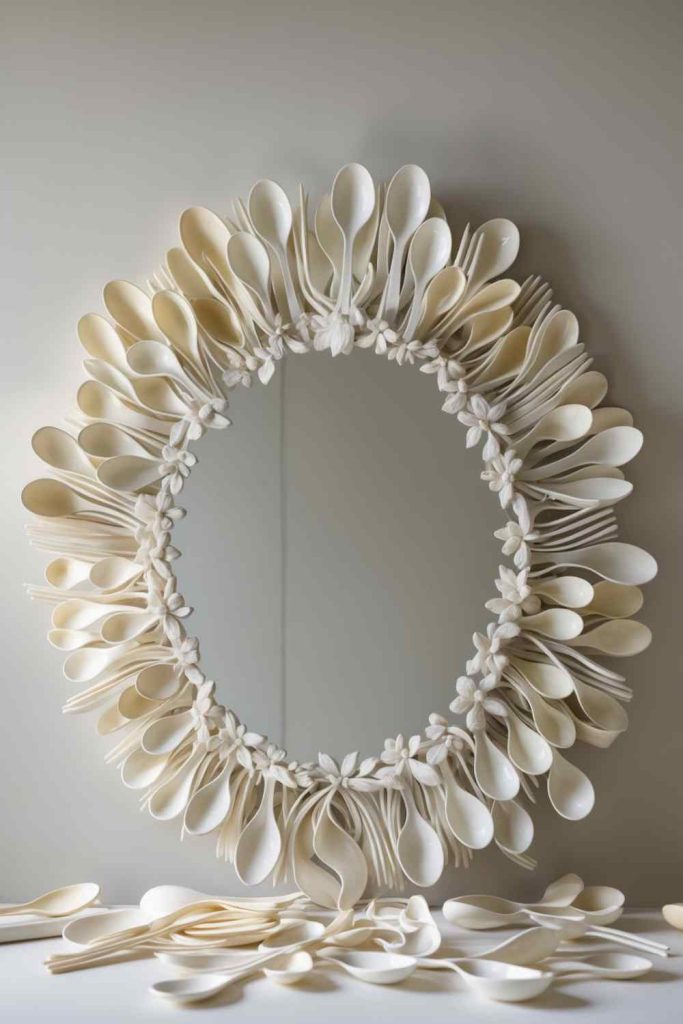
Disposable spoons have a shallow curved shape that can look surprisingly petal-like once the handles are removed. Layered around a plain round mirror, the spoon bowls create a broad floral frame without requiring carved wood or expensive mouldings. The effect depends less on elaborate decoration and more on repeated spacing, a secure backing, and a finish that visually connects the separate pieces.
Use clean spoons of the same general size so the rings sit evenly. A sturdy circular board behind the mirror gives the petals something reliable to grip and keeps adhesive away from the reflective edge. The finished frame can become quite wide, so measure the intended wall space before building outward; a craft that fits the table does not always fit between two shelves.
Materials and Tools
· Plain round mirror
· Firm circular backing board larger than the mirror
· Clean plastic spoons
· Heavy scissors or suitable snips
· Adhesive suitable for plastic and the backing
· Primer and paint suitable for plastic, if colouring
· Hanging hardware rated for the finished weight
Steps for This Upcycle Project
1. Prepare the mirror base. Centre the mirror on the backing board and trace around it, then mark several guide circles for the spoon layers. Confirm that the board is flat and that the chosen hanging hardware can be fixed securely before the decorative pieces cover the back.
2. Cut and organise the spoons. Remove the handles with strong scissors or snips, wearing eye protection because hard plastic can jump as it is cut. Sort the bowls by shape and discard any cracked pieces that could leave a sharp edge in the finished frame.
3. Build the petal rings. Work from the outside toward the mirror, placing each spoon bowl with a small, consistent overlap. Dry-arrange a complete ring first, then attach the pieces one at a time so the final gap does not become noticeably narrow or crowded.
4. Finish and hang the frame. Apply surface-appropriate primer and paint in light coats if a uniform colour is wanted, keeping the mirror protected. Once everything has cured, attach the mirror and hanging hardware securely, then test the frame close to the floor before mounting it in its final position.
The part I would watch is the spacing in the first ring. If that outer layer is uneven, every later row tends to copy the same problem. A simple paper template with marked intervals can save a surprising amount of repositioning.
For a quieter version, leave the spoons in their original colour and use only two layers. Mixed spoon sizes can create a more textured frame, but arrange them deliberately rather than scattering them at random.
Recommended Products:
Cozy DIY with Old Sweaters

A sweater may be too stretched, stained, or worn for clothing while still holding large areas of useful knitted fabric. Those intact sections can become cushion covers, patchwork throws, soft storage liners, or small warm accessories. Ribbing, cables, and colour blocks already provide texture, which means the fabric often needs less added decoration than ordinary yardage.
Knitted fabric can unravel and stretch once cut, so stabilising the edges matters. Choose sweater areas without thin patches, moth damage, or permanently distorted seams. If several garments are being combined, match their care needs and approximate thickness so one piece does not shrink or sag differently from the others.
Materials and Tools
· Clean old sweaters
· Cushion insert or backing fabric
· Sharp fabric scissors
· Pins or sewing clips
· Strong matching thread
· Sewing machine or hand-sewing needle
· Optional woven lining or lightweight stabiliser
Steps for This Upcycle Project
1. Wash and inspect the sweaters. Clean them according to the fibre needs and let them dry flat before cutting. Mark any weak areas, stains, buttons, or seams that should be avoided, then decide which knitted details deserve to remain visible on the finished piece.
2. Measure and stabilise the panels. Use the cushion insert or planned blanket layout as a guide, adding seam allowance around every cut piece. Pin or baste close to the cutting line first, especially with loose knits, so the loops cannot open while the fabric is handled.
3. Join the main construction. Sew cushion panels with the right sides together, leaving an opening for the insert, or connect blanket blocks with a seam that lies comfortably flat. Support very stretchy sections with lining fabric rather than pulling them tight enough to match firmer pieces.
4. Finish without distorting the knit. Turn the cover gently, shape the corners, and insert the cushion without forcing it. Close the opening with small secure stitches, then check that decorative seams, buttons, and ribbed edges sit where they will not rub or catch during use.
For me, the original sweater detail should do most of the visual work. A cable panel placed across the centre of a cushion usually looks more considered than several extra trims competing around it.
Smaller sound sections can become hot-water-bottle covers, soft patches, mittens, or lined pouches. Beginners can use a felted wool sweater because the denser fabric is less likely to unravel after cutting.
Vintage Paper Flower DIY
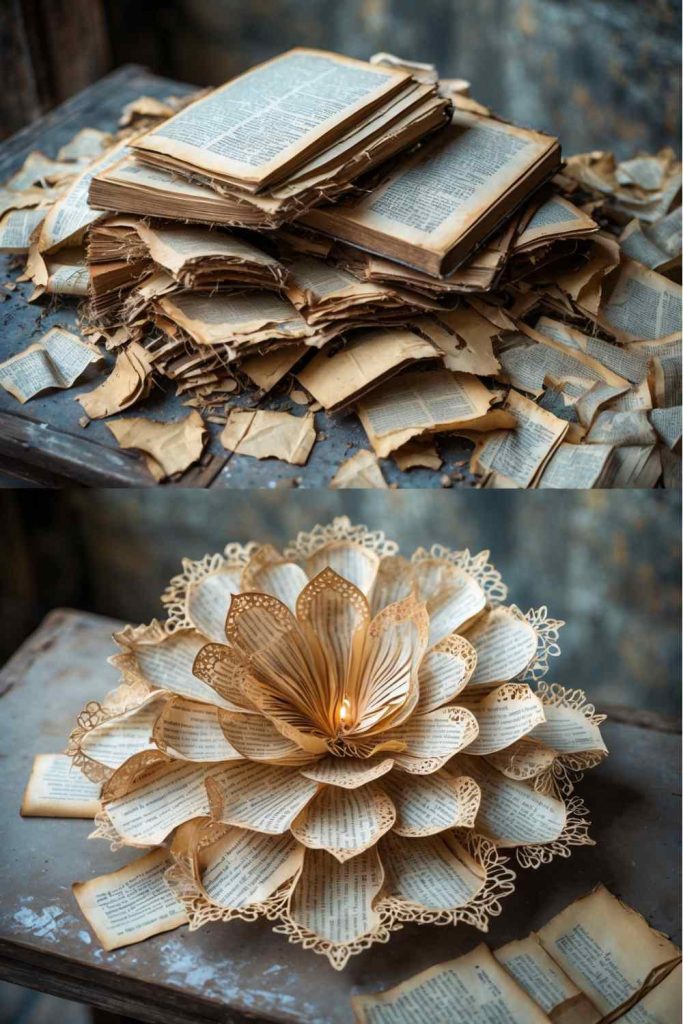
Old book pages, damaged sheet music, maps, and unwanted printed paper can be shaped into layered flowers that preserve the character of the print without keeping an entire unusable volume. The petals gain depth from gentle curling and overlapping, while a simple centre hides the joins. These flowers work best as dry indoor decoration where the paper will not be crushed or exposed to moisture.
Avoid cutting a valuable or meaningful book simply because the pages look aged. Loose pages from damaged books, outdated manuals, discarded proofs, and photocopies of sentimental text are safer choices. Paper weight also matters: very thin sheets create soft petals, while heavier paper holds a sculpted curve but may need stronger adhesive.
Materials and Tools
· Discarded printed paper or damaged book pages
· Cardboard scrap for the base
· Pencil and petal template
· Sharp paper scissors
· Paper-safe adhesive
· Optional button, bead, or rolled-paper centre
· Optional skewer or pencil for shaping
Steps for This Upcycle Project
1. Select and prepare the paper. Flatten curled sheets beneath a clean book and remove dusty or brittle edges. Decide whether the text direction matters, then group pages with similar colour so the finished flower does not look patchy by accident.
2. Cut a graduated set of petals. Trace several sizes rather than making every petal identical, and cut them with smooth continuous movements. A small slit at the base can help each petal overlap into a shallow cup, but keep the cut short so the paper does not tear through.
3. Shape and layer the flower. Curl the outer edges around a pencil or skewer, then arrange the largest petals on a cardboard circle. Attach smaller layers toward the centre, rotating each row so the gaps below are covered without creating a heavy stack of glue.
4. Add the centre and support. Finish with a button, bead, tightly rolled paper coil, or cluster of narrow paper strips. Let the flower dry flat, then use it on a gift box, frame, wreath, or wall arrangement where the petals will not be handled repeatedly.
I don’t think every petal should curl by exactly the same amount. Slight variation makes the paper feel less stamped out, while the repeated centre keeps the whole flower connected.
Use maps for travel-themed flowers, plain kraft paper for a simpler look, or children’s artwork that would otherwise be discarded. A flat version without curled petals can decorate cards and journals more easily.
Recommended Products:
Rustic Shutter Organizer DIY
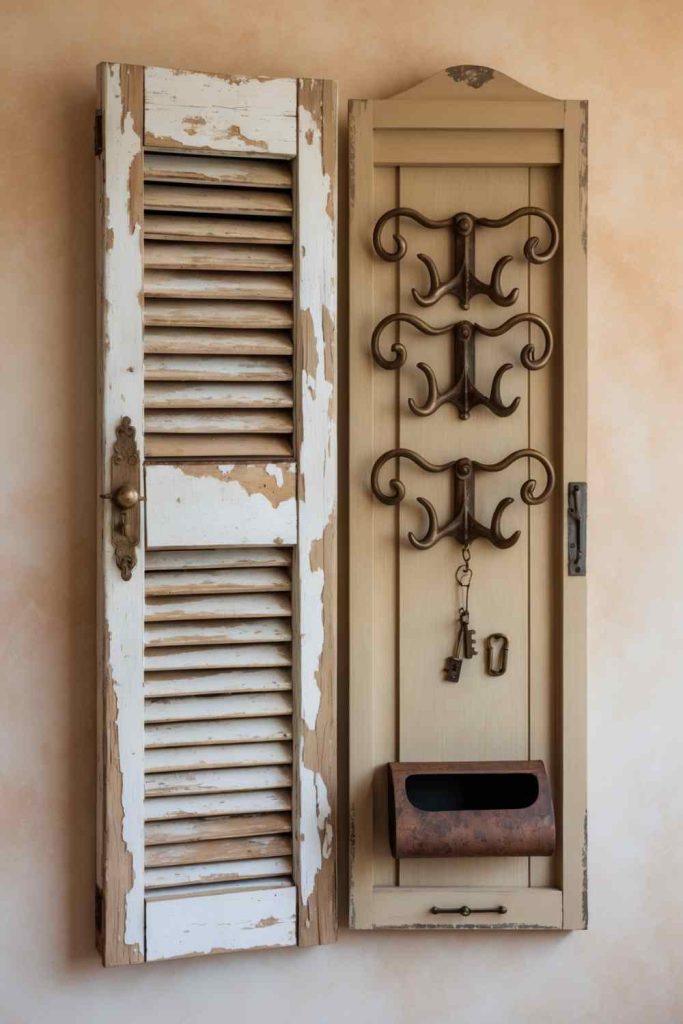
An old window shutter already has a tall narrow shape, repeated lines, and a frame strong enough to support light storage. Mounted vertically, it can become an entryway organiser for keys, letters, sunglasses, and small reminders. The slats give hooks and clips visual order, while a basket near the bottom adds space for items that do not hang neatly.
The distressed finish may be worth keeping, but loose paint and weak joints are not decorative features. Check whether the shutter is solid wood, composite, or a lightweight decorative panel before choosing screws and wall fixings. Any old coating that may contain hazardous material should be assessed and handled appropriately rather than aggressively sanded indoors.
Materials and Tools
· Old wooden shutter
· Soft brush and mild cleaner
· Fine abrasive pad or sandpaper, when appropriate
· Small hooks, clips, or pegs
· Lightweight basket or mail holder
· Screws and washers suited to the shutter
· Wall fixings rated for the loaded organizer
Steps for This Upcycle Project
1. Clean and assess the shutter. Remove dirt with a brush and damp cloth, then tighten loose corners or slats. Preserve stable worn paint if you like the aged finish, but remove only material that is actively flaking and follow safe precautions for unknown old coatings.
2. Plan the storage zones. Lay the shutter flat and place hooks, clips, a basket, and any label holder before drilling. Keep frequently used keys at a comfortable height and leave enough room above the basket for letters to slide in without snagging on the slats.
3. Attach the hardware. Drill small pilot holes where needed and use short screws that will not burst through the front. Spread the basket attachment across more than one point, then pull gently on every hook to confirm it is seated in solid material rather than a thin louvre edge.
4. Mount and load it gradually. Fix the organiser to wall studs or suitable anchors, checking that it sits level and does not rock. Add light items first, then watch for movement at the frame or fixings before allowing the basket to fill with heavier mail and accessories.
What matters here is restraint. The shutter already contains plenty of lines, so a few well-placed hooks and one useful basket usually look calmer than hardware attached to every available slat.
A horizontal shutter can hold photographs, postcards, or recipe cards. Renters could use a smaller shutter leaned securely on a desk, provided it cannot tip and the storage remains lightweight.
Recommended Products:
Wooden Ladder Bookshelf DIY

A retired wooden ladder can provide the side structure for an open bookshelf, plant stand, or display shelf. Planks resting across the steps create graduated surfaces, with wider shelves near the bottom and lighter display space above. The original wear gives the piece character, but its success depends entirely on stability; a ladder that was unsafe for climbing does not automatically become safe furniture.
Choose a ladder with sound side rails and joints. Repair loose rungs, remove splinters, and decide whether it will stand as an A-frame or lean against a wall. Books are heavy, so shelf boards, brackets, anti-tip restraints, and floor contact all need more attention than the paint colour.
Materials and Tools
· Structurally sound wooden ladder
· Shelf boards cut to suitable lengths
· Sandpaper or sanding block
· Wood screws and appropriate brackets
· Drill and bits
· Level and tape measure
· Anti-tip wall restraint or suitable anchoring hardware
Steps for This Upcycle Project
1. Inspect and repair the ladder. Place it on a level floor, check every joint, and reject rails with serious splits or rot. Tighten or reinforce sound joints, then smooth splinters without erasing all of the surface wear that gives the piece its history.
2. Measure the shelves in position. Open or lean the ladder exactly as it will stand, then measure each shelf separately because old ladders are not always perfectly symmetrical. Cut boards with enough support on both sides and round any corners that project into a walkway.
3. Secure the boards and stabilise the frame. Fasten shelves with brackets, cleats, or another method appropriate to the ladder design instead of relying on friction. Add an anti-tip restraint and confirm that the feet sit firmly without rocking before any books are placed on it.
4. Load from the bottom upward. Put heavier books and pots on the lowest shelves and keep light decor above. Check for bending, spreading, or loose screws as weight is added, and leave the original climbing function permanently retired once the ladder becomes shelving.
I would rather use fewer, deeper shelves than squeeze a plank across every rung. The open spaces help the ladder shape remain visible and make it easier to dust and arrange the contents.
A short step ladder can become a bedside shelf or plant stand. For a non-load-bearing display, narrow boards can hold framed prints and lightweight baskets, but the anti-tip support is still essential.
Recommended Products:
Creative Bottle Cap Makeover
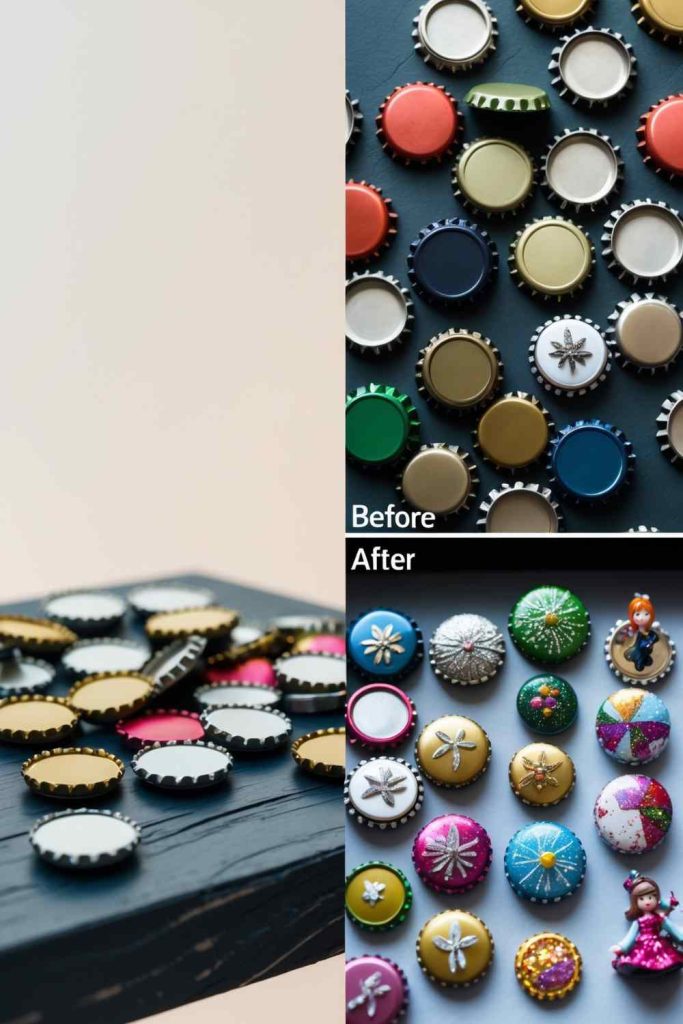
Bottle caps are small enough to collect in colour groups and sturdy enough to become magnets, tokens, miniature frames, labels, or game pieces. Their raised rim naturally contains paint, paper, tiny motifs, and shallow embellishments. Because the object is so small, clean edges and a clear purpose matter more than adding several layers of decoration.
Metal caps may have sharp crimped edges, while plastic caps can carry stubborn drink residue. Wash and dry them thoroughly, then inspect each one before crafting. Small magnets and embellishments can be hazardous around young children and pets, so finished pieces should be stored and used accordingly.
Materials and Tools
· Clean bottle caps
· Small brush and surface-appropriate paint
· Scrap paper, fabric, or tiny flat embellishments
· Craft adhesive suitable for the chosen materials
· Optional flat magnets or pin backs
· Clear protective medium, if compatible
· Tweezers and a tray for small parts
Steps for This Upcycle Project
1. Prepare a consistent group of caps. Remove residue, flatten bent areas only when this can be done safely, and discard caps with sharp tears. If logos will show through the design, apply a thin suitable base coat and let it cure before adding detail.
2. Choose one simple design system. Group caps by colour, use repeated initials, cut small circles from maps or fabric, or paint a set of related motifs. Work inside the raised rim and keep the layer thin enough that the design still feels protected rather than piled above the edge.
3. Attach the functional backing. Fix a magnet, pin, small loop, or game-piece base to the back using an adhesive intended for both surfaces. Centre it carefully and allow it to cure flat so the cap does not lean or spin when used.
4. Seal and test the finished pieces. Add a compatible clear coat only if it will not react with the paper, ink, paint, or plastic. Test magnets with one lightweight note and check pin backs for sharp movement before placing the caps into regular use.
The tiny scale is the charm here. I’d choose one bold image or colour per cap rather than trying to fit a complete scene into a space no larger than a coin.
Without magnets or pins, decorated caps can become counters for homemade games, mosaic pieces, gift tags, or centres for paper flowers. Keep purely decorative sets in a shallow frame when loose parts are unsuitable.
Recommended Products:
Bottle Cap Decor DIY
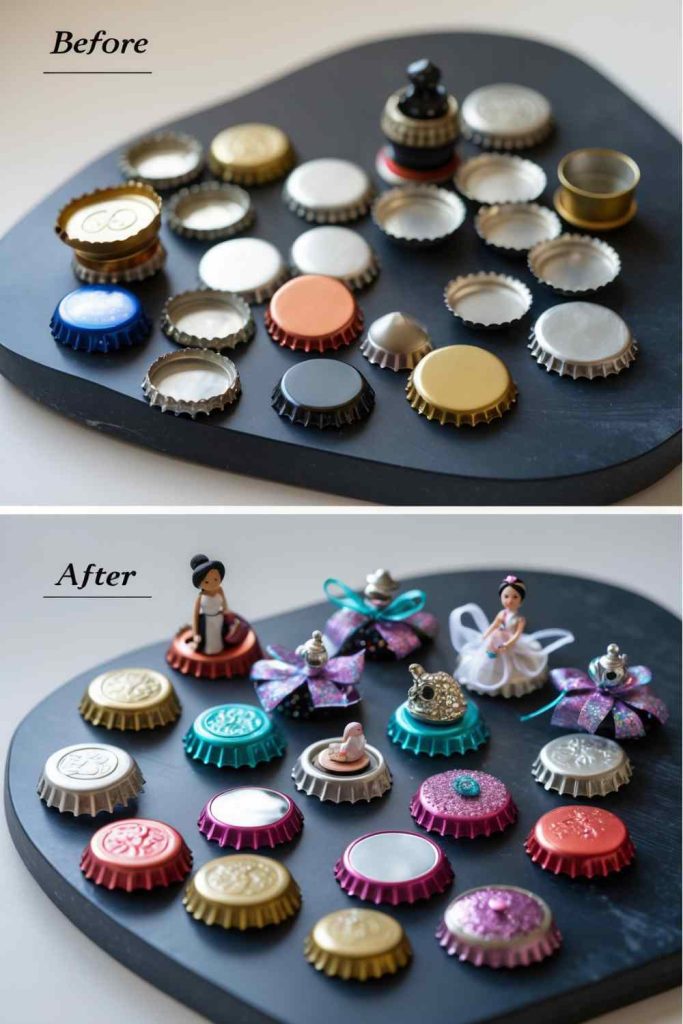
Bottle cap decor becomes more sculptural when the caps are arranged together rather than treated as separate miniatures. Repeated circles can form flowers, letters, borders, wreath details, or patterned panels. The original colours may create the design, or a restrained paint palette can unify caps collected from many sources.
The supporting surface should match the intended display. A light cardboard panel suits indoor framed art, while a wooden board provides better support for a larger wall piece. Lay out the full pattern first because cap spacing changes quickly, and one extra row can shift the entire design beyond the edge of the base.
Materials and Tools
· Clean metal or plastic bottle caps
· Firm backing board or frame insert
· Ruler, pencil, and paper template
· Adhesive suitable for caps and backing
· Optional primer and paint
· Optional hanging hardware
· Gloves for handling rough metal edges
Steps for This Upcycle Project
1. Develop the pattern at full size. Trace the backing shape on paper and arrange the caps over it, testing flowers, lettering, colour gradients, or repeated geometry. Photograph the final layout before moving anything so you have a clear reference during assembly.
2. Prepare the caps and base. Clean both surfaces, cover logos if the design requires it, and lightly mark centre lines on the backing. Smooth or discard any cap whose edge could remain exposed where hands may touch the finished piece.
3. Attach the design in sections. Begin at the centre or along one fixed guide line, then add neighbouring caps while checking the spacing. Use enough adhesive for a secure bond but not so much that it squeezes visibly around every rim.
4. Finish the edges and mounting. Allow the panel to cure flat, then inspect every cap by gently testing it. Add a frame, narrow border, or painted edge if it helps contain the pattern, and use hanging hardware suited to the combined weight of the base and metal pieces.
For me, the gaps between the caps are part of the pattern. Trying to force every circle to touch can make curved shapes look cramped and can leave awkward spaces at the outer edge.
Make a small trivet-shaped wall decoration rather than a large panel, or use caps as accents around a mirror or noticeboard. Outdoor versions need weather-suitable materials and regular checks for corrosion or loose pieces.
DIY CD Mosaic Art
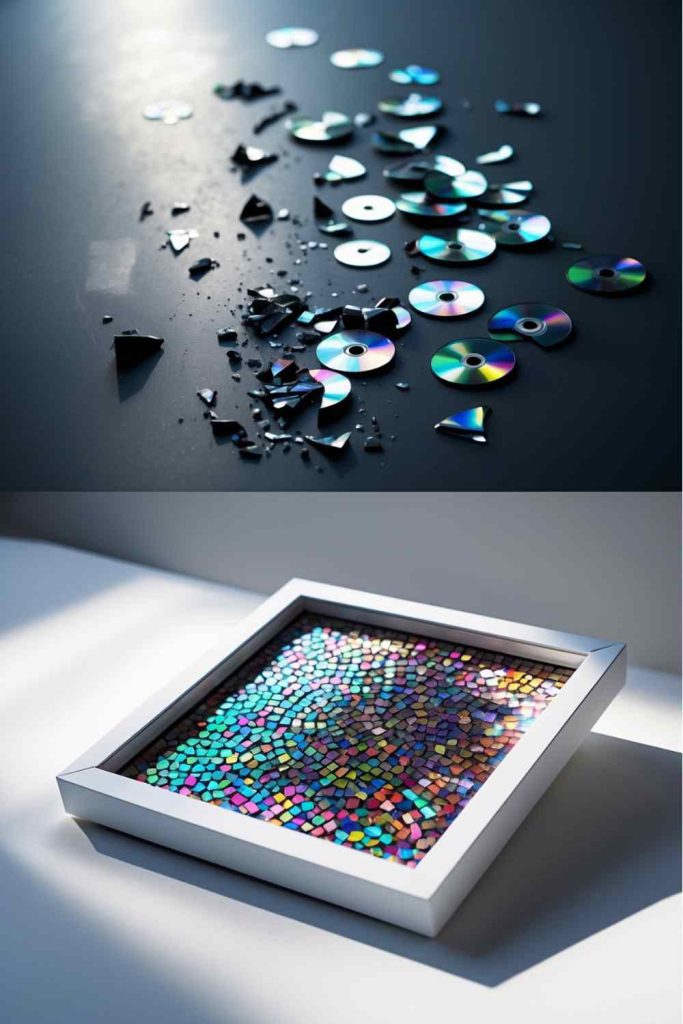
Scratched or obsolete optical discs reflect colour even after they are no longer useful for data. Cut into irregular pieces, they can form a mosaic on a frame, tray, small panel, or decorative box. The reflective surface changes with the light, so a simple arrangement often creates more interest than a complicated painted background.
Cut disc fragments can be sharp and may split unpredictably. Wear eye protection and gloves, contain small pieces, and keep them away from children and pets. This is best treated as decorative art rather than a surface that will be handled, washed, or used for food.
Materials and Tools
· Unwanted CDs or DVDs
· Protective gloves and eye protection
· Strong scissors or suitable cutting tool
· Firm frame, board, or box lid
· Adhesive compatible with plastic and the base
· Tweezers
· Optional filler or clear protective covering suitable for craft mosaics
Steps for This Upcycle Project
1. Choose the base and sketch the design. A small rigid surface is easier to finish safely than a flexible or oversized one. Mark a border and decide whether the pieces will radiate from a centre, follow a simple shape, or sit in a loose broken-glass pattern.
2. Cut and sort the discs carefully. Work over a tray or contained surface, protecting hands and eyes from fragments. Separate the pieces by size and curve, then discard shards that are too small or sharp to position safely.
3. Arrange before gluing. Place the largest pieces first and leave narrow, consistent gaps instead of trying to interlock every edge. Once the balance feels right, attach each fragment with the reflective side facing the same way or deliberately mix directions for a more active surface.
4. Protect the completed mosaic. Let the adhesive cure flat, check for loose or projecting corners, and add an appropriate clear covering or filler only when it is compatible with the disc coating. Frame the piece or display it where hands will not brush across the edges.
I like the mosaic most when the disc pieces are large enough to catch recognisable bands of colour. Tiny glitter-like shards create more sharp edges and usually make the surface harder to clean safely.
Use uncut discs as a layered wall installation for a beginner version. Small rounded fragments can decorate a frame corner, while the centre of the frame remains calm and easy to view.
Recommended Products:
Egg Carton Flower DIY
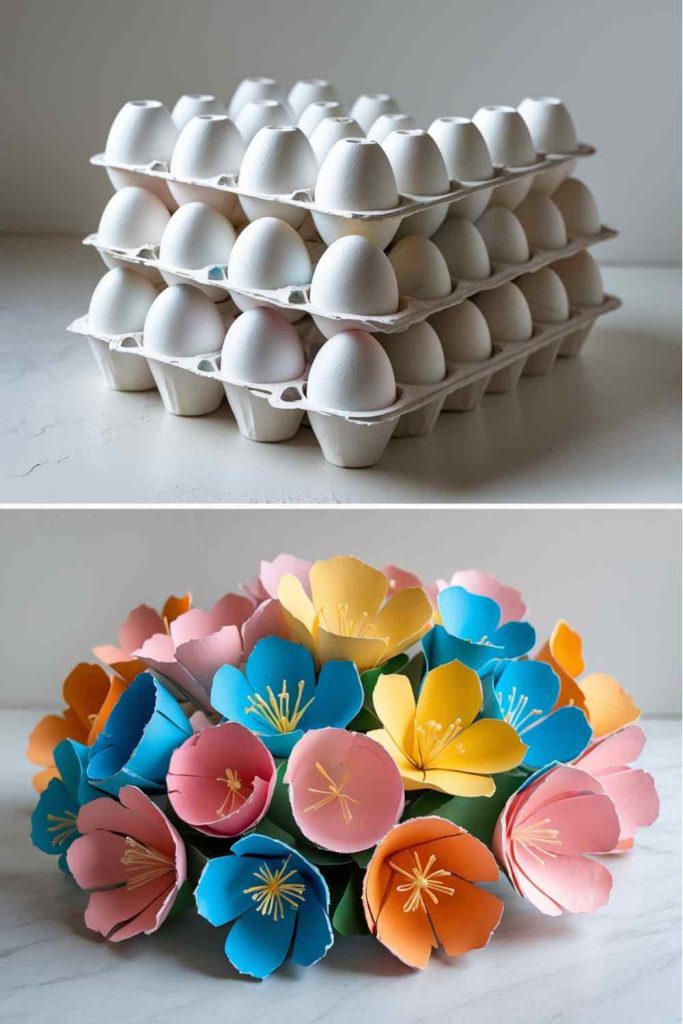
The cups and raised separators in a paper egg carton already suggest petals, buds, and flower centres. Cut apart and painted, they can become wreath decorations, garlands, bouquets, or small dimensional wall pieces. The material is light and easy to shape, making it useful for practising composition before moving to more expensive craft supplies.
Use clean dry paper cartons rather than foam versions, and keep them away from moisture and flame. The cut edges can shed fibres, so shape them with sharp scissors and apply paint sparingly. Thick wet coats may soften the carton and erase the crisp petal curves.
Materials and Tools
· Clean dry paper egg cartons
· Sharp scissors
· Acrylic or craft paint
· Small brushes
· Paper-safe craft adhesive
· Optional buttons, paper circles, or beads for centres
· Optional wire or paper stems for display only
Steps for This Upcycle Project
1. Separate the usable carton shapes. Cut individual cups and raised points away from the lid and rim, then trim each piece into rounded, pointed, or fringed petals. Keep several forms on the table before deciding which ones belong in the same flower.
2. Shape and paint lightly. Bend the petals outward with your fingers and add small cuts where a deeper separation is needed. Apply thin coats of paint to the outer and inner surfaces, allowing the pieces to dry without stacking them together.
3. Build the flower layers. Nest a smaller cup or separator inside a larger petal shape and rotate it so the openings alternate. Glue only through the central area, then add a paper circle, button, or lightweight bead that conceals the join.
4. Arrange the finished flowers. Test the group on a wreath base, card, frame, or garland before attaching every piece. Keep heavy decorations off the outer petals, which can crease, and display the project indoors away from damp areas.
A little unevenness works in favour of these flowers. Real petals are not identical, and the carton texture gives the painted surface a soft, almost handmade-paper appearance.
Leave the carton unpainted for a neutral kraft look, or use only one colour with darker centres. Flat petal pieces can also become gift toppers that are easier to store than a full bouquet.
Recommended Products:
Toilet Paper Roll Wall Art
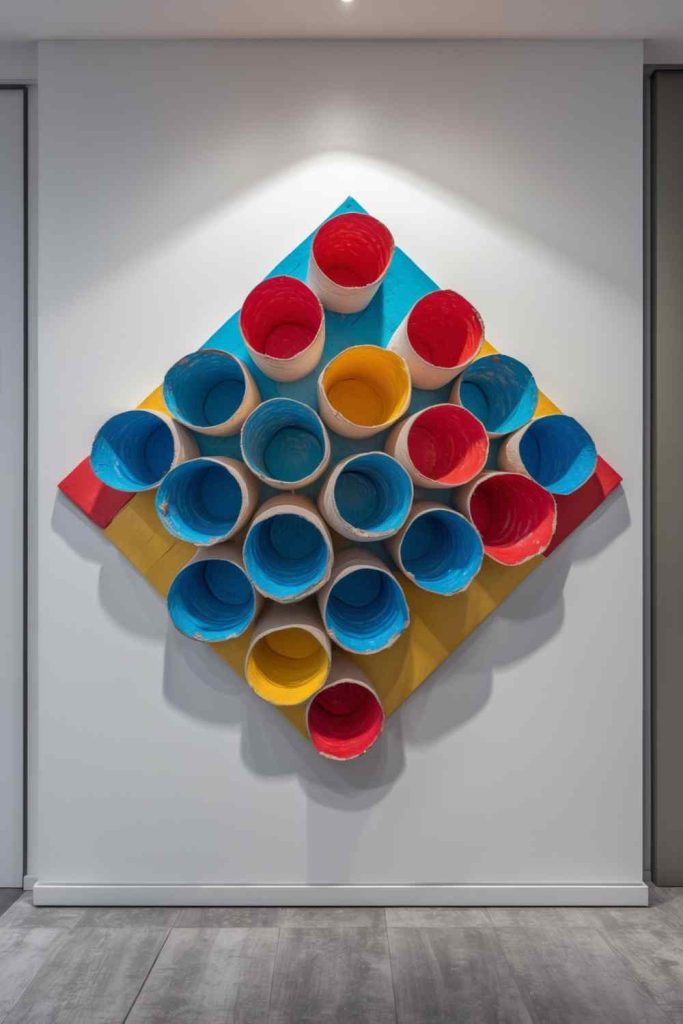
Cardboard tubes can be cut into narrow rings, pinched into leaf shapes, and joined into repeated wall patterns. Their curved walls create shadow and depth without adding much weight. A symmetrical design can resemble metal scrollwork from a distance, while brightly painted interiors make the humble material more obvious and playful.
Dry, undamaged tubes are essential. Discard anything stained, crushed, or exposed to moisture. The finished art remains lightweight and indoor-only, so a cardboard backing or a few discreet mounting points are usually enough; heavy frames and hardware can overwhelm the material.
Materials and Tools
· Clean cardboard tubes
· Ruler and pencil
· Sharp craft scissors
· Paper-safe adhesive
· Clips or pegs for holding joins
· Paint and small brushes, if desired
· Lightweight backing board or hanging tabs
Steps for This Upcycle Project
1. Flatten and mark the tubes. Press each tube gently into an oval, then mark equal-width strips along its length. Consistent measurements help the repeated shapes align even when the original tubes vary slightly in diameter.
2. Cut and shape the rings. Use sharp scissors for smooth edges, then pinch the ends to create leaves, petals, diamonds, or rounded cells. Sort the pieces by size and set aside any with weak creases or torn cardboard.
3. Build the design on a flat surface. Arrange a central motif and expand outward, checking both sides for balance. Glue neighbouring edges and hold them with clips until secure, working in small sections so the pattern does not drift while wet.
4. Paint, back, and hang the artwork. Colour the assembled piece with light coats or leave the kraft surface visible. Attach it to a thin board if more support is needed, then mount it away from steam, damp walls, and places where people may brush against the delicate edges.
The open spaces are just as important as the cardboard shapes. I would stop adding pieces while the pattern can still breathe rather than filling every gap until the wall art becomes a solid block.
Use narrow rings for delicate floral work or wider sections for a bold geometric panel. Small motifs can decorate gift boxes and frames without needing a permanent wall installation.
Recommended Products:
Tin Can Lantern DIY
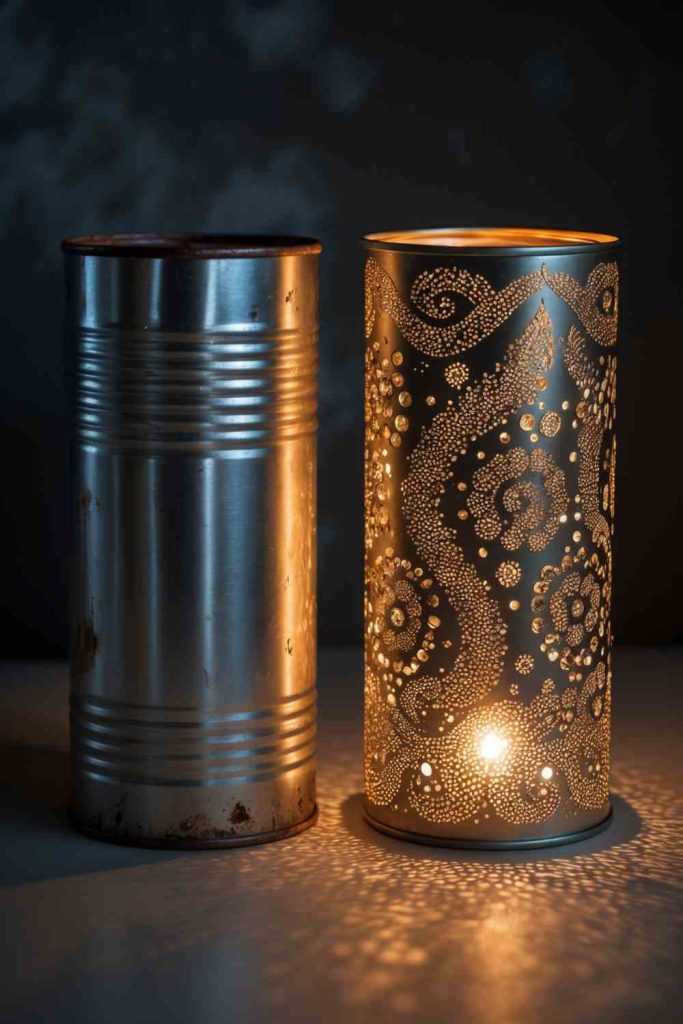
A cleaned tin can can project dots and simple patterns of light after holes are punched through its sides. The rigid cylinder holds the design neatly, while paint or a natural metal finish changes the mood. These lanterns are especially effective in groups because each pattern creates a different set of shadows.
Sharp metal and heat are the main concerns. Smooth the rim, wear eye protection when punching, and use a battery-operated light rather than an open flame whenever possible. A real candle can heat the can and nearby handle, paint, or decorations, so the safer light source also makes the lantern easier to place indoors.
Materials and Tools
· Clean tin can with a safe smooth rim
· Water and freezer space for stabilising the can
· Marker and paper pattern
· Hammer and assorted nails or metal punch
· Work gloves and eye protection
· Surface-appropriate paint, optional
· Battery-operated LED tealight
Steps for This Upcycle Project
1. Prepare and stabilise the can. Remove the label and adhesive, check the rim, and fill the can with water before freezing it upright. The ice supports the walls while the pattern is punched and helps reduce unwanted dents.
2. Transfer a simple pattern. Tape a paper design around the frozen can or draw dots directly with a marker. Leave enough metal between holes to maintain strength, especially near the upper rim and base.
3. Punch the openings safely. Rest the can on a folded towel or stable support, then use a hammer and nail to make one hole at a time. Wear eye protection and gloves, and rotate the can rather than reaching across the tool path.
4. Thaw, finish, and light it. Let the ice melt, dry the can thoroughly, and smooth any sharp burrs. Paint the exterior if desired without clogging the holes, then place a battery LED inside and display the lantern on a stable non-flammable surface.
The simplest dot patterns often cast the clearest shadows. Dense detail may look impressive while drawing, but it can weaken the metal and turn into a bright blur once the light is inside.
Punch initials, constellations, leaves, or repeated geometric bands. Add a wire handle only if the attachment holes are smooth and the lantern will carry a cool battery light rather than a flame.
Recommended Products:
DIY Tin Can Planters
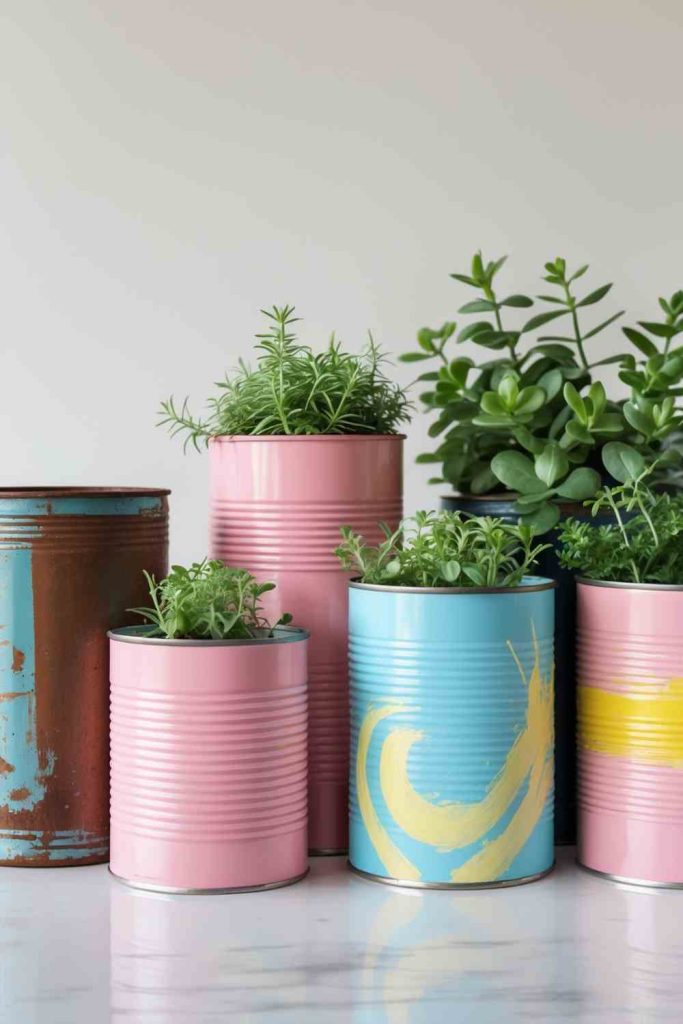
Food tins can become compact covers or planters for herbs, succulents, and small flowers once their sharp edges and drainage needs are handled properly. Their straight sides accept paint, paper labels, and simple patterns, making a group of mismatched cans look related. The metal shell is durable, but moisture can cause rust and roots should not sit in trapped water.
The safest approach is often to use the decorated tin as an outer cachepot with a removable nursery pot inside. If planting directly, add drainage holes, protect surfaces beneath the can, and check the interior coating and condition. Avoid using badly rusted tins or cans that held unsuitable substances.
Materials and Tools
· Clean food tins with safe rims
· Fine abrasive pad
· Primer and paint suitable for metal, optional
· Hammer and nail or drill for drainage
· Small nursery pots or potting mix
· Waterproof saucers
· Gloves and eye protection
Steps for This Upcycle Project
1. Clean and inspect the cans. Remove labels and adhesive, wash away food residue, and dry the metal immediately. Smooth the rim or fit a protective edge if needed, then discard any can with deep rust, punctures, or a damaged interior.
2. Prepare the finish and drainage. Lightly key the exterior and apply a suitable primer before painting in thin coats. For direct planting, make several drainage holes while wearing eye protection; for a cleaner indoor option, leave the can intact and use a removable inner pot.
3. Add the plant without overfilling. Place the nursery pot inside or add appropriate potting mix to the drained can. Keep soil below the rim, settle the plant gently, and make sure water can leave without collecting against painted metal or the shelf below.
4. Arrange and maintain the group. Set the cans on saucers or a waterproof tray and place them where the chosen plants receive suitable light. Lift inner pots for watering when possible, wipe moisture promptly, and check the metal regularly for rust or peeling finish.
I think a group looks more intentional when one element repeats perhaps the same stripe, label shape, or paint family while the can heights and plants are allowed to vary.
Use the cans as covers for small shop-bought pots, seed-starting containers for short-term use, or dry holders for artificial stems. Chalk labels can make a kitchen herb set easy to update.
Recommended Products:
DIY Denim Wall Pockets
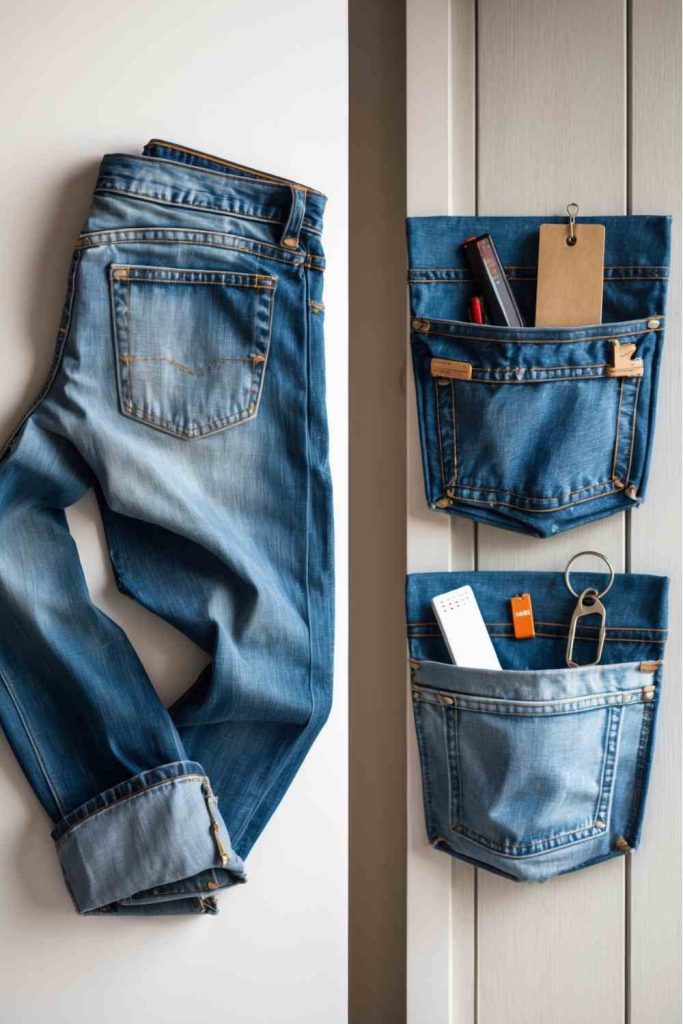
The back pockets from worn jeans are already reinforced, shaped, and ready to hold small objects. Attached to a sturdy backing, they can organise pens, craft tools, mail, chargers, or children’s art supplies without requiring new pocket construction. Different denim washes create a patchwork effect, while repeated pocket shapes keep the board orderly.
Cut enough fabric around each pocket to secure it properly. Stitching only through the original pocket edge may not provide enough support if the backing is rigid or the contents are heavy. Keep sharp tools and small objects out of reach when the organiser will hang in a child’s room.
Materials and Tools
· Old jeans with intact pockets
· Strong fabric scissors
· Canvas, plywood, cork, or firm board backing
· Heavy thread and needle or suitable fasteners
· Pins or clips
· Optional fabric trim or labels
· Wall hardware appropriate to the backing and load
Steps for This Upcycle Project
1. Remove and clean the pockets. Wash the jeans, then cut around each pocket with a border of surrounding denim. Trim bulky seam areas only where they interfere with placement, keeping the original upper opening and reinforced corners intact.
2. Plan the board layout. Arrange the pockets at different heights and test what each one will hold before attaching them. Leave enough hand space above every opening and keep heavier storage near the bottom of the backing.
3. Secure the pockets across strong areas. Sew them to a fabric-covered board, staple the surrounding denim to the back of a wooden panel, or use another fastening method suited to the base. Reinforce upper corners because that is where repeated pulling concentrates stress.
4. Mount and load the organiser. Fit the wall hardware before filling the pockets, then hang the board level on appropriate anchors. Add lightweight contents gradually and check that neither the denim nor backing bows away from the wall.
The pocket openings need to remain easy to reach. Decorative labels are useful, but I would keep them below the opening rather than folding trim over the very edge people use every day.
A single pocket on an embroidery hoop can hold a phone charger beside a desk. Several pockets sewn onto a hanging canvas panel create a softer, rollable organiser for temporary spaces.
Tidy Up with Tin Can Organizers
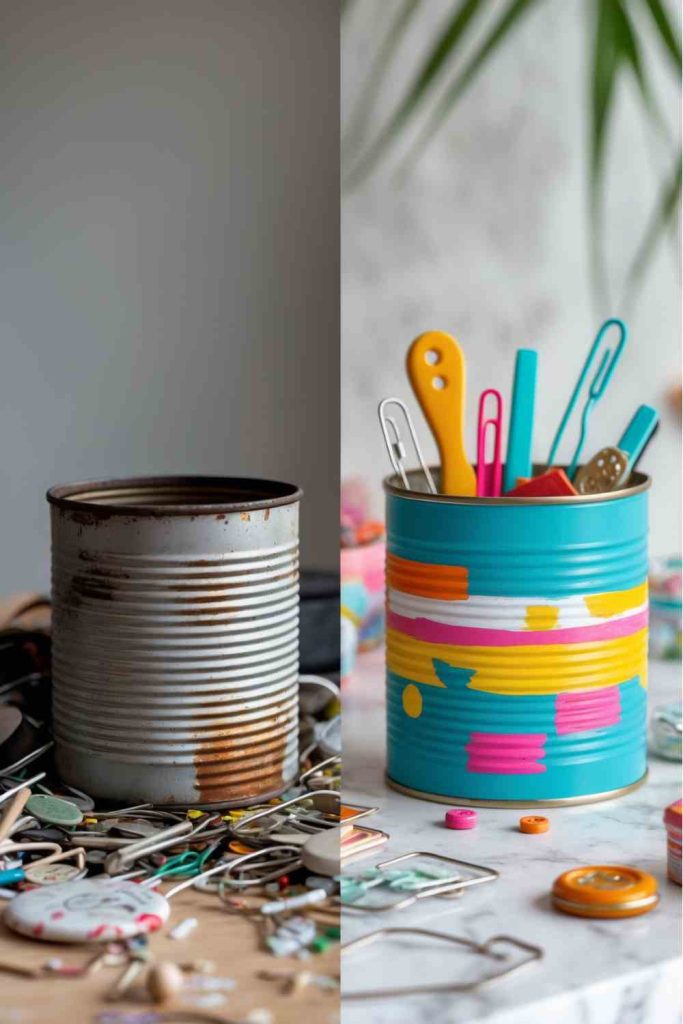
Tin cans are naturally suited to upright storage because their cylindrical walls support pens, brushes, scissors, and small tools. Decorating several cans together can turn a collection of unrelated containers into a desk system. The most useful versions consider height and contents first, then add colour or pattern after the practical arrangement is settled.
A safe rim is essential, especially for cans used by children. Tall cans suit brushes and rulers, while shorter cans make clips and small tools easier to see. Heavy items can tip a narrow can, so a broad shared base or added internal weight may be helpful.
Materials and Tools
· Clean tin cans in several heights
· Protective rim edging if needed
· Surface-appropriate primer and paint
· Scrap paper, fabric, or felt for lining
· Strong base board
· Adhesive suitable for metal and base
· Optional labels
Steps for This Upcycle Project
1. Match the cans to the supplies. Sort the items that need storage and choose can heights that keep handles visible. Clean the cans, remove labels, and cover or smooth every rim before anyone reaches inside them.
2. Decorate with a restrained system. Paint the exteriors, wrap them in paper or fabric, or add a single repeated band. Keep the lower surface flat and avoid thick decoration where neighbouring cans need to sit close together.
3. Create a stable arrangement. Test the cans on a board and place the tallest or heaviest near the back. Attach them securely to the base if the organiser will be moved, then line the bottoms with felt or card to soften the sound of dropped tools.
4. Label and use the storage. Add clear category labels only where they improve daily tidying, and avoid overfilling any can. Place scissors point-down only when the rim is safe and the handles remain easy to grasp without reaching among sharp tools.
The good thing about using several cans is that the system can grow. I would leave a little open space on the base rather than crowding it completely, because another category of small tools always seems to appear.
Mount the cans horizontally beneath a shelf for lightweight rolled papers, or use a single lined can as a bathroom brush holder. Outdoor tool storage needs rust-resistant treatment and shelter from rain.
Recommended Products:
DIY T-Shirt Tote Bag
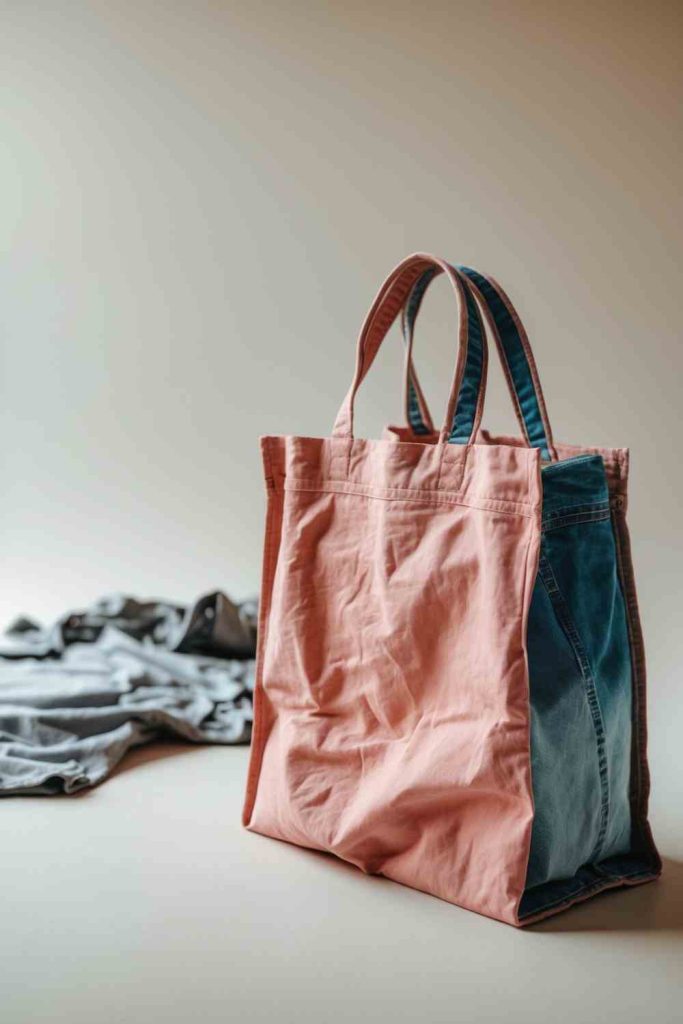
An old T-shirt can become a soft tote because the body already provides a broad fabric panel and the shoulder area can be cut into handles. Stretchy jersey makes the bag easy to fold and carry, although it also means the bottom and handle openings need support. A shirt with a favourite print can remain useful after it is no longer comfortable to wear.
Choose fabric without thinning at the shoulders or lower hem, as those areas will carry the load. This kind of tote suits lightweight groceries, craft supplies, or laundry rather than sharp or very heavy objects. A sewn base is usually stronger and less bulky than multiple fringe knots.
Materials and Tools
· Clean old T-shirt
· Fabric scissors
· Washable marking tool
· Pins or clips
· Strong thread and sewing needle or machine
· Optional woven strip for handle reinforcement
· Ruler or curved template
Steps for This Upcycle Project
1. Prepare and mark the shirt. Lay it flat, smooth the side seams, and decide which graphic or colour block should face forward. Mark matching sleeve curves and a wider neckline opening without cutting so deeply that the handles become narrow.
2. Cut the handles and opening. Remove the sleeves along the marked curves and trim the neckline evenly through both layers. Test the shape over a shoulder before sewing the base, then reinforce or reshape any area that feels thin.
3. Close the bottom securely. Turn the shirt inside out and sew across the lower edge with a stretch-tolerant seam, adding a second line for support. Box the corners slightly if a flatter base is wanted, or use tied fringe only for a light casual bag.
4. Finish and test the tote. Turn it right side out, trim loose threads, and add a narrow reinforcement strip inside the handles if needed. Load it gradually with soft items and check the shoulder openings and lower seam before using it away from home.
I’d keep the handles wider than they first appear necessary. Jersey rolls inward under weight, so a generous opening usually becomes a much narrower strap once the bag is carrying anything.
Use a child’s shirt for a small gift bag or a long tunic for a deeper laundry tote. A woven fabric lining can reduce stretch and keep small objects from pulling the knit out of shape.
DIY Desk Organizers from Cardboard Tubes
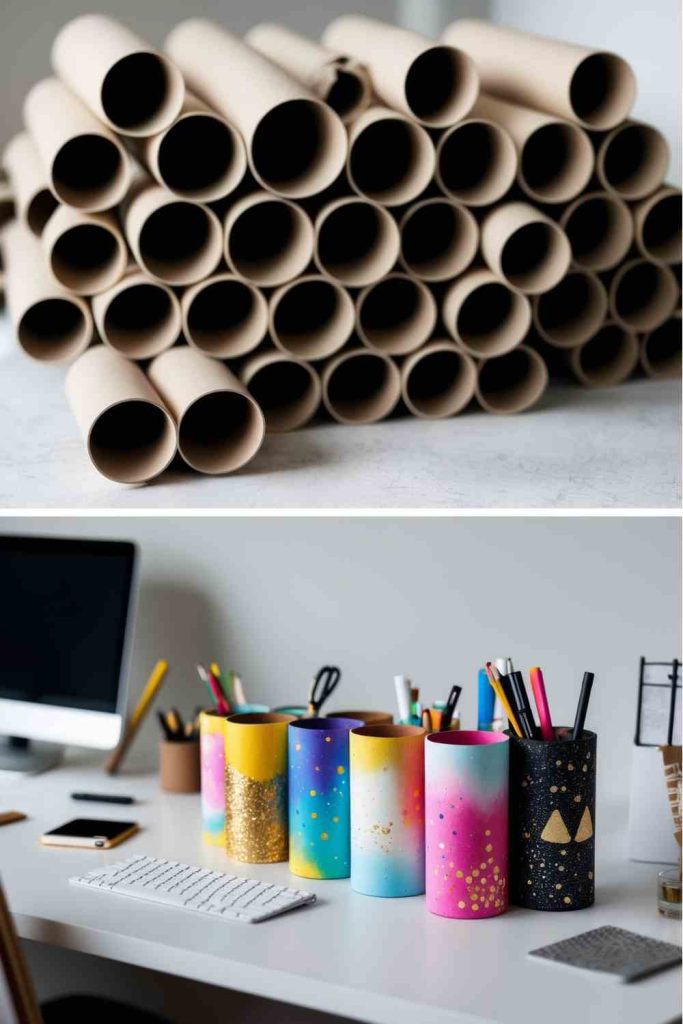
Cardboard tubes can be trimmed to different heights and grouped on a base to hold pens, brushes, rulers, and markers. Their repeated round openings create visual order, while scraps of paper, paint, or fabric can connect tubes collected from different products. The project is light and inexpensive, but it needs a firm base and clean dry material to remain useful.
Think about tool length before cutting. Short tubes are ideal for erasers and clips but frustrating for long pencils, while very tall narrow tubes may tip when loaded with scissors. A stepped arrangement keeps every category visible and places the most stable containers where they support the lighter ones.
Materials and Tools
· Clean dry cardboard tubes
· Strong cardboard, plywood, or cork base
· Ruler and pencil
· Craft knife used with a cutting mat or strong scissors
· Paper-safe adhesive
· Paint, paper, or fabric scraps
· Optional labels and felt base
Steps for This Upcycle Project
1. Plan the height sequence. Stand the tools on the proposed base and mark tube heights that leave handles visible. Cut on a protected surface and smooth ragged paper layers rather than covering them with a thick ridge of glue.
2. Decorate the tubes before assembly. Paint with light coats or wrap each tube in measured paper or fabric. Fold the covering neatly over the top edge only if it will not narrow the opening or catch pen clips.
3. Arrange and attach the containers. Place tall tubes at the back and low ones at the front, checking that the group remains balanced from every side. Glue each tube to the base and to neighbouring tubes where appropriate, then leave the organiser undisturbed until secure.
4. Finish for daily use. Add labels, line the bottom with small card circles, and fit felt beneath the base to protect the desk. Distribute heavier tools across several tubes and replace any section that becomes crushed or soft from moisture.
A varied skyline is useful, not just decorative. When every tube is the same height, the short items disappear and the organiser quickly becomes another place to lose a pen.
Use square drink cartons or small boxes alongside tubes for sticky notes and clips. A single wide tube can become a brush holder, while a long low tray on the same base can store rulers.
Recommended Products:
DIY Mason Jar Herb Planters
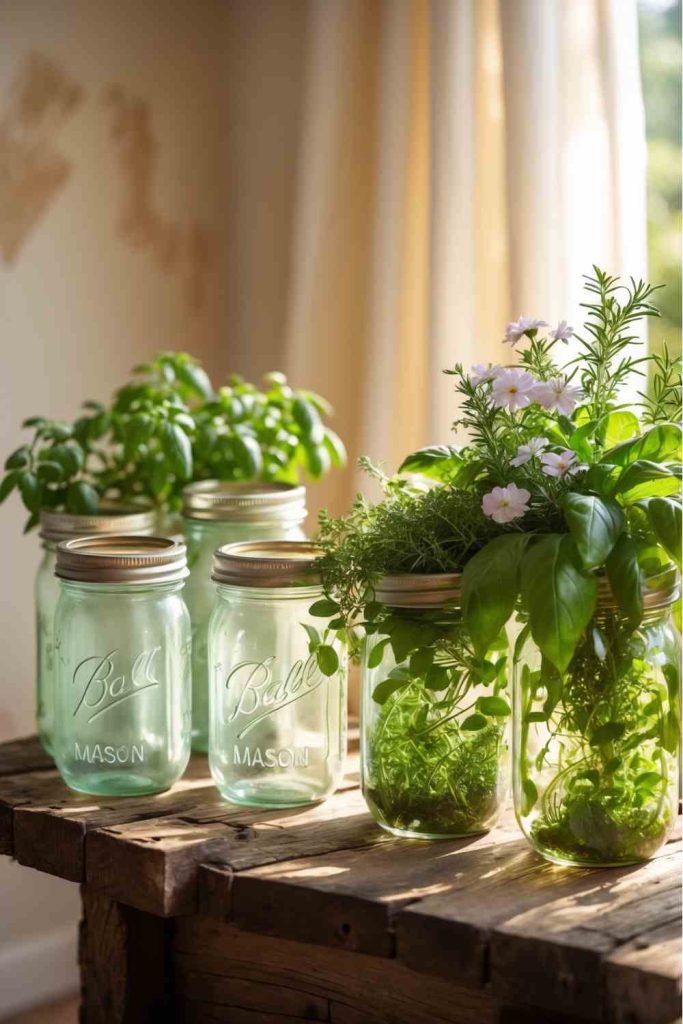
Glass jars let roots, soil layers, and moisture remain visible, which makes them attractive containers for kitchen herbs. Their narrow footprint fits a windowsill, and simple labels can turn several jars into a tidy group. However, most jars have no drainage holes, so they require careful watering or are better used as outer containers for small nursery pots.
Choose jars without chips or cracks and keep the rim smooth. Herbs need suitable light, root space, and drainage, so the jar should not be selected only because it matches the kitchen. A layer of stones does not replace a drainage hole; it simply creates space where excess water may collect.
Materials and Tools
· Clean sound glass jars
· Small nursery pots that fit inside, preferred
· Appropriate potting mix
· Herb seedlings or cuttings suited to the location
· Waterproof tray or saucers
· Labels and removable marker
· Small spoon or narrow scoop
Steps for This Upcycle Project
1. Match jars to the plants and light. Measure the windowsill and choose herbs that suit the available sun rather than forcing shade-loving and sun-loving plants into the same row. Inspect every jar and avoid using damaged glass.
2. Choose a drainage method. Place a small nursery pot inside each jar so it can be lifted for watering, or use the jar only for short-term propagation where water levels are visible. Do not assume stones at the bottom make overwatering harmless.
3. Plant and label carefully. Fill the inner pot with suitable mix, settle the herb at its previous depth, and leave room below the rim for watering. Add a clear label that can be removed when the planting changes.
4. Maintain without trapping moisture. Lift the inner pot, water it over a sink, and return it only after excess water drains. Wipe condensation and spilled soil from the jar, rotate the group for even light, and repot herbs that outgrow the limited space.
The clear glass makes it easy to notice forgotten water at the bottom. I would treat that visibility as a maintenance reminder rather than as part of the decoration.
Use jars for rooting herb cuttings in water, storing dried seed labels, or holding artificial greenery. A wall-mounted jar system needs secure clamps and fixings rated for wet soil and glass.
Recommended Products:
DIY Plastic Bottle Birdhouses
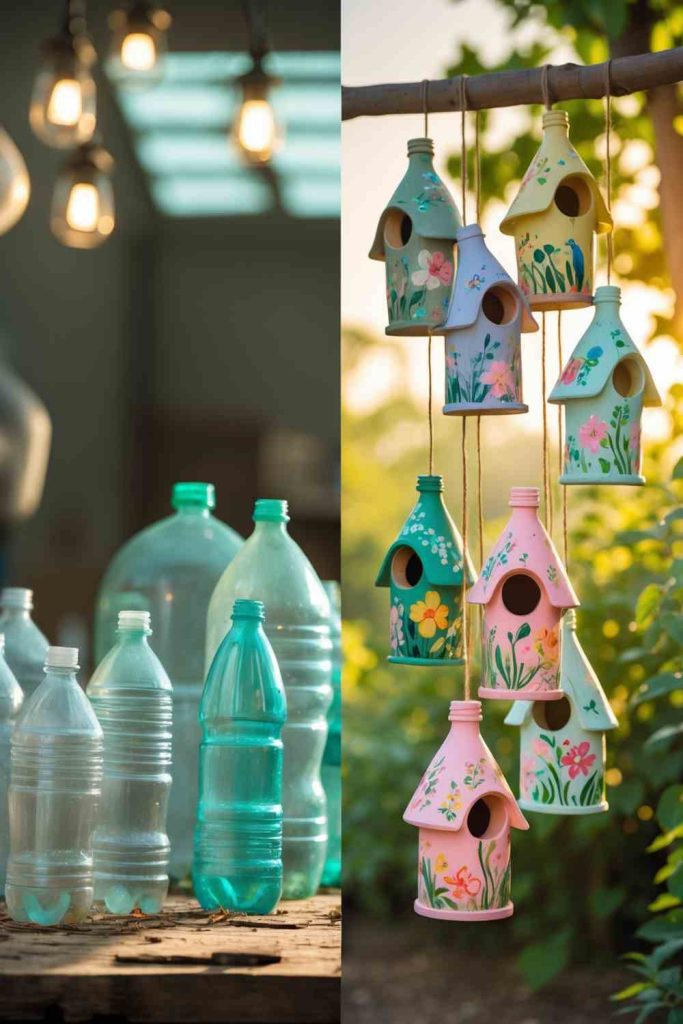
A plastic bottle can be cut and decorated into a birdhouse-shaped garden craft, but its safest use is as a decorative shelter form or a carefully managed feeder cover rather than a permanent nesting box. Real nest boxes need appropriate dimensions, ventilation, drainage, insulation, and siting. Thin transparent plastic can become hot in direct sun and offers little protection from temperature changes.
If the craft will be placed outdoors, remove labels, smooth every cut edge, add drainage and ventilation, and keep paint away from areas birds may peck. Hang it in shade and inspect it often. For birds to raise young, a properly designed untreated wooden nest box is the more responsible choice; the bottle project can still demonstrate reuse without pretending that decoration alone makes suitable wildlife housing.
Materials and Tools
· Clean plastic bottle with cap removed or ventilation added
· Marker and sturdy scissors or craft knife
· Protective gloves
· Fine abrasive paper or strong edge tape
· Weather-suitable non-toxic decoration for exterior areas
· Strong hanging cord
· Optional small perch only if appropriate and securely fixed
Steps for This Upcycle Project
1. Decide on a responsible purpose. Use the bottle as a decorative garden piece, covered feeder, or short-term observation craft rather than assuming it suits nesting. Choose a sound bottle, remove all residue, and plan openings that will not create a narrow trap.
2. Cut and protect the openings. Mark the entrance and drainage points, then cut on a stable surface away from the body. Smooth every edge thoroughly or cover it with durable edging, and add several small ventilation openings near the upper area.
3. Decorate without blocking function. Paint only the exterior with a suitable product, keeping drainage and air holes open. Avoid loose glitter, strings, small glued ornaments, or fibres that could detach where wildlife can swallow or become caught in them.
4. Hang in shade and monitor. Use secure cord at two balanced points so the bottle does not spin violently, and place it away from full direct sun. Check after heat, wind, and rain; remove the craft immediately if it warps, collects water, develops sharp edges, or attracts nesting activity it cannot safely support.
This is one project where the cute appearance should not lead the decision. I’d rather adapt the bottle into a simple feeder cover and provide a properly built wooden nest box nearby.
Cut the bottle into a scoop-style bird feeder with safe edges and drainage, or turn it into a decorative garden house for artificial flowers. Children can paint the outside while an adult handles all cutting and hanging.
Recommended Products:
DIY Music Sheet Wreath

Unwanted music pages can be rolled into cones, folded into leaves, or cut into layered shapes around a wreath base. Repeated black notes on pale paper create texture without requiring strong colour, and the circular arrangement turns separate pages into one connected display. Damaged scores, photocopies, and discarded practice sheets are better choices than rare or meaningful originals.
Paper wreaths remain indoor decorations. Keep them away from candles, heaters, cooking steam, and damp doors. The cones should be light and hollow so the wreath base does not become overloaded or pull away from its hanging loop.
Materials and Tools
· Discarded music sheets or printed copies
· Lightweight wreath ring or cardboard base
· Paper scissors
· Paper-safe adhesive or double-sided tape
· Ruler and pencil
· Ribbon or cord for hanging
· Optional lightweight centre embellishment
Steps for This Upcycle Project
1. Prepare the pages and base. Flatten the paper, remove torn margins, and decide whether the visible notes should face the same direction. Cover or paint the wreath ring if gaps may remain visible between the paper forms.
2. Create a repeatable paper shape. Roll pages into cones, fold them into fans, or cut broad leaves using one simple template. Secure each form with a small amount of adhesive and make enough pieces to test a complete ring before assembly.
3. Build the wreath in balanced layers. Attach pieces at four opposite points first, then fill the spaces between them. Overlap the bases rather than the decorative ends, keeping the outer edge full while leaving a clear central opening.
4. Add the hanger and finish. Fix the ribbon or cord to the base itself rather than to paper cones, then add only lightweight decoration at the centre. Let the wreath dry flat and hang it where the paper will not be exposed to moisture or heat.
The printed notes already provide fine detail, so I don’t think the wreath needs much glitter or colour. One ribbon or a small centre motif is usually enough to give the eye a resting place.
Use old maps, dictionary pages, or monochrome wrapping paper with the same construction. A half-wreath or small paper rosette is easier for beginners and uses fewer sheets.
Recommended Products:
DIY Cozy Mug Warmers from Sweater Sleeves
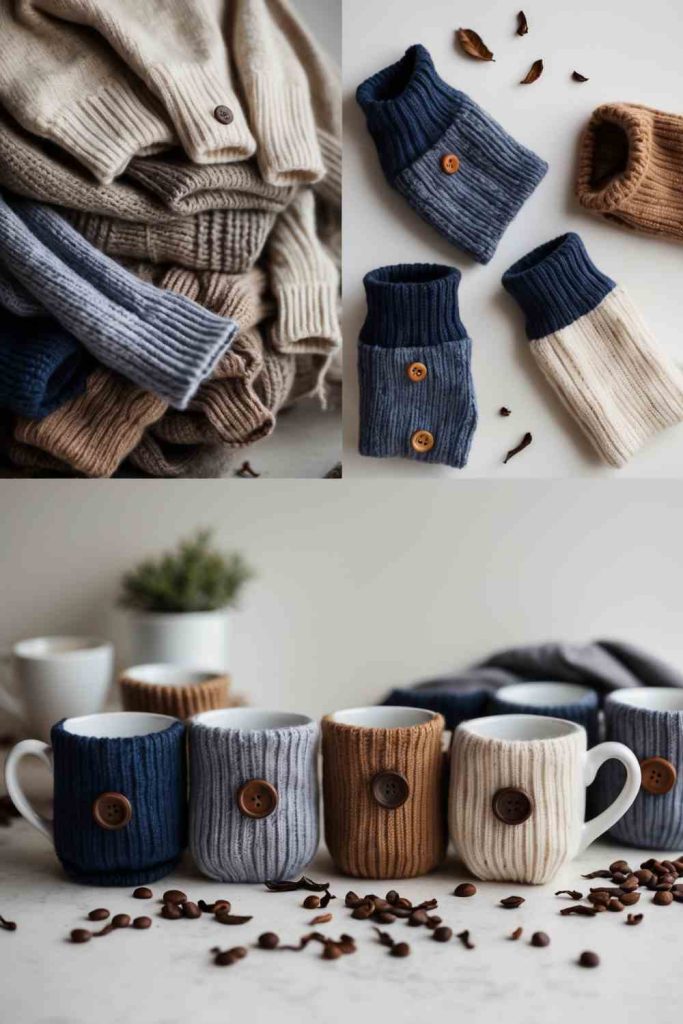
A ribbed sweater cuff can fit naturally around a mug, turning a small undamaged section of clothing into a removable sleeve. The knit adds grip and a little separation from a warm cup, while buttons, simple embroidery, or a contrasting patch can cover a repaired seam. It should never be treated as protection from extreme heat or used where fabric could reach a flame or heating element.
Measure the actual mug while it is cool and empty. The warmer must sit below the drinking rim and leave the handle clear, with no loose decoration where fingers grip. Washable fibres and flat seams make the sleeve more practical after inevitable spills.
Materials and Tools
· Clean sweater sleeve with sound ribbing
· Cool empty mug for measuring
· Fabric scissors
· Pins or clips
· Strong thread and hand-sewing needle
· Optional button or small fabric patch
· Optional narrow woven lining for very stretchy knit
Steps for This Upcycle Project
1. Choose and measure the sleeve section. Slide the intact cuff or sleeve over the cool mug and mark a height that stays below the rim. Check the stretch around the widest point and avoid areas with thin yarn or pulled loops.
2. Cut and secure the knit. Remove the chosen section with a small seam allowance, then baste or stitch near the raw edge before it can unravel. Fold the edge inward or add a narrow facing, keeping the finished opening flexible enough to slide on and off.
3. Fit around the handle. For a handled mug, cut and finish a small opening or make the warmer as a flat band with a button closure. Test the position carefully so the fastening sits away from the hand and cannot scratch the mug.
4. Finish, wash, and test. Add one flat decoration if desired, weave in every thread end, and wash according to the fibre. Let the sleeve dry fully, then test it on a cool mug before using it with an ordinary warm drink.
The original cuff often makes the neatest top edge, so I would place it where it remains visible rather than cutting it off and recreating the same finish by hand.
A buttoned flat band works for mugs of several sizes, and leftover sleeve sections can become jar cosies or small wrist warmers. Skip bulky embellishments for a sleeve used every day.
Crafting Shortcuts That Can Weaken an Upcycled Project
Decorating before checking the structure. Paint and trim can hide cracks, loose joints, rust, and thinning fabric without fixing them. Test the original object first, repair what can safely be repaired, and reject pieces whose new purpose would place weight on damaged material.
Using one adhesive for every surface. Paper, glass, knitted fabric, metal, and plastic do not bond in the same way. Read the intended surfaces on the adhesive, test a hidden area, and use screws, stitching, brackets, or clamps when the project must carry weight or withstand movement.
Cutting all the pieces before testing one. Spoon petals, cardboard rings, paper flowers, sweater panels, and mosaic fragments can change size once folded, curved, or joined. Complete a small sample first, then adjust the template before repeating the same mistake across an entire batch.
Ignoring sharp or heated edges. Cut CDs, punched tins, trimmed caps, and rigid plastic can leave points that are difficult to see. Smooth, cover, or discard unsafe pieces, wear protection during making, and choose battery lights over open flames in metal lanterns whenever possible.
Treating decoration as structural support. A painted ladder, covered shutter, or wrapped storage can still tip or separate. Use proper fixings, anti-tip restraints, strong seams, and load testing rather than relying on an attractive surface to make the project dependable.
Adding more detail after the craft already works. Heavy flowers can pull on paper, multiple embellishments can make a mug sleeve uncomfortable, and crowded caps can obscure a clear pattern. Build the useful form first, then add one focal detail and stop when it begins to interfere with handling or balance.
Forgetting the conditions where the item will live. Paper dislikes damp rooms, painted tins can rust, jars without drainage can trap water, and plastic wildlife crafts can overheat outdoors. Match the material to the location, inspect it regularly, and move or replace the object when the environment begins to damage it.
Frequently Asked Questions
Which upcycle crafts ideas are easiest for beginners?
Paper flowers, egg-carton flowers, cardboard-tube organisers, and a simple T-shirt tote are approachable because the materials are easy to replace and the construction can be tested in small stages. Begin with one object, a limited colour palette, and no more than one decorative technique.
Do I need to sand every object before painting it?
No. Sanding is useful only when the material and existing finish can be handled safely and a light key will help the new coating grip. Clean first, identify the surface, and follow the preparation guidance for the chosen paint or primer; old unknown coatings may require extra precautions rather than casual sanding.
What is the best way to remove labels and sticky residue?
Soak washable jars and tins in warm water, then lift softened paper with a scraper that will not damage the surface. For stubborn adhesive, use a suitable residue remover sparingly, wash the object again, and let it dry completely before painting or gluing.
Can hot glue hold all of these projects together?
Hot glue can be useful for lightweight indoor decoration, but it is not the right structural solution for every material or load. Shelves, wall organisers, handles, outdoor pieces, and fabric seams usually need screws, brackets, stitching, wire, or another more dependable attachment.
How can I make upcycled crafts look coordinated instead of mismatched?
Repeat one visual feature across the group, such as a paint family, label shape, metal finish, or fabric trim. The original objects can remain different in size and texture; that variation often looks intentional once one element connects them.
Are these projects suitable for children?
Several can be adapted for supervised crafting, especially paper flowers, egg-carton flowers, and decorating cardboard tubes. Adults should handle hot glue, strong adhesive, spray paint, sharp metal, glass, disc cutting, drills, knives, and wildlife installation, while small magnets and embellishments should stay away from young children and pets.
How should I clean and maintain the finished crafts?
Dust paper and cardboard gently and keep them dry. Wash removable fabric pieces according to the fibre, wipe painted metal without soaking it, and inspect hanging or load-bearing projects for loose fixings. Plant containers and outdoor crafts need more frequent checks because moisture, sunlight, and temperature changes can damage both the finish and the base material.
Let One Forgotten Object Suggest the Next Craft
The most useful upcycle crafts ideas usually begin with a material that already offers part of the answer. A sweater provides softness, a shutter provides structure, a tin provides a container, and a printed page provides pattern. Working with those qualities produces a more convincing result than forcing every object into the same decorative style.
Choose one project that matches the tools, space, and materials you already have, then make a small first version. Clean it carefully, test the attachments, and leave room to adjust the design before everything becomes permanent. Reusing an object does not mean accepting unsafe edges, weak joints, or an impractical finish; thoughtful repair and restraint are part of the transformation.
Which item in your home is waiting for a better second purpose: an old sweater, a stack of jars, a worn ladder, or the small collection of caps and tubes that keeps escaping the recycling box?