A long-sleeve shirt already contains many of the pieces needed for a tote bag. The front and back provide broad fabric panels, the sleeves can become handles, and a chest pocket may return as useful storage rather than disappearing into the scrap pile.
The challenge is deciding which parts remain strong enough to carry weight. A shirt can look perfectly wearable from a distance while the elbows, cuffs, underarms, or buttonholes have become thin. Those areas need to be removed or supported before they become part of a bag.
I don’t think the most complicated tote is automatically the best use for an old shirt. A simple cotton button-down can become a light shopping bag, while a thinner shirt may work better as the lining inside a structured tote.
The original details are worth considering before cutting. Buttons can form a closure, cuffs can strengthen handle ends, and the pocket can hold keys or a phone. Once you look at the shirt as a collection of useful pieces rather than one finished garment, the bag begins to plan itself.
Check Whether the Shirt Can Support a Tote Bag
Wash and dry the shirt according to its care label before measuring it. This removes storage dust, helps reveal permanent stains, and prevents unexpected shrinkage after the bag has been completed.
Hold the shirt in front of a bright window and inspect:
- Elbows
- Underarm areas
- Cuffs
- Shoulder seams
- Side seams
- Buttonholes
- Chest pocket
- Lower hem
- Collar
- Sleeve plackets
- Areas around old repairs
- Fabric surrounding embroidered details
Thin sections often appear lighter when held against the window. Do not place those areas at the bottom of the bag, beneath the handles, or around a closure.
Cotton, linen, flannel, chambray, and light denim shirts can all become totes, but their behaviour differs. Crisp woven fabric holds a clearer shape, while soft rayon or fine cotton may need lining and interfacing.
Stretch jersey can become a relaxed bag, although it may sag under weight. Silky or slippery fabric usually needs more control while cutting and sewing.
Decide What Type of Tote Suits the Fabric
A useful bag should match the strength of the original shirt.
A medium-weight cotton shirt can become:
- A simple everyday tote
- A book bag with reinforcement
- A lined shopping bag
- A button-front shoulder bag
- A ruffled tote
- A lightweight zip-top carryall
A thin or delicate shirt may work better as:
- Bag lining
- Decorative outer panels
- Internal pockets
- Ruffles
- Handle wraps
- Patchwork sections
A thick flannel or denim shirt can support:
- A structured tote
- A work bag
- A wide-bottomed shopping bag
- Reinforced handles
- Exterior pockets
I’d rather use a thin shirt as a good lining than force it to become a weak outer bag. Upcycling works best when the new purpose respects what the material can still do.
Preserve the Useful Shirt Details
Unbutton the shirt and examine each feature before removing anything.
The chest pocket can remain on the front panel as exterior storage. A second pocket may be created from one cuff or a section of sleeve.
Buttons can provide a centre closure, although the original button placket should be reinforced when it will receive repeated pulling. Decorative buttons can also be saved for another project if they are unsuitable for the bag.
Sleeves can become handles, ties, internal dividers, or narrow patchwork strips. The cuffs are especially useful because they already contain several layers of fabric.
The lower shirt hem may form the top edge of a bag if the shirt is turned upside down during construction. This can save finishing work, but only when the hem remains strong and straight.
Gather the Basic Materials and Tools
- Clean long-sleeve shirt
- Fabric scissors
- Small thread scissors
- Seam ripper
- Measuring tape
- Ruler
- Tailor’s chalk
- Washable fabric marker
- Pins or fabric clips
- Sewing machine or hand-sewing needle
- Thread suited to the fabric
- Stronger thread for handles
- Iron and pressing cloth
- Interfacing
- Lining fabric
- Reclaimed denim or canvas
- Zip, when needed
- Magnetic closure or button loop
- Paper for templates
- Safety pin
- Optional webbing
- Optional bag base insert
Use a machine needle suited to the fabric and number of layers. Thick cuffs, denim reinforcement, and folded handles may require a different needle from the lightweight shirt body.
Keep the Button Front in a Classic Shirt Tote
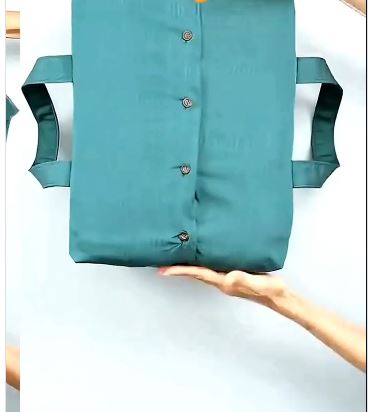
Keeping the button placket visible makes the original garment immediately recognisable. It also gives the front of the bag a natural centre line without requiring additional decoration.
The shirt pocket can remain in place for receipts, a small notebook, or other lightweight items. Before relying on it, inspect the stitching and reinforce loose corners.
This version works best with a medium-weight woven shirt. Thin fabric should be lined so the buttons, pocket, and seams do not pull out of shape.
Materials and Tools
- Long-sleeve button-down shirt
- Fabric scissors
- Measuring tape
- Tailor’s chalk
- Pins or clips
- Lining fabric
- Interfacing
- Strong thread
- Sewing machine or hand-sewing needle
- Optional magnetic closure
Make the Button-Front Tote
- Plan the front panel around the placket. Button the shirt and lay it flat. Mark a large rectangle with the placket centred and the pocket positioned well above the future bottom seam.
- Cut matching panels. Cut through the shirt front carefully, then use it as a guide for the back panel, lining, and interfacing. Avoid placing thin underarm or side-seam fabric inside the final rectangle.
- Stabilise and assemble the bag body. Apply suitable interfacing to the wrong side of the outer panels. Sew the outer front and back together along the sides and base, then construct the lining separately.
- Create and attach the handles. Form handles from strong sleeve sections or another reinforced material. Insert their ends well below the upper edge and stitch them securely before joining the lining to the outer bag.
- Finish the opening. Join the lining and outer bag around the top, leaving enough space to turn the piece. Close the final opening, press the edge, and reinforce the handle attachment points.
For me, the pocket and button front already provide enough visual detail. Adding patches, bows, embroidery, and several contrasting handles may make the shirt’s original character harder to notice.
A beginner can remove the buttons and stitch the placket closed before cutting. This prevents gaps and creates one flat front panel.
Combine Two Old Shirts Into a Large Zip-Top Tote
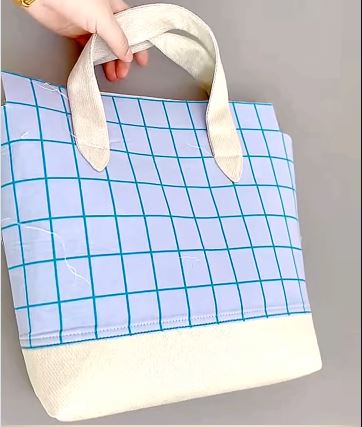
One shirt does not always provide enough sound fabric for a large tote, especially when the elbows and lower front are worn. Combining two shirts allows you to choose the strongest parts of both.
A zip-top carryall needs more structure than a light shopping bag. The opening, handles, lining, and base should all be reinforced so the extra capacity does not become extra strain.
Related colours can create a quiet panelled design, while contrasting shirts produce a more obvious patchwork bag.
Materials and Tools
- Two long-sleeve shirts
- Lining fabric
- Interfacing
- Zip
- Fabric scissors
- Measuring tape
- Ruler
- Pins or clips
- Strong thread
- Sewing machine
- Optional base insert
- Optional internal pocket zip
Sew the Large Carryall
- Map the available fabric. Open the shirts along their side and sleeve seams, then mark every weak area. Plan the main panels, handles, zip tabs, pockets, and base before cutting.
- Build larger panels. Join strong shirt sections until each outer panel reaches the needed size. Place seams away from handle attachment points and reinforce the completed panels with interfacing.
- Install the zip. Attach the zip between prepared upper strips or facing pieces. Check that it opens smoothly before sewing the top assembly to the bag body.
- Construct the bag and lining. Join the outer panels, add boxed corners or a separate base, and make a lining with useful pockets. Insert a washable base support when the fabric needs help holding its shape.
- Attach strong handles and finish. Build handles from layered sleeve fabric, reinforced shirt panels, or webbing covered with shirt fabric. Stitch them deeply into the upper bag and test the completed tote gradually.
For me, the zip should open wider than the largest item you expect to carry. A beautifully sewn bag becomes frustrating when the opening is narrower than everything meant to go inside it.
A smaller version can use one shirt for the exterior and another only for the lining. The remaining cuffs may form zip-end tabs or pocket flaps.
Turn a Striped Men’s Shirt Into a Ruffle Tote
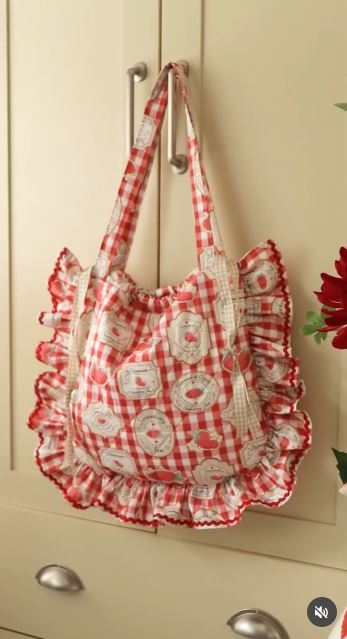
A striped shirt can become a ruffle tote without losing the pattern that made it worth saving. The straight grain and repeated lines also help reveal whether panels and handles have been cut evenly.
The ruffles may come from sleeves, the lower shirt body, or narrow leftover strips. They should remain decorative rather than carrying the structural load.
Gathering requires more fabric than the finished edge length. Plan the main bag panels and handles first, then use what remains for the ruffle.
Materials and Tools
- Striped long-sleeve shirt
- Lining fabric
- Lightweight interfacing
- Fabric scissors
- Ruler
- Tailor’s chalk
- Pins
- Gathering thread
- Strong construction thread
- Sewing machine
- Optional button closure
Make the Ruffle Tote
- Cut the main bag before the decoration. Position matching front and back panels so the stripes remain straight. Reserve the longest sound sleeve and body sections for handles and ruffle strips.
- Prepare the ruffles. Join narrow strips when necessary, finish the exposed edge, and sew gathering stitches along the opposite side. Pull the threads gently until the ruffle fits the planned bag edges.
- Attach the decorative strips. Pin the ruffle around the front panel with its raw edge aligned to the bag edge. Distribute the gathering evenly and keep bulky joins away from the corners.
- Construct and line the tote. Sew the outer panels together, enclosing the ruffle inside the seam. Add interfacing and lining so the gathered edge does not have to support the bag’s contents.
- Add the handles and closure. Form reinforced handles from sleeve sections and attach them securely. Use one saved shirt button with a fabric loop when a simple closure suits the design.
The first ruffle arrangement rarely ends up being the final one. I’d pin the whole strip before sewing because a crowded section near one corner is surprisingly noticeable.
A beginner can place one short ruffle across the upper front instead of framing the entire bag. Pleats can also replace gathers for a cleaner striped effect.
Shirt-to-Tote Decisions That Determine Whether the Bag Lasts
Cutting the Sleeves Off Before Planning the Handles
The sleeves may provide the longest matching fabric strips available. Decide the handle length and width before cutting them into smaller pieces.
Keeping Thin Elbow Fabric
Elbows often wear out before the rest of a long-sleeve shirt. Do not place weakened sections inside handles, base panels, or other high-stress areas.
Using Shirt Fabric Alone for Heavy Loads
Fine cotton, rayon, and dress-shirt fabric may stretch or tear under books and groceries. Add lining, interfacing, denim, canvas, or webbing where the bag needs strength.
Failing to Secure the Button Placket
Buttons can open when the bag is filled. Stitch the placket closed, reinforce it, or design it as a controlled closure rather than leaving it unsupported.
Attaching Handles Only at the Top Edge
A short line of stitching may tear away from the bag. Extend each handle below the upper edge and reinforce the attachment across a wider area.
Cutting the Main Panels Before Centring the Pattern
Stripes, checks, pockets, and motifs may become crooked or disappear inside seams. Plan the visible front carefully before cutting the back and lining.
Ignoring the Direction of the Fabric Grain
Panels cut in different directions may stretch unevenly. Keep the main bag pieces aligned wherever the available shirt fabric allows it.
Adding Decoration Before Constructing the Bag
Ruffles, patches, and embroidery can shift during assembly or end up inside a seam. Plan their final position using the marked sewing lines.
Making a Large Bag Without a Stable Base
A roomy tote can sag heavily once filled. Add boxed corners, a separate base panel, or a removable insert when the intended use requires support.
Leaving Raw Edges Inside the Bag
Woven shirt fabric may fray with use and washing. Enclose raw edges inside the lining or finish them with a suitable seam method.
Relying on Fabric Glue for Load-Bearing Seams
Adhesive may help position a patch or hold a decorative detail, but handles, side seams, and the base usually need dependable stitching.
Throwing Away the Collar and Cuffs Too Soon
These pieces can become closure tabs, pockets, handle reinforcements, key loops, or labels. Keep them until the finished bag has been assembled and tested.
Frequently Asked Questions
Which long-sleeve shirt is best for a tote bag?
A medium-weight woven cotton, linen-blend, chambray, flannel, or light denim shirt is usually manageable. The fabric should remain strong around the body, shoulders, and sleeves.
Can I turn a thin dress shirt into a tote?
Yes, but it will usually need lining and interfacing. You can also use the shirt only for the lining or decorative outer panels while stronger reclaimed fabric supports the bag.
Can the shirt sleeves become the handles?
Yes. Open the sleeves along their seams, cut matching strips, and reinforce them with interfacing or webbing before attaching them to the bag.
Should I keep the original shirt buttons?
Buttons can remain as decoration or form part of a closure. Stitch the placket closed when it will not be used, since buttons alone may not hold a filled tote securely.
Can I make the tote without a sewing machine?
A tote can be hand sewn with strong, closely spaced stitches, although the process will take longer. Reinforce the handles, corners, base, and upper edge carefully.
How can I make the bottom stronger?
Use reclaimed denim, canvas, interfacing, boxed corners, or a separate base panel. A removable base insert can also help the tote hold its shape.
What can I make from the remaining shirt scraps?
Smaller pieces can become pockets, key loops, zip tabs, patches, button closures, gift tags, hair accessories, or stuffing for another textile project.
Let the Shirt’s Strongest Details Shape the Bag
Learning how to upcycle a long sleeve shirt into a tote bag begins before the first cut.
The shirt body can form the main panels, but the sleeves, cuffs, pocket, placket, and collar may be equally useful. A sturdy cotton shirt can become a simple everyday tote, while thinner fabric may work better as lining inside a denim or canvas bag.
Begin with one clean shirt, identify the weak areas, and decide which details deserve to remain visible. Then plan the handles, body, lining, and base together rather than treating each part as a separate decision.
Which shirt would you reuse first: a striped button-down for a ruffle tote, an oversized cotton shirt for an everyday bag, or a sentimental shirt that would work best as the lining?