Closet shelves often fail in very ordinary ways. A shelf may look tidy on the day it is installed, then begin to bow under folded clothes, disappear behind deep baskets, or leave shoes stacked where they are difficult to reach. Good closet organization begins with the items that actually need a home, not with buying a matching set of containers and hoping everything fits afterward.
I like storage projects that reuse useful materials while making daily routines easier. Old bookcase panels, sound timber offcuts, baskets, crates, wire racks, doors, drawer slides, and even carefully planned pipe frames can become part of a closet system. I don’t think every shelf needs to look built-in, but it should feel stable, accessible, and suited to the weight and shape of what it holds.
Before changing the layout, empty enough of the closet to see its real dimensions and awkward points. Doors need room to swing, hanging clothes need clear drop space, and high shelves should hold items that can be lifted safely. A thoughtful design makes it easier to put things away, not only to arrange them for one photograph.
Measure the Closet and Record Fixed Obstacles
A closet can lose useful space through one overlooked hinge, sloping ceiling, skirting board, socket, vent, or door frame. Measure the empty structure rather than estimating around clothes, then write the dimensions down before choosing a shelf style.
· Measure the clear width, depth, and height at several points because walls and floors may not be perfectly square.
· Record door swing, frame thickness, handles, hinges, light fittings, sockets, vents, access panels, and heating equipment.
· Measure the longest hanging garments so new shelves do not crush hems or block the clothes rod.
· Note comfortable reach height for every regular user, including children or anyone with limited mobility.
· Check wall construction before choosing anchors; plasterboard, masonry, timber studs, and hollow panels need different fixings.
· Mark floor-level obstructions such as skirting boards, carpet grippers, uneven thresholds, and existing drawer units.
· Leave enough space to remove baskets, open drawers, slide shelves, and carry bulky items through the closet door.
Sort What the Shelves Need to Hold
Shelf spacing should follow the contents. Folded knitwear, shoes, handbags, linen, storage boxes, and small accessories all behave differently, so one repeated shelf height rarely uses the whole closet well.
· Separate everyday items from seasonal, occasional, sentimental, and rarely used belongings.
· Group shoes by height so boots do not force every shelf to be unnecessarily tall.
· Measure baskets, boxes, handbags, folded stacks, and storage cases before fixing shelf positions.
· Keep heavy items lower and reserve high shelves for light, clearly labelled containers.
· Decide which belongings need ventilation, dust protection, privacy, or quick visual access.
· Remove items that no longer belong in the closet before designing storage around them.
· Allow a small amount of spare space so the system can absorb laundry, seasonal changes, and new purchases.
Gather Reclaimed Materials, Hardware, and Safety Tools
Reused materials can reduce waste and give the closet character, but shelves must still remain straight, clean, and securely supported. Inspect every board, basket, crate, bracket, and runner before deciding where it belongs.
· Sound timber, plywood, old shelving panels, crates, baskets, wire racks, or modular components that remain dry and undamaged.
· Tape measure, square, level, pencil, straightedge, stud finder where suitable, and a written layout plan.
· Saw, drill or driver, suitable bits, clamps, sanding tools, and a stable work surface.
· Brackets, shelf pins, standards, screws, washers, wall plugs, anchors, or drawer slides matched to the wall and intended load.
· Gloves, eye protection, hearing protection, dust control, and safe support for materials during cutting and drilling.
· Edge banding, trim, filler, primer, or low-odour finish where exposed reused surfaces need cleaning or protection.
· Labels, removable liners, shelf dividers, and non-slip pads only after the main structure has been tested.
Closet Storage with Basket
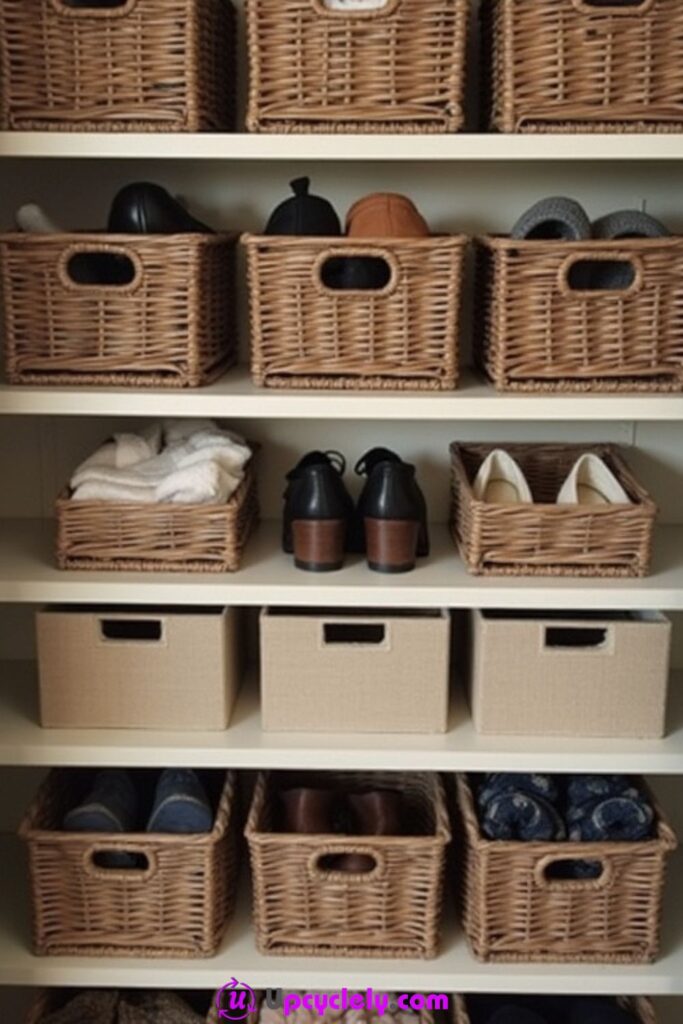
Baskets turn open shelves into flexible compartments without committing the closet to permanent drawers. Wicker, fabric, and sturdy reclaimed boxes can hide smaller items, soften a plain shelf unit, and make high storage easier to pull forward as one contained group.
The important part is matching the basket to the shelf rather than choosing it only for colour. A basket that fills the full depth can become heavy and difficult to lift, while one that is too shallow wastes the space behind it. Handles, washable liners, and clear labels matter more than a perfectly matching set.
Materials and Tools
· Existing closet shelves or sound reclaimed shelf boards
· Wicker baskets, fabric bins, or sturdy reused boxes
· Labels, tags, or removable label holders
· Non-slip shelf liner or small felt pads
· Tape measure and pencil
· Optional washable fabric liners
· Brackets or shelf pins if the shelf height needs adjustment
Steps for This Closet Shelf Project
1. Measure the usable shelf openings. Measure width, depth, and clear height, including any shelf lip or door frame that affects removal. Decide whether each basket will be lifted down, pulled forward, or left open on the shelf. Then choose containers that leave enough finger space around the sides and top.
2. Prepare and group the baskets. Clean every reused basket and check handles, corners, wire ends, and woven sections for damage. Line rough interiors when they will hold delicate fabric. Group items by purpose, keeping each basket light enough for the person who will regularly move it.
3. Arrange by frequency and weight. Place frequently used baskets between waist and shoulder height. Keep heavier linen or footwear lower, and reserve the highest shelf for light seasonal items. Add non-slip pads if smooth baskets drift when one is removed from a row.
4. Label and test the routine. Use labels broad enough to remain useful, such as winter accessories, swimwear, or spare bedding. Live with the arrangement for several days, then move any basket that requires awkward reaching or repeated rearranging. Leave one small open area for items waiting to be put away.
A practical detail I would not skip: I would avoid filling a deep basket to the very top. A little visible space keeps fabric from catching and makes the container far easier to return to the shelf.
Variation: Use mismatched second-hand baskets with coordinated washable liners or simple card labels instead of replacing containers that already work.
Adjustable Closet Shelving
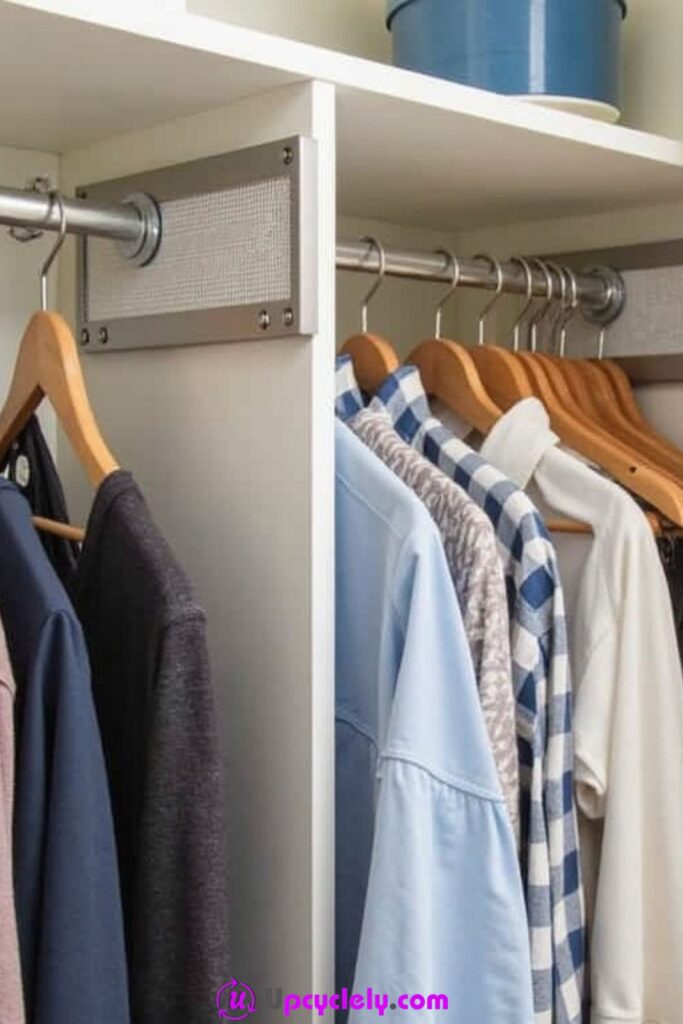
Adjustable shelving is useful when the closet contents change through the year. Standards, shelf pins, slotted rails, or modular uprights allow one shelf to move without rebuilding the entire unit, which is especially helpful for children’s clothes, changing shoe collections, and seasonal storage.
Flexibility still needs a strong starting structure. The vertical supports must be level, securely anchored, and placed so the shelves cannot tip or bow. It is worth planning several realistic shelf positions rather than drilling a long series of holes that will never be used.
Materials and Tools
· Reusable shelf boards in sound condition
· Adjustable wall standards, shelf pins, or modular uprights
· Brackets matched to the chosen system
· Appropriate wall anchors and screws
· Level, tape measure, square, and pencil
· Drill or driver with suitable bits
· Optional edge banding and shelf labels
Steps for This Closet Shelf Project
1. Plan the adjustment range. List the tallest and shortest items likely to use the shelves, then mark a sensible range of positions. Keep fixed hanging rods, drawers, and doors in mind. A few useful increments are better than placing hardware where baskets or garments will block it.
2. Locate and secure the supports. Identify studs or the correct fixing method for the wall construction. Mark vertical lines with a level, then install the standards or uprights according to the hardware instructions. Check that paired supports begin at the same height before tightening fully.
3. Prepare the shelf boards. Cut or reuse boards that sit correctly on the brackets without excessive overhang. Smooth rough edges, seal exposed surfaces where needed, and test each board for flatness. Add a front edge strip if a thin panel needs stiffness and the support system allows it.
4. Load and adjust gradually. Set the first layout and add belongings in stages, beginning with lighter items. Watch for movement, bowing, or brackets that do not seat properly. After a week of normal use, move shelves that leave unusable gaps or make common items awkward to reach.
A practical detail I would not skip: The adjustable feature only helps when the shelves can be moved without emptying half the closet. I would keep the likely adjustment points free of permanent hooks and cable clips.
Variation: A freestanding modular unit can provide adjustability in a rental where drilling several wall standards is not appropriate, provided it is stabilised safely.
Budget-Friendly Closet Shelve
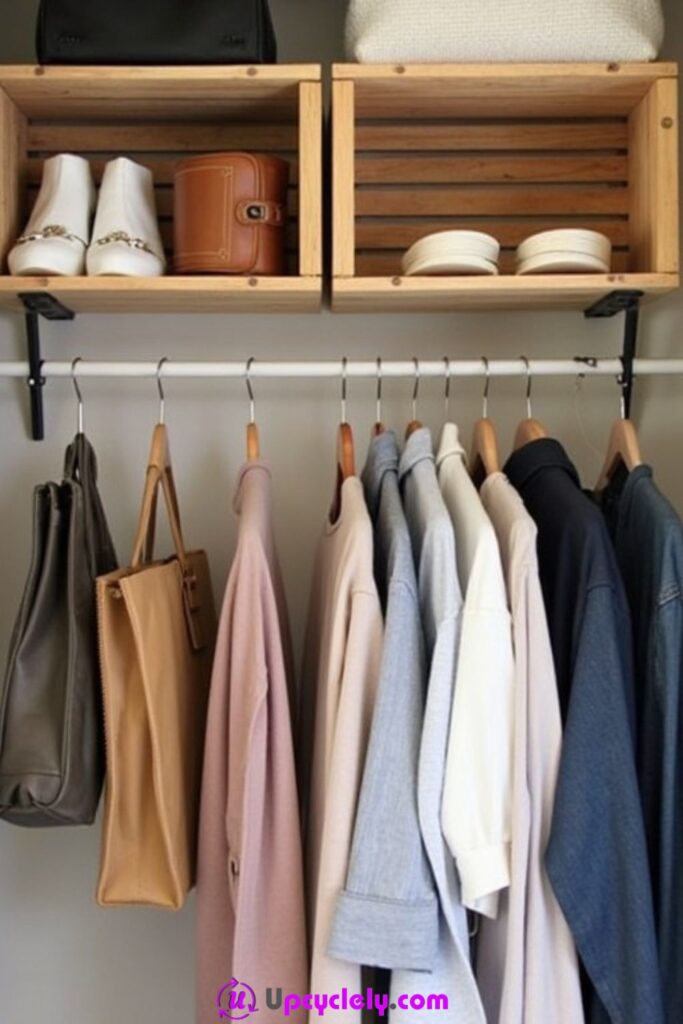
A budget shelf can be built from reclaimed boards, old bookcase sides, sound crates, or leftover plywood without looking improvised. The finish feels intentional when the pieces share a consistent depth, the edges are cleaned, and the supports are placed where the material actually needs them.
Cost cutting should focus on appearance and uncomplicated construction, not on weak fixings. Wall anchors, brackets, screws, and any load-bearing support need to suit the wall and the stored items. Paint cannot compensate for a shelf that is too thin or badly supported.
Materials and Tools
· Sound reclaimed boards, plywood, or bookcase panels
· Simple shelf brackets or timber cleats
· Wall fixings suited to the wall construction
· Screws, washers, and optional corner braces
· Saw, drill, level, square, and clamps
· Sandpaper, filler, and optional leftover finish
· Reused boxes or dividers for small items
Steps for This Closet Shelf Project
1. Sort the reclaimed material. Lay every board flat and reject pieces with deep splits, swelling, rot, active pests, or strong unknown odours. Group boards by depth and thickness. Use the straightest pieces for shelves and reserve smaller offcuts for cleats, dividers, or edge strips.
2. Design around simple cuts. Choose a layout that uses the existing board lengths with minimal waste. Mark shelf positions according to the actual contents and keep spans modest. If a board feels flexible, shorten the span, add a centre support, or strengthen the front edge before installation.
3. Install reliable supports. Mark level lines and attach brackets or cleats with fixings appropriate to the wall. Do not rely on adhesive alone for loaded shelves. Place supports near board ends and at intermediate points where needed, then test each shelf before adding storage containers.
4. Unify the finish and organise. Sand rough areas, cover exposed composite edges, and use leftover paint or clear finish only after the structure is secure. Repeat one label style or box colour to make mixed materials feel connected. Keep the heaviest items on the lowest shelf.
A practical detail I would not skip: For me, straight edges and consistent spacing make reclaimed shelves look more considered than an expensive finish ever could.
Variation: Stack sound wooden crates as a removable floor unit instead of fixing shelves to the wall, but connect the crates and stabilise the finished unit so they cannot shift.
Closet Shelf Organizer Idea
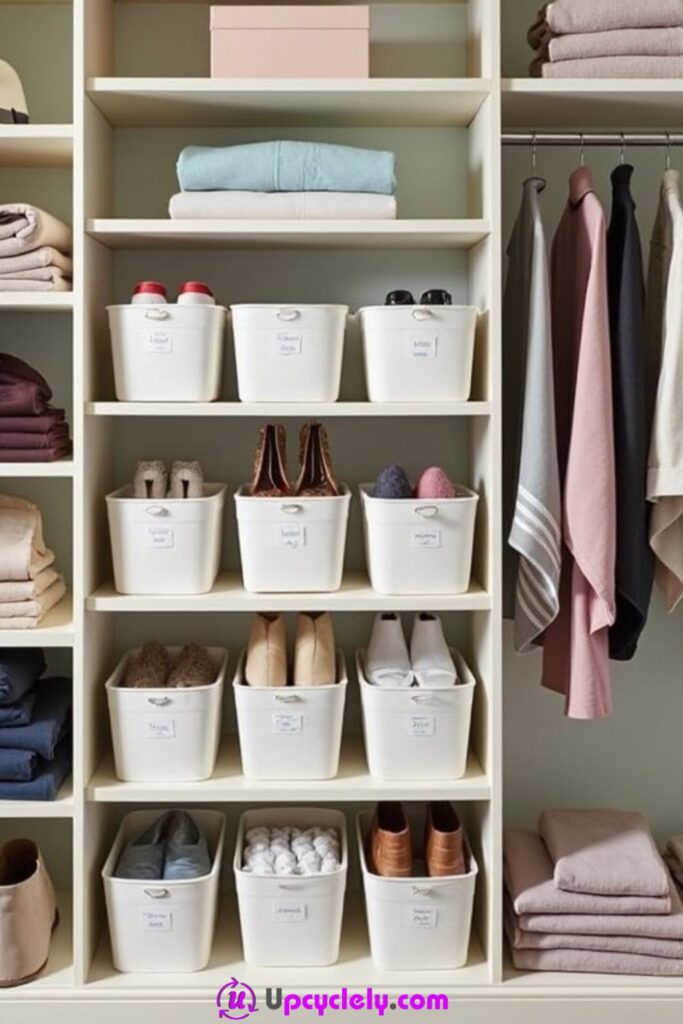
An organiser shelf works best when the compartments match real categories. Labelled boxes can manage gloves, belts, hats, scarves, spare toiletries, or children’s accessories, while open sections keep folded clothes and frequently used pieces visible.
Too many tiny categories create another kind of clutter because items stop fitting the labels. Broad groups, consistent folding, and one easy return point usually keep the system working longer than a complicated arrangement that needs constant maintenance.
Materials and Tools
· Existing shelving or a simple cubby unit
· Reused boxes, fabric bins, or clear containers
· Card dividers or removable shelf separators
· Labels and removable adhesive holders
· Non-slip liner
· Tape measure and pencil
· Optional small tray for loose daily items
Steps for This Closet Shelf Project
1. Audit the small items. Empty the category that causes the most clutter and group similar belongings on a clear surface. Remove duplicates and items that belong elsewhere. Notice which groups need privacy, ventilation, a lid, or quick visual access before assigning containers.
2. Divide the shelf logically. Use boxes or dividers to create sections that reflect the amount of each category. Keep daily items at the front and seasonal items higher or farther back. Avoid making compartments so narrow that folded fabric has to be forced into place.
3. Label for easy return. Choose plain labels that every user understands and place them where they remain visible when the shelf is full. A label such as cold-weather accessories is often more useful than separate boxes for every type of glove, hat, and scarf.
4. Test the reset process. Put away a normal load of laundry or accessories and notice where the system slows down. Add a small temporary tray for items that need sorting later. Adjust any compartment that regularly overflows instead of repeatedly pushing the contents down.
A practical detail I would not skip: I don’t think every box needs a lid. Open bins often work better for items that are used and returned several times a week.
Variation: Turn cereal boxes or strong delivery cartons into lightweight dividers by trimming them neatly and covering only the visible fronts with leftover paper or fabric.
Closet Storage Ideas for Shoes
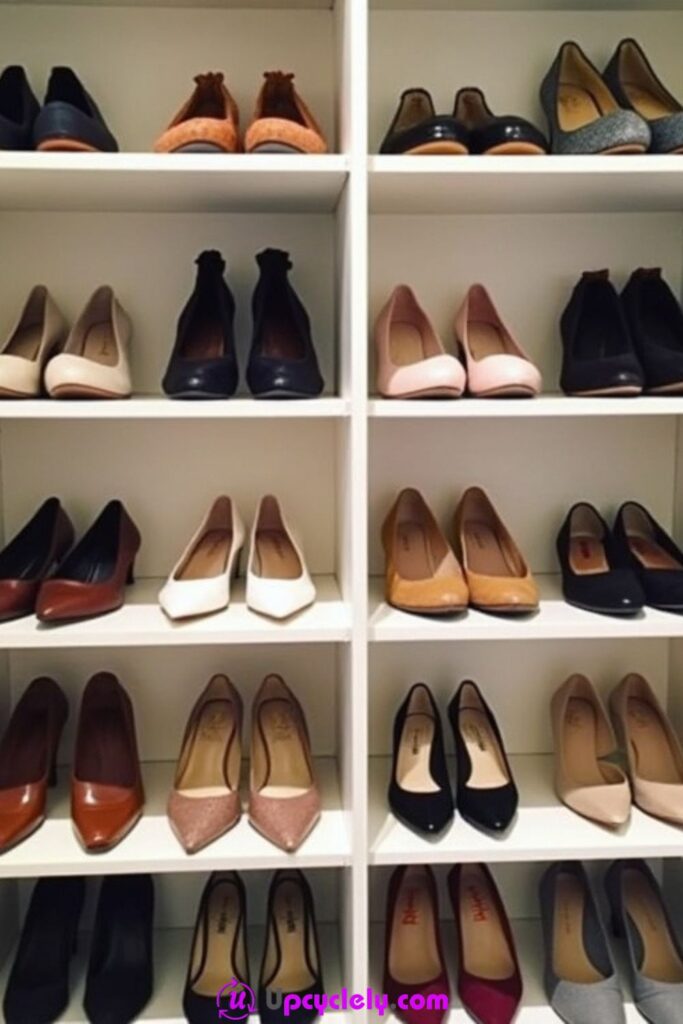
Shoe shelves keep pairs visible and reduce the wear caused by unstable piles. A useful layout separates low shoes, heels, trainers, and boots so each type receives enough height without wasting the entire closet on tall compartments.
Depth matters as much as shelf spacing. Shoes should sit securely without heels hanging into a walkway or toes disappearing so far back that they are forgotten. Ventilation and easy cleaning are important because closed, crowded footwear storage can hold dust and moisture.
Materials and Tools
· Existing shelves or sound boards cut to suitable depth
· Brackets, cleats, or shelf pins
· Washable shelf liner or removable trays
· Boot inserts or rolled reused card for light support
· Labels for seasonal or occasional shoes
· Level, tape measure, drill, and suitable fixings
· Optional low dividers to keep pairs together
Steps for This Closet Shelf Project
1. Sort and measure the footwear. Group shoes by height, width, and frequency of use. Measure the tallest boots and the longest everyday pair rather than using a general shoe-shelf dimension. Remove footwear that needs repair or cleaning before it returns to the closet.
2. Set practical shelf spacing. Use closer spacing for flats and trainers, then leave one taller section for boots or boxed shoes. Keep everyday pairs between knee and shoulder height. A slightly angled shelf may improve visibility, but it still needs a front stop so shoes cannot slide.
3. Protect and ventilate the surfaces. Add removable washable liner or shallow trays where soles contact the shelf. Leave air space around damp-weather footwear and never store wet shoes immediately against timber or fabric containers. Keep cleaning access open rather than filling every gap.
4. Arrange pairs and maintain the system. Place each pair together with toes or heels aligned consistently. Use dividers only where they prevent pairs from mixing. Rotate seasonal shoes, wipe the shelves regularly, and leave one accessible space for the shoes currently in use.
A practical detail I would not skip: The shelf should make shoes easier to choose and put away. If each pair has to be carefully balanced, the spacing is too tight.
Variation: Use shallow reclaimed drawers or sturdy trays as removable shoe platforms on a low shelf, adding felt pads so they slide without scratching.
Overhead Closet Shelf Design
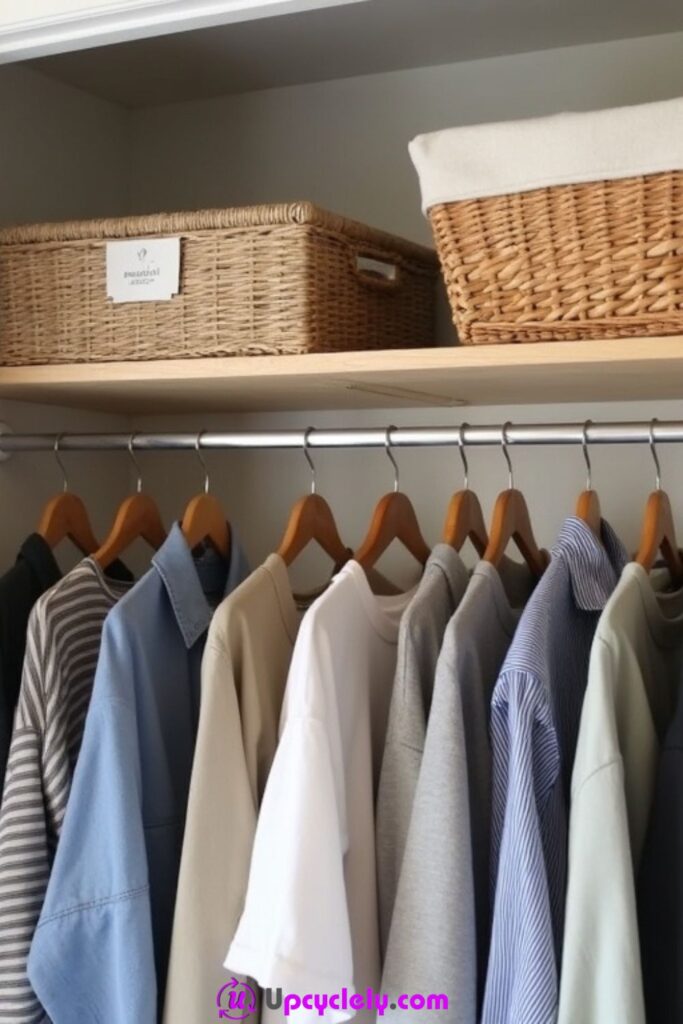
An overhead shelf can recover space above the clothes rod for bedding, hats, bags, and seasonal containers. It works best when the stored items are light, contained, and needed infrequently, because reaching above hanging clothes with a heavy loose object is awkward and unsafe.
The shelf depth should allow a container to clear the door frame and be lifted without striking the ceiling. A front lip can prevent light boxes from shifting, but it should not become so high that baskets catch during removal.
Materials and Tools
· Straight shelf board or reused cabinet panel
· Strong brackets or continuous timber cleat
· Wall fixings suited to the structure
· Lightweight baskets or lidded containers
· Labels visible from below
· Level, drill, tape measure, and pencil
· Optional low front edge strip
Steps for This Closet Shelf Project
1. Check reach and clearance. Measure the space above the hanging rod, including garment hangers and the closet door opening. Decide what can be lifted safely from that height. Keep heavy luggage, large appliances, and unstable stacks out of an overhead position.
2. Install the support line. Mark a level line and locate suitable fixing points. Attach brackets or a cleat securely, then test that the shelf board sits flat without rocking. Add intermediate support where the span or material requires it rather than relying on end brackets alone.
3. Prepare lightweight storage. Choose containers that can be held with two hands and that do not exceed the clear height. Label the fronts or undersides before loading. Avoid overfilling soft baskets because the contents can catch on the ceiling or spill over hanging clothes.
4. Load by season and inspect access. Place the least-used, lightest items first and keep a safe step stool nearby if appropriate. Remove one container several times to confirm the route is clear. Check brackets and shelf edges periodically, especially after changing the contents.
A practical detail I would not skip: I would rather leave one overhead section empty than fill the whole length with boxes that are difficult to lower safely.
Variation: A shorter shelf above only one side of the rod can preserve clear overhead space for long garments while still holding seasonal accessories.
DIY Floating Shelves for Closet
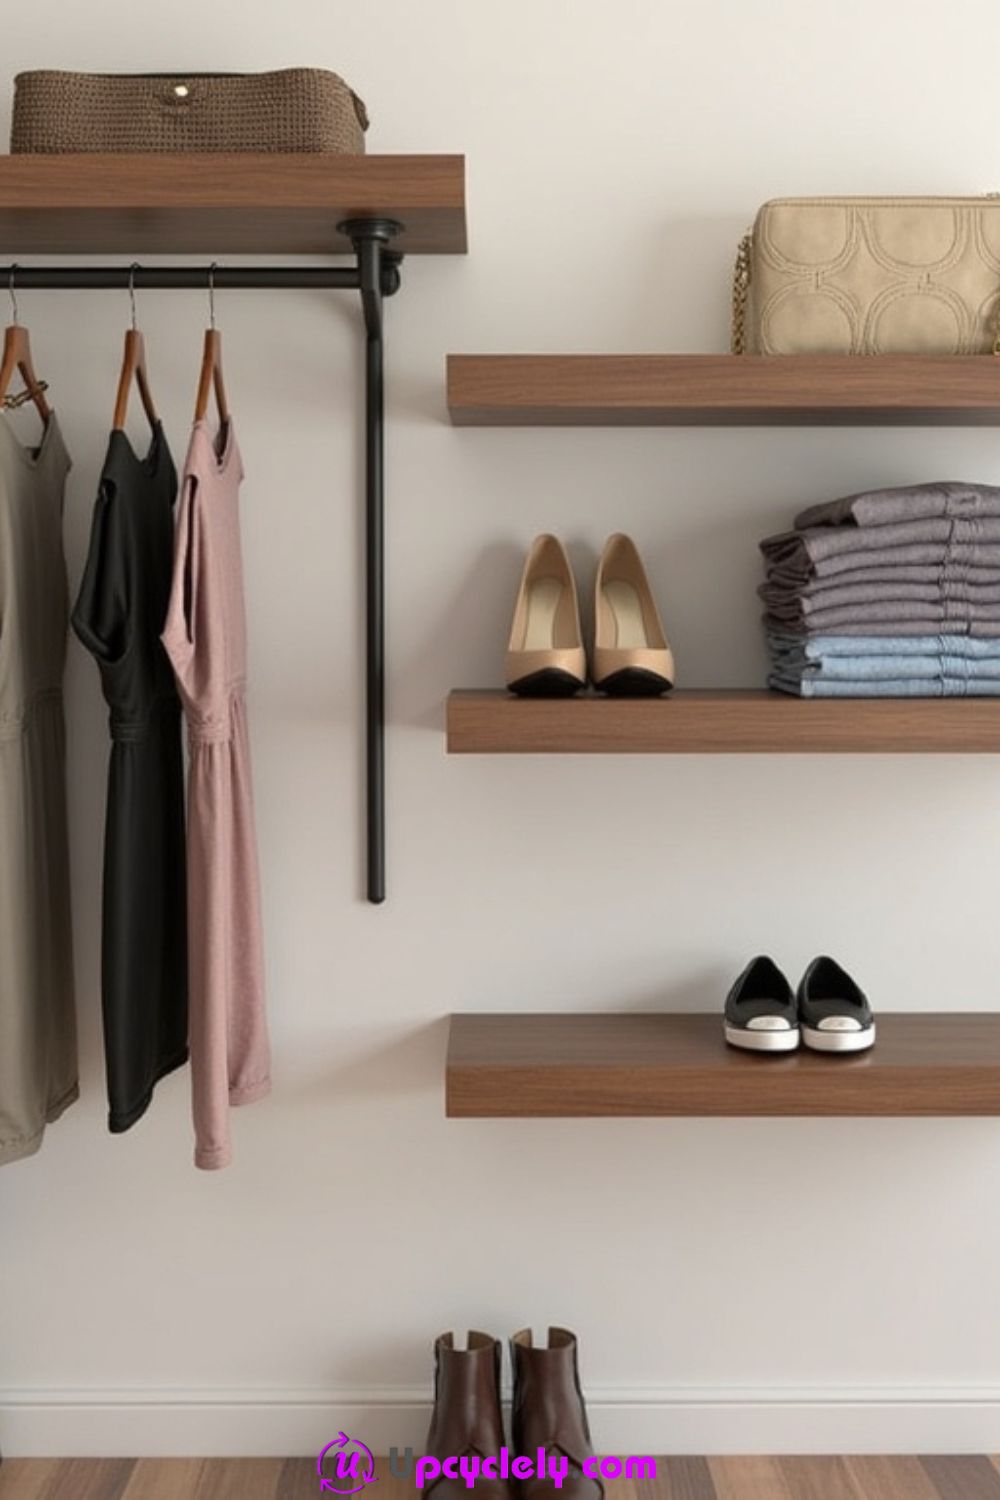
Floating shelves give a closet a clean, open appearance and work well for folded clothing, handbags, hats, or a small shoe display. Their hidden-support look is most successful when the wall fixing and internal bracket are suited to the shelf depth and intended load.
These shelves are not the place to guess about anchors. A reused hollow-core board, a solid timber shelf, and a thick box shelf all need different support. The visible simplicity depends on careful levelling and a secure connection behind the shelf.
Materials and Tools
· Solid shelf boards or properly constructed hollow box shelves
· Compatible floating shelf brackets or concealed supports
· Wall anchors and screws suited to the wall
· Level, drill, tape measure, and stud finder where suitable
· Clamps and square
· Sandpaper and optional edge finish
· Non-slip pads for displayed items
Steps for This Closet Shelf Project
1. Choose the right shelf construction. Match the shelf thickness and internal structure to the floating hardware. Do not use a thin unsupported panel simply because its front edge looks suitable. Check that the intended depth leaves enough wall connection to resist downward leverage.
2. Mark and fix the concealed supports. Locate appropriate fixing points and mark the bracket line with a level. Install the support exactly as required, tightening into suitable structure rather than relying on decorative wall covering. Recheck level before the shelf hides the hardware.
3. Fit and secure the shelf. Slide or place the shelf over the supports, checking for gaps and movement. Use the supplied locking screws or another approved securing method. Do not load the shelf until the connection feels firm and the finish or adhesive, where relevant, has fully cured.
4. Style with restrained weight. Arrange a few folded stacks, light bags, or shoes with space between them. Keep heavier boxes on a supported lower unit. Use small non-slip pads under smooth objects and periodically check for movement where the shelf meets the wall.
A practical detail I would not skip: Floating shelves look calmer when they are not packed edge to edge. The empty space is part of the design and also makes cleaning easier.
Variation: Create a floating appearance with slim visible brackets painted to match the wall; this is often simpler to inspect and may suit reclaimed boards better.
Easy Closet Shelving Design
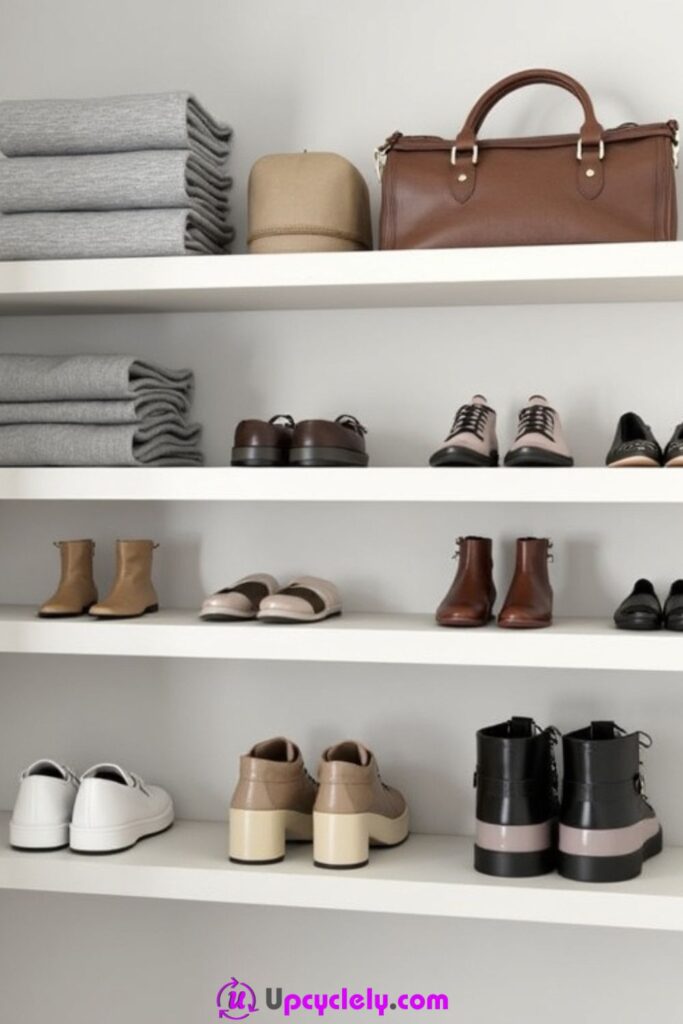
A straightforward closet design can combine a few evenly spaced shelves with one hanging section and a clear floor. The simplicity makes it easier to build, clean, and change later, especially when the shelves use standard board sizes and uncomplicated brackets.
Easy should describe the construction, not careless planning. The shelf heights still need to fit the contents, the boards need enough support, and the layout should leave room for hands to fold, lift, and return items without disturbing the entire stack.
Materials and Tools
· Standard shelf boards or reused panels of consistent depth
· Simple brackets, shelf pins, or timber cleats
· Wall fixings and exterior-free interior screws
· Level, tape measure, square, and pencil
· Saw and drill or driver
· Optional removable shelf liner
· A few baskets or dividers rather than many small containers
Steps for This Closet Shelf Project
1. Choose three or four storage zones. Assign the closet to broad functions such as folded clothing, shoes, bags, and hanging garments. Measure the largest item in each zone. Keep the plan simple enough that every shelf has a clear purpose without creating narrow leftover gaps.
2. Cut and prepare matching shelves. Use boards of the same depth where possible and cut them square. Smooth the edges and test each piece on a flat surface. If a reused board is slightly different in colour, keep the front edges aligned so the variation feels intentional.
3. Install from the lowest shelf upward. Mark each support line with a level and install the lower shelf first, leaving room for cleaning beneath it. Continue upward while checking real containers and folded stacks against the spacing. Correct an awkward gap before all the supports are fixed.
4. Add only the organisers that help. Place everyday items directly on the shelves and use baskets only for loose categories. Leave some open width so stacks can be lifted without scraping the side. Review the layout after a normal laundry cycle and adjust before adding decorative details.
A practical detail I would not skip: The easiest system to maintain is usually the one with fewer categories and enough room to return an item without precise folding.
Variation: Use a freestanding narrow bookcase inside the closet as the shelf tower, securing it appropriately so it cannot tip.
Homemade Closet Storage Solution
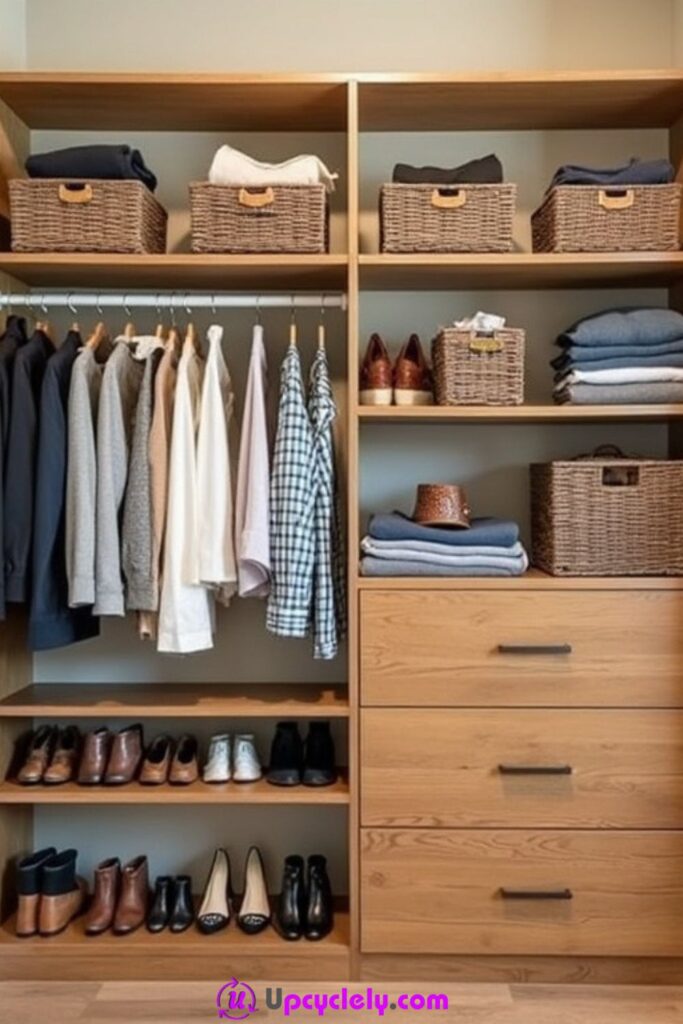
A homemade storage solution can combine shelves, hanging space, baskets, and small drawers into one unit shaped around an awkward closet. Reclaimed cabinet sides, drawer boxes, timber strips, and existing closet rods may all be useful when the parts are sound and their dimensions work together.
The layout should be modular enough to repair. A removable basket, shelf, or drawer is easier to clean and replace than a tightly sealed structure that traps dust in every corner. I know it can feel tempting to fill the whole wall, but service access deserves space too.
Materials and Tools
· Reclaimed cabinet panels, shelving, or plywood
· Existing drawers or sound drawer boxes
· Baskets and simple dividers
· Closet rod and secure end supports
· Brackets, cleats, screws, and wall fixings
· Drawer runners where needed
· Level, saw, drill, clamps, and square
Steps for This Closet Shelf Project
1. Map the unit as separate modules. Divide the design into a shelf tower, hanging section, basket area, or drawer base rather than building one complicated frame. Check how each module enters the closet doorway. Mark removable parts and leave clearance for drawers and baskets.
2. Build and square the main frames. Assemble the shelf or drawer carcasses on a flat surface, checking diagonals and corners. Reinforce reused panels where hardware has weakened the edges. Place the units in the closet and level them before connecting them to each other or the wall.
3. Add rods, shelves, and moving parts. Install the clothes rod with supports that prevent sagging, then fit shelves and drawer runners. Test drawers with weight and check that handles do not strike doors or adjacent clothing. Keep fastener heads covered where fabric could catch.
4. Finish the storage routine. Assign baskets, drawers, and open shelves according to frequency of use. Add labels only after the categories work. Leave a narrow cleaning route at the floor and avoid sealing the unit against a wall that needs ventilation or utility access.
A practical detail I would not skip: I would make at least one shelf removable. That small decision can make later repairs, painting, or cleaning much less frustrating.
Variation: Combine a reused chest of drawers with a separate wall-mounted shelf tower instead of constructing drawers from scratch.
Modular Closet Storage Unit
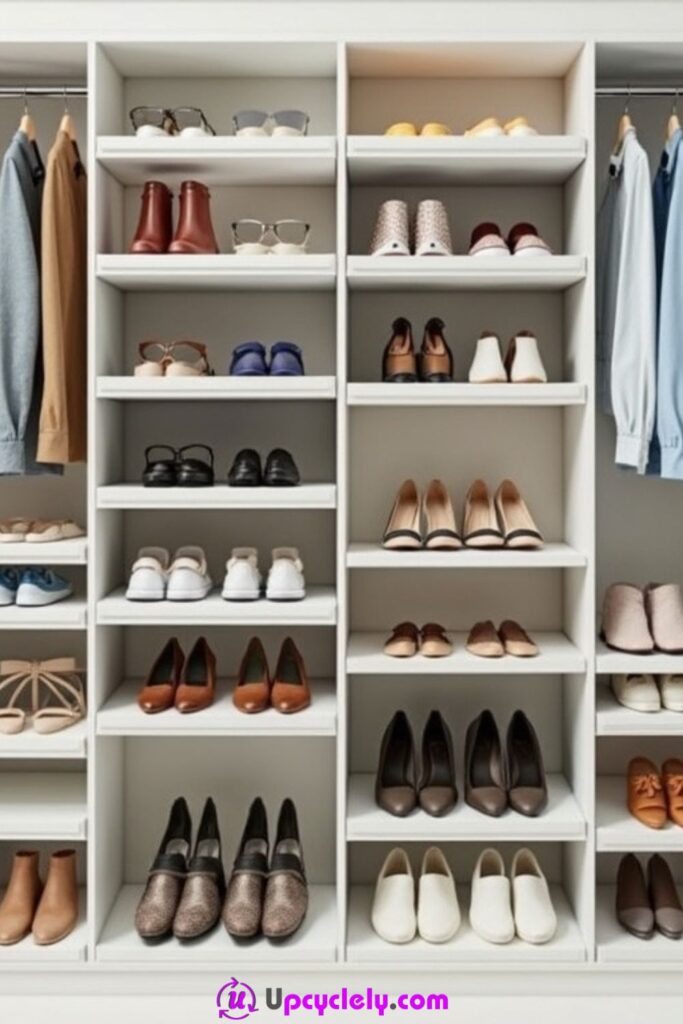
A modular unit divides the closet into sections that can change independently. One bay may hold long garments, another may contain double hanging rods, and a central tower can manage folded clothes or shoes. This works well for shared closets or wardrobes that change over time.
Modules need consistent alignment so gaps do not become dust traps or pinch points. Freestanding sections should be stabilised, and connected pieces should remain removable where possible. The system should adapt without requiring every panel to be discarded.
Materials and Tools
· Reusable cabinet boxes, cube units, or shelf towers
· Shelf boards and optional adjustable pins
· Closet rods and end supports
· Connection plates, screws, and suitable wall anchors
· Level, tape measure, square, and clamps
· Shims for uneven floors
· Optional removable drawers, baskets, or shoe shelves
Steps for This Closet Shelf Project
1. Define the modules. Plan each section around one main task: long hanging, short hanging, shelves, shoes, or drawers. Keep module widths compatible with existing boards or cabinet boxes. Check that every piece can pass through the door before assembly.
2. Position and level the bases. Place the heaviest or tallest module first and level it with appropriate shims. Align the fronts of adjacent units even when the back wall is uneven. Stabilise each section according to its design before using it as a reference for the next.
3. Connect without losing flexibility. Join neighbouring units where needed to prevent movement, but use accessible screws or plates rather than permanent adhesive. Add rods, shelves, and baskets after the main boxes are square. Leave space for doors, drawers, and hanging sleeves to move freely.
4. Assign and revise the zones. Load each module gradually and watch for unused height or crowded categories. Move adjustable shelves or swap baskets rather than rebuilding the whole unit. Keep a record of spare shelf pins, brackets, and matching hardware for future changes.
A practical detail I would not skip: For me, modular storage earns its value when one section can change without disturbing the rest of the closet.
Variation: Use two narrow reused bookcases with a clothes rod between them, securing all components safely and adding a shared top shelf only if the supports allow it.
Space-Saving Closet Shelve
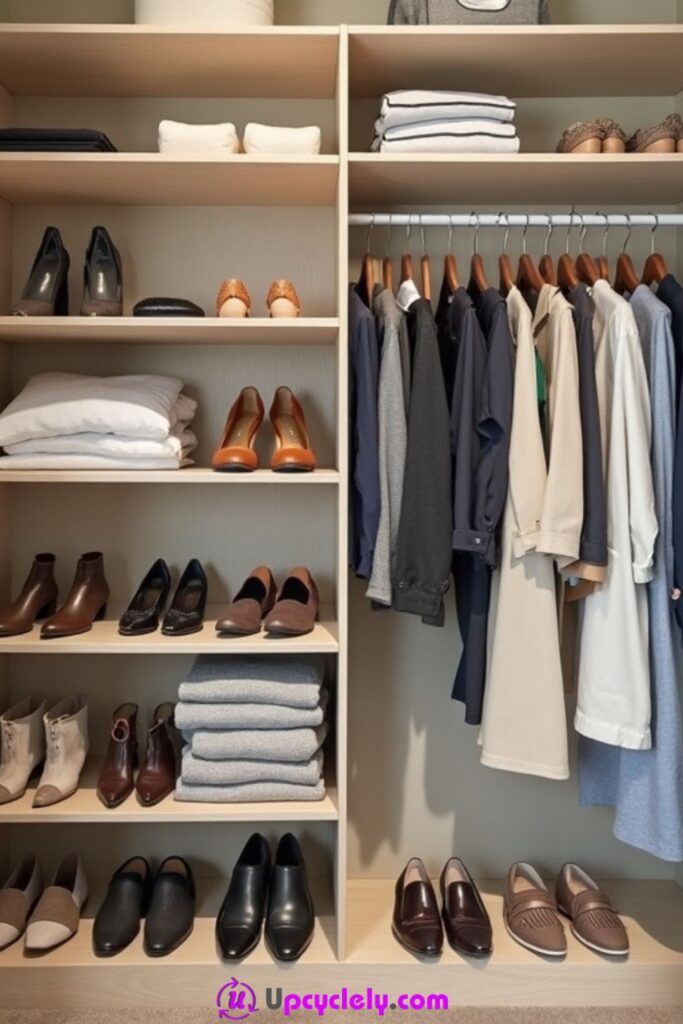
A space-saving shelf uses height and narrow gaps without making the closet difficult to enter. A slim vertical tower beside a hanging rod can hold shoes, folded clothing, and small baskets while preserving the central floor and keeping garments visible.
Narrow does not mean unstable. Tall shelf units need a secure base, sufficient wall connection, and spacing that prevents items from projecting into the doorway. A few well-proportioned shelves usually store more effectively than many shallow slots.
Materials and Tools
· Narrow shelf boards or a slim reclaimed cabinet unit
· Side panels or strong wall brackets
· Appropriate wall anchors and screws
· Level, tape measure, square, and drill
· Optional adjustable shelf pins
· Small baskets or shoe dividers
· Non-slip pads and edge trim
Steps for This Closet Shelf Project
1. Find the overlooked vertical strip. Measure beside the door, at the end of a clothes rod, or between existing units. Check door swing and shoulder clearance before using the gap. Choose a depth that holds the intended items without narrowing the entry route.
2. Build a stable narrow tower. Assemble side panels and shelves square, or install a closely supported wall system. Add a back brace or wall fixing so the unit cannot twist. Keep the lowest shelf raised enough for cleaning and protect exposed corners near the doorway.
3. Use varied shelf heights. Create low sections for shoes, medium sections for folded items, and one taller opening for a basket or bag. Avoid repeating tiny shelves simply to increase the count. Test the real items before fixing every position.
4. Keep the front line clear. Arrange belongings so nothing protrudes beyond the shelf edge into hanging clothes or the walkway. Use low dividers rather than deep bins where visibility matters. Review the tower after normal use and remove any category that repeatedly spills outward.
A practical detail I would not skip: A narrow unit feels larger when the contents stay behind one clean front line. Overhanging sleeves and shoes quickly undo the space-saving benefit.
Variation: A rotating or wheeled narrow cart may fit beside a wardrobe in a larger room, but it should not block a closet door or become a tipping risk.
Over-the-Door Storage Shelve
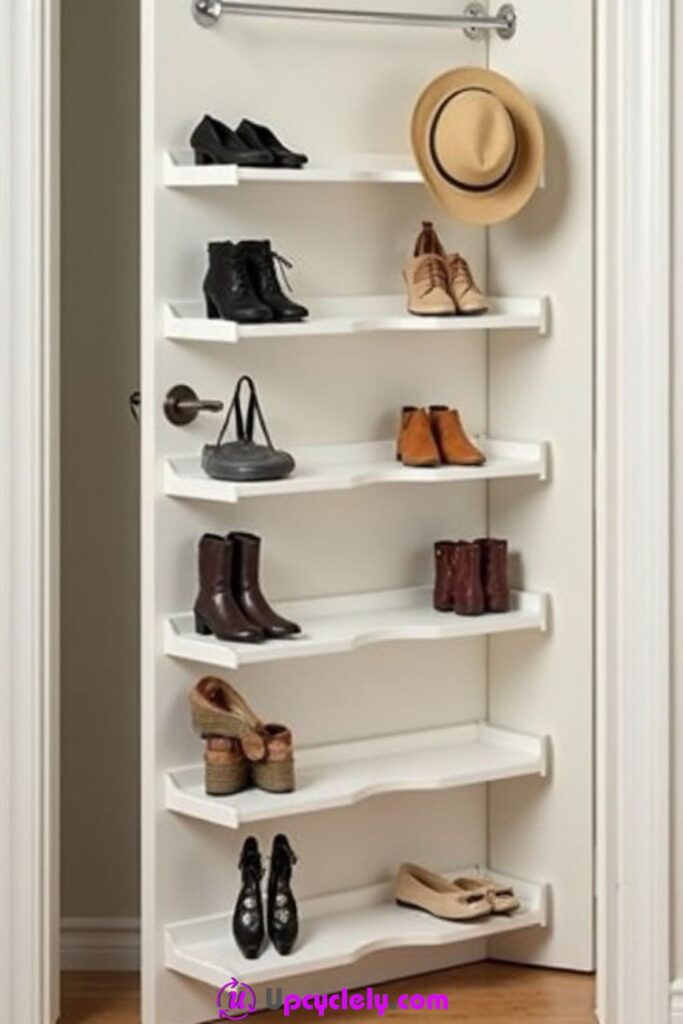
Over-the-door storage uses a surface that often remains empty. Shallow shelves or baskets can hold shoes, bags, scarves, and lightweight accessories without occupying the closet floor, making the idea useful in rentals and very small rooms.
The door still has to close, latch, and move without strain. The organiser should clear the top frame, hinges, handles, and wall behind the door. Heavy storage can distort a weak door or make it swing unexpectedly, so the contents need to remain light and evenly distributed.
Materials and Tools
· Commercial over-door frame or carefully made hanging support
· Shallow shelves, baskets, or fabric pockets
· Protective felt or rubber pads
· Lightweight containers and labels
· Tape measure and level
· Optional lower stabilising straps or hooks
· No sharp exposed fasteners
Steps for This Closet Shelf Project
1. Measure the complete door path. Check door thickness, top clearance, handle position, hinge side, and the wall or shelving behind the open door. Measure with the door moving through its full arc. Confirm that the organiser will not strike a switch, mirror, or adjacent furniture.
2. Prepare the hanging system. Use hooks or a frame designed for the door thickness and protect contact points with pads. If making a support, smooth every edge and avoid screws that could split or puncture the door. Add a lower stabiliser so the unit does not swing.
3. Fit shallow storage. Attach shelves or baskets with enough spacing for the chosen items while keeping the total projection modest. Place heavier lightweight items low and distribute the load across the width. Do not store glass, dense tools, or overfilled containers overhead.
4. Test opening and everyday use. Load the organiser gradually, then open and close the door several times. Listen for hinge strain and check that items remain contained. Move frequently used pieces to comfortable height and remove anything that makes the door difficult to control.
A practical detail I would not skip: The door should still feel like a door, not a loaded trolley. If it becomes difficult to stop or close, the organiser is carrying too much.
Variation: Use a fabric pocket organiser for scarves and accessories when rigid shelves would project too far into the room.
Pull-Out Shelf Ideas for Closets
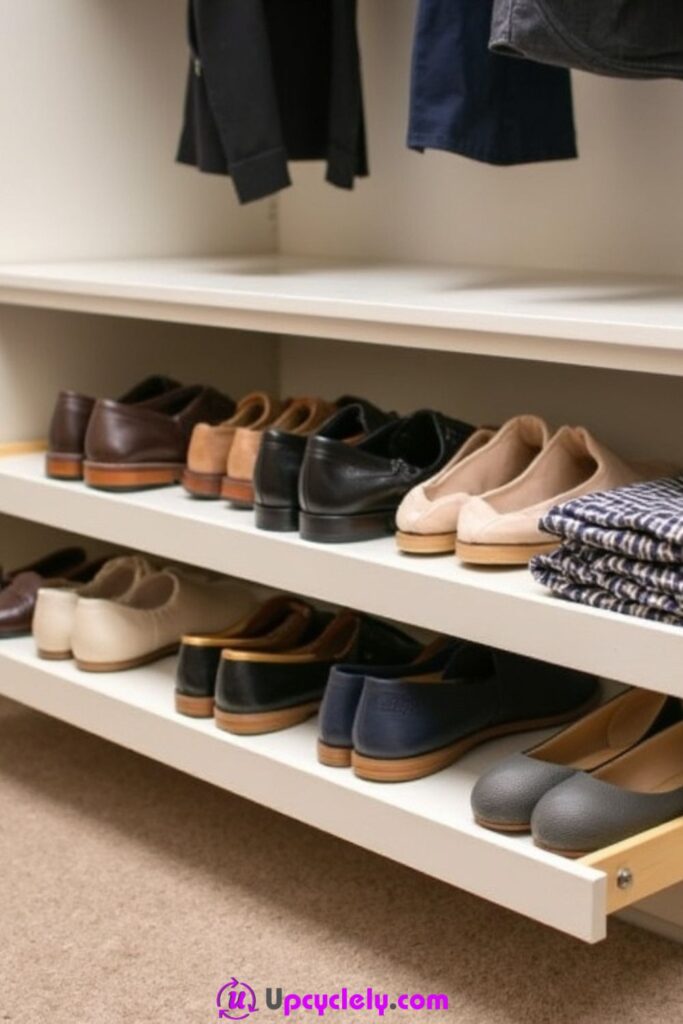
Pull-out shelves bring shoes, folded clothes, or baskets forward from a deep closet. They make the back of the storage visible and reduce kneeling or reaching, but the runners, shelf box, and surrounding cabinet must remain square for smooth movement.
A pull-out shelf also needs front clearance. It should not collide with closet doors, hanging garments, or handles on the opposite side. Full extension is helpful only when the extended shelf remains stable and the stored items cannot slide off.
Materials and Tools
· Sound shelf boards or shallow drawer boxes
· Drawer slides suited to the construction and intended load
· Mounting screws specified for the runners
· Cabinet sides, spacer blocks, or support frame
· Level, square, tape measure, drill, and clamps
· Low front and side edges
· Optional non-slip liner
Steps for This Closet Shelf Project
1. Confirm the opening and travel. Measure the cabinet opening at the front, middle, and back. Check door hinges and garment clearance along the full extension path. Decide whether the shelf needs full or partial extension and leave room for fingers at the front.
2. Build a rigid pull-out platform. Use a flat shelf with low sides or a shallow drawer box so items cannot fall during movement. Keep the assembly square and slightly narrower than the measured opening according to the runner requirements. Smooth all edges before fitting hardware.
3. Install the slides accurately. Mark both sides at matching height and use spacer blocks or a level to keep the runners parallel. Fix the cabinet members securely, then attach the shelf members as specified. Test empty movement before tightening every screw.
4. Load, balance, and adjust. Add items gradually and distribute them evenly rather than placing all weight at the extended front. Check that shoes, baskets, and folded stacks clear the opening. Adjust the runners or shelf edges if movement becomes stiff or objects shift.
A practical detail I would not skip: The first empty test can feel perfect, so I would always repeat it with the real contents before calling the project finished.
Variation: A reused shallow drawer can become the pull-out shelf if its base, joints, and dimensions remain sound and compatible with suitable runners.
PVC Pipe Closet Organization
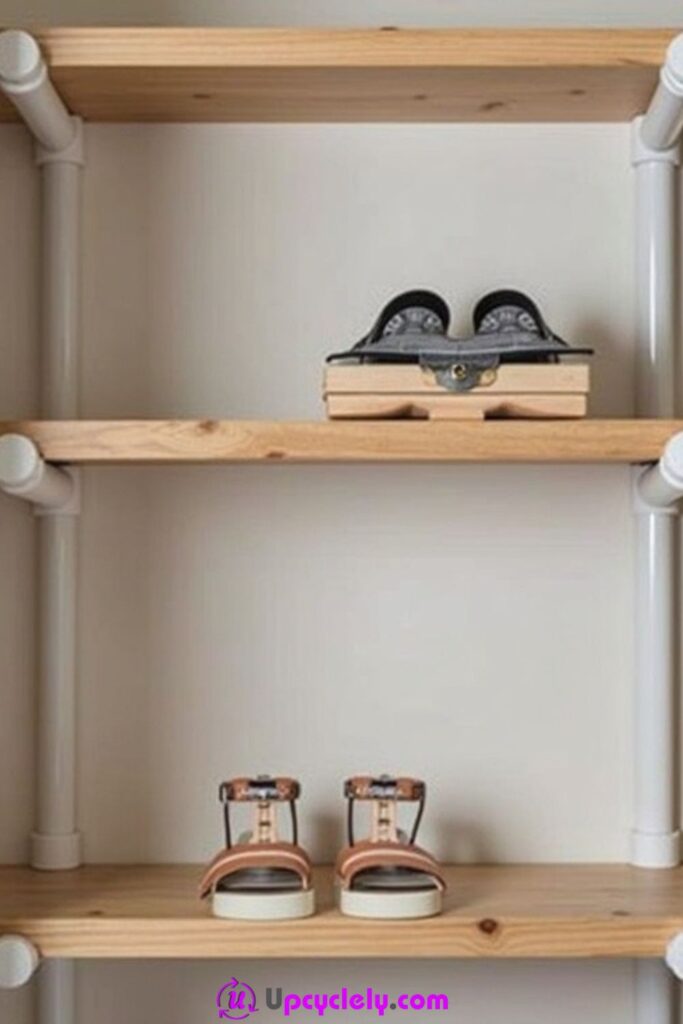
PVC pipe can form a lightweight framework, spacer, shoe cubby, or support element in a closet project. Its clean cylindrical shape suits simple modular layouts, but it should be used where the material and joints can safely handle the intended load.
A pipe-framed shelf needs accurate cuts and square assembly. Friction-fit joints may be useful for a temporary mock-up, while a permanent unit needs a connection method suitable for the chosen pipe. Cut edges must be smoothed, and the structure should not wobble when loaded.
Materials and Tools
· Clean reused or new PVC pipe of consistent diameter
· Compatible elbows, tees, and end caps
· Shelf boards or lightweight panels
· Pipe cutter or fine-tooth saw
· Measuring tape, square, marker, and level
· Appropriate adhesive or mechanical fixing if required
· Ventilation, gloves, and eye protection during cutting or bonding
Steps for This Closet Shelf Project
1. Choose a suitable function. Decide whether the pipe will support light shelves, divide shoes, or form a freestanding frame. Avoid assuming every diameter and joint can carry the same load. Keep heavy storage on a conventional supported shelf unless the frame has been properly designed for it.
2. Cut and dry-fit the frame. Measure each pipe section carefully and cut square ends. Remove burrs and dust, then assemble the full frame without permanent bonding. Check diagonals, shelf spacing, and door clearance while changes are still easy.
3. Secure the final structure. Mark joint orientation before disassembly. Use the connection method appropriate to the material and project, following ventilation and safety instructions for any adhesive. Add wall stabilisation or broad feet where needed so the unit cannot rack or tip.
4. Fit shelves and load lightly. Attach shelf boards so they cannot slide off the round supports. Add end caps and protect clothing from rough edges. Begin with shoes, small boxes, or folded light items, then watch the frame for movement before increasing the load.
A practical detail I would not skip: PVC looks simple, but small cutting errors multiply through the frame. Dry-fitting the whole unit is the part I would never skip.
Variation: Use short pipe sections as individual shoe or rolled-accessory cubbies inside an existing shelf box instead of building the entire support frame from pipe.
Small Closet Shelf Solution
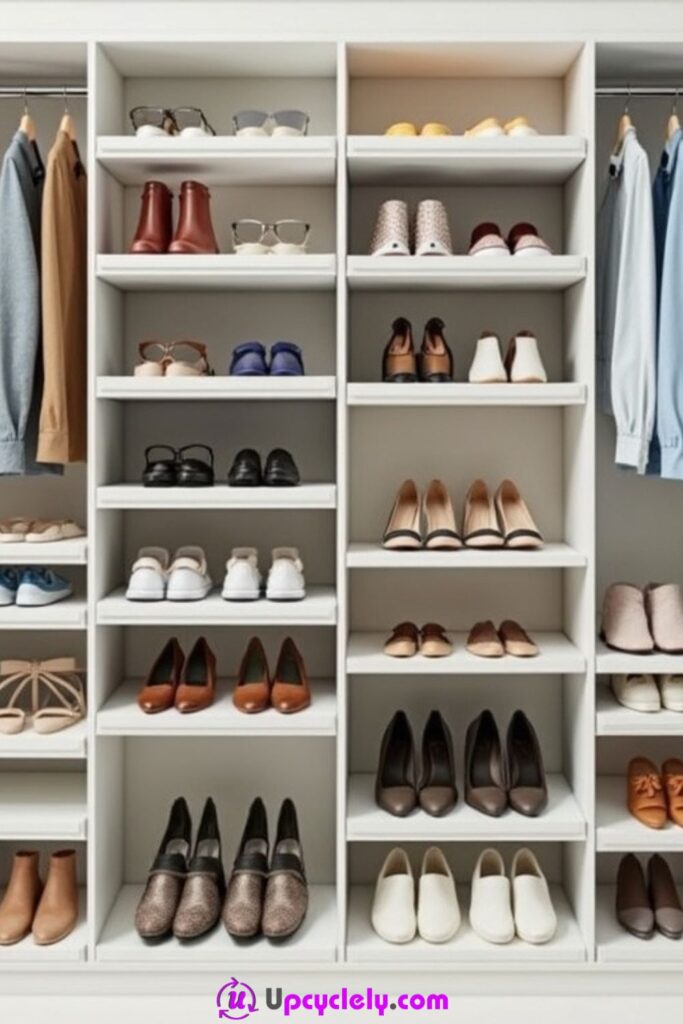
A small closet needs clear priorities. Dividing the space into one narrow shelf tower, one hanging area, and one low storage zone can make the contents easier to see without filling every wall with deep cabinetry.
The solution should protect movement through the doorway. Shelves near the front need rounded or covered edges, hanging clothes should not bury the shelf openings, and floor storage should remain removable for cleaning.
Materials and Tools
· Narrow shelf boards or a compact reused unit
· Closet rod and secure supports
· Wall brackets, cleats, or shelf standards
· Appropriate screws and anchors
· Level, tape measure, square, and drill
· Small baskets or dividers
· Edge trim or protective corner treatment
Steps for This Closet Shelf Project
1. Prioritise the daily wardrobe. Choose the clothes, shoes, and accessories used most often and design around those first. Move bulky seasonal items elsewhere if necessary. Measure the door opening and keep the main access route clear before adding any shelving.
2. Divide the height efficiently. Place shoes or a removable basket low, folded items in a narrow middle tower, and hanging clothes where they have uninterrupted drop space. Use the upper area for light seasonal storage. Avoid shelf depths that swallow the limited standing room.
3. Install compact supports. Use wall-mounted standards, a narrow secured unit, or short supported shelves that match the wall construction. Cover corners near the entry and test the clothes rod with real hangers. Add a centre support if the rod or shelf span requires it.
4. Keep the categories restrained. Use one basket for loose accessories rather than several tiny containers. Fold to the shelf depth and keep one empty space for laundry in transition. Review the closet monthly so unused items do not slowly take over the limited capacity.
A practical detail I would not skip: In a small closet, empty space is working space. I would protect enough room for hands, hangers, and baskets to move without a struggle.
Variation: Install a shallow shelf tower on only the back half of one wall, leaving the front area open for access and longer garments.
Wire Shelving for Closet Organization
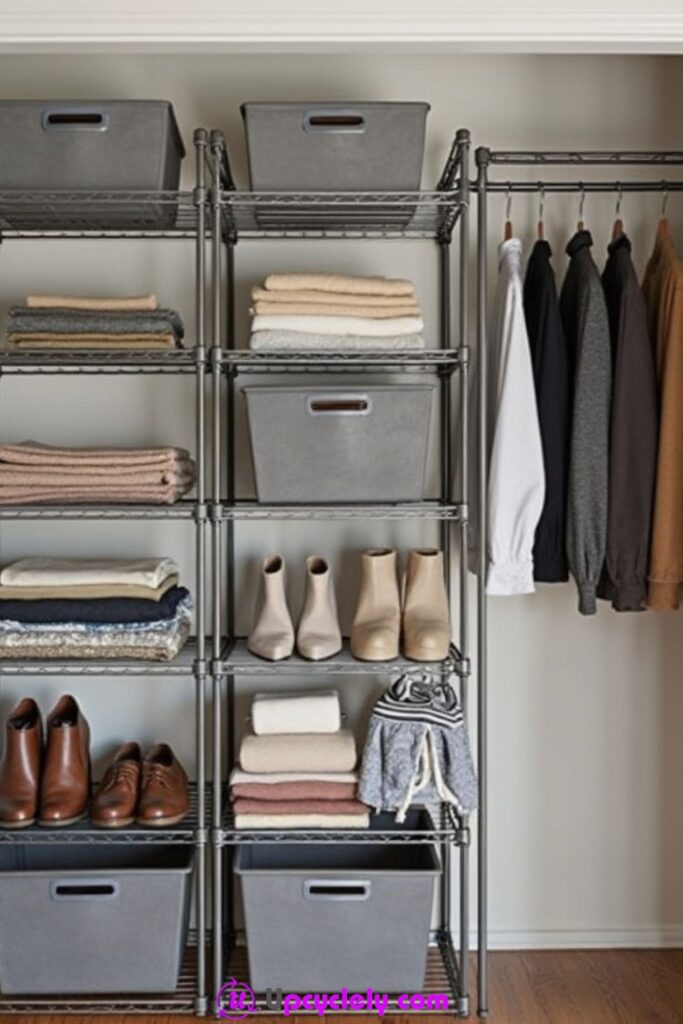
Wire shelving keeps the closet visually light and allows air to move around folded clothing and shoes. Adjustable wire systems can be practical in utility closets, shared wardrobes, and spaces where the layout may change, but small items and soft stacks need support so they do not sag through the gaps.
The wall clips, standards, brackets, and front support poles must all belong to a compatible system or be engineered to work together. Sharp cut ends need caps, and the shelf should remain level across the full run.
Materials and Tools
· Wire shelves in sound, rust-free condition
· Compatible standards, clips, brackets, and support poles
· Wall fixings suited to the wall construction
· End caps for cut wire
· Bolt cutters or suitable cutting tool where required
· Level, tape measure, drill, and eye protection
· Shelf liners or trays for small items
Steps for This Closet Shelf Project
1. Plan the shelf runs. Measure wall lengths and mark the intended shelf heights according to folded items, shoes, and hanging garments. Keep corners and door frames in mind. Follow the support spacing required by the shelving system rather than stretching one shelf across a long unsupported span.
2. Install the wall hardware. Mark level lines and fix the standards, clips, or back rail using suitable anchors. Add brackets and support poles where required. Check every component for full engagement before placing the wire shelf on top.
3. Cut and finish safely. If the shelf needs trimming, use the correct cutting tool and control the offcut. Smooth or cap every exposed wire end so clothing and hands cannot catch. Fit corner joins or end supports according to the system rather than improvising loose overlaps.
4. Add liners and organise. Use washable liners under small accessories, knitwear, or narrow shoe heels. Keep heavy items close to supports and avoid overfilling deep baskets. Periodically check clips, brackets, rust spots, and areas where the shelf has begun to flex.
A practical detail I would not skip: Wire shelving is easiest to live with when the liner is removable. Permanent coverings often trap dust where it is hardest to clean.
Variation: Reuse a sound freestanding wire rack inside a wide closet, stabilising it appropriately and adding labelled fabric bins for items that need privacy.
Tiered Closet Shelf Storage
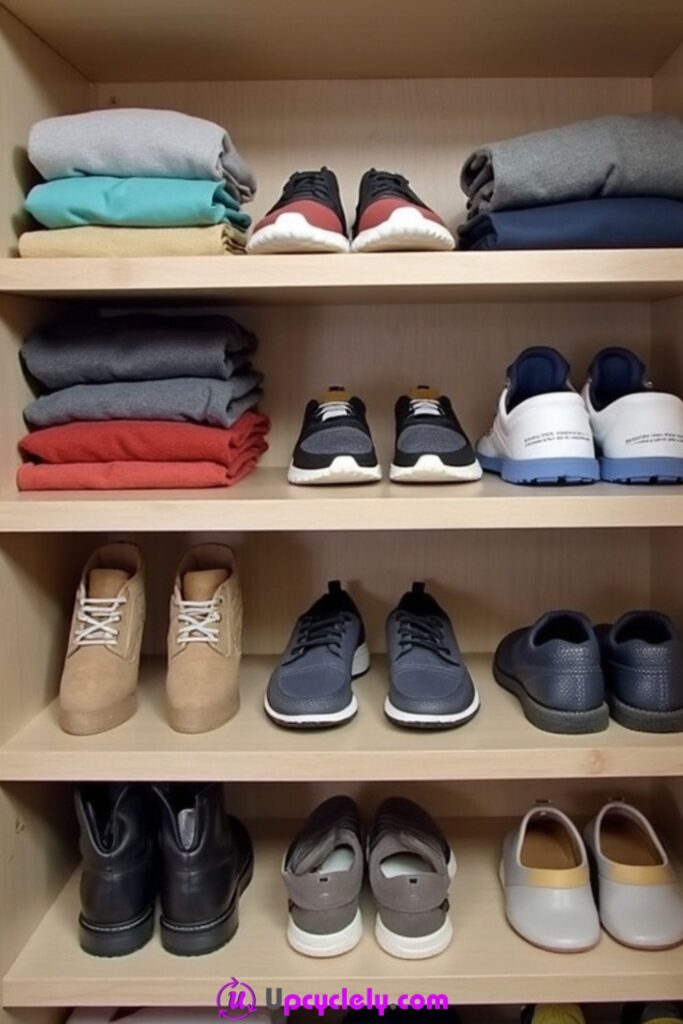
Tiered shelves improve visibility by lifting back rows above the items in front. They work especially well for shoes, small bags, folded accessories, and shallow boxes that would otherwise hide one another on a deep shelf.
The rise between tiers should be enough to reveal the back row without making the structure steep or unstable. Each level needs a firm base, and the front edge should not become a trip or snag point near the closet doorway.
Materials and Tools
· Shelf boards or sound reclaimed offcuts
· Timber risers, blocks, or a small stepped frame
· Screws and optional corner braces
· Non-slip liner or low front stops
· Level, square, tape measure, saw, and drill
· Sandpaper and edge finish
· Labels where boxes occupy the tiers
Steps for This Closet Shelf Project
1. Choose the items and viewing angle. Arrange the intended shoes or boxes on a flat surface and decide how much of the back row needs to remain visible. Measure the tallest front item and the closet opening. Keep the overall tier unit shallow enough to remove for cleaning if possible.
2. Build the stepped support. Cut risers or a small frame so each level remains square and evenly supported. Join the pieces securely and test the structure on a flat floor. Avoid balancing a back shelf on loose blocks that can shift when one item is removed.
3. Fit the shelf surfaces. Attach the tier boards with smooth front edges and add a low stop where objects may slide. Use non-slip liner under shoes or boxes. Check that the highest tier does not collide with the shelf above or the door frame during removal.
4. Arrange by height and frequency. Place taller or less-used items at the back and everyday items at the front. Keep pairs or categories together without covering the raised row. Lift the entire tier periodically to clean beneath it and inspect the joints.
A practical detail I would not skip: A tier should reveal the back row, not merely raise it. If the front items still hide everything, the spacing needs to change.
Variation: Use two sturdy reclaimed drawer boxes of different heights as removable tiers, adding non-slip pads and keeping their open sides accessible.
Wall-Mounted Closet Shelves
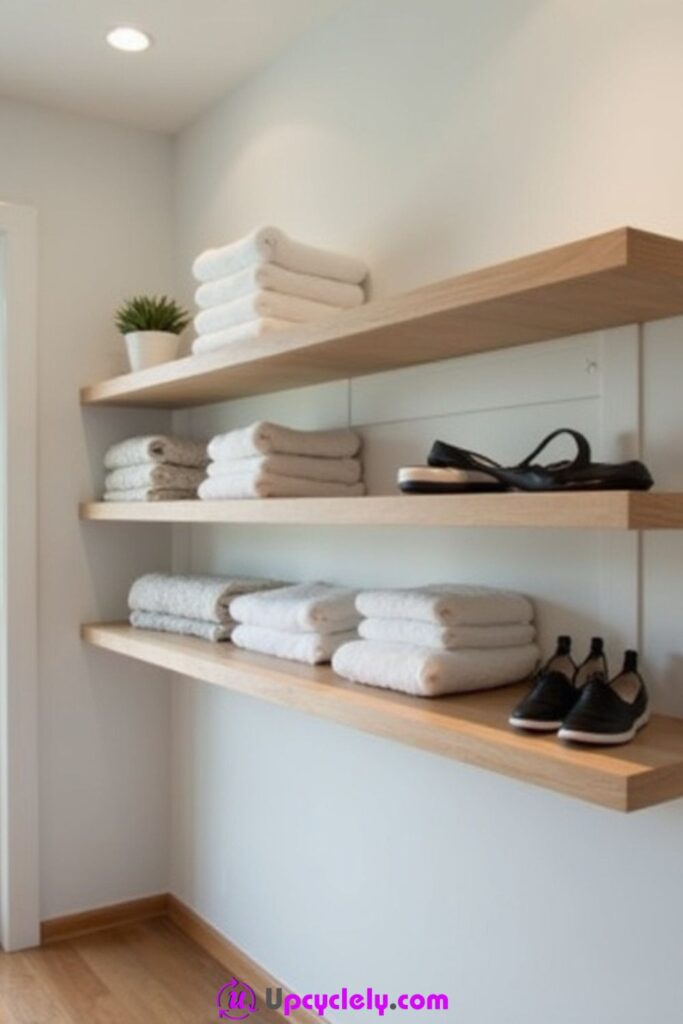
Wall-mounted shelves free the floor and can be fitted around an existing rod, dresser, or awkward corner. They suit folded linen, bags, shoes, and light containers, while the open space beneath remains available for cleaning or movable storage.
The wall connection is the project. Shelf material, brackets, anchors, and support spacing must work together, especially when shelves hold dense folded items or several pairs of shoes. Decorative brackets still need correct fixing points.
Materials and Tools
· Straight shelf boards or reused cabinet panels
· Brackets or continuous wall cleats
· Appropriate screws, plugs, or anchors
· Level, tape measure, square, and pencil
· Drill or driver and suitable bits
· Stud finder where appropriate
· Optional removable liner and edge trim
Steps for This Closet Shelf Project
1. Design around the wall and contents. Mark the shelf length, depth, and height while the closet is partly empty. Check the wall for utilities, uneven sections, and suitable fixing points. Keep enough vertical clearance to lift items off the shelf rather than sliding them through a narrow gap.
2. Prepare boards and supports. Cut boards square, smooth the edges, and reinforce thin panels where needed. Mark bracket positions according to the intended span and material. Use matching supports so the shelf remains level and the front edge does not twist.
3. Fix and test each shelf. Install the brackets or cleat with anchors suited to the wall. Place the shelf, secure it to the supports where appropriate, and press gently at several points to check movement. Test one shelf fully before repeating the spacing above it.
4. Load from low to high. Put heavier folded items and shoes on lower shelves and lighter baskets above. Keep objects inside the shelf edge and leave space for removal. Recheck fasteners after the first period of use and whenever the stored category changes significantly.
A practical detail I would not skip: I would install one shelf at a time and test the real contents. A paper plan cannot show how comfortably your hands will reach between the finished levels.
Variation: Run short wall-mounted shelves around only one corner of the closet, leaving the remaining wall open for hooks, a mirror, or long hanging clothes.
Closet Shelf Planning Choices That Create Sagging, Cluttered, or Hard-to-Reach Storage
Installing shelves before measuring the contents. Repeated equal spacing often wastes height above shoes and compresses baskets or folded stacks. Measure the real items and test the proposed gaps before fixing every support.
Using weak reclaimed boards across long spans. A board may look straight while empty and bow after several weeks of folded clothing. Shorten the span, add a centre bracket, reinforce the front edge, or choose a thicker sound panel.
Choosing wall fixings by convenience. The shelf system is only as reliable as its connection to the wall. Identify the wall construction and use fixings suitable for both the substrate and the intended load.
Making shelves too deep. Deep shelves can hide small items and make rear containers difficult to lift. Use shallower storage, pull-outs, tiers, or labelled baskets where the full depth cannot be reached comfortably.
Filling every gap with a container. Too many boxes create extra steps and leave no room for laundry in transition. Keep some open shelf space and use containers only where they genuinely control loose items.
Ignoring doors, hinges, and hanging clothes. A shelf may fit the empty wall but block a door, crush garments, or prevent a drawer from opening. Test the complete movement path before installation.
Putting heavy items above comfortable reach. High shelves are better for light seasonal belongings. Dense boxes, appliances, or large luggage should remain low enough to lift safely and without disturbing hanging clothes.
Skipping edge finishing and snag checks. Rough timber, exposed composite board, cut wire, and projecting screws can damage clothes or hands. Smooth, cap, cover, or reposition every exposed edge before loading the closet.
Designing for appearance rather than the return routine. A closet only stays organised when items can be put away quickly. Broad categories, visible labels, and adequate clearance usually outperform tightly styled displays.
Frequently Asked Questions
How deep should closet shelves be?
The useful depth depends on what will be stored and how easily the back can be reached. Folded clothes, shoes, baskets, and luggage need different depths, so measure the real items and avoid making every shelf as deep as the closet.
Can I reuse old bookcase shelves in a closet?
Yes, when the boards remain flat, dry, and structurally sound. Remove damaged edge banding, check old screw holes, and add suitable support rather than assuming the previous span will work in the new location.
Do closet shelves need to be attached to wall studs?
Some systems attach to studs, while others use anchors designed for masonry, plasterboard, or other wall construction. The correct method depends on the wall, hardware, shelf design, and intended load, so follow the fixing requirements rather than using one method everywhere.
What should go on the highest closet shelf?
Light, infrequently used, and clearly labelled items are usually the most practical choice. Avoid dense boxes or loose objects that are difficult to control while reaching overhead.
How can I stop long shelves from sagging?
Use a suitable board thickness, reduce the unsupported span, add intermediate brackets or a centre divider, and keep heavy items near supports. A front edge strip may add stiffness to some designs, but it does not replace correct structural support.
Are open shelves or baskets better?
Open shelves make folded clothes and shoes easy to see, while baskets contain small or visually busy categories. Many closets work best with both: open space for daily items and baskets for accessories or seasonal belongings.
How do I make a rental closet more organised without major drilling?
Use stabilised freestanding shelf towers, over-the-door organisers, removable dividers, baskets, and tension-based products used according to their instructions. Avoid overloaded temporary supports, and confirm any fixing or alteration with the property rules.
How often should I review the closet layout?
Review it when seasons change, when a category repeatedly overflows, or when items become difficult to return. Small adjustments to shelf height, basket location, and categories are usually more effective than waiting for a complete reorganisation.
Build Closet Shelves Around the Way You Actually Get Dressed
The most useful closet shelf ideas begin with honest measurements and ordinary habits. A basket system may suit accessories, adjustable shelves may support a changing wardrobe, and a narrow tower may solve a small closet better than a full wall of cabinetry. Reclaimed boards, crates, drawers, wire racks, and modular units can all be useful when they remain sound and receive proper support.
Choose one area that causes daily frustration and improve that first. A single shoe shelf, a properly supported overhead board, or one labelled basket zone can make the whole closet easier to manage. Which part of your closet would benefit most from a shelf that finally fits the items you already own?