Old work uniforms often remain in the wardrobe because they feel too useful to throw away but too specific to wear anywhere else. A scrub top may still have strong fabric, chef trousers may contain several practical pockets, and a retired hi-vis shirt may be worn at the collar while its lower panels remain perfectly usable.
I think the best use depends on what the uniform has been through. Clean everyday workwear can become bags, cushions, aprons, or keepsakes. Protective clothing exposed to chemicals, lead, biological material, heavy oils, or other workplace hazards should not quietly move onto the craft table.
The logo matters as well. An old company name, staff number, embroidered badge, access patch, or role title may need to be removed before the fabric is reused. Some employers require uniforms to be returned, so check the workplace policy before cutting anything.
I don’t think every garment needs to become a sentimental object. A uniform can be remembered through a carefully placed pocket or embroidered name panel, while the rest of the fabric becomes something practical enough to use every week.
Clear the Uniform for Safe and Responsible Reuse
Begin by deciding whether the uniform genuinely belongs to you. Return employer-owned garments, access cards, security badges, removable insignia, and specialist protective items according to workplace instructions.
Do not bring a potentially contaminated garment into the home simply because it looks clean. Chemicals and other hazardous materials can travel home on work clothing, and official workplace guidance warns that contaminated protective clothing may require employer-managed or professional cleaning rather than ordinary home laundering.
Set aside uniforms used around:
- Lead, asbestos, pesticides, or industrial chemicals
- Blood or potentially infectious body fluids
- Heavy grease or unknown residues
- Fire, heat, or electrical hazards
- Hazardous dust
- Paints, solvents, or laboratory substances
- Controlled or secure work environments
Protective equipment should remain within the employer’s approved disposal or recycling route. A retired flame-resistant jacket, respirator component, reflective safety garment, or chemical-resistant uniform should not be converted casually into children’s items, pet bedding, kitchen textiles, or clothing.
For ordinary clean uniforms, inspect:
- Fabric thinning
- Torn seams
- Permanent stains
- Broken zips
- Missing buttons
- Stretched elastic
- Reflective strips
- Reinforced knees
- Useful pockets
- Embroidery and logos
- Name labels
- Metal fasteners
- Areas damaged by repeated washing
Remove confidential or identifying details. Unpick embroidered names when practical, cut out access patches, remove ID windows, and cover branding that should no longer appear in public.
Wash the uniform according to its care label and dry it completely before storing or cutting it. Press only at a temperature suitable for the fabric, particularly when synthetic fibres, reflective tape, waterproof coatings, or heat-applied logos are present.
Useful Materials and Tools
- Clean, decommissioned work uniforms
- Seam ripper
- Fabric scissors
- Rotary cutter and cutting mat
- Measuring tape
- Tailor’s chalk
- Sewing clips
- Pins
- Strong polyester thread
- Sewing machine
- Hand-sewing needle
- Universal, denim, or ballpoint machine needle as appropriate
- Zip
- Cotton or polyester lining
- Fusible interfacing
- Bag webbing
- Cushion insert
- Toy stuffing
- Paper for patterns
- Strong canvas scraps
- Reclaimed buckles and fasteners
- Replacement elastic
- Optional reflective offcuts
- Iron and pressing cloth
Remove badges, access devices, sharp fasteners, and confidential information before reuse. Keep scissors, needles, zips, buttons, and small uniform fittings away from young children and pets.
Turn Hospital-Uniform Trousers Into Toiletry Bags
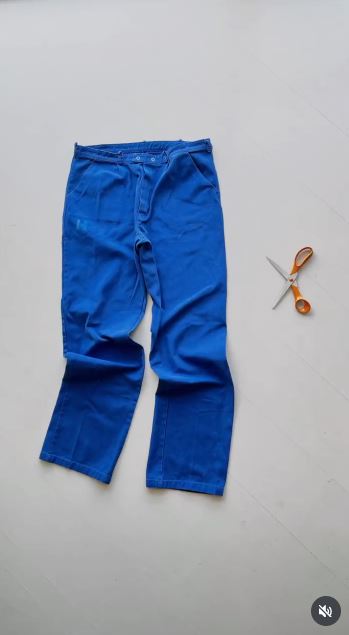
Hospital trousers often provide larger uninterrupted panels than scrub tops. The selected project transforms retired blue uniform trousers into functional toiletry bags, using the existing fabric for a small item that can be washed and carried regularly.
Only use scrubs or hospital uniforms that have been properly decommissioned, cleaned, and confirmed suitable for personal reuse. Clothing contaminated with blood or other potentially infectious materials needs appropriate workplace handling, not a normal craft wash.
Materials and Tools
- Clean uniform trousers
- Cotton or water-resistant lining fabric
- Zip
- Medium-weight interfacing
- Fabric scissors
- Sewing machine
- Strong thread
- Clips
- Optional webbing loop
- Optional original pocket
Sew the Wash Bag in Five Steps
- Choose the strongest trouser sections. Open the inner-leg seams and lay the fabric flat without stretching it. Avoid worn knees, frayed hems, stained areas, and sections that have become thin after repeated washing.
- Cut the outer and lining panels. Use a simple rectangular pouch pattern and add the required seam allowance. Apply interfacing to the outer panels when the uniform fabric feels too soft to hold the finished shape.
- Install the zip. Place one outer panel and one lining panel on opposite sides of the zip tape, sew the seam, and repeat with the second side. Keep the fabric clear of the zip teeth and press it carefully according to the uniform’s fibre content.
- Form the bag. Open the zip partly, then sew the outer pieces together and the lining pieces together. Box the lower corners if you want a wider base, and leave a turning gap in the lining.
- Turn and inspect the pouch. Pull the bag through the opening, close the lining seam, and test the zip several times. Reinforce the ends and add a small webbing loop only after the shape sits correctly.
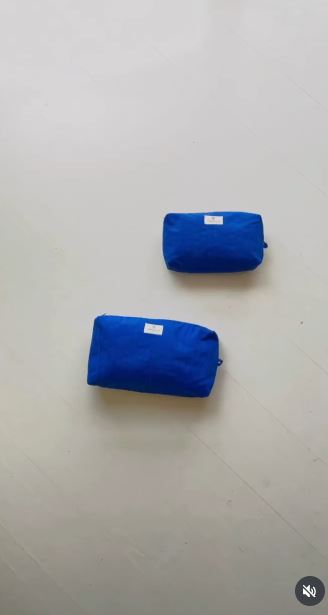
The original trouser pocket can become an external compartment, but I’d use only one. Several layered pockets can make a small toiletry bag unnecessarily bulky.
A shorter zip creates a pencil case or tool pouch. Leftover panels can become cord organisers, luggage tags, or small washable storage bags.
Sew Patchwork Cushion Covers From Hospital Uniforms
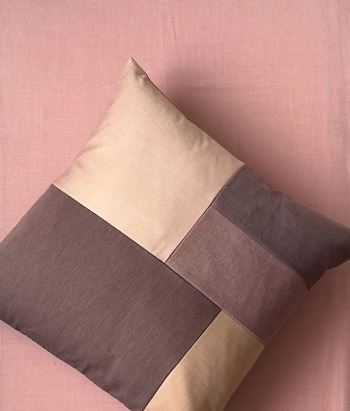
Patchwork cushions suit uniforms with localised wear because each usable area can be cut into a smaller shape. The selected project combines hospital-uniform fabric into patchwork cushion covers, preserving the recognisable colour without keeping the garment’s original form.
Firm woven scrubs can be joined directly, while very lightweight or stretchy fabric may need interfacing. Mixing several uniforms works best when their weights and washing needs are reasonably similar.
Materials and Tools
- Clean uniform tops or trousers
- Paper square or geometric template
- Fabric scissors or rotary cutter
- Lightweight interfacing
- Sewing machine
- Polyester thread
- Ruler
- Cushion backing fabric
- Zip, buttons, or envelope closure
- Cushion insert
Make the Cushion Cover in Five Steps
- Map the usable cloth. Cut away collars, thick waistbands, damaged elbows, worn knees, and bulky seams. Keep pockets, embroidered dates, or plain colour panels only when they support the final design.
- Cut a consistent patch set. Use one template or a carefully planned group of shapes. Mark the grain or stretch direction so neighbouring pieces do not pull against each other after sewing.
- Join the patchwork face. Sew small units into rows, press the seams in a controlled direction, and then connect the rows. Add lightweight interfacing behind the completed panel when the uniform fabric feels unstable.
- Prepare the cushion back. Choose a zip, button, or envelope opening that allows the cover to be removed for cleaning. Use a plain reclaimed sheet or stronger fabric when there is not enough uniform material for the back.
- Complete and test the cover. Join the front and back, trim bulky seam intersections, and turn the cover right side out. Insert the cushion and check that no weak patch sits under heavy tension.
For me, the strongest design usually repeats one colour in several places. Patchwork can look considered without every square being a different shade.
A smaller patchwork panel can sit in the centre of an otherwise plain cushion. You could also use the same method for a seat pad, lap blanket, or fabric storage box.
Preserve a Nursing Uniform as a Memory Bear
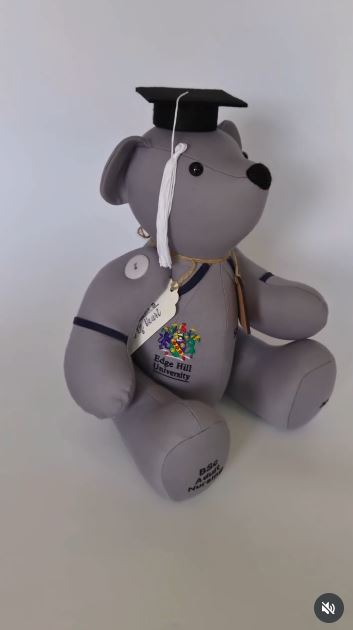
A memory bear can preserve a student nurse uniform, retirement tunic, work shirt, or another garment connected to an important stage of life. The selected project transforms a nursing uniform into a handmade bear that retains the colour and identity of the original workwear.
This is a keepsake rather than an ordinary soft toy unless it has been constructed and tested specifically for play. Buttons, embroidered badges, zips, and small accessories may not be suitable for babies or young children.
Materials and Tools
- Clean uniform
- Memory-bear sewing pattern
- Paper and pencil
- Fabric scissors
- Fusible interfacing
- Sewing machine
- Strong thread
- Polyester stuffing
- Embroidery thread
- Safety eyes only when appropriate
- Hand-sewing needle
- Optional pocket or name panel
Construct the Keepsake in Five Steps
- Choose the details worth preserving. Decide whether the bear should include a pocket, coloured trim, embroidered name, sleeve cuff, or date label. Photograph the complete uniform before cutting it.
- Stabilise the fabric. Press the garment carefully and apply interfacing to lightweight, stretchy, or frequently washed sections. Test the interfacing on an offcut because heat may affect synthetic workwear.
- Position and cut the pattern. Arrange the body pieces around the strongest fabric and centre important details deliberately. Mark every notch before lifting the pattern from the cloth.
- Sew and stuff the bear. Join the curved seams slowly, clip only where the pattern requires it, and turn the pieces carefully. Add stuffing in small amounts so the limbs remain even rather than hard and distorted.
- Close and personalise the keepsake. Ladder-stitch the opening and add embroidered facial details or a securely attached label. Inspect every seam and decorative element before display or handling.
I know it can feel tempting to fit every badge and pocket onto one bear, but the keepsake still needs a clear shape. One or two recognisable details often say more than a crowded collection of uniform parts.
A memory cushion is simpler for beginners. Smaller scraps can become a heart ornament, framed textile panel, or fabric-covered memory book.
Convert Redundant Workwear Into a Duffle Bag
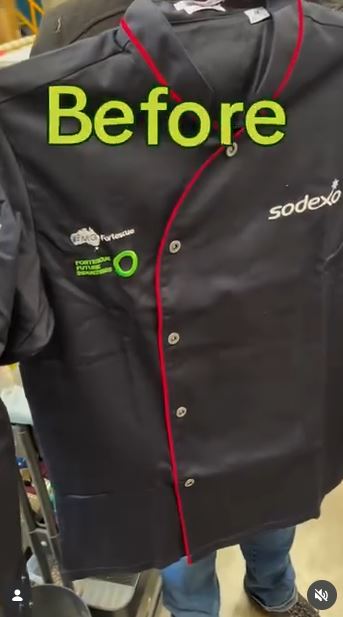
A duffle bag is useful when several uniforms or large workwear garments are available. The selected project shows redundant uniforms being transformed into duffle bags, making use of fabric that was originally designed for repeated wear.
This is a more involved project because the bag needs a strong zip, balanced handles, lining, reinforced seams, and a stable base. Avoid relying on worn fabric simply because the original garment once felt heavy.
Materials and Tools
- Two or more clean workwear garments
- Duffle-bag pattern
- Strong lining
- Heavy zip
- Webbing
- Interfacing or bag stabiliser
- Sewing machine capable of handling the layers
- Suitable machine needle
- Strong polyester thread
- Clips
- Optional reclaimed pockets
- Optional base board
Make the Duffle in Five Steps
- Sort the fabric by strength. Use sound trouser legs, jacket backs, and shirt panels for the main body. Reserve lighter fabric for internal pockets and avoid elbows, knees, cuffs, and faded areas that have lost strength.
- Plan the colour blocks and branding. Arrange the panels before cutting and decide whether any logo can legally and appropriately remain. Remove staff names, security markings, and branding that should not appear on a personal bag.
- Build the outer shell. Join smaller panels into the required pattern pieces, apply stabiliser, and attach pockets before assembling the main body. Reinforce every point where a handle or shoulder strap will pull against the fabric.
- Add the zip and lining. Install the zip evenly across the opening and include internal pockets if useful. Keep the lining slightly smaller than the outer bag so it does not bunch inside.
- Finish and load-test the bag. Attach the handles through reinforced sections, close the turning opening, and inspect every seam. Begin with light contents and increase the weight gradually while watching the handle attachments and base.
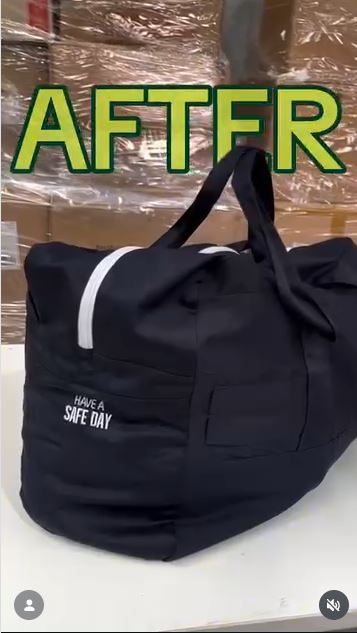
For me, one visible original pocket or seam is enough to show where the fabric came from. Leaving every old pocket in place can make the bag heavy before anything has been packed inside.
A simpler rectangular holdall needs fewer curved pieces. Smaller uniform collections can become a laptop sleeve, lunch bag, or reinforced tote instead.
Where Uniform Upcycles Become Unsafe, Awkward, or Misleading
Reusing Contaminated Workwear
Clothing exposed to hazardous chemicals, lead, biological material, or industrial dust should follow workplace decontamination and disposal procedures. Contaminated protective clothing should not be brought home casually for laundering or crafts.
Cutting Employer-Owned Uniforms
Some uniforms remain company property after employment ends. Confirm ownership and return requirements before removing logos or cutting fabric.
Leaving Names and Security Details Visible
Employee names, ID windows, access patches, facility details, and official insignia can create privacy or security concerns. Remove them before donation, sale, photography, or public use.
Treating Retired PPE as Ordinary Fabric
Flame-resistant, chemical-resistant, medical, military, and high-visibility garments may have specialised coatings or controlled disposal routes. A craft made from retired PPE does not retain its original certification or protective function.
Sewing Through Weak Areas
The knees, elbows, seat, cuffs, and underarms may look usable but fail under tension. Cut pattern pieces from the strongest fabric and reinforce load-bearing seams.
Mixing Fabrics That Behave Differently
A stretchy scrub knit and rigid work trouser fabric may pull against each other. Stabilise lighter cloth and match washing requirements before joining panels.
Keeping Too Many Original Details
Pockets, zips, reflective strips, badges, and seams can add character, but preserving all of them may make the new item heavy or awkward. Choose details that support the new function.
Making Children’s Items With Small Uniform Parts
Buttons, zips, metal clips, badges, and reflective fragments may become choking or scratching hazards. Memory bears and cushions should be treated as display keepsakes unless designed specifically for safe play.
Ignoring the New Washing Method
The project may combine several fabrics, linings, adhesives, and fasteners. Follow the care needs of the most delicate component rather than assuming the old uniform’s washing cycle still applies.
Frequently Asked Questions
Can I donate an old uniform with a company logo?
Ask the employer first. Some organisations allow clean uniforms to be donated after branding and identification are removed, while others require all garments to be returned or destroyed through an approved route.
Are old scrubs safe for craft projects?
Ordinary clean scrubs may be suitable once properly decommissioned and washed. Scrubs or protective clothing contaminated with blood, body fluids, chemicals, or hazardous materials need appropriate workplace handling.
What is the easiest uniform upcycle for a beginner?
A simple cushion cover, zip pouch, or waist apron is easier than a structured duffle bag or memory bear. Begin with a garment made from stable woven fabric.
Can reflective strips be reused?
They can remain as decorative features on a bag or pouch when clean and sound. Do not claim that the finished craft is certified safety equipment or rely on it for required visibility.
How can I remove an embroidered company logo?
Small embroidery may be unpicked carefully from the reverse with a seam ripper. Dense stitching can leave holes, so another option is to cut around it, cover it with a new patch, or exclude the panel.
What can I do with very small uniform scraps?
Use them for patchwork, zip tabs, pocket linings, cord wraps, textile art, labels, or stuffing for non-washable decorative items. Avoid stuffing children’s toys with loose fabric scraps unless the design and construction are suitable.
Can I sell items made from company uniforms?
Check ownership, branding, trademark, privacy, and workplace requirements before selling. Remove names, access information, and official-looking insignia that could make the item misleading.
Let the Uniform Work in a Different Way
Deciding what to do with old work uniforms begins with separating ordinary reusable fabric from clothing that still carries workplace responsibilities.
A clean pair of hospital trousers can become toiletry bags. Scrub panels can form a patchwork cushion, while a nursing uniform can preserve a graduation or retirement inside a memory bear. Hi-vis fabric suits a boot bag, chef clothing can become a tool apron, and a larger collection of redundant workwear can support a structured duffle.
Begin with one garment that you own, that has been properly decommissioned, and that is safe to handle. Remove the identity details, wash it according to its care label, and choose the strongest sections before making the first cut.
Which old work uniform would you reuse first: scrubs, chef clothing, hi-vis workwear, an office shirt, or a heavy work jacket?