Old yearbooks are difficult to treat like ordinary unwanted books. They contain familiar faces, handwritten messages, school events, forgotten hairstyles, and small details that may become more meaningful as the years pass. Even a thrifted yearbook can hold striking photographs, typography, illustrations, and bits of social history.
I don’t think every old yearbook should automatically be cut apart. A signed personal copy may deserve careful storage, while a duplicate or inexpensive secondhand yearbook can become an altered sketchbook, star book, paper portrait collection, collage journal, or handmade zine.
The sensible first step is deciding which memories must remain intact. Scan meaningful pages, set aside photographs you would regret losing, and check whether the school, local archive, or another family member needs the book before making permanent cuts.
Once that decision has been made, the pages offer more than background paper. Portraits can become characters in new artwork, captions can add humour to collage, and the original covers can support another generation of drawing and writing.
Decide What Must Be Preserved Before You Cut a Page
Look through the complete yearbook before removing anything. Pay particular attention to signatures, handwritten messages, folded notes, loose photographs, class lists, and pages connected to people your family still remembers.
Separate yearbooks into three groups:
- Personal copies that should remain intact
- Duplicate or damaged copies suitable for selective reuse
- Thrifted yearbooks with no direct family connection
- Books that may have value to a school, library, or historical group
- Volumes that need digitising before physical alteration
Scan or photograph important pages before cutting them. The Library of Congress recommends cleaning the scanner surface, creating a high-quality master file, and keeping separate working copies for editing or sharing. It also advises keeping digital files in more than one storage location.
A yearbook does not need to lie completely flat on a scanner. Pressing an old binding aggressively can damage the spine or loosen pages. Support the open book and capture one page at a time when the binding feels tight.
Yearbooks that remain intact should be protected from strong light, damp storage, and unsupported shelving. The Library of Congress recommends supporting bindings and pages during handling and using suitable archival storage when a volume is fragile.
I know it can feel efficient to choose the most striking photograph and begin cutting immediately, but the reverse side may contain an autograph or another image you care about. Check both sides first. Then mark the pages that are genuinely available for crafting.
Useful Materials and Tools
- Duplicate, damaged, or thrifted yearbooks
- Scanner or camera
- Clean lint-free cloth
- Cutting mat
- Craft knife
- Paper scissors
- Metal ruler
- Bone folder
- Pencil
- Eraser
- Archival-quality envelopes
- Acid-free paper
- Glue stick
- Bookbinding adhesive
- Double-sided tape
- Cardstock
- Scrap paper
- Bookbinding needle
- Waxed thread
- Awl
- Bulldog clips
- Decorative tape
- Paint markers
- Coloured pencils
- Gel-print papers
- Old envelopes and packaging
- Small photo corners
- Blank drawing paper
- Lightweight book board
Keep craft knives, awls, needles, loose blades, and small paper fasteners away from children and pets. Protect personal names, addresses, telephone numbers, and handwritten information before sharing yearbook projects publicly.
Turn an Old College Yearbook Into an Altered Sketchbook
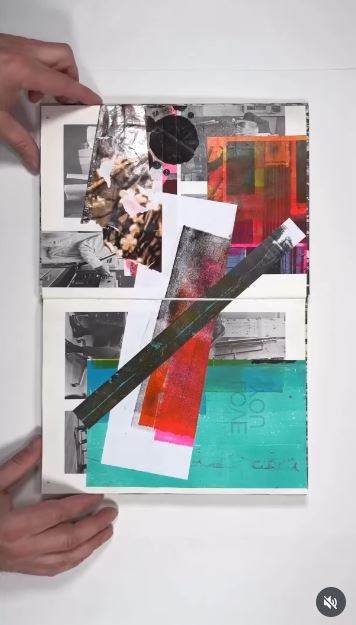
An altered sketchbook keeps the yearbook’s binding and many of its original pages while giving the book a completely different daily purpose. The selected project transforms an old college yearbook into a working sketchbook rather than dismantling it into loose scraps.
Printed portraits, class headings, and captions can remain partly visible beneath drawing, paint, and collage. That interaction between the old page and new work is what makes the book more interesting than a plain notebook.
Materials and Tools
- Old yearbook with a sound binding
- Glue stick
- Lightweight collage papers
- Gesso or matte acrylic paint
- Paintbrush
- Coloured pencils
- Paint markers
- Drawing pens
- Scrap paper
- Bulldog clips
- Craft knife and cutting mat
Create the Altered Sketchbook in Five Steps
- Test the binding and page strength. Open the book gently and identify loose signatures, cracked hinges, or brittle paper. Repair only what you can safely stabilise, and avoid forcing a tight spine flat.
- Create space for added materials. Remove a limited number of page pairs throughout the book rather than cutting a large block from one section. This gives collage and paint somewhere to expand without making the covers bulge.
- Prepare selected page surfaces. Apply a thin layer of gesso or pale paint where you want to soften the printed content. Leave some photographs, names, borders, or headings visible so the original yearbook still contributes to the artwork.
- Add drawing and collage gradually. Work across one spread at a time and use lightweight papers. Let wet media dry before closing the book, then place scrap paper between pages if anything still feels tacky.
- Strengthen the finished sketchbook. Trim loose paper edges, reinforce lifted collage pieces, and add a simple closure only if the book needs one. Keep thick objects, metal pieces, and heavy embellishments away from the binding.
For me, the printed page should not disappear completely. A face peeking through a painted background or an old caption becoming part of a new sentence gives the sketchbook its character.
A beginner can begin with dry materials such as pencil, coloured pencil, and paper collage. A heavily damaged yearbook may be disbound and used as individual sketchbook sheets instead.
Fold Yearbook Pages Into a Layered Star Book
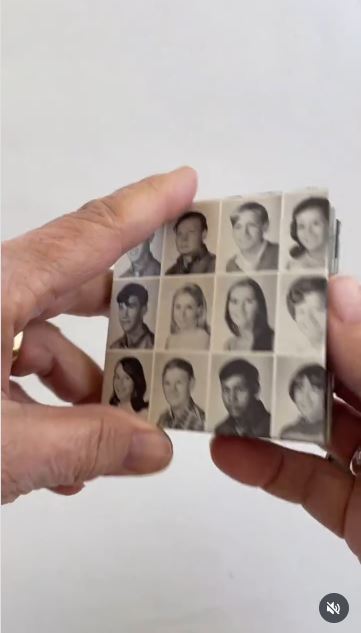
A star book turns flat paper into a dimensional object that can open for display and fold closed for storage. The selected project uses pages from old yearbooks to create the layers of a collage-style star book.
This method suits pages with strong portrait groupings, large headings, school illustrations, or handwritten notes from a duplicate copy. The book can honour one graduating class, one friendship group, or a mixture of anonymous vintage photographs.
Materials and Tools
- Yearbook pages
- Cardstock
- Lightweight decorative paper
- Metal ruler
- Craft knife
- Cutting mat
- Bone folder
- Glue stick or bookbinding adhesive
- Ribbon
- Clips
- Two cover boards
- Decorative paper for covers
Assemble the Star Book in Five Steps
- Select pages with a shared theme. Choose portraits, sports photographs, class titles, or repeated colours. Scan anything meaningful before cutting, and check both sides of every page.
- Cut repeated paper sections. Prepare several sets of rectangles or squares in graduated sizes. Keep the measurements consistent so each folded unit opens at the same angle.
- Fold and join each layered unit. Score the paper before folding to reduce cracked edges. Attach the smaller layer inside the larger one, leaving the central folds free enough to expand.
- Connect the units into an accordion. Glue the back of one folded section to the next, maintaining the same orientation throughout. Then test the structure before attaching the covers.
- Add covers and a closure. Fix sturdy boards to the outer sections and attach ribbon so the book can be tied closed or held open in a star shape. Let the adhesive dry under light, even pressure.
The edges do not need to line up with machine-made precision, but the folds do need to face the same direction. One reversed section can make the star twist rather than open evenly.
A smaller version can use photocopies rather than original pages. You could also keep the portraits intact and use yearbook typography only on the outer decorative layers.
Frame Vintage Yearbook Portraits Inside Mini Paper Houses
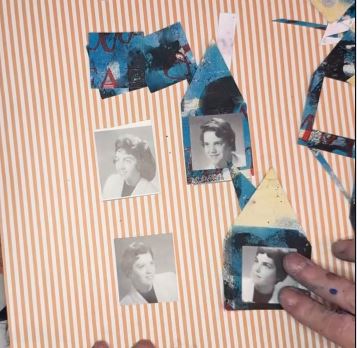
Small paper houses can turn individual yearbook portraits into ornaments, gift tags, garland pieces, or miniature framed artwork. The selected project places vintage yearbook photographs inside house-shaped paper frames, using the opening like a window around each face.
This idea is especially useful when only a few small portraits remain usable. Each house can carry a different colour, roof shape, date, or handwritten word.
Materials and Tools
- Vintage yearbook portraits
- Painted scrap paper
- Cardstock
- Small square or circle punch
- Craft knife
- Cutting mat
- Pencil
- Ruler
- Glue stick
- Thread or ribbon
- Small photo corners
- Paint marker
- Optional cardboard backing
Make the Portrait Houses in Four Steps
- Choose and copy the portraits. Scan the original faces first, then decide whether to use the original page or a printed copy. Copies are easier to replace when a cut goes wrong.
- Create the house shapes. Draw a simple square or rectangle with a roof above it, then cut an opening for the face. Test the portrait behind the opening before trimming the final frame.
- Layer the photograph and backing. Position the portrait so the face sits comfortably inside the window. Attach it with photo corners or a small amount of adhesive, then add a sturdier backing layer.
- Finish the miniature display. Add a hanging loop, roof detail, house number, date, or short word. Keep the decoration light so the portrait remains the main feature.
One detail I would check carefully is the crop. A window that sits too close around the face can make the portrait feel cramped, so leave a little of the original background visible.
Several houses can become a reunion garland or family-history display. A single house can be mounted inside a larger frame with the person’s name and graduation year.
Use Yearbook Faces and Words in a Mixed-Media Journal
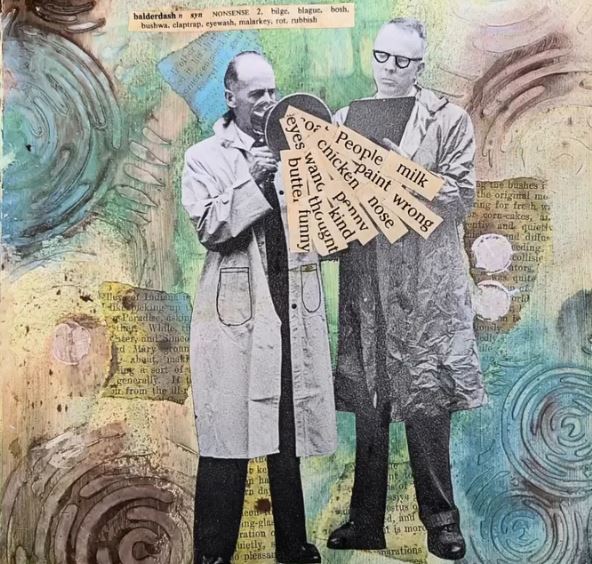
A single journal spread can use small yearbook fragments that are too limited for a larger project. The selected artwork combines old yearbook images with random words and other printed materials inside a mixed-media journal.
Because the page is personal and exploratory, every fragment does not need a literal meaning. A serious portrait can sit beside an absurd sentence, painted line, or oversized shape.
Materials and Tools
- Yearbook portraits and text fragments
- Art journal
- Glue stick
- Matte medium
- Paint
- Paintbrushes
- Oil pastels or crayons
- Coloured pencils
- Stamps
- Old textbook words
- Tissue paper
- Scrap packaging
- Protective paper
Create the Journal Spread in Four Steps
- Build a loose background. Add thin paint, torn paper, stamps, or pencil marks without covering every part of the journal page. Leave quieter areas where the yearbook portrait can remain readable.
- Select one or two faces. Cut the portraits with either a neat edge or a rough torn border. Place them at different positions until the direction of each person’s gaze works with the page.
- Arrange the words. Combine captions from the yearbook with phrases from old textbooks, packaging, or magazines. Read the sentence aloud before gluing because accidental wording can change the whole mood.
- Connect the layers. Use painted marks, repeated colours, or small paper shapes to link the images. Let wet materials dry fully before closing the journal.
For me, mixed media becomes less interesting when every empty space is treated like a problem. A little untouched paper gives the portraits and words room to breathe.
The project can also be completed on loose cardstock and later bound into a book. Printed copies are a practical alternative when you want to reuse one portrait several times.
Make a Folded Collage Zine From Vintage Yearbook Photos
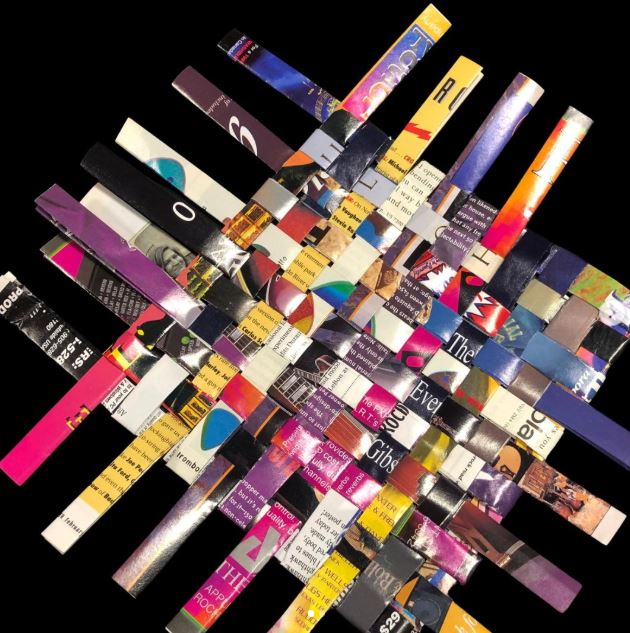
A zine turns separate yearbook images into a short visual story. The selected collection uses vintage high school yearbook photographs inside collage zines built around a shared theme.
Unlike a single framed collage, a zine has sequence. The first page introduces the idea, the centre can carry the strongest image, and the final page can leave the reader with a question, phrase, or visual surprise.
Materials and Tools
- Vintage yearbook photographs
- One sheet of copy paper or lightweight cardstock
- Scrap paper
- Glue stick
- Scissors
- Craft knife
- Cutting mat
- Black pen
- Photocopier or scanner
- Bone folder
- Stapler, thread, or folded binding
Assemble the Zine in Five Steps
- Choose one narrow theme. Build the zine around expressions, hairstyles, school clubs, imagined conversations, or a single repeated phrase. A focused idea helps unrelated portraits feel connected.
- Make a blank page dummy. Fold the paper into the chosen zine format and number the pages lightly. This prevents the artwork from appearing upside down after folding or copying.
- Build each small collage. Work directly on the flat master sheet, keeping important details away from folds and trimmed edges. Repeat one colour, shape, or type style throughout the pages.
- Copy the finished master. Scan or photocopy the completed sheet, then fold the copies into zines. Use the duplicate for sharing and preserve the original collage as a master.
- Add simple finishing details. Number the edition, write a title, and credit the source yearbook when known. Avoid publishing private handwritten messages or personal information without careful consideration.
The small page size helps here. It forces you to choose the strongest face or phrase instead of squeezing an entire yearbook spread into one tiny booklet.
A no-copy version can remain a one-of-a-kind zine. You could also exchange copies with classmates or include blank pages where readers add their own school memories.
Where Yearbook Projects Lose Their Meaning or Damage the Original
Cutting the Only Personal Copy
A signed yearbook may become more valuable to you later. Use a duplicate, a thrifted copy, or scanned reproductions when you feel uncertain about permanent alterations.
Forgetting to Check the Reverse Side
Yearbook pages are printed on both sides. A portrait that seems available may have a handwritten message or important photograph behind it.
Pressing an Old Binding Flat
Tight or brittle bindings can crack when forced against a scanner or table. Support the book and capture the pages without applying unnecessary pressure.
Using Too Much Wet Adhesive
Thin yearbook pages may wrinkle, curl, or tear beneath heavy glue. Use a controlled amount and test the adhesive on an unwanted fragment first.
Adding Too Much Bulk to an Altered Book
Cardboard, thick fabric, metal charms, and multiple wet layers can strain the spine. Remove some page pairs and favour lightweight materials.
Sharing Identifiable Pages Carelessly
Old yearbooks may contain full names, personal messages, signatures, and other details. Review every page before posting a scan or finished project publicly.
Cutting a Historically Useful Volume
Schools, alumni groups, libraries, or local archives may value missing editions. Check whether another organisation needs the book before dismantling it.
Failing to Save Digital Copies
Digitising important pages is useful only when the files remain organised and backed up. Keep copies on more than one storage medium or location.
Storing the Remaining Book in Damp or Bright Conditions
Light and unstable environmental conditions can damage paper and photographic material. Protect intact volumes from excessive light, moisture, and unsupported storage.
Frequently Asked Questions
Should I throw away old yearbooks?
Not until you have checked their sentimental, historical, and practical value. Family members, classmates, the school, a local archive, or a collector may want them.
Can I scan a yearbook without taking it apart?
Yes. Support the binding and capture one page at a time with a scanner or camera. Do not force a fragile book completely flat.
What is the easiest project for a beginner?
A mixed-media journal page or small paper portrait house requires fewer bookbinding skills than a star book or altered sketchbook. Printed copies also reduce the risk of damaging the original.
Can I sell crafts made from yearbook pages?
Before selling reproduced photographs, names, logos, or artwork, check any applicable rights, privacy concerns, and marketplace requirements. Using anonymous thrifted material does not automatically remove every consideration.
How do I preserve handwritten messages?
Scan the complete message at a readable resolution and record the writer’s name when known. Store the original page in an archival-quality sleeve or keep the full yearbook intact.
What should I do with a mouldy yearbook?
Keep it away from unaffected books and avoid disturbing visible mould in an indoor living area. A valuable or sentimental volume may need advice from a qualified paper conservator.
Can I donate an old yearbook?
Contact the school, alumni association, local historical society, library, or archive first. Ask whether they need that specific year and what condition they can accept.
Let the School Memories Take a More Visible Form
Deciding what to do with old yearbooks does not require choosing between keeping every volume untouched and throwing everything away.
One personal copy can remain stored safely while a duplicate becomes an altered sketchbook. Thrifted portraits can form paper houses, cut-paper collages, mixed-media journal pages, star books, and small folded zines.
Begin by scanning the pages you value most. Then choose one project that matches the condition of the book and the amount of change you feel comfortable making.
The best result should preserve something recognisable from the yearbook, whether that is a face, a caption, the original cover, or the slightly formal school-photo style that makes these books so memorable.
Which old yearbook project would you begin with: an altered sketchbook, star book, portrait house, paper collage, journal spread, or handmade zine?