Garden objects rarely become useless all at once. A tyre may no longer belong on a vehicle but still have a strong shape, a chipped terracotta pot can hold soil in several little levels, and an old drawer may be far more interesting outdoors than it ever was inside a forgotten cabinet. The useful part is learning to see what remains sound instead of focusing only on the item’s original job.
I especially like upcycle garden ideas that let the reused object stay recognisable. The curve of a colander, the handle of a toolbox, or the bright shape of a rain boot can become part of the planting design rather than something to hide.
Even so, outdoor projects have to cope with water, weight, sunlight, and movement. A thoughtful drainage hole or secure support matters more than another decorative coat of paint, so I would always prepare the structure first and style it afterwards.
Inspect Reused Containers for Strength, Cleanliness, and Outdoor Safety
Begin by checking every reused item before soil or paint goes near it. Look for cracked plastic, loose handles, deep rust, rotten timber, sharp metal rims, weakened fabric, unstable joints, and old residues that cannot be identified. A container does not need to look new, but it does need to remain strong enough for wet compost and growing roots. If an object once held fuel, chemicals, oils, or unknown workshop products, use sealed nursery pots inside it rather than planting directly against the original surface.
Clean with a method suited to the material and let the item dry fully. Brush soil from porous terracotta, wash glass and metal, remove flaking paint, and sand splintered wood only after checking that it is safe to handle.
I don’t think every mark should disappear; scratches and faded colour often give an upcycled garden project its character. What should disappear are loose coatings, sharp edges, trapped grease, and anything that could weaken the finished piece.
Plan Drainage, Soil Depth, and Plant Choice Before Filling
The shape of the old object should guide the plant rather than the other way around. Shallow gutters suit herbs with modest root systems, broken pots work well with compact succulents, and deep tubs can hold fuller seasonal planting. Check how much usable depth remains after adding a liner or inner pot. A small opening may look generous when empty but become cramped once drainage material and roots take up space.
Decide where excess water will leave before adding compost. Existing sink outlets and colander holes are helpful, while cans, boots, drawers, and toolboxes may need drainage openings or removable planted inserts. Pebbles alone do not turn a sealed container into a freely draining one. When drilling is unsuitable, keep the outer object decorative and place a properly drained pot inside, then empty any collected water after rain.
Prepare Paint, Linings, Supports, and Safe Working Tools
Set out the non-planting materials at the beginning: exterior paint where appropriate, rust treatment, brushes, liners, mesh, landscape fabric, brackets, chains, screws, wall anchors, and removable pots. Match each product to the surface rather than assuming one paint or adhesive will work on rubber, metal, glazed ceramic, and timber equally well. Apply finishes in a ventilated area and follow the manufacturer’s instructions for preparation and curing.
Keep gloves, eye protection, a stable work surface, and the correct drill bit or cutting tool nearby when the project needs holes or hardware. Heavy planters should be positioned before they are filled, and wall-mounted designs need fixings suited to both the wall and the complete wet weight. I know it can feel tempting to start arranging flowers immediately, but sorting out drainage and support first makes the enjoyable part much easier later.
DIY Colorful Tire Planters
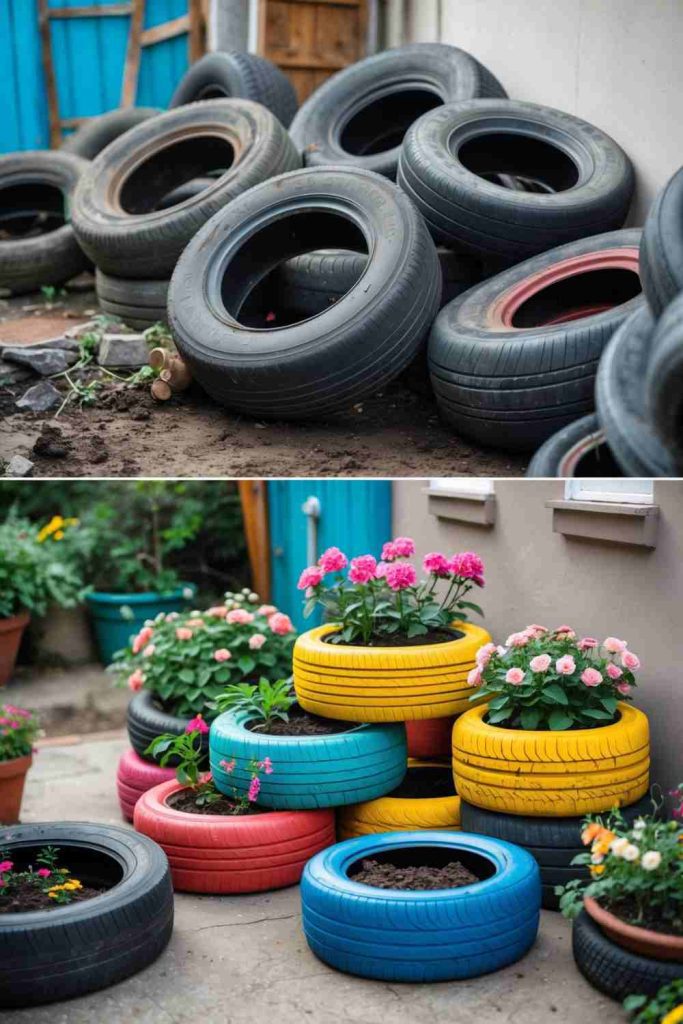
Painted tyres create bold circular planting beds without disguising what they used to be. The rounded sidewalls form a strong frame around the flowers, while stacked or overlapping tyres can build height in a corner that would otherwise feel flat. Bright colour works particularly well here because the dark rubber becomes a clear outline between the painted surface and the planting.
A tyre planter is better suited to ornamental flowers than crops when the tyre’s history and material are uncertain. It also needs thoughtful positioning: black rubber can become warm in strong sun, and a tyre filled with wet soil is not something you will want to move casually. I would settle the layout first, keep the stack low and stable, and then choose plants that suit the light available.
Materials and Tools
· Clean, structurally sound used tyres
· Stiff brush, mild cleaner, and water
· Primer and exterior paint suitable for rubber, if recommended by the paint maker
· Brushes or rollers and a protected work surface
· Landscape fabric or a suitable base layer
· Potting mix and ornamental plants
Steps for This Garden Project
1. Prepare the tyres thoroughly. Scrub the grooves and sidewalls to remove road dirt, then rinse and allow the rubber to dry. Inspect both beads and sidewalls for exposed wire, severe splits, or crumbling sections; discard any tyre that cannot be handled safely.
2. Plan the arrangement before painting. Place the tyres where they will eventually sit and test whether a single ring, low stack, or staggered group feels balanced. Avoid tall unsecured stacks, and make sure the lowest tyre rests on firm, level ground rather than soft soil that may sink after rain.
3. Apply the colour in controlled coats. Follow the paint instructions for priming and surface preparation, then cover the visible outer areas without coating surfaces unnecessarily. Let each coat cure properly, even when patience suddenly feels like the least exciting garden tool in the shed.
4. Line, fill, and plant the tyres. Add a base layer that keeps compost in place while allowing water to leave, then fill gradually so the tyre remains stable. Arrange the tallest plants towards the centre or back, water gently, and check after the first heavy rain that no water is collecting where it should drain.
For me, the best tyre groups repeat one or two colours rather than using a completely different shade on every ring. The flowers already bring plenty of variation, so a limited palette helps the reused shapes feel connected instead of scattered.
Leave the rubber unpainted for a quieter industrial look, or wrap only the outer wall with weather-resistant rope where the location stays relatively sheltered. A single tyre can also become a low flower bed around a small ornamental grass, while half-buried tyres may edge a playfully shaped border if all cut surfaces remain safe.
DIY Fairy Garden in a Broken Pot
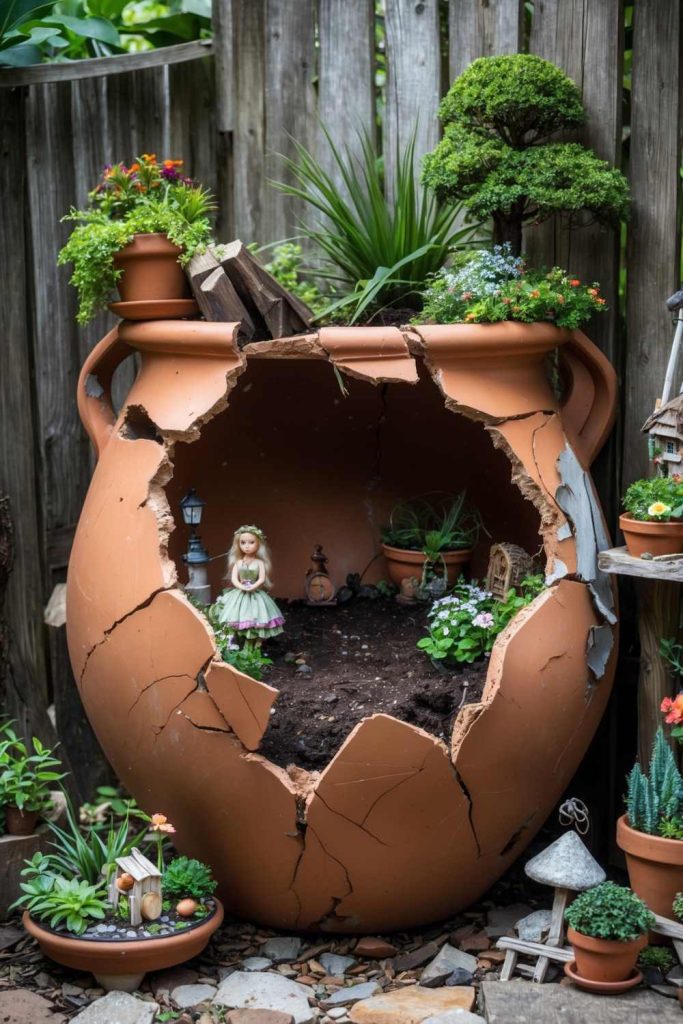
A broken terracotta pot already contains the beginnings of a miniature landscape. The missing front section opens the view, and the larger fragments can become terraces, steps, or retaining walls inside the remaining shell. Small succulents, mossy textures, pebbles, and tiny ornaments then turn the damage into the main feature rather than something to conceal.
The charm depends on scale, but the construction still needs to be practical. Jagged pieces must sit securely, the main pot should not rock, and every plant needs enough compost around its roots. I would use the strongest fragments as structure and keep loose decorative pieces light so they do not press against delicate stems.
Materials and Tools
· A broken terracotta pot with a stable main section
· Large sound fragments from the same pot
· Well-draining potting mix suited to the chosen plants
· Small succulents, compact groundcover, or miniature plants
· Pebbles, bark, or fine gravel
· Optional miniature steps, doors, figures, or tiny garden furniture
Steps for This Garden Project
1. Sort and smooth the broken pieces. Wear gloves while handling sharp terracotta and set aside any fragment that flakes or cracks under light pressure. Position the main pot so it rests steadily, then test the largest shards inside without adding soil yet.
2. Build the inner levels from the bottom upward. Add a little compost, press a strong shard into place as a low retaining wall, and continue creating two or three usable terraces. Keep the pieces angled slightly inward so they are supported by the soil rather than balanced on a narrow edge.
3. Plant before adding the smallest decorations. Place compact plants where their mature size will not cover every path or miniature feature, then firm the compost around the roots. Water lightly to settle the arrangement and add more mix where gaps appear around the terracotta walls.
4. Finish the miniature scene with restraint. Use pebbles to define a path, add one focal object, and place tiny details where they remain visible without crowding the plants. Check that no loose shard can fall out of the open front, especially when the pot will sit near children or pets.
The broken edge does not need to form a neat doorway. I actually prefer an irregular opening because it makes the little terraces look as though they developed inside the pot rather than being fitted into a perfect display case.
Skip figures and use only stones, thyme-like groundcover, and small succulents for a more natural miniature landscape. A cracked but unbroken pot can be laid partly on its side, while several tiny terracotta pots can be grouped inside a larger broken shell for removable planting.
DIY Cinder Block Planter
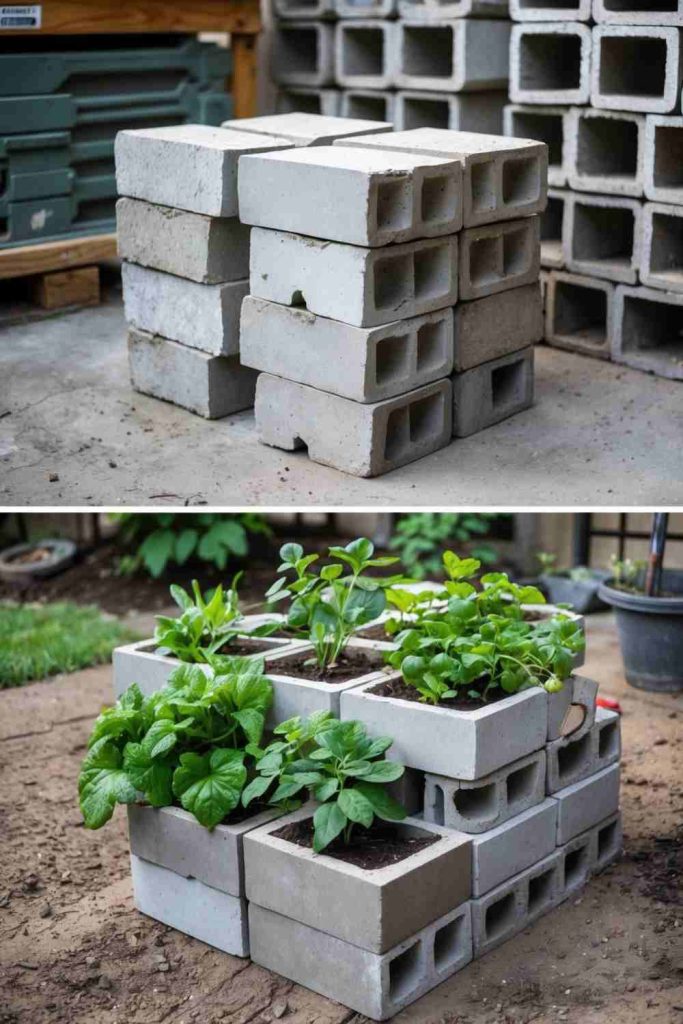
Cinder blocks make a modular planter because the hollow cores can hold individual pockets of soil while the solid faces create a stepped structure. Rotating a few blocks outward produces planting spaces at different heights, and the repeated concrete shape gives even a mixed selection of flowers a clear order.
The blocks are heavy enough to feel permanent, but they can still shift when stacked carelessly or placed on uneven ground. Concrete also dries quickly in exposed sun, so small pockets may need more frequent watering than a deep bed. I would keep the first arrangement low, test every block for movement, and reserve the highest openings for plants that remain light.
Materials and Tools
· Clean, uncracked cinder blocks
· A level paving base or compacted gravel area
· Coarse mesh or landscape fabric for open bottoms
· Potting mix
· Small flowers, herbs, grasses, or succulents suited to the site
· Work gloves and optional exterior masonry paint
Steps for This Garden Project
1. Prepare a level foundation. Clear loose soil and create a firm base wide enough for the complete arrangement. Set the first row in position and press each block at the corners to confirm that it does not rock.
2. Dry-stack the full design before planting. Turn selected blocks so their hollow cores face upward and remain accessible, then stagger the joints rather than creating one unsupported vertical line. Keep the centre of weight over the base and remove any block that makes the structure feel top-heavy.
3. Line the planting cavities where necessary. Place mesh or folded landscape fabric across openings that would otherwise lose compost, but do not seal the drainage route. Fill the pockets gradually and leave a small space below the rim so watering does not wash soil over the concrete face.
4. Plant according to the pocket conditions. Use trailing plants near outward-facing edges, upright plants in the lower stable cavities, and drought-tolerant choices in hotter upper blocks. Water slowly, then revisit the structure after settling to confirm that both the soil and the blocks remain in place.
The part I would keep simple is the stacking pattern. One or two turned blocks create enough rhythm; too many projecting pieces can make the planter harder to stabilise and awkward to reach with a watering can.
Paint only a few front faces for colour while leaving the rest of the concrete exposed. A single row can form a low herb edge, and individual blocks can hold nursery pots rather than direct soil when you want to rearrange the display seasonally.
DIY Clawfoot Bathtub Planter
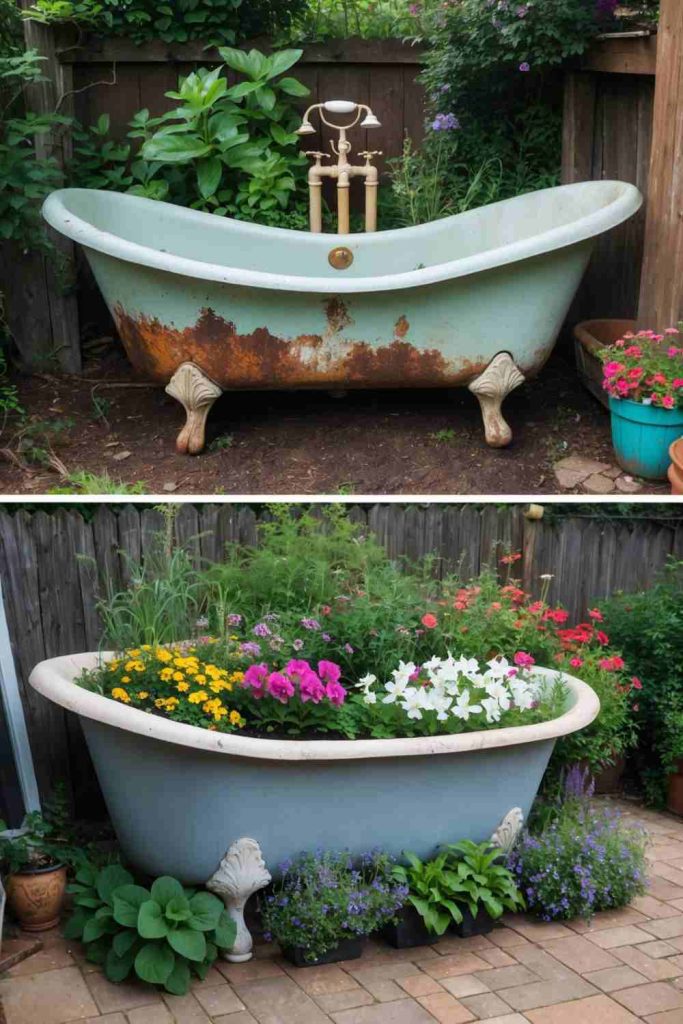
An old clawfoot bathtub has the depth and presence of a raised garden bed, with the curved rim and feet giving it a shape that ordinary timber planters cannot copy. Filled with layered flowers or generous foliage, it becomes a clear focal point rather than a container that disappears behind the planting.
This is one of the heaviest projects in the group. The tub must be positioned before it is filled, the feet need full support, and the existing waste outlet should remain part of the drainage plan. Rust and damaged enamel may be visually appealing on the outside, but weak metal around the base or feet needs repair before the tub carries wet compost.
Materials and Tools
· A structurally sound clawfoot bathtub
· Wire brush and suitable rust-removal supplies
· Exterior metal primer and paint, if refinishing
· Mesh for the waste outlet
· Lightweight drainage material and quality planting mix
· A varied selection of flowers, herbs, or ornamental foliage
Steps for This Garden Project
1. Choose and prepare the final location. The ground should be firm, level, and able to support the complete filled weight without settling. Place pads beneath the feet if needed and check that the tub does not twist or rock before doing any surface work.
2. Clean and stabilise the tub. Remove loose rust and flaking paint using a method appropriate to the surface, then repair or seal areas that could continue deteriorating. Refinish the exterior only after the metal is dry, and keep the waste opening clear throughout the process.
3. Set up dependable drainage. Cover the outlet with mesh so compost cannot escape, then add only enough coarse material to keep the opening free. Use a suitable planting mix rather than filling the entire depth with dense garden soil, which can add unnecessary weight and compact around the roots.
4. Build the planting in layers. Place taller or fuller plants near the centre or back, allow trailing growth to soften the rim, and leave enough space for each plant to develop. Water slowly and watch the outlet; if drainage is sluggish, correct it before the roots become established.
I would let some of the tub remain visible. Covering every inch with trailing foliage may hide the very detail that makes this planter worth using, especially the curved rim and claw feet.
Use removable large pots inside the tub for a lower-commitment seasonal display, or fill only part of the depth with a raised internal platform. A damaged freestanding basin can create a smaller version, provided it stands securely and drains without water collecting around its base.
DIY Tin Can Planters
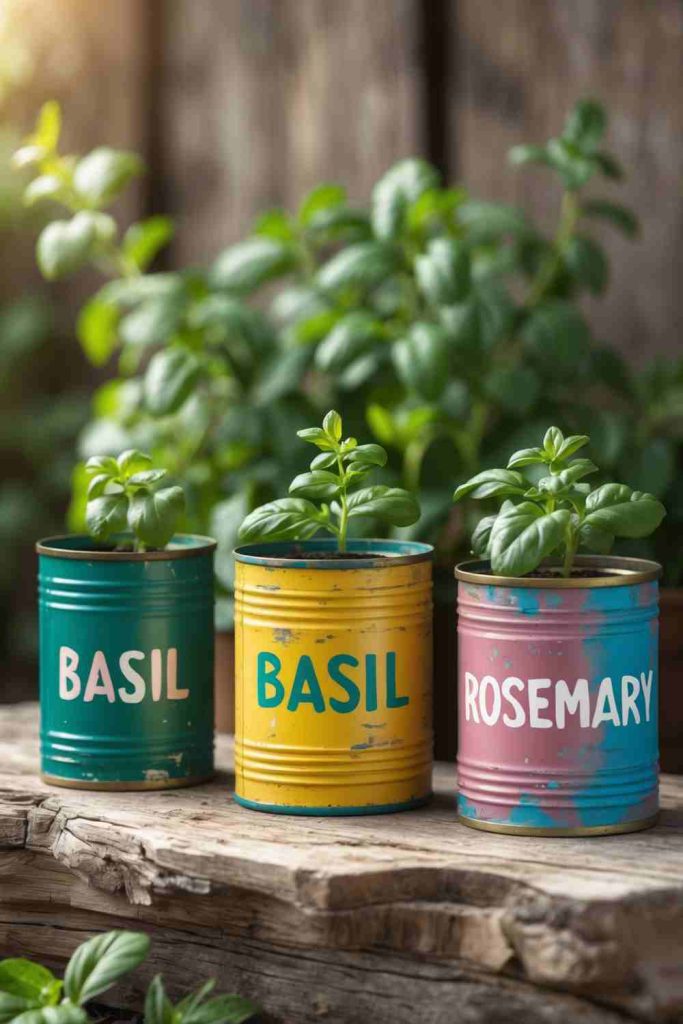
Small tin cans are useful for creating a varied row of compact planters because their straight sides take paint, paper, or simple patterning easily. Different can heights can be grouped without looking untidy when one colour family or repeated motif ties them together. The result suits a windowsill, fence shelf, or small patio table where a full-sized pot would feel too bulky.
The rim is the first detail to check. A can opener may leave a sharp inner edge, and newly drilled holes can create metal burrs underneath. Rust is also likely when bare steel stays wet, so I prefer using the decorated can as an outer sleeve for a small nursery pot whenever that fits the design.
Materials and Tools
· Clean empty tin cans in useful sizes
· Metal file or sandpaper for sharp edges
· Drill, nail, and hammer for drainage where appropriate
· Metal primer and exterior craft paint, or weather-resistant wrapping
· Small nursery pots or a liner
· Compact flowers or foliage plants
Steps for This Garden Project
1. Remove labels and check every rim. Soak away adhesive, wash the cans, and dry them immediately so hidden seams do not begin rusting. Smooth any sharp edge and press carefully around the opening with a gloved hand to find snags before decorating.
2. Decide between direct planting and removable inserts. For direct planting, add several small drainage holes and remove the burrs underneath. For a cleaner, longer-lasting option, keep the can intact and fit a drained nursery pot inside, using a small spacer so it does not sit in collected water.
3. Decorate the outer surface. Prime bare metal if the chosen finish requires it, then add stripes, simple blocks of colour, or restrained patterns. Keep paint away from the inner area where it may remain constantly damp, and allow the surface to cure fully before handling.
4. Plant and group the cans. Use plants with modest root needs, leave watering space below the top, and arrange taller cans behind shorter ones. Lift each inner pot to water when possible, then empty excess water from the decorative can before replacing it.
A mixed collection looks more deliberate when one element repeats—perhaps the same rim colour, the same label shape, or the same type of plant. Matching every can exactly is not necessary, and can remove the easygoing character of the idea.
Leave the cans unpainted and wrap a removable band of fabric or jute around the middle. They can also hold cut flowers, seed packets, or garden tools instead of living plants, which avoids the drainage and rust problem entirely.
DIY Dresser Drawer Planters
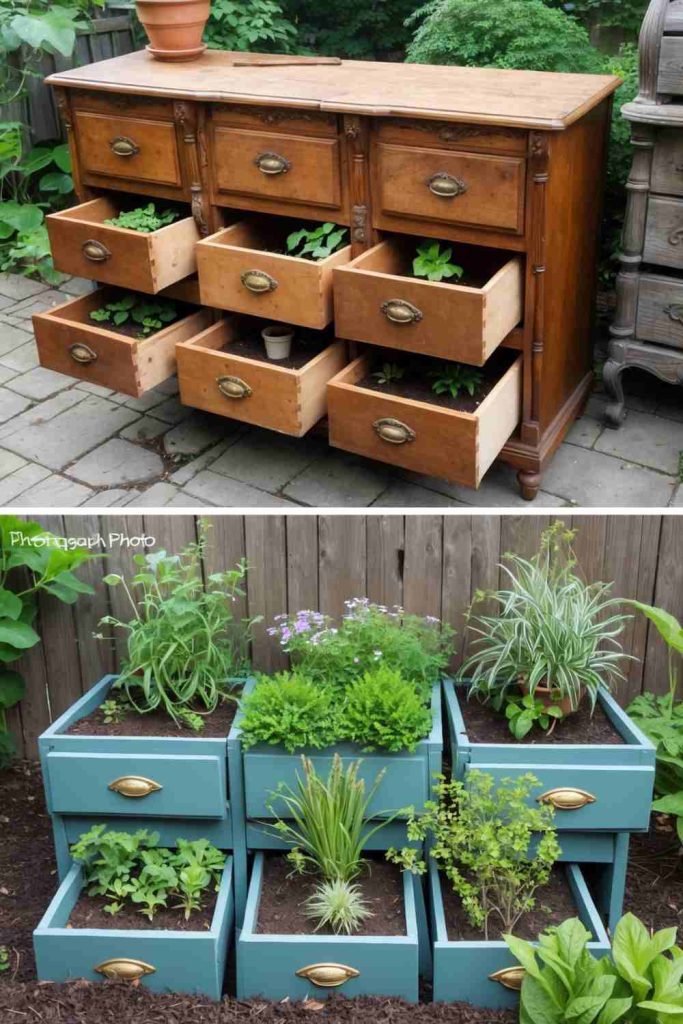
Old drawers create deep rectangular planting boxes while their original handles keep the furniture connection visible. They can be arranged separately on low supports, staggered like steps, or left partly extended from a sound dresser frame. The long shape is useful for repeating flowers, small herbs, or a layered mix that spills gently over the front.
Wooden drawers were made for dry clothing, not wet compost, so preparation matters. Thin bases can sag, joints may open, and unsupported extended drawers place strain on their runners. I would treat every drawer as a planter box that needs its own support rather than expecting old furniture hardware to carry the planted weight.
Materials and Tools
· Sound wooden drawers with secure joints
· Exterior wood cleaner, sandpaper, and suitable finish
· Drill and wood bit for drainage
· Plastic liner, pond offcut, or removable planting trays
· Low blocks, feet, or a strong supporting frame
· Potting mix and flowers or compact herbs
Steps for This Garden Project
1. Repair the drawer before decorating it. Tighten loose corners, reinforce a weak base, and remove damaged runners or protruding nails. Clean the surfaces, sand splinters, and preserve the handle if it remains firmly attached.
2. Plan how the drawer will be supported. A freestanding drawer should rest on blocks or feet that keep the timber off wet ground. When using a dresser frame, support the underside of each open drawer independently and secure the complete unit so it cannot tip forward.
3. Create a protected planting area. Drill drainage holes where water can leave safely, then fit a liner without covering those exits. A removable plastic trough or several nursery pots are often easier because they reduce constant contact between damp compost and the wooden base.
4. Fill and plant without overloading the structure. Use a lightweight mix, distribute it evenly, and avoid pressing heavily against old joints. Add plants with similar moisture needs, water in stages, and inspect underneath after rain for sagging, trapped water, or softening wood.
The drawer handle is already a strong decorative feature, so I would not cover the front with too many signs or ornaments. A little worn paint beside a simple row of flowers often says enough.
Mount a shallow drawer securely as a wall box for lightweight pots, or use a set of mismatched drawers as separate planters along a path. Indoors, lined drawers can hold artificial plants or dry arrangements when the timber is too delicate for real soil.
DIY Shoe Organizer Planter
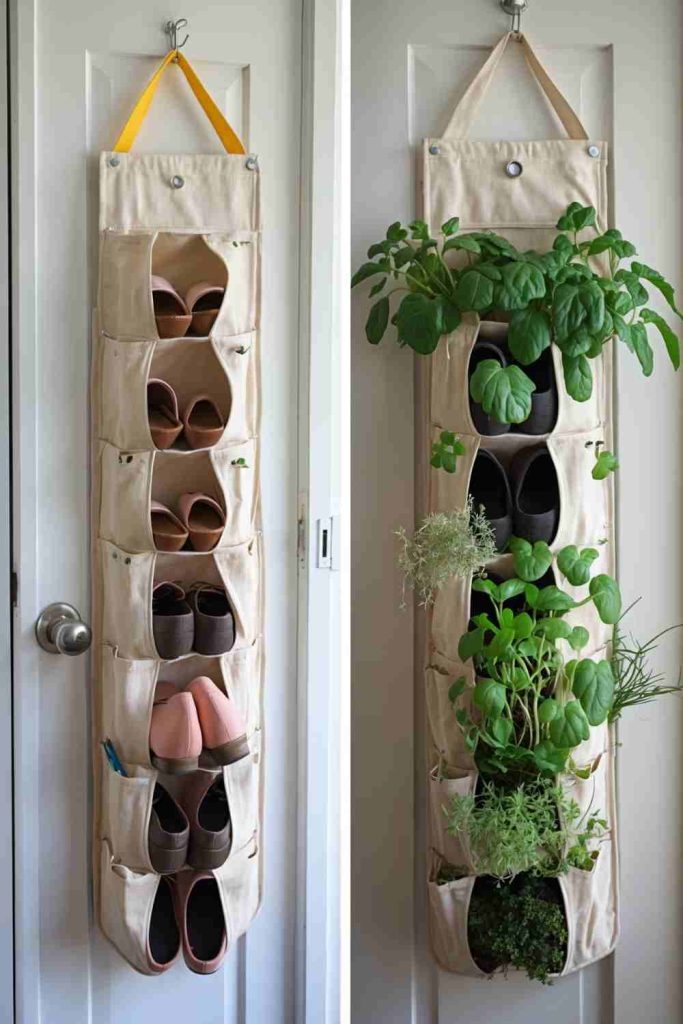
A fabric shoe organiser turns a narrow wall or fence into a series of planting pockets. Each compartment separates one herb or small flowering plant, while the repeated grid creates order even when the foliage varies. It is particularly useful where floor space is limited, but the organiser must carry far more weight than it did when it held shoes.
Wet compost pulls on stitching, water runs down the back, and sunlight can weaken some fabrics. The project works best with a sturdy outdoor-suitable organiser, a strong top rail, and small removable pots or lined pockets. I would also protect the wall behind it, especially when the organiser hangs against timber or painted masonry.
Materials and Tools
· A strong fabric shoe organiser with sound seams
· Heavy-duty hooks, screws, or a secure hanging rail
· Waterproof backing sheet or wall protector
· Small nursery pots, grow bags, or pocket liners
· Lightweight potting mix
· Herbs, strawberries, lettuces, or compact flowers suited to the pocket depth
Steps for This Garden Project
1. Test the organiser and its hanging points while empty. Pull gently on the upper eyelets or loops and inspect the seams around every pocket. Reinforce weak areas before planting, then mount the rail or hooks into fixings that suit the supporting wall.
2. Protect both the fabric and the surface behind it. Attach a waterproof backing with a small air gap where possible, and place liners or individual pots inside the pockets. Make sure each planting insert can drain without sending water into the pocket below.
3. Fill from the bottom upward. Add the lower pots first so the organiser settles gradually, then work towards the top while checking that it remains level. Use lightweight mix and avoid packing the pockets tightly, because expanding wet compost can strain the stitching.
4. Plant and manage the watering carefully. Place thirstier plants lower where drips may reach them and drought-tolerant choices higher. Water each pocket in small amounts, remove dead growth promptly, and inspect the fabric and anchors regularly for stretching or mildew.
The neat grid can become visually busy very quickly. Repeating one herb in several pockets or limiting the flower colours helps the vertical garden look calm even when every compartment contains something different.
Use the organiser for lightweight nursery pots that can be lifted out individually, or turn alternate pockets into storage for gloves and hand tools. A rigid pocket panel made from reclaimed timber may suit an exposed site better when fabric would remain wet for long periods.
DIY Glass Bottle Watering System
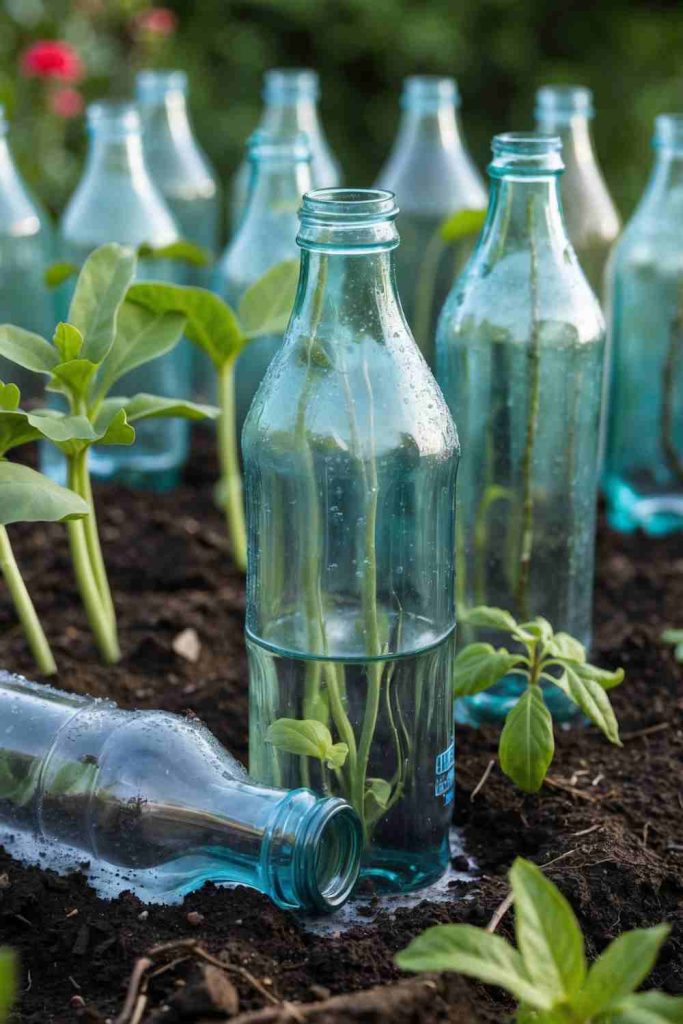
An inverted glass bottle can release water slowly near a plant’s root area, giving an empty bottle a useful role during warm weather or short absences. The clear body also makes the remaining water easy to see. A row of matching bottles can look surprisingly orderly when the necks sit at a consistent angle among larger garden plants.
The system needs testing because soil texture, bottle opening, cap holes, and temperature all affect the flow. A bottle that empties immediately is not a slow-waterer, while one sealed too tightly may release almost nothing. I would test the method in a spare pot before depending on it for a valuable plant.
Materials and Tools
· Clean glass bottles without cracks or chipped rims
· Caps or corks that fit securely
· A fine nail, awl, or drill suitable for making a controlled opening
· Water
· A small trowel or planting dibber
· Optional terracotta watering spikes that accept bottle necks
Steps for This Garden Project
1. Inspect and clean the bottles. Remove labels if you want a clear finish, rinse away residue, and check the neck and base under good light. Do not use damaged glass, and avoid cutting bottles for this project when a complete bottle can do the job safely.
2. Create a controlled outlet. Make one very small opening in a cap or prepare a cork so water can escape gradually, then fill the bottle and test it over a sink. Increase the opening only in tiny stages; it is much easier to enlarge a hole than to make it smaller again.
3. Prepare the soil before inserting the bottle. Water the plant normally first, then make a narrow guide hole near the root zone without damaging the main stem. Turn the filled bottle over and press the neck into the prepared opening so it stands firmly rather than resting on the glass shoulder.
4. Observe the first full cycle. Check the water level after a short period and again later, looking for bubbles and signs of steady release. Adjust the cap, insertion depth, or soil contact if the bottle drains too quickly, and remove it before freezing weather or vigorous garden work.
I would use this as support rather than a reason to stop checking the plant. The bottle can help even out moisture, but it cannot tell you whether the roots are waterlogged or whether heavy rain has already done the job.
Fit bottles into purpose-made terracotta spikes for a more stable connection, or use a clean plastic bottle where broken glass would be a concern. Decorative bottles can also act as simple garden markers when the watering method is unsuitable.
DIY Hanging Colander Planters
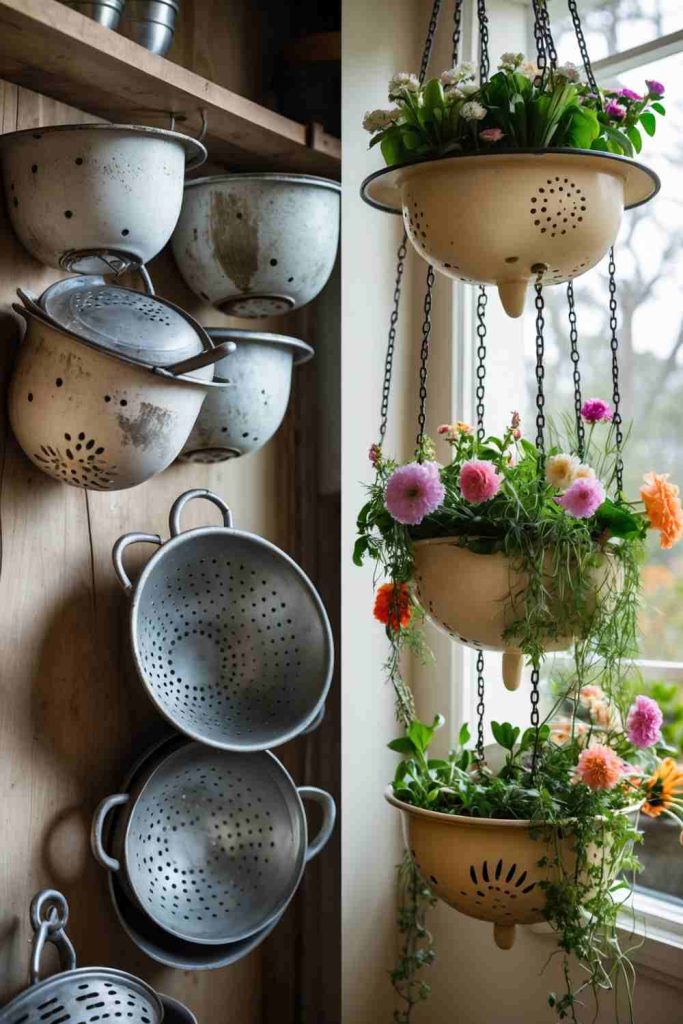
A colander already has the drainage pattern that many improvised planters need, and its rounded bowl lets trailing flowers fall naturally around the edge. Metal, enamel, or brightly painted colanders can hang from chains as individual baskets or as a small group at different heights. The handles and perforations make the original kitchen purpose easy to recognise.
Those same holes can lose compost unless the bowl is lined, and the hanging points must carry the complete wet weight. Thin handles may bend, while a rusted rim can fail without much warning. I would attach the support through several strong points around the bowl rather than depending on one handle.
Materials and Tools
· A sound colander with no sharp rusted areas
· Coir liner, moss, or landscape fabric
· Three equal chains or strong weather-resistant cords
· S-hooks, a hanging ring, and secure overhead fixing
· Lightweight hanging-basket mix
· Trailing flowers, herbs, or foliage plants
Steps for This Garden Project
1. Check the bowl and attachment points. Clean the colander, smooth rough metal, and pull gently on handles or rim sections to find weakness. Mark three evenly spaced strong points so the planter will hang level rather than tipping towards one side.
2. Fit the liner without blocking all drainage. Shape coir, moss, or folded landscape fabric inside the bowl and secure it discreetly through the existing holes. The liner should hold the mix while still allowing water to pass through the colander.
3. Attach and balance the hanging supports. Connect equal chain or cord lengths to the marked points, bring them together at a ring, and test the empty planter from its final hook. Make small adjustments now, because wet soil will exaggerate even a slight imbalance.
4. Fill, plant, and hang gradually. Add a modest depth of lightweight mix, place trailing plants around the outer edge, and keep fuller growth near the centre. Water over a safe area first, watch where it drips, and make sure the overhead fixing remains firm before regular use.
The colander holes are decorative on their own, especially when light passes through them. I don’t think this design needs extra ornaments hanging below, where they may tangle with the plants or add unnecessary weight.
Set the colander on a stand instead of hanging it, or nest a removable nursery pot inside for easier seasonal changes. A small colander can hold succulents on a table, while a deeper one can become a herb basket near an outdoor cooking area.
DIY Mason Jar Herb Garden
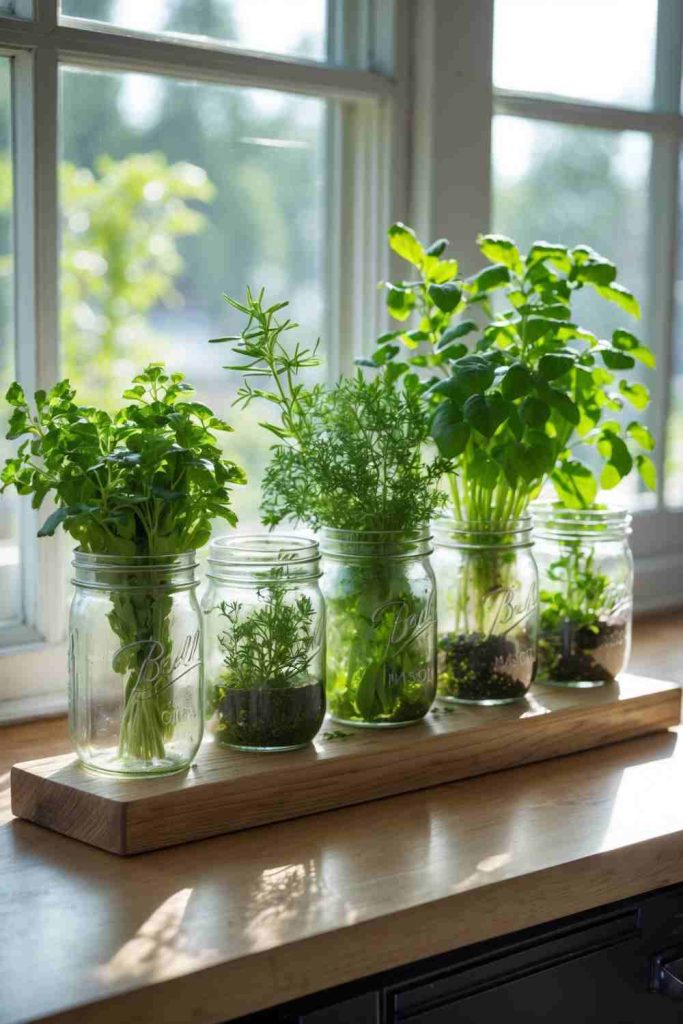
Mason jars create a clean row of small herb containers, especially when metal clamps hold them against a reclaimed board. The clear glass shows the layers inside, while handwritten or simple labels make each herb easy to identify. Mounted together, the separate jars feel like one organised garden rather than several containers competing for space.
Glass jars do not normally have drainage holes, so filling them directly with soil requires careful watering and can leave roots sitting in moisture. I would use removable planted cups, water-grown herb cuttings, or a very controlled indoor arrangement rather than relying on gravel at the bottom to solve drainage. The board and clamps also need to support the jars without pressing too tightly against the glass.
Materials and Tools
· Clean Mason jars with intact rims
· A sound reclaimed wooden board
· Stainless hose clamps or purpose-made jar holders
· Screws and wall fixings suited to the mounting surface
· Small removable nursery cups or water-propagated herb cuttings
· Labels and a waterproof marker
Steps for This Garden Project
1. Prepare the board and plan the spacing. Clean and sand the timber, then lay the jars across it with enough room to remove each one from its clamp. Mark the centre line and check the full arrangement against the intended wall before drilling.
2. Attach the holders securely. Fasten each clamp or bracket to the board using screws that sit flat and do not leave sharp points behind. Open the holder wide enough for the jar, insert the glass, and tighten only until it cannot slide; excessive pressure can crack the jar.
3. Choose a planting method that respects the lack of drainage. Fit a small drained cup inside each jar, or use the jars for herb cuttings in water and change the water regularly. If you plant directly, use very small amounts of water and monitor the lower layer closely rather than assuming stones will remove excess moisture.
4. Mount, label, and maintain the herb garden. Fix the board into suitable wall anchors, then add the jars one at a time and check the level. Label each herb clearly, lift the inner cups for watering, and wipe condensation or spilled water from the glass and timber.
The transparent jars look best when the water line, inner pot, or planting mix remains tidy. A crowded tangle of wet roots may be healthy in some propagation setups, but it changes the calm, orderly character of the display.
Stand the jars in a reclaimed wooden crate instead of mounting them, or use them for cut herbs and propagation rather than permanent planting. Tin cans fitted into the same board can create a lighter, less breakable version for a busy outdoor area.
DIY Painted Tin Can Herb Planters
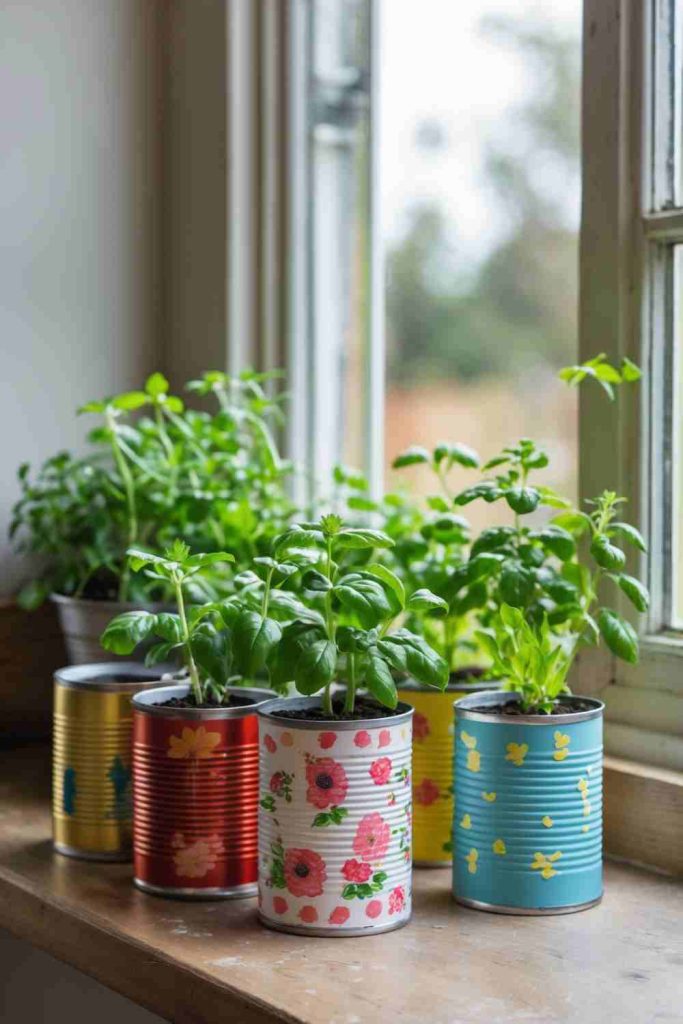
Painted herb cans work best as a coordinated kitchen-garden set rather than a random collection. Larger coffee-style cans provide more room than ordinary food tins, and clear plant names turn the decoration into something practical. Repeating the same label position across different colours keeps basil, rosemary, mint, or other herbs easy to find.
Because herbs are harvested regularly, the containers need to remain clean, stable, and simple to water. Paint should stay on the exterior, and any can with an unknown coating or rusting seam is better used as a decorative sleeve around a proper plant pot. Mint also spreads quickly, so a separate removable pot can prevent it from taking over neighbouring herbs.
Materials and Tools
· Large clean tin or coffee cans
· Metal file and supplies for safe drainage holes
· Metal primer and exterior paint
· Stencils, labels, or a waterproof paint marker
· Removable nursery pots or liners
· Herbs with compatible light conditions
Steps for This Garden Project
1. Prepare a matching group of cans. Remove labels and adhesive, smooth the rims, and compare the heights before deciding the layout. Place the largest cans at the back or use them for herbs that need a little more root space.
2. Add drainage or inner pots. Drill several neat holes in cans intended for direct planting and flatten the burrs underneath. For easier care, fit a nursery pot inside each decorated can and raise it slightly so drained water does not collect around the base.
3. Paint and label the exteriors. Apply the recommended primer, build the colour in thin coats, and leave a clean area for each herb name. Use lettering large enough to read from the usual viewing distance, then let the finish cure before inserting plants.
4. Arrange the herbs by growth habit. Keep vigorous or spreading herbs in their own containers, place taller plants where they will not shade smaller ones, and turn the cans periodically for even light. Lift the inner pots to water and trim the herbs regularly so the labels remain visible.
The labels are the focal detail here, so I would keep the painted patterns around them fairly quiet. A border, stripe, or simple block of colour supports the lettering better than a surface covered with competing motifs.
Use chalkboard-style removable labels so the cans can change plants, or wrap the centre with a replaceable paper band when the display stays under cover. The same labelled containers can organise seed packets and plant markers outside the growing season.
DIY Porcelain Sink Planter
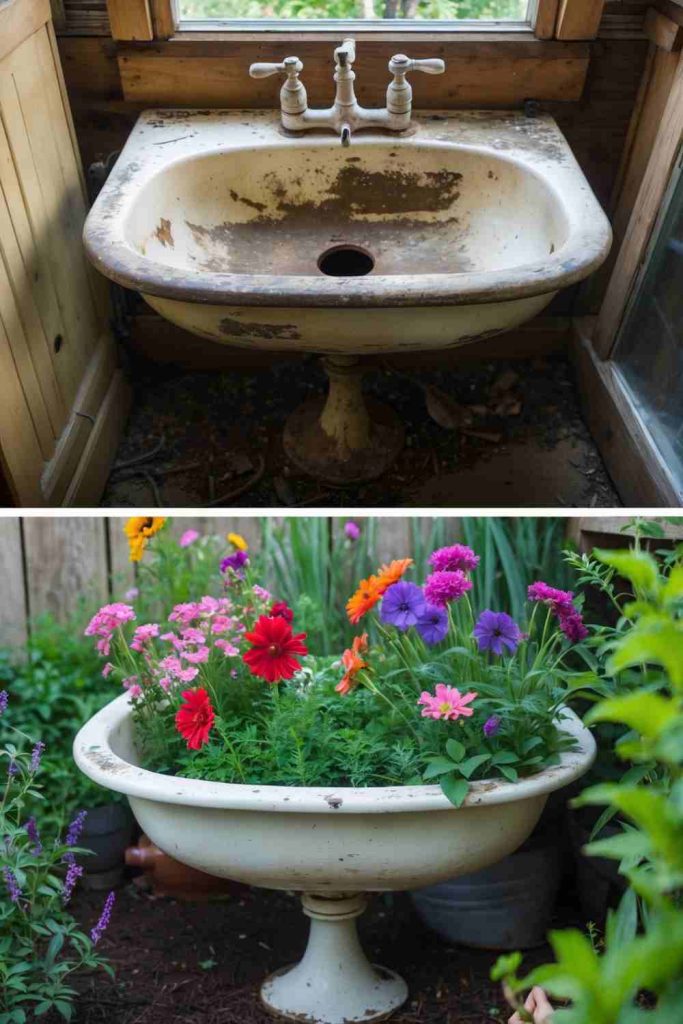
An old porcelain sink has a built-in basin and drain, making it a natural candidate for a compact raised planter. The glazed white surface creates a crisp border around bright flowers or soft foliage, and the taps or plug fittings can remain as playful reminders of the sink’s original use if they are secure.
Porcelain can chip sharply, and pedestal sinks must stand on a stable base before they carry soil. The existing drain is useful, but it needs mesh so the planting mix stays inside. I would avoid drilling extra holes through the glazed basin unless a qualified person confirms it is necessary and safe; the original outlet is usually the better route.
Materials and Tools
· A stable porcelain sink or basin without dangerous cracks
· Mesh or a drain screen
· Weather-resistant support or secure pedestal base
· Mild cleaner and a non-scratching brush
· Lightweight planting mix
· Flowers, compact shrubs, herbs, or succulents suited to the depth
Steps for This Garden Project
1. Inspect and position the sink. Check the underside, rim, pedestal, and fixing points for cracks or movement, then choose a level site where runoff will not create a slippery patch. Stabilise the base before adding any weight.
2. Clean the basin and prepare the outlet. Remove grime without scratching the glaze, take out loose plumbing parts, and fit mesh across the waste opening. Test with a jug of water to confirm that it drains freely before adding compost.
3. Fill the basin with an appropriate mix. Keep the drain area open, add compost in layers, and avoid pressing excessive weight against a cracked or thin edge. Leave the plug and taps visible if they are part of the design, but secure any loose metal so it cannot fall among the plants.
4. Plant for the basin’s shape. Use upright growth near the back or tap area and softer trailing plants along the front rim. Water gently, observe the outlet, and clear leaves or roots that begin blocking the drain during the growing season.
The glossy porcelain already contrasts strongly with garden textures. I would resist painting the whole basin unless the original surface is badly marked; the simple white curve often makes the plants look fresher.
Use a countertop basin on a solid reclaimed cabinet, or place removable pots inside a delicate vintage sink that should not be filled directly. A sink too damaged for plants may still hold a dry arrangement of pinecones, seed heads, or garden tools under cover.
DIY Rain Gutter Vertical Garden
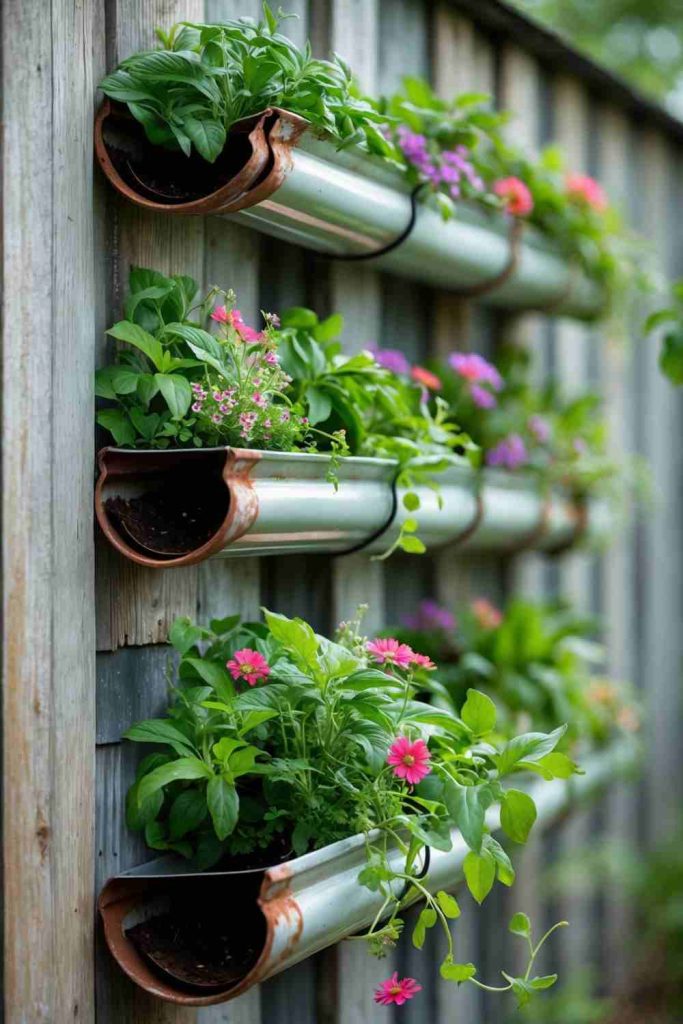
Long gutter-style channels turn a fence or wall into narrow rows of planting, using vertical space without taking much room from a path or balcony. Several levels can hold herbs, lettuces, strawberries, or small flowers, and the repeated horizontal lines keep the display organised even as the plants begin to trail.
The channels are shallow, so root depth and watering need close attention. They must also sit with enough fall or drainage openings to prevent stagnant water, while brackets carry the wet weight along the full length. Old guttering should be clean and free from questionable residues or damaged coatings before it holds edible plants.
Materials and Tools
· Clean sections of sound rain guttering or gutter-shaped planting channels
· End caps and suitable brackets
· Drill and bits appropriate to the gutter material
· Wall or fence fixings rated for the loaded weight
· Lightweight potting mix
· Shallow-rooted herbs, salad crops, strawberries, or flowers
Steps for This Garden Project
1. Measure the wall and prepare the channels. Cut only with tools suited to the material, smooth every edge, and fit end caps securely. Mark drainage points along the lowest part of each length so water can leave without running into the wall structure.
2. Plan the vertical spacing. Hold the empty channels against the surface and allow room for plant growth, watering, and harvesting. Keep the lowest row high enough to avoid splashback from the ground and leave a small air gap behind the gutter where possible.
3. Install strong, evenly spaced brackets. Fix into solid supports rather than decorative cladding alone, then set the channels in place and test them with gradually increasing weight. Check the level and slight drainage fall before filling; a long planter can hold a surprising amount of wet compost.
4. Fill and plant in small sections. Add a lightweight mix, keep the crown of each plant above the soil line, and use choices that suit the limited depth. Water slowly from one end while observing the drainage holes, then adjust the routine because upper rows may dry faster than lower ones.
This design becomes easier to maintain when every row has a purpose—perhaps herbs at hand height, flowers above, and strawberries lower down. Mixing everything everywhere may look lively at first but makes watering and harvesting less predictable.
Mount one gutter beneath a window as a narrow herb trough, or place short sections on a freestanding timber frame for a rental-friendly version. Clean plastic channels are lighter, while sound metal gutters may suit a more industrial garden style.
DIY Rain Boot Planters
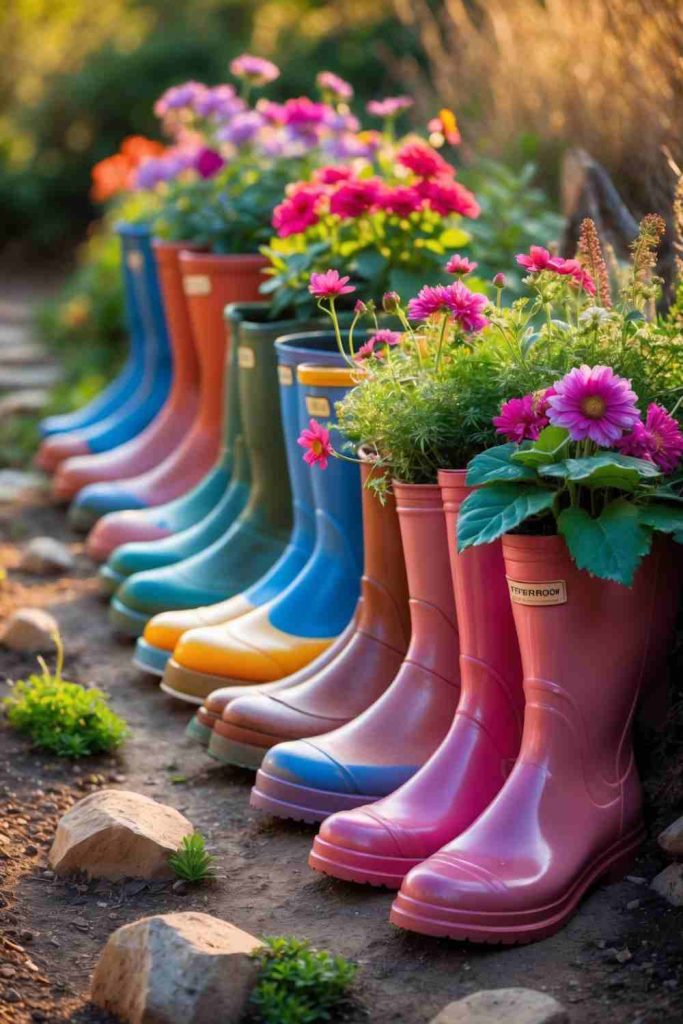
Worn rain boots make playful upright planters because the tall shafts lift flowers above the ground and the pairs already create a natural grouping. Bright rubber colours, patterned surfaces, buckles, and handles remain visible around the planting, so the project needs very little extra decoration.
Boots hold water extremely well, which is useful on feet and troublesome around roots. Drainage holes in the soles are essential for direct planting, and the narrow ankle can make filling awkward. I would use small nursery pots inside taller boots where possible, especially when the pair has sentimental or decorative value.
Materials and Tools
· Clean unwanted rain boots without exposed sharp parts
· Drill or awl suitable for rubber
· Small mesh pieces
· Lightweight potting mix or fitted nursery pots
· Compact flowers or trailing plants
· A stable tray, step, fence support, or protected display area
Steps for This Garden Project
1. Clean and inspect the boots. Wash away mud, dry the lining, and check the soles for splits that could make the boot collapse rather than drain neatly. Remove loose insoles and any metal fitting that may cut the rubber or snag a hand.
2. Create several drainage openings. Drill through the lowest parts of the sole and place mesh inside so compost does not escape. Test with water before filling, because one tiny hole may clog quickly once soil settles into the toe.
3. Fill without distorting the shape. Add mix in small amounts and tap the boot gently so it reaches the toe, or slide a narrow nursery pot into the shaft. Keep the ankle supported and stop below the top so water does not spill muddy soil down the outside.
4. Plant and arrange the pair. Use flowers that suit the available root space, then place the boots where they cannot topple in wind. Check drainage after rain and lift removable pots for watering and seasonal replacement.
A pair looks strongest when the planting differs slightly but still feels related. Two completely identical flower mounds can look rather formal for such a playful object, while one shared colour keeps the boots connected.
Use a single child’s boot for a small succulent arrangement, hang lightweight boots from a secure fence support, or fill damaged boots with artificial stems for a covered porch. Shoes with open toes can become planters too, but they usually need an inner pot to keep the compost contained.
Rustic Toolbox Herb Garden
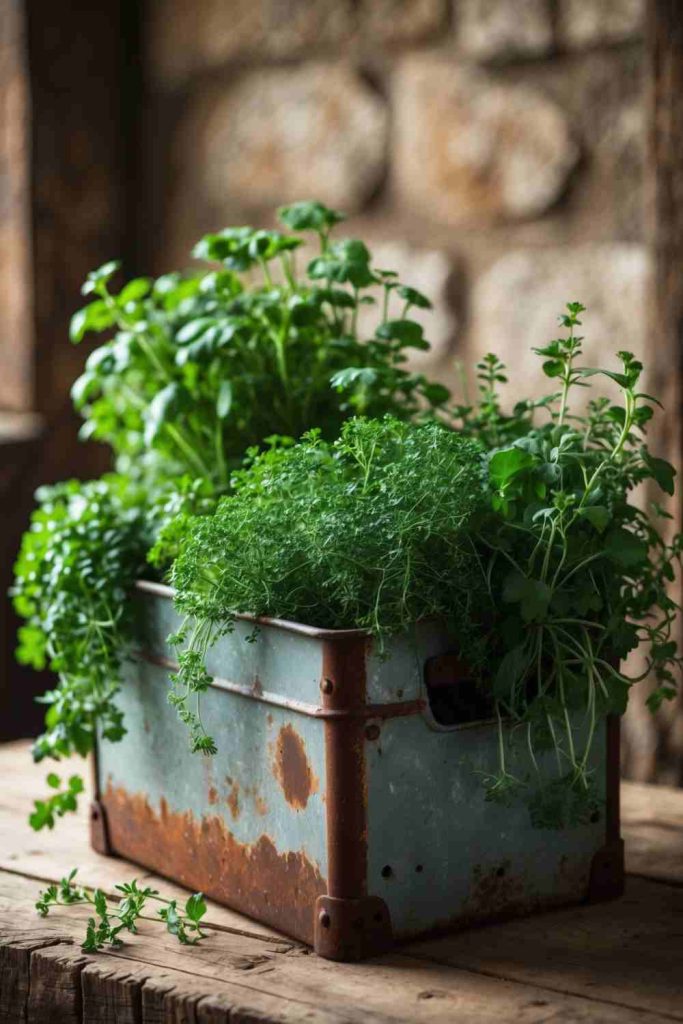
An old toolbox brings several useful details to a herb planter: a long shallow body, a central handle, and often small compartments that naturally divide one plant from another. Worn timber or aged metal gives the garden a practical workshop character, while the handle makes the original object immediately recognisable.
A toolbox may also contain old oil, paint, or rust that should not touch edible plants. Clean it carefully and use removable pots whenever the previous contents are uncertain. The handle is decorative and convenient for an empty box, but I would not lift the finished herb garden by it unless the joints have been checked for the full planted weight.
Materials and Tools
· A sound wooden or metal toolbox
· Cleaner and brushes suited to the material
· Rust treatment or exterior wood finish where needed
· Removable nursery pots, trough liner, or individual containers
· Lightweight potting mix
· Compact herbs with similar light requirements
Steps for This Garden Project
1. Empty and inspect the toolbox. Remove dust, loose rust, splinters, and any unidentified residue, then check the base, corners, handle, and dividers. If the box has a workshop history you cannot verify, plan to keep all compost inside separate pots.
2. Protect the structure without erasing its age. Treat active rust, seal vulnerable timber, and preserve sound worn areas that give the box its character. Drill drainage only when direct planting is appropriate; otherwise fit a tray that can be lifted out and emptied.
3. Arrange the herb containers before filling gaps. Set taller herbs towards the back or ends, keep spreading varieties in their own pots, and make sure the handle remains usable as a visual divider. Add small spacers beneath the pots so drained water does not remain against the toolbox base.
4. Plant, label, and place the toolbox. Use clear markers that do not compete with the aged surface, water the pots separately, and trim herbs to keep air moving between them. Carry the box only when light, supporting it from underneath rather than trusting an old handle.
The worn surface is the reason this idea feels convincing. I would repair active damage but avoid sanding every dent away; a toolbox that looks brand new can lose the quiet history that makes it interesting among fresh herbs.
Use the box as a holder for potted flowers, seed packets, or gardening tools when edible planting is not suitable. A wooden cutlery tray or old sewing box can create a smaller divided herb display for a windowsill.
Wooden Pallet Vertical Garden
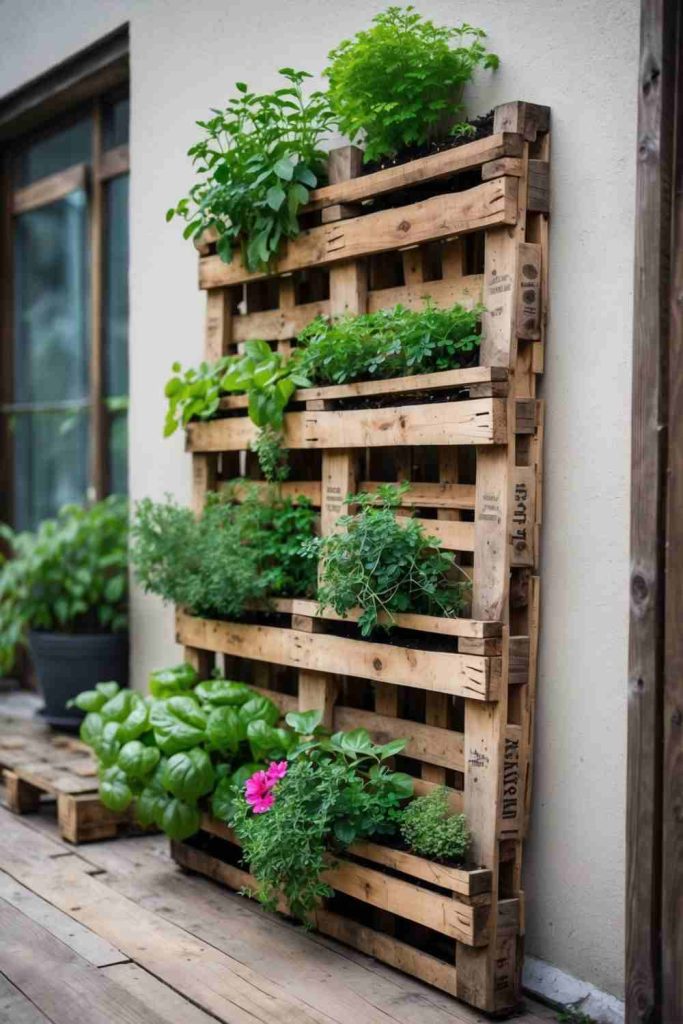
A wooden pallet offers a ready-made grid for vertical planting, with horizontal slats that can support pockets, pots, or lined planting troughs. Once secured upright, it gives herbs and flowers several levels while keeping a strong rustic frame visible around the foliage.
Not every pallet belongs in a garden. Check the treatment mark, avoid timber with chemical spills or an unknown industrial history, and reject rotten or deeply split boards. The pallet also needs firm anchoring; leaning a soil-filled structure loosely against a fence is not enough once wind and watering add movement.
Materials and Tools
· A clean, sound pallet suitable for reuse
· Work gloves, sandpaper, and a brush
· Exterior wood finish if desired
· Landscape fabric, sturdy planting pockets, or pot brackets
· Staples or screws appropriate to the construction
· Wall anchors or a stable freestanding support
· Lightweight mix and compact plants
Steps for This Garden Project
1. Select and prepare the pallet. Confirm that the timber is appropriate for garden use, remove protruding nails, tighten loose boards, and sand rough edges. Clean it thoroughly and let it dry before applying any finish or fabric.
2. Choose how the plants will be held. Staple strong landscape fabric into selected cavities to form deep pockets, or attach individual pot holders to the front. Reinforce the lower edge of every pocket so wet compost cannot pull the fabric away from the slats.
3. Anchor the pallet before filling it. Fix it into a solid wall or fence structure with spacers for airflow, or build a broad freestanding base that cannot tip. Test the empty frame with pressure from several directions and keep the heaviest planting areas low.
4. Fill and plant from the bottom upward. Add mix gradually, settle each pocket, and choose trailing plants for upper levels where they will not smother growth below. Water carefully and inspect the rear fabric, timber, and fixings throughout the season.
I would leave some timber visible between the plants. Filling every gap immediately can hide the pallet structure and makes it harder to inspect the wood or reach individual pockets when something needs attention.
Attach removable pots instead of fabric pockets for easier winter storage, or place the pallet horizontally on blocks as a low planter frame. A narrow section cut from a damaged pallet can become a small herb rack, provided the remaining boards stay strong.
Vintage Suitcase Flower Planter
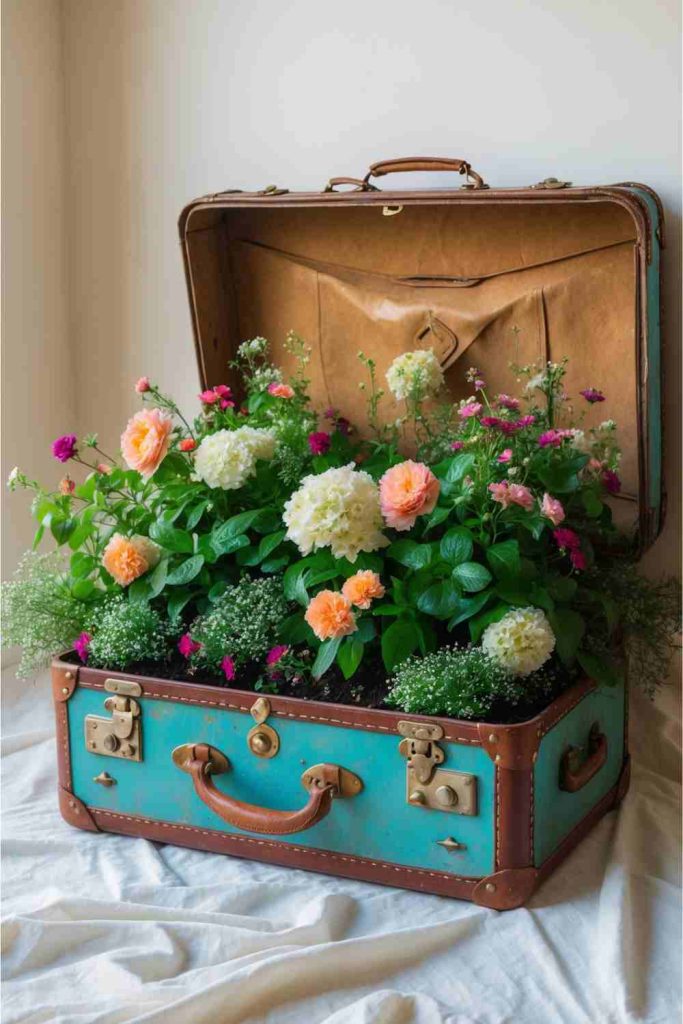
An open vintage suitcase frames flowers like a small travelling garden, with the lid becoming a backdrop and the case body holding the planting. Lining fabric, old clasps, corner protectors, and a worn handle all contribute to the display, so the flowers should support those details rather than bury them completely.
Most suitcases were never designed to remain wet. Cardboard panels can collapse, leather can crack, metal fittings can rust, and a closed drainage system can quickly damage roots. I would treat the suitcase as a decorative outer container with removable pots or a fitted waterproof tray, especially when the case has genuine age or sentimental value.
Materials and Tools
· A structurally sound old suitcase
· A removable waterproof tray or collection of nursery pots
· Blocks or a low stand to keep the base off damp ground
· A discreet lid support
· Lightweight potting mix
· Seasonal flowers, trailing foliage, or dry decorative plants
Steps for This Garden Project
1. Inspect the case and decide how much weather it can tolerate. Test the hinges, base, lid, handle, and corners, then clean the interior gently. Keep delicate paper labels or fabric away from direct water and choose a sheltered position for vulnerable materials.
2. Support the open form. Place the case on a stable stand and add a discreet brace so the lid cannot fall forward in wind. Do not rely on tired hinges to hold the display angle, and keep the case level so inner pots do not slide.
3. Build a removable planting layer. Fit a waterproof tray or arrange nursery pots inside the lower section, using lightweight spacers to bring smaller pots to the right height. Leave room to lift each pot out and to empty collected water after watering.
4. Arrange the flowers around the suitcase details. Place taller growth near the lid, let a little foliage soften the front edge, and keep clasps or labels visible. Water the plants outside the suitcase when possible, then return them only after excess water has drained.
The suitcase is already theatrical, so the planting does not need every possible colour. A limited flower palette lets the worn lining, hardware, and travel marks remain part of the composition instead of becoming background clutter.
Use artificial flowers or dried seed heads for a long-lasting covered display, or fill the case with small removable houseplants indoors. A hard-sided modern case can create a bolder version, while a small vanity case may suit one compact plant.
Rustic Ladder Plant Stand
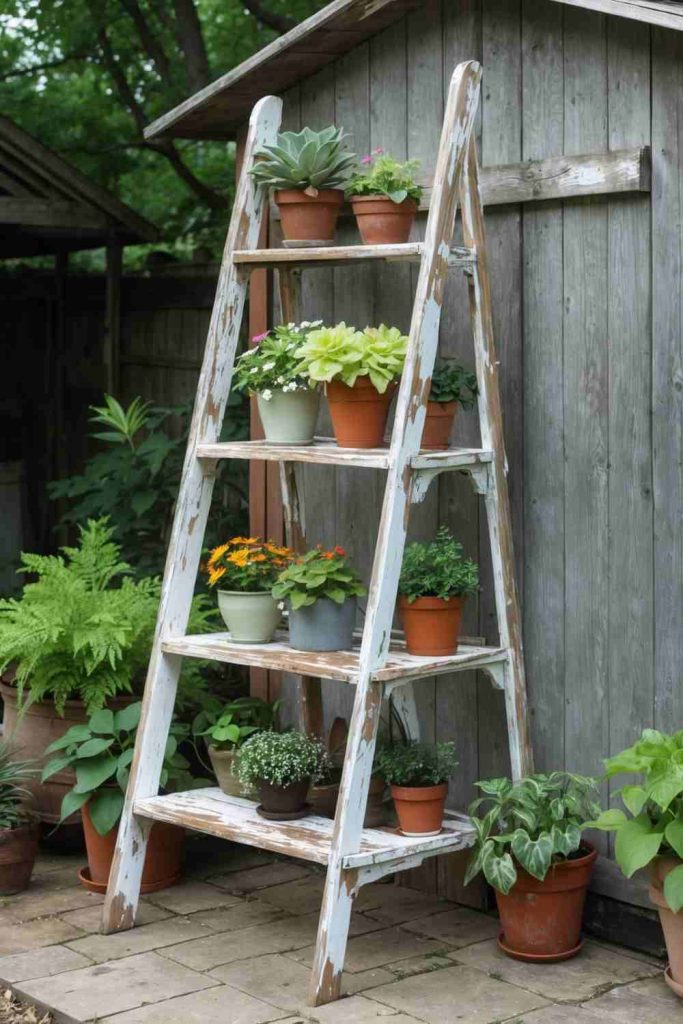
An old wooden ladder creates height for potted plants without requiring a new shelving unit. Each rung or added shelf can hold a different pot, and the narrowing shape naturally places smaller plants near the top and larger ones lower down. Faded timber and paint marks provide enough texture that the pots can remain fairly simple.
A decorative ladder still needs to behave like a structure. Loose rungs, split side rails, slippery feet, and an unsupported lean can become dangerous once plants add weight. I would repair it first, anchor the top or open it fully if it is a step ladder, and place every pot on a proper shelf rather than balancing a narrow base on one rung.
Materials and Tools
· A sound wooden ladder or step ladder
· Screws, brackets, and timber for optional shelves
· Sandpaper and exterior wood finish if needed
· Non-slip feet or ground pads
· Wall restraint or anchor suitable for the location
· Pots in graduated sizes and plants suited to the light
Steps for This Garden Project
1. Check the ladder as though it still needed to carry weight. Tighten joints, replace unsafe rungs, sand splinters, and reject timber with deep rot. Clean the feet and decide whether the ladder will lean, open, or stand within a custom base.
2. Add stable pot supports. Fit boards across paired rungs on a step ladder or attach small level shelves to a leaning ladder using brackets. Test every support with gradually increasing weight and keep shelf edges wide enough that pots cannot slide off easily.
3. Secure the complete stand. Add non-slip pads, place it on level ground, and use a restraint at the top where a ladder leans against a wall. Keep the heaviest pots on the lowest shelves and avoid creating a top-heavy arrangement that catches the wind.
4. Arrange and maintain the plants. Position larger foliage low, use lighter pots higher, and leave access for watering without reaching through unstable branches. Remove pots before moving the ladder and inspect the timber and fixings after wet weather.
The ladder shape looks best when the display becomes lighter as it rises. One small pot near the top feels intentional; a heavy container perched above eye level feels like a future story nobody wants to tell.
Use a short step stool as a compact stand, lay a ladder horizontally on brackets for a wall shelf, or hang lightweight pots from sound rungs with secure hooks. Indoors, an untreated ladder can hold dry plant baskets where it will not face rain.
Garden Upcycling Decisions That Can Shorten a Project’s Life
Using an object before checking what it once contained. Toolboxes, cans, gutters, and workshop containers may carry residues that cleaning cannot reliably remove. Keep edible plants inside separate food-safe nursery pots when the history is uncertain, or use the object only for ornamental planting.
Treating pebbles as a substitute for drainage. A layer of stones may create a small reservoir, but water still has nowhere to leave a sealed jar, boot, or suitcase. Add proper outlets where safe, use removable pots, and empty collected water before roots remain wet for long periods.
Painting before repairing the structure. Fresh colour can hide a weak drawer base, rusted colander handle, split pallet slat, or loose ladder rung without making it stronger. Complete repairs, reinforcement, and drainage work first; decoration should be the final surface layer, not a disguise for damage.
Underestimating wet weight. Compost, plants, and retained water can turn a light organiser or wall channel into a heavy load. Choose anchors and brackets for the completed planter, distribute the weight across several points, and test gradually before hanging anything above a walkway or seating area.
Letting reused wood sit directly on damp ground. Drawer boxes, ladders, pallets, and suitcases absorb moisture through their lowest surfaces. Raise them on feet or blocks, protect the end grain, and leave airflow beneath so the object can dry after watering or rain.
Choosing plants for appearance alone. A deep tub, shallow gutter, hot tyre, and shaded pocket do not offer the same growing conditions. Match root depth, light, mature size, and watering needs to the reused container so the planting does not outgrow or overwhelm the structure.
Adding so much decoration that maintenance becomes difficult. Extra rope, signs, ornaments, and tightly packed plants may block drainage holes or hide developing rust and rot. Keep inspection points visible and make inner pots removable wherever regular cleaning or seasonal changes will be needed.
Frequently Asked Questions
Which upcycle garden ideas are easiest for beginners?
Tin can planters, rain boot planters, a broken-pot fairy garden, and a simple toolbox display are approachable because they need limited construction. Begin with a container that can hold a removable nursery pot, as this avoids complicated lining and makes drainage easier to manage.
How do I know whether an old container is safe for herbs or vegetables?
Use the item’s history as your guide. Avoid direct planting in containers that held chemicals, oil, paint, or unknown materials, and place edible plants in separate clean pots instead. When the material itself is uncertain, ornamental planting is the more cautious choice.
Do all upcycled planters need drainage holes?
Living plants need a reliable way to avoid sitting in excess water, but the outer decorative object does not always need to be drilled. A removable pot with its own drainage can sit inside a jar, can, boot, suitcase, or toolbox, provided you empty water collected underneath.
What paint should I use on outdoor garden projects?
Choose a finish made for the particular surface and outdoor conditions, whether that surface is metal, timber, masonry, or rubber. Follow the product instructions for cleaning, priming, ventilation, and curing, and keep decorative coatings away from areas that directly contact edible plants unless the product is intended for that use.
How can I keep wooden upcycled planters from rotting quickly?
Repair joints, protect vulnerable timber with a suitable exterior finish, and prevent constant contact with wet compost by using removable pots or liners. Raise the wood above damp ground and make sure water cannot become trapped between the liner and the base.
Can a vertical garden be attached to any wall or fence?
The surface must be strong enough for the complete wet weight and suitable fixings must reach solid support. Protect the wall from repeated water runoff, leave airflow behind the planter where possible, and avoid hanging heavy containers above areas where people regularly sit or walk.
How should I prepare these projects for winter?
Remove tender plants and empty containers that could hold freezing water. Store delicate fabric organisers, suitcases, and lightly constructed displays under cover, then inspect paint, wood, metal, chains, and fixings before using them again in spring.
Let Forgotten Garden Objects Become Useful Growing Spaces
The most successful upcycle garden ideas begin with the condition and shape of the object already available. A colander offers drainage, a sink provides a basin and outlet, a ladder creates height, and a broken pot supplies its own miniature terraces. Working with those features usually produces a more convincing result than forcing every item to behave like the same standard planter.
Start with one manageable object and make drainage and support your first decisions. A painted can, planted boot, or herb-filled toolbox can test the idea before a larger build. Which forgotten object could become your next useful growing space?