Turn Cherished Outfits into a Patchwork Quilt
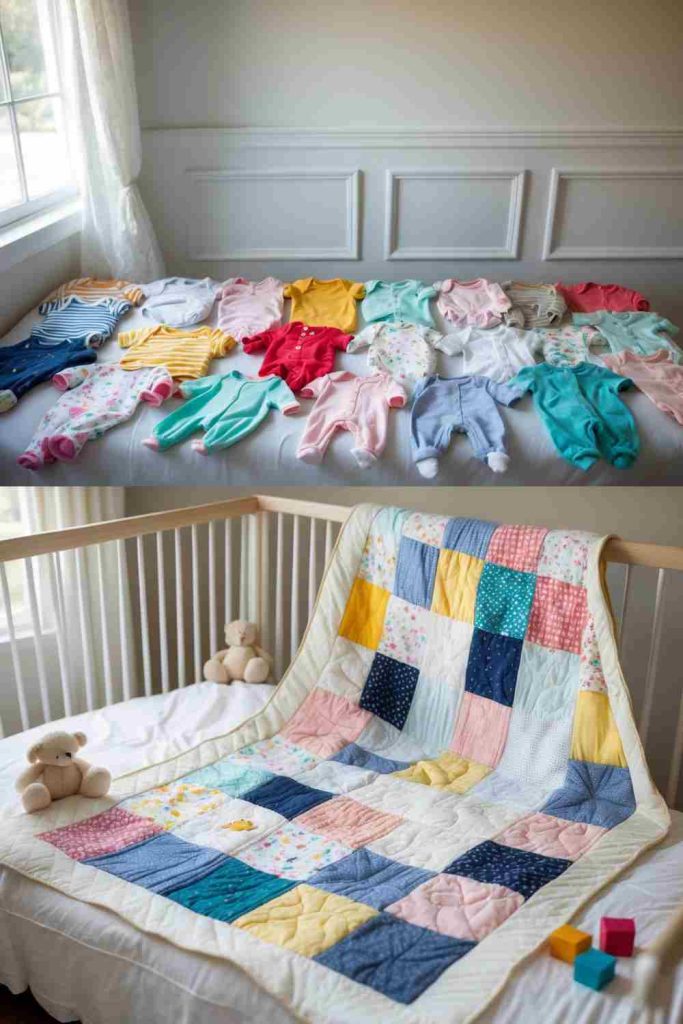
4 Steps to Create Your Patchwork Quilt
Gather and Prepare
Collect your baby’s outgrown clothes. Wash and iron them to ensure they’re clean and wrinkle-free. Then, cut the fabric into square or rectangle shapes, aiming for uniform sizes.
Lay Out Your Design
Arrange the fabric pieces on a flat surface. Mix and match patterns, colors, and textures to create a visually pleasing layout. Snap a photo to remember the design before sewing.
Sew the Quilt Top
Using a sewing machine, sew the fabric pieces together row by row. Once rows are complete, attach them to form the full quilt top. Press seams flat as you go for a smooth finish.
Layer and Finish
Pair the quilt top with a soft backing fabric and a layer of batting in between. Pin all layers together and quilt as desired either by hand or with a machine. Finish by sewing on binding to the edges for a polished look.
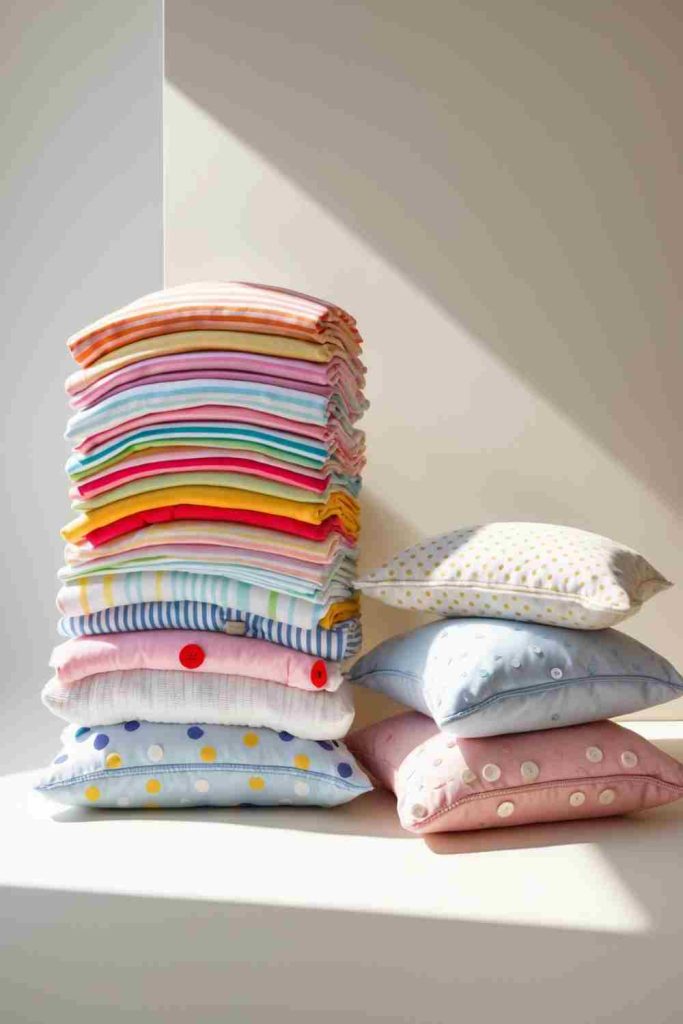
Upcycling Baby Clothes Ideas: Create Adorable Throw Pillows from Cherished Outfits
4 Steps to Create Your Throw Pillows
- Choose and Prep Your Fabric
Select baby clothes with sentimental value. Wash and iron them to ensure they’re clean and smooth. Cut the fabric into squares or rectangles based on your pillow size preference. - Design Your Pillow Cover
Combine different patterns and colors for a unique look. For clothes with buttons or cute embellishments, position them strategically to be the centerpiece of your design. - Sew the Covers
Pin two fabric pieces together, right sides facing each other. Sew along three edges using a sewing machine, leaving the fourth side open. Turn the fabric right side out and press the edges flat for a neat finish. - Stuff and Seal
Insert a pillow form or stuff the cover with soft filling. Close the open edge by hand stitching or using a machine. Add decorative stitches if desired for an extra special touch.
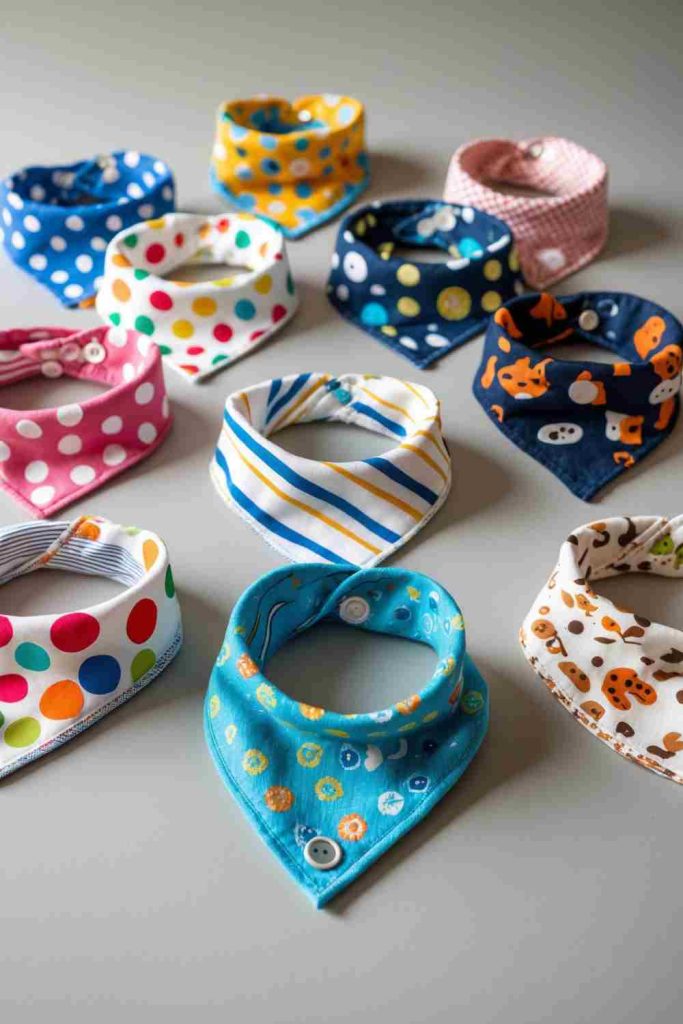
Transform Tiny Outfits into Adorable Bandana Bibs
4 Steps to Create Your Bandana Bibs
- Select and Prep Materials
Gather baby clothes with patterns or colors you love. Wash and iron them to freshen the fabric, then cut out triangle shapes that will form the bib’s base. Aim for symmetrical cuts for a tidy finish. - Add a Backing Fabric
Choose a soft, absorbent material like flannel or terry cloth for the backing. Cut this fabric to match your bib shape and pin the two pieces together, right sides facing each other. - Sew the Bib
Sew along the edges of the pinned fabric, leaving a small gap for turning. Flip the bib right side out through the gap and press the edges flat. Then, top stitch around the border for a polished look. - Add a Fastener
Attach snaps, Velcro, or buttons to secure the bib in place. Make sure they’re placed for easy fastening and a snug but comfortable fit around your baby’s neck. Test your bib to confirm it fits perfectly.
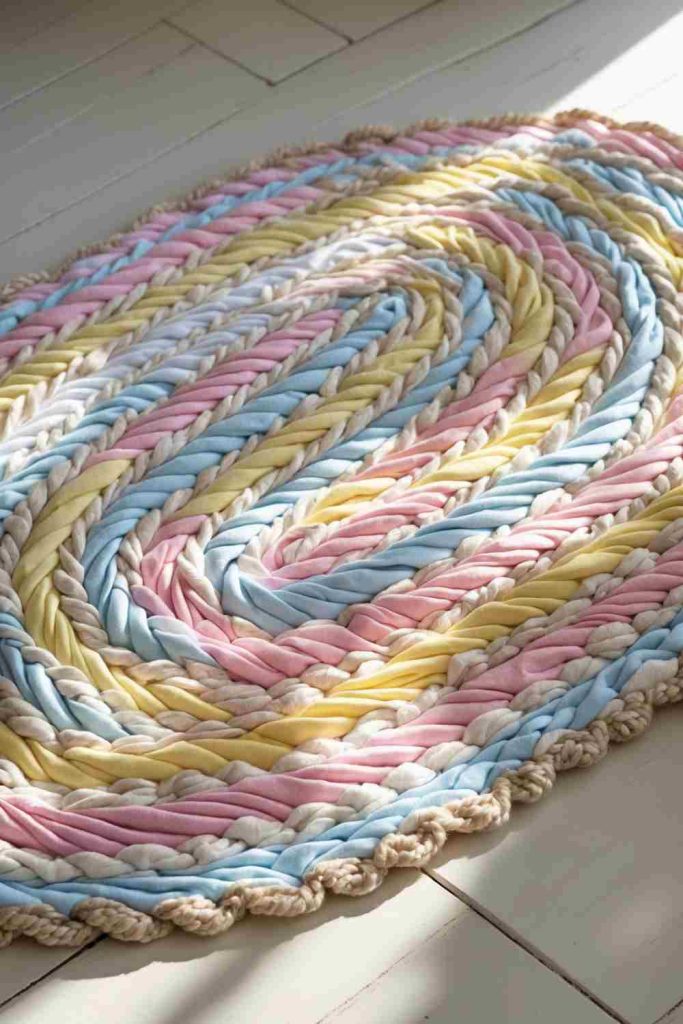
Craft a Beautiful Braided Rag Rug from Beloved Outfits
4 Steps to Create Your Braided Rag Rug
- Prep and Cut Fabric Strips
Select baby clothes you want to upcycle. Wash and iron them, then cut the fabric into long, even strips around 1-2 inches wide. Group similar colors together for a harmonious look. - Braid the Strips
Take three fabric strips, knot them at one end, and begin braiding tightly. Secure the ends with another knot. Continuously add new fabric strips by overlapping and sewing the ends together to create a longer braid. - Shape the Rug
Start coiling your braid into an oval or circle shape on a flat surface. Use needle and thread to hand-stitch the edges of the braid together as you expand outward. Keep the stitches tight to maintain a firm, uniform rug structure. - Finish and Secure
Once you’ve reached your desired rug size, tuck and stitch the braid’s loose end securely under the rug. Double-check all seams for stability, and your braided rag rug is ready to use!
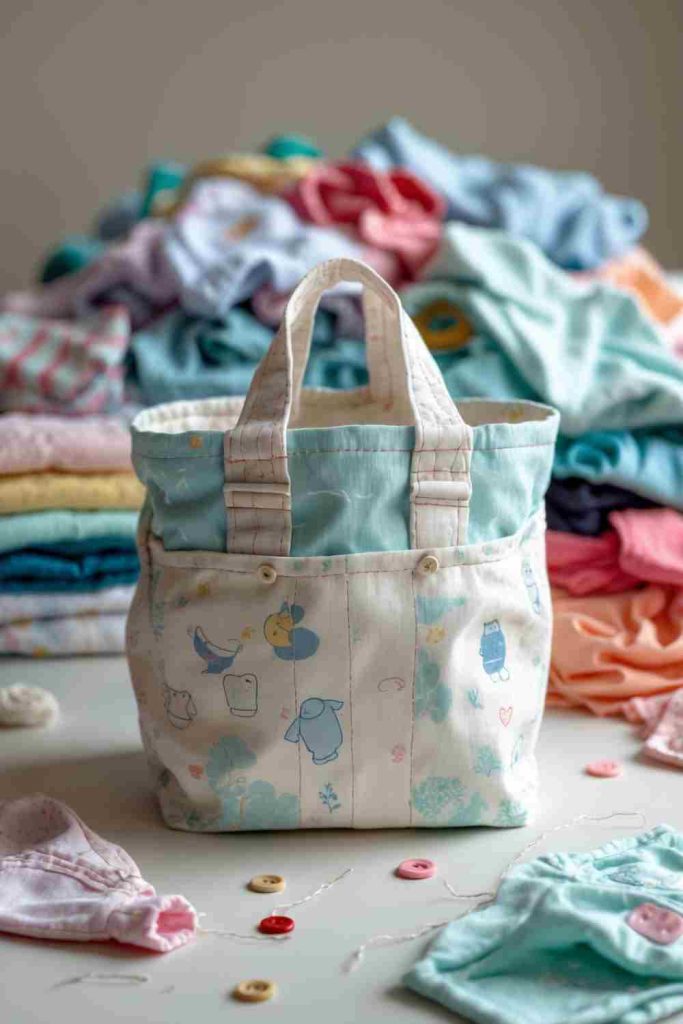
Craft a Cute Cloth Laundry Bag from Cherished Outfits
4 Steps to Create Your Cloth Laundry Bag
- Select and Cut Your Fabric
Choose baby clothes with patterns or prints that hold a special meaning. Wash and press the fabric, then cut it into panels in your desired bag size. Typically, two rectangular pieces will work for a simple bag design. - Sew the Bag’s Body
Pin the panels together, right sides facing each other. Stitch along the sides and bottom using a sewing machine, leaving the top open. For extra durability, double stitch the seams. - Create Handles or a Drawstring
If you’re making handles, cut fabric strips, fold them lengthwise, and sew to form sturdy straps. For a drawstring bag, hem the top edge of the bag and create a casing to insert a ribbon or cord. - Add Personalized Details
Embellish your bag with buttons, embroidery, or patches from the original baby clothes. Make it uniquely yours by showcasing meaningful designs or accents that remind you of your little one.
Make Cute Soft Fabric Baby Blocks from Adored Outfits
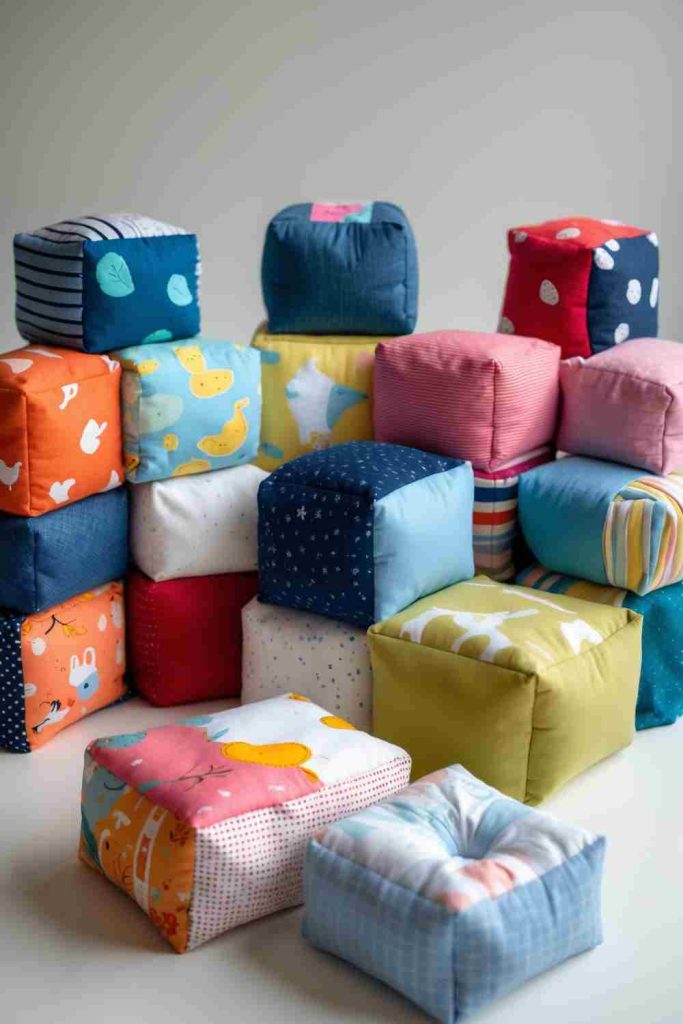
4 Steps to Create Your Fabric Baby Blocks
- Select and Prep the Fabric
Choose baby clothes with fun patterns or bright colors. Wash and iron the pieces, then cut them into equal squares. You’ll need six squares for each block. - Sew the Squares Together
Stitch the fabric squares together, one at a time, to create the sides of the block. Start with four squares to make the sides, then attach the top and bottom, leaving a small opening. - Stuff the Block
Flip the sewn fabric inside out and fill it with soft stuffing or scraps of unused fabric. Ensure the stuffing is evenly distributed for a sturdy, squishy block. - Close the Block and Add Details: Fold the edges of the opening inward and sew it shut. For added charm, you can sew on small embellishments like fabric appliques or embroidery from the original clothes.
Craft Adorable Beanies from Precious Outfits
4 Steps to Create Your Baby Clothes Beanies
- Pick and Prep Your Fabric
Choose soft, stretchy baby clothes like onesies or T-shirts. Wash and iron the fabric, then cut out two half-circle shapes (or your preferred hat pattern) slightly larger than your desired beanie size. - Sew the Edges Together
Place the two fabric pieces with the right sides facing each other. Sew along the curved edge, leaving the straight bottom edge open. Use a stretch stitch for durability. - Hem the Bottom
Fold the bottom edge inward about half an inch to create a clean hem. Sew around the hemline, leaving a neat and stretchy finish. - Add a Touch of Personalization
Decorate your beanie with embellishments like small bows, leftover appliques, or fabric patches from the original outfit. Make it unique and meaningful!
Make Sentimental Fabric-Covered Baby Books

4 Steps to Create Your Fabric-Covered Baby Books
- Choose Your Fabric
Pick baby clothes with patterns or colors that hold a special place in your heart. Wash and iron them, then cut the fabric into rectangles slightly larger than the book cover. - Prepare the Book and Fabric
Select hardcover books for the project. Spread a thin layer of fabric glue or use spray adhesive on the book cover. Position the fabric over the cover, ensuring it’s smooth and aligned. - Wrap and Secure Edges
Fold the excess fabric over the book’s edges (top, bottom, and sides). Secure it onto the inside cover with glue, pressing down to ensure no bubbles or loose spots. - Add Personalized Touches: Use buttons, embroidery, or patches from your baby’s clothes to embellish the book cover. These add character and extra sentimental value to your one-of-a-kind creation.
Craft Adorable Hand Puppets from Beloved Outfits
4 Steps to Create Your Baby Clothes Hand Puppets
- Select and Prep the Fabric
Choose baby clothes with cute prints, soft textures, or vibrant colors. Wash and iron the fabric, then cut it into a puppet shape—think of a simple mitten outline with a wider base for the hand. - Sew the Puppet Shape
Place two identical fabric pieces with the right sides facing each other. Stitch around the edges, leaving the bottom open for your hand. Turn the fabric inside out for a smooth finish. - Add Features and Details
Use fabric scraps, buttons, or embroidery to create eyes, noses, and mouths for your puppet. You can even add ears, hats, or animal-like details made from the extra scraps of baby clothes. - Finish the Puppet: Make sure all seams are secure and trim any excess threads. Test your puppet by slipping it onto your hand, then make any final adjustments or embellishments as needed.
Create Stylish Headbands from Outgrown Onesies
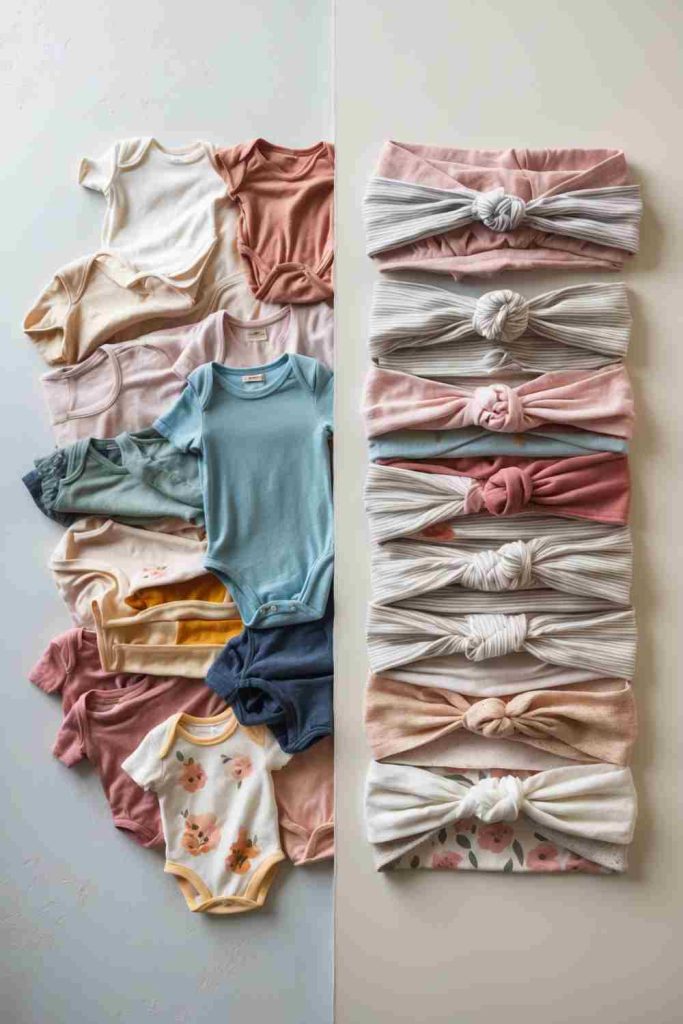
4 Steps to Create Your Baby Clothes Headbands
- Select the Perfect Clothes
Choose soft, stretchy onesies or T-shirts with colors and patterns you love. Wash and iron the fabric to make it easier to work with. - Cut the Fabric Strips
Measure and cut a strip of fabric roughly 16-18 inches long and about 4 inches wide (adjust for the head size). Use the stretchy parts of the clothes for added comfort. - Sew or Knot the Fabric
Fold the fabric in half lengthwise with the right sides facing each other. Sew along the edges to create a tube, then turn it inside out. Tie the fabric into a simple knot or bow at the center for a chic design. - Finish and Adjust
Stretch the headband to check the size, and trim any excess fabric or threads. Add embellishments like small bows, rosettes, or fabric appliques to personalize it further.
Sew Adorable Quilted Baby Bibs from Precious Fabrics
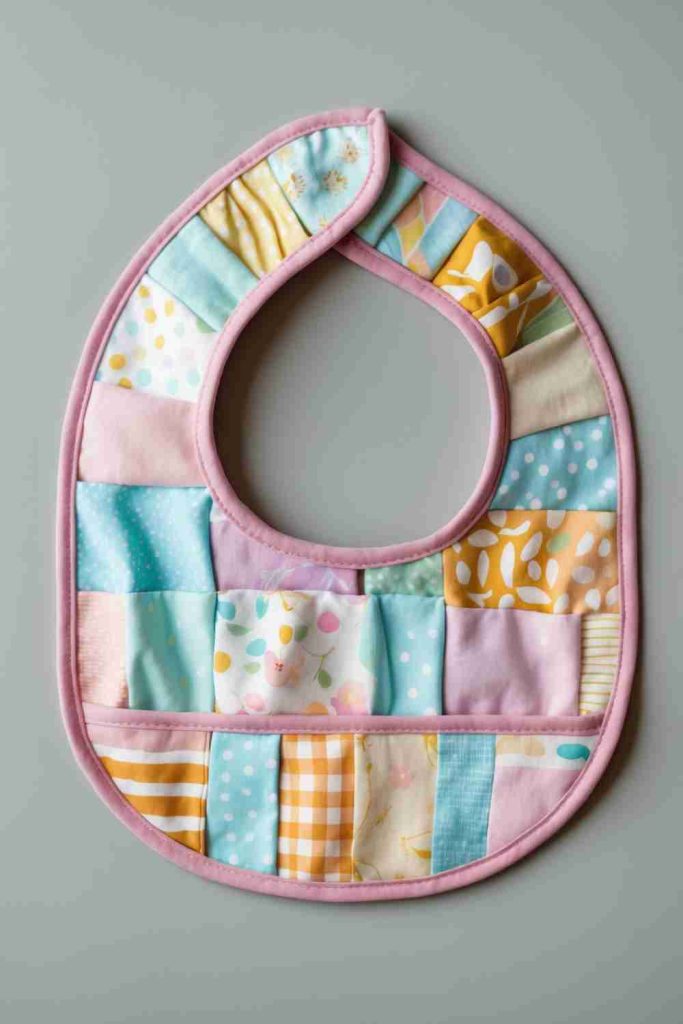
4 Steps to Create Your Quilted Baby Bib
- Gather and Cut Your Fabric
Select baby clothes with soft textures and patterns you love. Cut the fabric into small squares or rectangles of varying patterns and colors to make the quilt patches. - Design Your Patch Arrangement
Lay out the fabric pieces in a bib-shaped pattern, arranging them in a way that balances the colors and patterns. Use a bib template to trace and ensure the shape is correct. - Sew the Quilt Pieces Together
Stitch the fabric patches together into rows, aligning the edges carefully. Once all rows are complete, sew them together to form the quilted bib face. - Attach a Backing and Finish the Edges
Add a soft backing material (can be repurposed baby leggings or similar items) and sew it to the quilted front. Hem or bind the edges with bias tape, fabric trim, or a contrasting color for a clean finish. Add Velcro or snaps at the neck for easy fastening.
Frame Precious Outfits for Charming Nursery Wall Art
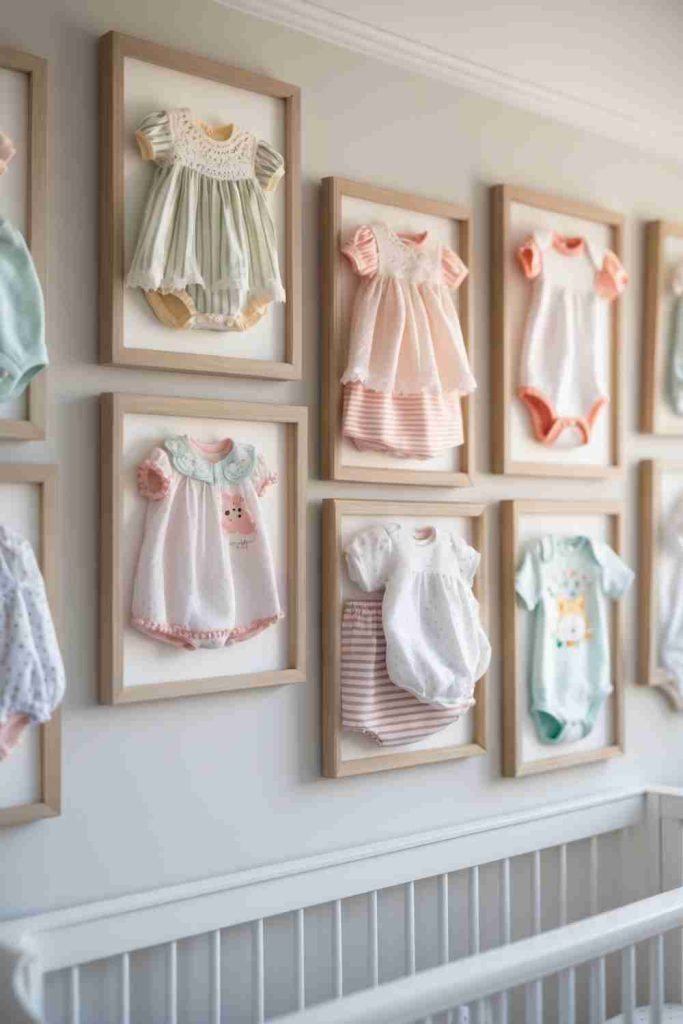
4 Steps to Create Your Nursery Wall Art
- Select the Outfits
Pick baby clothes with sentimental value or adorable patterns and colors. Ensure they’re clean, wrinkle-free, and in good condition for framing. - Prepare the Frames
Choose frames that complement your nursery decor. Standard shadow box frames work best to fit and display the clothes without crushing them. - Arrange and Secure the Clothes
Lay the outfit in the frame’s backing and arrange it neatly. Use fabric tape, pins, or small adhesive strips to secure the clothes without damaging the material. - Hang and Display
Arrange your framed pieces on the nursery wall in a balanced and pleasing layout. Use a level to ensure even spacing, and enjoy this heartwarming display of memories!
Sew a Colorful Small Toy Bag from Special Fabrics
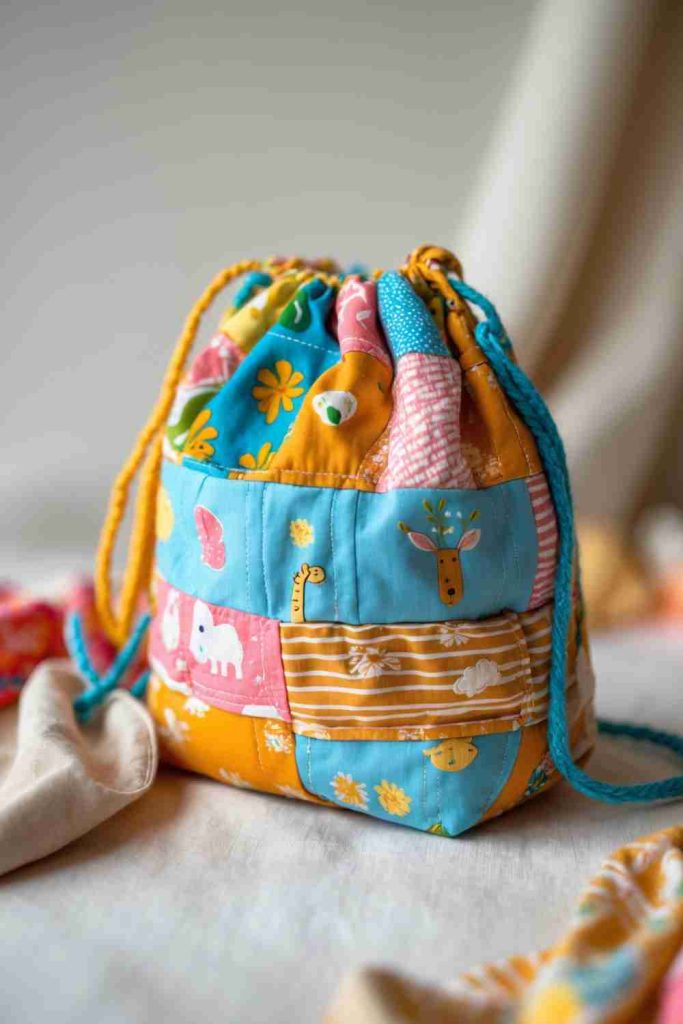
4 Steps to Create Your Small Toy Bag
- Choose and Cut Fabric Patches
Select baby clothes with fun colors and patterns. Cut them into squares or rectangles of equal size to use for the quilted bag design. - Stitch the Patches Together
Sew the fabric pieces together to create a quilted panel that will form the body of the bag. Match the edges carefully for a seamless and sturdy bag design. - Add a Lining and Create the Bag Shape
Use a soft lining, such as an old T-shirt, for the inside of the bag. Sew the quilted panel and lining together, leaving a channel at the top for the drawstring. Sew the sides and bottom to close the bag. - Thread the Drawstring: Insert a cord or a shoelace through the top channel to create the drawstring. Pull gently to gather the top of the bag and tie it securely.
Craft Cute Soft Bookshelf Bins from Old Outfits
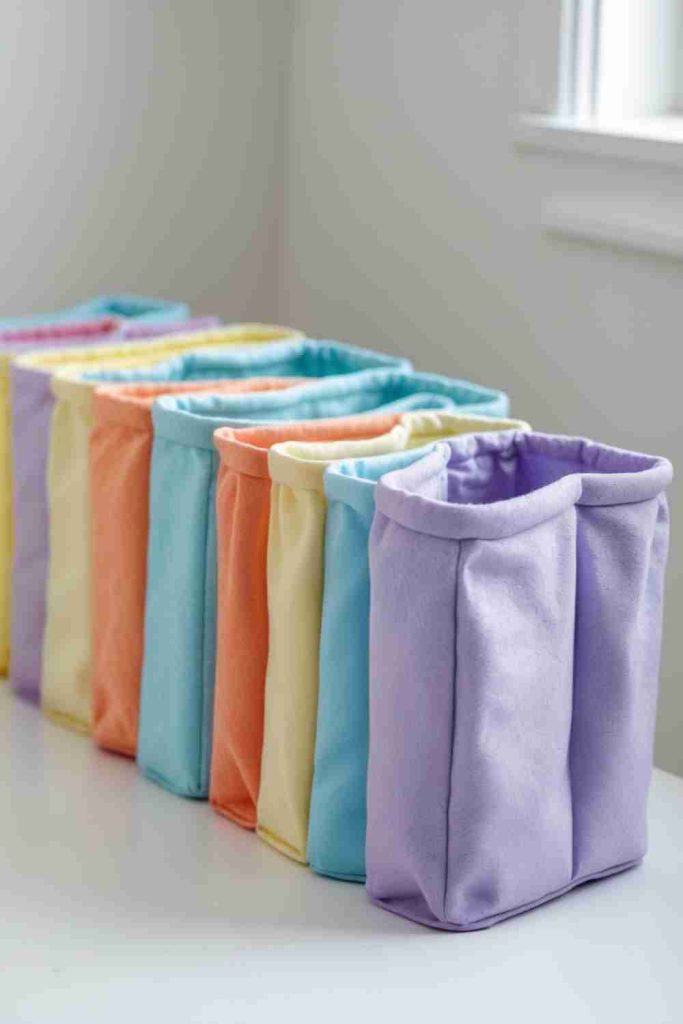
4 Steps to Create Your Soft Bookshelf Bins
- Select and Prepare the Fabric
Pick baby clothes with sturdy yet soft fabrics. Cut the pieces into rectangles or squares that match the size you want for the bins. - Make the Outer Shell
Sew your fabric pieces together to form a rectangular panel. This will serve as the outer layer of your bin. Add interfacing or a bit of padding for extra durability. - Attach the Lining
Line the inside of the bin with a soft, uniform fabric, such as material from an old T-shirt. Sew the lining and the outer shell together, ensuring clean, secure edges. - Shape and Finish Your Bin
Fold and sew the panel into a box shape. Reinforce the bottom for added stability using cardboard covered in fabric. Trim the edges and turn the bin right-side out for a polished look.