Birds in Flight

Materials Needed:
- Canvas (size of your choice)
- Acrylic paints (black, orange, pink, blue, white)
- Paintbrushes (flat, detail, and fan brushes)
- Palette or plate for mixing colors
- Sponge (optional for sky gradient)
- Pencil for light sketching
Steps to Create:
Step 1: Prep the Canvas
I start by prepping my canvas with a light coat of white paint as a base. Once dry, I use a pencil to lightly sketch the horizon line to separate the grounded colors of the sunset from the sky. This helps me balance the composition.
Step 2: Paint the Sunset Sky
To create that stunning gradient, I use a sponge or a fan brush. I blend warm orange and pink near the horizon, fading into light blue as I move upwards. I overlap the colors slightly to achieve a natural transition. If it feels patchy, adding a bit of white paint smooths it all out.
Step 3: Add the Sun
Once the background is dry, I use a small flat brush to create a soft, round sun near the horizon. Adding a hint of white around the edges gives it a glowing look. Keep the sun subtle so it complements the birds later.
Step 4: Paint the Birds in Flight
Now comes the focal point! Using a fine-tipped brush, I paint the silhouetted birds in a V-formation. I start with a small V near the top for distant birds and gradually increase their size as I move toward the foreground. A steady hand helps make the birds sharp and clean.
Pro Tip:
Practice painting the birds on a sheet of paper before adding them to your canvas. A confident stroke makes all the difference for clean silhouettes.
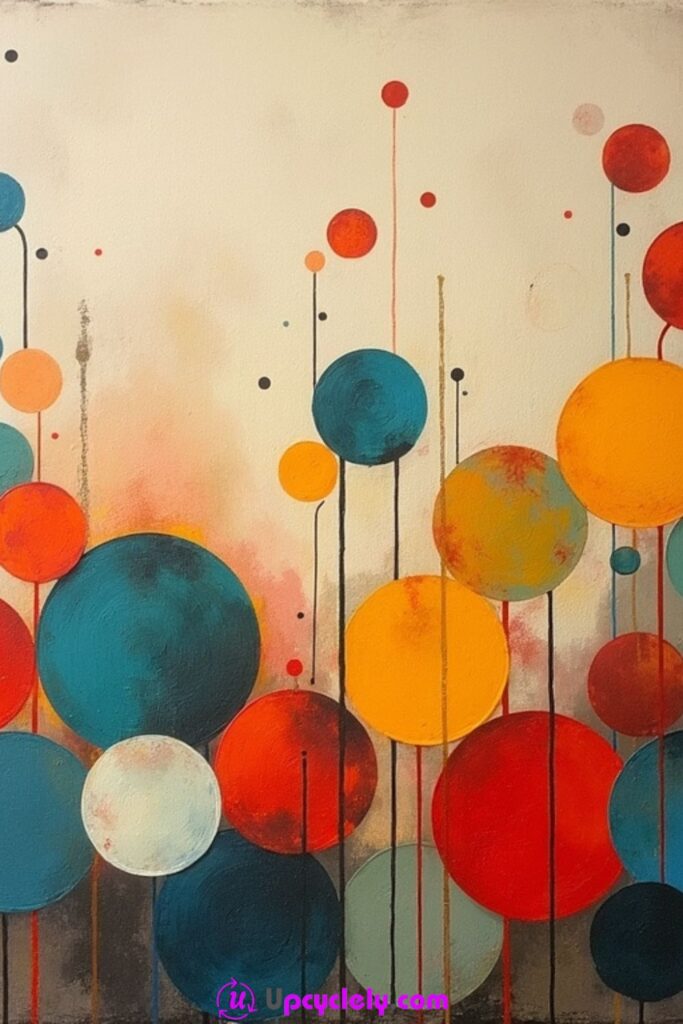
Abstract Circles
Materials Needed:
- Canvas
- Acrylic paints (red, orange, teal, yellow, light blue)
- Round and detail brushes
- Palette or plate
- Thin-tipped marker (optional for outlining)
Steps to Create:
Step 1: Layout the Composition
I sketch a basic layout of where the circles will go. I keep larger circles towards the bottom and small ones at the top, connecting them with thin lines to create a flow.
Step 2: Paint the Circles
Using a round brush, I paint the larger circles first in bright, bold colors. Red, orange, and teal are my go-to base colors. I layer light blue and yellow over some areas to create depth.
Step 3: Connect the Circles
Once the circles are dry, I use a thin brush or a fine marker to draw vertical, stem-like lines connecting them. These lines can overlap or curve gently for an organic look.
Step 4: Add Highlights and Layers
Next, I add lighter or darker shades to parts of the circles to give them dimension. I also layer smaller dots and shapes around the main circles so they feel vibrant and textured.
Pro Tip:
Use a metallic paint (like gold or silver) for thin outlines or accents. It adds an eye-catching shimmer!
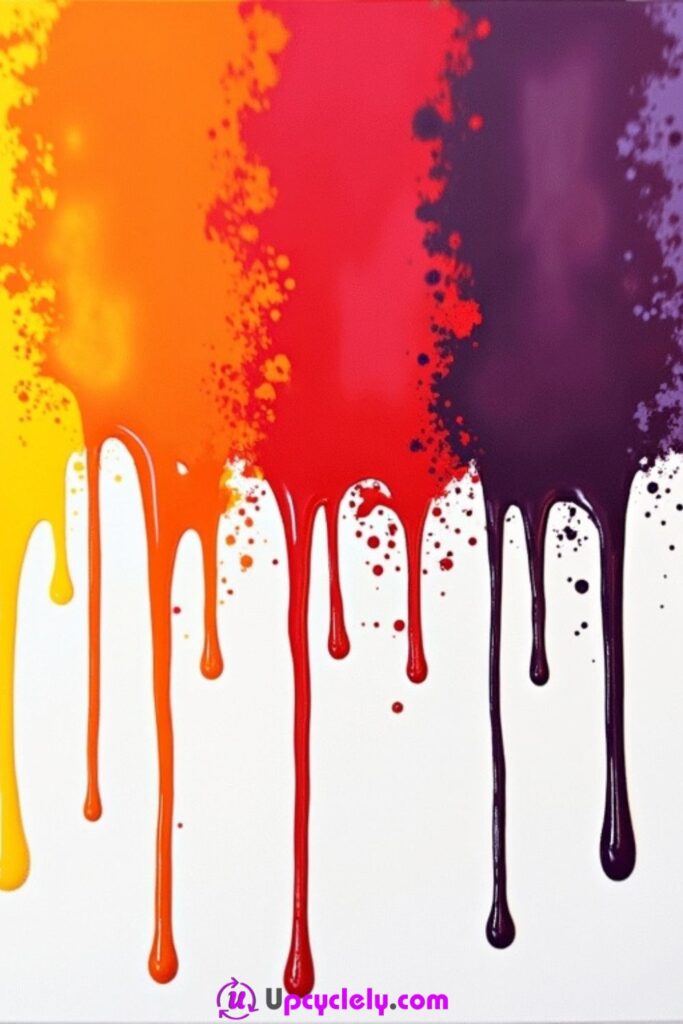
Abstract Drips
Materials Needed:
- Canvas
- Acrylic paints (yellow, orange, red, purple)
- Palette knife (optional)
- Paintbrushes
- Cup of water or pipette
- Dropper or squeeze bottles
Steps to Create:
Step 1: Prep the Canvas
I start by placing my canvas on a flat surface and applying a thin layer of white acrylic paint as the base. It’s important to ensure this base dries completely before moving on.
Step 2: Mix the Colors
I mix each of the four colors with a small amount of water to make them fluid enough for dripping. If you want bolder drips, avoid diluting the colors too much.
Step 3: Create the Drips
Using a pipette or by lightly tipping a squeeze bottle, I apply the paint at the top edge of the canvas, allowing the colors to flow downward naturally. I control the length by tilting the canvas.
Step 4: Blend Transitions
While the paint is still wet, I use a palette knife or brush to gently blend where two colors meet. This creates a seamless gradient effect.
Pro Tip:
Place newspapers or an old sheet below your workspace. That way, any accidental drips or spills won’t create a mess.
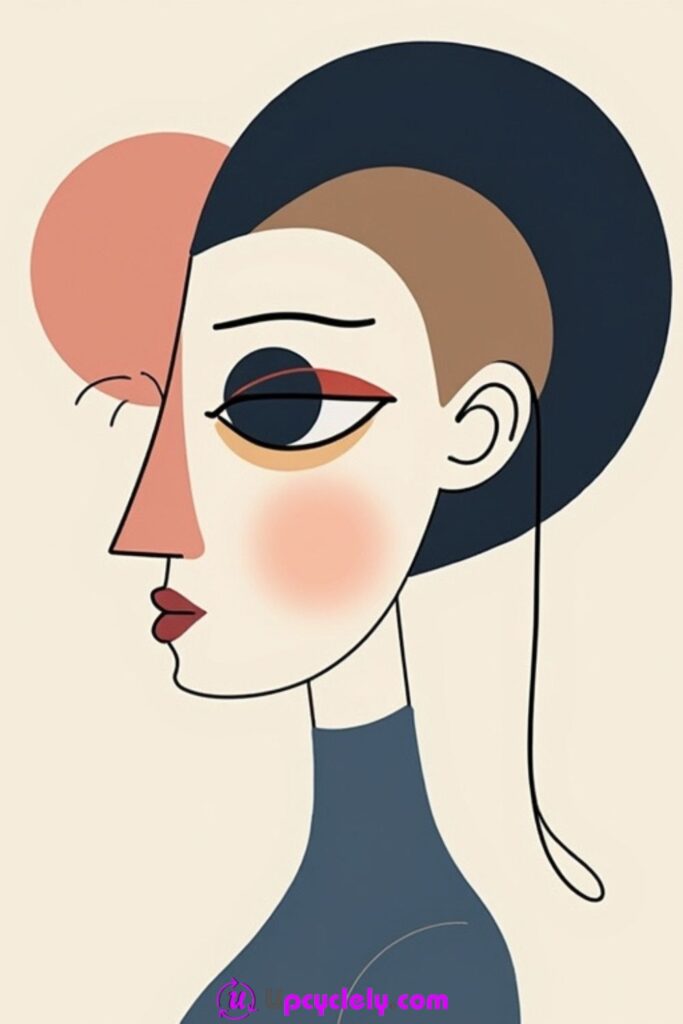
Abstract Faces
Materials Needed:
- Canvas
- Acrylic paints (tan, pink, black, dark blue, red)
- Ruler or stencil for sharp lines
- Pencils for light sketches
- Paintbrushes
Steps to Create:
Step 1: Sketch the Profile
I start by lightly sketching the face’s profile on the canvas. Geometric shapes like triangles for the nose and ovals for the eye make the process easier.
Step 2: Block in Base Shapes
Using a flat brush, I fill in the different areas of the face with tan or pink paint. The hair can be a bold blue (or any color you prefer).
Step 3: Define the Details
With a detail brush, I carefully outline the eye, lips, and other elements in black. I add red for the lips and blush to the cheek, making the face pop against the muted background.
Step 4: Add Abstract Elements
I paint a bold circle overlapping the forehead and a few lines extending outward from the head. These touches bring in the modern, abstract style.
Pro Tip:
Don’t aim for perfection with symmetry. The beauty of abstract art lies in its imperfections!
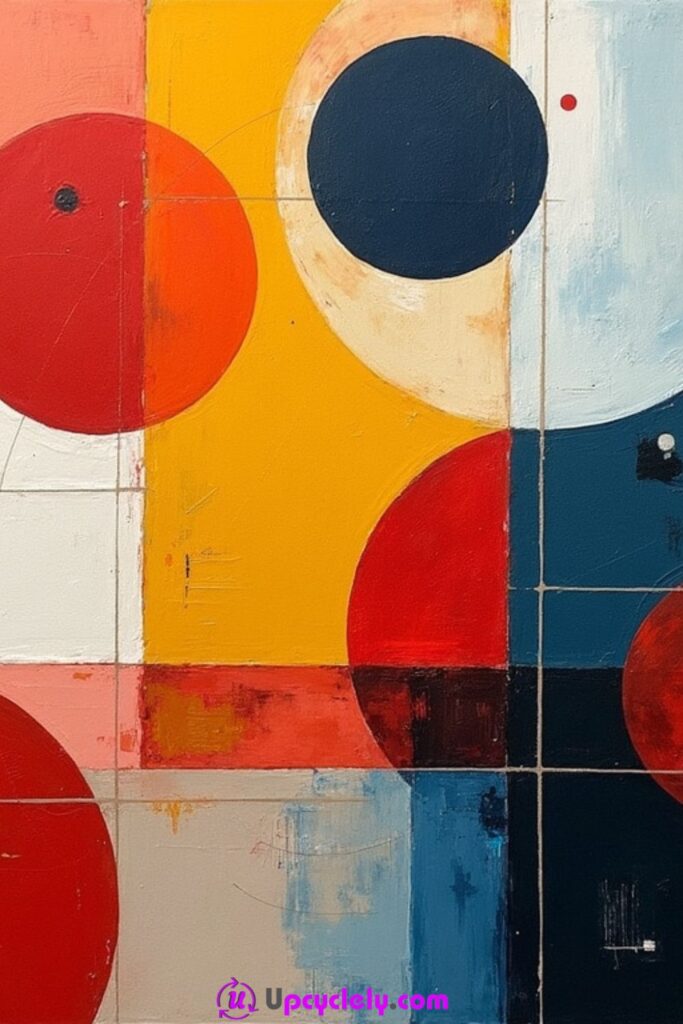
Abstract Geometric Shapes
Materials Needed:
- Canvas
- Acrylic paints (red, blue, cream, orange, yellow)
- Ruler or masking tape
- Paintbrushes
- Palette for mixing colors
Steps to Create:
Step 1: Divide the Canvas
Using a ruler or masking tape, I divide the canvas into a grid pattern. This helps create distinct sections for the colors.
Step 2: Paint the Background
Now, I fill each grid section with different colors like blue, red, and cream. I make sure to blend the edges of adjacent sections for variety.
Step 3: Add the Circles
I paint large circles over these grid sections, allowing them to overlap. Mixing shades of cream with blue or red with orange gives the circles depth.
Step 4: Highlight with Dots and Lines
Using a detail brush, I add smaller dots and lines within or around the circles. These extra elements tie the composition together.
Pro Tip:
Experiment with glazing. Mixing a transparent medium with your paint can create subtle layers that add complexity to the design.
Polka Dots Pattern

Materials Needed:
- Canvas (any size)
- Acrylic paints (red, yellow, teal)
- Round sponge brushes or foam dabbers (different sizes)
- Palette or a paper plate for mixing colors
- Ruler and pencil (optional for spacing)
Steps to Create:
Step 1: Prepare the Canvas
To start, I place my canvas on a flat, clean surface and make sure the base layer is clean or coated with white paint for a clean background. While it dries, I decide on a layout style for the dots for better planning. You can choose random freehand spacing or sketch light pencil guides for even placement.
Step 2: Start Painting the Largest Dots
I use a sponge dabber dipped in one paint color at a time. Pressing gently, I create the largest dots first, allowing proper space for the smaller ones. I aim for a playful, scattered look with no two dots touching.
Step 3: Add Medium and Small Dots
Once the largest dots are dry, I switch to smaller dabbers for medium and small dots. This step helps fill the canvas with varied patterns while keeping it balanced. I continue alternating colors to enhance visual interest.
Step 4: Finalize with Touch-Ups
After the base dots dry, I review the painting for any gaps or inconsistencies. I layer a few dots on top of partly dried ones or add thin outlines around some circles for more texture and flair.
Pro Tip:
Experiment with metallic or neon paints on some dots to give the pattern extra vibrancy and pop.
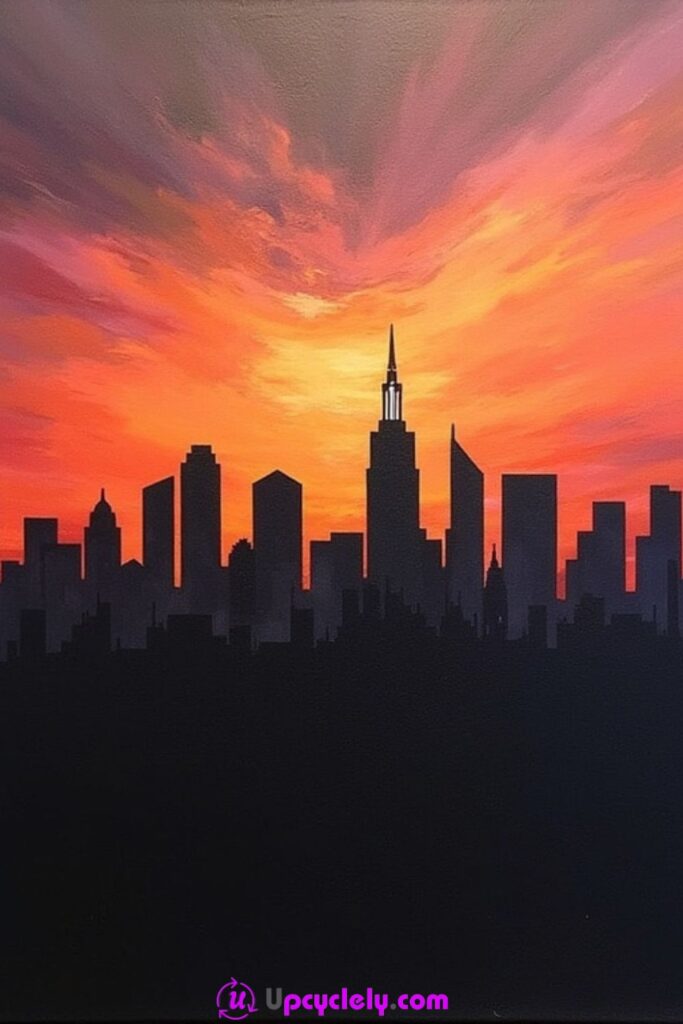
Cityscape Silhouette
Materials Needed:
- Canvas (medium or large)
- Acrylic paints (black, orange, pink, purple)
- Paintbrushes (flat, detail)
- Palette
- Pencil for sketching
- Masking tape (optional)
Steps to Create:
Step 1: Paint the Sunset Background
I mix orange, pink, and purple paint on a palette and apply them horizontally on the canvas. Starting at the bottom with orange, I blend upwards into pink, finishing with purple. Using a wide, soft brush, I smooth transitions for a natural sunset gradient.
Step 2: Sketch the City Silhouette
After the background dries, I sketch the city skyline lightly on the lower third of the canvas. Adding tall and distinguishable buildings makes the skyline more dynamic. If you’re not confident freehanding, tape small stencils or use references for shapes.
Step 3: Paint the Buildings
Using a flat brush and black paint, I carefully fill in the building shapes. I keep the edges crisp by using a detail brush for finer touches, especially around smaller structures or unique elements like antennae.
Step 4: Enhance the Glow
Once the stencil dries, I add a subtle glow effect below the building line using diluted orange or pink paint and feather it upwards, creating the look of reflected sunlight.
Pro Tip:
Use a ruler or an angled palette knife to keep the base of the buildings straight and professional-looking.
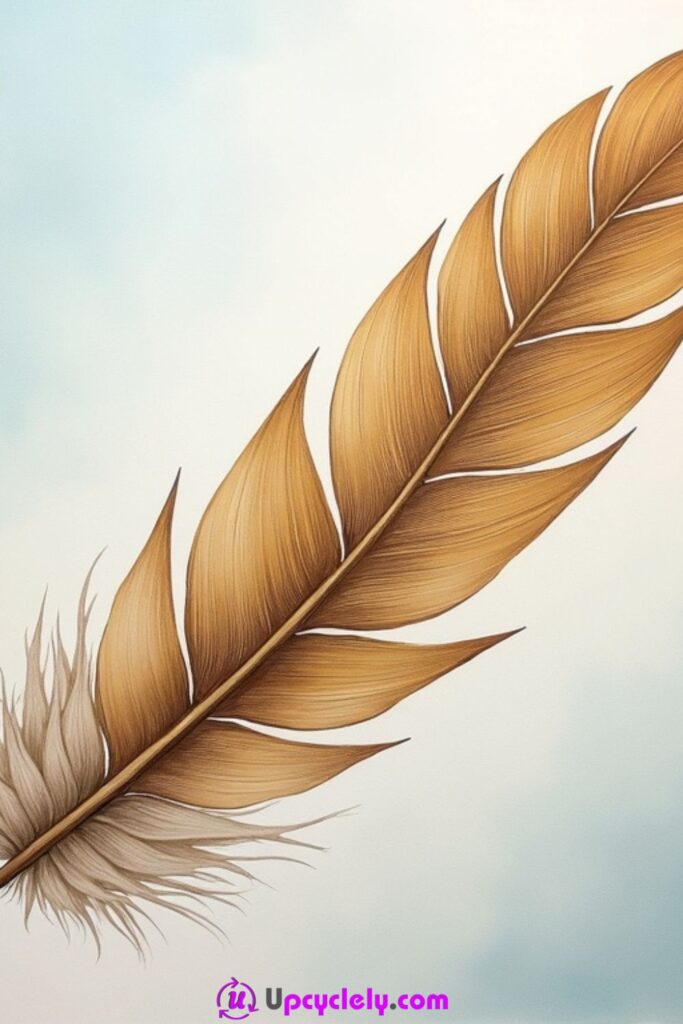
Feather Art
Materials Needed:
- Canvas
- Acrylic paints (golden brown, light brown, white, blue)
- Fine detail brushes
- Flat brush for background
- Palette for mixing
- Pencil for sketching
- Feather stencil (optional)
Steps to Create:
Step 1: Paint the Background
I start with a smooth blend of light blue and white acrylic paint, applying it with a wide brush for a sky-like gradient. I make sure to keep the center of the canvas lighter for emphasis.
Step 2: Sketch the Feather
Once the background is completely dry, I carefully sketch the shape of the feather. If you prefer, using a stencil is a neat way to achieve precision. I focus on proportion and symmetry.
Step 3: Add Base Color to the Feather
Using golden-brown acrylic paint, I fill in the feather shape. I ensure that the shaft (the central line) stands out by keeping it slightly darker or outlining it with fine strokes. At the feather’s base, I use lighter brown strokes to mimic fluff.
Step 4: Detail and Texture
Adding texture brings the feather to life. I use fine brushes to paint thin, parallel lines extending outward from the shaft. For a finishing touch, I add highlights with white paint along the edges and tips.
Pro Tip:
Layer the paint with patience. Overlapping strokes give the feather a realistic, soft, and detailed look.
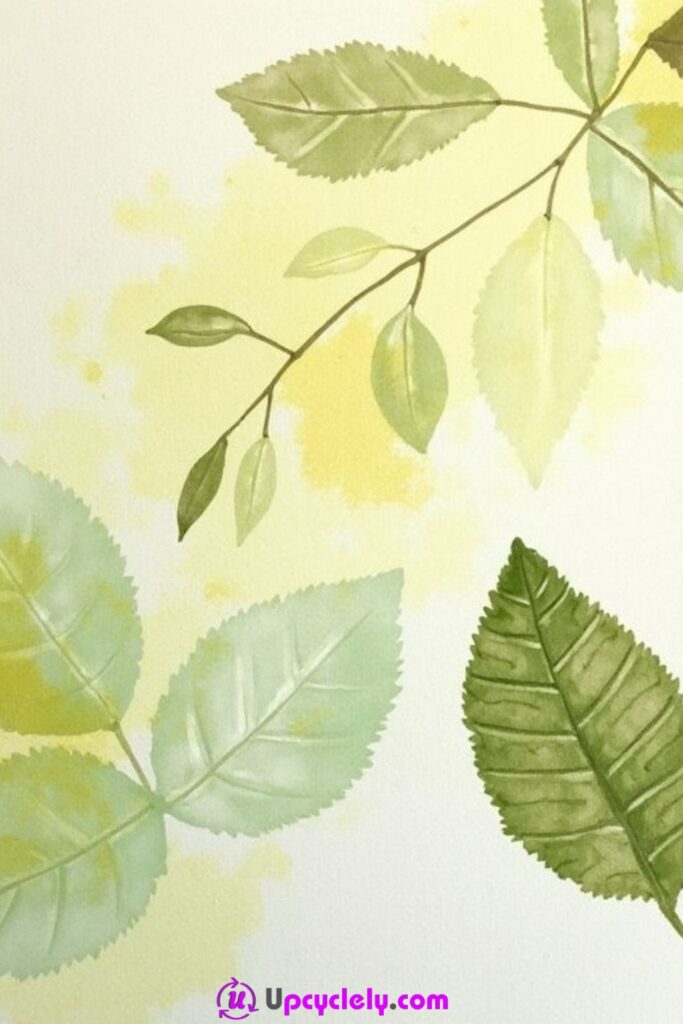
Leaf Impressions
Materials Needed:
- Canvas
- Acrylic paints (multiple green shades)
- Paintbrushes (flat, detail)
- Pressed leaves (variety of shapes and sizes)
- Palette for mixing
- Sponge brush
Steps to Create:
Step 1: Prepare the Base
I create a simple, warm background on the canvas by blending white paint with just a touch of yellow. Using a sponge brush, I add irregular watercolor-like strokes for texture and allow it to dry.
Step 2: Arrange the Leaves
I organize the pressed leaves in a layout that feels natural, like a botanical display. I pay special attention to the varied sizes and angles to keep the composition dynamic.
Step 3: Paint the Leaf Impressions
With a small brush or sponge dipper, I lightly coat one side of each leaf using green acrylic paint. Before the paint dries, I press the painted side on the canvas firmly and peel it away carefully, leaving a clean imprint. For overlapping effects, I allow each impression to fully dry.
Step 4: Add Details
Once the impressions dry, I use a fine brush to add veining, shadows, or extra tonal details on each leaf. This step helps add dimension and logical continuity to the composition.
Pro Tip:
Use a mix of dark and light greens for dimension. Trying metallic green can also elevate the look.
Minimalist Mountain Range

Materials Needed:
- Canvas (rectangular is ideal)
- Acrylic paints (various shades of blue, white)
- Flat and round brushes
- Palette for mixing shades
- Masking tape (optional for straight edges)
Steps to Create:
Step 1: Paint the Layers
I start at the bottom of the canvas with the darkest blue shade and gradually work my way upwards. For each layer, I lighten the shade by adding white to the paint. This gradient technique creates the illusion of depth and distance.
Step 2: Define the Peaks
Using a round brush, I add soft, curved lines to define the peaks of each layer. I focus on creating curves that flow naturally across the canvas, avoiding sharp edges to maintain the tranquil vibe.
Step 3: Smooth Out Transitions
Once I’ve defined the peaks, I blend between the layers softly using a dry brush technique. This creates a seamless and serene look, similar to misty mountains.
Step 4: Finalize with Highlights
I work on the topmost layer, incorporating near-white shades to mimic the light hitting the farthest peaks. If you feel adventurous, add small dots or a light touch of silver paint for a snowy effect.
Pro Tip:
Tilt the canvas slightly as you paint the lightest layers. This helps with the natural flow of the gradient and prevents brush lines.
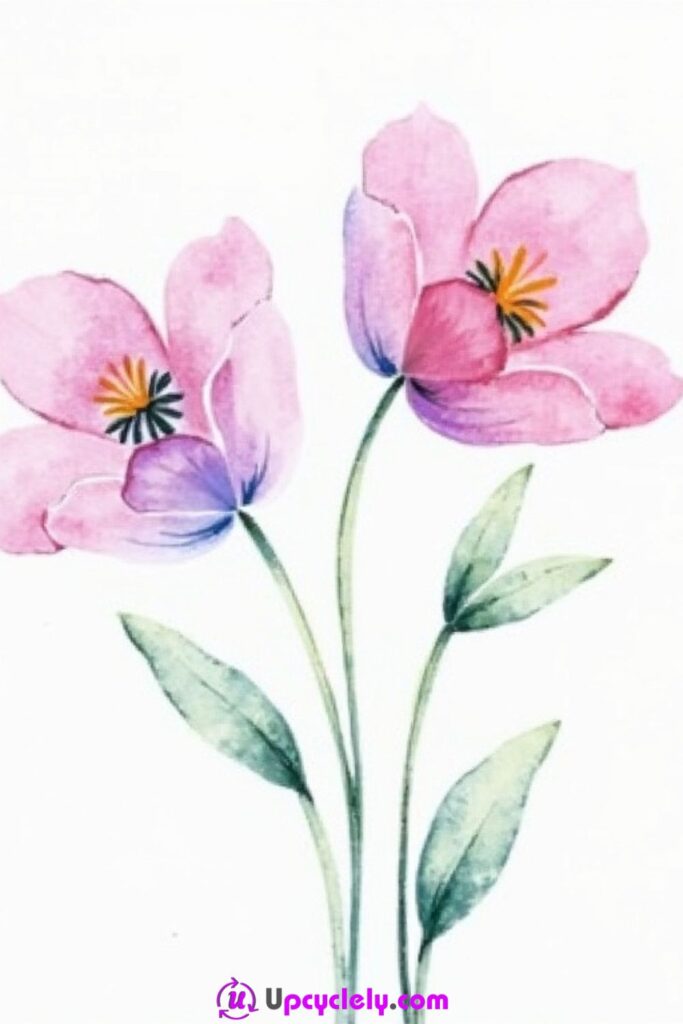
Watercolor Flowers
Materials Needed:
- Canvas
- Acrylic paints (pink, purple, yellow, orange, green, blue, white)
- Soft round and fine detail brushes
- Sponge or damp cloth
- Palette for mixing colors
- Pencil for sketching
Steps to Create:
Step 1: Prepare the Canvas and Background
To start, I cover the canvas with a light wash of blue and white acrylic paint to mimic a watercolor-like background. I use a soft sponge to blend these colors seamlessly, keeping the center lighter for a soft focal area. I make sure this layer dries completely before moving on.
Step 2: Sketch the Floral Outlines
I lightly sketch the shapes of two flowers with stems and leaves using a pencil. Positioning them close but slightly offset gives the composition a natural flow.
Step 3: Paint the Flowers
Using a soft round brush, I begin with the petals. I start with a mix of pink and purple for a gradient effect, painting each petal carefully. By blending the edges with a damp brush, I create the delicate, soft texture of watercolor. For the centers, I use a mix of yellow and orange, adding fine dots to simulate stamens.
Step 4: Add Stems and Leaves
I mix shades of green with a hint of blue for variety and paint the stems and leaves. Using a fine detail brush, I add soft lines to mimic leaf veins and make the composition more dynamic and realistic.
Pro Tip:
For an authentic watercolor effect, slightly dilute your paint with water and work quickly to maintain that soft, airy look.
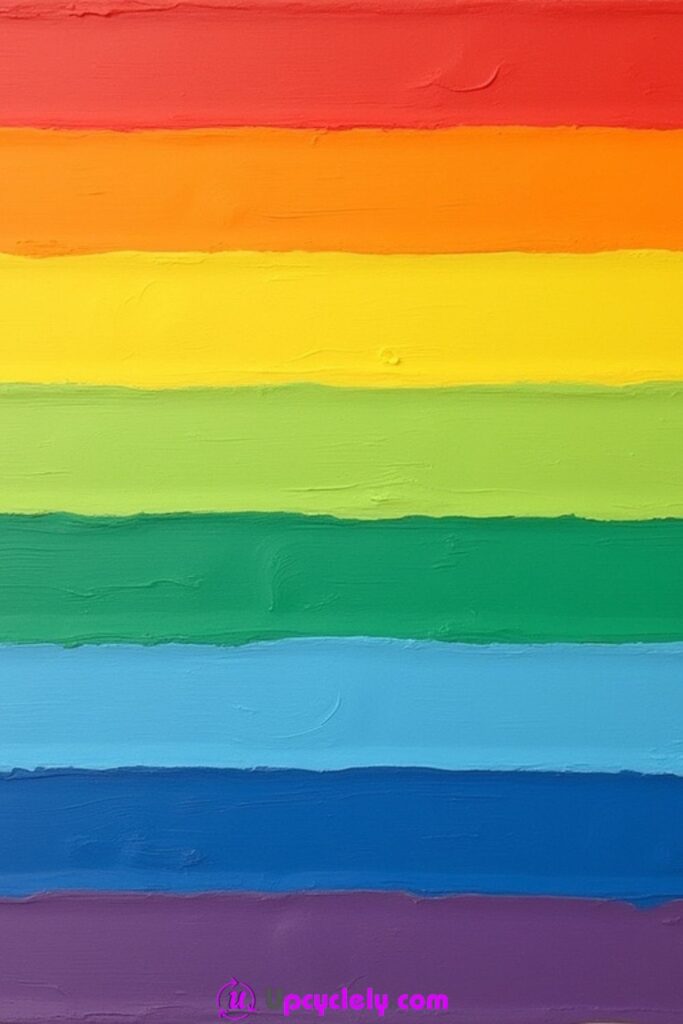
Rainbow Stripes
Materials Needed:
- Canvas
- Acrylic paints (red, orange, yellow, green, cyan, blue, purple)
- Wide flat brush or foam roller
- Ruler or masking tape (optional)
- Palette or plate for mixing colors
Steps to Create:
Step 1: Prepare the Base Layer
I ensure the canvas is clean and start by brushing on a thin coat of white paint for an even, smooth foundation. Masking tape can be used to divide the canvas into even horizontal sections for cleaner lines.
Step 2: Begin with Red
I load my flat brush with red acrylic paint and cover the top section completely. I make sure to use consistent strokes to achieve an even texture. After finishing this stripe, I clean my brush thoroughly before moving on.
Step 3: Build Layer by Layer
One by one, I paint the next colors (orange, yellow, green, cyan, blue, and purple) in horizontal stripes, following the order of the rainbow. I maintain equal width for each stripe and ensure the paint overlaps slightly with the previous color for a smooth gradient transition.
Step 4: Final Touches
Once all the colors are applied and dried, I remove the masking tape carefully, if used. I inspect for uneven edges and touch them up with a small detail brush for a professional finish.
Pro Tip:
To add texture, lightly drag a dry brush over the top of each color before it dries to create a subtle blended effect.
Simple Animal Portrait

Materials Needed:
- Canvas
- Acrylic paints (brown, beige, black, white, dark brown)
- Paintbrushes (round and fine detail)
- Palette for mixing colors
- Ruler and pencil (optional for symmetry)
Steps to Create:
Step 1: Sketch the Face Layout
I start by sketching a simple lion face using basic geometric shapes. A large circle for the head, two smaller ones for ears, and a triangle for the nose are a good foundation. I make sure everything is symmetrical for a balanced look.
Step 2: Paint the Base Colors
I use light beige for the face and a darker brown for the mane. I carefully fill these areas using a round brush, working from the outlined shapes. For areas like the mouth and nose, I switch to a smaller brush for precision.
Step 3: Add Details
I use black paint for the eyes, nose, and mouth details. To give the lion character, I add highlights in the eyes with small dots of white. For the mane, I create depth by layering darker tones along the edges.
Step 4: Refine and Stylize
Finally, I inspect the painting and refine any lines or edges. For a cartoonish flair, I outline some of the main shapes with a thin black line, making the features stand out more.
Pro Tip:
For extra dimension, use a dry-brushing technique with a slightly lighter shade of brown to create textured fur effects on the mane.
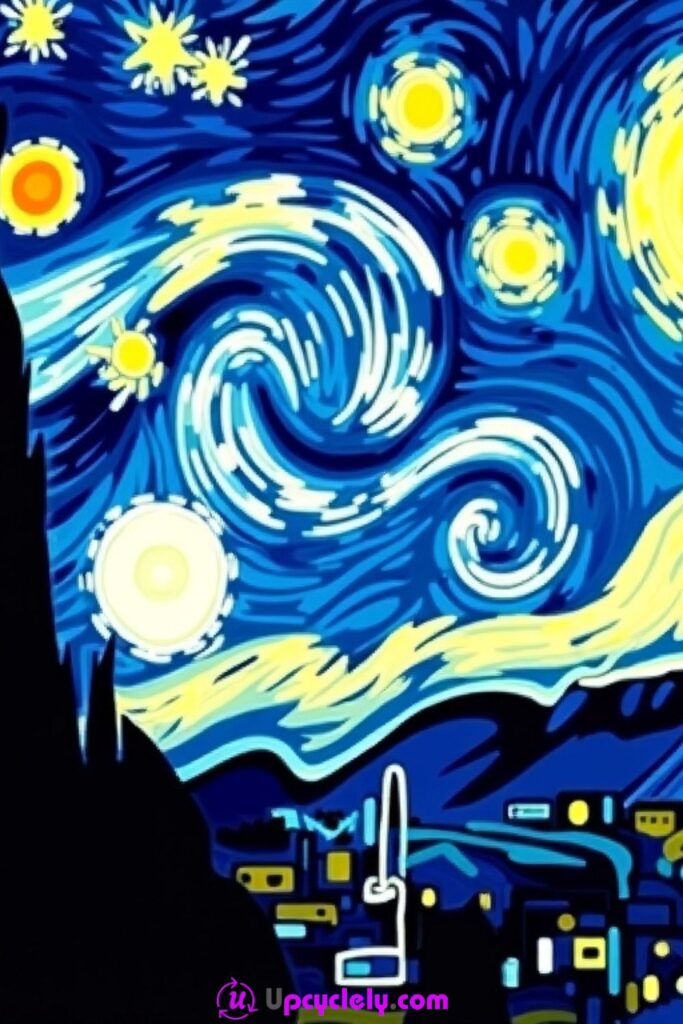
Starry Night
Materials Needed:
- Canvas
- Acrylic paints (blue, white, yellow, black)
- Round and fine detail brushes
- Palette for mixing colors
- Palette knife (optional for texture)
Steps to Create:
Step 1: Paint the Sky
I start with a base layer of deep blue. Then, using a round brush, I add swirling patterns with lighter shades of blue and white acrylic. I overlap strokes slightly to mimic motion in the night sky.
Step 2: Add Stars and Moon
Using yellow and white, I paint circles for stars and a crescent moon. I make some stars larger than others for variation. To make them glow, I feather outward with a clean brush in circular strokes.
Step 3: Incorporate the Landscape
I use black paint to create the cypress tree and rolling hills. A palette knife is helpful here to add texture, especially for the sharp edges of the tree silhouette.
Step 4: Highlight and Enhance
Once the base layers are dry, I add finer details like light reflections near the stars. Using white and yellow paint, I lightly dab to make the stars twinkle against the dark sky.
Pro Tip:
Use a dry sponge to softly blend the swirling patterns in the sky, adding an ethereal glow to your painting.
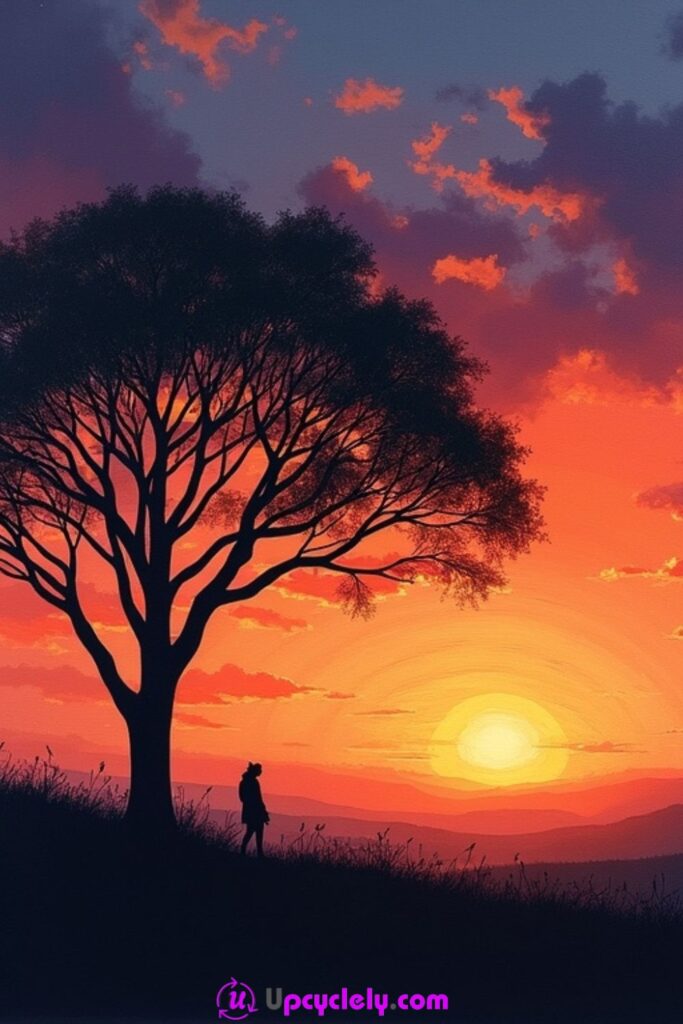
Sunset Silhouette
Materials Needed:
- Canvas
- Acrylic paints (orange, pink, purple, black)
- Paintbrushes (flat, round, detail)
- Palette for mixing
- Sponge (for blending)
Steps to Create:
Step 1: Paint the Background
I begin by blending orange, pink, and purple to create a vibrant sunset sky. Using a sponge or a soft brush, I ensure no harsh lines form between colors, allowing for a natural gradient effect.
Step 2: Sketch the Silhouettes
Once the background is dry, I sketch the tree and person’s silhouette lightly using a pencil. Placing the tree slightly off-center creates a better-balanced composition.
Step 3: Paint the Silhouettes
I use black paint and a fine detail brush to fill in the tree trunk, branches, and the person. For the tree, I vary the thickness of the branches for a realistic touch. The person is painted in simple, clean lines to keep focus on the sunset.
Step 4: Final Refinements
I add subtle shadows to the hilltop with diluted black paint for depth. Looking over the entire piece, I touch up any uneven edges or areas needing sharpness.
Pro Tip:
Dilute black paint with a tiny amount of water if you need smoother lines for delicate silhouette details.