So, you’ve decided to try your hand at sashiko, huh? That’s awesome! Whether you’re a seasoned pro or a total beginner, one thing’s for sure getting the right fabric markers can make all the difference. The thing about sashiko (the Japanese art of decorative stitching) is that it requires precision.
And if you’re trying to transfer intricate patterns onto fabric, you’ll need a fabric marker that does the job right. But what’s the best fabric marker for sashiko? Let’s dive in and find out. Trust me, by the end of this article, you’ll be armed with all the knowledge you need to choose the perfect markers for your stitching projects.
| Product Image | Product Name | Features | Price |
|---|---|---|---|
 |
JR.WHITE Fabric Markers Permanent for T Shirts Clothes | A wide selection of bold shades perfect for fabrics, paper, wood, glass, and more. Quick-drying, fade-proof, waterproof, and weatherproof to keep artwork fresh and long-lasting. Smooth ink flow with precise coverage, ideal for detailed designs and embellishments. |
Check Price |
 |
Lange & König Heat Erasable Fabric Marking Pens for Sewing | Glides smoothly over textiles, providing clear, easy-to-see lines without the mess of chalk. Markings vanish instantly with the heat of an iron, saving time and effort. A must-have for quilting, tailoring, embroidery, and sewing machine projects. |
Check Price |
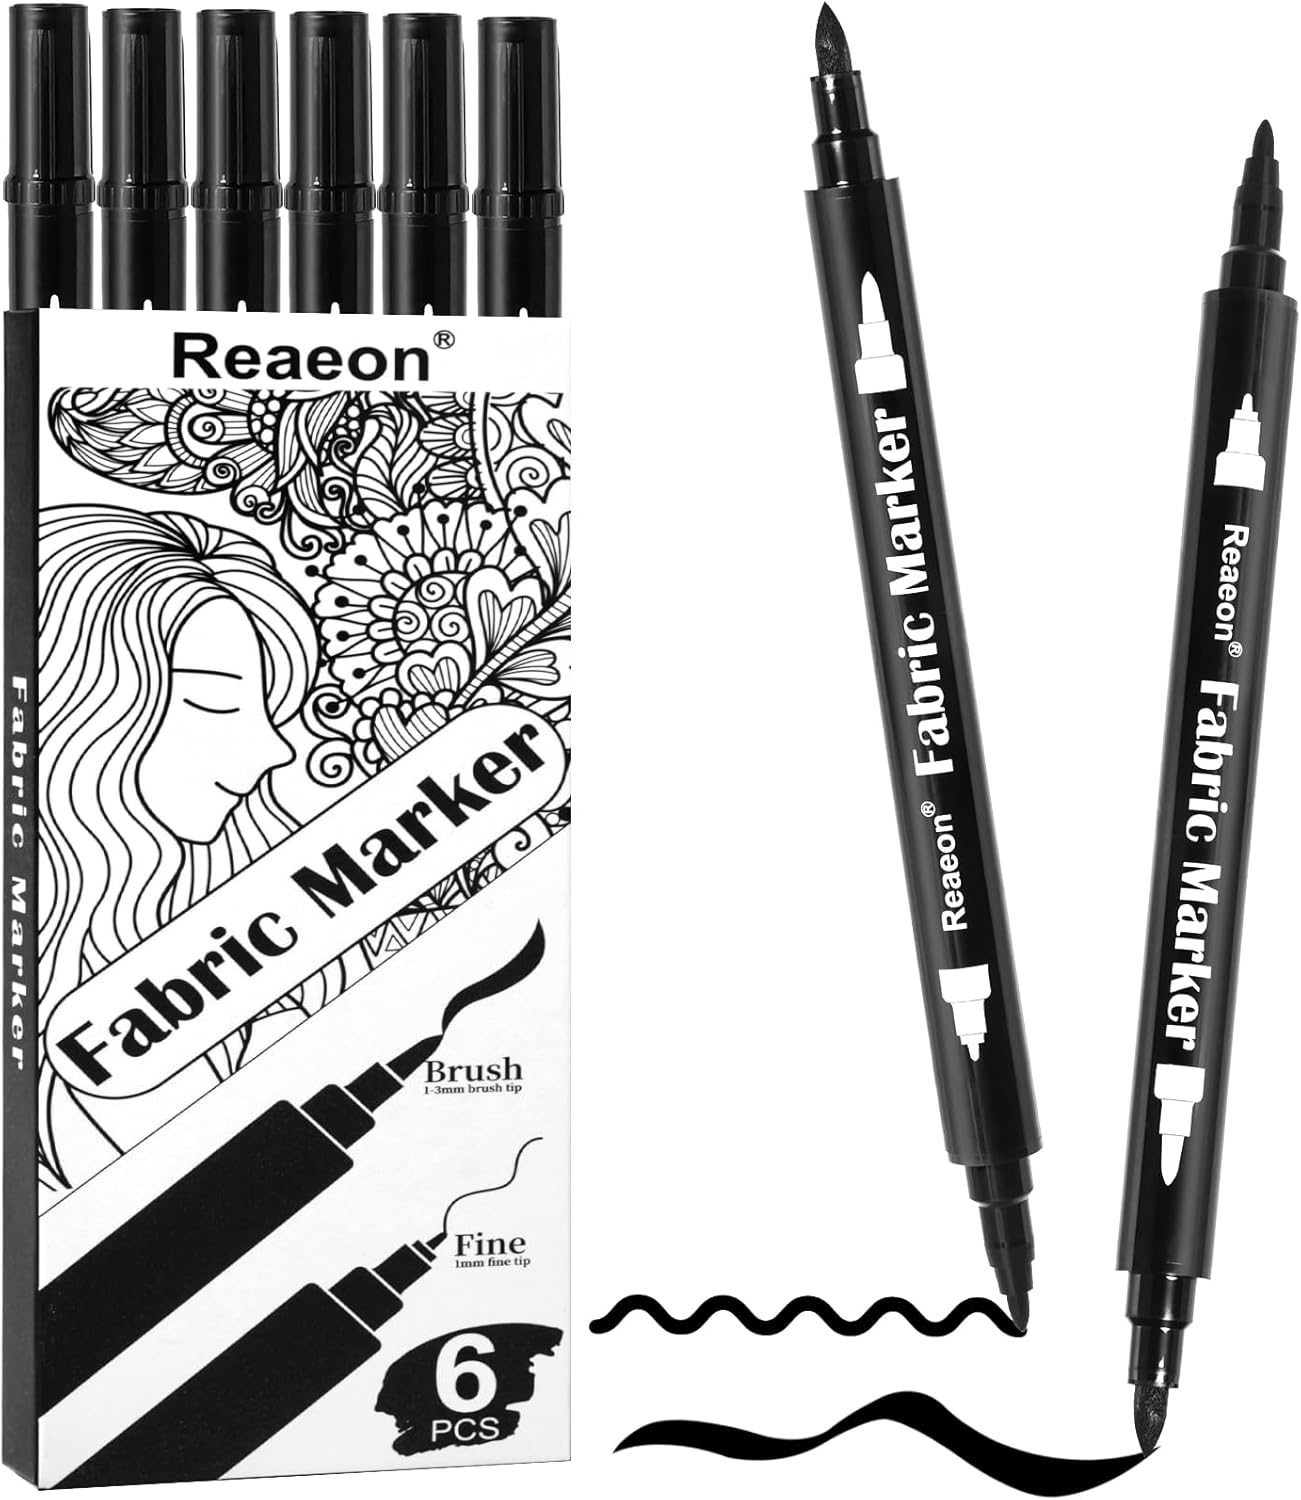 |
Reaeon Black Fabric Markers | Includes a 1mm fine tip for precision work and a 1–3mm brush tip for filling, shading, and bold strokes. Quick-drying, fade-proof, and waterproof to ensure designs remain vibrant and long-lasting. Maximum adhesion with minimal bleeding keeps artwork sharp and detailed. Allow designs to dry for 24 hours; wash in cold water with mild detergent. |
Check Price |
 |
Zenacolor 20 Fabric Markers with Dual Tips | Smooth, consistent ink flow works effortlessly on fabrics with no smudges or bleeding. Fine tip for precision detailing and chisel tip for bold strokes, shading, and gradients. Excellent adhesion on cotton, canvas, shoes, accessories, and home décor projects. |
Check Price |
 |
sunioine 12 Pcs Disappearing Ink Pen Water | Includes 12 pens in Blue and Purple. Markings fade naturally within 1–7 days or can be wiped away instantly with water or a damp cloth. Ideal for fabric marking, cross stitch, embroidery, patchwork, needlework, shoe labeling, and DIY projects. |
Check Price |
 |
JusArt 3 Pack White Permanent Markers | Fine point allows for intricate detailing, outlining, and lettering without clogging or flooding. Ensures clean application and long-lasting results across projects. Perfect for decorating, labeling, crafting, and DIY projects across multiple mediums. |
Check Price |
Why Fabric Markers Matter for Sashiko
Let’s be real: one of the most important steps in creating a beautiful sashiko design is transferring that gorgeous pattern onto your fabric. You could sketch it with a pencil or a cheap pen, but let’s face it those will either smudge or fade by the time you’re halfway through your stitching. Not the vibe we’re going for, right?
So, what makes fabric markers so special? Well, for starters, they are designed specifically for fabric. They’re usually permanent, water-resistant, and won’t bleed into the fabric, which means your pattern stays crisp and clean throughout the stitching process. Imagine trying to stitch through a design that’s blurry or faint. Yikes.
But not all fabric markers are created equal, and when it comes to sashiko, you need a marker that’s got fine control, doesn’t run, and gives you enough precision for those delicate stitches.
What Makes a Great Fabric Marker for Sashiko?
Before we go recommending specific markers (because let’s be honest, that’s what you’re here for), let’s talk about the key features you should look for when choosing a fabric marker for sashiko:
1. Precision Tip
For sashiko, you’re working with small, detailed patterns. You don’t want a fat, clunky marker that’s going to make your design look like a toddler’s doodle. The best fabric markers for sashiko should have a fine or ultra-fine tip to help you transfer those tiny stitches with precision. If you’ve ever tried using a marker with a thick nib, you know how frustrating it is when the lines aren’t sharp or clean.
2. Washability
Here’s the thing: you don’t want to spend hours stitching your beautiful sashiko patterns, only for your marker lines to smudge when you wash the fabric. Washable ink is a must for fabric markers. Most quality fabric markers will wash out once your project is complete, so always check whether the marker is washable before you start.
3. Color Options
While traditional sashiko tends to stick with blue or white thread on indigo fabric, sometimes you want to mix things up, right? A good set of fabric markers should offer a range of colors so you can experiment with different styles and add some personality to your work.
4. Permanent Ink
You don’t want your designs fading halfway through your project. Choose fabric markers with permanent ink that won’t disappear after a few washes. This ensures your lines stay visible, no matter how many times you wash or handle your fabric.
5. Quick Drying
Let’s be honest, no one has the patience to wait hours for their fabric markers to dry before starting their stitching. Quick-drying ink will prevent any smudging or smearing as you transfer your design and stitch.
Top Fabric Markers for Sashiko: My Honest Thoughts
Alright, now let’s get into the juicy part—what markers are worth your time and money? I’ve spent hours researching and trying out different markers (yes, I know, my stitching game is strong now), so here are my top picks for fabric markers that will work wonders for your sashiko projects.
1. Faber-Castell Fabric Ink Markers
If you’ve ever tried a Faber-Castell marker, you already know their quality is top-notch. The Faber-Castell Fabric Ink Markers are no exception. With a fine tip, these markers give you the precision you need for intricate sashiko patterns. The ink is permanent once set, and it’s washable, so you won’t have to worry about your lines vanishing when you wash your fabric.
Pros:
- Precision tip perfect for detailed stitching
- Quick-drying ink
- Wide range of vibrant colors
- Water-based for easy cleanup
Cons:
- Not as easily available in all regions
2. Sakura Pigma Fabric Pen
Let’s talk about the Sakura Pigma Fabric Pen. This marker is a favorite among many fabric artists, including those who do sashiko. The pigment ink is permanent, and once set, it won’t fade, even after washing. The fine tip lets you create neat and precise lines, and it’s great for working on both light and dark fabrics.
Pros:
- Excellent precision
- Permanent ink
- Ideal for both light and dark fabrics
- No bleeding (hallelujah!)
Cons:
- Ink can be a bit slow to dry (so don’t touch it too soon!)
3. Pilot Fabric Markers
The Pilot Fabric Markers are a solid choice if you’re looking for something reliable without breaking the bank. The fine tip makes them great for precise sashiko lines. Plus, the colors are super vibrant, which makes for stunning stitching projects. Permanent ink ensures your lines stay intact, and they dry quickly, so you can keep stitching without waiting around.
Pros:
- Affordable without sacrificing quality
- Bright, vibrant colors
- Quick-drying
- Washable
Cons:
- Might need a few layers for darker fabrics
How to Use Fabric Markers for Sashiko: A Step-by-Step Guide
So now you’ve got your fabric markers, but how do you actually use them for sashiko? Let’s walk through the process step-by-step, shall we?
1. Prepare Your Fabric
First things first get that fabric ready. Pre-wash your fabric to remove any sizing or chemicals. This will give your fabric a clean surface to work on. Iron it to remove wrinkles, too, so your pattern goes down smoothly.
2. Transfer Your Design
Once your fabric is ready, it’s time to transfer your sashiko design. Place your fabric on a flat surface, and lightly trace your design with a pencil (or a washable fabric marker if you prefer). Keep the lines light so you can easily remove them later if necessary.
3. Use Your Fabric Marker
Now, grab your fabric marker and carefully trace over the pencil lines. Make sure to use light, even strokes. The key here is to be patient—don’t rush! This is the part where precision is key, so take your time. Keep the tip steady to avoid smudging.
4. Let the Ink Dry
Once you’ve finished tracing, let the ink dry for a few minutes before you start stitching. You don’t want to accidentally smear the lines while you’re working. It’s a good idea to check if the marker instructions say anything about setting the ink—some markers require heat-setting with an iron.
5. Start Stitching
Once the ink is dry, it’s time to start your sashiko stitching. Grab your needle and thread and get to work! As you stitch, you’ll see how beautifully the markers’ lines stay intact, giving you the perfect guide.
Final Thoughts: A Little Patience Goes a Long Way
Choosing the best fabric markers for sashiko really comes down to what feels right for you. You might prefer a super fine tip for detail, or maybe you just want something reliable that won’t break the bank. Either way, it’s all about experimenting and finding the perfect fit for your needs.
But here’s a tip from me: take your time and enjoy the process. Whether you’re using these markers for the first time or you’re a seasoned pro, sashiko is all about precision and patience. Don’t rush through your designs, and let your creativity flow.
Ready to dive in? Grab your fabric markers, find that perfect fabric, and start stitching away. Your sashiko masterpiece awaits.