Upcycling T-Shirt Ideas with a Stylish Bandana Twist
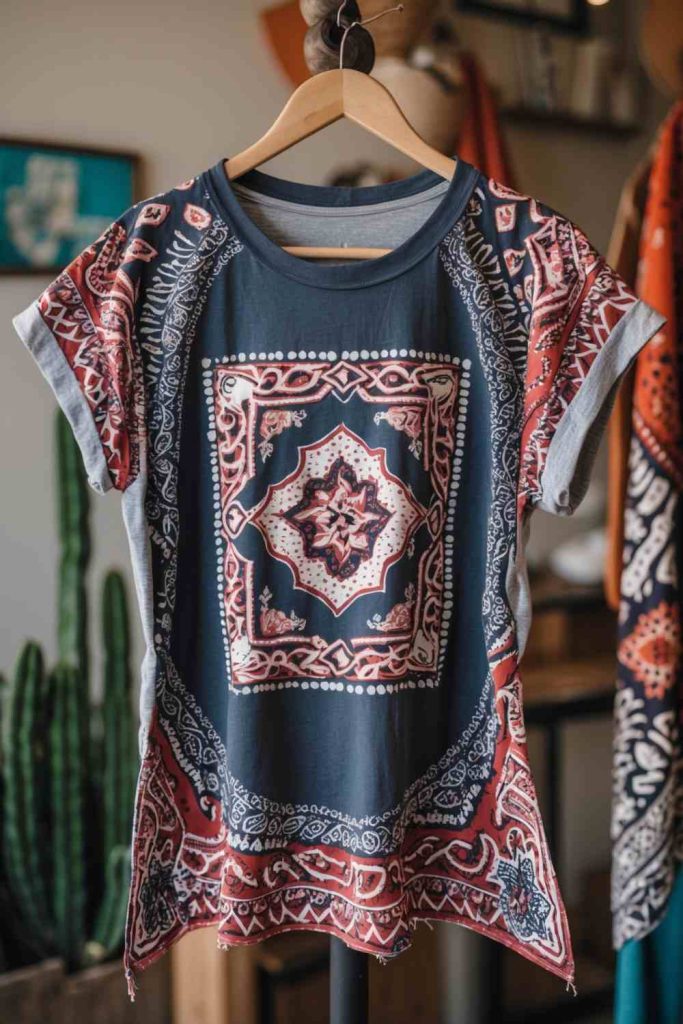
4 Steps to Create This Stylish Bandana Twist
- Gather Your Materials
Take an old t-shirt and a bandana with bold patterns (navy blue, red, and white work great!). You’ll also need fabric scissors, fabric glue or needle and thread, and a few pins for securing. - Cut Out the Design
Lay the t-shirt flat and decide where you’d like the bandana design to go. Most people love a diamond or square placement in the center. Trim your bandana to fit. You can use the extra fabric for the sleeves or edging. - Attach the Bandana
Use fabric glue for a quick fix or hand-sew the bandana onto the t-shirt for a more durable option. Secure the corners tightly and smooth out any wrinkles along the way. - Add Finishing Touches
For extra flair, use leftover bandana scraps to line the sleeve cuffs, edge the neckline, or create small patch designs on the hem. This will tie the look together and make it even more special.
Upcycling T-Shirt Ideas with Stunning DIY Bleach Art
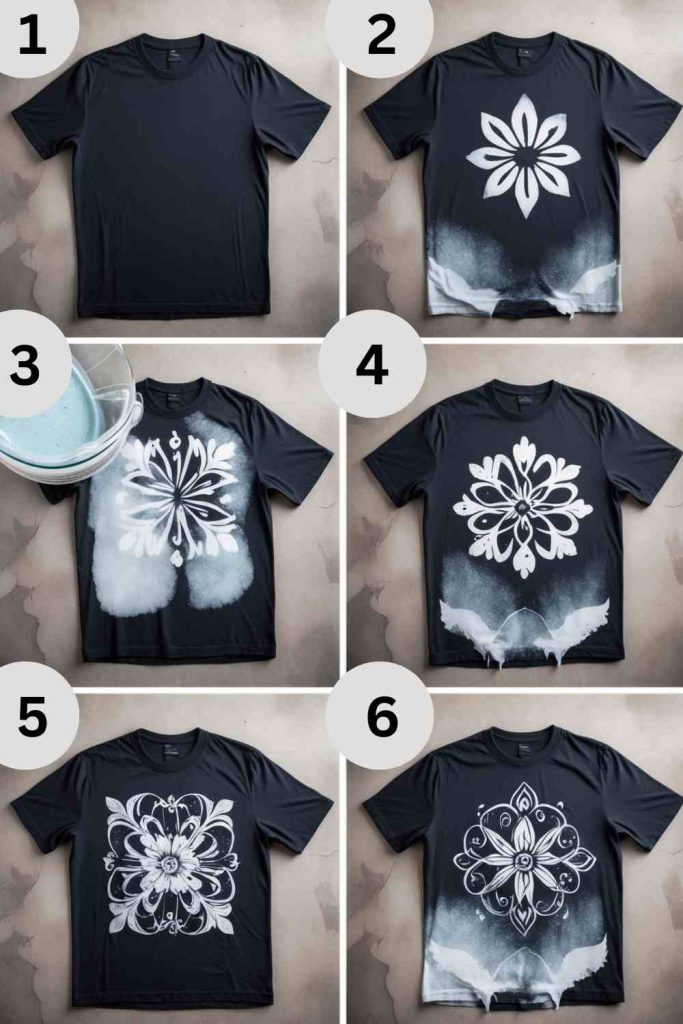
4 Steps to Create This Stunning DIY Bleach Art
Prepare Your Materials
Grab a plain black t-shirt, household bleach, a spray bottle, a stencil (for patterns), and a piece of cardboard to protect the backside of the shirt.
Set Up the Design
Lay your t-shirt flat and insert the cardboard inside to prevent the bleach from soaking through. Place your stencil or create your design freehand with tape or other masking materials.
Apply the Bleach
Mix bleach with water in a spray bottle (1 part bleach to 1 part water). Gently spray over the stencil or the exposed area of the shirt. Watch as the design starts to appear, changing from black to a striking contrast color.
Rinse and Dry
Once your desired effect is visible (this happens quickly with bleach), rinse the t-shirt with cold water to stop the bleaching process. Wash it thoroughly and let it air dry.
DIY Chic Crop Top with a Stylish Tie Knot
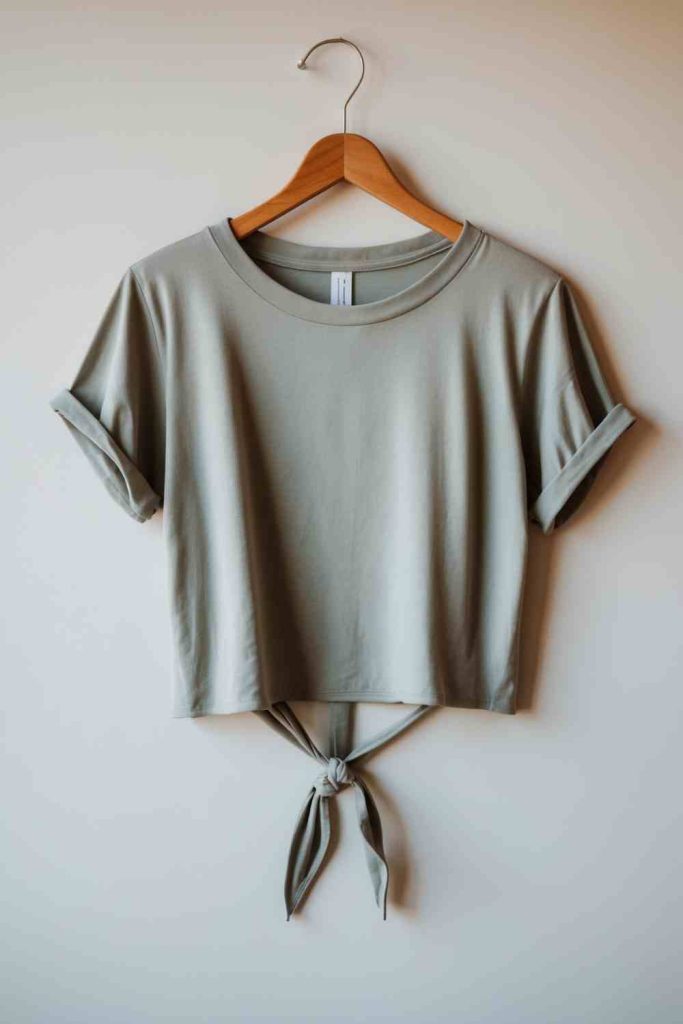
4 Steps to Create This Stylish Tie Knot
- Choose Your T-Shirt
Pick a loose, comfortable t-shirt that you’d like to upcycle. Light colors or soft fabrics work great for this casual style. - Measure and Crop
Decide how short you want your crop top. Use a chalk line or washable marker to mark the cutting line. Carefully cut across the line, leaving extra fabric at the center if you’d like a tie knot. - Create the Tie Knot
Trim the extra fabric at the center into two strips. These will be your ties. Pull them into a knot at the front to give your crop top that trendy, knotted look. Adjust the knot to sit snugly. - Refine the Edges: To keep it clean, roll the sleeve ends (optional) and secure them with a light stitch or fabric glue. You can leave the hem raw for a casual vibe, or sew it for a polished finish.
DIY Creative Pouches from Old Tees
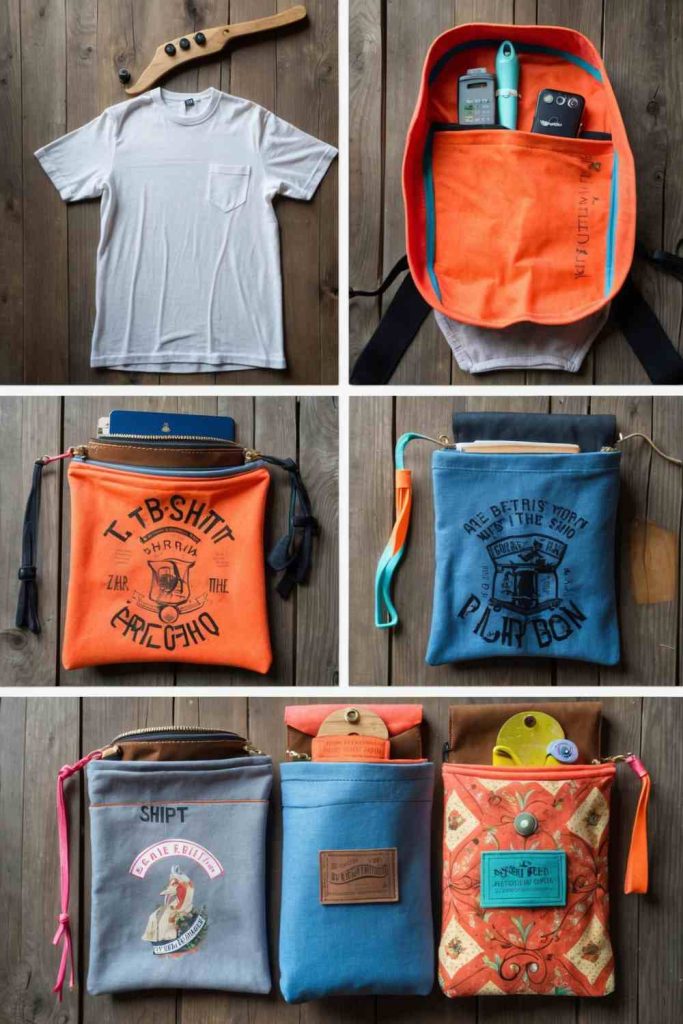
4 Steps to Create This DIY Creative Pouches from Old Tees
- Select Your T-Shirt
Choose a t-shirt with fun colors or patterns you’d like to turn into a pouch. Soft, durable fabric works great for this project. - Cut and Measure the Fabric
Decide your pouch size and cut two identical rectangles from the t-shirt. You can also use leftover hem or sleeves for small pouches. - Sew or Glue the Edges
Place the two fabric pieces together with the design side facing in. Sew along three sides, leaving one side open for the zipper. If you’re not sewing, fabric glue can work too! - Add a Zipper or Close It Up
Attach a zipper to the open side for a polished look, or use Velcro for a quicker option. Turn it right side out, and you’ve got a creative pouch ready to use or gift!
Upcycling T-Shirt Ideas with Beautiful DIY Fabric Paint Designs
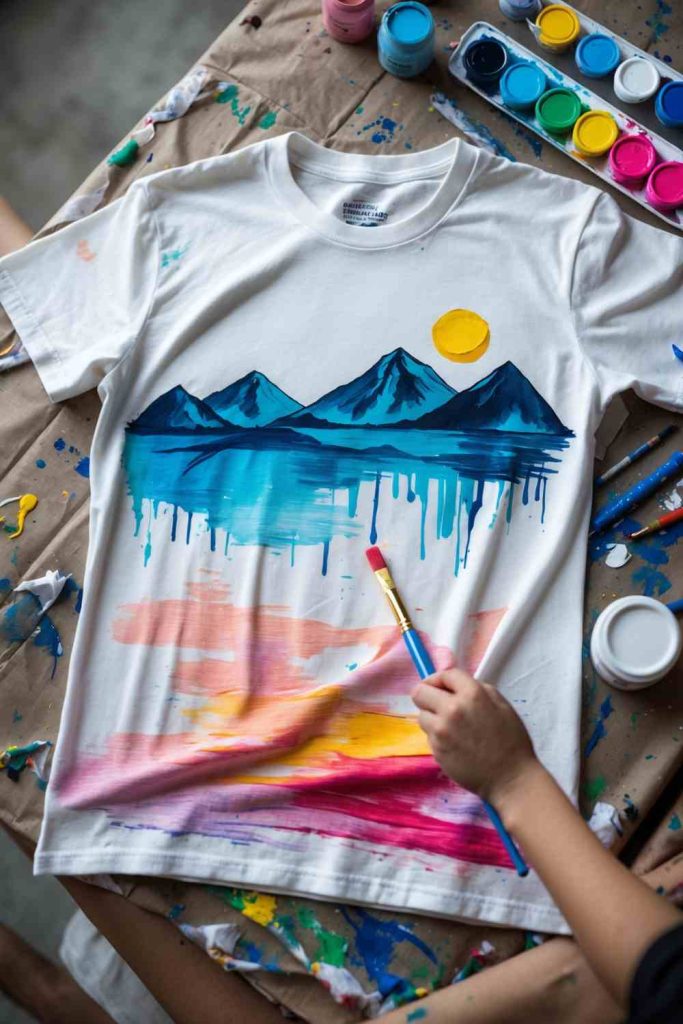
4 Steps to Create This Beautiful DIY Fabric Paint Designs
- Prepare Your T-Shirt and Workspace
Lay your t-shirt flat on a table covered with protective paper. Place a piece of cardboard inside the shirt to prevent paint from bleeding through to the back. - Sketch Your Design
Lightly draw your design onto the t-shirt using a washable fabric pencil or chalk. This could be mountains, sunsets, or any scenic idea you love! - Start Painting
Use fabric paints and brushes to fill in your design with color. Blend shades, create textures, or use dripping effects for extra flair. Be creative and let your imagination flow! - Set the Paint and Display
Allow the paint to dry completely, then heat-set it based on the instructions provided with your fabric paint (usually with an iron or dryer). Your custom t-shirt is now ready to wear or gift!
DIY Fringe Belt for a Boho-Chic Look
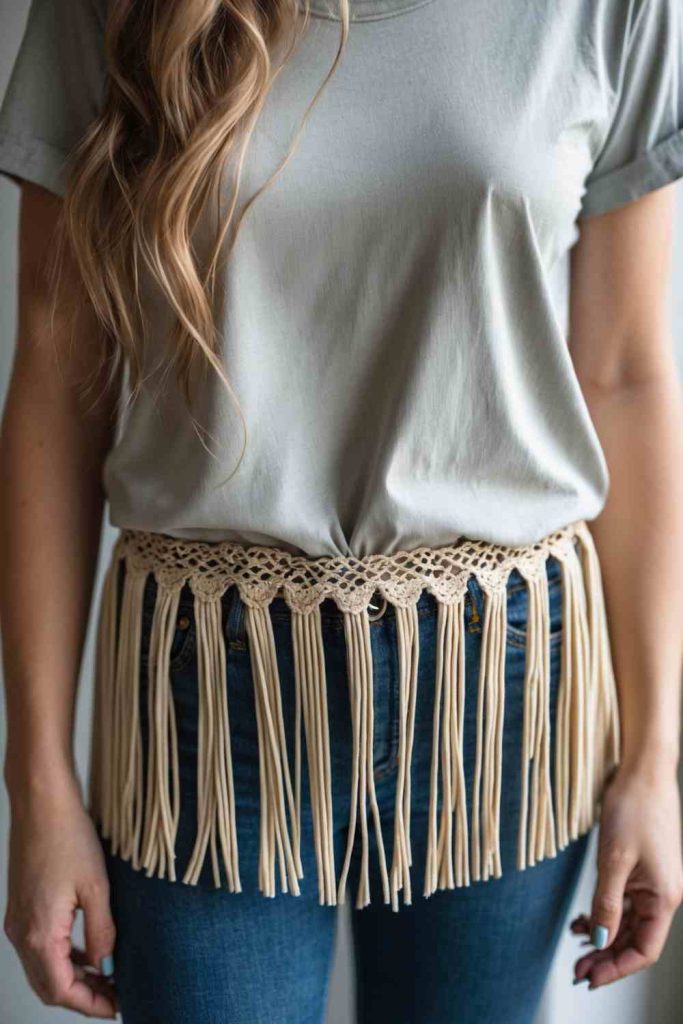
4 Steps to Create This DIY Fringe Belt for a Boho-Chic Look
- Choose Your T-Shirt
Look for a lightweight, soft t-shirt in neutral or bright colors, depending on your style. Cut off the hem and sleeves to create a flat piece of fabric. - Cut the Fringe
Lay the t-shirt flat and cut long, evenly spaced strips along the edge of the fabric. The length of the strips will determine the fringe length, so adjust based on your preference. - Create the Belt Base
Cut a horizontal strip from the t-shirt (about 2–3 inches wide) to serve as the waistband. Stretch it slightly to ensure it fits snugly around your waist. Attach the fringes to the bottom edge of this strip using knots or light sewing. - Tie and Style
Wrap the belt around your waist and tie it securely with a decorative knot. Layer it over jeans, skirts, or dresses for a bohemian-inspired look.
DIY Graphic Patchwork for a Funky New Look

4 Steps to Create This DIY Graphic Patchwork for a Funky New Look
- Choose Your T-Shirt and Patches
Grab an old t-shirt and select graphic patches that reflect your style. These can be store-bought or even repurposed from other clothing. - Plan the Layout
Lay your t-shirt flat and arrange the patches where you’d like them. Experiment with different placements until you’re happy with the design. - Attach the Patches
Use a needle and thread to sew the patches onto your t-shirt securely. If sewing isn’t your thing, fabric glue or iron-on patches work just as well! - Personalize and Wear
Add extra flair with fabric paint, beads, or embroidery if you want! Once finished, your revamped t-shirt is ready to wear and show off your unique style.
DIY Hand Embroidery with Beautiful Floral Designs
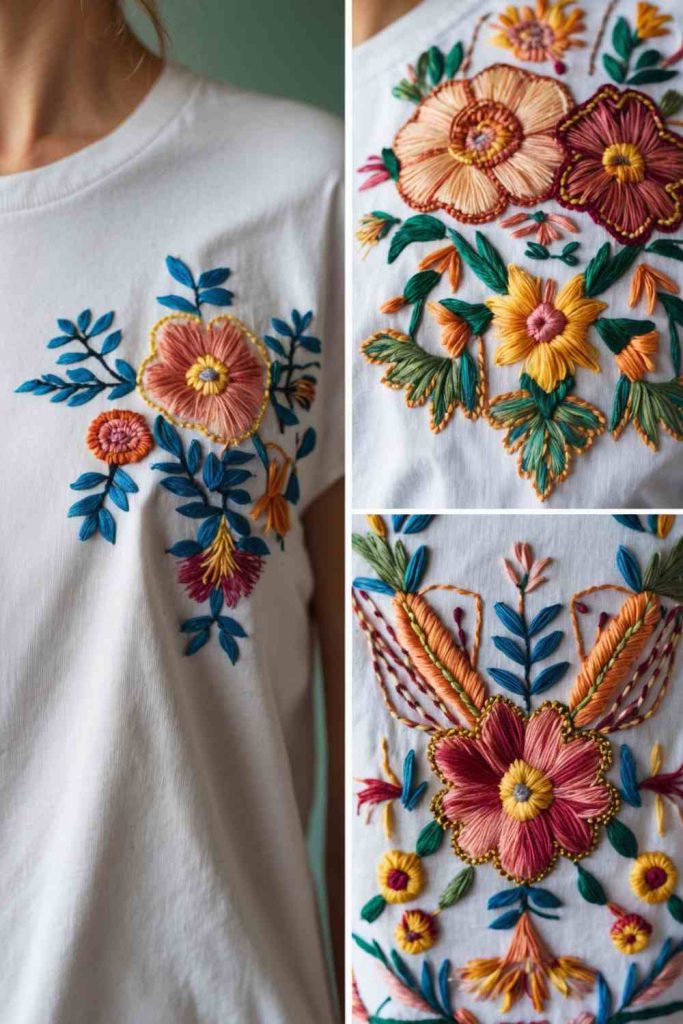
4 Steps to Create This DIY Hand Embroidery with Beautiful Floral Designs
- Pick Your T-Shirt and Design
Choose an old T-shirt in a solid color to act as your canvas. Sketch your floral design directly onto the fabric using a washable pencil or tailor’s chalk. - Gather Your Embroidery Supplies
Get an embroidery hoop, colorful threads, needles, and scissors. Select thread colors that match your floral theme, such as greens for leaves and pastels for flowers. - Start Stitching
Secure your t-shirt into the embroidery hoop and begin stitching your design. Use basic stitches like satin, backstitch, or French knots for extra texture. Work slowly to bring your floral design to life. - Final Touches
Once your embroidery is complete, carefully remove the hoop, erase any visible design marks, and wash the shirt gently to set the stitches. Your floral-embroidered masterpiece is ready to wear or gift!
DIY Color-Blocked Denim and Fabric Design
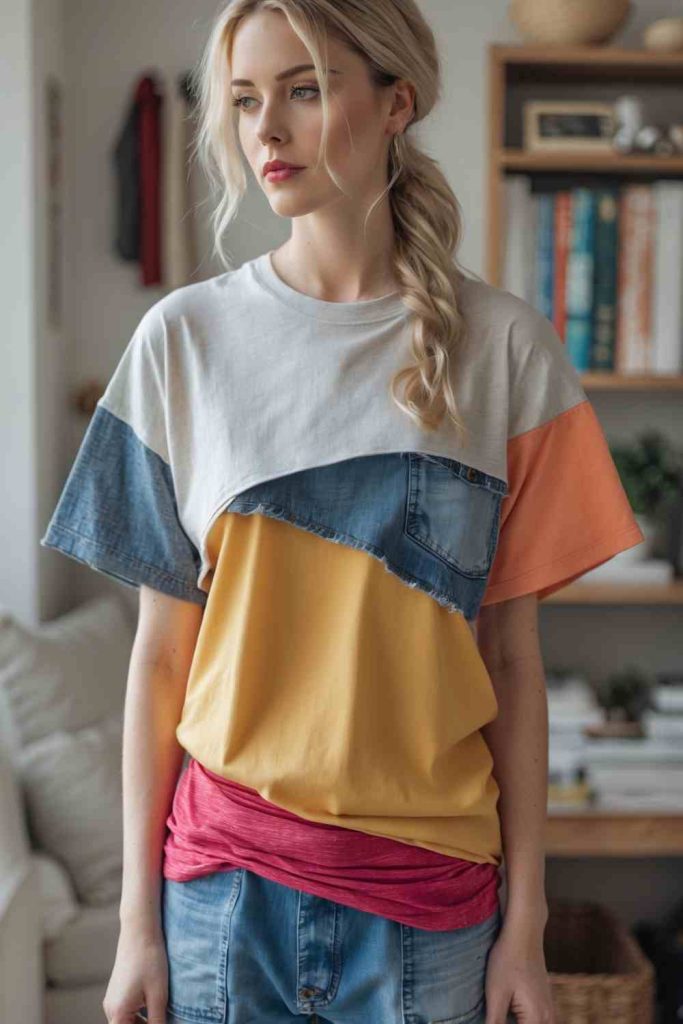
4 Steps to Create This DIY Color-Blocked Denim and Fabric Design
- Gather Materials and Select Your T-Shirt
Choose an old t-shirt as your base along with scraps of denim and bright-colored fabrics. Pick complementary colors for a bold, color-blocked effect. - Plan Your Design
Decide how you want to divide your t-shirt into sections, such as shoulders, chest, or hem. Sketch the design on paper or directly onto the t-shirt using washable markers. - Cut and Attach Fabrics
Cut your denim and fabric scraps to fit the sections you planned. Use a sewing machine or strong fabric glue to attach the pieces securely onto the t-shirt, creating a layered and color-blocked effect. - Refine and Personalize
Add finishing touches like decorative stitching or embellishments to make your design pop. Once complete, your revamped t-shirt is ready to wear or share as a one-of-a-kind statement piece!
DIY Two-Tone Tie Design for a Chic Look
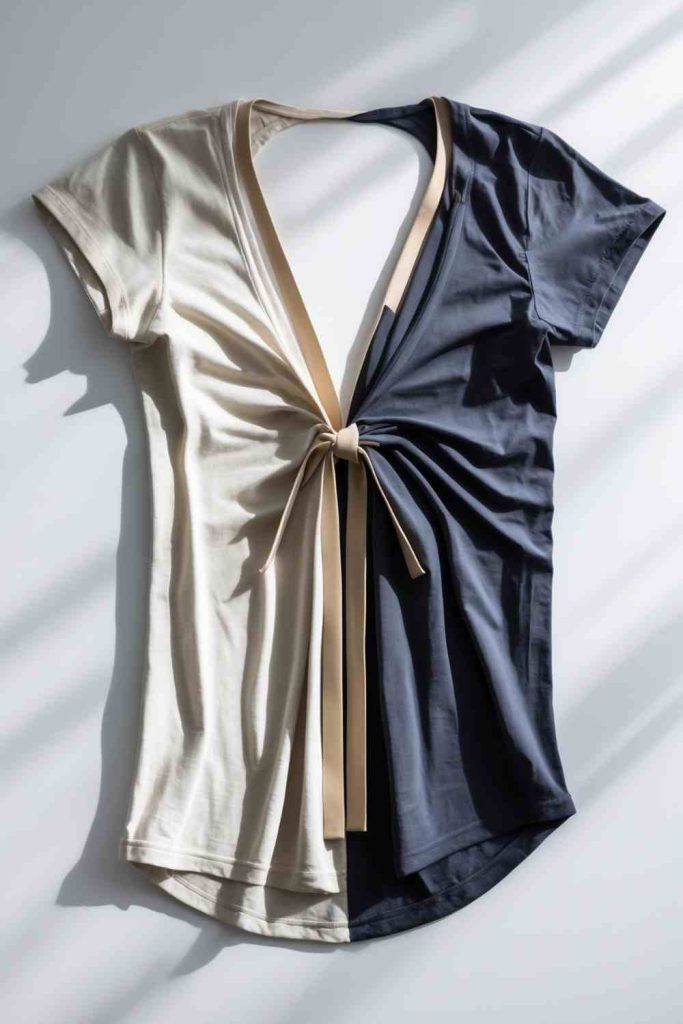
4 Steps to Create This DIY Two-Tone Tie Design for a Chic Look
- Choose Your T-Shirts
Select two t-shirts in contrasting colors to create a bold two-tone effect. Make sure they’re similar in size and material for the best results. - Cut and Prepare
Cut each t-shirt vertically down the middle. Decide which side of each shirt you want to use and save the other halves for future projects. - Sew the Pieces Together
Align the two halves so they match up perfectly at the seams. Sew them together using a sewing machine or needle and thread to form a new shirt with two-tone panels. - Add the Front Tie Feature
Cut and attach a strip of fabric from the leftover t-shirt pieces to the front hem. Sew it securely to the shirt, leaving enough length to knot. Tie the fabric into a bow for a stylish finish!
DIY Patchwork Design for Vibrant Style
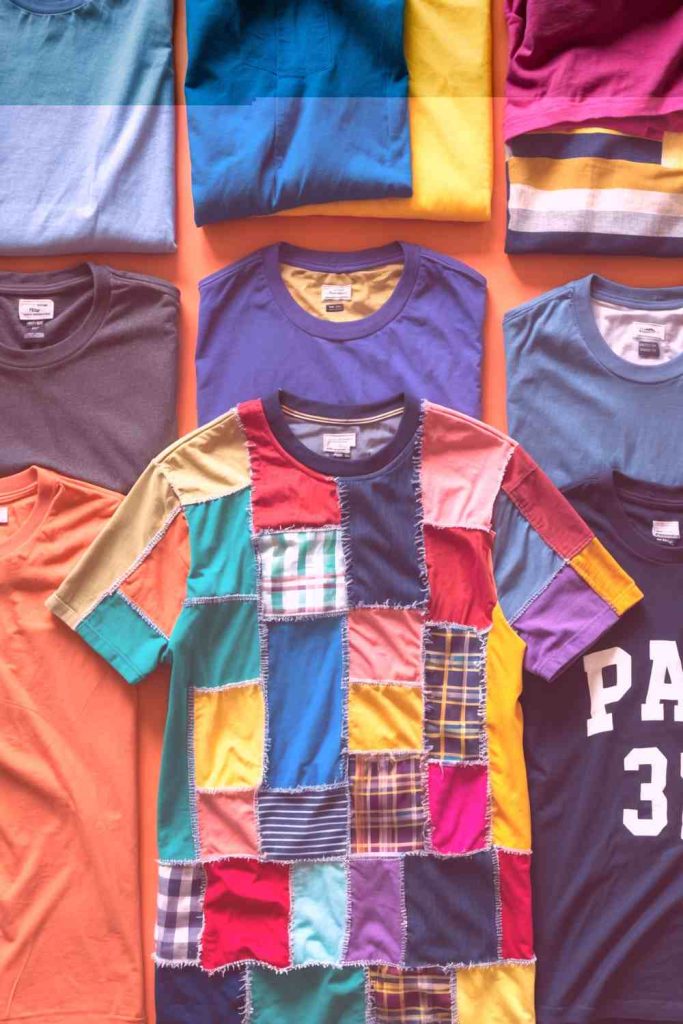
4 Steps to Create This DIY Patchwork Design for Vibrant Style
- Gather Your T-Shirts and Fabric Scraps
Choose several old t-shirts or fabric scraps in different colors and patterns. Look for bold, contrasting designs for an eye-catching patchwork effect. - Cut Your Fabric Squares
Use scissors to cut the t-shirts and fabric into squares or rectangles of similar size. Don’t worry if it’s not perfect; patchwork is all about character! - Sew or Attach the Patches
Arrange your fabric pieces on a base t-shirt to visualize the design. Sew them in place using a sewing machine, by hand, or use fabric glue for a no-sew option. - Customize and Finish
Add optional embellishments like stitching details or embroidered accents. Once done, trim any excess fabric and give the t-shirt a gentle wash to ensure everything is secure. Your one-of-a-kind patchwork tee is ready to wear!
DIY Ruffled Sleeves with Striped Fabric for a Fun Twist
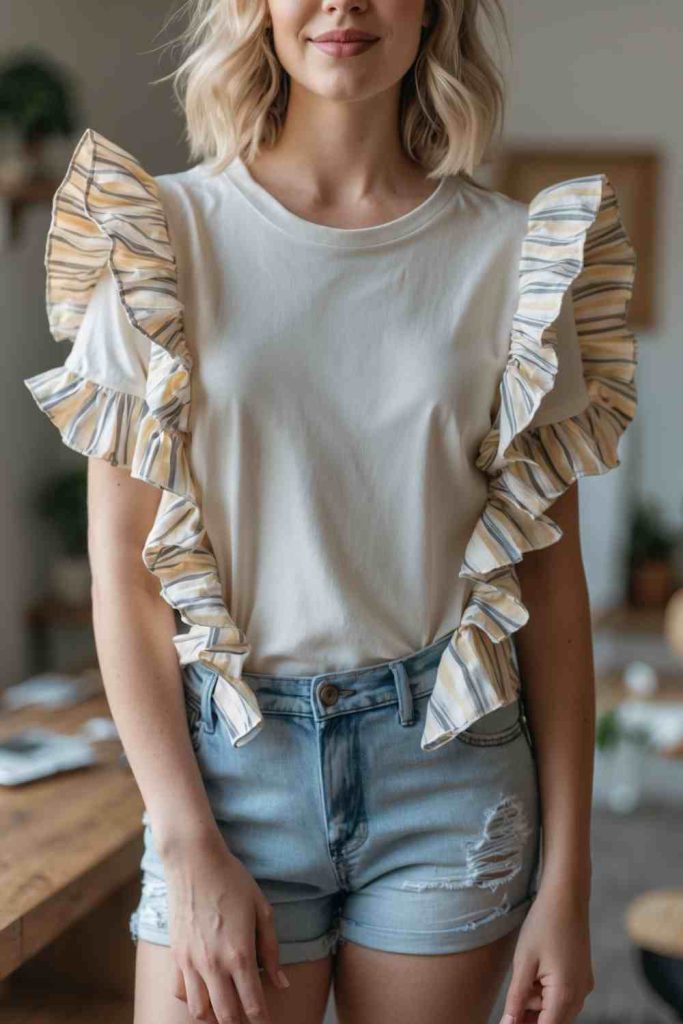
4 Steps to Create This DIY Ruffled Sleeves with Striped Fabric for a Fun Twist
- Gather Your Materials
Take an old t-shirt and some leftover striped fabric (like from an old shirt or unused fabric scraps). Choose colors and patterns that complement your t-shirt. - Create the Ruffle Strips
Measure and cut the striped fabric into long strips, about 3-4 inches wide. Sew a basting stitch along one edge of each strip, then gently pull the thread to create ruffles. - Attach to the Sleeves
Pin the ruffled strips along each sleeve’s outer seam and adjust the placement for even ruffles. Sew them securely onto the shirt, ensuring the stitches are neat and durable. - Finish and Customize
Trim any loose threads and adjust ruffles for a polished look. You can add extra details, like fabric paint or small embellishments, to make it truly one of a kind. Your chic and trendy ruffled-sleeve t-shirt is ready to rock!
DIY Stamped Patterns with Ink Pads for a Unique Look
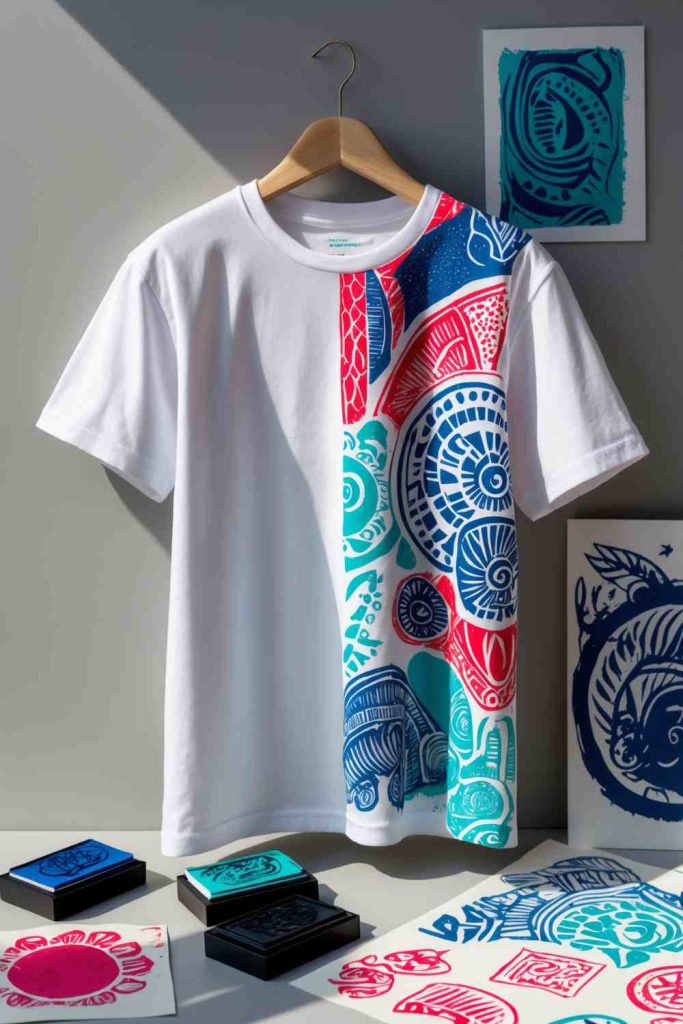
4 Steps to Create This DIY Stamped Patterns with Ink Pads for a Unique Look
- Gather Your Materials
Start with a plain white t-shirt, ink pads in your favorite colors, and stamps or household objects (like bottle caps or sponges) to imprint patterns. - Create Your Stamps
Use ready-made stamps or craft your own by carving designs into potatoes, foam, or rubber. Dip your stamp into the ink pad to coat it evenly with color. - Stamp Your Design
Press the stamp onto the fabric in your desired pattern. You can overlap shapes or use different colors to create a vibrant, abstract look. Repeat until you’re happy with the design. - Set the Ink and Finish
Allow the ink to dry completely, then heat-set it by placing a cloth over the design and ironing it for a few seconds. Your custom stamped t-shirt is now ready to wear or gift!
DIY T-Shirt Pillow for Cozy Home Decor
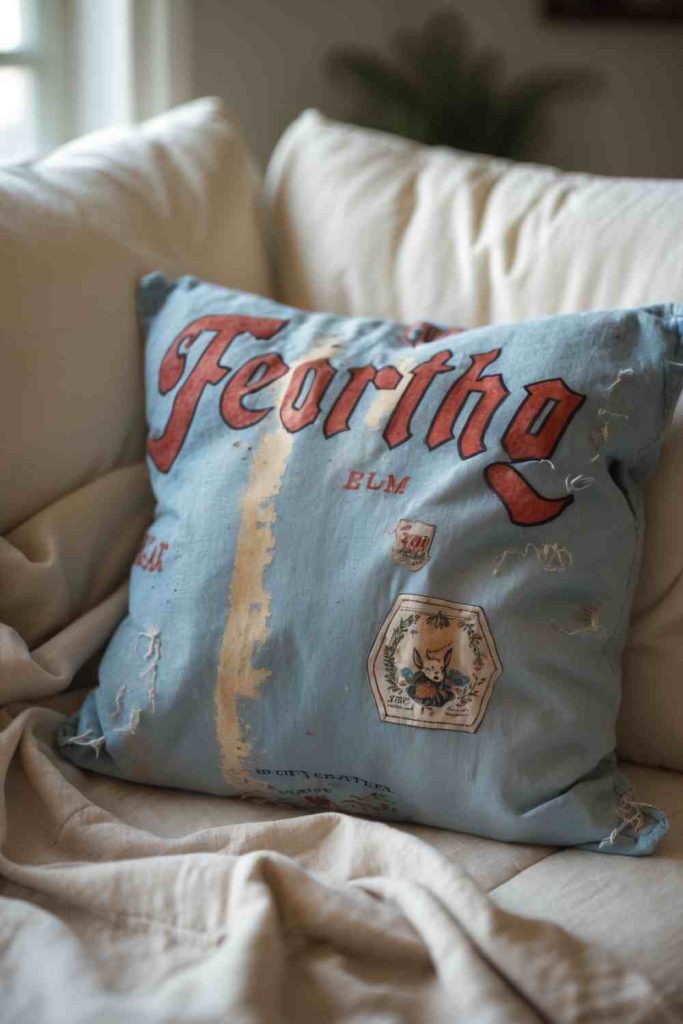
4 Steps to Create This DIY T-Shirt Pillow for Cozy Home Decor
- Select Your T-Shirt
Choose a t-shirt with a design, pattern, or text you love. It could be a vintage tee, a sports shirt, or even one that holds sentimental value. - Cut and Prep the Fabric
Lay your t-shirt flat and cut it into two equal-sized squares or rectangles, depending on the shape of the pillow you want. Keep the design in the center. - Sew the Edges
Place the two fabric pieces together, with the design sides facing inward. Sew along three edges, leaving one side open to stuff. For a no-sew option, use fabric glue or iron-on adhesive tape. - Stuff and Finish
Turn the fabric right-side out and fill your pillow cover with stuffing or an old pillow insert. Sew or glue the open edge. Fluff it up, and your personalized t-shirt pillow is ready to decorate your couch or bed!
Upcycled T-Shirt Quilt: DIY Memory Keepsake
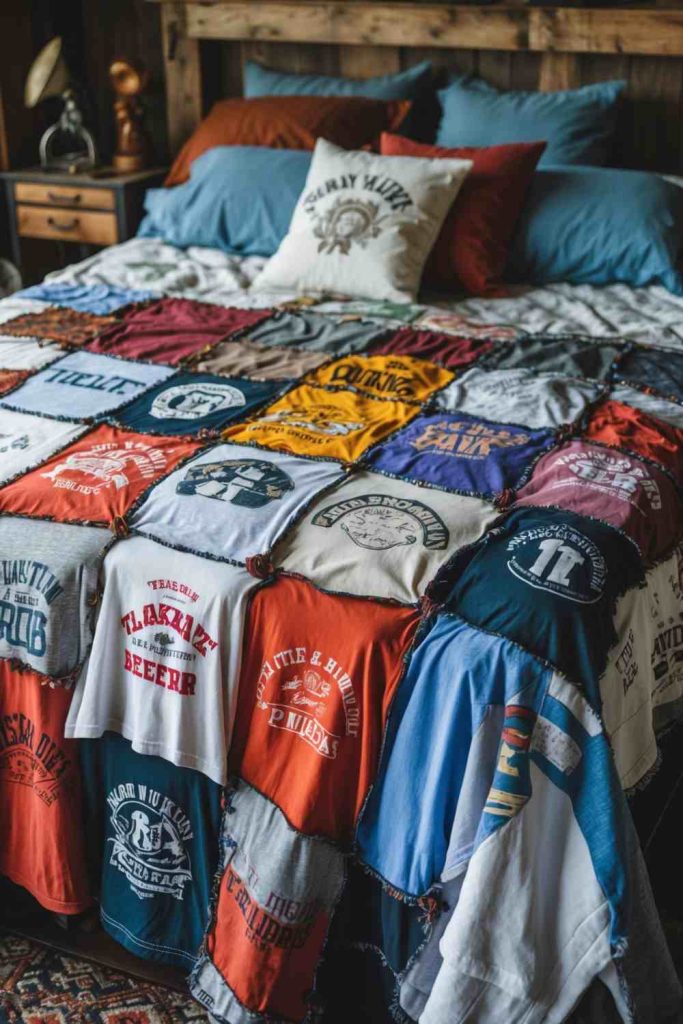
4 Steps to Create This Upcycled T-Shirt Quilt:
- Gather Materials: Collect old t-shirts, fabric scissors, a rotary cutter, a quilting ruler, quilt batting, backing fabric, thread, and a sewing machine.
- Prepare the T-Shirts: Wash the t-shirts and cut out sections with designs or logos into uniform squares or rectangles using the quilting tools.
- Assemble the Quilt Top: Arrange the cut t-shirt pieces in your desired layout, sew them together in rows, and join the rows to form the quilt top.
- Finish the Quilt: Layer the quilt top with batting and backing fabric, quilt the layers together, and sew a binding around the edges to complete it.
Upcycled T-Shirt with Vintage Buttons – DIY Upcycling T-Shirt Ideas
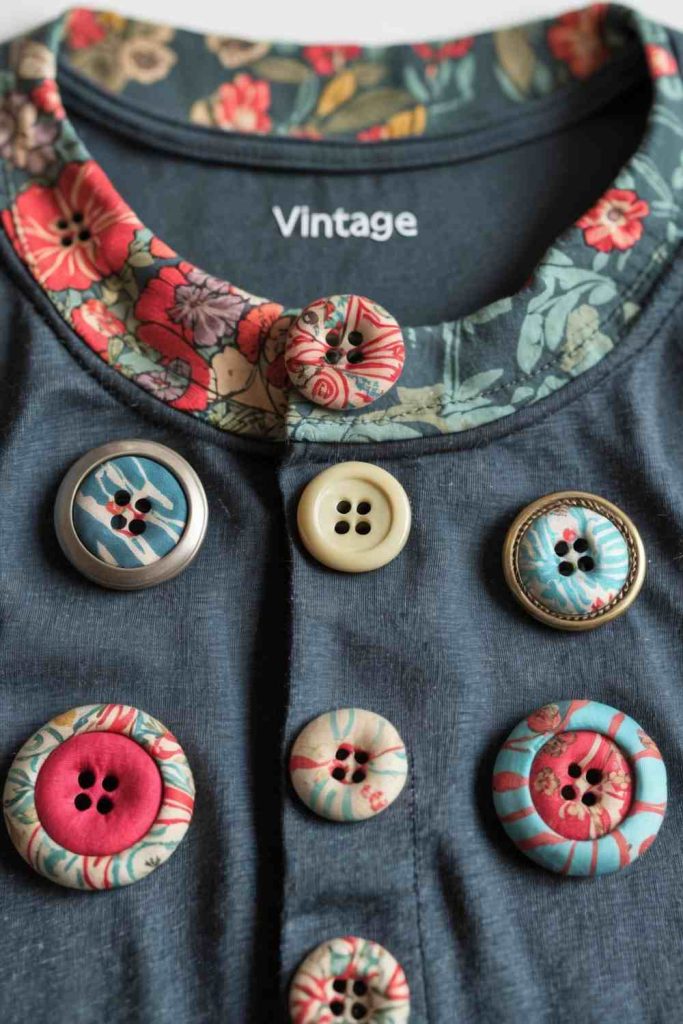
4 Steps to Create This T-Shirt with Vintage Buttons:
- Gather Your Materials: Collect an old t-shirt, an assortment of vintage buttons, needle, thread, and scissors.
- Plan Button Placement: Lay out your buttons on the t-shirt to decide on the design. Popular choices include decorating the neckline, sleeves, or front panel for a balanced look.
- Sew on the Buttons: Use a needle and thread to carefully attach each button to the t-shirt. Take your time to ensure they’re securely sewn.
- Check and Finalize: Trim any extra thread and double-check that all buttons are secure. Your stylish upcycled t-shirt is now ready to wear or showcase!