Birds on a Branch

Materials Needed:
- Ceramic plate or mug
- Ceramic paints in blue, brown, gray, orange, and cream
- Fine-tipped brushes and detailing brushes
- Pencil or ceramic-safe marker
- Clear ceramic glaze
- Oven or kiln
Step-by-Step:
- Sketch the Layout
Start by sketching a horizontal branch across the ceramic surface using a pencil or ceramic-safe marker. Make sure it’s slightly curved for a natural look. Next, outline the three birds sitting on this branch. Leave enough space between each bird and finalize their positioning by lightly drawing their shapes. - Paint the Branch
Mix a rich brown color for the branch. Using a fine-tipped brush, paint the branch first, adding small twigs for extra detail. Focus on creating slightly rough edges and varying shades of brown to resemble bark. Allow it to dry before moving on. - Add Color to the Birds
Starting with the leftmost bird, paint it a soft light blue. For the second bird, use a warm brown shade, and for the third bird, use delicate gray tones. When adding the orange beaks, make sure to use a very fine brush to keep the details sharp. Don’t forget to paint their orange feet to match. - Finish with Background and Glaze
Leave the background as a clean cream color to maintain contrast or lightly blend cream-colored paint. Finally, once the entire piece has dried, apply a coat of clear ceramic glaze and bake it in your oven or kiln as per the paint instructions.
Pro Tip: Create subtle feather textures on each bird by using a dry brush technique with a slightly darker shade of their base colors.
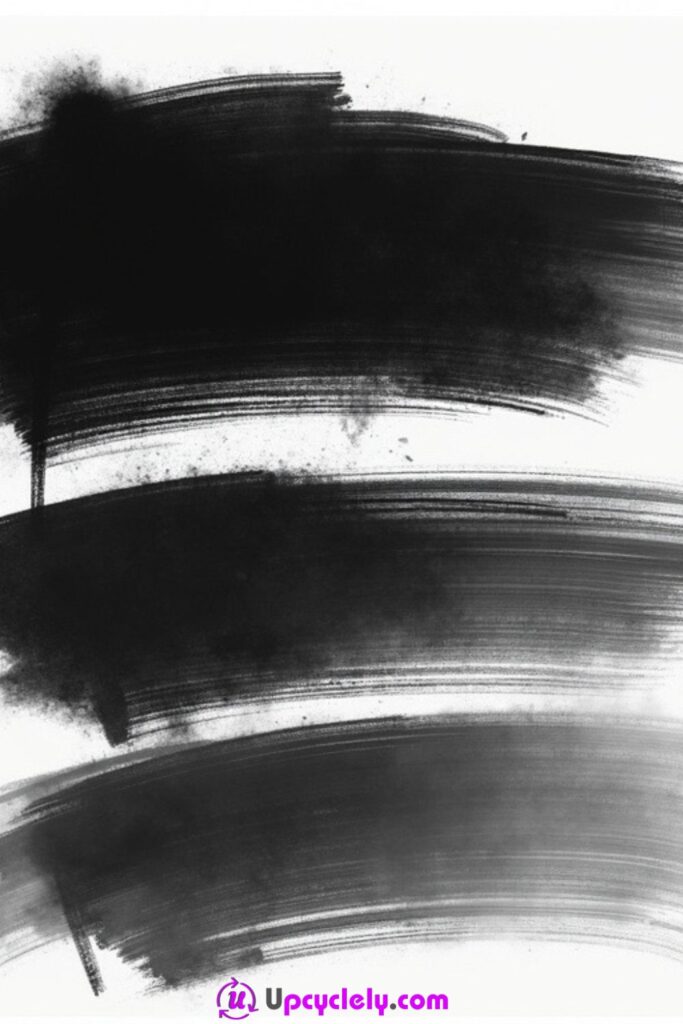
Abstract Brush Strokes
Materials Needed:
- Plain ceramic bowl or vase
- Black ceramic paint
- Wide flat brushes and thin liner brushes
- Palette for mixing paint
- Clear ceramic glaze
- Oven or kiln
Step-by-Step:
- Prepare Your Workspace
Choose a clean, plain ceramic piece with ample surface area. Select three flat brushes in different widths, from thick to thin. Decide where you’ll place each brushstroke on the ceramic. - First Bold Brushstroke
Dip the largest brush into black paint, ensuring the bristles are coated evenly but not overly dripping. Drag the brush across the ceramic, aiming for a smooth yet textured finish. This stroke should set the tone as the boldest and darkest element. - Layer with Lighter Strokes
Using the medium and smaller brushes, apply lighter strokes beneath the first one. To achieve varying opacity, dilute the black paint slightly with water. Make each stroke unique by altering the texture, direction, and pressure applied. - Seal and Cure
Once the paint has dried completely, apply a clear ceramic glaze to protect and enhance the texture’s richness. Bake the ceramic as per the manufacturer’s instructions.
Pro Tip: Add extra finesse by practicing your brushstrokes on paper first. This way, you can experiment with how much pressure to use.
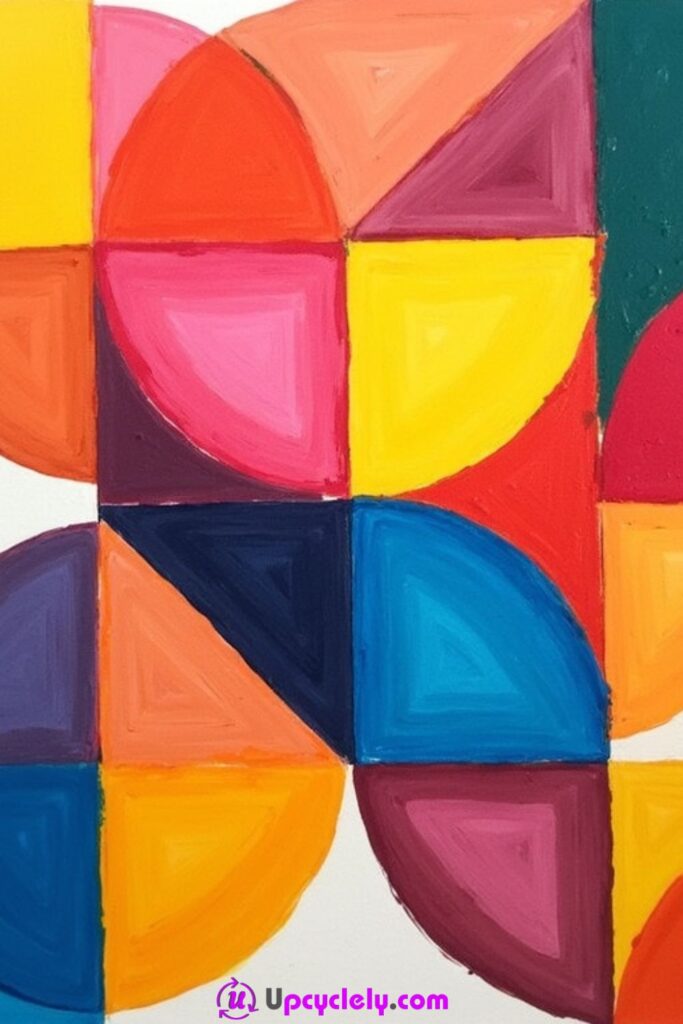
Abstract Geometric Shapes
Materials Needed:
- Ceramic tile or platter
- Ceramic paints in bold, vibrant colors (yellow, orange, red, blue, green, pink, purple)
- Stencil or masking tape
- Pencil or ceramic-safe marker
- Clear ceramic glaze
- Oven or kiln
Step-by-Step:
- Plan and Divide the Layout
Using a pencil or marker, divide the ceramic surface into a 3×3 grid. Each square will act as a canvas for your geometric patterns. Sketch circles, semicircles, triangles, or quarter circles within each square to visualize the final design. - Mask the Edges for Precision
To achieve clean, sharp boundaries, use masking tape to outline your shapes. For curved segments, consider using a stencil or cutting tape into curves. - Paint Bold Colors
Assign each shape a vibrant, contrasting color. For example, pair warm tones like red and yellow with cool tones like blue and green. Layer the paint carefully and allow one color to dry before painting adjacent sections. - Add Detailing and Seal
Once the base colors are dry, add small accents or textures, such as dots or stripes, using a fine-tipped brush. Seal the entire piece with a clear ceramic glaze and cure it in an oven or kiln.
Pro Tip: Blend two colors slightly within a shape to give it a gradient effect, adding dimension.
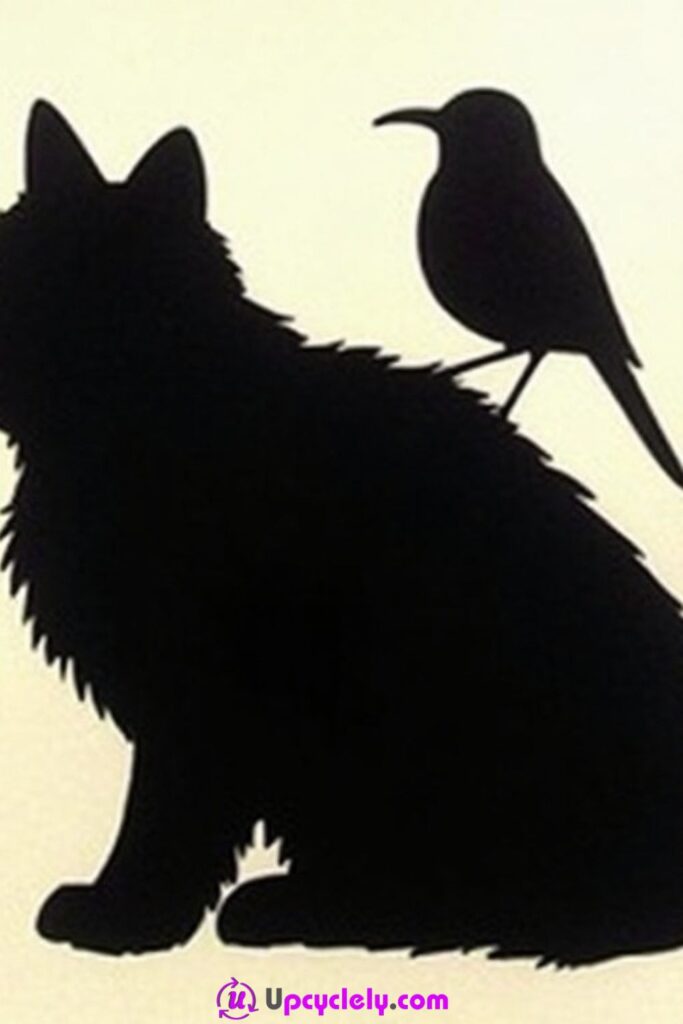
Animal Silhouettes
Materials Needed:
- Ceramic mug or plate
- Black ceramic paint
- Fine-tipped brush
- Stencil for silhouettes (cat and bird)
- Pencil or ceramic-safe marker
- Clear ceramic glaze
- Oven or kiln
Step-by-Step:
- Outline the Silhouettes
Place the stencil of a cat and bird on your ceramic piece and lightly trace around it with a ceramic-safe marker. Position the bird on the cat’s back for a serene composition. - Fill in the Silhouettes
Using black ceramic paint and a fine-tipped brush, carefully fill in the traced outlines. Take your time to create even coverage and ensure that the shapes are well-defined. - Create Texture Details
Once the paint is dry, use the brush to add small details to the edges of the cat, such as tufted fur or pointed whiskers. Keep the bird’s outline sleek and clean for contrast. - Seal and Protect
Apply a clear ceramic glaze to the entire piece to give it a polished, durable finish. Cure it according to the glaze’s instructions.
Pro Tip: Use a toothpick dipped in paint to create ultra-fine details like whiskers or feathers.
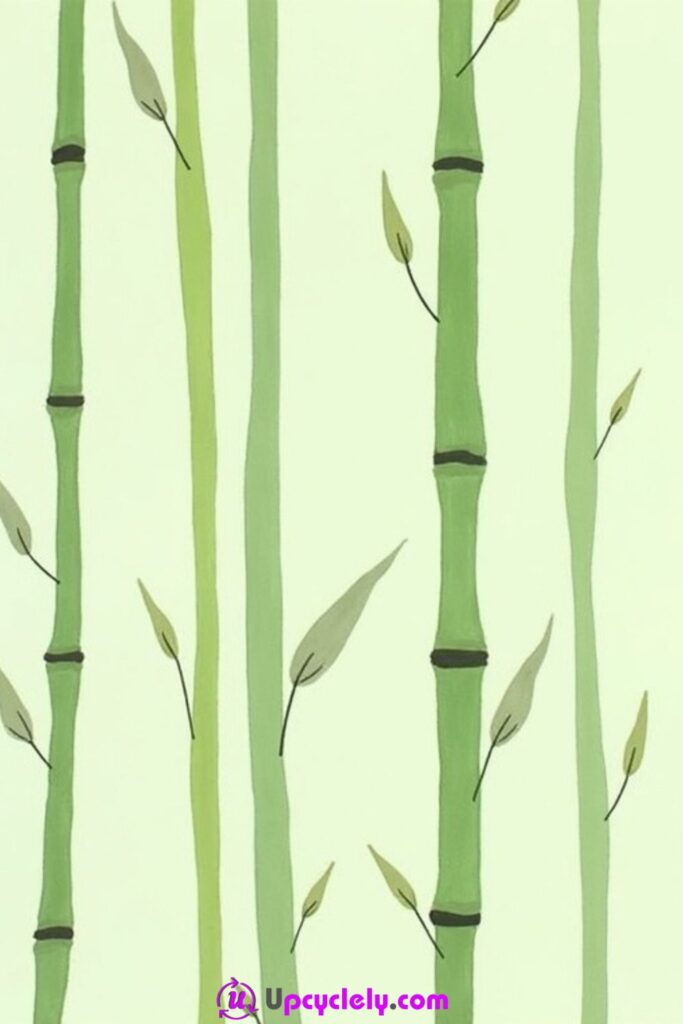
Bamboo Stems
Materials Needed:
- Ceramic platter or wall tile
- Green ceramic paints in various shades
- Thin liner brushes
- Pencil or ceramic-safe marker
- Clear ceramic glaze
- Oven or kiln
Step-by-Step:
- Draw the Bamboo Stems
Sketch vertical bamboo stalks evenly across your ceramic piece using a pencil. Mark where the segments will be with horizontal dividing lines, and lightly outline leaves near different sections. - Paint the Stems
Start with a mid-green shade for the base of each stalk. Once dry, deepen the segments with a darker green to create depth. Use a fine brush to keep these details precise. - Add Leaves for Completeness
Paint elongated, slightly curved leaves extending from the stalk segments. Use two to three shades of green, blending them for natural dimension. - Apply the Glaze and Bake
Complete the design with a coat of clear ceramic glaze for a smooth, glossy finish. Cure the ceramic as specified.
Pro Tip: Add a light yellow-green wash around the design to give the bamboo an atmospheric look.
Boho Feathers

Materials Needed:
- Ceramic mug, plate, or tile
- Light brown, dark brown, and cream ceramic paints
- Fine-tipped brushes
- Metallic gold ceramic marker or paint (optional)
- Pencil or ceramic-safe marker
- Clear ceramic glaze
- Oven or kiln
Step-by-Step:
- Sketch the Feather Design
I start by lightly sketching a single feather in the center of the ceramic piece. I focus on drawing the quill and soft curves of the feather’s barbs. I leave enough space for fine detailing and subtle gradients. - Paint the Quill Base
Using a fine-tipped brush, I carefully paint the quill in light brown. Then, I gradually blend darker brown paint moving outward toward the feathery edges to create dimension. I add slight strokes along the quill to make it look realistic. - Layer the Feather’s Barbs
I work section by section, painting the fine lines that extend from the middle quill. I vary the pressure of my brush for a delicate texture. If I want a boho-inspired twist, I’ll use a metallic gold marker to add accents between the barbs for an ethereal shimmer. - Seal and Cure the Design
After letting the paint dry fully, I apply a coat of clear ceramic glaze to seal the design. Then, I bake the ceramic piece in the oven or kiln according to the glaze instructions for a polished and lasting finish.
Pro Tip: For extra boho flair, add a few smaller feathers or tribal patterns around the main feather design.
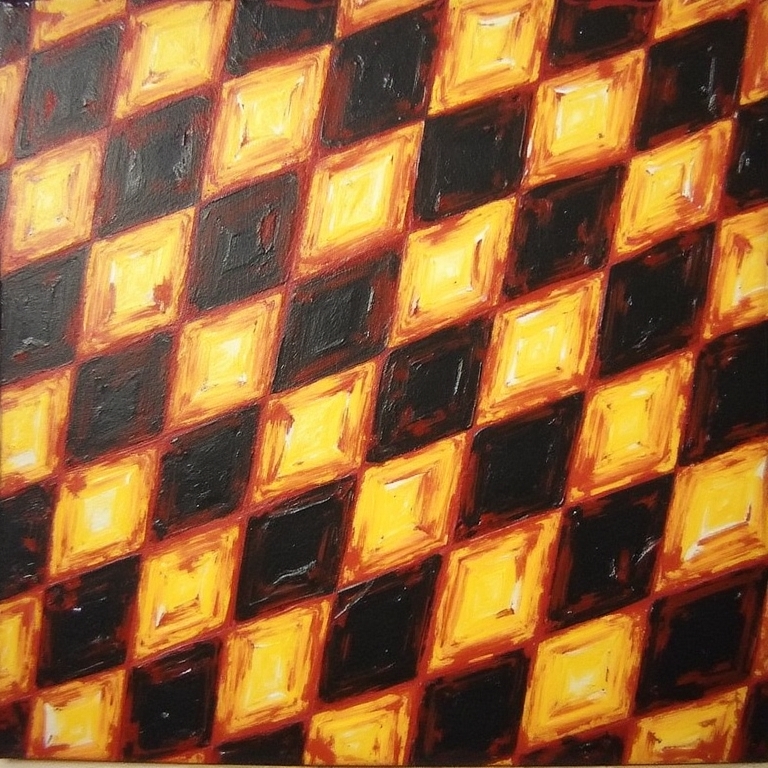
Checkerboard Pattern
Materials Needed:
- Ceramic platter or tile
- Black and yellow-orange ceramic paints
- Stencils or painter’s tape
- Medium and small brushes
- Clear ceramic glaze
- Oven or kiln
Step-by-Step:
- Plan the Pattern Layout
With a pencil, I outline diagonal rows of diamonds across the ceramic surface. I make sure to alternate the spaces where the black and yellow-orange diamonds will go to mimic the checkerboard pattern. - Mask the Diamonds for Precision
Using painter’s tape or stencils, I mask off the sections I don’t want to paint. I make sure the edges of each diamond are crisp and clean. - Paint the Diamonds
I start painting the black diamonds using a medium brush, making sure to keep the strokes even and neat. For the yellow-orange diamonds, I use layered brushstrokes to create a textured effect, letting the first coat dry before adding another layer. - Remove Tape and Finish
Once all the painted sections are completely dry, I gently peel off the tape. I apply a clear ceramic glaze over the entire surface and bake it to lock in the vibrant and textured checkerboard pattern.
Pro Tip: To give the design character, use a dry brushing technique for some of the yellow-orange diamonds to create variations in texture.
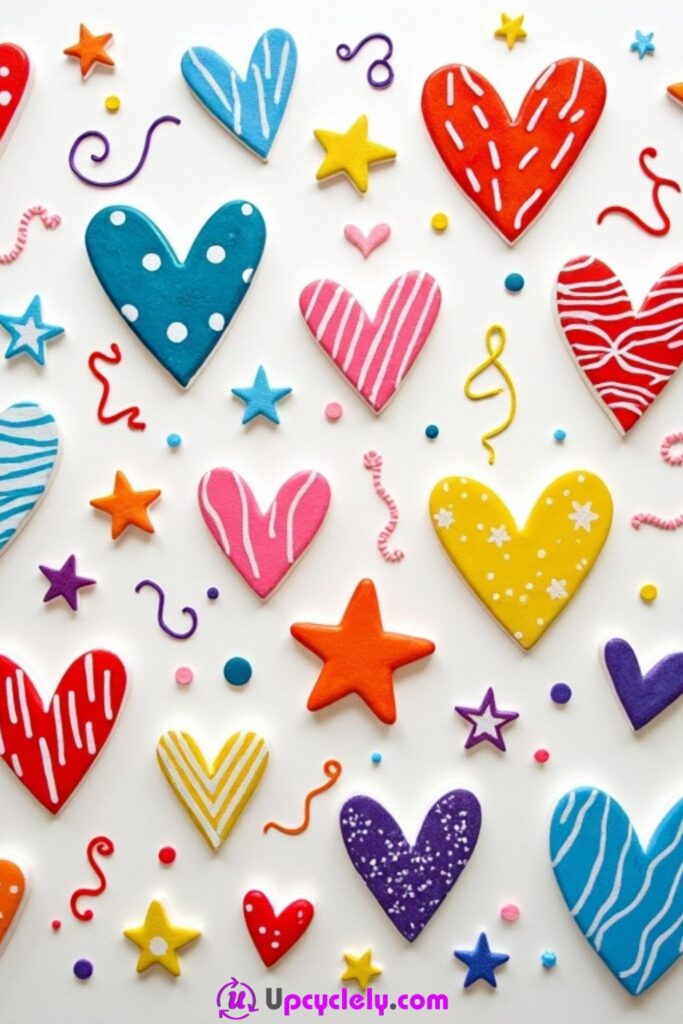
Doodle Art
Materials Needed:
- Ceramic cup or bowl with a smooth surface
- Ceramic paints in red, pink, yellow, blue, and purple
- Small and fine-tipped brushes
- Clear ceramic glaze
- Oven or kiln
Step-by-Step:
- Plan the Doodle Layout
I visualize how I want the hearts, stars, swirls, and dots to be spread out. I lightly sketch a few shapes onto the ceramic surface using a pencil for guidance. - Layer the Hearts and Stars
Starting with the hearts, I paint them in various colors, ensuring some have stripes, polka dots, or blended gradients to make the design whimsical. Next, I add stars around the hearts, varying their sizes and colors. - Add Swirls and Dots
With a fine-tipped brush, I add colorful swirls and dotted patterns as fillers around the larger shapes, ensuring there’s balance in the overall composition. I experiment with colors to give each swirl and dot a unique, playful feel. - Seal and Bake
Once all the paint has dried, I apply a clear ceramic glaze. This gives the doodle art design a glossy finish once it’s baked in an oven or kiln.
Pro Tip: Use metallic paints for some of the dots and swirls to add pops of shine and make the design look more festive.
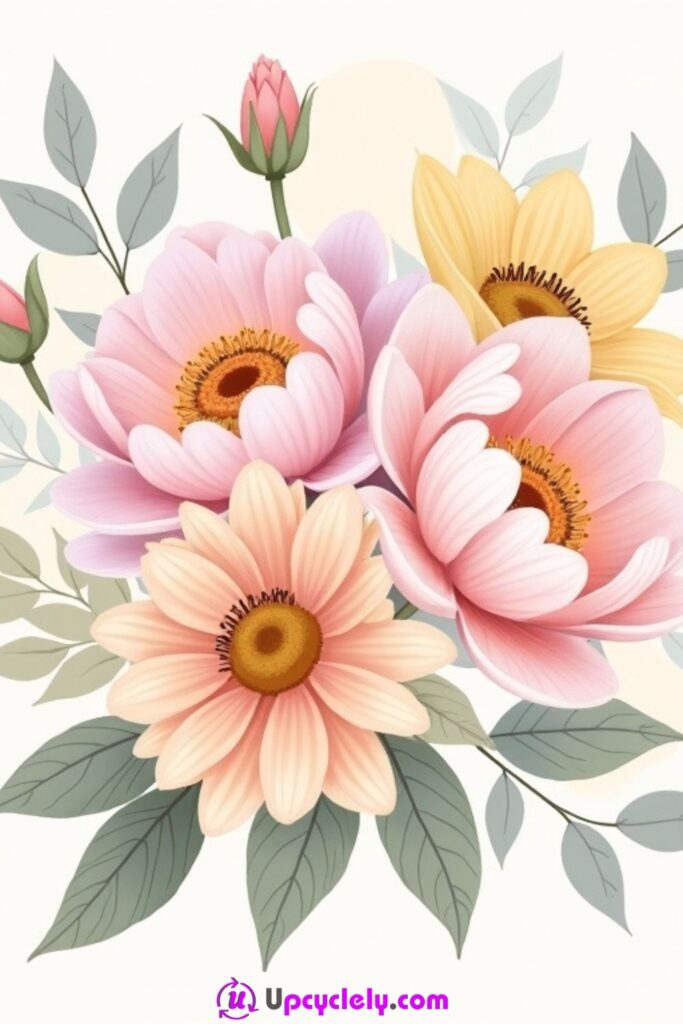
Floral Motif
Materials Needed:
- Ceramic plate or tea set
- Ceramic paints in pastel pink, peach, yellow, green, and white
- Fine brushes and medium-sized brushes
- Ceramic-safe pen for outlines (optional)
- Clear ceramic glaze
- Oven or kiln
Step-by-Step:
- Sketch the Floral Layout
I begin by sketching the arrangement of flowers and leaves, starting with three large flowers in the center and smaller elements around them. I use light pencil strokes to plan how they’ll overlap. - Paint the Base Colors
Using pastel shades, I apply the base colors for the flowers and leaves. I build up the pink, peach, and yellow shades gradually to keep the tones soft and delicate. - Detail the Flowers and Leaves
For the flowers, I add dimension by layering slightly darker shades toward the edges of the petals. I then use a small brush to add fine lines, dots, and slight gradients in the centers of the flowers. For leaves, I blend muted green tones with brushwork that mimics natural veining. - Add the Final Gloss
Once my painting is completely dry, I cover it with a clear glaze. The glaze protects and enhances the pastel colors after baking.
Pro Tip: Experiment with adding a bit of white or gold detailing to the petal edges for an elegant finishing touch.
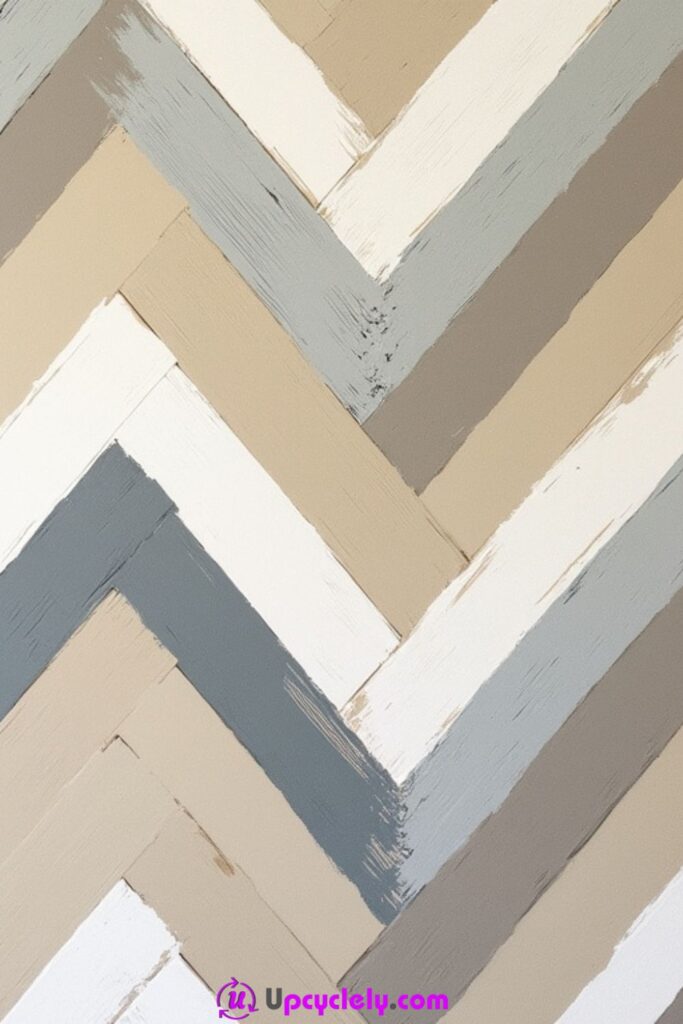
Herringbone Pattern
Materials Needed:
- Rectangular ceramic platter or tile
- Ceramic paints in beige, cream, taupe, and gray
- Small detailing brushes and masking tape
- Clear ceramic glaze
- Oven or kiln
Step-by-Step:
- Sketch and Mask the Pattern
I begin by marking diagonal lines across the ceramic piece to outline the rows of rectangles. Using masking tape, I block off alternating rows to create a zigzag arrangement. - Start Painting the Rectangles
For each rectangle, I alternate between beige, cream, taupe, and gray paints. I use small brushes to keep the paint neatly confined within the lines. I make sure to leave slight texture in the paint for a brushed appearance. - Add Depth and Texture
Once the base colors are dry, I use a dry brush dipped in slightly darker paint to create a brushed, distressed look on each rectangle. I focus on blending edges lightly to highlight the herringbone interlocking style. - Seal and Set
After the paint has dried, I carefully remove the masking tape and apply clear glaze to the entire piece. Baking it finalizes the texture and durability.
Pro Tip: Combine matte and glossy glazes in alternating rows for a striking and modern finish.
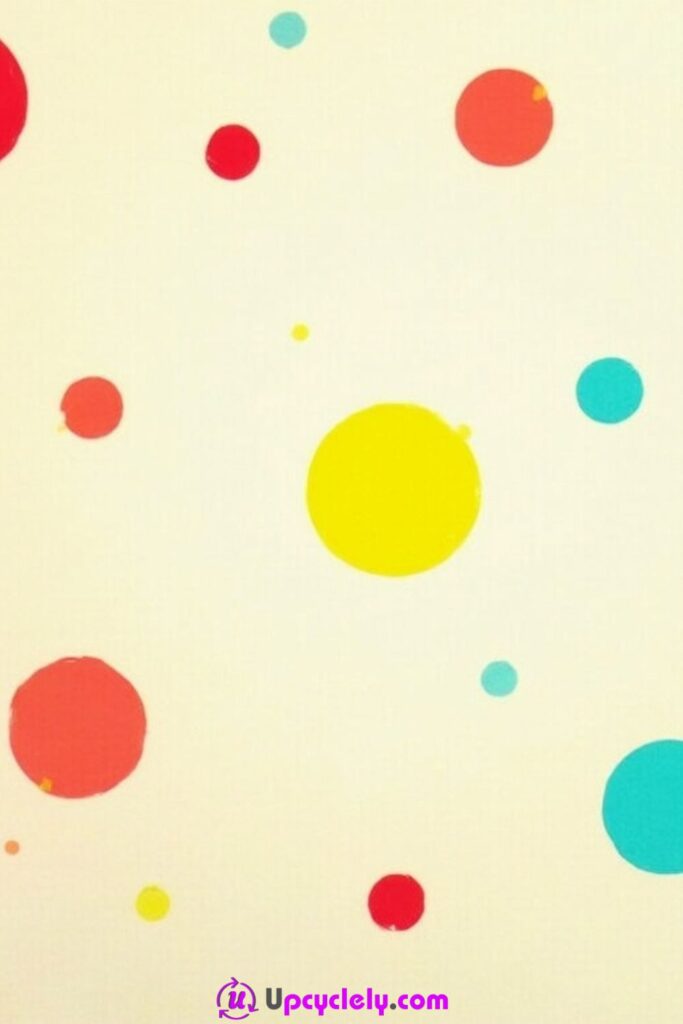
Polka Dots
Materials Needed:
- Plain ceramic plate, bowl, or mug
- Ceramic paints in red, yellow, orange, and blue
- Assorted dotting tools or brushes (round-tipped)
- Clear ceramic glaze
- Pencil
- Oven or kiln
Step-by-Step:
- Prepare the Template
I start by lightly marking the positions of the dots on the ceramic surface with a pencil. This helps me maintain even spacing and align the larger dots correctly. I vary the sizes randomly to ensure the playful pattern stands out. - Paint Larger Dots First
I dip the largest dotting tool into red paint for the biggest dots. I then press it gently onto the ceramic surface where I’ve marked large red spots. I clean the tool before alternating to yellow, blue, and orange paint for more large dots. - Add Smaller Dots
Using smaller dotting tools or round-tipped brushes, I fill the gaps with smaller dots. I use the same paint colors, balancing the composition for an energetic yet orderly appearance. - Glaze and Cure the Design
Once the paint is fully dry, I apply a clear ceramic glaze to give the piece a glossy, protected finish. I make sure to bake it in the oven or kiln as per the instructions to preserve the design.
Pro Tip: For crisp round edges, dip the tool cleanly into the paint before each application and avoid dragging it.
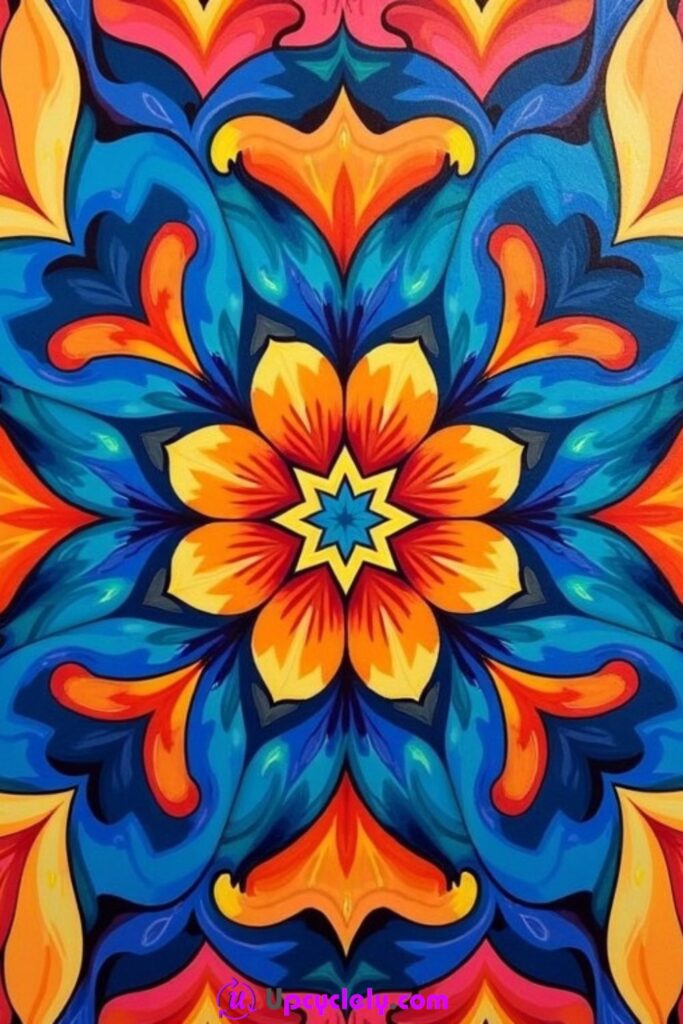
Kaleidoscope Patterns
Materials Needed:
- Flat ceramic plate or tile
- Ceramic paints in blue, red, orange, yellow, and white
- Fine-tipped and medium brushes
- Ruler and pencil (for symmetry)
- Clear ceramic glaze
- Oven or kiln
Step-by-Step:
- Create the Pattern Layout
I start by drawing a symmetrical design with a pencil on the ceramic piece, working from the center outward. Using a ruler, I break the design into radial sections to ensure balance and uniformity. - Paint the Central Star
I use blue and white paint to create the star-like shape in the center, blending the colors slightly to add dimension. I work slowly to ensure the sharp points stay crisp and symmetrical. - Add Petal and Leaf Layers
I paint the surrounding layers one at a time, alternating warm colors like orange and yellow with cool tones like red or blue. For intricate detail, I switch to a fine-tipped brush and carefully fill in the smaller areas. - Seal and Finish
Once the paint has dried completely, I apply a generous coat of clear glaze to protect the design’s vibrancy and set the ceramic in an oven or kiln for final curing.
Pro Tip: Rotate the ceramic piece as you paint each section to ensure each angle looks consistent and symmetrical.
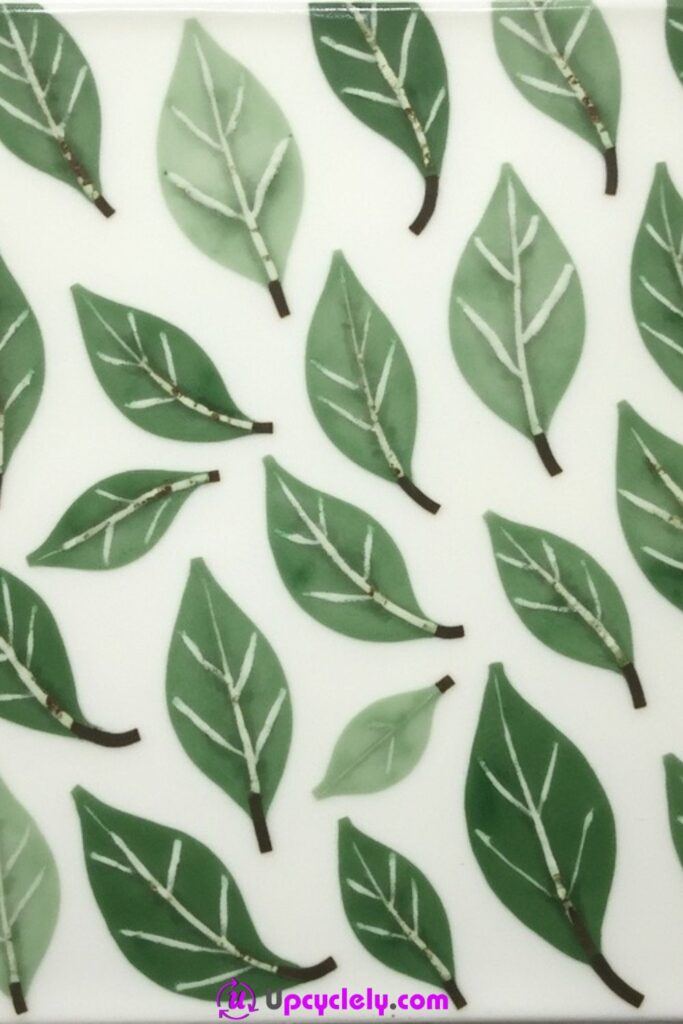
Leaf Pattern
Materials Needed:
- Ceramic platter or wall tile
- Green ceramic paints in light, mid, and dark shades
- Fine-tipped and liner brushes
- Pencil
- Clear ceramic glaze
- Oven or kiln
Step-by-Step:
- Sketch the Leaf Outlines
I lightly draw varying sizes of leaves across the ceramic surface with a pencil. I position them in different orientations, creating a natural scattered effect. I also add thin stems to connect some leaves for cohesion. - Fill the Base Color
Using a mid-green paint, I fill in the outlined leaves with solid color. I make sure to overlap edges slightly for a seamless look while preserving light pencil details. - Add Veins and Details
With a liner brush, I use a darker green paint to add veins to each leaf, starting from the central vein and branching outward. I use a lighter green to accentuate the edges or create a subtle gradient effect for depth. - Seal the Design
Once the leaves are painted completely, I apply a thin layer of clear glaze over the entire surface to add a polished and durable finish before setting the ceramic in the oven or kiln.
Pro Tip: To make the leaves look more realistic, add tiny, irregular notches or curves to the edges.
Minimalist Line Art

Materials Needed:
- Plain ceramic mug or plate
- Black ceramic paint or fine ceramic-safe marker
- Fine liner brushes or paint pen
- Clear ceramic glaze
- Pencil
- Oven or kiln
Step-by-Step:
- Sketch the Basic Features
I begin by carefully sketching the outline of the facial features on my chosen ceramic surface. This outline includes closed eyes, a simple nose, and a softly curved line for lips. - Paint the Line Art
Using a fine liner brush or a ceramic-safe marker, I trace over the pencil lines with black ceramic paint. I ensure the strokes are fluid, maintaining consistency and avoiding interruptions. - Refine the Lines
Once the initial paint layer dries, I go over the lines again to ensure their opacity. I also use a steady hand to smooth any lines that may have imperfections for a clean, sleek minimalist style. - Glaze and Bake
After the paint sets, I add a coat of clear ceramic glaze to protect the design’s simplicity and enhance its elegance. I bake it in the oven or kiln to ensure durability.
Pro Tip: Less is more with minimalist designs, so keep the lines elegant and avoid over-complicating.
Mountain Silhouette

Materials Needed:
- Ceramic serving platter or tile
- Ceramic paints in dark blue, light blue, pink, and yellow
- Medium and fine-tipped brushes
- Clear ceramic glaze
- Pencil
- Oven or kiln
Step-by-Step:
- Sketch the Mountain Layers
I lightly sketch the outline of the mountain ranges across the ceramic surface, layering up to three rows of peaks. I use a soft pencil to define where one layer ends and another begins. - Begin with the Foreground
I paint the foreground mountains using dark blue paint, keeping the strokes clean and filling the entire area. For texture, I add hints of tree detailing along the lower edges with fine brushwork. - Paint Midground and Background
Moving upward, I add mid-toned blue paint for the midground hills. For the background, I blend light pink and yellow paint for a soft sky effect, creating a subtle transition that resembles sunrise or sunset. - Final Glaze Application
Once the layers are fully dry, I apply a clear ceramic glaze over the entire piece. Baking it in an oven or kiln allows the layered design to fully set and the colors to pop.
Pro Tip: Blend the sky colors with a sponge for a smoother, gradient-like effect.
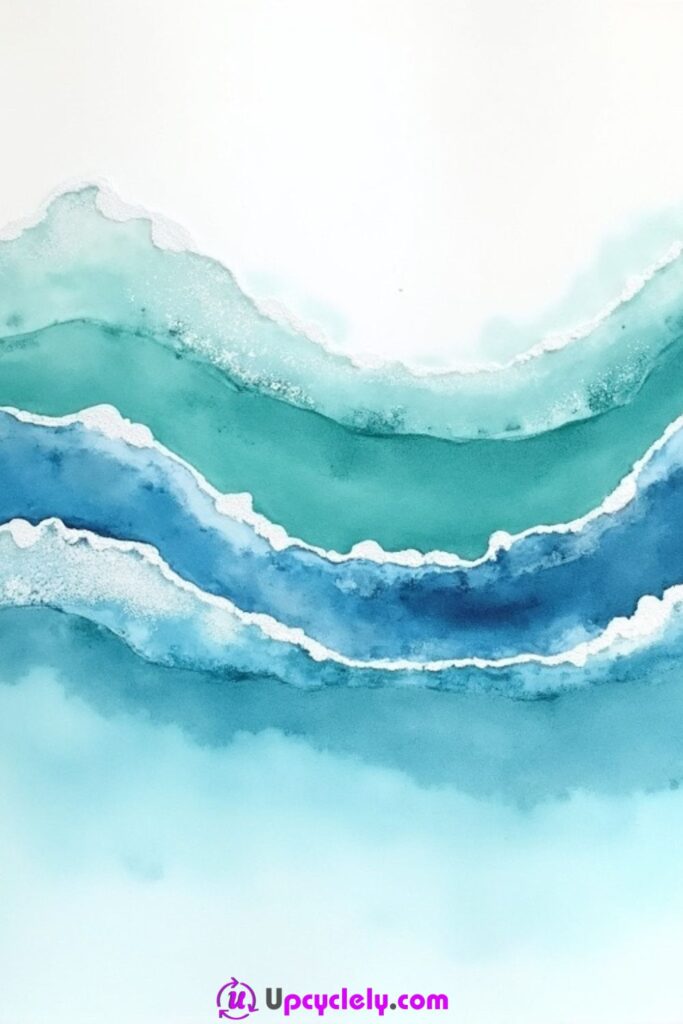
Watercolor Waves
Materials Needed:
- Plain ceramic platter, tile, or plate
- Ceramic paints in shades of blue (light blue, teal, dark blue) and green (pale green, forest green)
- Paint thinner or water (to achieve watercolor-like effects)
- Wide brushes and fine-tipped brushes
- Sponge or tissue for blending
- Pencil or ceramic-safe marker (for sketching layers)
- Clear ceramic glaze
- Oven or kiln
Step-by-Step Guide:
1. Sketch the Wave Layers
I start by lightly sketching the outline of wavy, horizontal layers across the ceramic surface using a pencil or ceramic-safe marker. I vary the thickness and curves of each layer, overlapping some lines to create movement and depth. The goal here is to make the waves look organic and fluid, as if they’re flowing naturally.
While sketching, I plan the color palette for each layer, starting with pale greens and blues at the top and transitioning to darker, richer shades toward the bottom. Having this plan in mind will help keep the colors harmonious.
2. Begin Painting the Top Layers
I mix pale greenish-blue paint with a bit of paint thinner or water to give it a translucent, flowing appearance. With a wide brush, I fill in the topmost layer and use smooth, horizontal strokes to mimic the softness of watercolor. The edges of each layer should remain uneven and jagged to match the natural look of waves.
To create blending, I lightly dab a sponge or tissue along the edges while the paint is still wet, softening the transitions between colors. Once satisfied with the look, I allow this layer to dry before moving on to the next.
3. Layer the Midtones and Shadows
For the next few layers, I gradually darken the color palette, adding teal and mid-tone blue shades. I use the same technique of thinning the paint and applying smooth, flowing strokes. Where the layers overlap, I gently blend the colors with a damp sponge or fine brush to make the transitions seamless.
At this stage, I focus on adding subtle depth by layering translucent paint over certain sections to create the illusion of shadow and light. This technique helps the layers appear three-dimensional and dynamic, much like rippling waves.
4. Add Details and Finish the Depth
Moving to the bottom layers, I incorporate darker shades like deep blue and forest green to anchor the design. I paint these using small, deliberate strokes to emphasize texture, creating the most intense color saturation at the base of the waves.
For a final touch, I go back to the middle and upper layers and add faint streaks of white or light blue to mimic reflections, making the design feel more vibrant and alive. Once the painting is completely dry, I apply a coat of clear ceramic glaze, which enhances the watercolor effect and provides a polished finish. I then bake the ceramic in an oven or kiln for durability.
Pro Tip:
To achieve an even more fluid and flowing effect, tilt the ceramic piece slightly while painting each layer. This step lets the thinned paint naturally run and blend, capturing the organic motion of water.