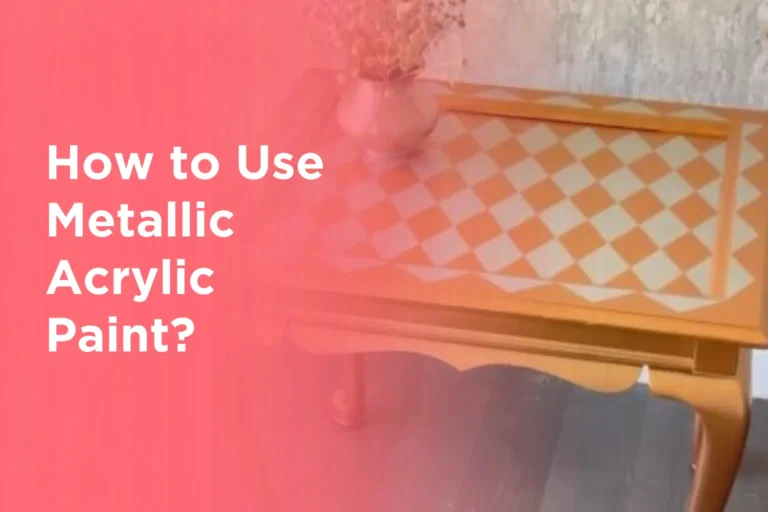
A gingham pattern on canvas looks calm and orderly, yet the effect depends on more than painting a collection of equal squares. The fabric-like appearance comes from a pale base, one set of vertical bands, a second set of horizontal bands, and darker intersections where the two directions overlap. When those values remain clear, the finished canvas reads as woven colour rather than a flat checkerboard.
I especially like this pattern on an older canvas because the design can cover tired artwork without needing a detailed drawing. A sound canvas from a charity shop, an unfinished practice piece, or a board left from another project can become a useful decorative panel with a limited palette and careful measuring.
The method is repetitive, but it should not feel rigid. A slightly softened brush edge can make the checks feel hand-painted, while straight spacing keeps the full composition settled.
I don’t think the first canvas needs to be large. A small square or rectangular surface is easier to tape, turn, and compare from a distance. The most important choice is not the colour itself; it is whether the base, the single bands, and the crossed areas remain visibly different after everything dries.
Before You Start Painting the Canvas
Choose a canvas that is firm, dry, and free from loose paint. If you are reusing a previously painted piece, check whether thick texture, peeling colour, dust, or oily residue will interfere with the new grid. Raised brush ridges can remain visible beneath gingham, so smooth only the unstable or distracting areas rather than trying to make an old canvas look factory-new.
Prime or cover the existing artwork with an appropriate acrylic ground when the old design remains too dark or uneven. Let the foundation dry fully before measuring. Fresh base paint can feel dry on top while still being soft enough for painter’s tape to lift it, and that is a frustrating way to discover that patience was the missing tool.
Set Aside Surfaces That Are Unsuitable for Gingham Painting
- Wet, damp, or greasy surfaces
- Wood with peeling paint or loose varnish
- Badly cracked, warped, or damaged surfaces
- Heavily textured surfaces that may create uneven lines
- Fabric with stains, wrinkles, or loose fibres
- Fabric that has not been washed before painting
- Glossy laminate that has not been sanded or primed
- Surfaces covered with dust, wax, oil, or cleaning residue
- Flexible materials that may cause ordinary acrylic paint to crack
- Previously painted surfaces with flaking or unstable coatings
A gingham pattern requires straight lines and evenly painted sections. Choose a clean, dry, smooth, and stable surface to achieve neat edges and consistent squares.
For a Surface Suitable for Painting, Inspect:
- Whether the surface is clean and completely dry
- Whether sanding or priming is required
- Whether the existing paint or finish is firmly attached
- Whether painter’s tape will stick without damaging the surface
- Whether the surface is smooth enough for straight lines
- Whether the chosen paint is suitable for the material
- Whether the available area is large enough for an even grid
- Whether the planned square size fits the project
- Whether the base colour provides enough contrast
- Whether the surface has been tested with a small amount of paint
- Whether fabric has been washed, dried, and ironed
- Whether the base coat is fully dry before applying tape
Measure the complete painting area before choosing the size of the squares. A small test section can help you check the colours, tape adhesion, and paint consistency.
Useful Materials and Tools
- Wooden board, canvas, fabric, or another suitable surface
- Mild surface cleaner
- Clean cloth or sponge
- Fine-grit sandpaper
- Surface-appropriate primer
- Light-coloured base paint
- Medium shade for the stripes
- Darker shade for the overlapping squares
- Fabric paint or fabric medium for textile projects
- Low-tack painter’s tape
- Measuring tape or ruler
- Carpenter’s square or set square
- Pencil or washable chalk marker
- Small foam roller
- Flat paintbrush
- Detail brush for corrections
- Paint tray or palette
- Paper towels
- Drop cloth or protective sheet
- Sealant or clear topcoat where required
- Safety gloves
Use low-tack tape on delicate surfaces and avoid applying too much paint at once. Several light coats usually create cleaner edges than one heavy coat.
Before committing to the full canvas, paint one sample crossing on a piece of prepared card. Add the base, one vertical band, and one horizontal band. The crossing should become darker without turning muddy or completely opaque. That small test will tell you more than staring at wet paint in the palette.
Plan the Gingham Scale and Colour Values
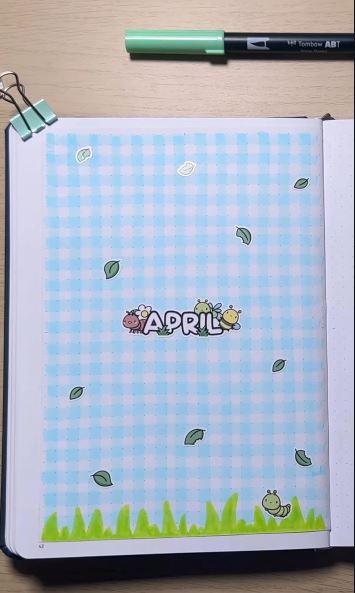
The pattern needs three visible values: the lightest base, the medium single bands, and the darkest crossed squares. You can create all three from one colour mixed at different strengths, or use a pale base with a related transparent stripe colour. The second approach often feels softer because the overlap develops naturally rather than being painted as a separate block.
Scale matters just as much as colour. Narrow checks create a busier surface and require more tape changes, while wider bands feel calmer and are easier to control on a first canvas. Measure the finished area rather than the full frame size, then choose a band width that produces a balanced repeat without leaving a tiny unwanted strip at one edge.
Materials and Tools
· Prepared scrap card or small canvas offcut
· Base colour and stripe colour
· White or pale neutral for mixing
· Optional acrylic glazing medium
· Ruler and pencil
· Painter’s tape
· Flat brush
· Palette
Create This Stage
1. Prepare the three values. Paint a small base patch, then mix a middle stripe colour that remains transparent enough to show the base. Cross a second band over the first. Let the sample dry before judging it because wet acrylic usually looks deeper and glossier than the final surface.
2. Choose the band width. Mark several possible widths on paper and view them from the distance where the finished canvas will hang. A small canvas usually benefits from a check large enough to read clearly without squeezing dozens of lines into the space.
3. Calculate the repeat. Measure the usable width and height, then divide each measurement by the proposed band width. Adjust slightly so both directions finish with a deliberate full or partial band. Keep a written note of the final spacing.
4. Create a paper map. Draw a simplified grid on paper and label the base, vertical bands, horizontal bands, and intersections. This is especially helpful when the pattern includes a border or when the canvas dimensions are not perfectly square.
For me, the dried crossing is the real decision point. If the overlap disappears, strengthen the stripe mixture slightly. If it looks like a solid painted square, make the bands more transparent rather than changing the whole palette.
A muted blue, sage, clay pink, ochre, or warm grey can all work over a pale base. For a quieter canvas, use two close tones. For stronger graphic contrast, use cream with navy or charcoal, but keep the bands transparent enough to preserve the layered gingham effect.
Create a Smooth Base Without Heavy Texture
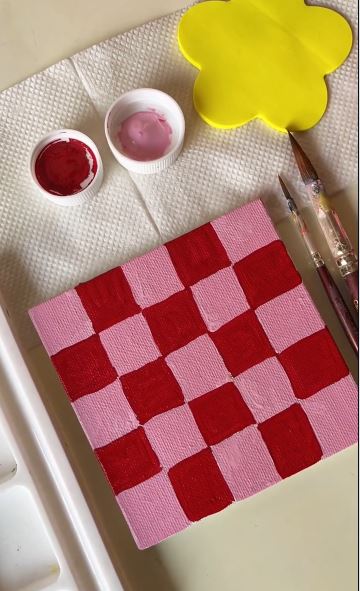
A repeated grid makes surface differences easy to notice. Thick paint ridges, missed corners, and patchy coverage can cause some checks to appear darker before the stripe layers are added. The goal is not a perfectly manufactured surface, but the base should be consistent enough that the pattern, rather than old texture, becomes the main detail.
When covering an older canvas, use thin controlled layers instead of one heavy coat. A wide soft brush can keep the direction of the base paint calm, while a small brush reaches the wrapped edges. Decide whether the gingham will continue around those edges or stop neatly at the front; making that choice now prevents awkward tape lines later.
Materials and Tools
· Sound reused canvas or canvas board
· Soft brush and dry cloth
· Acrylic ground or compatible base paint
· Wide flat brush or small roller suited to canvas
· Small brush for edges
· Palette or paint tray
· Optional fine abrasive pad for unstable raised areas
· Drop cloth
Create This Stage
1. Inspect and clean the surface. Remove dust with a dry soft brush or cloth. Check for loose paint, deep cracks, dents, or sagging canvas. Repair or reject unstable areas rather than expecting a new layer to hold them together.
2. Reduce distracting texture. Where old paint forms sharp unstable ridges, smooth only those areas using a method suitable for the existing surface. Do not aggressively abrade an unknown or valuable artwork. A sound inexpensive reuse canvas is the sensible choice for this project.
3. Apply the first base layer. Brush the acrylic ground or pale base across the canvas in thin even passes. Work from one side to the other and feather the joins before they begin drying. Keep heavy paint away from the inside edge of the stretcher bars.
4. Build coverage gradually. Add another thin layer only after the first has settled according to the product guidance. Turn the canvas under side light and look for shiny thick areas, missed texture, or exposed old colour.
5. Let the base become firm. Place the canvas flat or upright where dust will not settle onto it. Do not begin taping simply because the surface looks dry. Give the coating enough time to develop a dependable bond before measuring the grid.
I know it can feel tempting to rush from the pale base straight into the interesting stripes. I’d rather leave the canvas alone a little longer than pull off the first tape line with part of the foundation attached.
A coloured base can replace white. Pale peach, warm cream, light blue, soft green, or a tinted grey may create a gentler finish. Keep the base lighter than the band colour so the three-value structure remains clear.
Measure and Paint the Vertical Bands
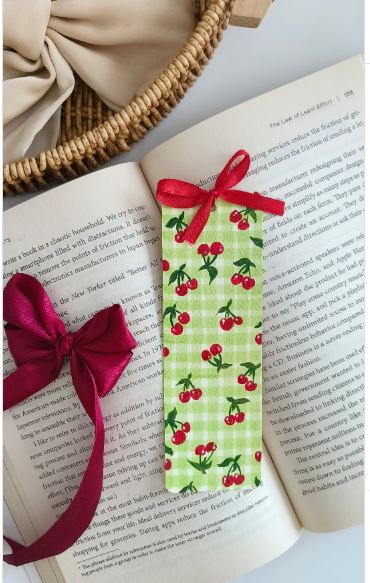
The vertical bands create the pattern’s first rhythm. A small measuring error can repeat across the canvas and become obvious only after the horizontal bands are added. Work from one fixed edge and mark every position from that same starting point. Moving the ruler from stripe to stripe can quietly carry a tiny error across the entire width.
Painter’s tape gives a clean structure, but the stripe itself does not have to become hard and plastic-looking. Use a thin glaze-like layer and remove most excess paint from the brush before working near the tape. Heavy paint can form a ridge, bleed beneath the edge, and make the later intersections too dark.
Materials and Tools
· Fully dry prepared canvas
· Ruler or tape measure
· Set square or straightedge
· Light removable pencil
· Low-tack painter’s tape
· Middle-value stripe mixture
· Small flat brush or dense foam applicator
· Clean cloth
Create This Stage
1. Mark every band from one edge. Choose the left or right canvas edge as the fixed measuring point. Place small marks along the top and bottom at every band position. Check the final spacing before joining the marks because correcting pencil is easier than correcting paint.
2. Apply the tape without stretching it. Connect matching top and bottom marks with low-tack tape. Press the edge that will meet the paint, but do not pull the tape so tightly that it bows or lifts the base later. Use a set square to confirm the first few lines.
3. Seal only when necessary. On a textured canvas, a very thin pass of the base colour along the tape edge may reduce bleeding. Keep this layer minimal and let it settle before adding the stripe colour. Too much sealing paint creates another ridge.
4. Paint the vertical bands lightly. Apply the stripe mixture in thin vertical passes. Move from the tape edge towards the centre of each band rather than brushing sideways underneath it. Build colour gradually and keep the base visible through the stripe.
5. Remove the tape carefully. Lift the tape back over itself while the paint is manageable and follow the product guidance. If an edge begins to pull, stop and use a fine tool to separate the paint film. Let the vertical bands dry fully before measuring across them.
The first three bands are worth checking from across the room. If they already look crowded or too dark, continuing across the canvas will not improve them. Correct the mixture or width early.
For a hand-painted interpretation, skip the tape and use a flat brush guided by light pencil lines. The bands can have slightly softened edges, but keep their centres and spacing straight so the finished pattern still feels intentional.
Layer the Horizontal Bands to Form the Checks
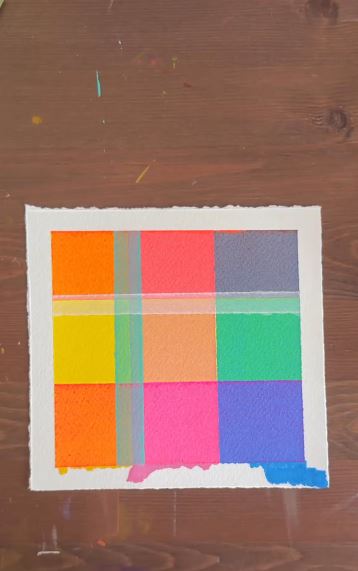
The canvas begins to look like gingham only when the horizontal bands cross the dry vertical set. Each crossing receives two layers of the stripe mixture and should become naturally deeper. This is why both directions need the same paint strength. A darker second mixture can make the intersections look pasted on rather than woven into the pattern.
Turn the canvas if that gives you a more comfortable brushing direction. Working with the bands in the same physical motion can improve consistency. Before applying new tape, make sure the vertical paint feels firm and does not become tacky under light pressure.
Materials and Tools
· Dry canvas with completed vertical bands
· Original measuring notes
· Ruler and set square
· Fresh low-tack painter’s tape
· The same stripe mixture used vertically
· Flat brush or foam applicator
· Palette and clean cloth
Create This Stage
1. Repeat the original spacing. Measure from one fixed top or bottom edge and use the same band width chosen for the vertical direction. Mark both sides of the canvas so every horizontal line connects cleanly across the surface.
2. Tape across the dry stripes. Apply fresh tape along the marks without dragging it repeatedly across the vertical paint. Press the painting edge carefully, especially where the tape crosses a raised band edge. Do not use old paint-marked tape for the second direction.
3. Match the stripe mixture. Stir the saved paint thoroughly or mix a new batch using the written sample notes. Test it over one spare vertical stripe on the practice card. The single horizontal area should match the vertical value when dry.
4. Paint the horizontal passes. Work in thin even layers and avoid scrubbing over each intersection. The crossing will deepen automatically because the vertical layer remains beneath it. Stop before the paint becomes opaque.
5. Reveal and assess the grid. Remove the tape carefully, then let the canvas dry before judging the values. View it straight on and from several steps away. Look for drifting rows, weak intersections, or bands that suddenly change width.
This is the stage where restraint matters most. I don’t think the darkest squares should be repainted immediately just because they look pale while wet. Let the acrylic dry, then decide whether any correction is actually needed.
The horizontal bands can use a closely related second colour for a plaid-like variation, but that changes the design away from classic one-colour gingham. Keep both stripe colours transparent and test the crossing first so it does not become muddy.
Refine the Intersections and Finish the Canvas
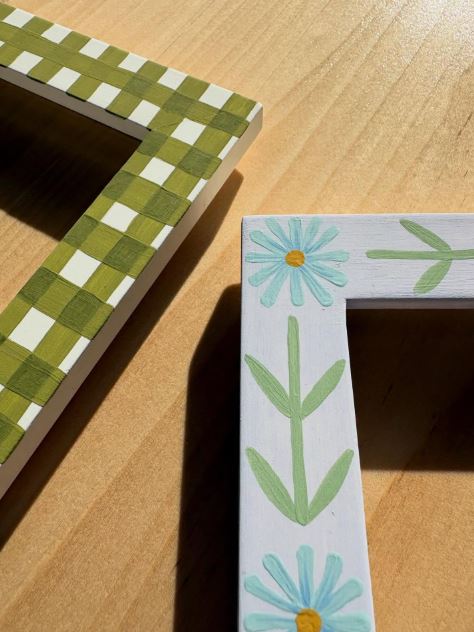
A finished pattern rarely needs every line repainted. Small bleeds, one pale crossing, or a slightly rough edge can usually be corrected with a fine brush and the saved base or stripe colour. Broad corrections are more noticeable because they interrupt the transparency that gives gingham its fabric-like depth.
Decide how the pattern ends at the canvas edge. Continuing it around the wrapped sides can make the piece feel complete without a frame, while a plain painted edge creates a clean border. Either option works when it is consistent. A random mixture of wrapped checks and unpainted sections looks unfinished rather than relaxed.
Materials and Tools
· Fully dry gingham canvas
· Saved base and stripe colours
· Fine detail brush
· Small flat brush
· Clean water and cloths
· Optional compatible matte or satin protective finish
· Hanging hardware suited to the finished canvas
Create This Stage
1. Inspect the values in normal light. Place the canvas upright and view it where it may eventually hang. Check that the base, single stripes, and intersections remain distinct. Side light is useful for finding ridges, but ordinary room light is better for judging the overall pattern.
2. Correct only clear problems. Use the base colour to tidy small bleeds after they are fully dry. Strengthen a weak band with a thin matching glaze rather than one opaque patch. Keep corrections inside the existing geometry.
3. Finish the outer edges. Continue the pattern around the sides using the original spacing, or paint all edges in one supporting colour. Protect the front while working and keep drips from wrapping onto the finished checks.
4. Test a protective coating. A decorative canvas may not need a separate finish. When protection is useful, test a compatible matte or satin product on the practice sample first because some coatings can deepen colour, increase shine, or soften the contrast.
5. Prepare the canvas for display. Let every layer cure according to the selected materials, then attach suitable hanging hardware. Check that the canvas hangs level because a tilted grid looks more obvious than a tilted loose abstract painting.
For me, the strongest finish is the one that still lets the layers show. A completely opaque dark square at every crossing may look neat, but it loses the gentle transparency that makes gingham different from checkerboard.
You can leave part of the canvas plain and place the gingham within a central rectangle, arch, circle, or wide border. A partial pattern uses fewer tape lines and can make an older canvas feel more contemporary without covering every inch.
Common Mistakes to Avoid
Using opaque paint for both stripe directions. When each band completely hides the base, the second direction cannot create a naturally darker crossing. Mix a transparent or lighter middle value and test the overlap before painting the canvas.
Measuring from the previous stripe. Small errors accumulate when each new mark depends on the last one. Measure every position from the same fixed edge and compare the final spacing before taping.
Taping over a soft base. Paint may lift even when it appears dry. Let the base become firm, use low-tack tape, and test the complete paint-and-tape system on a sample first.
Loading too much paint near the tape. A wet heavy brush pushes colour beneath the edge and leaves a ridge. Remove excess paint from the applicator and build the band with thin controlled passes.
Repainting every intersection separately. Darkening each crossing by hand can flatten the layered effect and create inconsistent squares. Let the two stripe directions form the value naturally, then correct only the few areas that genuinely need it.
Ignoring the canvas edges. A front pattern with accidental drips and unfinished wrapped sides can make the piece feel incomplete. Decide before painting whether the checks continue around the edge or stop at a clean border.
Judging the colour while it is wet. Wet acrylic often looks darker and shinier. Let the sample and each stage dry before strengthening the bands or changing the mixture.
Frequently Asked Questions
Can a beginner paint gingham on canvas?
Yes. A small canvas with wide bands is manageable because the process relies more on measuring and thin paint layers than on drawing skill. Make a practice crossing first and keep the palette limited.
What paint works for a gingham canvas?
Acrylic paint is a practical choice for prepared canvas. Use a compatible glazing medium when the stripe mixture needs more transparency, and follow the product directions rather than thinning the paint excessively with water.
How do I make the crossed squares darker?
Use the same translucent stripe mixture in both directions. The horizontal layer passes over the vertical one and naturally creates a deeper value. Test the result after drying before adding any extra paint.
Can I paint gingham without painter’s tape?
Yes. A flat brush and light pencil guides can create a softer hand-painted pattern. Keep the band centres straight and the spacing consistent, even when the edges remain slightly relaxed.
Why did the tape lift my base paint?
The base may not have bonded firmly, the tape may have been too strong, or the surface may have contained dust or unstable old paint. Test the system first, allow adequate drying, and peel the tape back slowly rather than pulling it sharply upward.
Should I seal the finished canvas?
A decorative canvas does not always require a separate coating. When a finish is useful, test a compatible matte or satin product on the practice sample because it may change the colour depth and shine.
Can I reuse an old painted canvas?
Yes, provided the canvas and existing coating are sound. Clean it, remove unstable texture, and cover the old image with an appropriate acrylic ground or base. Avoid altering valuable or unknown artwork simply for a craft experiment.
Let the Layers Create the Gingham Effect
Learning how to paint a gingham pattern on canvas is mostly a lesson in controlled repetition. The base needs to stay visible, the first set of bands must establish dependable spacing, and the second set should deepen the crossings without covering them completely. Once those three values work together, the pattern begins to resemble woven colour rather than a collection of painted blocks.
Begin with a small reused canvas and a quiet palette. Make one proper sample crossing, keep written notes about the band width and mixture, and let every stage dry before deciding it needs more paint. I’d rather see a few soft hand-painted edges than a perfectly sharp grid buried beneath heavy opaque layers.
Which colour would you try first for a gingham canvas: muted blue, warm clay, soft green, or a simple cream-and-charcoal combination?