How to Use Acrylic Paint to Tie Dye?
Acrylic paint behaves very differently once it touches folded fabric. A colour that looks smooth inside a mixing cup may settle deeply into one crease, skim across another, and leave a pale line beneath a rubber band. Those uneven marks are exactly what give an acrylic tie-dye project its character.
The difficult part is keeping the finished fabric flexible. Ordinary acrylic paint contains a binder that stays behind after the water evaporates. Apply it too heavily and a soft cotton shirt may develop stiff patches. Thin it without considering the paint system and the colour may spread too far, lose strength, or wash unevenly.
I don’t think an acrylic tie-dye project needs to begin with a new white shirt. A faded top, marked fabric panel, old canvas shoe, leftover cotton square, or forgotten summer T-shirt can all provide a useful starting point.
A compatible fabric-painting medium gives acrylic colour a better chance of remaining flexible on wearable fabric. Some mediums are specifically designed to be mixed with acrylic paint and heat set after drying. GOLDEN also notes that its High Flow Acrylics can be combined with GAC 900 to produce tie-dye effects on fabric.
Understand the Paint Before Folding the Fabric
Traditional tie dye uses colour that penetrates or bonds with the textile fibres. Acrylic paint contains pigment suspended in an acrylic binder. Once dry, some of that binder remains around the fibres rather than behaving like a conventional fabric dye.
This does not mean acrylic paint cannot create a tie-dye effect. It means the application needs more control.
A thin, flexible mixture may work well for soft colour patches, spirals, crumpled patterns, and painted folds. A thick layer is more suitable for sturdy canvas, denim accents, tote bags, or decorative fabric that will not stretch repeatedly.
The fabric underneath also changes the result.
White cotton gives colours the clearest appearance. Cream, pale grey, blush, or light blue create softer combinations. Faded denim can produce muted colour shifts, while black or dark fabric may need opaque acrylic, a pale underlayer, or a design that allows the original background to remain visible.
Useful colour combinations include:
- Turquoise, violet, and pink
- Blue, green, and white
- Yellow, orange, and red
- Rose, peach, and lavender
- Navy, pale blue, and silver
- Teal, green, and yellow
- Burgundy, pink, and cream
- Black, grey, and white
Avoid beginning with too many colours. Three shades are often enough to create movement without turning the folded areas muddy.
Acrylic Paint, Fabric Medium, and Water
Acrylic paint, fabric medium, and water each affect the mixture differently.
Acrylic paint provides the colour and binder. Heavy-bodied acrylics may need more adjustment before they can move through folded fabric, while fluid acrylics already have a thinner consistency.
Fabric medium is designed to modify acrylic paint for textile use. Depending on the product, it may improve flow, flexibility, penetration, softness, or laundering performance. Always follow the instructions for the medium you are actually using rather than borrowing a ratio from a different product.
Water can make acrylic colour easier to spread, but it should not automatically replace fabric medium. Adding a large amount may reduce the binder concentration and produce a mixture that behaves differently from the manufacturer’s tested paint system.
GOLDEN recommends testing fabric applications because paint type, fabric, application thickness, and heat setting all affect the outcome. Its fabric guidance also warns that filling large areas with thick paint can leave a garment stiff and uncomfortable.
I would mix only a small amount first. Paint one scrap, let it dry, bend it, stretch it gently, and check the reverse. That small test can save an entire shirt.
Prepare the Fabric Properly
Wash the item before painting unless its care instructions say otherwise. New fabric may contain sizing or finishing treatments, while used clothing can hold fabric softener, body oils, detergent residue, or dust.
Preparation may include:
- Washing without fabric softener
- Drying the item completely
- Removing lint and loose fibres
- Repairing weak seams
- Checking for permanent stains
- Testing the paint on a hidden area
- Protecting printed logos
- Removing shoelaces
- Placing cardboard inside bags or shirts
- Covering the worktable
- Wearing protective gloves
- Keeping wet paint away from children and pets
- Checking whether the fabric can tolerate heat setting
Do not use paint to disguise structural damage. Repair torn shoe canvas, loose bag handles, open seams, or badly stretched necklines before adding colour.
Acrylic mixtures can pass through lightweight fabric. Place clean cardboard or another suitable barrier between the front and back of a shirt, cushion cover, or tote when you are working on an opened design.
Gather the Basic Tools
- Clean fabric item
- Acrylic paint
- Compatible fabric-painting medium
- Small mixing cups
- Measuring spoons
- Stirring sticks
- Squeeze bottles
- Droppers
- Soft brushes
- Cosmetic or craft sponge
- Rubber bands
- String or reusable ties
- Protective gloves
- Plastic table covering
- Absorbent cloths
- Cardboard inserts
- Cooling rack or protected tray
- Clean water
- Scrap fabric
- Low-tack masking tape
- Iron, dryer, or heat press when required
- Pressing cloth or suitable protective paper
Keep damp cloths nearby for accidental drips, but keep them separate from towels used around food. Once a container or utensil has been used for acrylic paint, I’d keep it in the craft cupboard.
Make a Soft Crumpled Tie-Dye Pattern
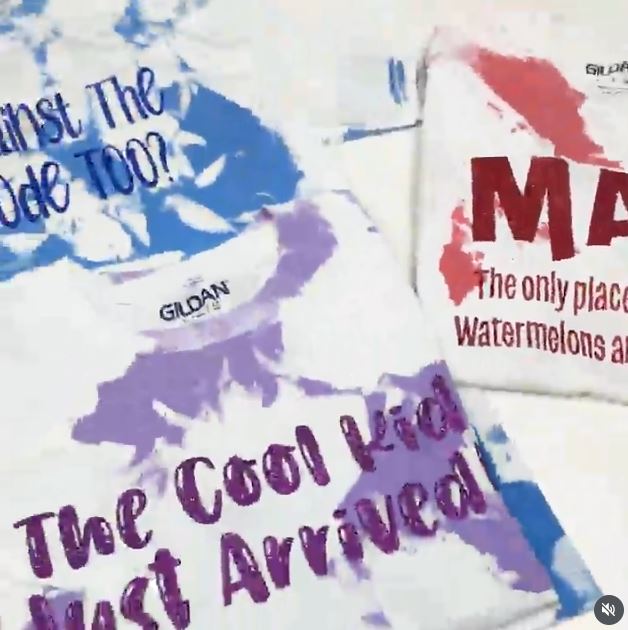
The crumple method creates a softer, less predictable pattern. Instead of turning the fabric around one centre, you push small areas together until the item forms a loose bundle.
An old cotton bandana or leftover fabric square is useful for practising. The finished piece can become a patch, cushion panel, small wall hanging, reusable wrapping cloth, or part of a fabric garland.
Materials and Tools
- Cotton bandana or fabric square
- Two or three acrylic colours
- Fabric medium
- Squeeze bottles or droppers
- Rubber bands
- Gloves
- Protected tray
- Scrap fabric
- Cardboard or drying rack
Form the Cloud-Like Pattern
- Choose colours that can meet safely. Mix and test each shade separately. Consider the colour created where two neighbouring paints overlap.
- Crumple the fabric loosely. Push small areas towards the centre using your fingertips. Secure the bundle with a few rubber bands without compressing it into one solid ball.
- Colour the raised folds. Apply the first shade to several upper areas and leave gaps between them. Turn the bundle before adding the next colour so the back does not remain completely blank.
- Add limited overlaps. Place the second and third colours beside selected painted areas. Then stop and check the bundle rather than filling every remaining pale fold.
- Open and set the fabric. Follow the product directions for drying, unfolding, heat setting, and washing. Let the material finish curing before sewing it into another object.
For me, this pattern works because the edges remain irregular. Trying to balance every patch can make a relaxed design look strangely calculated.
A simpler version can use one colour in different strengths. You could also crumple only the centre and leave a plain border around the fabric.
Add Tie-Dye Colour to Old Canvas Shoes

Canvas shoes offer a firmer surface than a lightweight shirt. They are useful when you want the colour movement of tie dye without folding the whole object into a bundle.
Use shoes that remain structurally sound. Acrylic colour will not repair separated soles, holes, cracked rubber, or badly weakened canvas.
Materials and Tools
- Clean canvas shoes
- Acrylic paint suitable for fabric
- Fabric medium
- Small soft brushes
- Cosmetic sponge
- Low-tack masking tape
- Paper or reusable stuffing
- Cotton swabs
- Gloves
- Compatible protective finish, if recommended
Paint the Canvas Uppers
- Clean and support the shoes. Remove the laces and brush away loose dirt. Let the canvas dry, then stuff the shoes so the upper surface remains firm.
- Protect the unpainted areas. Apply low-tack tape around the sole, eyelets, labels, and any sections you want to preserve. Press the edge down carefully where the canvas meets the rubber.
- Place the light colours first. Dab a thin paint-and-medium mixture across selected areas with a sponge or soft brush. Keep the first layer light enough for the canvas texture to remain visible.
- Add darker patches and transitions. Place deeper colour beside the lighter areas and soften only part of each boundary. Repeat the overall balance on the second shoe without copying every mark.
- Dry and finish the pair. Remove the tape carefully and follow the setting guidance for the paint system. Replace the laces only when the surface is ready to handle.
I’d rather make the two shoes look related than identical. Matching the palette matters more than recreating every coloured patch in the same position.
A beginner can paint only the heel panels, toe sections, or tongue. That keeps the design manageable and reduces the amount of flexing paint.
Keep a White Graphic Visible Inside the Tie-Dye Pattern
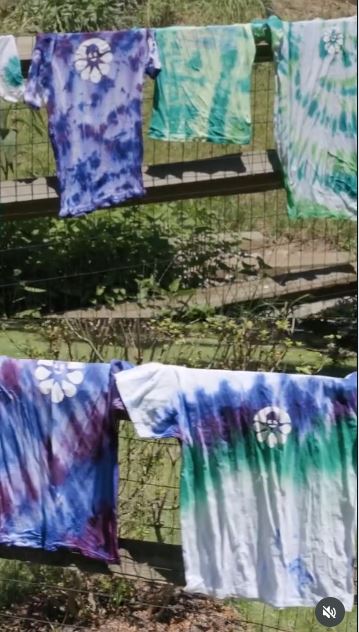
A white-on-white graphic can remain almost invisible until colour is added around it. The pale design then acts as a quiet focal point inside the painted fabric.
This approach works especially well on a shirt with a logo or printed area you want to preserve. Masking and careful placement matter more than forcing colour into every fold.
Materials and Tools
- Clean white or pale shirt
- Existing pale graphic or suitable fabric design
- Acrylic colours
- Fabric medium
- Cardboard insert
- Low-tack masking material, if suitable
- Sponge or soft brush
- Small squeeze bottles
- Gloves
- Protected work surface
Colour Around the Graphic
- Inspect the existing design. Check that the graphic remains firmly attached and can tolerate the setting process required by the paint medium. Avoid high heat when the print or garment label does not allow it.
- Protect the focal area. Insert cardboard into the shirt and cover sections that should remain pale. Press the masking material down gently without pulling at the printed surface.
- Add colour around the design. Use a sponge, small bottle, or soft brush to place the acrylic mixture around the protected area. Build the colour outward rather than flooding the graphic’s edges.
- Create the surrounding pattern. Crumple, pinch, or loosely pleat the unprotected fabric and add a second colour. Then open the shirt and soften any areas that look too sharply separated.
- Remove the masking and finish. Lift the protective material carefully once the paint is stable enough. Follow the correct drying, curing, and heat-setting instructions without damaging the original graphic.
I don’t think the centre needs extra decoration once the colour around it becomes strong. Leaving the graphic pale gives the eye somewhere to rest.
The same idea can preserve an embroidered pocket, stitched name, small appliqué, pale fabric label, or an intentionally unpainted shape cut from removable masking material.
Common Mistakes to Avoid
Treating Acrylic Paint Like Traditional Fabric Dye
Acrylic paint leaves pigment and binder around the textile fibres. Do not assume that every instruction for fibre-reactive dye also applies to an acrylic mixture.
Adding Too Much Water
A large amount of water may reduce the binder concentration and change the paint film. Use a compatible fabric medium when the goal is improved flow and flexibility.
Skipping the Scrap Test
Two cotton shirts may respond differently because of fibre blends, previous treatments, and fabric weight. Test the paint mixture, drying method, and setting process before working on the actual item.
Applying Too Much Paint
Heavy paint can make a shirt stiff, fill the texture of canvas, and crack where fabric bends. Build colour gradually and leave some areas lighter.
Using Too Many Colours
Paints continue meeting inside the folds even when they appear separate on the outside. Choose colours that can overlap without producing a large muddy area.
Tying Every Bundle Too Tightly
Firm binding creates clearer pale lines, but extremely tight bands can prevent a thicker acrylic mixture from entering most of the fabric. Adjust the pressure according to the pattern you want.
Opening the Fabric While the Paint Is Running
Wet colour may travel into pale sections as the bands come off. Follow the product instructions and open the item carefully over a protected tray.
Ignoring Heat-Setting Requirements
Some fabric mediums require heat setting for improved laundering performance. GOLDEN advises letting its modified acrylic paint air dry to the touch before completing an approved heat-setting method.
Applying Heat Without Checking the Garment
Synthetic trim, printed graphics, elastic, shoe rubber, and delicate fibres may not tolerate high heat. Read both the textile care label and the paint-medium instructions.
Painting Over Weak Fabric
Paint will not repair torn seams, frayed handles, separated shoe soles, or deteriorated cotton. Complete structural repairs before decorating the item.
Washing the Project Too Soon
Acrylic can feel dry before it has completed the curing or setting process required by the medium. Follow the manufacturer’s care guidance rather than relying on one universal waiting time.
Frequently Asked Questions
Can regular acrylic paint be used for tie dye?
Regular acrylic paint can create a tie-dye-style pattern, but wearable fabric usually benefits from a compatible textile medium. The medium can help modify the paint’s consistency and flexibility.
Is acrylic tie dye the same as normal tie dye?
No. Traditional tie dye normally uses textile dye that colours the fibres, while acrylic paint leaves pigment and acrylic binder on or around the fabric. The finished texture and washing behaviour may therefore differ.
Which fabric works best?
A light-coloured cotton item is a practical starting point because the colour remains visible and the fabric is easy to fold. Blends, waterproof textiles, coated fabric, and heavily treated materials require more testing.
How can I stop acrylic paint from making fabric stiff?
Apply thin layers, use a suitable fabric medium, avoid filling every fold, and test the dried mixture first. Keeping some of the original fabric visible also improves flexibility.
Should I rinse acrylic tie dye after opening it?
Do not automatically rinse it as you would traditional fabric dye. Follow the acrylic paint and fabric-medium instructions for drying, heat setting, curing, and washing.
Does acrylic paint need to be heat set on fabric?
That depends on the product system. Some fabric mediums require heat setting for improved laundering performance, while others have different instructions.
Can I use acrylic tie dye on black fabric?
You can, but transparent colours may disappear against a dark background. Try opaque colours, metallic shades, pale painted areas, or a design that uses the black fabric as part of the pattern.
Can I use this method on canvas shoes and bags?
Yes, provided the canvas is clean, sound, and compatible with the selected paint system. Keep layers thin in areas that bend frequently.
How should I wash an acrylic-painted garment?
Follow the care instructions provided by the fabric-medium manufacturer. Gentle washing, lower friction, and avoiding harsh treatment may help protect the painted surface.
Can children make acrylic tie-dye projects?
Children can take part with adult supervision and age-appropriate, clearly labelled materials. An adult should handle heat-setting equipment and keep wet paint away from the face, food, pets, and unprotected furniture.
Let the Folds Decide Where the Colour Goes
Learning how to use acrylic paint to tie dye is mainly about controlling thickness, placement, and flexibility.
A spiral makes the folding pattern easy to recognise. A dip-coloured hem can hide uneven fading, while a crumpled fabric square produces softer patches. Canvas shoes, cushion panels, and graphic shirts give old items another use without asking the paint to behave exactly like traditional dye.
Begin with one small project and a tested mixture. Let the sample dry, bend it in your hands, and check whether the colour remains flexible enough for its intended purpose. Then fold the real item, add the paint gradually, and give the finished surface the setting time it needs.
Which forgotten item would you colour first: a faded shirt, worn canvas shoes, an old cushion cover, or a leftover square of cotton?