Canvas looks like an obvious surface for a colourful sublimation print, but the weave alone doesn’t make it suitable. Many inexpensive art canvases are made from cotton and covered with an acrylic primer, while traditional sublimation needs polyester fibres or a polymer-coated surface to hold the transferred dye properly.
That difference explains why one canvas produces a crisp photograph and another gives you a faint, slightly disappointing shadow of the same design.
I like canvas sublimation because it can turn unused craft canvases, leftover polyester fabric, old frames, and small display panels into personalised wall art. Even so, I don’t think the best approach is to place transfer paper over the nearest cotton canvas and hope the heat press sorts everything out.
You need to decide what will receive the dye. It may be a polyester-coated canvas blank, a polymer layer added to an ordinary canvas, a thermal-laminate surface, or a separate sheet of sublimated polyester fabric mounted onto a reused frame.
Once that choice is clear, canvas becomes far easier to work with.
Choose a Surface That Can Hold the Sublimation Dye
Check the canvas label or product description before printing your design. Look for wording such as:
- Polyester canvas
- Sublimation-ready canvas
- Polymer-coated canvas
- Sublimation canvas panel
- Polyester fabric canvas
- Coated photo canvas
Traditional sublimation transfers dye effectively onto polyester textiles and products manufactured with a suitable polymer coating. Ordinary uncoated cotton canvas does not provide the same receptive surface.
You still have several practical options when the canvas you own is cotton:
- Add a coating manufactured for sublimation
- Apply a suitable thermal-laminate layer
- Press the design onto polyester fabric and mount it
- Use a printable transfer system intended for cotton
- Keep the cotton canvas as a support for a separate sublimated panel
Inspect reused canvases for dents, stretched fabric, loose staples, oily marks, heavy paint texture, or a warped frame. A slightly marked surface may work for an abstract design, but deep ridges and cracked paint can interrupt a photograph.
White and pale surfaces normally preserve sublimation colours more accurately than dark backgrounds because sublimation ink does not print an opaque white layer. The colour of the blank can therefore influence the finished image.
Useful Materials and Equipment
- Sublimation printer and compatible ink
- Sublimation transfer paper
- Heat press
- Polyester-coated canvas or another suitable method
- Heat-resistant tape
- Fresh protective paper
- Lint roller
- Microfibre cloth
- Heat-resistant mat or pressing pad
- Sublimation coating, when required
- Thermal-laminate sheet, when required
- Polyester fabric for mounting
- Reused canvas frame or panel
- Staple gun or suitable adhesive
- Scissors or rotary cutter
- Heat-resistant gloves
- Measuring tape
- Design software
- Painter’s tape
- Optional acrylic paint and art materials
Treat the heat setting supplied with the canvas, coating, laminate, or transfer product as your main instruction. Sawgrass lists approximately 400°F or 205°C for 45 seconds at medium pressure as a general starting point for polyester fabric, but it also stresses that settings vary by substrate and should be confirmed with the blank manufacturer.
Keep your hands away from the press platen and wear suitable heat protection when handling hot canvas, paper, or metal tools. Ventilate the workspace when using sprays, coatings, adhesives, or heated synthetic materials.
Sublimate Directly Onto a Polyester-Coated Canvas
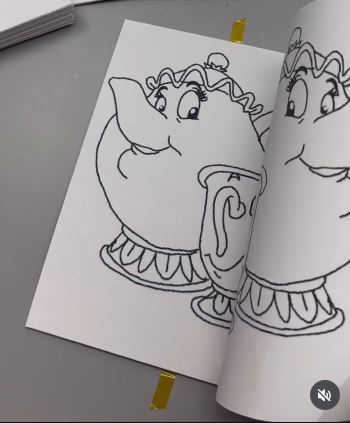
A polyester-coated canvas is the most straightforward option because the receptive layer has already been added. The selected project uses this type of canvas to create customised artwork for a party or decorative display.
This method works particularly well for photographs, quotations, children’s artwork, business signs, and colourful illustrations. The canvas weave remains visible beneath the design, giving the print a softer texture than a smooth metal or ceramic panel.
Materials and Tools
- Polyester-coated sublimation canvas
- Sublimation print
- Heat-resistant tape
- Lint roller
- Protective paper
- Heat press
- Pressing pad, if recommended
- Heat-resistant gloves
Transfer the Design in Five Steps
- Confirm the canvas instructions. Check the supplier’s temperature, time, pressure, and pressing direction. Do not assume that every coated canvas uses the same settings, especially when comparing flat panels with stretched frames.
- Prepare the artwork and surface. Size the design to cover the intended area and mirror it when your printing setup requires that. Lint-roll the canvas carefully because even a small fibre can create a pale mark inside a detailed photograph.
- Pre-press only when recommended. A brief pre-press may remove moisture and flatten the surface, but some specialised coatings can react to unnecessary heat. Protect the canvas and follow the blank manufacturer’s guidance.
- Position and secure the transfer. Centre the print face down and tape it firmly enough to prevent movement. Add clean protective paper above and below the project so stray dye does not reach the press.
- Press and lift the paper steadily. Open the press carefully and remove the transfer without sliding it across the hot surface. Let the canvas cool flat before handling the edges or fitting it into a frame.
For me, the alignment deserves more attention than squeezing another tiny decorative element into the design. A photograph placed slightly off-centre will remain noticeable long after everyone stops admiring the font.
A small canvas can become a table sign, party favour, nursery name panel, or memorial photo. You could also create a coordinated group of three panels instead of placing the entire image on one large canvas.
Prepare an Ordinary Canvas With Sublimation Coating
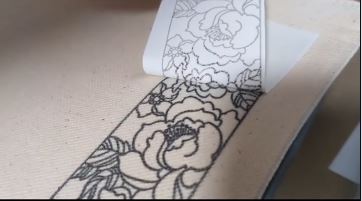
A sublimation coating can create a polymer-receptive layer over an ordinary cotton canvas. The selected test uses a pretreatment spray and produces a clearly visible graphic while retaining some of the canvas texture.
The coating needs to be even. A heavy wet patch can become glossy or obscure the weave, while an area with too little product may produce weak colour.
Materials and Tools
- Clean cotton canvas
- Sublimation coating intended for the material
- Masking tape
- Drop cloth
- Gloves and suitable respiratory protection
- Lint-free cloth
- Sublimation transfer
- Protective paper
- Heat press
- Pressing pad, if needed
Coat and Print the Canvas in Five Steps
- Read the coating instructions completely. Check the ventilation, curing, application, and heat requirements. Some products are sprayed, while others may be rolled or brushed.
- Mask the areas you want to keep unchanged. Protect the wooden frame, outer sides, or hanging hardware. Place the canvas on a level surface so the coating does not run toward one edge.
- Apply several controlled layers. Build a thin, even film rather than soaking the canvas in one pass. Let each application settle according to the product instructions and keep dust away while the surface cures.
- Inspect the cured coating. Look across the canvas from an angle to find missed patches, drips, or rough particles. Correct the surface only in the way recommended by the coating manufacturer.
- Press the sublimation design. Secure the transfer and follow the coating’s stated settings. Remove the paper carefully, cool the canvas flat, and record the results so you can adjust your next piece.
One detail I wouldn’t skip is writing down how many layers you applied. Otherwise, the second canvas becomes a guessing game involving spray, heat, and a surprisingly unreliable memory.
A coated reused canvas can suit quotations, silhouettes, bold graphic shapes, and distressed artwork. Designs with forgiving texture may be easier for a first experiment than photographs containing subtle skin tones.
Make Small Sublimated Canvas Calendar Panels
[Insert Instagram Reel 5 Here]
Creator credit: Confirm the original creator before publishing.
Instagram source: https://www.instagram.com/reel/DRvrE3lE403/
Suggested file name: sublimated-mini-canvas-desk-calendar.jpg
Alt text: Small sublimated canvas panels arranged as a twelve-month personalised desk calendar.
Caption: Compact canvas panels combine printed calendar pages with artwork that can be displayed throughout the year.
Small canvas panels can become more than wall art. The selected project uses twelve 5-by-7-inch sublimated panels to create a desk calendar celebrating teachers.
A calendar requires readable text, accurate alignment, and consistent colour across the full set. The design should remain useful from normal viewing distance rather than becoming a tiny poster squeezed onto a small surface.
Materials and Tools
- Twelve sublimation-ready canvas panels
- Calendar templates
- Sublimation transfers
- Heat-resistant tape
- Protective paper
- Heat press
- Ruler
- Display stand, clips, or small easel
- Packaging for storage
Produce the Calendar Set in Five Steps
- Design every month as one coordinated collection. Keep the date grid in the same position and change only the featured artwork or colour. Check every date carefully before printing.
- Prepare all panels consistently. Clean and measure them, then mark the reverse discreetly so each month remains in order. Use one test panel to confirm the print size and heat settings.
- Press the transfers one at a time. Position each sheet with the same margins and use fresh protective paper whenever stray ink appears. Consistent placement helps the collection feel professionally organised.
- Inspect the text before continuing. Make sure the smallest dates remain legible and that no number has faded near an edge. Recheck the sequence before packing the panels.
- Choose a practical display method. Use a reusable stand, small easel, or clip system that allows the current month to be changed without damaging the canvas.
I know it can feel efficient to print and press all twelve immediately, but one completed test month can reveal an alignment problem before it repeats across the entire year.
The same method could create recipe cards, affirmation panels, milestone markers, table numbers, educational flash cards, or interchangeable seasonal signs.
Why Canvas Sublimation Turns Dull, Patchy, or Ghosted
Pressing Directly Onto Plain Cotton Canvas
Traditional sublimation needs polyester or a suitable polymer coating. A plain cotton art canvas may produce a weak result because it does not provide the intended receptive surface.
Ignoring the Canvas Manufacturer’s Settings
Canvas blanks, coatings, laminate sheets, and transfer systems behave differently. Use general heat charts only as a starting reference and follow the product-specific instructions whenever they are available.
Moving the Transfer During Removal
A hot transfer that shifts can create a second faint edge around the image. Tape the design securely and lift the paper in one controlled movement.
Using Uneven Pressure Over Stretcher Bars
A raised wooden frame can prevent the centre of the canvas from receiving the same pressure as the edges. Use the pressing arrangement recommended for the blank, or press a removable fabric panel before mounting it.
Leaving Lint or Dust on the Surface
Tiny fibres may block the dye and appear as pale specks. Clean the canvas and use fresh protective paper before every press.
Applying Too Much DIY Coating
Heavy coating can create drips, gloss, or a plastic-looking surface. Build several thin layers and allow them to cure according to the product instructions.
Forgetting That the Blank Colour Affects the Design
Sublimation ink is normally used on white or light substrates. A cream, grey, or coloured canvas can shift the appearance of pale areas and skin tones.
Trusting the Heat-Press Display Without Checking It
An inaccurate or uneven press can cause inconsistent colour. Sawgrass recommends checking that the press reaches the required temperature and following the product or dealer guidance for the selected substrate.
Frequently Asked Questions
Can I sublimate directly onto an ordinary cotton canvas?
Traditional sublimation generally needs polyester or a polymer-coated surface. You can adapt cotton canvas with a suitable coating, laminate method, specialist transfer system, or sublimated polyester fabric layer.
What type of canvas gives the easiest result?
A white or pale canvas manufactured specifically for sublimation is normally the simplest starting point. Its supplier should also provide recommended press settings.
Can I use a household iron?
A heat press usually provides more consistent temperature and pressure across the full design. A household iron may leave sections underheated, especially on a larger photograph.
Should I remove stretched canvas from the wooden frame?
That depends on the blank and press arrangement. Removing or supporting the canvas may help when the frame causes uneven pressure, but you should not dismantle a manufactured blank unless it can be reassembled safely.
Can sublimated canvas be painted afterward?
Yes, mixed-media work can combine sublimated imagery with suitable paint. Test the paint first because its adhesion and appearance may vary across coatings and laminated surfaces.
Why does my sublimation print look faded?
Possible causes include an unsuitable cotton surface, low polyester content, incorrect time or temperature, uneven pressure, moisture, or an uncalibrated press. Check one variable at a time instead of changing every setting together.
Can I reuse an old painted canvas?
Possibly. A sound frame can hold sublimated polyester fabric, while a smooth old surface may accept another suitable preparation method. Deep texture, oil residue, cracking paint, or loose fabric should be corrected or covered first.
Give Old Canvas a More Personal Purpose
So, can you sublimate onto canvas? Yes, but the successful result comes from giving the dye a compatible surface rather than relying on the word “canvas” alone.
Polyester-coated blanks offer the most direct route. Laminate and polymer coatings can adapt inexpensive cotton panels, while sublimating separate polyester fabric gives you a useful way to reuse an old frame. The finished piece can become wall art, a paint-party outline, a calendar, a photo display, or the starting point for mixed-media work.
Begin with a small test panel, follow the material manufacturer’s instructions, and record the settings that worked. Then you can repeat the result without treating every new canvas like a completely different experiment.
Which canvas project would you try first: a photograph, paint-party outline, calendar panel, or mixed-media artwork?