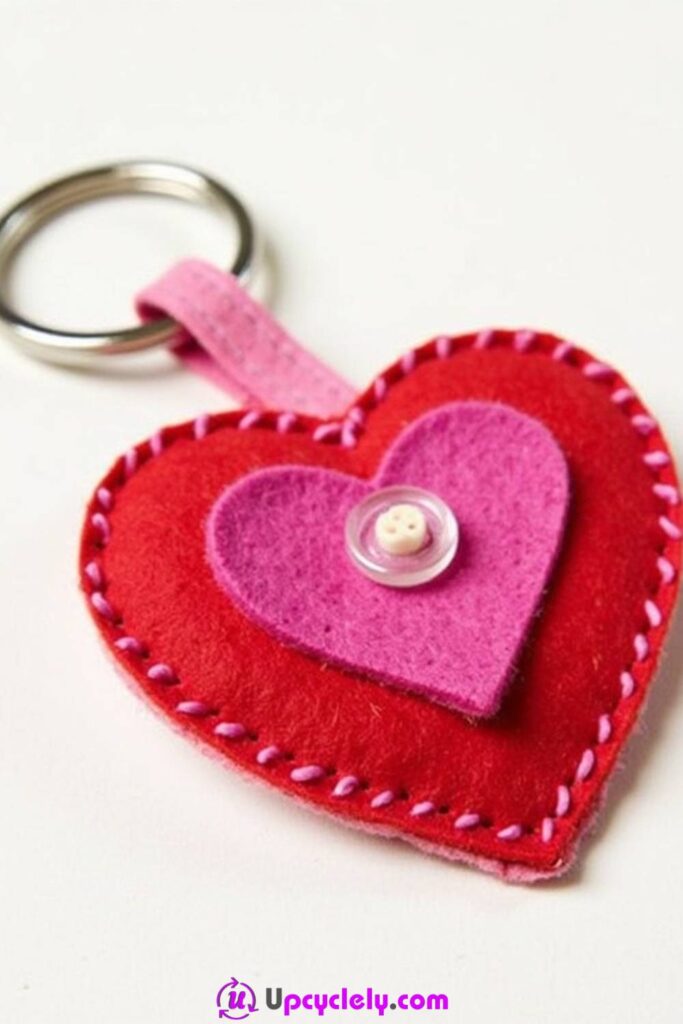
Felt Tassel Keychains
Materials Needed:
- Felt sheets (various colors)
- Scissors
- Keychain rings
- Needle and thread
- Beads (optional)
Step-by-Step Instructions:
- Cut the Felt: Start by cutting your felt sheets into strips. I like to make them about 1 inch wide and 3-4 inches long for a balanced look. You can mix and match colors to make your keychain pop.
- Make the Tassels: Take a strip of felt and fold it to form a tassel. The strips should be cut into tiny fringe pieces at one end, leaving the top part solid so you can roll it easily.
- Add the Beads: Before rolling your tassel, slide a bead onto the top for a decorative touch. It adds an extra element of style and sophistication to an otherwise simple design.
- Assemble the Keychain: Once you have your tassels ready, take the needle and thread to attach them to the keychain ring. Make sure to secure the felt tightly around the bead and ring. Voila! You now have a vibrant and fun keychain to use or gift.
Pro Tip: Add a few extra beads or small charms to your keychain to personalize it more. You can also experiment with different felt colors and beads to match the seasons or your mood!
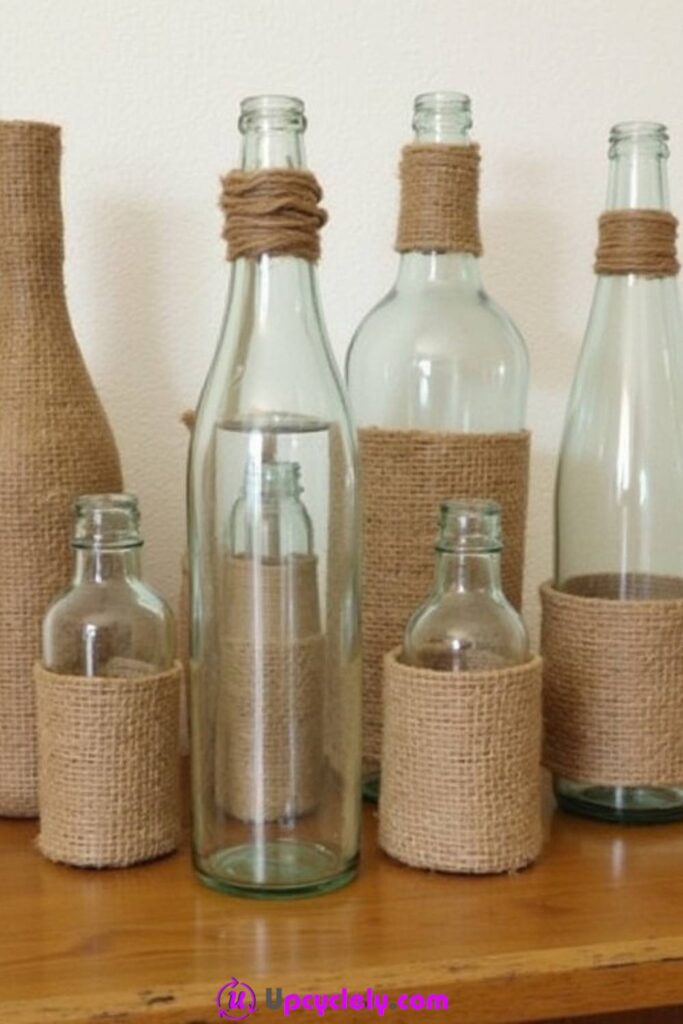
Burlap Wrapped Bottles
Materials Needed:
- Empty glass bottles
- Burlap fabric
- Hot glue gun
- Scissors
- Twine or ribbon (optional)
Step-by-Step Instructions:
- Prepare the Bottles: Clean your empty bottles thoroughly and dry them completely. You want to ensure there’s no dust or moisture for the fabric to stick to.
- Cut the Burlap: Measure and cut the burlap fabric so it fits around the bottle. Leave a little extra on the sides to overlap. This will give the bottle a snug fit once wrapped.
- Attach the Burlap: Use your hot glue gun to attach the burlap at the bottom of the bottle, and work your way up. Make sure to pull the fabric taut as you go to avoid any loose sections.
- Finish the Look: Once the burlap is secured, tie a piece of twine or ribbon around the neck of the bottle for added flair. You can even add a small tag for a more personalized touch!
Pro Tip: If you want a rustic, shabby-chic look, fray the edges of the burlap before wrapping the bottle. It adds texture and character to your craft.
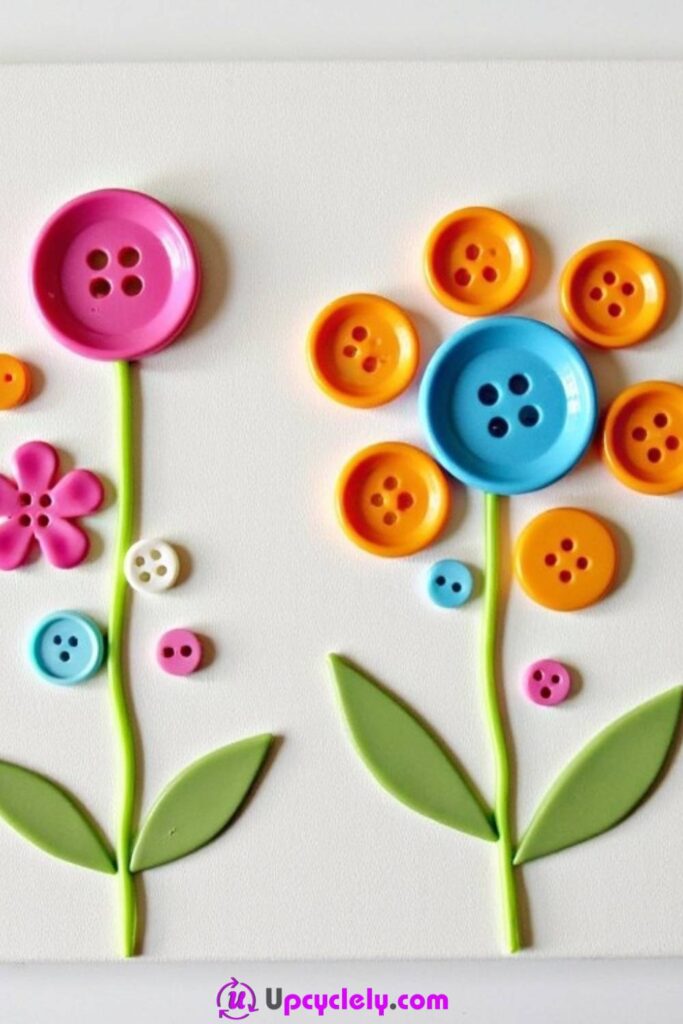
Button Flowers
Materials Needed:
- A blank canvas
- Colorful buttons (various sizes)
- Green craft wire or paper for stems
- Glue gun
- Scissors
Step-by-Step Instructions:
- Plan Your Design: Lay out the buttons on your canvas to design the flowers. You can create one large flower or a bouquet with several smaller ones. Arrange the buttons in a way that looks balanced to you.
- Create the Stems: Use green craft wire to create the stems. If you don’t have wire, cut strips of green paper to form the same shape. Glue the stems onto the canvas first to make sure they’re in place.
- Attach the Buttons: Once the stems are secure, glue the buttons on top of the stems to form flowers. Stack buttons of different sizes to create dimension and depth.
- Let it Dry: Allow everything to dry thoroughly before displaying your vibrant new artwork. This simple yet colorful piece will brighten up any room!
Pro Tip: Experiment with different button colors and sizes to create a more dynamic look. You can even use different shapes of buttons to give the flowers more personality.
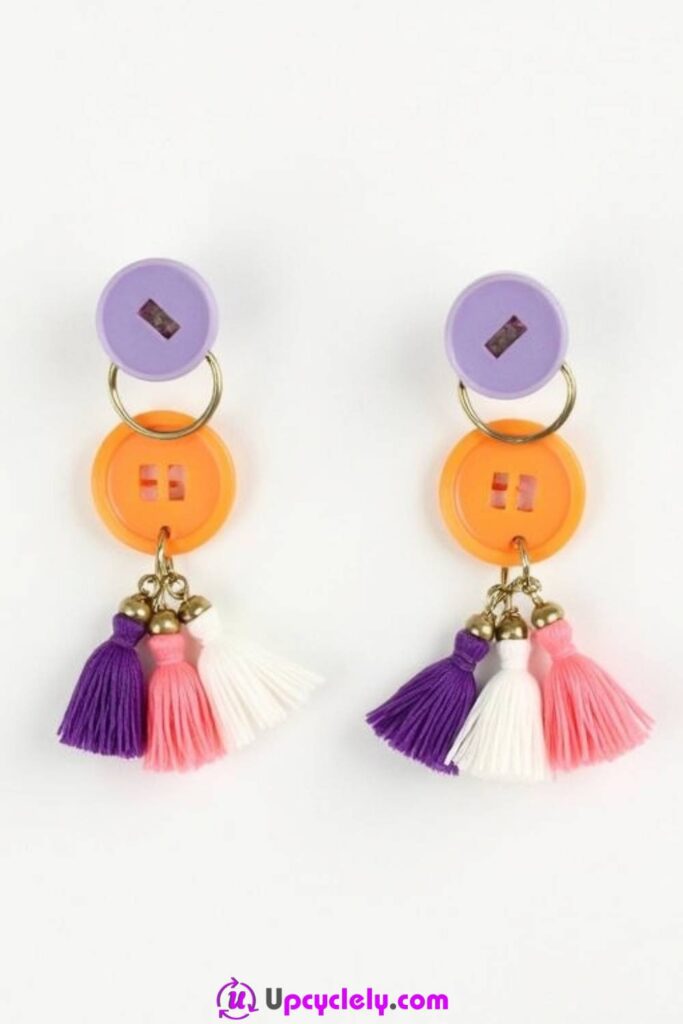
Button Tassel Earrings
Materials Needed:
- Colorful buttons
- Embroidery floss or yarn (for the tassels)
- Earring hooks
- Needle and thread
- Small jump rings
Step-by-Step Instructions:
- Create the Tassels: Cut your embroidery floss into several small pieces. Bundle them together and tie a knot at the top to form a tassel. Repeat for as many tassels as you want on your earrings.
- Attach the Tassels to the Button: Thread the tassels through the button holes, and tie them securely in place. You can either use a button with multiple holes or thread the yarn through one hole and tie it at the back.
- Add the Earring Hooks: Use small jump rings to attach the buttons to your earring hooks. Make sure the jump ring is tightly closed so your button doesn’t slip off.
- Enjoy Your New Earrings: These earrings will add a pop of color to any outfit. Wear them out, and get ready for the compliments to roll in!
Pro Tip: Play with the length of your tassels to create different effects. Longer tassels are trendy and dramatic, while shorter ones give a more subtle, delicate look.
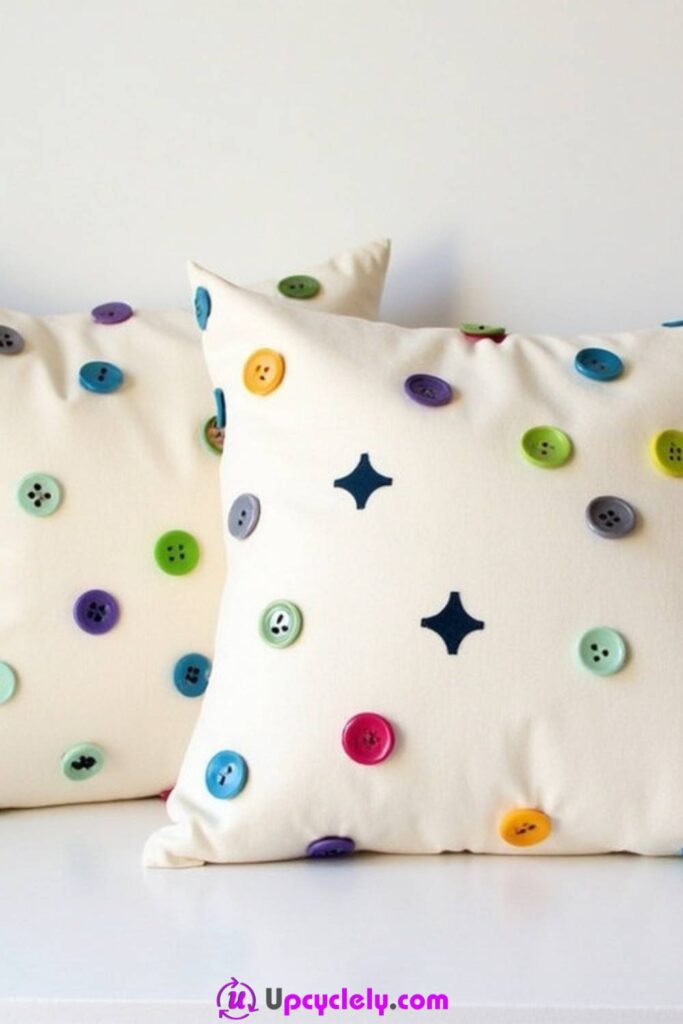
Button-Stamped Pillow Covers
Materials Needed:
- Plain pillow covers
- Assorted buttons
- Fabric paint or fabric markers
- Needle and thread (optional)
- Iron (for setting paint)
Step-by-Step Instructions:
- Prepare Your Pillow Covers: Lay out your pillow cover on a flat surface. You want it to be wrinkle-free for a clean print.
- Create the Button Stamps: Thread your buttons onto a piece of yarn or string. You can arrange them in a pattern or random design. Dip them in fabric paint or use fabric markers to color the button faces.
- Stamp the Fabric: Gently press the button onto the pillow cover. Repeat the process with different buttons and colors, creating a unique pattern. If you want a specific design, consider creating a border or a fun motif in the middle.
- Set the Paint: Let the paint dry completely. Once dry, use an iron to set the paint into the fabric, ensuring that your design lasts.
Pro Tip: If you want to add texture to the pillow, sew a few buttons on after painting. It will create a 3D effect and enhance the look of your design.
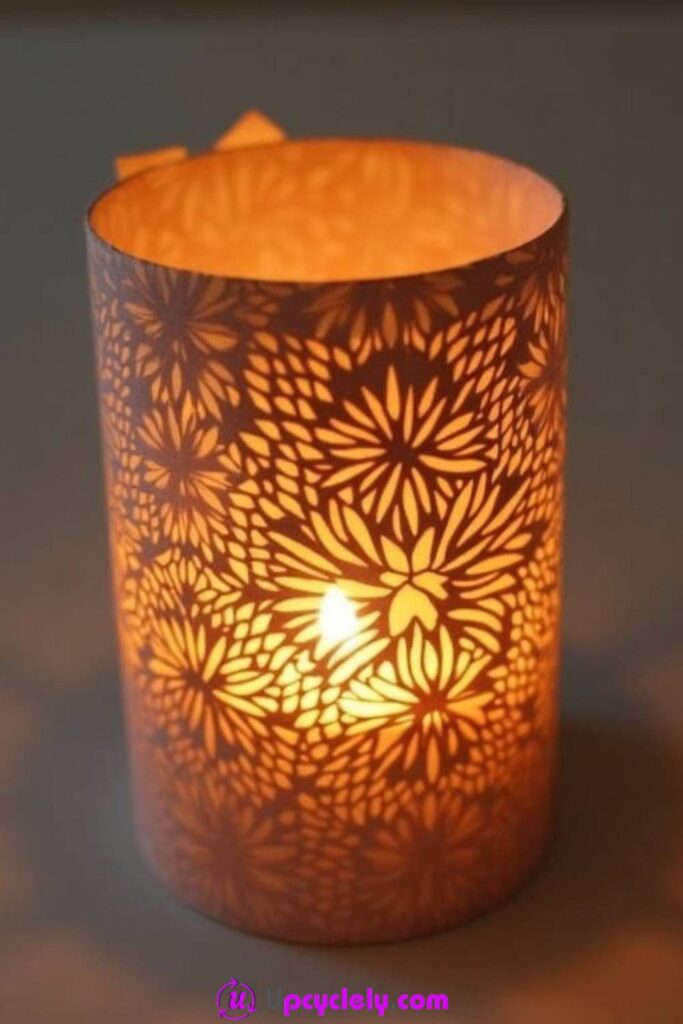
Candle Holder from Toilet Rolls
Materials Needed:
- Empty toilet paper rolls
- Scissors
- Hot glue gun
- Decorative paper or paint
- LED candle or tea light
Step-by-Step Instructions:
- Prepare the Toilet Rolls: Start by collecting a few toilet paper rolls. You can use one or several, depending on how large or clustered you want your candle holder. If you want the rolls to be taller or shorter, simply trim them with scissors.
- Decorate the Rolls: Use decorative paper or paint to cover the outside of each roll. You can use different colors or patterns to make it look unique. If you’re using paper, make sure to glue it securely around the roll.
- Cut the Design: Once your rolls are covered, it’s time to get creative! Use scissors to carefully cut out shapes, such as flowers, stars, or any pattern you like. The idea is to leave the top part open so the candle can sit inside while the cutouts allow the light to shine through.
- Assemble the Holder: Glue the rolls together if you’re stacking them or leave them separate for a more minimalistic approach. Place your LED candle or tea light in the center of the holder, and you’re done!
Pro Tip: If you want to add a soft, romantic glow, opt for an LED candle to avoid any fire hazards. You can also use washi tape around the edges for a colorful, sleek finish!
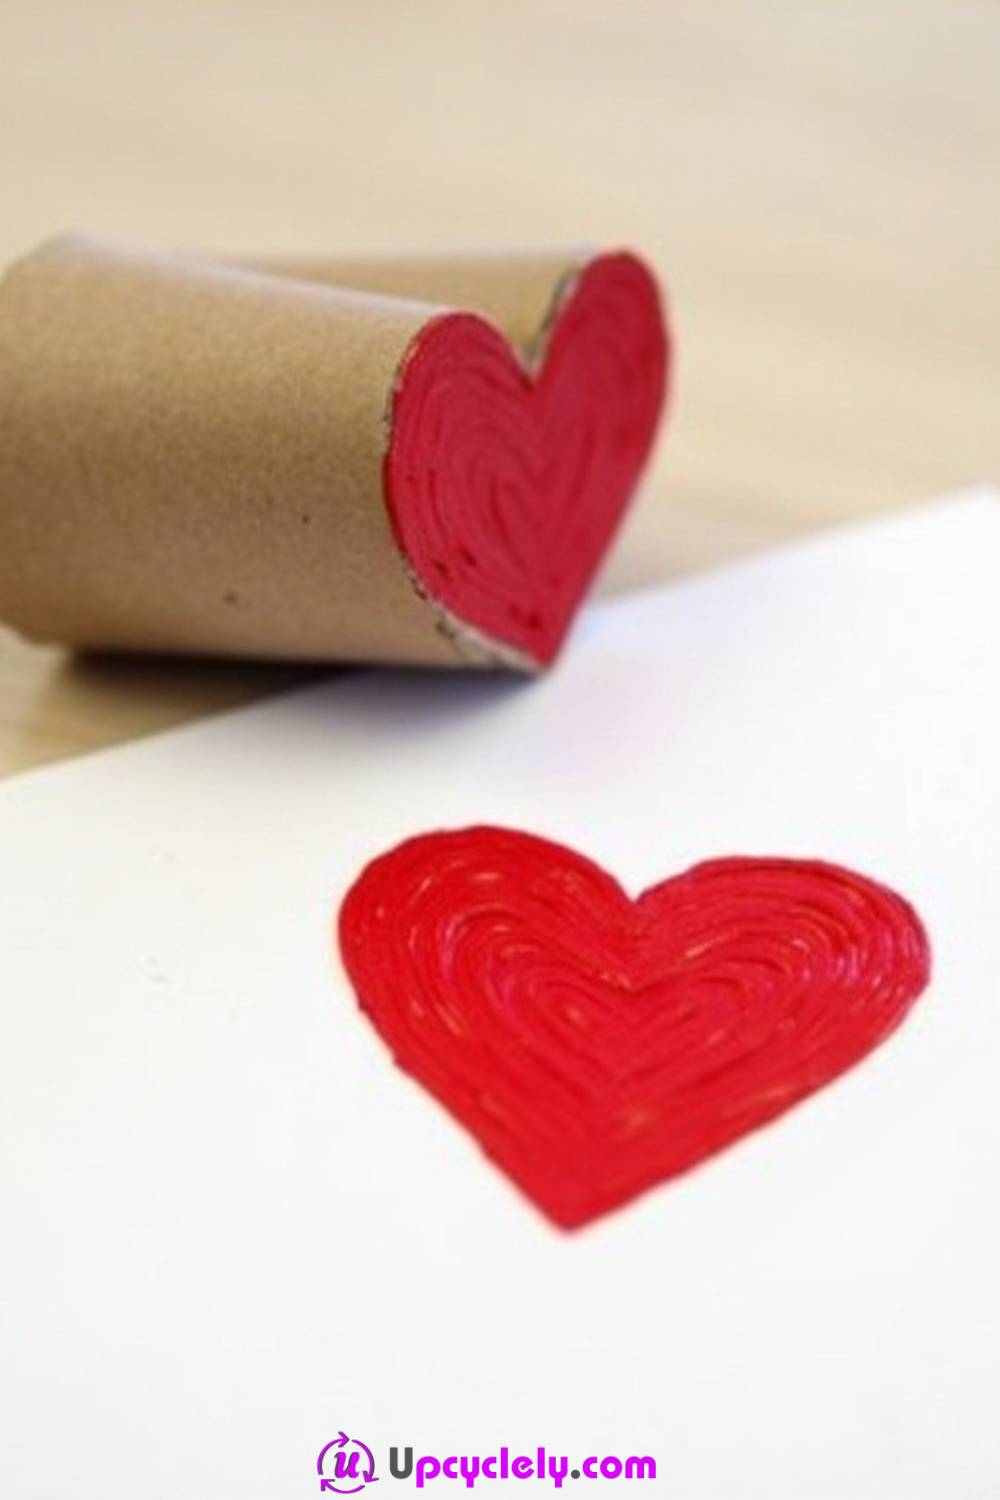
Cardboard Roll Stamp
Materials Needed:
- Empty cardboard toilet rolls
- Scissors
- Paint or ink pad
- Paper or fabric for stamping
Step-by-Step Instructions:
- Shape the Roll: Take the empty toilet roll and gently squeeze it to create a heart shape (or any other shape you like, such as stars, flowers, etc.). You’ll want to fold the edges so that the roll holds its shape firmly.
- Prepare Your Paint: Pour some paint into a small container or use an ink pad. For a neat stamp, try to keep the paint or ink level as even as possible on the surface of the roll.
- Stamping Process: Dip the shaped cardboard roll into the paint or press it into the ink pad. Carefully stamp it onto paper or fabric, pressing evenly to get a full print. Repeat this to create your desired design.
- Finishing Touches: Once the stamped items are dry, you can use them in various crafts, such as greeting cards, gift wrap, or fabric designs.
Pro Tip: Experiment with different shapes and patterns to create a more dynamic effect. Also, try using metallic paints for a modern twist!
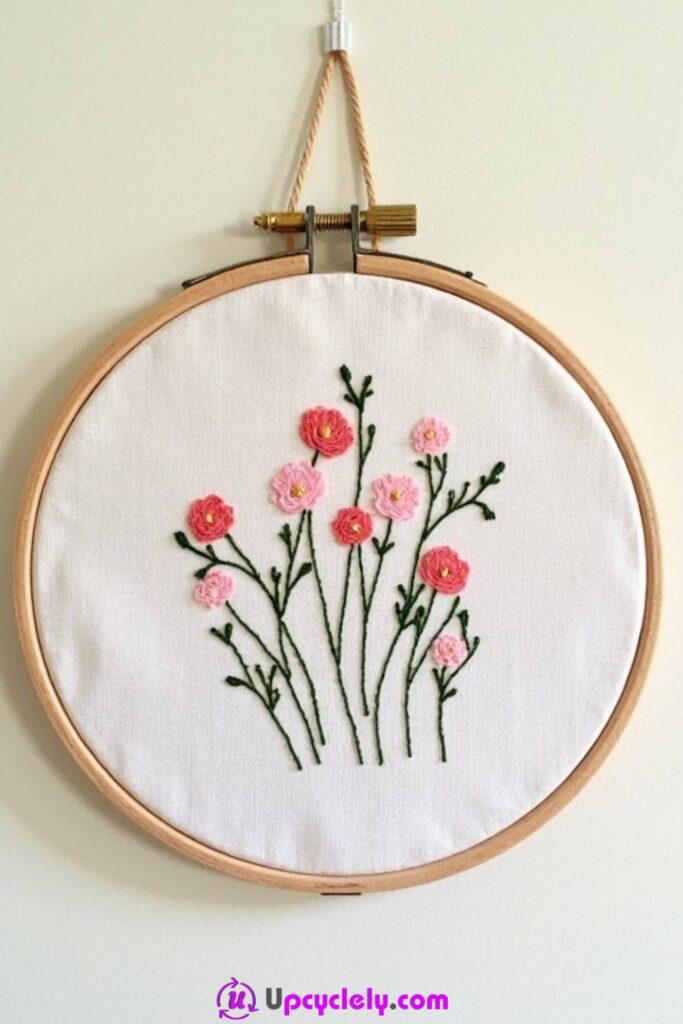
Embroidery Hoop Wall Art
Materials Needed:
- Embroidery hoop
- Fabric of your choice
- Embroidery floss (in your preferred colors)
- Needle
- Scissors
Step-by-Step Instructions:
- Prepare the Fabric: Start by placing your fabric inside the embroidery hoop. Stretch it tightly so it’s taut, and then tighten the hoop to hold it in place. You want your fabric to stay nice and smooth.
- Start Your Design: Using your embroidery floss, thread your needle and start stitching the design of your choice. You can do simple stitches, like running stitches, or more intricate designs, depending on your skill level.
- Create the Flower Design: If you’re doing a flower design, focus on making each petal distinct. Use different thread colors for a more vibrant look and make the stitching more textured by layering the threads.
- Finishing Up: Once you’re done stitching, trim any excess fabric around the hoop. Hang the hoop on your wall or place it on a shelf as a unique piece of art.
Pro Tip: Choose fabric with a fun pattern, or even upcycle old clothing or linens, to add more character to your piece. And don’t worry about being perfect—the handmade feel adds charm!
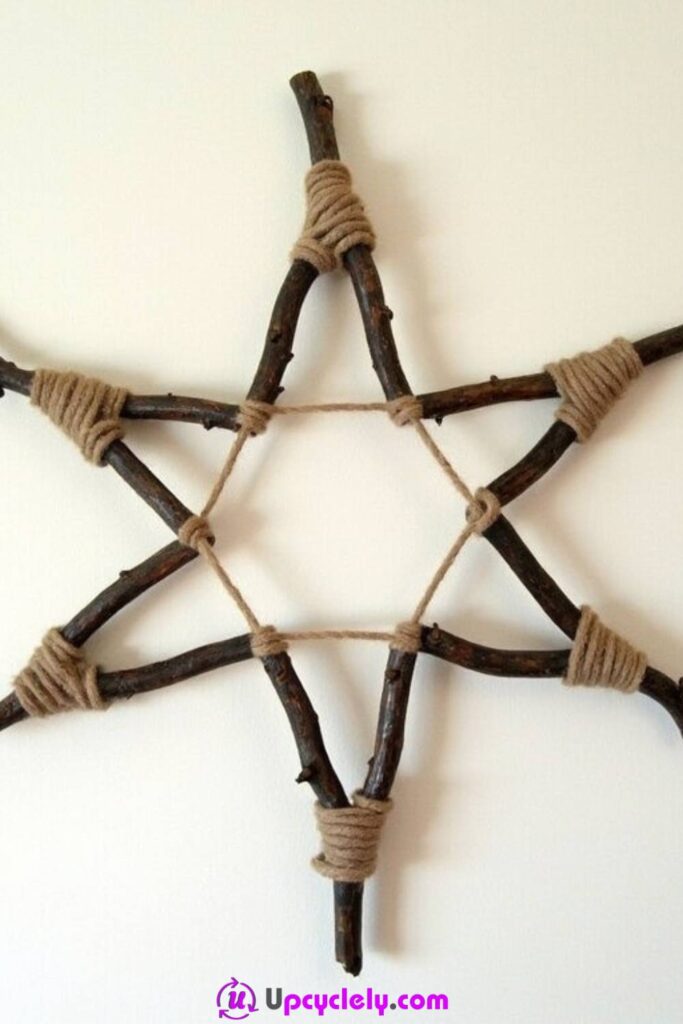
Twig and Yarn Wall Art
Materials Needed:
- Twigs (you can collect them from outside)
- Yarn (twine or string also works)
- Scissors
- Hot glue gun (optional)
Step-by-Step Instructions:
- Arrange the Twigs: Start by arranging your twigs into a star or any shape you prefer. I find that a star shape looks beautiful and adds a rustic charm to the room. Play around with the placement of the twigs before securing them.
- Secure the Twigs: Once you have your shape set, use yarn to wrap the twigs together where they meet. You can tie them securely at the intersections or even glue them with a hot glue gun for extra support.
- Add More Yarn: Now, start wrapping the yarn around the whole structure. I like to create a crisscross pattern, weaving the yarn across the branches to give the piece more depth. Make sure the yarn is tight enough to hold the twigs together, but loose enough to let the design shine.
- Hang and Admire: Once your yarn art is in place, simply hang it on the wall and admire your work. It’s such a simple craft, but the result can really elevate the space.
Pro Tip: You can dye the yarn with natural colors for a more personalized touch or add small embellishments like beads or ribbons.
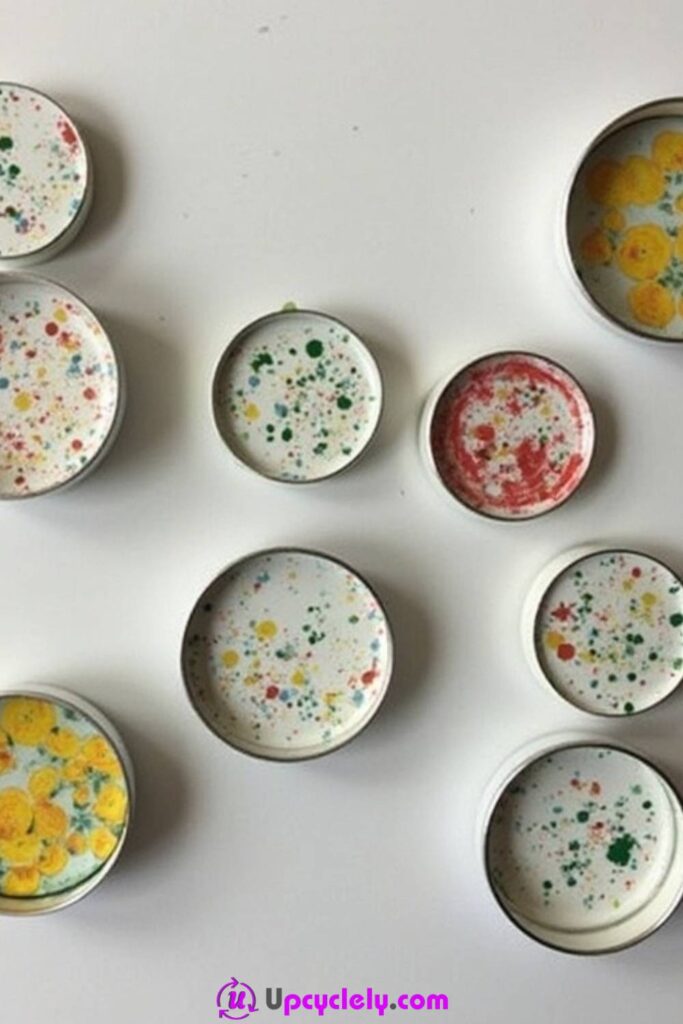
Jar Lid Magnets
Materials Needed:
- Empty jar lids
- Small magnets
- Paint or colorful paper
- Glue gun
- Scissors
Step-by-Step Instructions:
- Prepare the Lids: Start by cleaning your jar lids thoroughly, making sure they are dry before starting. You can use lids from jam jars or any other jar with a metal lid.
- Decorate the Inside: Cut small pieces of colorful paper or paint the inside of the jar lid. You can go for a simple solid color or get creative with patterns, flowers, or geometric shapes. Make sure the design fits neatly within the lid.
- Add the Magnet: Once the paint or paper is dry, glue a small magnet to the back of the lid. You can buy round magnets or even repurpose old ones from fridge magnets that no longer serve their purpose.
- Stick and Enjoy: Place your new magnets on your fridge or any magnetic surface. They add a charming handmade touch to any space.
Pro Tip: For an eco-friendlier version, you can decorate the inside of the lids with recycled materials like fabric scraps or old greeting cards.
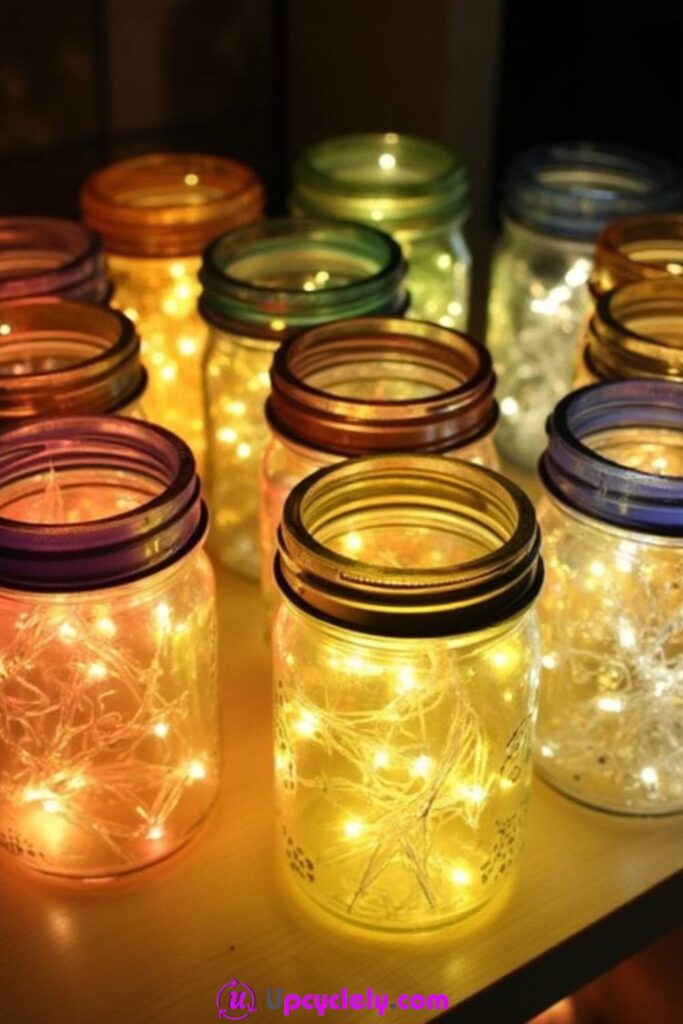
Jelly Jar String Lights
Materials Needed:
- Empty jelly jars or mason jars
- String lights (battery-operated work best)
- Decorative items like fake snow, glitter, or small beads
- Ribbon or twine for finishing
Step-by-Step Instructions:
- Prep Your Jars: Clean your jars and remove any labels. You can keep the lids on for a more finished look, or leave them off for an open effect.
- Fill with Decorative Items: Add a small amount of decorative items to the bottom of your jar—this could be glitter, fake snow, or beads. These elements help catch the light and create a soft, magical glow.
- Insert the String Lights: Carefully stuff the string lights inside the jar. I like to make sure the lights are spread out evenly, so the entire jar is filled with warm light. If you’re using a jar with a lid, you can poke small holes in the lid to let the lights shine through.
- Add a Finishing Touch: Wrap the jar’s rim with twine or a ribbon to give it a festive look. Then, place the jar on a shelf, table, or use it as a centerpiece. The soft light from the jar creates a cozy atmosphere.
Pro Tip: You can even personalize these jars for different seasons—add autumn leaves for fall, or tiny pinecones for winter.
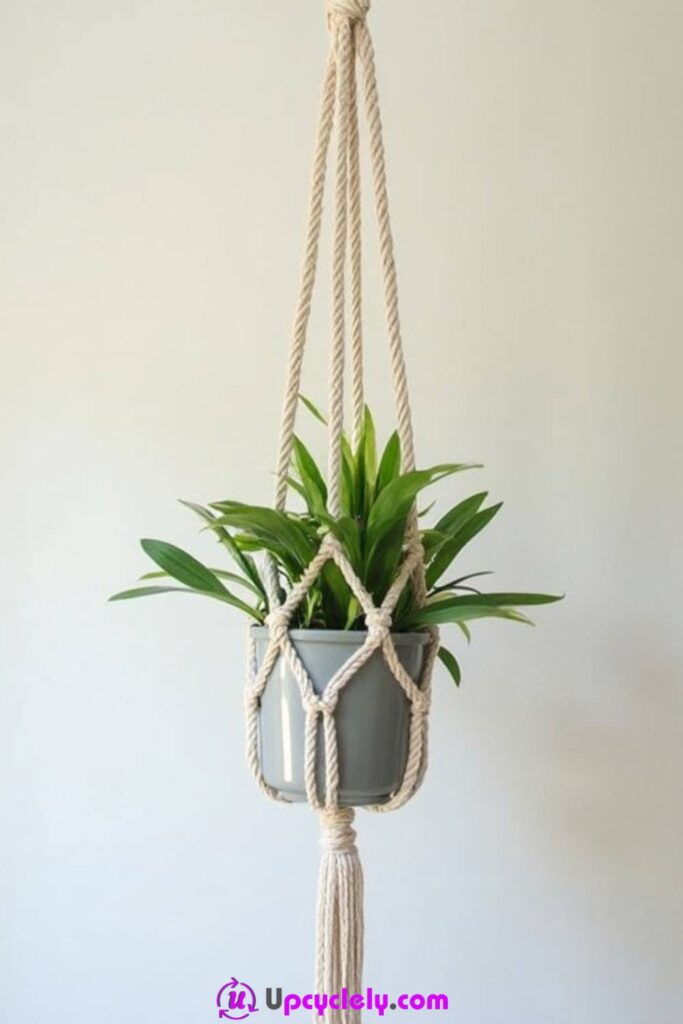
Macramé Plant Hanger
Materials Needed:
- Macramé cord or any thick string
- A plant pot
- Scissors
- Wooden ring or a sturdy hook (optional)
Step-by-Step Instructions:
- Cut the Macramé Cord: Cut four equal lengths of macramé cord, each about 2-3 feet long. If you want a longer hanger, you can cut the cords a bit longer.
- Tie the Knot: Gather all the cords together and tie a knot at the top, leaving a little loop for hanging. You can use a wooden ring or just knot the cords to a hook directly on the ceiling.
- Create the Pattern: Start by dividing the cords into sections, using basic macramé knots (such as square knots or larks head knots). For a simple plant hanger, weave the cords in a crisscross pattern until you have the desired length for the hanger.
- Place the Plant Pot: Once your macramé pattern is finished, place your plant pot into the holder. Adjust the knots to make sure the pot is secure and hanging evenly. Hang your plant from a hook or ceiling hook, and enjoy the stylish touch it adds to your space.
Pro Tip: Choose a thick, colorful cord for a more vibrant look, or go for a neutral tone like cream or grey for a boho-chic vibe.
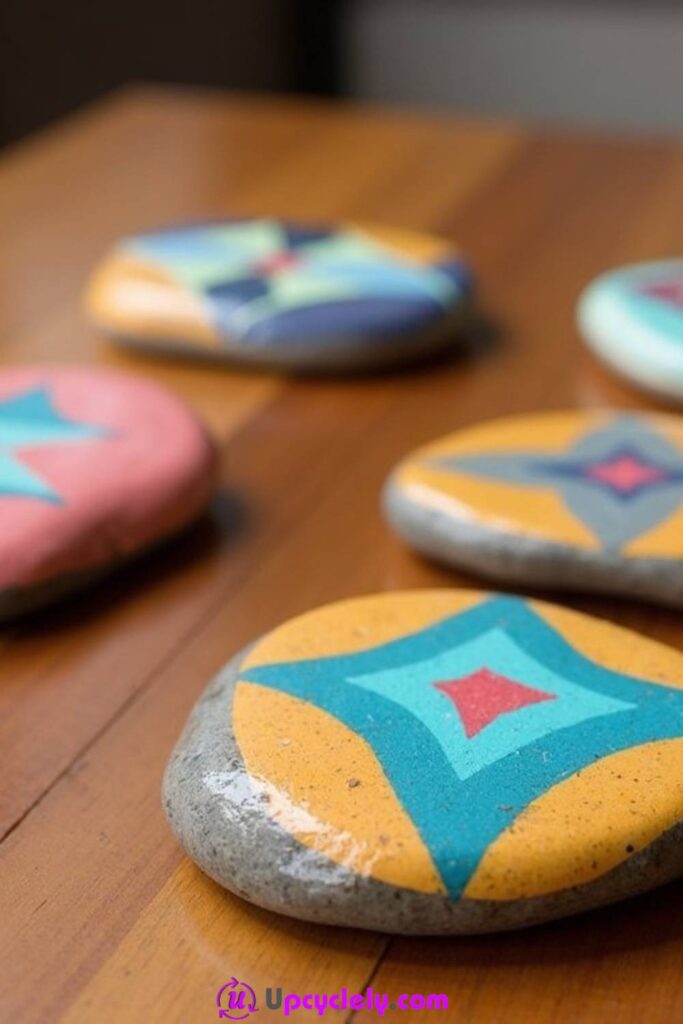
Painted Rock Coasters
Materials Needed:
- Smooth rocks (preferably flat)
- Acrylic paints
- Paintbrushes
- Clear sealant
Step-by-Step Instructions:
- Prepare the Rocks: Choose rocks that are flat and smooth. Clean them off with soap and water, then let them dry completely. These will make the perfect canvas for your design.
- Paint Your Design: Use acrylic paints to create a design on each rock. You can paint fun geometric patterns, flowers, or even a quote. Be sure to add a base coat of white paint if you want your colors to pop.
- Allow to Dry: Let your painted rocks dry fully before proceeding. It’s important that the paint is completely set so it doesn’t smudge.
- Seal the Coasters: After the paint is dry, use a clear sealant spray to protect your designs. This will also make them water-resistant and durable. Let the sealant dry and then your coasters are ready for use!
Pro Tip: Experiment with different shapes and sizes of rocks for varied coaster looks. You can also paint the backs with a solid color to keep it clean and sleek.
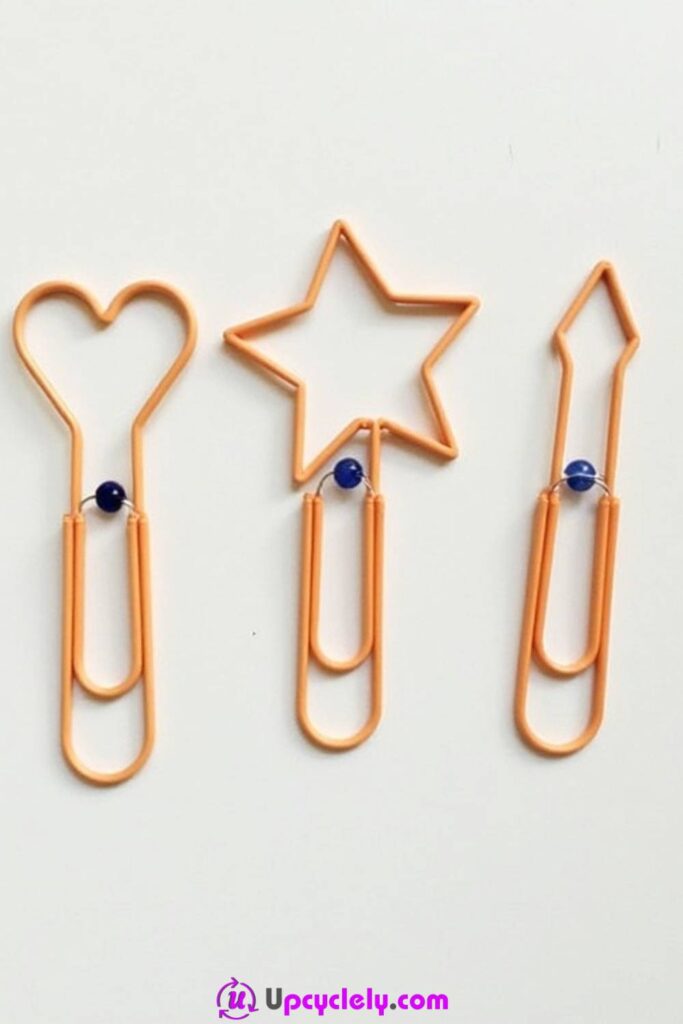
Paperclip Bookmarks
Materials Needed:
- Paperclips
- Beads (small ones)
- Wire or thin string
- Pliers
Step-by-Step Instructions:
- Shape the Paperclips: Take your paperclip and use pliers to bend it into shapes, such as hearts, stars, or even arrows. Make sure the loops are large enough to easily slide onto a book.
- Add the Beads: Thread beads onto the wire or string, and then attach them to the top of your paperclip shape. You can use multiple beads or just one for a minimalist look.
- Secure the Beads: Use the pliers to twist the wire or string securely, ensuring the beads stay in place.
- Use as Bookmarks: Place your new bookmarks in your favorite books. They not only keep your place but also add a unique, personalized touch to your reading material.
Pro Tip: Experiment with different types of beads and charms to make each bookmark truly unique!
Recycled Paper Beads

Materials Needed:
- Old magazines or newspaper
- Scissors
- Glue stick
- Toothpicks or skewers
- String
Step-by-Step Instructions:
- Prepare the Paper: Cut your magazines or newspaper into long, triangular strips. The wider the base of the triangle, the larger the bead will be.
- Roll the Paper: Start at the wide end of the triangle and roll it tightly around a toothpick or skewer. Keep the roll tight as you move to the point of the triangle. Use a bit of glue at the end to secure the paper in place.
- Let Them Dry: After rolling, let the beads dry completely. Once dry, you can remove them from the skewer.
- String the Beads: Once you have a collection of beads, string them together to create a necklace, bracelet, or any other jewelry you prefer.
Pro Tip: Paint or decorate the beads with vibrant colors to make them stand out even more. Recycled paper beads are perfect for a fun and eco-friendly accessory!