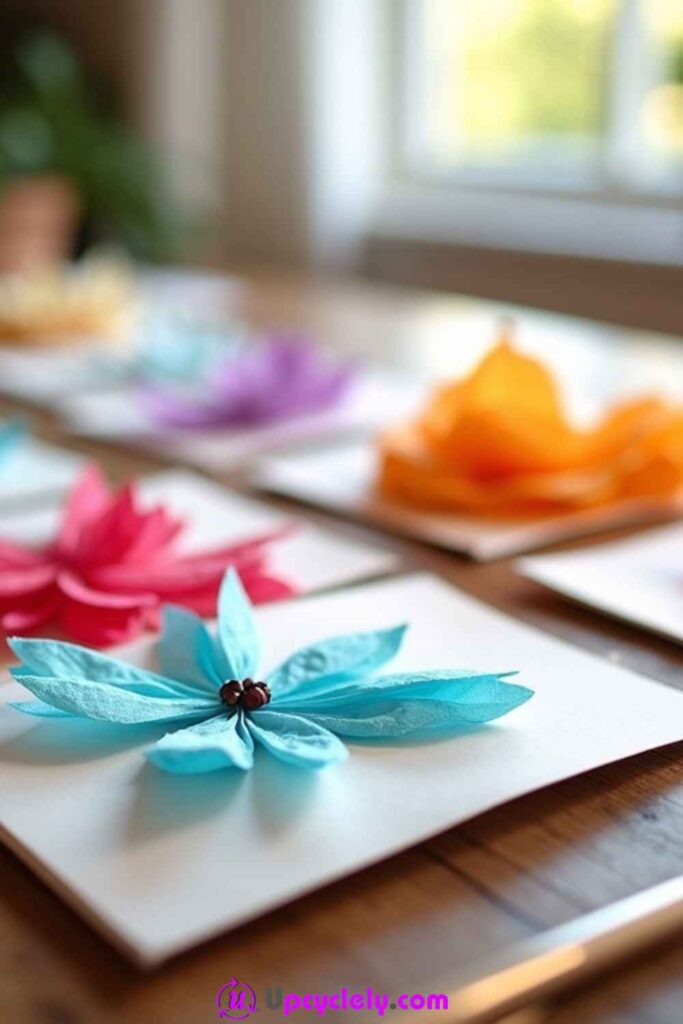
Tissue Paper Cards
Materials Needed:
- Tissue paper sheets (various colors)
- Cardstock or blank cards
- Scissors
- Glue stick
- Small beads or sequins (optional)
- A pen or marker for final touches
Steps to Create:
- Create the Flowers
I started by cutting several circles of tissue paper in varying sizes. For each flower, I stacked 4-5 layers of circles. To give them a realistic look, I gently crumpled each layer for texture. Once layered, I used a small dot of glue in the center to hold them together. For an extra touch, I glued a tiny bead right in the middle as the flower’s center. - Prepare the Card Base
Next, I chose simple white blank cards to make the flowers pop. You can also use colored cardstock if you prefer. Positioning is key here—I laid the flowers on the card to plan their arrangement before attaching them. - Glue and Final Details
Once happy with the layout, I glued each flower to the card. Then, I used the pen to add a little green “stem” or handwritten message that runs along with the bouquet theme. By the end, each card was cheerful and vibrant, filled with a heartfelt touch!
Pro Tip:
Keep a small damp cloth nearby to clean your hands as glue can smudge tissue paper. Clean hands mean crisp, flawless flowers!
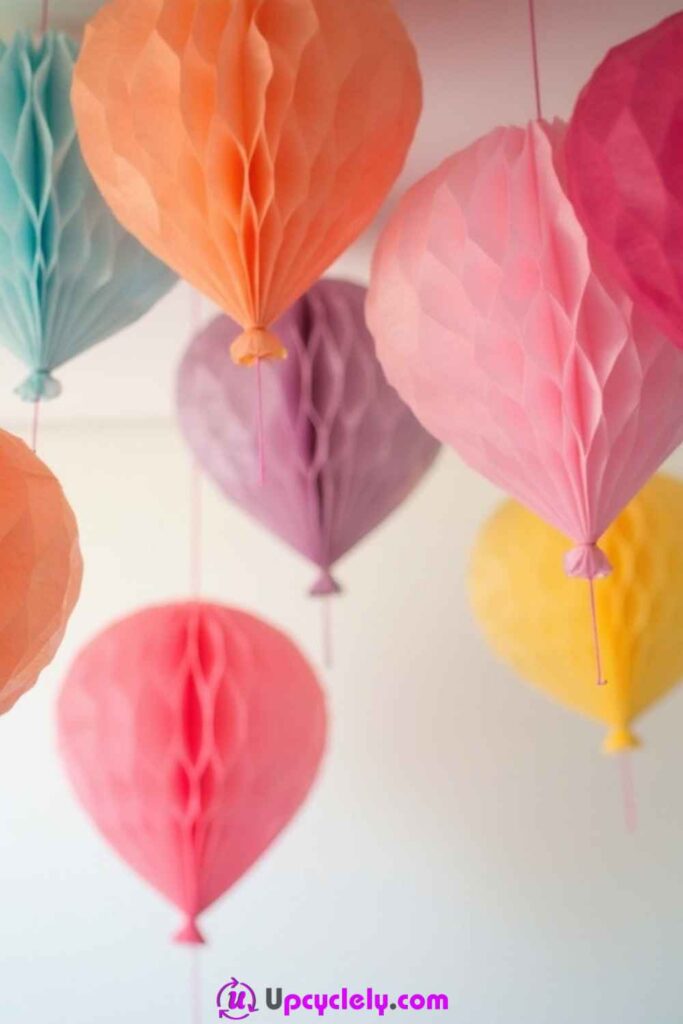
Tissue Paper Balloon Decorations
Materials Needed:
- Honeycomb tissue paper lanterns (available online or at craft stores)
- Balloon-shaped paper templates (optional)
- String or ribbon
- Tape
Steps to Create:
- Prepare the Lantern Base
If you’re using plain honeycomb paper lanterns, like I did, open them up and secure them into the traditional balloon shape using tape. These lanterns have a pleated texture that stands out beautifully when fully opened. - Attach Strings
I cut ribbons or strings in coordinating colors and tied them to the top of each lantern. This step really brings out the “hot air balloon” theme and adds that delightful hanging effect when clustered together. - Arrange and Hang
To create an eye-catching display, I adjusted the lengths of the strings so the balloons hang at different heights. I had so much fun choosing the perfect corners of the ceiling for these decorations to make the space pop with color and movement.
Pro Tip:
Mix and match pastel and bright colors for a visually stunning effect. If you’re hanging these near windows, the sunlight will also enhance the colors beautifully.
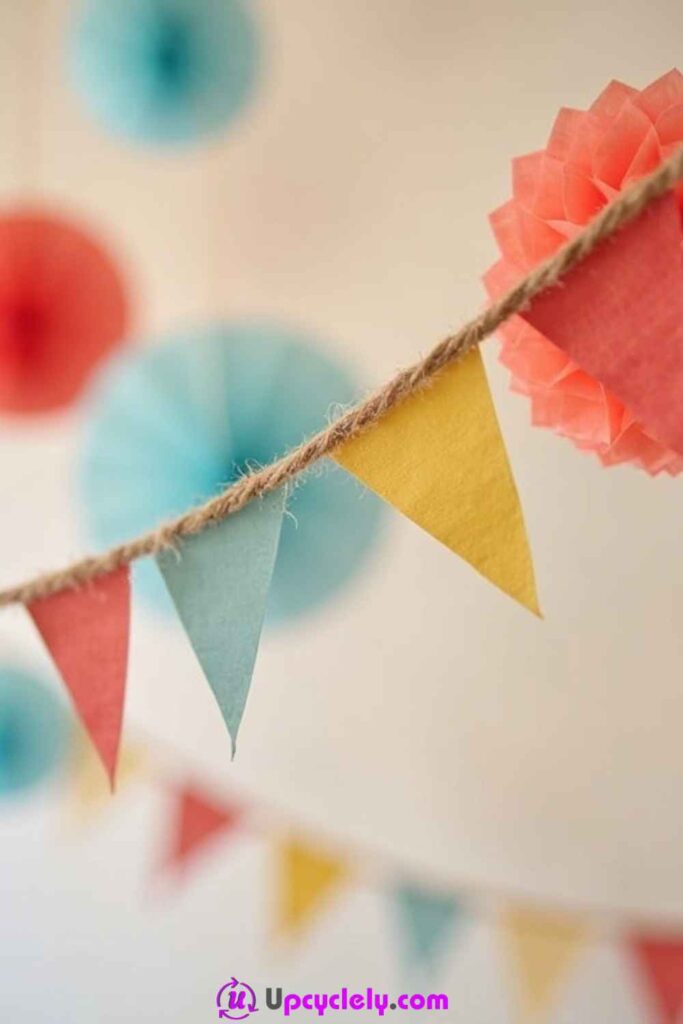
Tissue Paper Bunting
Materials Needed:
- Tissue paper (red, yellow, blue, or any colors you love)
- String or twine
- Scissors
- Hole puncher
- Clear tape or glue
Steps to Create:
- Cut Out the Flags
First, I folded sheets of tissue paper into layers to cut several triangles at once. This saved me a lot of time! I made sure the triangles were uniform in size for a neat look, but don’t worry if they’re not perfect. Handmade pieces often have more charm. - Punch Holes for Stringing
Using a hole puncher, I made two holes along the top edge of each triangle. If you don’t have a puncher, folding the edge down and taping it onto the string works just as well. - String the Flags Together
Finally, I threaded the triangles onto a long piece of string. I secured the flags in place with a tiny bit of clear tape on the back so they wouldn’t slide around. The result? A cheerful, lightweight bunting that instantly brightened up the room.
Pro Tip:
Mix sizes and patterns for each triangle if you want something playful and eclectic. It’s a great way to use leftover tissue paper!
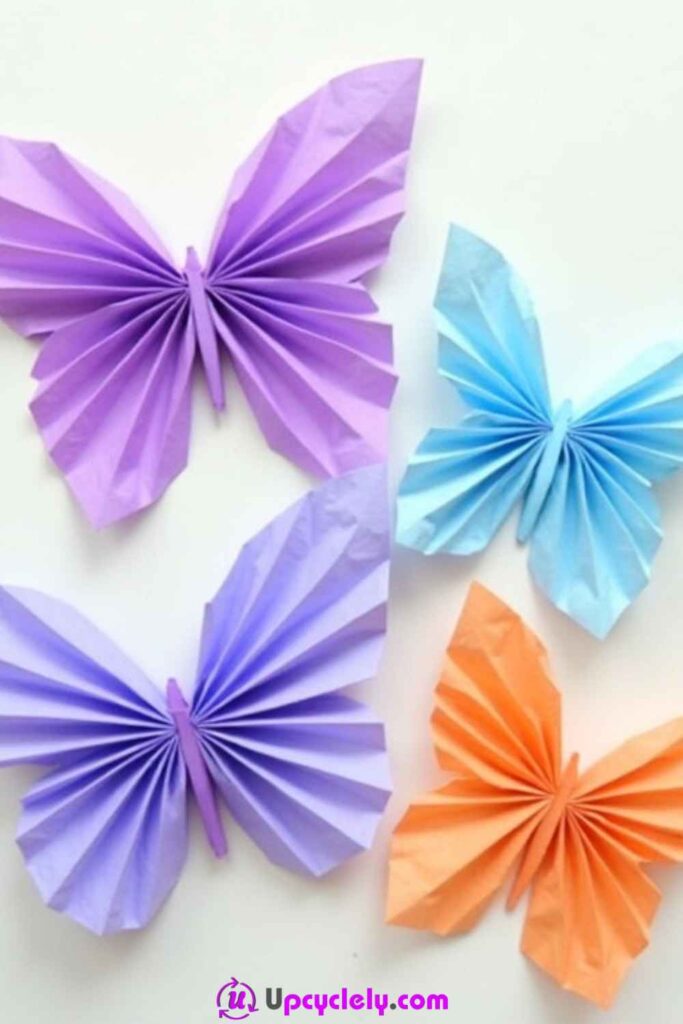
Tissue Paper Butterflies
Materials Needed:
- Tissue paper (purple, blue, orange, or your favorite colors)
- Scissors
- Wire or pipe cleaners for antennae (optional)
Steps to Create:
- Fold the Tissue Paper
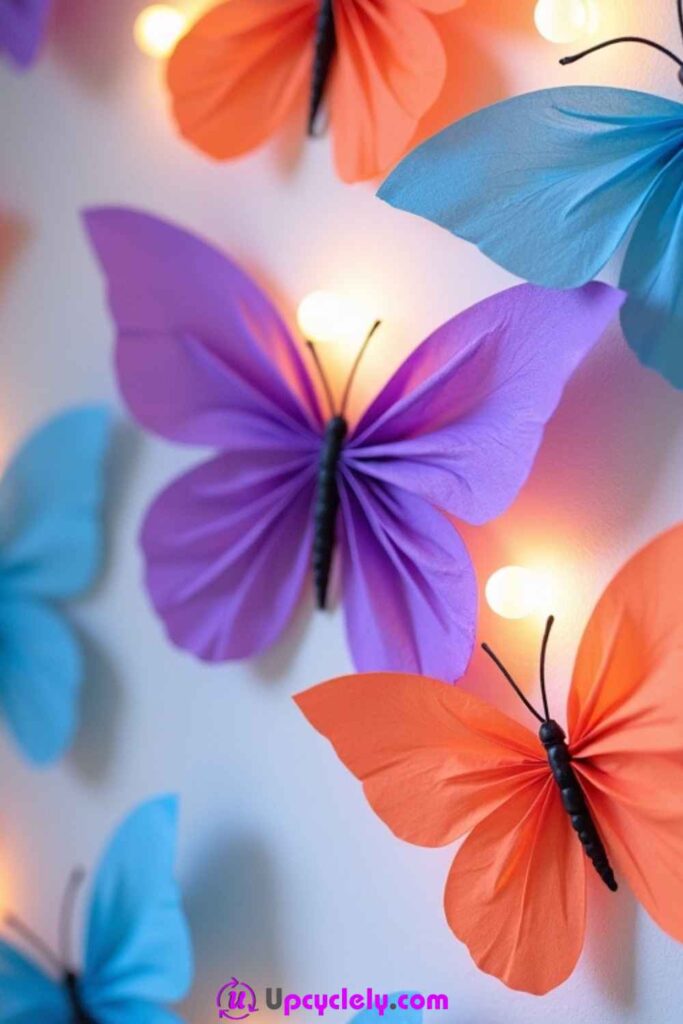
I started with a rectangular piece of tissue paper and accordion-folded it lengthwise. Then, I folded it in half to find the center point, where I tied a piece of thin crafting wire snugly to hold the accordion together. - Shape the Wings
After securing the center, I spread out the folds to create butterfly wings. At this stage, I trimmed the edges into rounded or jagged shapes for variety. It felt so rewarding to see the butterflies come to life with just a few tweaks! - Add the Finishing Touches
If you’re feeling creative like I was, you can add wire antennas by twisting them to the center. You can also mount the butterflies onto a poster board or keep them loose for various uses.
Pro Tip:
Layer tissue paper of different colors when folding to create butterflies with multi-colored wings. The effect is stunning!
Tissue Paper Butterfly Wall Art
Materials Needed:
- Tissue paper (multiple colors)
- Scissors
- Glue dots or double-sided tape
- String lights (optional)
Steps to Create:
- Cut and Fold the Butterflies
I followed the folding technique from the above butterfly craft, making several butterflies in different sizes. The variety gave the wall art a dynamic and lively look. - Arrange the Layout
I arranged my tissue butterflies on a blank wall, experimenting with patterns until I found an arrangement that looked natural, almost like the butterflies were in motion. - Attach and Add Lighting
Using glue dots, I secured the butterflies on the wall. To take it a step further, I wrapped string lights loosely around the area. When lit, the combination of glowing lights and colorful butterflies created a magical ambiance.
Pro Tip:
If attaching to walls feels permanent, use poster board as a backdrop instead. It gives you the freedom to move the entire piece whenever needed.
Tissue Paper Stamped Cards
Materials Needed:
- White or light-colored cardstock
- Wax paper
- Tissue paper (various colors)
- Paintbrush
- Water
- Scissors
- Glue stick
Steps to Create:
- Make Tissue Paper Stamps
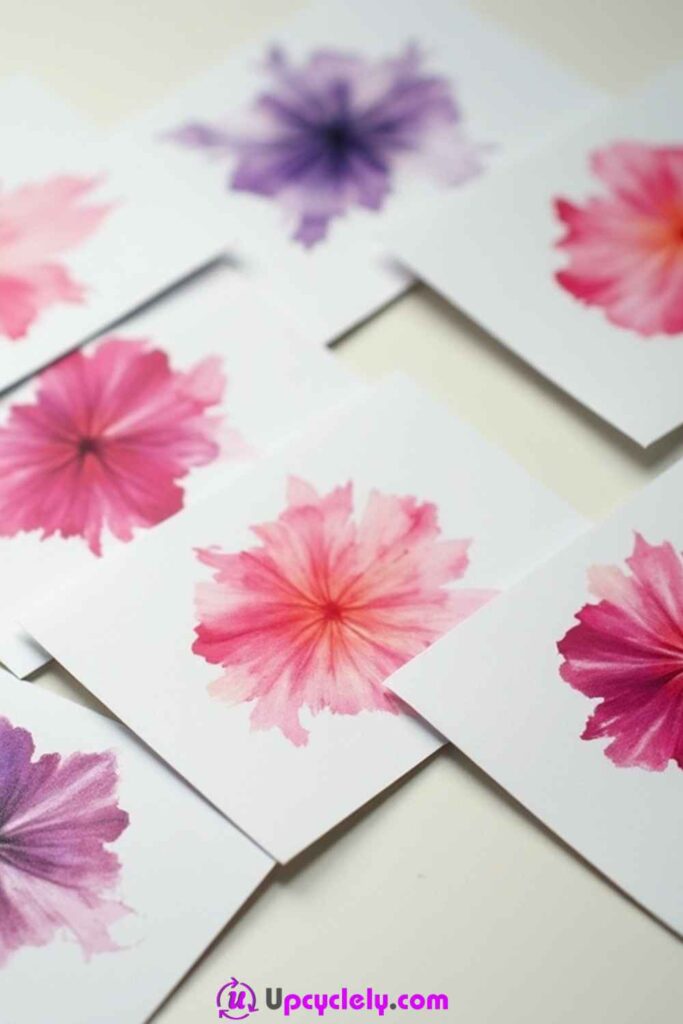
I began by cutting small shapes and petals out of tissue paper. You can experiment with concentric circles or irregularly shaped pieces. Then, I set down a piece of wax paper to protect my surface because things can get a little messy. - Create the “Watercolor” Effect
After placing a tissue paper piece on the cardstock, I used a damp paintbrush to slightly moisten it. The water soaked through the tissue paper, releasing its color onto the cardstock, leaving behind a soft, pastel pattern. I repeated this step with different colors to form layered, blooming flowers. - Peel and Arrange
Once each shape dried and left its imprint, I carefully peeled off the tissue paper. What was left underneath were beautiful, subtle flower-like patterns. I arranged the imprints in clusters, making sure to leave room for a personal message.
Pro Tip:
Experiment with color gradients! Overlapping pieces or blending warm and cool tones creates depth and a painterly effect.
Tissue Paper Collage Art
Materials Needed:
- A canvas or sturdy poster board
- Tissue paper (vivid colors)
- Glue stick or Mod Podge
- Paintbrush
- Scissors
Steps to Create:
- Tear and Texture Tissue Paper
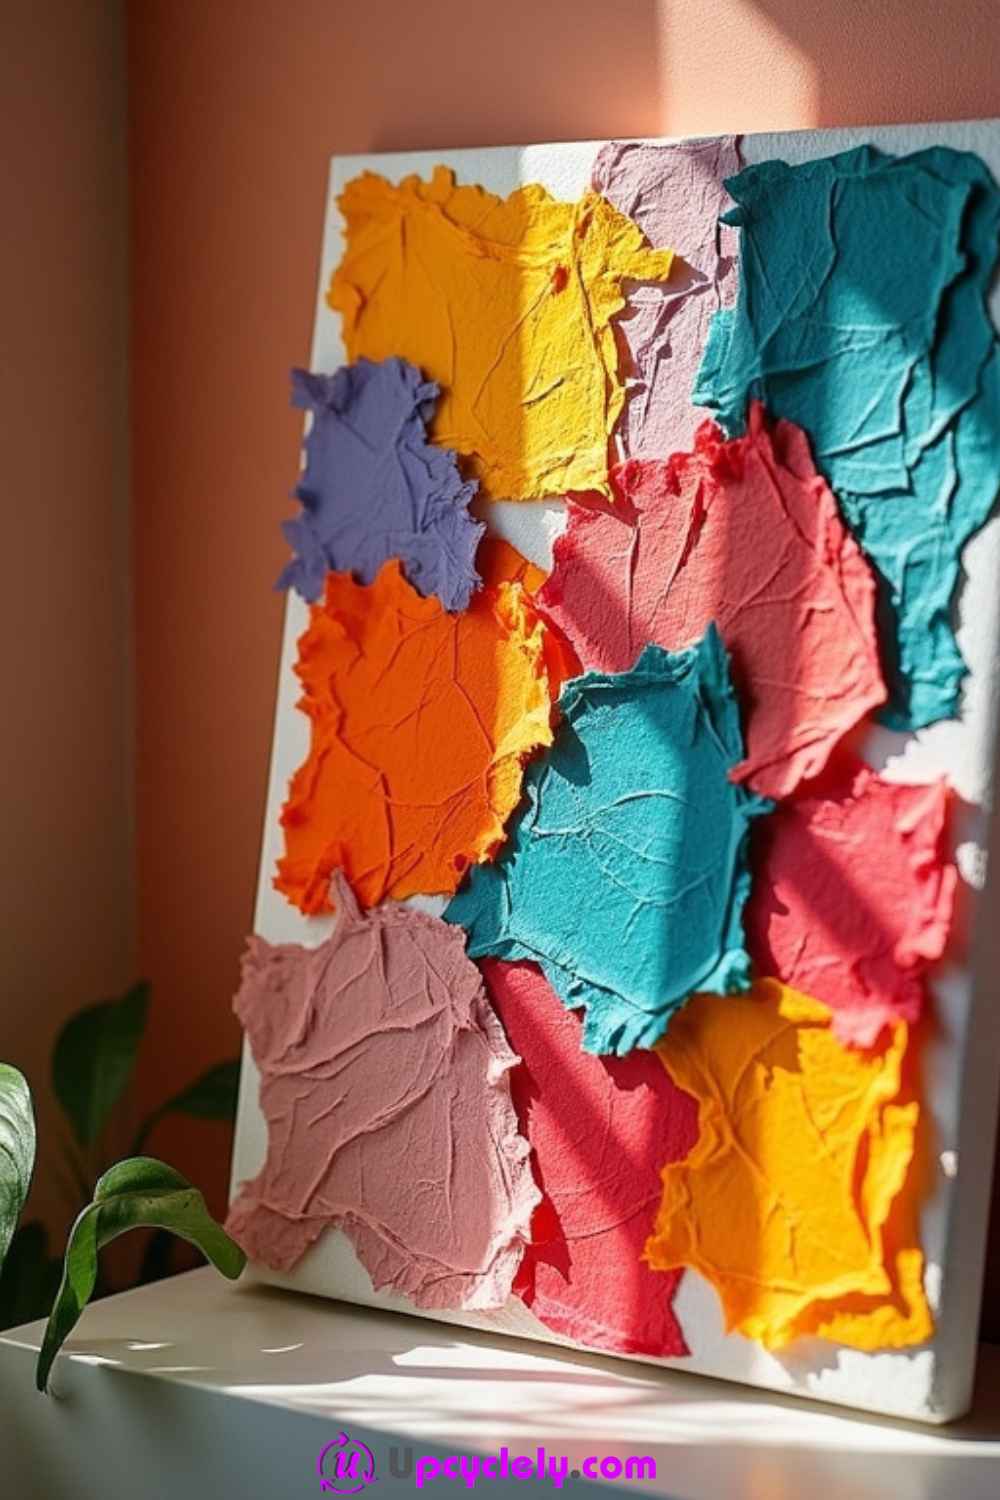
I tore tissue paper into uneven patches, making sure to experiment with different sizes for an overlapping effect. Tearing by hand gives the art a more freestyle and textured look. - Layer Onto the Canvas
Using Mod Podge on a paintbrush or a glue stick, I brushed a thin layer of adhesive onto the canvas. I started layering the tissue paper patches, randomly or in color sections. With each added piece, I smoothed out any air bubbles with my fingers to keep it neat. - Seal for a Shiny Finish
Once I was happy with my collage, I coated the entire surface with a final layer of Mod Podge to seal it. The matte or glossy finish brought out the vibrancy in the colors and gave it a polished gallery-type feel.
Pro Tip:
Overlap translucent-colored tissue paper to create new hues and gradients, giving your artwork depth and dimension.
Tissue Paper Cupcake Toppers
Materials Needed:
- Tissue paper (red, yellow, blue, pink)
- Wooden toothpicks
- Glue stick
- Scissors
Steps to Create:
- Create Fun Shapes
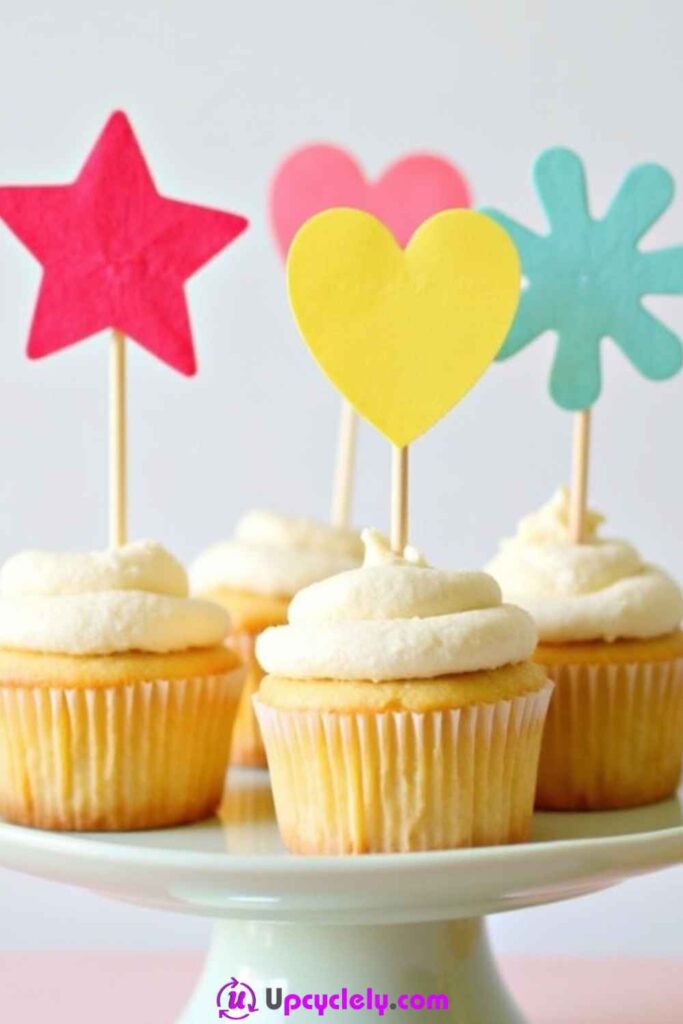
I began by folding tissue paper squares into layers and cutting out shapes like stars, hearts, circles, and even quirky abstract designs. Folding the paper allowed me to cut several pieces at once for consistency. - Attach to Toothpicks
Once I had my tissue paper shapes, I took two identical pieces and glued them together with a wooden toothpick sandwiched in between. This step made the toppers sturdy and secure. - Fluff and Finalize
To add dimension and fluffiness, I gently pulled apart the tissue paper layers on each topper. The result? Adorably puffy accents that sat cheerfully on top of cupcakes.
Pro Tip: Personalize the toppers by writing short messages or initials on the shapes with a marker.
Tissue Paper Lanterns
Materials Needed:
- Tissue paper (multiple colors)
- Pre-made paper lanterns
- Mod Podge or glue stick
- LED string lights
- Paintbrush
Steps to Create:
- Decorate the Lanterns
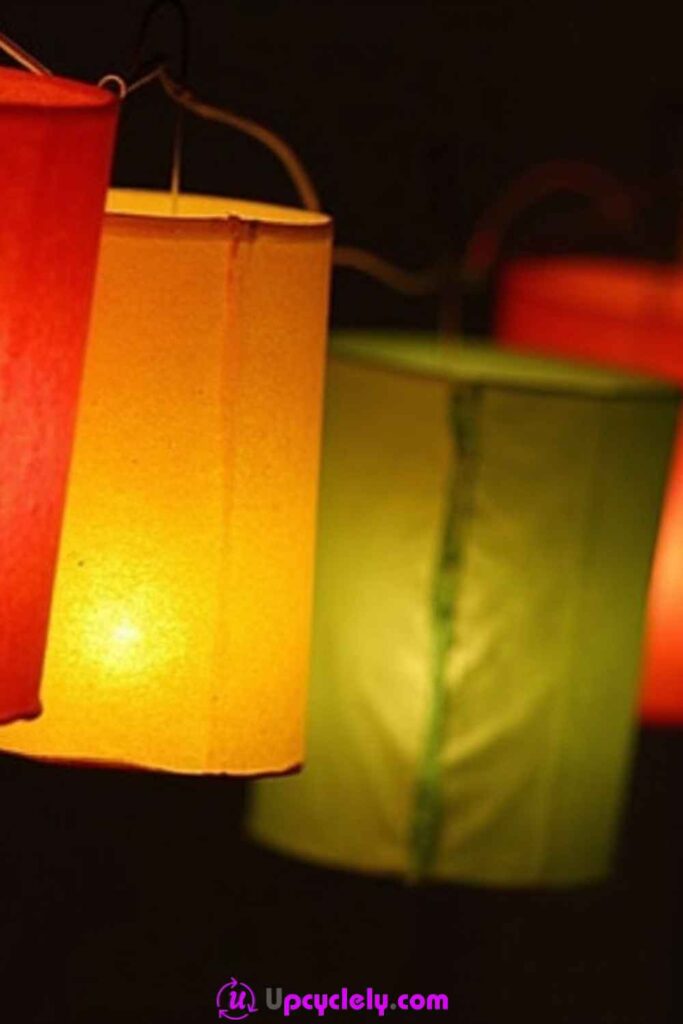
I started with plain paper lanterns and cut up tissue paper into leaf or petal shapes. Then, using a paintbrush, I lightly brushed glue onto the surface of the lanterns and applied the tissue shapes, overlapping them for a layered effect. - Illuminate from Within
After decorating all the lanterns, I carefully inserted LED string lights inside. These not only made the colors pop but also created a warm, soft glow when turned on. - Hang and Display
To finish, I hung the lanterns in a cascading formation, varying the heights for visual interest. It was so satisfying to see the entire effect come together!
Pro Tip:
Use color themes for specific occasions, like pastel colors for spring or bold reds and yellows for festive holidays.
Tissue Paper Pom-Poms
Materials Needed:
- Tissue paper sheets (8-10 per pom-pom)
- Scissors
- Wire or twist ties
- String for hanging
Steps to Create:
- Fold the Tissue Paper
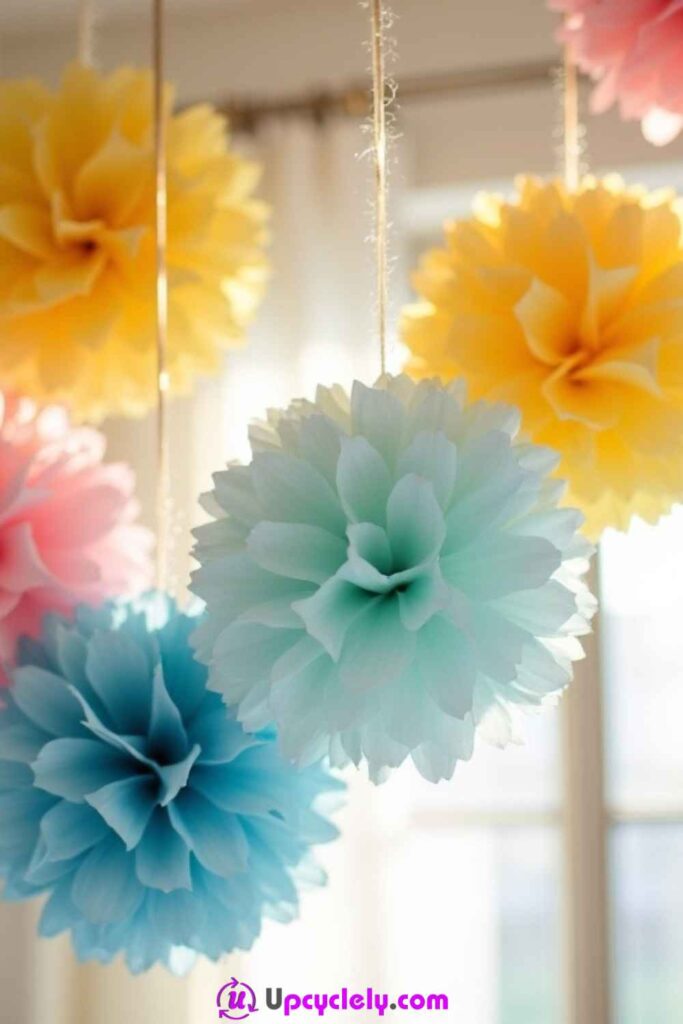
I stacked 8-10 sheets of tissue paper and accordion-folded them into 1-inch pleats across the shorter side. This part felt therapeutic, as the folds began to come alive. - Secure and Shape
After folding, I tied a piece of wire around the middle of the folded paper. Then, I rounded off the edges with scissors to give the pom-poms a softer, more rounded look. You can also cut into pointy ends for a starburst effect. - Fluff and Hang
The final step was my favorite! I gently pulled apart each layer of tissue paper, fluffing them to create a full, ball-like shape. Using string, I hung each pom-pom from a different height to add dimension to the space.
Pro Tip:
To make smaller pom-poms, simply cut the tissue paper into smaller sheets before beginning the folds. They make adorable accents paired with the larger ones!
Tissue Paper Tree
Materials Needed:
- Tissue paper (red, orange, yellow, and brown)
- Cardboard or cardstock (for the base)
- Glue stick or craft glue
- Scissors
Steps to Create:
- Prepare the Tree Trunk and Base
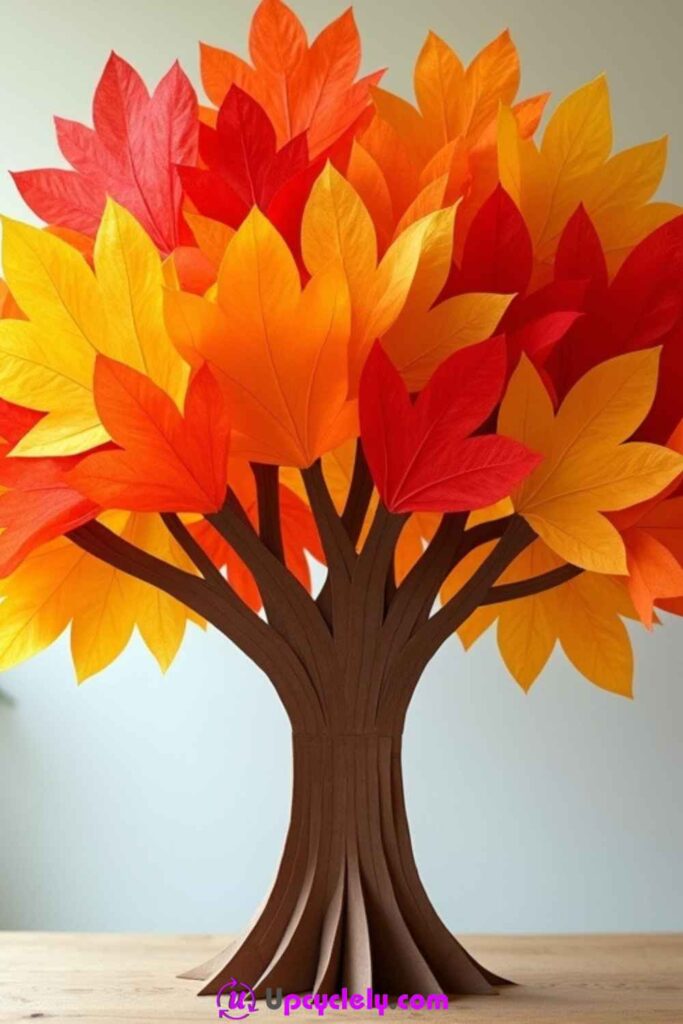
I started by sketching a tree trunk and branches on a sturdy piece of cardboard. Once I was happy with the shape, I cut it out carefully with scissors. This would act as the foundation for the project. For added stability, I glued a wide cardboard base to the bottom of the trunk to help it stand tall. - Create the Leaves
I tore tissue paper sheets into small, irregular pieces. This part was surprisingly satisfying because the torn edges gave the leaves a natural, rustic look. You can also experiment with cutting neat leaf shapes, but I loved the organic feel of torn pieces. Then, I crumpled each piece slightly to give it some texture. - Attach the Leaves
Starting at the top of the branches, I glued the tissue paper pieces in clusters, layering red, orange, and yellow to mimic the look of fall foliage. I worked my way down, overlapping the colors for a vibrant and full effect. By the end, the tree was dense with fiery leaves, making it feel like a mini autumn masterpiece.
Pro Tip: If you want to make your tree more dynamic, add a sprinkle of glitter to the leaves for a hint of sparkle in the light. It adds a magical touch!
Tissue Paper Suncatchers
Materials Needed:
- Tissue paper (red, blue, green, yellow, orange, and more)
- Clear contact paper or transparent sheets
- Scissors
- A template or stencil (optional)
Steps to Create:
- Cut the Tissue Paper Circles
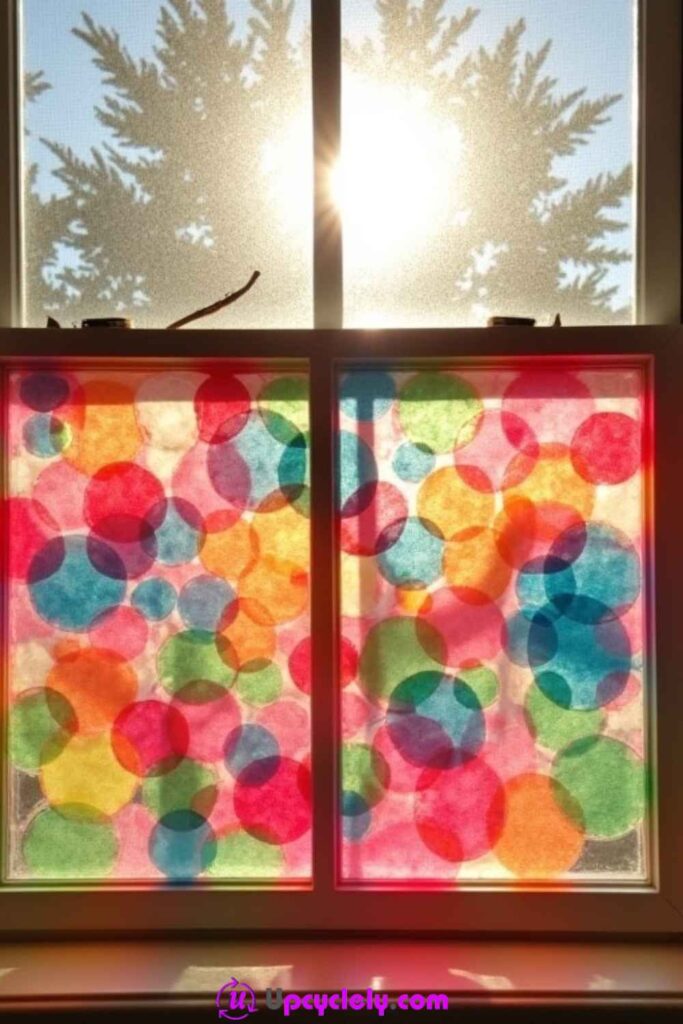
I chose a mix of bold and pastel tissue paper colors and cut out several circles in varying sizes. If freehand cutting feels tricky, a stencil or any circular object, like a glass, can help you trace perfect shapes. I loved this step because the circles began to feel like tiny bursts of sunshine. - Prepare the Contact Paper Base
I peeled the backing off a sheet of clear contact paper and placed it sticky side up on my workspace. To keep it steady, I used a bit of tape on the edges. This step was crucial because it acted as the canvas for my design. - Arrange and Layer
I started placing the tissue paper circles onto the sticky surface, overlapping them to create new colors and gradients wherever they intersected. The overlapping effect felt so magical, like blending paints without the mess. Once the design was complete, I sealed the piece with another layer of contact paper on top, trimming the edges neatly.
Pro Tip:
Try different shapes and arrangements for variety! Stars, hearts, or abstract patterns can make your suncatcher unique. And for extra durability, frame your finished piece before placing it on the window.