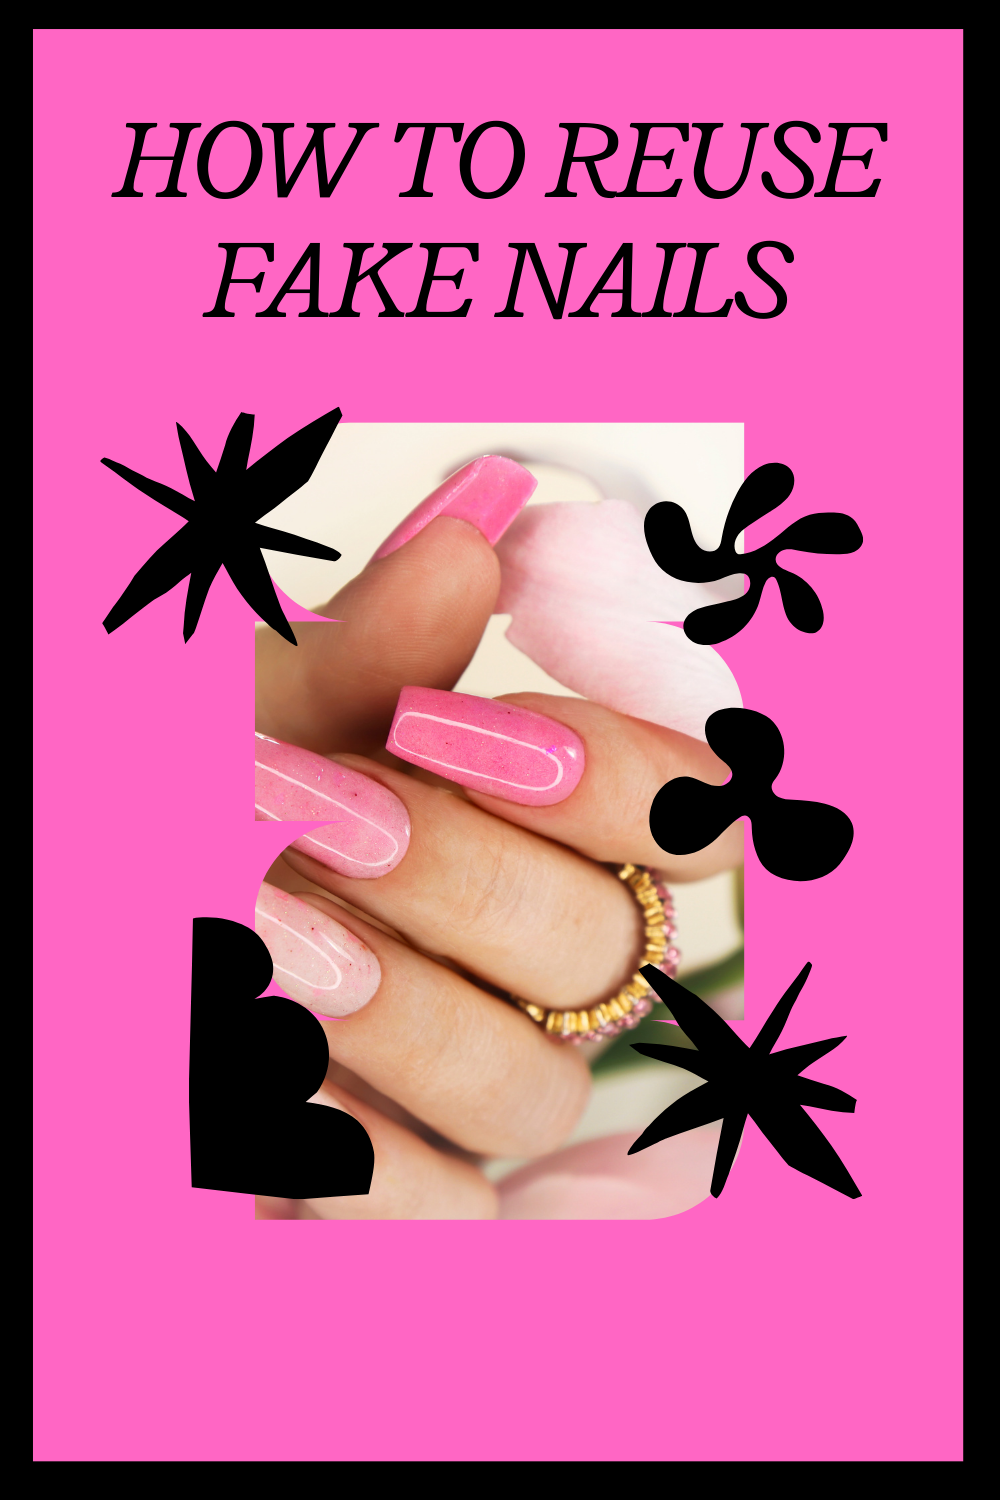
Let’s face it, fake nails can be expensive! Whether you get them done professionally or buy the DIY kits, the cost can quickly add up.
But here’s a question what if you didn’t have to throw away those beautiful nails after just one use? If you’ve ever found yourself thinking, “I wish I could reuse these,” you’re not alone. Reusing fake nails not only saves you money but also helps reduce waste, which is a win for your wallet and the environment.
In this post, I’m going to guide you through the process of reusing fake nails, from cleaning them to ensuring they stay in good shape for your next application. I
’ll share step-by-step instructions, common mistakes to avoid, and some of my personal tips for getting the most out of your nails. Whether you’re a pro or a beginner, you’ll find useful tips to make the process smoother.
How to Safely Remove Fake Nails
Before we can reuse those nails, we need to start by removing them properly. It’s tempting to just pull them off, but doing so can seriously damage your natural nails. Let’s go over the right way to do it:
Step-by-Step Instructions for Safe Nail Removal
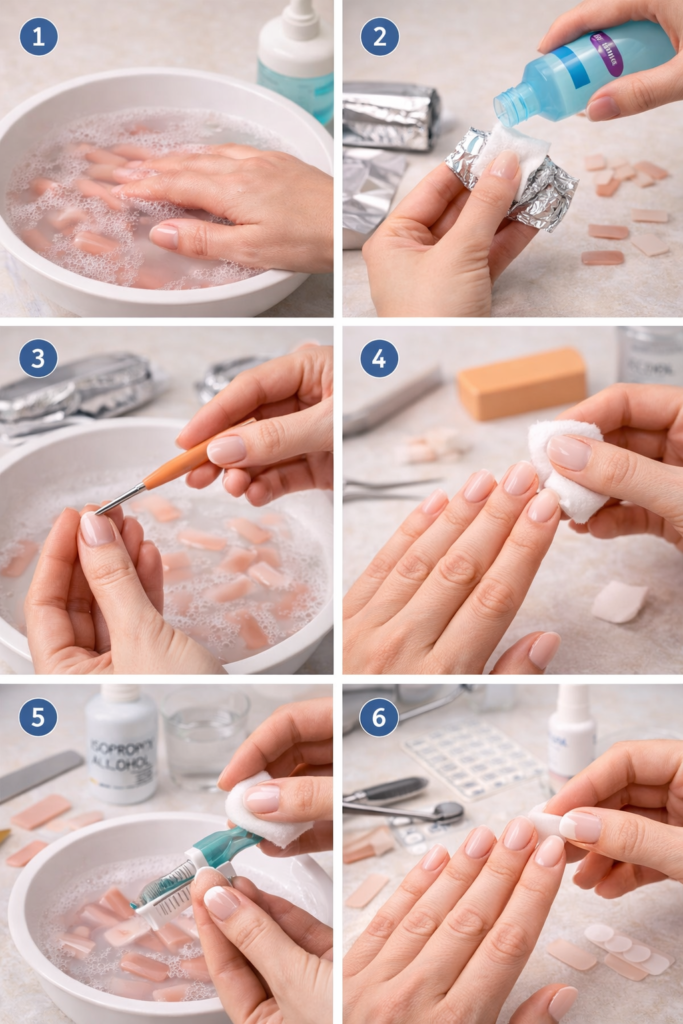
- Soak Your Nails
Begin by soaking your fake nails in warm, soapy water. This helps to loosen the adhesive or glue that holds the nails in place. Soak them for at least 10-15 minutes to allow the water to soften the glue. - Use Acetone (for Acrylic or Gel Nails)
If your fake nails are acrylic or gel, acetone is your best friend. Pour some acetone into a bowl and dip your nails into it for about 5-10 minutes. Alternatively, you can use cotton pads soaked in acetone and place them over your nails, wrapping them in foil to keep them in place. - Gently Pry Off the Nails
After soaking, use a cuticle pusher or an orange stick to gently lift the edges of the fake nail. Avoid using sharp objects, as they can damage both your natural nails and the fake ones. Work slowly and gently—don’t force anything off. - Remove Leftover Adhesive
Once the nails are removed, you’ll probably find some adhesive left on them. Use a cotton ball dipped in acetone to clean off the leftover glue, or use a nail buffer to gently file it away. Make sure to be thorough so your nails are completely clean.
Why This Method Works
By soaking the nails and using acetone, you’re allowing the adhesive or glue to break down without damaging your natural nails. This is the key to ensuring the nails remain in good condition for reuse.
How to Clean and Prep Fake Nails for Reuse
Now that you’ve removed the nails, it’s time to clean and prep them for their next round of use. This step is crucial if you want your fake nails to stay looking good and stay securely attached for the next few weeks.
Cleaning the Fake Nails
- Wash with Soap and Water
First, wash the fake nails with warm, soapy water to remove any leftover adhesive, oils, or dirt. You can use a nail brush or an old toothbrush to scrub the surface gently. - Sanitize with Rubbing Alcohol
After washing, wipe down each nail with rubbing alcohol. This will ensure the nails are free from oils and bacteria, which is essential for a proper application. It also helps remove any lingering moisture, which could prevent the adhesive from sticking properly next time.
Inspect and Repair the Nails
- Inspect for Damage
Check each nail carefully for any cracks or chips. If you find any, you can try to repair them using a small amount of clear nail glue or acrylic powder, depending on the material of the nail. Don’t reuse nails with significant damage, as they might not adhere well. - Shape and File the Nails
Once the nails are clean and dry, you may want to file them to restore their shape. Use a fine-grit nail file to smooth out the edges, and if you notice any rough spots or imperfections, file those down too. This is especially important if the nails are acrylic or gel because they can become jagged over time. - Polish or Add Designs (Optional)
If you want to give your reused nails a fresh look, you can paint them with your favorite nail polish or add fun designs using nail art tools. This step is optional, but it’s a great way to make the nails feel new again.
How to Apply Reused Fake Nails
Applying reused fake nails is similar to applying new ones, but with a few key differences. Here’s how you can ensure they stay put:
Step-by-Step Instructions for Reapplying Fake Nails
- Prep Your Natural Nails
Start by pushing back your cuticles and filing your natural nails. If there’s any leftover glue from previous applications, gently remove it with a buffer. This will help the fake nails adhere more effectively. - Apply Nail Glue or Double-Sided Tape
For the best hold, I recommend using a good-quality nail glue. Apply a thin layer of glue to the back of each fake nail, and quickly press it onto your natural nail, holding it in place for about 10-15 seconds to ensure a strong bond.
If you prefer a less permanent solution, you can also use double-sided nail tape, but keep in mind that it won’t last as long as glue.
- Press Firmly
Press each fake nail firmly onto your natural nail, ensuring there are no air bubbles underneath. This step is crucial for a long-lasting hold. - File and Shape
Once the nails are applied, you might want to do some final shaping and filing to ensure everything looks seamless. This is especially important if you reused the nails multiple times, as the edges might be a bit rough.
Common Mistakes to Avoid When Reusing Fake Nails
Reusing fake nails can be a great way to save money, but it’s easy to make a few mistakes along the way. Here are some common errors to watch out for:
Mistake 1: Rushing the Removal Process
Trying to pull off fake nails quickly can damage your natural nails or the fake ones. Always take your time during removal this is crucial if you want to reuse the nails without any issues.
Mistake 2: Skipping the Cleaning Process
If you skip cleaning your nails properly, the leftover glue or adhesive can prevent your fake nails from sticking well during the next application. Make sure to clean both the fake nails and your natural nails before reapplying.
Mistake 3: Using Damaged Nails
If a fake nail has cracks or chips, it’s better to toss it than to risk applying it again. Damaged nails are more likely to break or fall off, leaving you with an imperfect look.
Mistake 4: Using Cheap Glue or Tape
The quality of the glue or tape you use for reapplying your fake nails matters a lot. Cheap products can cause the nails to lift or fall off prematurely. Invest in a good-quality nail glue for a secure hold.
Pro Tips for Getting the Most Out of Your Fake Nails
Reusing fake nails is a great way to save money, but there are a few ways you can get even more mileage out of them. Here are some tips that have worked for me:
- Store Your Nails Properly
After cleaning your nails, store them in a cool, dry place. Avoid leaving them in direct sunlight or a hot environment, as this can cause them to warp or lose their shape. - Reapply Only When Necessary
It’s tempting to reuse nails over and over, but if you notice they’re becoming worn down or the adhesive is weakening, it’s time to retire them. Overuse can lead to poor results and a higher risk of damaging your natural nails. - Try Different Designs for Variety
One of the best things about fake nails is that you can experiment with different styles and designs. Even if you’re reusing the same set, you can repaint them or add new designs to keep things fresh.
Conclusion
Reusing fake nails is not only an environmentally friendly option, but it’s also a great way to extend the life of your nails and save money. By following the right steps for removal, cleaning, and application, you can make sure your nails stay looking fresh and secure for every use.
If you’ve never tried reusing your fake nails before, give it a shot! I promise, it’s totally worth the effort, and you’ll get much more out of your nail investments.
If you found this guide helpful, share it with your friends who love their fake nails! Let’s help others save money and reduce waste while still looking fabulous. Happy reusing!
FAQs About Reusing Fake Nails
Can I reuse press-on nails multiple times?
Yes, you can reuse press-on nails, but make sure they are in good condition. Clean them properly and inspect them for cracks before reapplying.
How long can reused fake nails last?
Reused fake nails can last anywhere from a few days to a couple of weeks, depending on how well they were applied and how much wear they get.
How do I avoid damaging my natural nails when removing fake nails?
Be gentle when removing fake nails and avoid pulling them off. Soak them in warm, soapy water or acetone to loosen the adhesive before carefully prying them off.