Fake nails are easy to collect without meaning to. A set may be the wrong size, a few pieces may remain after a manicure, or an older design may no longer suit your style even though the plastic tips still look clean and decorative. Because each nail is small, glossy, and already shaped, it can work much like a bead, tile, or miniature embellishment in a simple craft project.
I like reuse ideas that make sense with the material rather than forcing it into an elaborate project. Press-on nails are lightweight and visually varied, so they are best used as surface decoration on small objects. A plain hair clip, key ring, frame, plant pot, or glass holder can take on a completely different look with a few carefully arranged nail tips.
These ideas are intended for loose artificial nails that are clean, dry, and no longer needed for wear. Do not pull attached nails from your natural nails for crafting, and do not reuse pieces with blood, skin, fungus, strong odour, or unknown contamination. When an old nail cannot be cleaned safely, discard it rather than turning a hygiene problem into a decoration.
Prepare the Nail Tips Before Crafting
Sort the fake nails by size, colour, curve, and condition. Remove old adhesive tabs or glue residue as carefully as possible, then wash reusable plastic tips with mild soap and water and dry them fully. Strong chemical removers may cloud, weaken, or dissolve some plastics, so test any cleaning method on one unwanted piece first.
· Use only loose, clean artificial nails that are no longer being worn.
· Discard cracked pieces, sharp fragments, and nails with biological residue or unknown contamination.
· File rough edges lightly with a fine nail file, keeping the curved front smooth.
· Arrange the full design before gluing because the curved shapes can create unexpected gaps.
· Use adhesive suited to both the fake nail material and the base object, and follow its safety instructions.
· Work in a ventilated area when using strong craft adhesive, and protect the table from drips.
· Keep loose nail tips and small decorations away from young children and pets.
Decorate a Plain Hair Clip With Fake Nails
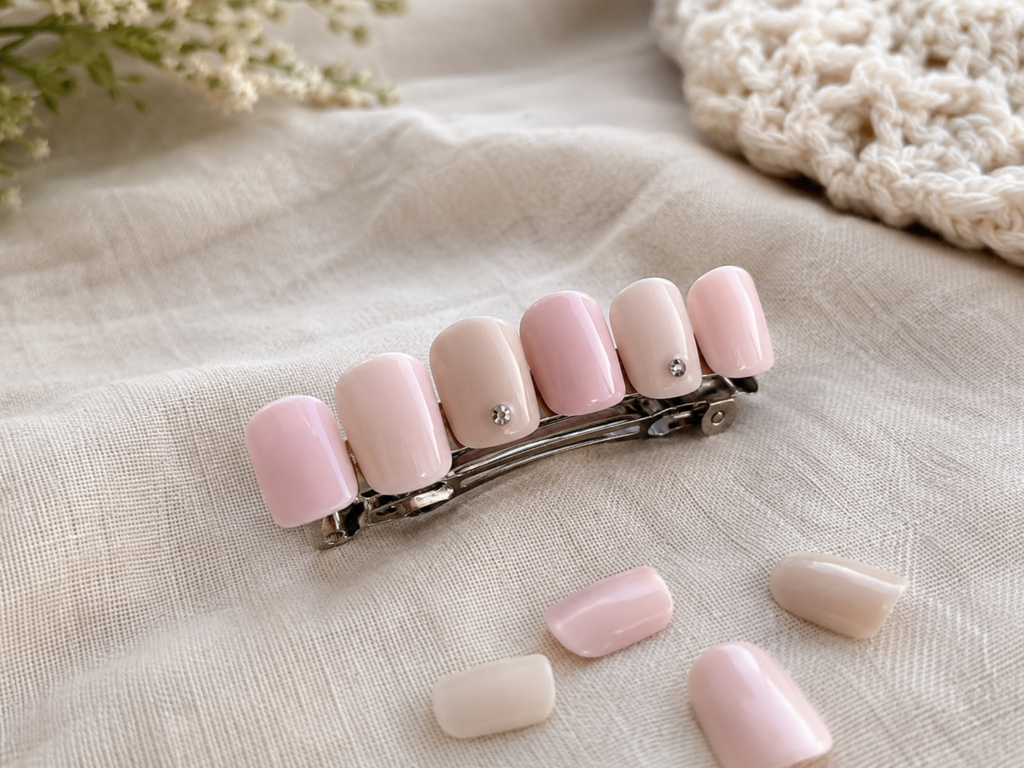
A wide barrette provides a simple base because the fake nails can sit in a neat row without needing complicated drilling or wirework. Short and medium tips work best; very long nails may catch in hair or extend beyond the clip. The generated design uses soft pink and neutral shades with only a few small rhinestones, which keeps the finished accessory easy to wear.
The clip still needs to open and close freely. That means the nail tips should stay on the upper decorative plate rather than covering the hinge, spring, clasp, or underside that touches the hair.
Materials and Tools
· Wide metal or plastic hair barrette with a flat top
· Five to eight clean fake nails in similar lengths
· Fine nail file or small sanding block
· Strong craft adhesive suitable for plastic and metal
· Tweezers or a wooden stick for placing pieces
· Optional small flat-back rhinestones
· Paper and pencil for testing the colour order
Steps to Decorate a Hair Clip
1. Plan the row before adding adhesive. Place the closed barrette on the table and arrange the nail tips across its flat upper surface. Keep the narrower ends facing the same direction and move the pieces until the widths feel balanced. I don’t think every shade needs to match, but the overall row should look deliberate rather than random.
2. Prepare the contact points. Lightly file the underside of each nail where it will touch the clip so the glossy surface becomes slightly less slippery. Clean away the dust and check that no nail overlaps the hinge or closing mechanism. If the clip is very curved, use fewer pieces rather than forcing every gap to disappear.
3. Glue one nail at a time. Apply a small amount of suitable adhesive to the prepared area, press the nail into position, and hold or support it according to the adhesive instructions. Continue across the clip while checking the alignment from the front and side. Too much glue can squeeze out and leave a cloudy edge, so restraint helps here.
4. Let the accessory cure before testing it. Once the adhesive has set fully, open and close the clip several times and run a finger carefully along the edges. Remove any loose rhinestone or nail tip before wearing it. A simpler version can use three larger tips in the centre instead of covering the whole barrette.
Make a Fake Nail Charm Keychain
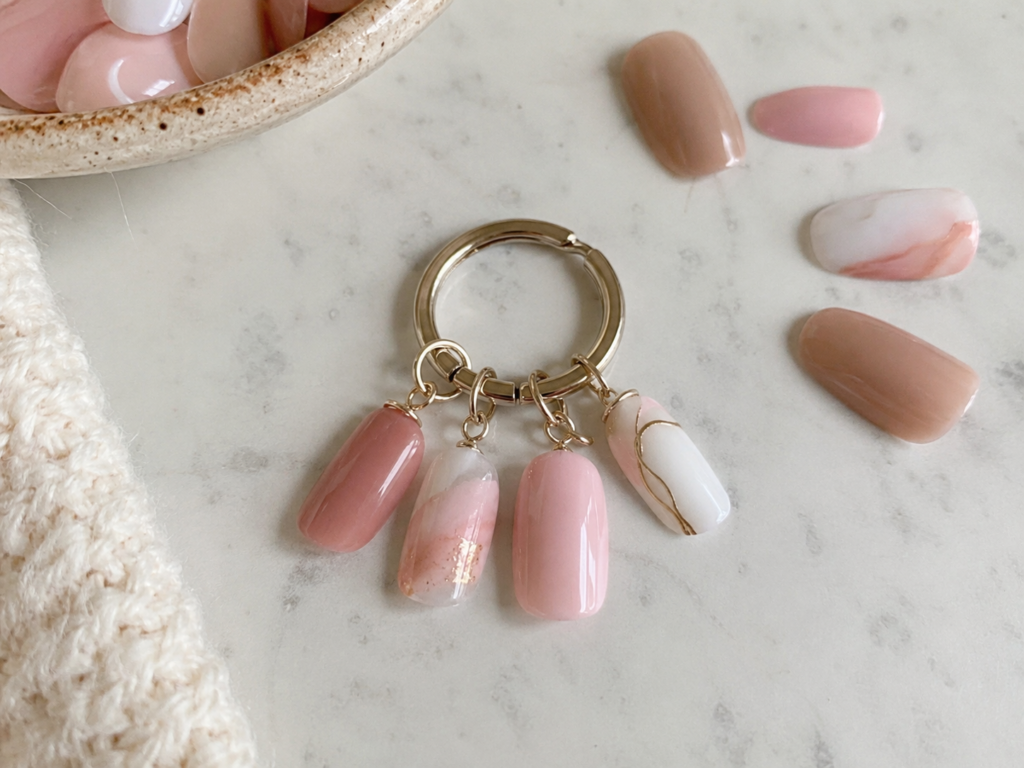
A charm keychain is useful when only a few attractive nails remain from different sets. The curved shapes hang like small tags, and each tip can keep its original colour or decoration. This project involves drilling tiny holes, so it needs more care than gluing nails to a flat surface. Shorter nails are easier to control and less likely to snap against keys.
Materials and Tools
· Four or five clean fake nails
· Key ring with a short chain
· Small jump rings
· Hand drill, pin vise, or another controlled small-hole tool
· Fine file or sandpaper
· Jewellery pliers
· Scrap wood and eye protection
Steps to Make a Nail Charm Keychain
1. Choose the strongest tips and mark the holes. Avoid cracked nails or pieces with very thin upper edges. Place a small pencil dot near the narrow end of each nail, leaving enough plastic around it so the hole will not tear out. Arrange the colours beside the key ring before drilling so you know how many charms are actually needed.
2. Drill slowly on a supported surface. Place the nail on scrap wood with the curved side facing upward, wear eye protection, and make a small pilot hole using a hand-controlled tool. Do not hold the nail in your fingers while drilling. Then smooth the hole and any rough edge lightly with a fine file.
3. Attach the jump rings. Open each ring sideways with jewellery pliers, pass it through the drilled hole, and connect it to the keychain. Close the ring firmly so the ends meet without a gap. Add the charms one at a time and check that they can move without rubbing sharply against one another.
4. Test the finished keychain gently. Hang it from a bag zip or use it with lightweight keys first, then watch for cracks around the holes. I’d keep the number of charms modest because too many plastic tips can become noisy and tangled. For an easier no-drill version, glue one nail to a flat pendant blank made for keychains.
Create a Fake Nail Border on a Photo Frame
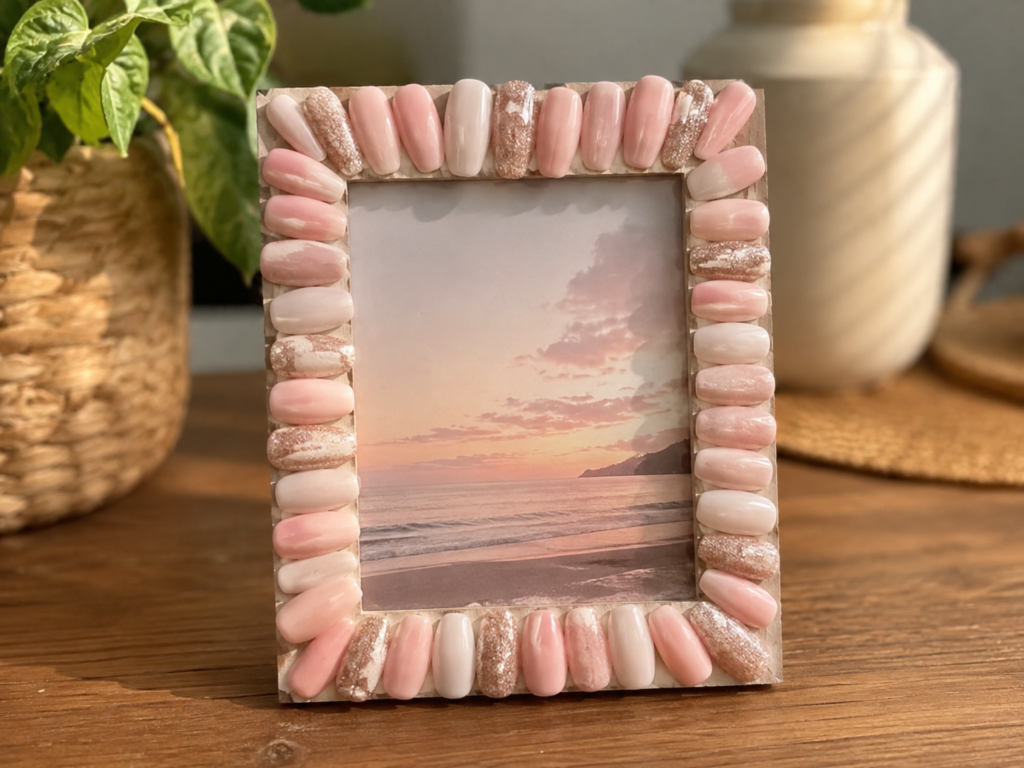
A basic frame gives many leftover nails one clear purpose. The straight edges make arranging easier, while the mix of pink, cream, and glitter tips creates a tiled border. A lightweight tabletop frame is better than a heavily decorated wall frame because the added plastic and adhesive can change the balance.
This idea works best when the nails fit within the frame border and do not cover the glass opening, stand, or clips at the back. If the frame has a narrow border, use smaller nails or decorate only the top and bottom.
Materials and Tools
· Plain wood, MDF, or sturdy plastic photo frame
· Enough clean fake nails to cover the chosen edges
· Ruler and pencil
· Fine file or sanding block
· Craft adhesive suitable for the frame material
· Tweezers or placement stick
· Optional painter’s tape to mark a straight inner boundary
Steps to Decorate a Photo Frame
1. Remove the glass and photograph before working. Clean the frame, repair loose corners, and place painter’s tape along the inner edge if you need a clear boundary. Then arrange the fake nails around all four sides without glue. Begin at the corners because those areas determine whether the rows will meet neatly.
2. Adjust the layout instead of cutting too many pieces. Mix narrow and wide nails to fill the available space, or leave small even gaps between them. Lightly file the underside contact areas and any rough edges. I know it can feel tempting to pack every space, but a consistent gap often looks better than one badly trimmed nail.
3. Glue the border in short sections. Work along one side at a time, using a small amount of adhesive under each nail. Keep checking that the tips stay outside the photo opening and do not lean over the outer edge. Support curved nails until the adhesive begins to hold, then move to the next section.
4. Allow the frame to cure flat. Reinstall the glass and photograph only after the adhesive has set and any fumes have cleared. Check that the stand remains stable and that no loose piece can fall. A beginner-friendly version can decorate only the four corners with pairs of matching nails.
Trim a Small Plant Pot With Fake Nails
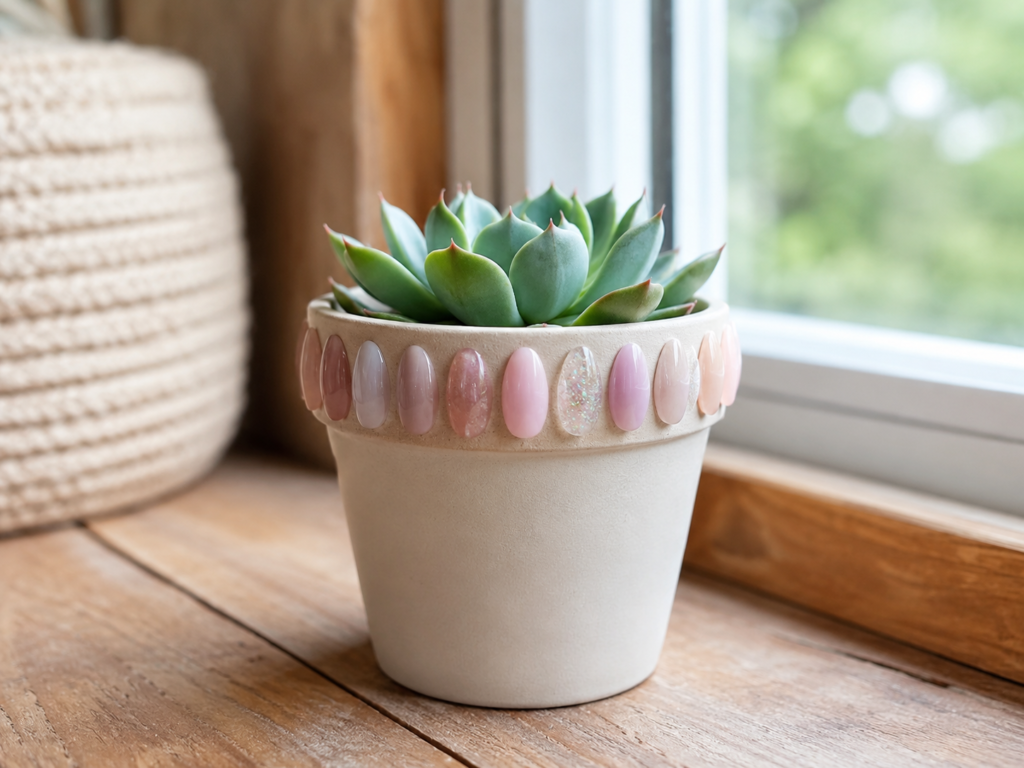
A row of fake nails around the upper part of a small pot creates a repeating scalloped effect without covering the whole container. The design is easiest on a smooth indoor cachepot that holds a separate nursery pot. That way, the decorated outer pot does not need to sit in water or receive soil directly.
Moisture is the main concern. Adhesive and artificial nails may loosen if they are soaked repeatedly, so keep the decoration above the water line and wipe splashes promptly.
Materials and Tools
· Small smooth cachepot or decorative plant pot
· Clean fake nails in coordinating colours
· Flexible adhesive suitable for plastic and the pot surface
· Ruler or paper strip for spacing
· Fine file
· Cloth and mild cleaner
· Optional removable nursery pot with succulent
Steps to Trim a Small Plant Pot
1. Choose the pot and test the spacing. Clean and dry the outer surface, then wrap a paper strip around the area where the nails will sit. Arrange the tips on the strip first to estimate how many are needed. Keep them in a single row and leave the drainage area, base, and inner rim clear.
2. Prepare the nail tips and mark a guide line. Lightly file the undersides where they will touch the pot. Use small pencil marks or low-tack tape to create a level band around the pot. If the pot curves sharply, use shorter nails or slightly wider gaps rather than pressing rigid tips against the surface.
3. Attach the nails gradually. Apply adhesive to one piece, press it against the pot, and support it until it stays in position. Continue around the pot while checking the row from several angles. Place glitter or patterned tips at intervals so they look like accents instead of accidental leftovers.
4. Keep the finished pot dry while it cures, then add the plant in a separate inner pot. Water the plant away from the decorated container when possible and wipe moisture from the nail band. For me, one row is enough; covering the full pot would make watering and cleaning much more difficult.
Decorate a Glass Candle Holder With Nail Tips
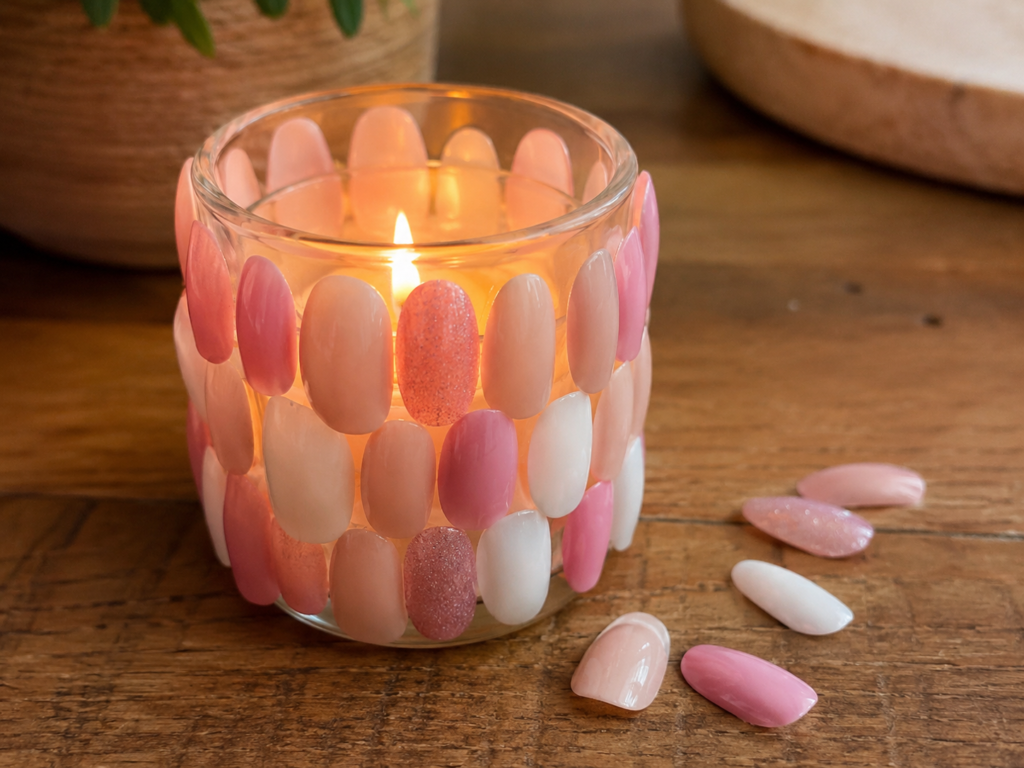
A clear glass holder makes translucent fake nails look like small coloured tiles. The warm light in the generated photograph brings out the pink and cream tones, but the safest version uses a battery-operated LED candle rather than an open flame. Plastic nail tips and craft adhesive should not be exposed to direct flame or high heat.
Keep the nails on the outside of a sturdy holder and leave space around the rim. This project is decorative only; it should never be used for food, drinks, or a candle that becomes hot enough to soften the plastic or adhesive.
Materials and Tools
· Thick glass votive holder or small glass jar
· Clean fake nails in translucent and opaque colours
· Clear adhesive suitable for glass and plastic
· Battery-operated LED tealight
· Rubbing alcohol for cleaning the outer glass, if suitable
· Paper strip and pencil for planning rows
· Protective gloves if recommended for the adhesive
Steps to Decorate a Candle Holder
1. Clean the outside of the glass and plan the pattern. Remove dust and grease, dry the holder fully, and wrap a paper strip around it to test the row length. Arrange the nail tips by colour before gluing. Leave the upper rim, base, and any area needed for gripping completely clear.
2. Prepare only the contact area of each nail. Lightly roughen the small point that will touch the glass, then wipe away the dust. Do not try to flatten the whole curved nail because excessive filing can weaken it. Use a mix of sizes so the pattern follows the shape of the holder naturally.
3. Glue the nails in one row at a time. Begin at the lower section, leaving a small gap above the base, and support each piece until it holds. Stagger the next row if you want a mosaic effect. Then inspect the holder for adhesive drips, sharp projections, or pieces that lean too far outward.
4. Let the decoration cure fully and use only a cool LED light inside. Check the holder during the first use and stop if the glass or plastic becomes warm. One detail I wouldn’t compromise on is flame safety: never place a real flame close to plastic nails, glue, ribbon, or other craft materials.
Fake Nail Craft Problems That Can Spoil the Finished Piece
Using dirty or previously contaminated nails is not worth the risk. A decorative finish cannot make an unhygienic item suitable for reuse. Choose only loose plastic tips that can be cleaned confidently, and discard anything with biological residue, odour, or damage.
Skipping the layout stage often creates uneven spacing, especially on frames and round pots. Arrange all the nails before adding glue, photograph the layout if helpful, and start from corners or centre points rather than guessing as you go.
Applying too much adhesive can cloud transparent tips, squeeze onto visible surfaces, and create hard ridges. Use a small controlled amount and support the piece while it sets instead of relying on a thick glue layer.
Ignoring the curve of the nail is another common problem. A rigid curved tip may touch a flat object at only one point, which weakens the bond. Lightly prepare the contact area, select a flexible adhesive where suitable, or choose a base with a similar curve.
Placing nails over moving parts can ruin the function of a hair clip or keychain. Keep hinges, clasps, springs, jump rings, photo-frame stands, and pot rims free so the original object still works properly.
Using plastic decorations near open flames or strong heat is unsafe. The candle-holder idea should use a cool battery-operated light, and decorated objects should stay away from cookers, heaters, and direct flame.
Finally, overdecorating can make small objects difficult to clean or handle. I’d rather use one neat row of secure nails than several crowded layers that catch, loosen, or hide the shape of the base item.
Frequently Asked Questions
Can used press-on nails be reused for crafts?
They can be considered only when they are loose, washable plastic tips with no biological residue, strong odour, or structural damage. Nails removed after infection, injury, or unknown use should be discarded rather than crafted with.
How do I remove old glue from fake nails?
Begin with gentle mechanical removal, such as peeling an adhesive tab or lightly filing residue from the underside. Strong solvents may damage some plastics or finishes, so test any cleaner on one unwanted tip and follow the material guidance.
Which project is easiest for a beginner?
The photo frame and plant pot trim are the simplest because they mainly involve arranging and gluing. A drilled keychain needs more control and safety equipment, while the hair clip requires careful placement around moving parts.
What glue works for fake nail crafts?
Use an adhesive labelled for the artificial nail material and the base surface, such as plastic-to-metal, plastic-to-glass, or plastic-to-wood. Follow the product instructions, work with ventilation where required, and avoid guessing about compatibility.
Can I cut fake nails into smaller shapes?
Some artificial nails can be trimmed with suitable clippers or craft tools, but brittle pieces may crack or send fragments outward. Wear eye protection, support the piece, and smooth every cut edge before using it.
Can children make these projects?
Because artificial nails are small and some methods involve strong adhesive, drilling, sharp tools, or tiny jewellery findings, adult supervision is necessary. The pieces should also be kept away from young children and pets because they may be swallowed.
Can I use a real candle in the decorated holder?
No. Use a cool battery-operated LED light instead. Plastic nails and craft adhesives should not be placed near open flame or high heat.
Give Leftover Nail Tips a Small, Useful Role
The most practical way to learn how to reuse fake nails is to treat them as lightweight decorative pieces rather than as a material that must carry weight. Their colour, curve, and glossy finish work best on small surfaces where careful spacing can make an ordinary object feel considered.
Begin with the easiest base you already own. A plain frame or plant pot needs little more than cleaning, arranging, and secure gluing. Once you understand how the curved tips sit against a surface, you can try a hair clip or a drilled charm keychain with more confidence.
Which leftover set would you use first: a few matching nails for one neat row, or a mixed collection for a colourful frame border?