Reusable cloth face masks often remain in drawers long after they are needed regularly. Some still have attractive fabric, strong seams, soft lining, or useful elastic, yet the shape is so specific that it can be difficult to see what else the material could become. I don’t think a clean cloth mask needs to be discarded simply because it no longer serves its first purpose.
I enjoy finding practical second uses for small household textiles. A cloth mask already contains several helpful parts: layered fabric, stitched edges, nose-wire channels, elastic loops, pleats, and sometimes a shaped centre seam. Those details can reduce the amount of new material needed for a small sewing project.
The important word here is clean. These ideas are for washable reusable cloth masks that have been thoroughly laundered and are no longer being used for protection.
Do not repurpose visibly soiled masks, damaged filter materials, or disposable medical-style masks for personal accessories, household storage, food use, or children’s crafts. When there is any doubt about hygiene or material safety, discard the mask according to local guidance instead.
Prepare Retired Cloth Masks Safely
Wash the masks using the care method suitable for their fabric, dry them completely, and inspect both sides under good light. Remove detachable filters, metal nose pieces, plastic adjusters, and damaged elastic before cutting. If the lining is stained, weakened, or difficult to clean, do not use it.
· Use only clean, washable cloth masks made from ordinary fabric that remains strong after laundering.
· Do not reuse disposable surgical masks, respirators, filters, or masks exposed to illness, chemicals, smoke, or unknown contamination.
· Remove metal nose wires before cutting so scissors and sewing-machine needles do not strike them.
· Separate usable outer fabric, lining, elastic loops, and binding rather than assuming every layer suits the same project.
· Press washable fabric lightly if needed, but avoid heat settings that may damage elastic or synthetic layers.
· Keep repurposed mask fabric away from food-contact uses and projects intended to provide medical protection.
Make a Soft Sleeve for Glasses
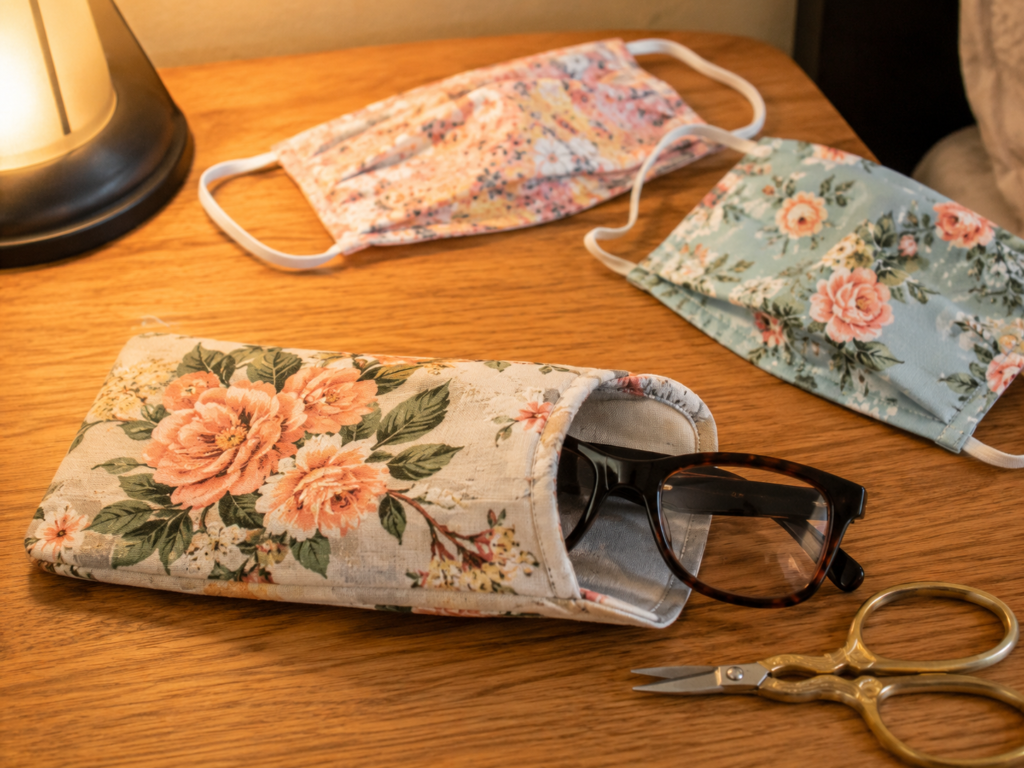
A shaped cloth mask can become a glasses sleeve with surprisingly little cutting. The curved centre seam may already create room for the folded frames, while the lining adds softness. This is a storage sleeve rather than a hard protective case, so it suits reading glasses kept inside a drawer, handbag compartment, or bedside basket.
Materials and Tools
· One or two clean shaped cloth masks
· Soft lining fabric if the original lining feels rough
· Thread, pins or clips
· Fabric scissors
· Sewing machine or hand-sewing needle
· Optional thin batting scrap
· Optional small snap, loop, or fabric tab
Steps to Make a Soft Glasses Sleeve
1. Remove the parts that no longer help the new design. Cut away the ear loops, nose wire, and bulky side adjusters, then open the mask flat. Place the glasses on the fabric and check whether the existing curved shape provides enough width and length. Leave room around the frames so they slide in without catching.
2. Create a soft inner layer. Keep the original lining only if it is clean, smooth, and securely attached. Otherwise, cut a fresh lining piece to match the outer shape. A thin batting layer can add cushioning, but avoid thick padding because it may make the sleeve difficult to close and carry.
3. Sew the sleeve shape. Place the outer and lining layers right sides together, stitch around the top opening, and turn them so the finished edge sits neatly. Fold the piece into a sleeve, align the sides, and sew the side and lower edges. Then trim bulky seam areas and turn the sleeve right side out.
4. Test the fit before adding a closure. Slide the glasses inside and confirm that the arms do not press against the seams. Add a small snap or loop only when needed. I’d rather keep the opening simple than add a closure that could scratch the lenses or make the sleeve awkward to use.
For sunglasses or larger frames, join two masks to make a wider panel. A small cleaning cloth can also be stored inside, provided the sleeve remains roomy enough to avoid pressure on the glasses.
Sew Small Lavender Sachets From Mask Panels
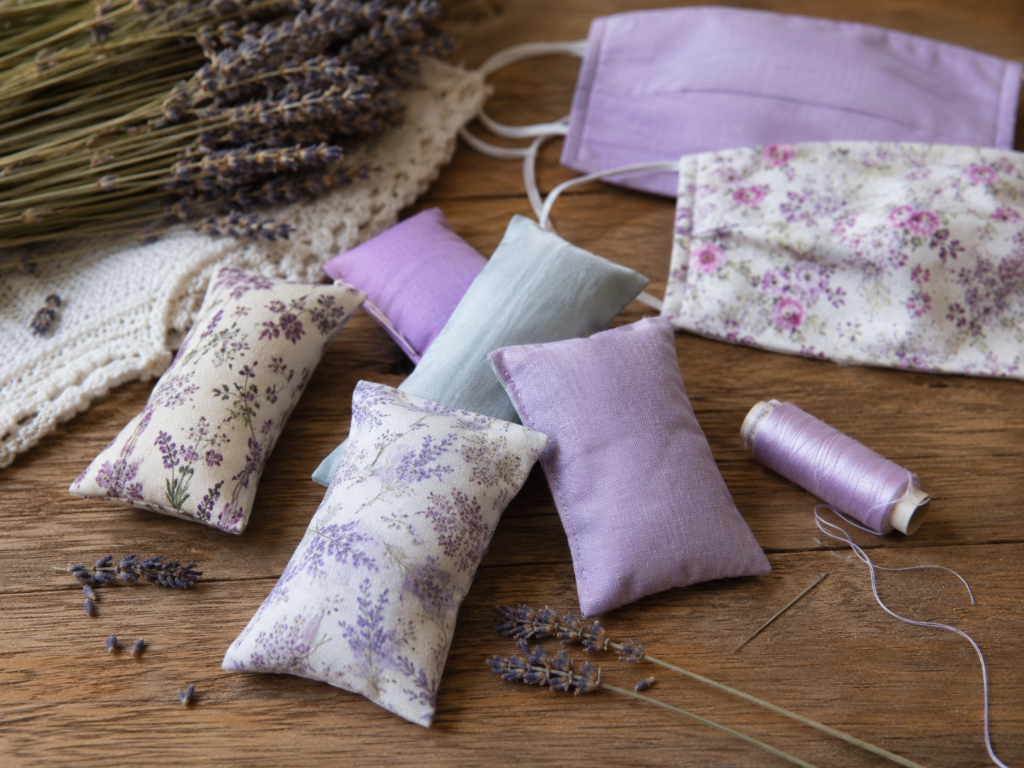
Lavender sachets are one of the easiest projects because they need only small fabric sections and short seams. Pleated masks can be opened and cut into simple rectangles, while shaped masks may provide curved pieces that become narrow pillow-like sachets. These belong in dry drawers, wardrobes, or gift baskets rather than damp rooms.
Materials and Tools
· Clean reusable cloth mask fabric
· Dried lavender or another dry sachet filling
· Thread and hand-sewing needle or sewing machine
· Fabric scissors
· Pins or clips
· Small spoon or paper funnel
· Optional ribbon made from mask ties or another scrap
Steps to Sew Lavender Sachets
1. Open the mask and choose the strongest fabric sections. Remove wires, elastic, and thick binding, then press the material flat. Cut pairs of small rectangles or squares from areas without needle damage. If the fabric is thin, keep two layers together or add a plain backing piece.
2. Sew each sachet almost closed. Place two pieces right sides together and stitch around the edges, leaving a small turning gap. Clip the corners lightly, turn the shape right side out, and press it. Keep the opening wide enough for filling but small enough to close neatly by hand.
3. Add a modest amount of dry filling. Spoon in dried lavender until the sachet feels softly padded rather than tightly packed. Overfilling places pressure on the reused seams and makes the shape look stiff. Then fold the opening edges inward and close them with small, secure stitches.
4. Finish and store the sachets correctly. Tie on a narrow ribbon if you want a hanging loop, or leave the sachet plain for drawers. Keep it dry and squeeze it lightly from time to time to release the scent. I know it can feel tempting to add extra filling, but more lavender does not automatically create a better-looking sachet.
A scent-free version can be filled lightly with clean fabric trimmings and used as a decorative mini pillow. Avoid fillings that may leak oil, attract moisture, or cause irritation.
Convert a Flat Mask Into a Cable Organizer
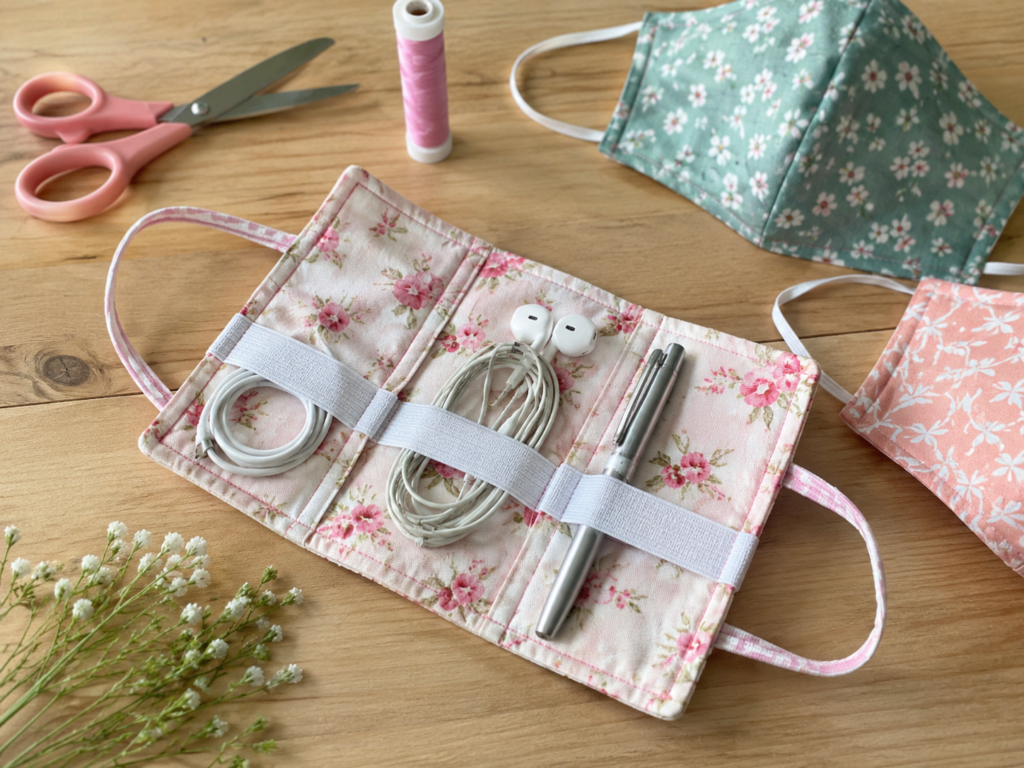
A flat pleated mask can become a cable organizer because its rectangular shape already resembles a small fabric roll. Reused elastic can hold earbuds, a charging cable, or a pen in place, while the original ties may work as a wraparound closure. This project is useful for a desk drawer or travel bag, but it should carry only cool, unplugged accessories.
Materials and Tools
· One or two clean flat cloth masks
· Usable elastic loops or narrow elastic from another source
· Plain backing or lining fabric
· Thread, pins or clips
· Fabric scissors and ruler
· Sewing machine or hand-sewing needle
· Optional thin interfacing
Steps to Create a Cable Organizer
1. Open the mask into the largest flat panel possible. Remove the nose wire and side binding, then release the pleats if they create too much bulk. Square the edges and decide whether the original fabric will form the outside or inside. Cut a matching backing piece to create a stable rectangular organizer.
2. Plan the holders around the actual accessories. Lay the unplugged cables, earbuds, and pen across the panel, then position short elastic sections over them. Leave enough ease for each item to slide underneath without stretching the elastic to its limit. Mark the attachment points before removing the accessories.
3. Sew the elastic and assemble the panel. Stitch each elastic section securely at its marked points, creating separate loops for different items. Then place the outer and backing fabrics right sides together, sew around them while leaving a turning gap, and turn the organizer right side out. Topstitch around the edge to strengthen the shape.
4. Add a closure and test the roll. Reuse a long mask tie, sew on a ribbon, or add a small elastic loop that wraps around the rolled organizer. Fill the loops, roll the panel without forcing the cables, and adjust any holder that feels too tight. Never store hot chargers or connected electrical items inside it.
A simpler version can hold only earbuds and one charging cable. For larger plugs, use fabric pockets instead of tight elastic loops so the organizer remains easy to roll.
Make a Small Drawstring Pouch
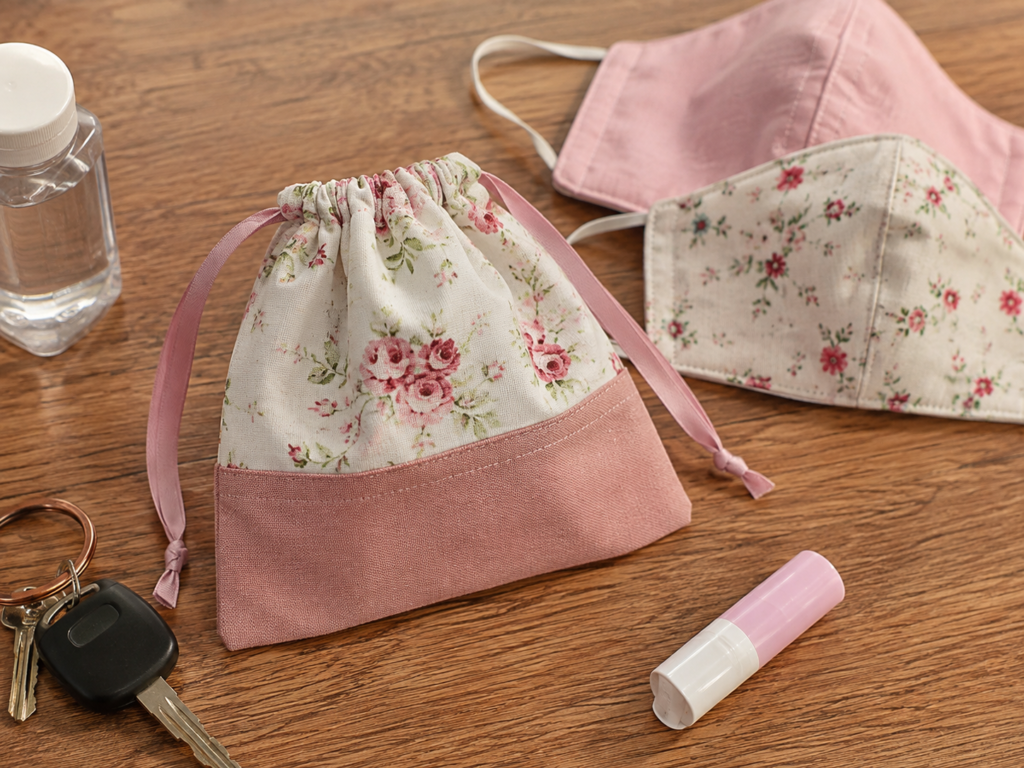
A drawstring pouch is a practical choice when mask ties or soft elastic remain usable. The fabric can form the pouch body, while the ties become the drawstrings. A contrasting lower panel is useful when the mask pieces are too short on their own, and it also makes the project look deliberate rather than pieced together only from necessity.
Materials and Tools
· Two or more clean reusable cloth masks
· Long fabric ties, ribbon, or soft cord
· Optional coordinating fabric scrap for the lower panel
· Thread, pins or clips
· Fabric scissors and iron
· Safety pin or bodkin for threading the drawstring
· Sewing machine or hand-sewing needle
Steps to Make a Drawstring Pouch
1. Prepare two pouch panels. Remove wires, elastic, and damaged edges, then cut two matching pieces from the masks. Join a plain fabric strip to the lower edge when extra height is needed. Press the joining seams and trim both panels to the same size before building the casing.
2. Create the drawstring channels. Fold the top edge of each panel inward twice to hide the raw edge, leaving a channel wide enough for the chosen ribbon or tie. Stitch along the lower fold while keeping the side openings clear. Check that the reclaimed ties can slide through without catching.
3. Sew the pouch body. Place the two panels right sides together and stitch the side and lower edges, stopping below the casing openings. Reinforce the upper side seams because they take pressure when the pouch is pulled closed. Turn the pouch right side out and press the corners gently.
4. Thread and test the drawstrings. Feed one tie through both channels from one side, then repeat from the opposite side for a double-pull closure. Knot the ends and fill the pouch with lightweight items. The part I would keep simple is the decoration; the gathers and mixed fabric already give the pouch enough detail.
One long ribbon can create a single drawstring when two ties are unavailable. The pouch can hold hair accessories, small toiletries, game pieces, or sewing clips, but it is not suitable for food or wet items.
Join Several Masks Into a Soft Storage Basket
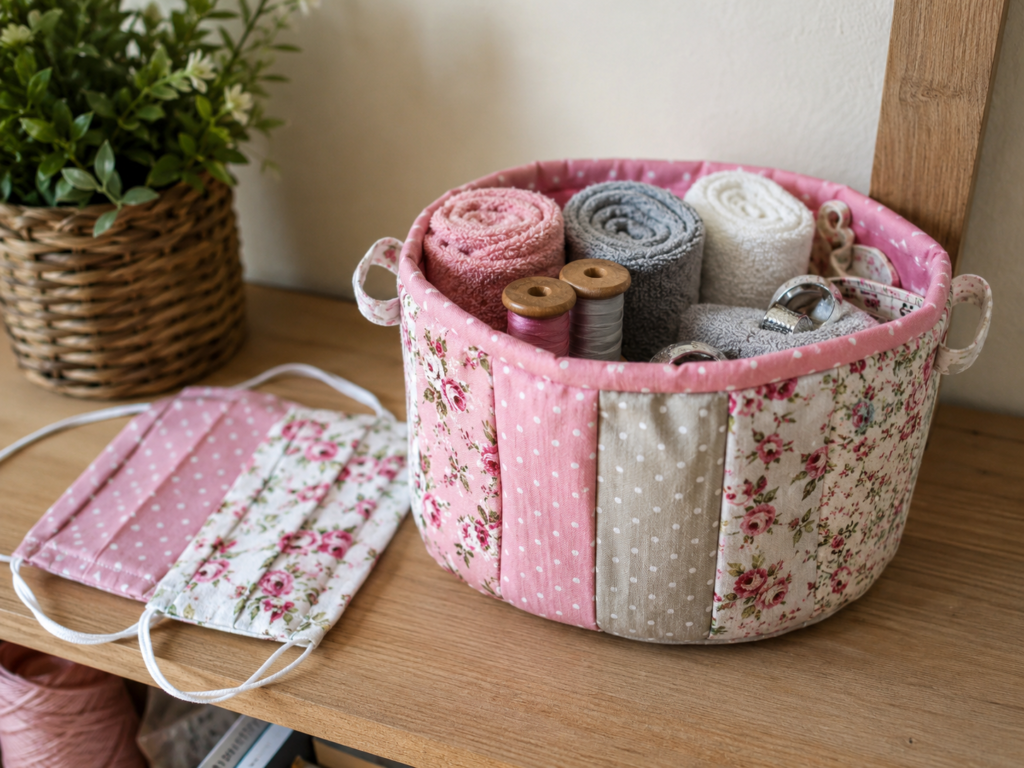
A soft basket uses more material than the other projects, which makes it helpful when several masks in similar colours are available. Individual mask panels can become vertical sections around the outside, while plain fabric or interfacing provides the structure. The finished basket is best for lightweight items such as rolled cloths, sewing supplies, socks, or small accessories.
Materials and Tools
· Several clean cloth masks in coordinating colours
· Plain lining fabric
· Medium interfacing, felt, or another soft stabilizer
· Thread, pins or clips
· Fabric scissors, ruler, and iron
· Sewing machine
· Optional fabric loops for handles
Steps to Sew a Soft Storage Basket
1. Take the masks apart and create larger patchwork panels. Remove all wires and hardware, open the seams, and press the usable fabric. Join the pieces into one long outer strip and one base panel, arranging colours before sewing. Trim the completed patchwork so the upper and lower edges remain straight.
2. Add structure before forming the basket. Attach interfacing or felt to the wrong side of the outer panels, then cut matching lining pieces. The stabilizer should help the basket stand without making the seams difficult to turn. If the mask fabric is very thin, use a plain backing behind it before adding the interfacing.
3. Sew the outer basket and lining separately. Join the ends of the long strip to form a loop, then attach the base slowly, clipping or easing the corners as needed. Repeat with the lining but leave a turning gap. Add small fabric handles to the outer basket before joining the top edges.
4. Join, turn, and shape the basket. Place the outer basket and lining right sides together, sew around the upper edge, and turn everything through the lining gap. Close the gap, push the lining inside, and topstitch the rim. Then fill the basket lightly and check whether the base needs an extra removable support board.
Beginners can make a square basket from four simple panels instead of a rounded one. Another easy option is to cover an existing cardboard box with joined mask fabric, which needs less structural sewing.
Face Mask Upcycling Choices That Can Make a Simple Project Unsafe
Using masks that are not suitable for reuse is the most serious mistake. Disposable masks, filters, damaged respirators, and cloth masks with uncertain contamination should not become household crafts. The fabric must be washable, fully clean, dry, and structurally sound.
Leaving a metal nose wire hidden inside the fabric can damage scissors or a sewing-machine needle. Feel along every seam and channel before cutting, then remove rigid inserts and plastic adjusters completely.
Treating reused mask fabric as if it were new food-safe material creates unnecessary risk. Keep these projects away from food storage, drink filters, kitchen strainers, and surfaces that contact food.
Making the projects too large for the available material often leads to weak piecing and distorted shapes. Add a plain coordinating fabric where needed instead of stretching small mask panels beyond their useful size.
Using worn elastic in a closure can cause the item to fail quickly. Test the elastic by stretching it gently; if it remains loose, cracks, or feels brittle, replace it rather than relying on it.
Forgetting the original needle holes can also weaken small pieces. Trim away heavily punctured side seams and place new stitching inside strong fabric rather than directly over damaged edges.
Finally, do not claim that a repurposed mask project still offers protective performance. Once cut, altered, or converted, the material is a craft textile only.
Frequently Asked Questions
Can disposable face masks be reused for these projects?
No. These projects are intended for thoroughly washed reusable cloth masks made from ordinary fabric. Disposable medical-style masks, respirators, and filter materials should not be converted into personal accessories or household storage.
How should I clean a cloth mask before cutting it?
Wash it according to the fabric care instructions, dry it completely, and inspect it for stains, damage, or odour. If it cannot be cleaned confidently, do not repurpose it.
Can I reuse the ear-loop elastic?
Yes, when it remains clean, flexible, and strong. Replace it if it has stretched permanently, become brittle, or causes the new item to close too tightly.
Which project is easiest for a beginner?
Lavender sachets and a simple drawstring pouch require the least complicated shaping. The zipper pouch and storage basket involve more layers and careful assembly.
Can I reuse a mask with a nose wire?
The fabric may be reusable after washing, but remove the wire before cutting or sewing. Check the entire upper channel because short wire ends may remain hidden inside.
Can these projects be washed later?
Most can be washed when all fabrics, interfacing, closures, and fillings are washable. Remove dried lavender or use a removable inner sachet before laundering a scented project.
Are these projects suitable for children?
A finished pouch or basket may be suitable with adult judgment, but remove wires, small adjusters, loose elastic, and other choking or snagging hazards. Keep needles, scissors, and unfinished pieces away from children.
Let Clean Cloth Masks Become Useful Fabric Again
Learning how to reuse face masks begins with separating safe cloth material from items that should simply be discarded. Once a washable mask has been cleaned, inspected, and stripped of wires or damaged elastic, its fabric can become a small but genuinely useful sewing material.
The easiest approach is to choose a project that respects the mask’s original size. A sachet needs only a small panel, a glasses sleeve can use the shaped curve, and a cable organizer can use the flat rectangle. Larger projects become manageable when several masks are joined with plain fabric rather than forced to provide every part.
Which retired cloth mask would you reuse first: one with enough fabric for a pouch, or a smaller piece that could become a simple sachet?