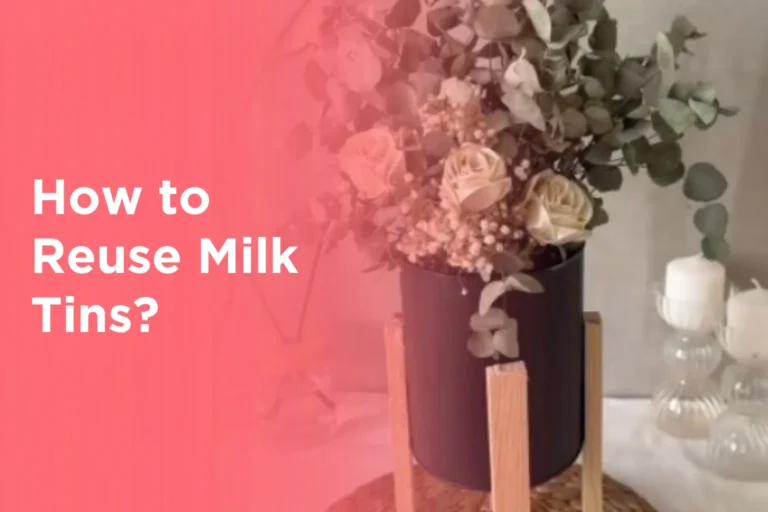
Young children are naturally drawn to the little things adults often throw away first: bottle caps, cardboard tubes, empty cartons, tins, paper scraps, and seed containers. That curiosity is exactly why reduce, reuse, recycle activities for preschoolers can feel so worthwhile. Instead of treating leftover materials as clutter, these projects turn them into something useful, playful, or surprisingly beautiful.
I always like preschool crafts that do more than fill a quiet half hour. The best ones build fine-motor skills, invite conversation, and help children notice that everyday objects can have another life before they reach the rubbish bin. A recycled item becomes easier to value when a child has sorted it, painted it, planted in it, or transformed it with their own hands.
What I especially like about the ideas below is that they balance learning with genuine fun. Some encourage sorting and observation, some lead into nature play, and others create something practical for the classroom or home. All of them keep the focus on simple materials, manageable steps, and the kind of mindful making preschoolers can understand.
Before You Start
A little preparation makes preschool recycling crafts much easier. Wash any bottles, cans, cartons, and plastic lids before bringing them to the table, and remove labels if they peel away easily. If a can has a sharp rim or a cut plastic container has rough edges, smooth or cover them before children handle the material.
I would also sort supplies into shallow trays before beginning. Preschoolers work more confidently when the materials are visible and easy to reach, especially if you separate bottle caps, cardboard pieces, glue, markers, seeds, and natural items such as leaves or twigs. That setup helps the activity stay calm instead of turning into a constant search for missing pieces.
Because several of these ideas use small items, keep close supervision in place and adjust for the children’s ages. Adults should handle any difficult cutting, hole-punching, or edge-trimming first, then let the children focus on the arranging, sticking, painting, planting, and exploring that make the project theirs.
Choose Materials Preschoolers Can Handle Confidently
The best recycled craft material is not simply whatever happens to be in the bin. It needs to be clean, sturdy enough for the activity, and comfortable for small hands. A thick cardboard tube is easier to paint than a crushed one, a broad plastic lid is easier to place than a tiny cap, and a smooth container is far more useful than one with a rough cut edge.
I would prepare a small selection rather than an enormous pile. Too many choices can make a preschool table feel busy before the activity has even begun. A tray with three or four dependable materials gives children enough freedom to make decisions while still helping them understand what each object can become.
Think about the way the material will behave once glue, paint, soil, or water is added. Thin paperboard may buckle under wet paint, a very light container may tip when used as a pencil holder, and some labels can peel away as soon as they get damp. A quick adult check at the start prevents a lot of mid-project frustration later.
Let Children Do the Parts That Carry the Learning
Adults naturally need to handle some preparation, especially cutting cartons, trimming sharp metal, or making holes for string. Even so, I would leave the meaningful decisions to the children whenever possible. Choosing colours, sorting caps, pressing down collage pieces, scooping soil, deciding where a twig belongs, or noticing which recycling bin matches an item are the moments where the learning actually happens.
It can feel tempting to fix crooked pieces or straighten every line, but preschool crafts rarely need that kind of correction. A slightly uneven rainbow or a caterpillar with different-sized painted sections still shows genuine planning and effort. The finished object should look like a child took part in making it, not like an adult quietly completed the difficult-looking bits after everyone went home.
That approach also makes the reuse message more personal. When children make the visible choices themselves, they are more likely to remember that the bottle cap, tube, carton, or tin had another possible use.
Set Up Cleanup as Part of the Activity
Recycled-material crafts can be surprisingly tidy if the cleanup is planned before the activity begins. Keep one tray for unused reusable pieces, one container for scraps that are genuinely finished, and a damp cloth or small cleanup area nearby for glue and paint. Children can help return bottle caps to a tub, place paper scraps in the correct basket, or brush loose soil back onto a tray.
This part is worth including because it reinforces the same reduce-and-reuse idea as the craft itself. A leftover green paper square may be useful tomorrow, while a soggy glue-covered scrap probably is not. Preschoolers do not need a complicated waste lesson, but they can begin to notice the difference between something that still has value and something that has reached the end of its use.
I also find that predictable cleanup makes the next activity easier. When children know where caps, crayons, brushes, and leftover paper belong, the table returns to order without the whole recycling theme disappearing into one large rubbish bag.
Teach Sorting Skills With a Preschool Recycling Station
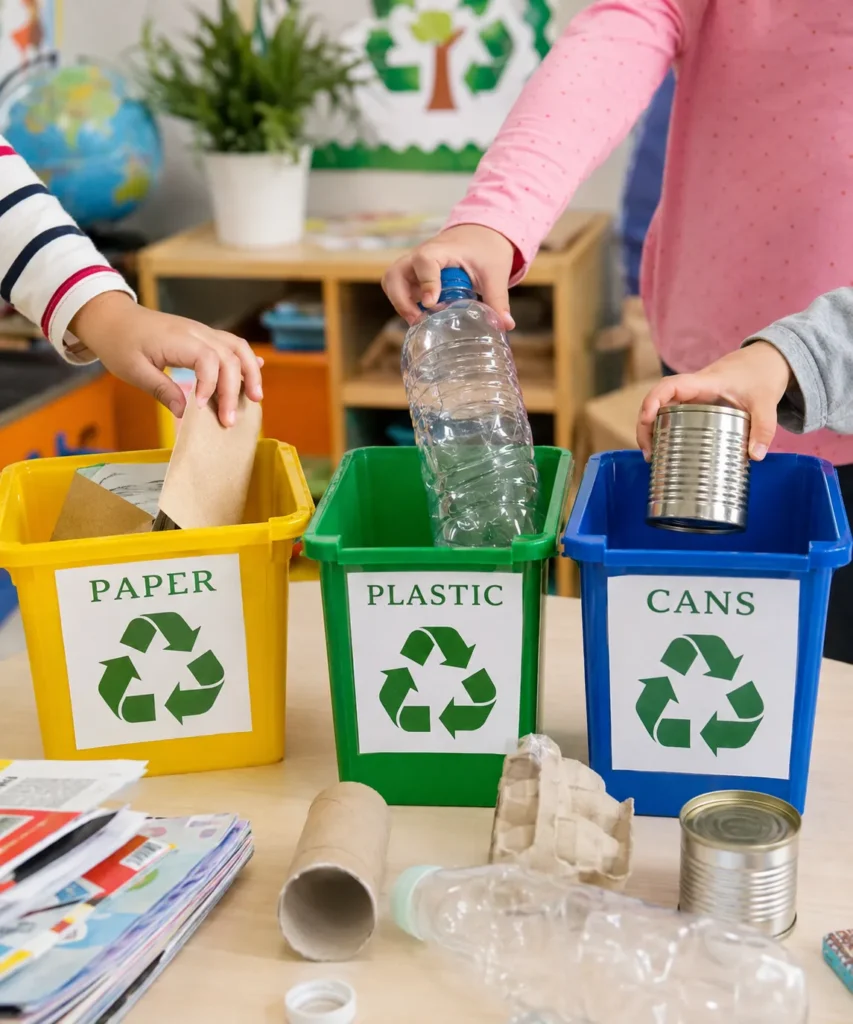
A recycling station is one of the clearest ways to introduce the basic idea of reduce, reuse, recycle activities for preschoolers. The coloured bins give children an immediate visual cue, while the familiar materials on the table make the lesson feel practical instead of abstract. Paper, plastic bottles, and cans are easy for young children to compare because the textures and shapes are so different.
This kind of activity works well in a classroom, at home, or even as part of a themed play corner. It encourages observation, matching, and early decision-making, but it also opens the door to bigger conversations. Children start noticing what items are made from, what can be used again, and why some objects belong together.
I also like that it can stay flexible. A very young child may simply match an object to the right bin, while an older preschooler can talk through the reason for the choice or help collect recyclable items during the week.
Why the Sorting Activity Works So Well at Preschool Age
Sorting gives young children a clear action with an immediate result. They pick up an object, notice something about it, and make a choice about where it belongs. That sequence supports early classification skills without needing worksheets or long explanations. The recycling theme simply gives the sorting a real-world purpose.
You can also build useful language around the objects. A child may describe a can as shiny, hard, round, or noisy; paper as bendy or soft; and a bottle as light or squeezable. Those sensory descriptions make the material categories easier to remember and keep the activity connected to what children can actually see and feel.
For a group that is new to sorting, I would model only a few examples and then step back. If every choice is corrected before the child has time to think, the activity becomes adult-led very quickly. A short question such as ‘What does this feel like?’ or ‘Which bin has another item like this?’ usually gives enough support.
Ways to Extend the Recycling Station Without Making It Harder
Once the children understand the basic categories, the station can become part of ordinary classroom routines. A small box beside the art table can collect clean card for future crafts, while the paper bin can receive fully used drawing sheets. Children begin to see that sorting is not only a special activity; it is something the room does every day.
At home, the same idea can be scaled down to two baskets and a handful of safe household items. You could also add a simple ‘use again’ tray for cardboard tubes, clean lids, or boxes that may become craft supplies. That small addition helps children understand that reuse can sometimes come before recycling.
If the group enjoys pretend play, turn the station into a mini recycling centre. Children can collect, sort, carry, and stack safe items while practising vocabulary. I would still keep the categories limited, because the fun comes from repeating a clear job rather than memorising every possible material type.
Materials and Tools
· Three sturdy bins or boxes, ideally in different colours.
· Large labels for paper, plastic, and cans, with simple symbols if helpful.
· A small mix of clean recyclable items such as cardboard, plastic bottles, and tins.
· A table or floor space wide enough for children to move around the bins.
· Optional picture cards if you want to extend the sorting activity.
A Practical Way to Recreate It
1. Prepare the station before children arrive. Set out the bins with clear labels and place a small collection of clean recyclable items in the middle of the table or on a mat. If any item has a sharp edge, replace it or prepare it safely in advance so children can sort without risk.
2. Introduce one material at a time. Start by showing children the difference between paper, plastic, and cans. Let them touch and compare the items, because preschoolers often understand the categories more easily when they can hold the objects instead of only hearing the words.
3. Invite the children to sort independently. Offer one item at a time for younger children, or let older preschoolers choose freely from the pile. Encourage them to say where the object belongs and why, but keep the tone light and exploratory rather than testing them.
4. Repeat and extend the lesson. Once the first round is finished, mix the items again and let the children try one more time. You can extend the activity by asking which items might be reused at home before being recycled, which makes the lesson feel more connected to everyday life.
The part I would keep especially simple is the first sorting round
Too many categories can overwhelm preschoolers quickly. I think three clear groups are enough at the beginning, and once that feels familiar, you can add more variety later.
Variations and Alternatives
· Use picture labels for pre-readers.
· Turn the station into a timed tidy-up game for a more active group.
· Add a “reuse” basket for items children might turn into crafts later in the week.
Make a Rainbow Bottle Cap Craft From Saved Lids
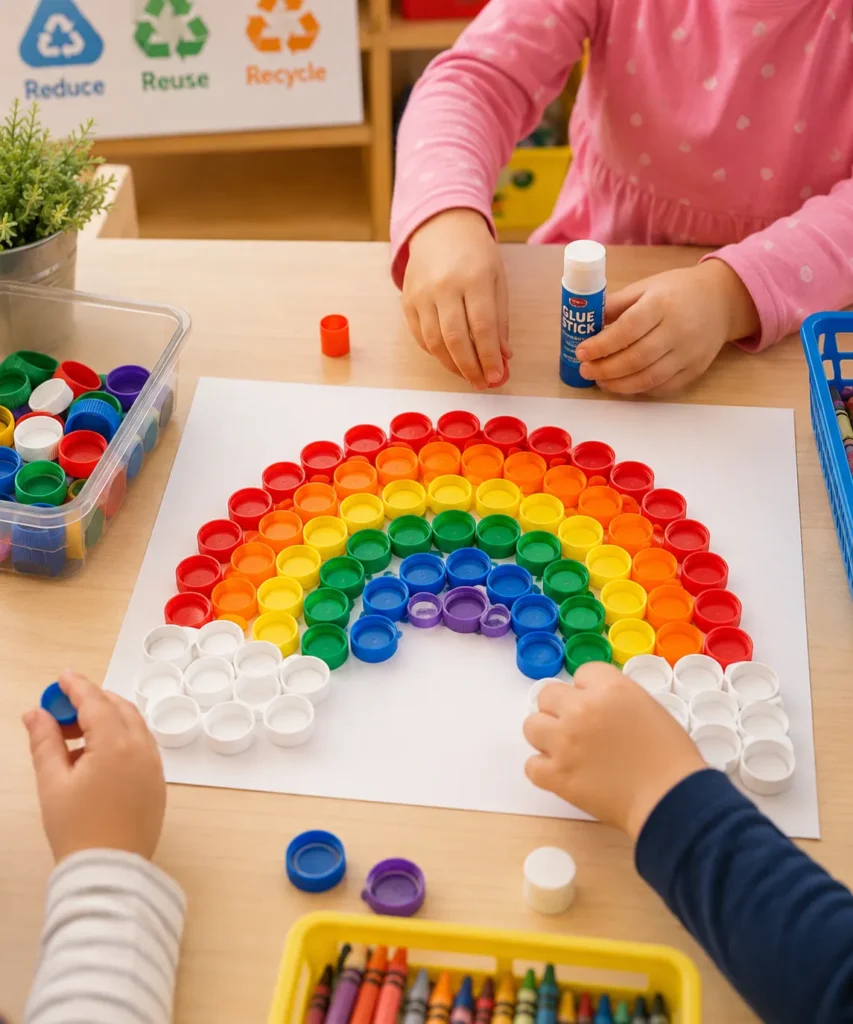
Bottle caps are one of the easiest materials to save for preschool crafts because they are colourful, sturdy, and satisfying for small hands to place. In this rainbow activity, the recycled lids become both the decoration and the structure of the picture, which gives children a strong sense of building something from simple leftovers.
The rainbow shape is especially useful because it supports several early-learning goals at once. Children can sort by colour, notice the arc pattern, and practise placing objects carefully in sequence. The white cloud shapes at each end also make the whole project feel complete without requiring much drawing skill.
If you want a project that feels cheerful but still manageable, this is a lovely choice. The finished piece can hang in a classroom, go home as artwork, or become part of a weather or spring display.
Build Colour Recognition and Fine-Motor Practice Into the Rainbow
The small repeated placement of bottle caps gives this craft more learning value than it first appears to have. Children use finger strength to pick up each lid, visual attention to find the matching colour group, and hand-eye coordination to place it along the curve. Because the same action repeats, preschoolers can settle into a rhythm rather than constantly learning a new technique.
Colour language can stay simple and conversational. Ask a child to find another red cap, notice which colour comes next, or compare a dark blue lid with a lighter one. There is no need to make the rainbow scientifically exact for the activity to be useful; the important part is noticing pattern and sequence.
If a child finds glue frustrating, let them arrange the caps first while an adult adds small dots of adhesive. That keeps the creative decision in the child’s hands while preventing a sticky pile of lids from taking over the table.
Make the Finished Rainbow Easier to Display and Keep
Bottle caps add more weight than paper, so the background matters. Thin printer paper can bend once the piece is lifted, especially if several rows of lids are attached. A piece of card, cereal-box board, or another firm recycled backing usually holds the rainbow more confidently.
I would also avoid making the design so large that it becomes hard to move. A medium sheet is easier for a preschooler to work around and much easier for an adult to dry flat. If the class is building one shared rainbow, use a larger board and let small groups work on one colour band at a time.
Leftover caps do not need to be glued somewhere just because they are available. Return the extras to the craft tub for counting games, colour sorting, loose-parts play, or another collage. Reuse feels more meaningful when the materials keep circulating instead of being attached to one project simply to empty the container.
Materials and Tools
· Clean plastic bottle caps in several colours.
· White paper or card as the background.
· Glue stick or child-friendly craft glue.
· A tray or tub to keep the caps sorted by colour.
· Optional crayons if you want to add extra details around the rainbow.
A Practical Way to Recreate It
1. Sort the bottle caps by colour first. Place the caps into small colour groups before children begin. That simple step makes the project less frustrating and helps preschoolers see the rainbow pattern more easily once they start building it.
2. Plan the shape before adding glue. Lightly show where the rainbow will curve across the page, either by pointing it out or drawing a faint guide line in advance. Then arrange a few caps dry before sticking anything down, because young children often change their minds once they see the arc take shape.
3. Glue the caps in rows from the outside in. Start with the outer colour and work inward so the rainbow keeps a balanced shape. Let children press each cap firmly into place, but do not worry if the arcs are not perfectly even; the charm of preschool art often comes from that slightly handmade rhythm.
4. Finish with the clouds and display the piece. Add clusters of white caps or paper circles at both ends to create cloud shapes. Once the picture is complete, leave it flat to dry and then display it where the children can recognise the recycled materials they transformed.
For me, this project works best when the colours stay easy to read
If the cap collection is very mixed, I would simplify the rainbow to fewer rows rather than forcing every possible shade in. Clear colour groups make the activity calmer and more satisfying for preschoolers.
Variations and Alternatives
· Use paper circles instead of caps if you do not have enough saved lids.
· Make a smaller rainbow on card for an individual take-home project.
· Create one large class rainbow by giving each child one colour row to help fill.
Turn Cardboard Tubes Into Pretend-Play Binoculars
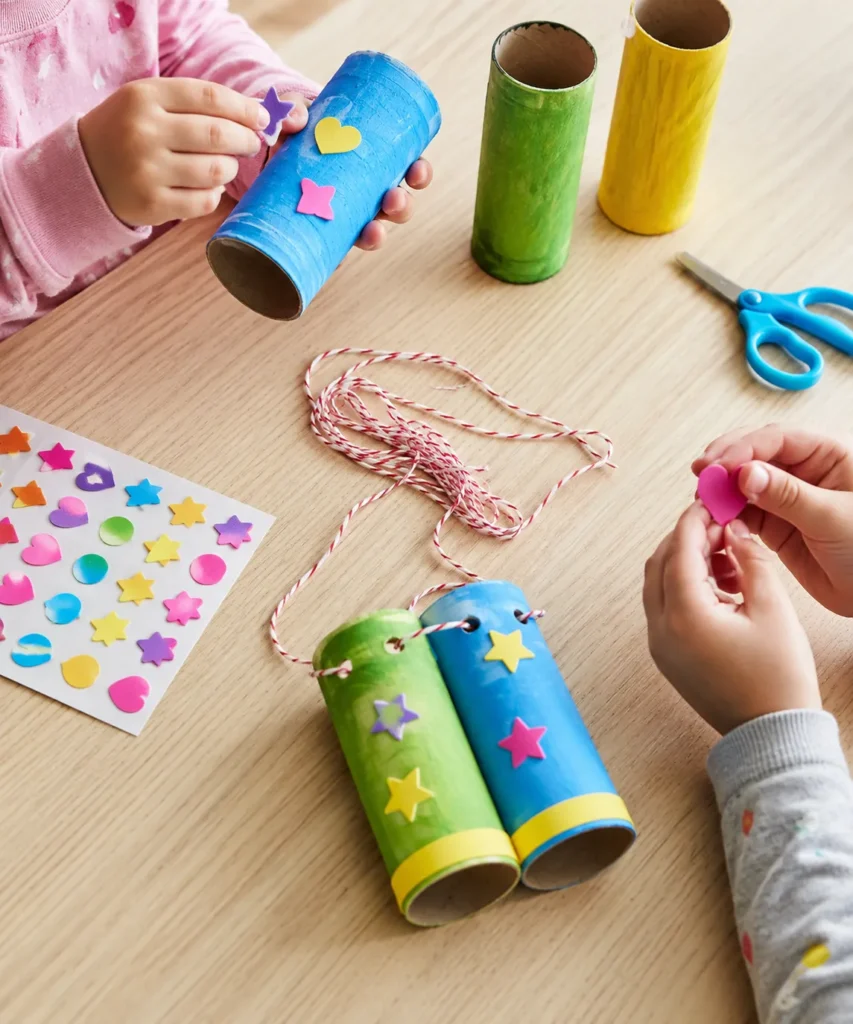
Cardboard tube binoculars are a classic reuse idea because the original material already suggests its new purpose. Two saved tubes, a little colour, and a neck string are enough to turn a simple leftover into something preschoolers can actually use during pretend play, nature walks, or scavenger hunts.
What makes this project especially useful is that it combines crafting and play so neatly. Children decorate the tubes first, which lets them make personal choices with paint, stickers, or paper shapes. Afterwards, the finished binoculars become a prop for observing birds, searching the garden, or acting out adventure stories indoors.
That second life matters. When a child keeps using the finished craft after the glue dries, the lesson about reuse sinks in more naturally than it does with a one-minute take-home picture.
Use the Binoculars to Connect Crafting With Imaginative Play
The finished binoculars become much more valuable when children have a reason to use them. Place picture cards around the room for a simple search game, take them outside to look for leaves and birds, or ask children to spot shapes and colours through the tubes. The cardboard does not magnify anything, of course, but the prop changes the way a child approaches observation.
This is also a useful activity for quieter children who may not jump into group pretend play immediately. Holding a familiar object gives them a role: explorer, birdwatcher, detective, or treasure hunter. The craft becomes a bridge into language and storytelling rather than only a decorated object.
I don’t think the tubes need elaborate decoration to achieve that. A few stickers or colour bands are enough if the children are eager to start playing. Sometimes the quickest route from making to imaginative use is the best one.
Keep the Construction Strong Enough for Repeated Play
Preschool props are handled enthusiastically, so the join between the two tubes needs more strength than a display craft would. If ordinary glue is taking too long to hold, an adult can reinforce the centre with a band of tape hidden under a paper wrap. The children can still decorate the outside while the structure stays dependable.
The string also deserves a practical check. Use soft yarn or cord and avoid creating a long loop that hangs near the knees. For some settings, especially very young groups, you may prefer to leave the neck strap off completely and let children carry the binoculars by hand.
When the ends become crushed after repeated play, that is not necessarily the end of the project. A ring of tape or a narrow strip of card can reinforce a softened edge. Repairing the toy in front of the children is another small way to show that worn objects do not always need to be discarded immediately.
Materials and Tools
· Two cardboard tubes for each pair of binoculars.
· Paint, markers, or paper to cover the tubes.
· Stickers or foam shapes for decoration.
· Glue or tape.
· Hole punch and yarn, twine, or string for a strap.
· Optional stapler or strong tape for adult assembly.
A Practical Way to Recreate It
1. Prepare the tubes and decide on the finish. Check that the cardboard tubes are clean and sturdy, then let children paint or cover them before assembly. Decorating first is usually easier, because small hands can reach the full surface without bumping into a finished pair of binoculars.
2. Join the two tubes together. Once the decoration is dry enough to handle, place the tubes side by side and secure them with strong glue, tape, or a hidden staple handled by an adult. Press them gently together and give them a little time to hold before adding extra details.
3. Add the strap and final embellishments. Punch one hole near the top outer side of each tube and tie on a piece of string or yarn. Then let children add their favourite stickers, stars, hearts, or other shapes to make the binoculars feel personal.
4. Put the binoculars to use right away. Invite the children to try them in a play area, near a window, or outside in the garden. Turning the finished craft into immediate pretend play helps children feel that a reused object can become something genuinely valuable.
One detail I would not skip is testing the string length
A strap that is too long can frustrate preschoolers or get in the way of movement. I would keep it short enough to sit comfortably without swinging too low.
Variations and Alternatives
· Use a single tube as a pretend telescope for a quicker project.
· Wrap the tubes in coloured paper instead of painting if drying time is limited.
· Add a simple nature-watching game after the craft to extend the activity.
Create a Friendly Caterpillar From an Egg Carton
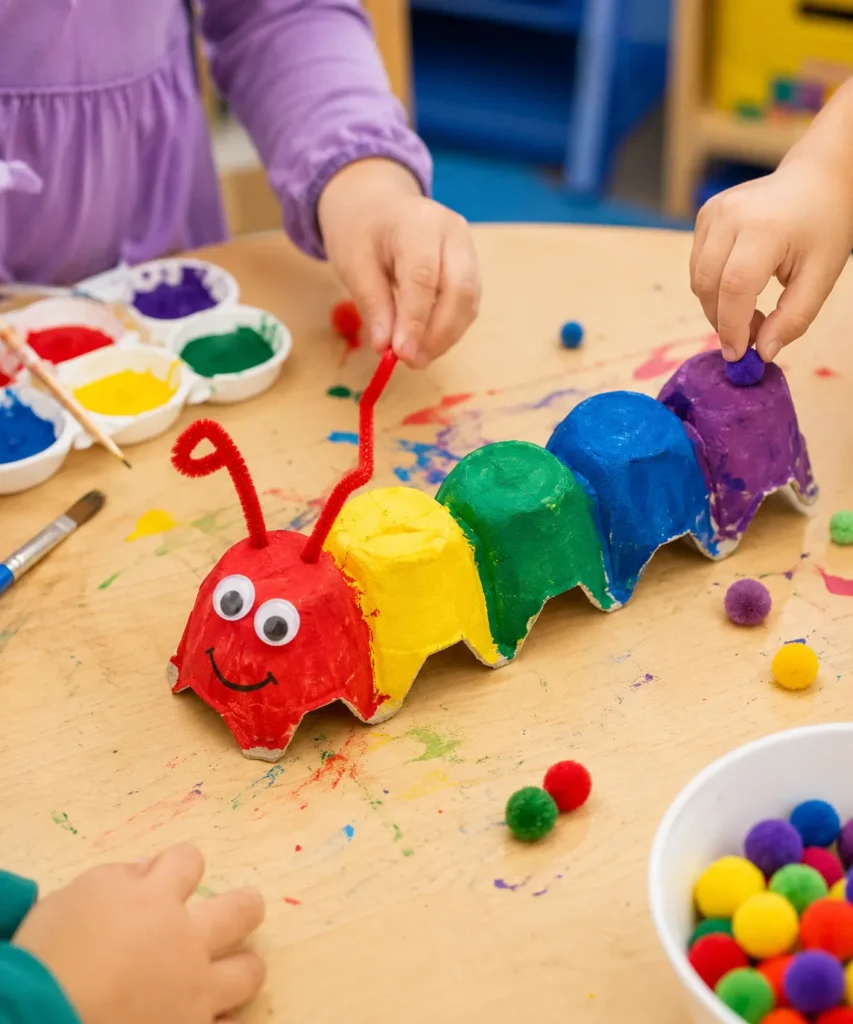
Egg cartons are brilliant for preschool reuse projects because their built-in shape already gives children a strong starting point. A cut strip from the carton becomes a caterpillar body almost immediately, which means the activity stays playful instead of getting bogged down in difficult construction.
Painting each segment a different colour also adds learning value. Children can name the colours, compare patterns, and decide where features such as eyes, antennae, and pom-poms should go. The caterpillar feels cheerful and expressive, yet the materials remain simple and inexpensive.
This is the kind of project that works well in a spring unit, a bug theme, or a general recycling week. It is visual, tactile, and easy to adjust for different levels of independence.
Turn the Caterpillar Into a Colour, Pattern, and Story Activity
Each egg-cup segment gives children a natural place to make one decision at a time. They can repeat two colours, create a simple sequence, or choose a different colour for every section. For younger preschoolers, free colour choice is enough; older children may enjoy copying a basic red-yellow-red-yellow pattern before adding the face.
Once the caterpillar has eyes and antennae, it easily becomes a storytelling character. Children can give it a name, decide where it lives, or move it through a pretend garden made from paper leaves. Those small extensions help language development without changing the original craft.
The carton texture also gives paint a different feel from smooth paper. Children notice the rough surface and the way colour settles into the bumps, which adds a useful sensory difference to an otherwise familiar painting activity.
Adapt the Egg Carton Craft for Different Skill Levels
For children who are still developing brush control, use larger brushes and fewer paint colours. They can cover whole sections freely while an adult handles the more delicate eyes and antenna holes later. For children who want a challenge, invite them to create a repeating pattern or add paper feet under each segment.
If small googly eyes or pom-poms are not appropriate for the group, make the features from paper instead. Large paper circles, drawn eyes, and thick paper antennae work well and keep the project safer for younger children. The caterpillar still reads clearly without tiny loose pieces.
I would also keep the body short enough to stay sturdy. A very long strip can bend or tear at the joins, especially after wet paint softens the cardboard. Four or five connected cups usually give children enough room for colour without making the craft difficult to handle.
Materials and Tools
· A cardboard egg carton, cut into a row of connected cups.
· Paint and brushes.
· Googly eyes or paper eyes.
· Pipe cleaners for antennae.
· Pom-poms or other small decorations, if age-appropriate.
· Glue and child-safe scissors, with adult help as needed.
A Practical Way to Recreate It
1. Cut and prepare the egg carton base. An adult should cut a strip of connected egg cups from the carton and trim away any awkward points that feel sharp or unstable. Set the caterpillar body on the table first so children can see the shape they will be decorating.
2. Paint the segments and let them become colourful. Invite children to paint each section in one colour or to mix colours as they like. The project does not need perfect coverage, but a broad coat of paint helps the recycled carton stop looking like packaging and start feeling like a real character.
3. Add the face and decorative details. Once the paint is dry enough, glue on eyes and draw or paint a simple smile. If you are using pipe cleaners, an adult can help poke the holes for antennae, then children can choose where to place pom-poms or extra details.
4. Use or display the finished caterpillar. The caterpillar can sit on a classroom shelf, become part of a bug display, or go home as a cheerful decoration. I like projects like this because the original material is still recognisable enough to support the reuse lesson, but transformed enough to feel magical to a child.
I know it can feel tempting to add every embellishment available, but
Preschoolers often enjoy this craft more when the focus stays on the caterpillar itself rather than too many loose extras. A clear face, a few colours, and simple antennae are usually enough.
Variations and Alternatives
· Turn the same base into a train, a dragon, or a painted bug if you want a different theme.
· Use paper scraps instead of pom-poms for a lower-cost version.
· Create a class display of caterpillars in different colour patterns.
Plant in Recycled Containers for a Preschool Garden Activity
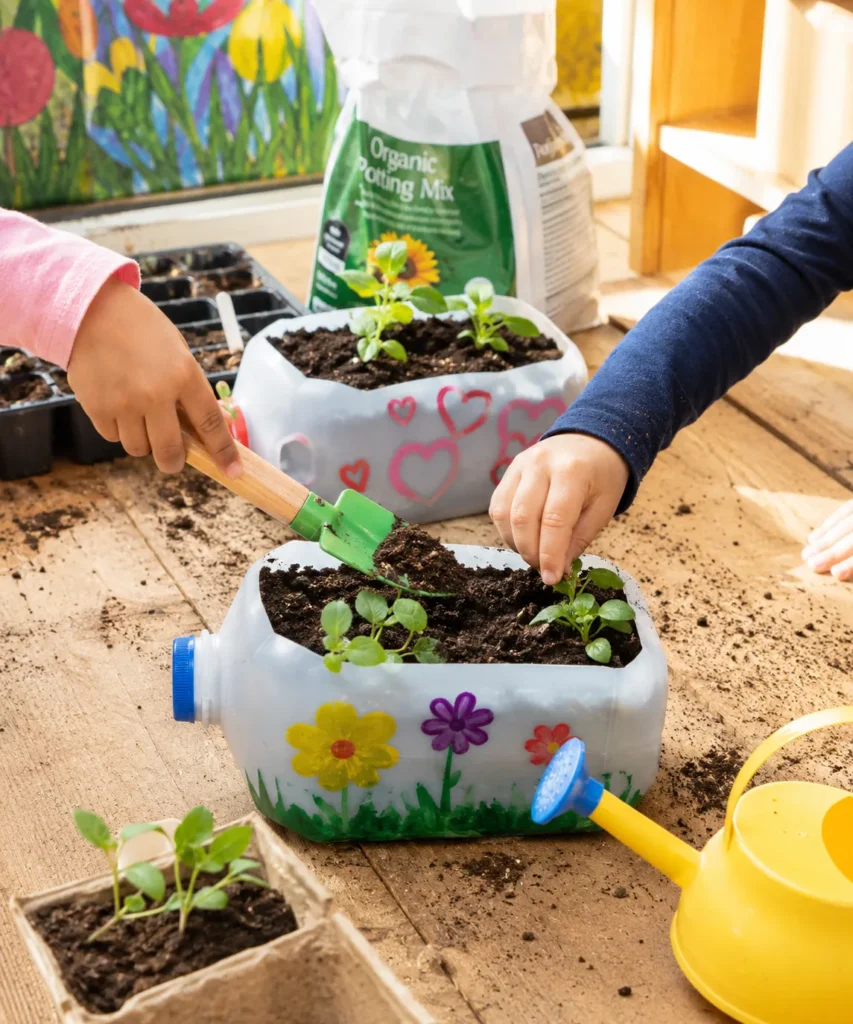
Planting in reused containers gives preschoolers a lovely visual lesson in second chances. A plastic bottle or carton that might have been thrown away becomes a planter full of soil, seedlings, and care. That transformation is easy for young children to understand because it is so concrete: the old container now has a purpose, and something living depends on it.
The decorating stage also helps children take ownership of the project. Painted flowers, hearts, or simple patterns turn the planter into a personal object, while the planting step introduces patience and responsibility. The craft does not end when the children leave the table; it continues each time they water, observe, or notice a new leaf.
Of all the reduce, reuse, recycle activities for preschoolers, this one may be the best at linking creativity with daily care.
Use the Planter as an Ongoing Observation Project
The most valuable part of this activity often happens after the planting day. Children can check whether the soil feels dry, look for new leaves, compare plant heights, and notice which direction stems lean toward the light. Those observations keep the reused container in daily view and give the project a purpose that develops over time.
A simple picture chart works well for preschoolers who are not yet writing. They can draw the plant once a week, add a sticker when it is watered, or compare photos taken by an adult. The goal is not precise science data; it is helping children notice change and understand that living things need ongoing care.
If several children share one planter, give them small rotating jobs such as checking the soil, carrying the watering can, or turning the pot carefully. Shared responsibility can make a single recycled container feel like a class project rather than an individual craft.
Choose Recycled Containers That Work as Real Planters
Not every container is equally useful for plants. A wide, stable bottle or jug is easier to fill than a narrow one, and the planter should stand securely once soil is added. If the base rocks or the sides collapse when squeezed, choose a sturdier container before children invest time decorating it.
Drainage also matters. An adult can add small drainage holes and place the container on a tray, or use the planter indoors with careful watering if drainage is not practical. I would rather simplify the plant choice and watering routine than create a container that constantly leaks across the windowsill.
At the end of the growing project, talk about what happens next. The plant may move into a garden or larger pot, and the container may be cleaned for another use if it remains sound. That final step completes the reuse story instead of letting the planter quietly disappear when the activity ends.
Materials and Tools
· Large clean plastic containers or bottles, cut open by an adult.
· Paint or permanent decoration suitable for the outside of the planter.
· Potting soil.
· Seedlings or easy starter plants.
· Small trowels or scoops.
· A tray or newspaper to catch soil.
· Optional watering can.
A Practical Way to Recreate It
1. Prepare the recycled planters safely. Wash the containers and let an adult cut an opening large enough for planting. Check the edges before use and, if needed, smooth them or cover them so the children can handle the planters comfortably.
2. Decorate the outside before adding soil. Let children paint or decorate the containers while they are still empty and clean. Simple flowers, hearts, grass shapes, or colour blocks work beautifully, and the decoration helps the reused container feel special instead of temporary.
3. Fill, plant, and gently press the soil. Add potting soil, then show children how to place a small seedling or starter plant into the planter. Encourage them to press the soil lightly around the roots so the plant feels secure without being packed too tightly.
4. Water lightly and keep caring for the planter. Give the new planter a small drink and place it in a bright location that suits the plant. Then return to it over the next few days so children can see that the recycled container is now supporting real growth.
The part I would check carefully is the size of the container opening
If the opening is too narrow, children struggle to add soil and plants neatly. A generous cut-out makes the whole gardening step calmer and more successful.
Variations and Alternatives
· Use herb seedlings for a kitchen windowsill project.
· Plant flowers if you want a brighter decorative result.
· Choose fast-growing seeds for an observation activity if seedlings are not available.
Build a Collaborative Earth Collage From Recycled Paper
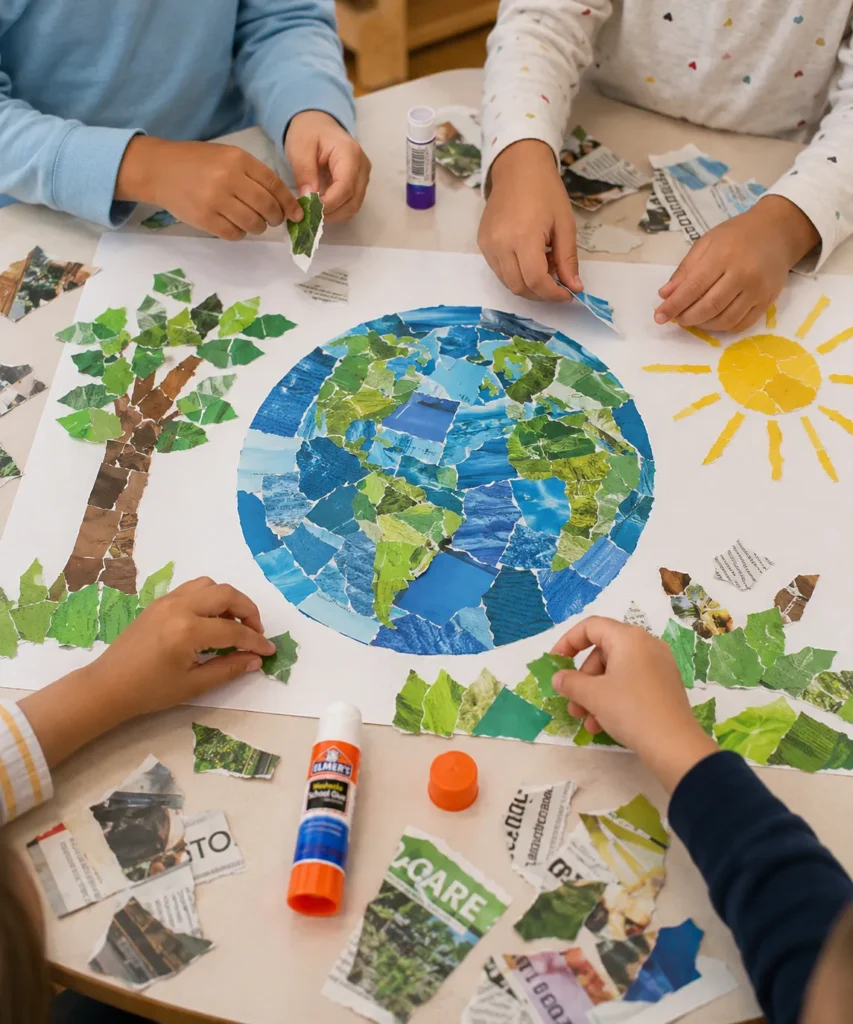
A large Earth collage is a thoughtful way to use paper scraps, magazine pages, and leftover printed material. Instead of treating those pieces as waste, children turn them into oceans, continents, grass, trees, and sunshine. The process naturally invites teamwork because the big picture grows through many small contributions.
For preschoolers, the torn-paper method is especially appropriate. Tearing paper is satisfying, manageable, and excellent for hand strength. It also gives the collage a textured look that feels more alive than a flat colouring sheet.
This kind of activity can support Earth Day, a weather theme, or any classroom conversation about caring for the world. The message stays gentle and age-appropriate because the focus is on creating something beautiful together.
Make the Shared Collage Work for a Whole Preschool Group
Large collaborative art can become crowded quickly, so I would divide the work into simple areas rather than placing every child around the poster at once. One small group can tear blue pieces, another can make green pieces, and a third can work on the tree or sun. Then children can take turns adding their prepared scraps to the main picture.
This structure still feels collaborative, but it gives each child enough physical space to participate. It also reduces the temptation to cover one another’s work or reach across wet glue. Preschoolers often work better when they know which small job is theirs for a few minutes.
The torn edges are part of the look, so there is no reason to chase perfect shapes. In fact, the irregular scraps help the Earth feel textured and make it obvious that old printed pages were reused rather than replaced with freshly cut craft paper.
Use the Collage to Talk About Paper Reuse in Everyday Terms
The environmental message should stay concrete. Children can understand that the class saved paper pieces, used them again, and made a new picture. That is enough. There is no need to turn the craft into a serious lecture about global problems for the reuse lesson to be meaningful.
You can strengthen the connection by collecting suitable scraps from ordinary classroom activities for several days beforehand. A strip left from another collage, an old brochure, or a piece of coloured paper with one clean side can all go into the material tray. Children then recognise that the collage grew from things the class already had.
When the poster is finished, display it beside a small basket of reusable paper scraps. The picture becomes a visual reminder that paper does not always need to be brand new for children to make something worth keeping.
Materials and Tools
· Large sheet of white paper or poster board.
· Old magazines, coloured paper scraps, or other clean paper offcuts.
· Glue sticks or child-friendly glue.
· Optional simple outline of a circle to guide the Earth shape.
· Scissors for adults or older helpers if some shapes need trimming.
A Practical Way to Recreate It
1. Gather and sort paper by colour family. Place blues, greens, browns, and yellows into loose groups so children can find the colours they need. You do not need exact shades, but this small bit of organisation helps the collage take shape more clearly.
2. Prepare the main layout on the poster. Lightly mark the circle for the Earth if needed, and leave space around it for extra images such as a tree, sun, or grass. Preschoolers work more confidently when they can already see the broad area where each part will go.
3. Let children tear and glue the paper pieces. Encourage them to tear pieces by hand and place them into the correct area of the picture. Some children may enjoy covering one section carefully, while others will move around the page more freely, and both approaches can work beautifully in a collaborative project.
4. Finish the edges and talk about the result. Once the main shapes are covered, look for gaps and let children add final pieces. Then spend a moment talking about how old paper helped make a new picture, because that short reflection strengthens the reuse lesson without making the activity feel heavy.
For me, the collaborative part matters as much as the final picture
It helps when children can see that every small torn piece contributes to something larger. That feeling of shared making often keeps the activity peaceful and engaged for longer than individual collage work.
Variations and Alternatives
· Make smaller individual Earth collages if group work feels too busy for your setting.
· Add handprints or names around the border for a class display.
· Use only scrap paper from the week’s activities to strengthen the recycling theme.
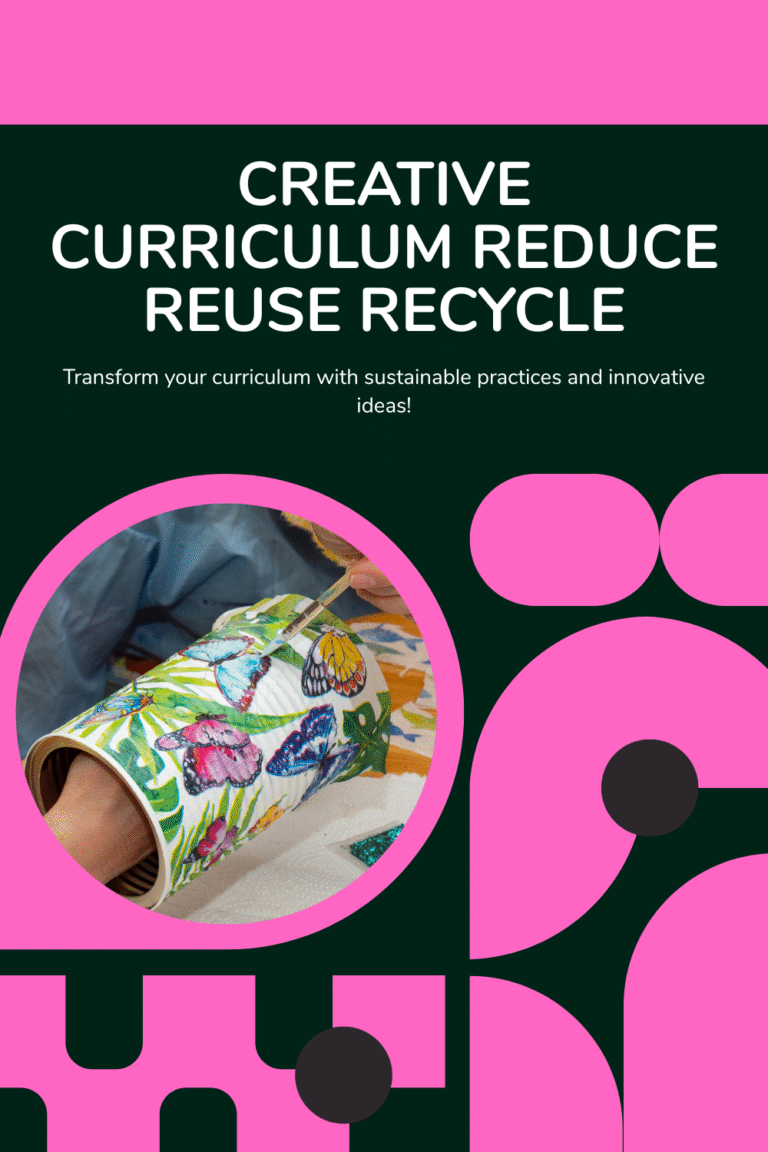
Reuse Empty Tins as Preschool Pencil Holders
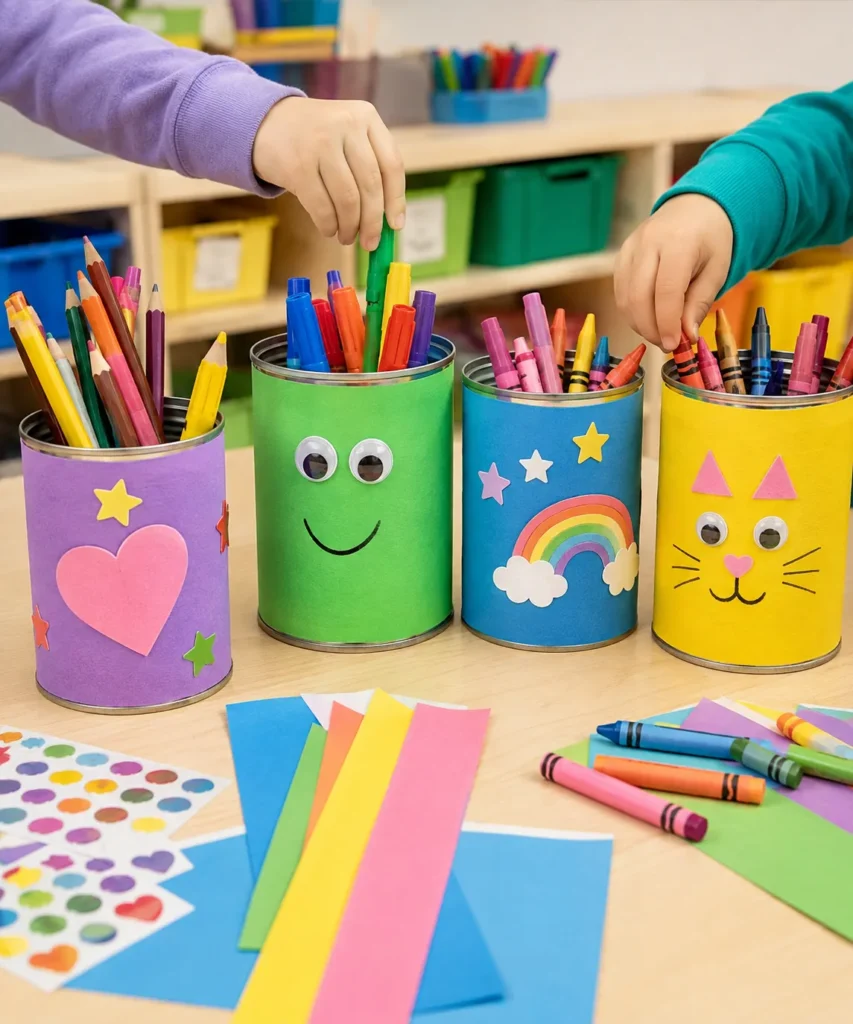
Some recycling crafts are decorative, but this one has the extra satisfaction of becoming immediately useful. An empty tin turns into a pencil holder, and preschoolers can see right away why reusing a container matters. Instead of buying another organiser, you give an existing one a brighter second life.
The decorating possibilities are nearly endless, which makes the activity easy to adapt. Children can add faces, hearts, rainbow motifs, stars, or simple colour blocks depending on their age and interest. At the same time, the overall shape stays straightforward, so the project is less fiddly than it looks.
I think this is also a strong classroom project because the finished items can continue working long after the craft session ends. They help tidy the room and remind children that useful objects can come from unexpected beginnings.
Turn the Finished Holders Into Part of Classroom Organisation
A pencil holder becomes even more useful when the decoration connects to what belongs inside. A blue tin might hold blue and green markers, an animal-face tin might store crayons used at the drawing station, and a rainbow tin can hold the mixed-colour pencils children use most often. The project then supports classroom routines instead of sitting on a shelf as decoration.
Children can also help decide the labels. Add a simple picture of a crayon, brush, or pencil to the front so even non-readers know where the supplies should return. That small visual cue turns cleanup into matching and sorting, which continues the learning from the recycling theme.
I know it can feel tempting to make every tin completely different, but a shared design feature can help the group look intentional. Matching paper bands, similar labels, or one repeated shape gives the collection some order while still leaving room for individual decoration.
Choose Safer Alternatives When Metal Tins Are Not Suitable
Metal containers are practical only when the rim is fully safe. If you have any doubt, swap them for cardboard food canisters, sturdy paper cups, short plastic tubs, or small boxes. The point of the activity is reusing a container, not insisting on one material at the expense of safety.
You can use the same decoration method on those alternatives: wrap the outside, add a large face or shape, and then place the organiser into service. Wider containers are often easier for preschoolers because little hands can reach inside without knocking everything over.
If the base feels too light, place a small amount of reusable modelling compound or another safe weight underneath a false cardboard bottom, handled by an adult. A stable holder is much more satisfying for children than one that tips every time they reach for a pencil.
Materials and Tools
· Clean empty tins with safe, smooth rims.
· Coloured paper, paint, or both for covering the tins.
· Glue or double-sided tape.
· Stickers, paper shapes, or drawn details for decoration.
· Pencils, crayons, or markers to place inside once finished.
A Practical Way to Recreate It
1. Prepare the tins for safe use. Wash the tins thoroughly and check the rims carefully before offering them to children. If any edge feels rough, choose another container or make sure the top is smoothed and safe enough for regular classroom handling.
2. Cover the tins with colour or paper. Wrap each tin in coloured paper or let children paint the outside first. This stage gives the project a neat base and helps hide any printed packaging so the reused container feels fully transformed.
3. Decorate with simple shapes or faces. Add stickers, cut-paper shapes, or easy drawn features that children can recognise and help place themselves. The best designs are usually bold and simple, because preschoolers enjoy a clear result more than very intricate details.
4. Put the organisers straight into use. Once the decoration is dry or secure, fill the holders with pencils, crayons, or markers. Using them right away helps children connect the craft to daily routines and see that reuse can be both creative and practical.
One thing I would avoid here is overloading the outside with bulky decorations
Flat paper details usually hold up better in a preschool setting than very raised embellishments. The tins are meant to be handled often, so simple decoration often lasts longer.
Variations and Alternatives
· Use one large tin for paintbrushes and smaller ones for crayons.
· Decorate tins by colour so children can sort supplies more easily.
· Make themed holders, such as animal faces or weather symbols, for a classroom display.
Make a Backyard Bird Feeder From a Reused Carton
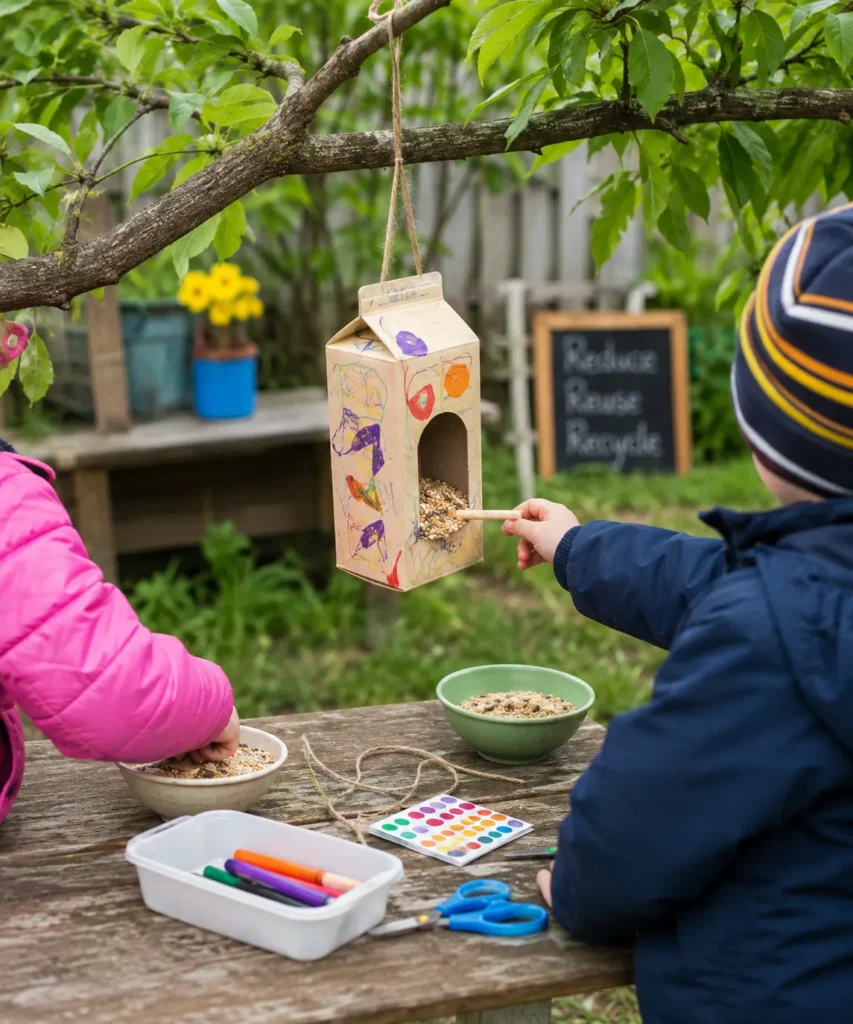
A bird feeder made from a reused carton gives preschoolers a particularly satisfying transformation. The old container becomes something useful outdoors, and children can keep returning to see whether birds visit. That repeated observation makes the project feel more alive than a craft that stays on the shelf.
The outdoor setting also adds meaning to the reuse lesson. Children see that a saved household item can help support wildlife in a small way, which feels tangible and kind. Decorating the feeder keeps the activity child-led, while filling it with seed introduces simple care and responsibility.
This is an especially nice idea for families or settings with access to a garden, a balcony, or a small outdoor area where the feeder can hang safely.
Use the Feeder to Encourage Gentle Nature Observation
Once the feeder is hanging, the project can shift from crafting to watching. Preschoolers can look through a window, use their cardboard binoculars, or simply notice whether the seed changes from one day to the next. The activity becomes a reason to slow down and pay attention to what is happening outdoors.
Keep the observation language simple: big bird, small bird, long beak, quick movement, no visitors today. Children do not need to identify every species for the experience to be worthwhile. The habit of looking carefully is enough, and it connects beautifully with the reuse theme because one old carton has created a new reason to notice nature.
If birds do not visit immediately, that is normal. I would avoid promising children that a bird will appear right away. The waiting is part of the experience, and it gives the feeder an ongoing role rather than making the project feel finished the moment it is hung.
Keep an Outdoor Recycled Feeder Practical and Clean
Outdoor projects need more maintenance than classroom crafts. Check the carton after rain, remove damp or spoiled seed, and replace the feeder if the material begins to break down. A reused carton is a simple temporary feeder, not a permanent structure that should be left outdoors indefinitely.
Choose decoration that can tolerate some handling and weather, and avoid loose pieces that may fall off outside. Markers or simple paper-free drawings are often easier than layers of glued-on craft material. The children can still make the feeder personal without turning the exterior into something difficult to maintain.
When the feeder reaches the end of its useful life, involve the children in taking it down and deciding what parts can be separated appropriately. That final step helps them see that reuse extends an item’s life, but does not make the material last forever.
Materials and Tools
· A clean carton or similar lightweight recycled container.
· Adult-cut opening and drainage holes if needed.
· String or twine for hanging.
· Markers, paint, or stickers for decorating.
· A small stick or dowel for a perch, if desired.
· Bird seed and a safe outdoor branch or hook.
A Practical Way to Recreate It
1. Prepare the carton before the craft begins. Wash and dry the carton thoroughly, then let an adult cut the feeding opening and any small holes needed for hanging. If you want a perch, add that structural part in advance so the children can focus on decorating.
2. Decorate the outside without overcomplicating it. Let children add colour, lines, stickers, or simple drawings around the carton. Keep the decoration mostly on the outer surfaces and avoid blocking the opening, because the feeder still needs to work well once it goes outside.
3. Fill and hang the bird feeder. Thread the string through the prepared holes, add a little bird seed, and choose a suitable branch or hook. Preschoolers enjoy helping with this step, especially when they can see the feeder start to look like a real object with a purpose.
4. Return to observe and refill when needed. Watch the feeder over the next few days and invite children to notice birds, weather changes, and whether the seed level drops. That ongoing observation is part of the value of the project and keeps the reuse idea active beyond the first making session.
I’d keep one thing in mind here
The feeder does not need heavy decoration to feel special. In fact, a simpler finish usually holds up better outdoors and keeps the practical opening easy for birds to use.
Variations and Alternatives
· Use a small bottle feeder if a carton is not available.
· Hang the feeder near a classroom window for birdwatching.
· Pair the project with a simple observation chart for older preschoolers.
Explore Nature Art With a Recycled Collage Tray
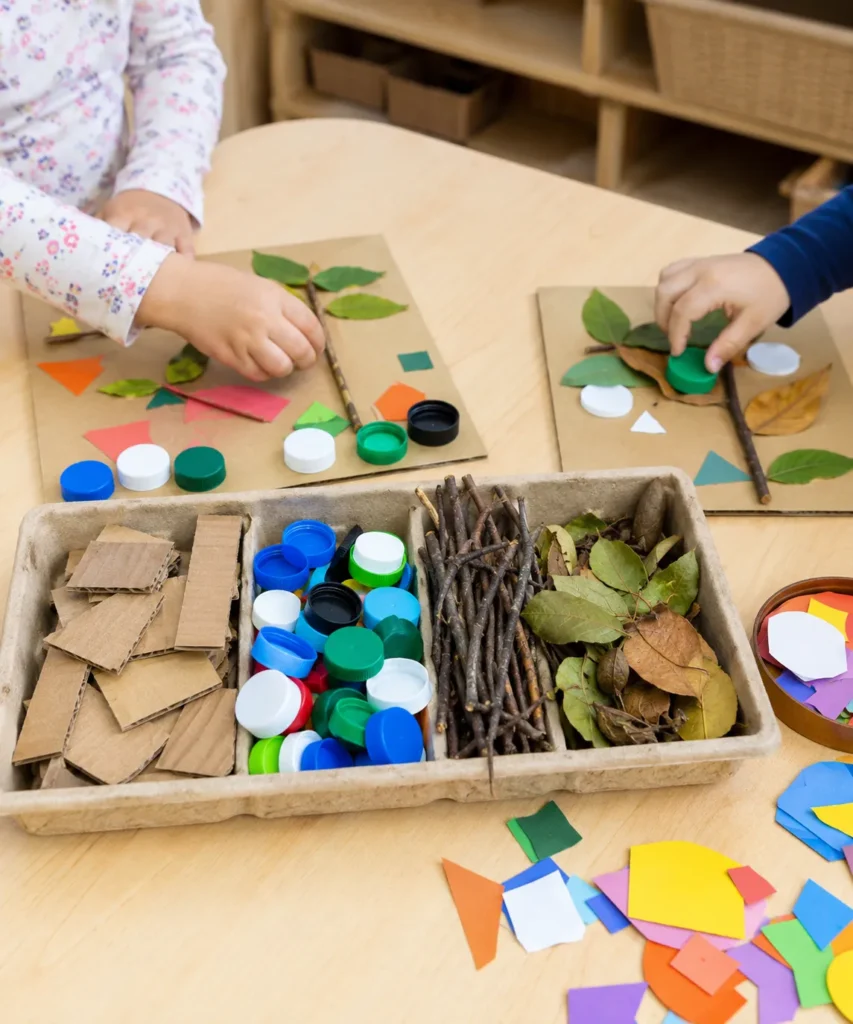
Open-ended collage is one of my favourite ways to use mixed leftover materials because it respects how preschoolers naturally work. A tray filled with cardboard pieces, bottle caps, twigs, leaves, and paper shapes invites children to sort, arrange, compare, and invent. There is structure in the materials, but freedom in the result.
This kind of activity is also excellent when you want a quieter, more exploratory craft. Some children will make a tree picture, some will build abstract patterns, and others will simply enjoy testing what fits together. That variety is not a problem; it is often the point.
Because the materials come from both recycling and nature, the collage feels especially rich. Children notice texture differences, weight differences, and colour changes in a way that a single-material craft cannot offer.
Why Open-Ended Materials Encourage Different Kinds of Thinking
A tray of loose materials does not tell children what the final picture has to be, and that freedom encourages more planning than a template sometimes allows. A bottle cap can become a flower centre, wheel, eye, button, or simply a coloured circle. A twig can be a tree trunk, line, leg, fence, or part of an abstract pattern.
That flexibility is useful for preschoolers because they can work at their own level. One child may arrange materials carefully into a recognisable tree while another experiments with rows, textures, or balance. Both children are making decisions, and neither needs to copy an adult model for the activity to succeed.
The tray also gives you a natural chance to compare materials. Ask which pieces are rough, smooth, bendy, heavy, light, soft, or brittle. Those descriptive words deepen the sensory experience without interrupting the creative flow.
Store and Refresh the Collage Tray So It Stays Inviting
Open-ended material stations work best when they look cared for. Remove crushed cardboard, dirty leaves, broken caps, and tiny scraps that no longer invite use. Then refresh the tray with a modest number of interesting pieces instead of continuously adding more and more leftovers.
Natural items also change over time. Dry leaves may crumble, twigs can snap, and fresh plant material should not be stored if it will become damp or mouldy. A quick adult check keeps the tray pleasant and prevents the reuse area from becoming a storage place for anything nobody knows how to discard.
You can rotate the materials by season or theme. Autumn leaves, seed pods, plain cardboard, and warm-coloured scraps create a different invitation from spring twigs, green paper, and flower-shaped cutoffs. The structure stays the same, but the possibilities feel new each time.
Materials and Tools
· A tray divided into sections for organised materials.
· Cardboard scraps in different shapes.
· Clean bottle caps or other saved flat pieces.
· Twigs, leaves, and other lightweight natural items.
· Card or thick paper as the base.
· Glue for attaching the finished arrangement.
A Practical Way to Recreate It
1. Set out the materials in a way children can read easily. Place each material type in its own section or small tray so the children can see the options clearly. An organised setup makes open-ended crafting feel inviting rather than chaotic, especially for preschoolers who still need visual order.
2. Let children explore and arrange before gluing. Encourage them to move items around on the card and try different combinations without rushing to stick them down. This trial stage matters, because young children often discover a picture idea only after touching and repositioning the pieces several times.
3. Glue the main shapes in a simple sequence. Once a child is happy with the arrangement, begin with the larger pieces such as cardboard shapes, twigs, or bigger leaves. Add smaller details afterwards so they do not get lost or bumped out of place too easily.
4. Talk about texture, shape, and reuse when the collage is done. Ask what materials the child used and which ones felt different in their hands. That gentle conversation helps link the creative process to observation and to the bigger idea that both natural finds and saved scraps can become art.
For me, this project becomes much stronger when adults resist overdirecting it
Preschoolers often surprise you when they are allowed to decide what a twig or bottle cap might become in a picture. A little guidance helps, but too much can take away the discovery that makes the activity so engaging.
Variations and Alternatives
· Create themed collages such as trees, insects, or flowers.
· Offer only two or three material types for a simpler version.
· Turn the tray into a permanent invitation-to-create station for several days.
Common Mistakes to Avoid
One common mistake with preschool recycling crafts is offering dirty or awkward materials straight from the recycling pile. Sticky bottles, dusty cartons, or tins with rough rims distract from the activity and can make children hesitant to touch the supplies. A quick wash, dry, and safety check makes the whole session more pleasant and much easier to manage.
Another issue is making the activity too complicated for the children’s age. If a project needs precise cutting, too many choices, or a long list of steps, preschoolers often lose interest before they enjoy the creative part. It usually works better to let adults prepare the difficult structure and leave the colour, placement, sorting, and decorating to the children.
I would also avoid overdecorating practical projects. A bird feeder still needs a clear opening, a pencil holder still needs to stand steadily, and a planter still needs enough room for soil and roots. When the function disappears under too many added pieces, the child misses the important lesson that reused objects can still be genuinely useful.
Small loose materials can create another problem if they are offered without enough supervision or without considering the group. Bottle caps, pom-poms, and tiny decorations can be wonderful for many preschoolers, but for younger children they may need substituting or closer adult involvement. Matching the materials to the age and setting matters just as much as choosing a cute idea.
Finally, it helps not to rush the reflection part. If children sort, plant, or collage without any short conversation about what was reused and why it matters, the activity can slip into being just another craft. The lesson does not need to become heavy, but a few warm, simple comments about giving old things a new use make the purpose clearer.
Another easy mistake is collecting more recycled material than the class can realistically use. A giant box of random packaging may look resourceful, but it quickly becomes clutter and can make children less able to see the value of the best pieces. Keep only clean materials that suit activities you are likely to do, and set a limit for each type.
Try not to make every recycling craft depend on buying lots of new decorations either. Stickers, fresh foam sheets, and extra accessories can be useful, but the reused material should remain central to the activity. Paper offcuts, old magazine pages, leftover ribbon, crayons, paint already in the classroom, and saved natural materials often provide enough variety without turning a reuse project into a shopping list.
Adults can also accidentally take over because they want the finished result to look neat. If every bottle cap is repositioned, every caterpillar segment is repainted, or every collage edge is corrected, the child may lose ownership of the project. Prepare the unsafe parts carefully, then allow the visible creative choices to stay genuinely child-made.
Finally, do not forget the afterlife of the finished craft. A planter needs care, a bird feeder needs checking, binoculars need a place in the play area, and pencil holders should actually hold supplies. When the project continues to be used, preschoolers see a much clearer example of reuse than they do from a craft that goes straight into a bag and is forgotten.
Frequently Asked Questions
Are these reduce, reuse, recycle activities suitable for all preschoolers?
Most of them can be adapted quite easily, but the exact materials should match the age and level of supervision in your setting. For younger preschoolers, I would choose larger pieces, do more of the prep work in advance, and keep small decorations to a minimum.
Do I need special craft supplies to make recycled preschool projects work?
Not usually. The most useful supplies are simple ones such as glue, paper, paint, child-safe tools, and containers for sorting. The real value comes from preparing the saved materials well and keeping the projects manageable.
What kinds of recyclable items are best for preschool crafts?
Cardboard tubes, bottle caps, paper scraps, clean cartons, smooth tins, and sturdy plastic containers are all very versatile. I tend to avoid flimsy packaging or anything with sharp edges, because preschool projects work best when the materials feel easy and safe to handle.
How can I make these activities less messy?
Set out the materials in trays, keep each item type grouped together, and prepare cutting work ahead of time. It also helps to choose one project focus at a time rather than putting every saved material on the table at once.
Can these projects be done at home as well as in a classroom?
Yes, very easily. In fact, many of them work especially well at home because children can help notice which items are worth saving, washing, and reusing. That connection to everyday routines often strengthens the lesson.
How do I keep children interested after the craft is finished?
Projects that remain useful tend to hold attention longest. Binoculars can be used in play, planters need care, bird feeders invite observation, and pencil holders stay in daily use, so those activities keep the reuse idea alive after the first session.
What is the best way to talk about recycling with preschoolers during crafts?
Keep the language simple and concrete. Instead of long explanations, say things like “This bottle had one job before, and now it has a new job” or “We saved these caps and turned them into art,” which makes the idea easy for young children to grasp.
Help Preschoolers See Treasure in Everyday Things
The nicest thing about reduce, reuse, recycle activities for preschoolers is that they teach care in such a practical way. A cardboard tube becomes binoculars, a carton becomes a feeder, an empty tin becomes storage, and a saved container begins holding a living plant. Children start to notice that everyday materials are not always at the end of their story the first time we finish using them.
If you want to try these ideas, I would begin with one project that fits your space and the materials you already have. A simple sorting station or bottle cap rainbow can be enough to start the conversation, and from there it becomes much easier to build a habit of saving, reusing, and making with intention.
If one of these projects catches your eye, gather a few clean leftovers and let the children help with the transformation. That small act of creative reuse is often where a much bigger sense of curiosity and care begins.
One useful habit is to keep a small, clearly labelled reuse box where children can see it. Add only clean, safe materials that have a likely second purpose, and empty it regularly rather than letting it become permanent clutter. Over time, children begin to ask whether a tube, lid, box, or piece of card might be useful before it is thrown away, which is exactly the kind of thinking these activities are meant to encourage.
The projects do not need to look polished to be worthwhile. A lopsided rainbow, a heavily painted caterpillar, or a planter covered in enthusiastic marks still carries a strong message: something ordinary was noticed, kept, and used again. For preschoolers, that simple transformation is often the most memorable lesson of all.