Used canvases often remain stacked behind a cupboard because the artwork no longer suits the room, yet the stretched fabric and wooden frame still feel too useful to discard. A canvas may have an unwanted painting, a few dents, or a surface that never worked as planned, but that does not mean the whole object has reached the end of its life.
I like looking past the old image to see the structure underneath. A used canvas is already lightweight, square, and easy to hang. Depending on its condition, the fabric can be covered, painted, or removed completely, while the wooden frame can support hooks, twine, mesh, a shallow shelf, or a new decorative surface.
The most useful project is not always the one that hides every trace of the original canvas. Sometimes the existing fabric makes a good memo board or chalkboard. In other cases, the frame deserves to take over once the old surface comes away. I don’t think every canvas needs an elaborate makeover; it simply needs a second purpose that suits its strength, depth, and size.
Inspect the Canvas and Wooden Frame Before Reusing It
Turn the canvas over and inspect the back before choosing a project. The outer surface may look fine while the frame has loose corners, bent stretcher bars, or staples that are beginning to lift.
· Press each corner gently and check whether the wooden frame stays square without twisting.
· Look for mould, damp marks, insect damage, deep warping, or a musty smell that makes the canvas unsuitable for indoor reuse.
· Check whether the stretched fabric remains tight enough for painting, pinning, or covering.
· Inspect the back staples and remove any loose or sharp pieces before handling the frame.
· Decide whether raised paint texture can be sanded lightly, covered with fabric, or should be removed with the old canvas surface.
· Measure the frame depth because a deeper canvas works better for trays and shelves than a very slim one.
· Avoid altering artwork that may have sentimental, historical, or resale value until its importance has been considered.
Gather Simple Canvas-Makeover Tools
Most of these projects use ordinary decorating and household tools. The exact supplies depend on whether you are keeping the fabric surface or working mainly with the wooden frame.
· Soft cloth, gentle cleaner, and a small brush for removing dust from the canvas and frame
· Medium and fine sandpaper for smoothing paint ridges and rough wooden edges
· Primer, furniture paint, chalkboard paint, or fabric suitable for the chosen finish
· Scissors, craft knife, staple remover, and pliers for taking off the old canvas safely
· Staple gun, strong adhesive, small screws, and a screwdriver for attaching new materials
· Measuring tape, pencil, ruler, square, and level for positioning hardware evenly
· Twine, wire mesh, push pins, hooks, handles, clips, or shelf timber required by the selected project
· Eye protection and gloves when removing staples, cutting mesh, drilling, or handling sharp hardware
Decide Which Original Canvas Details Should Stay Visible
A reused canvas does not need to look completely new. The wooden edge, stretched fabric, old paint marks, or staple pattern may contribute to the finished character, provided those details remain clean and safe.
· Keep the stretched fabric when it is smooth enough for a memo board, chalkboard, or covered surface.
· Remove the fabric when an open frame is more useful for mesh, twine, jewelry, or photographs.
· Preserve a deep frame when it can form the raised sides of a lightweight tray.
· Leave sound natural wood visible when it suits the room, or paint it for a cleaner result.
· Cover heavily textured artwork with batting and fabric rather than applying many thick coats of paint.
· Retain small signs of age only when they look intentional and do not leave splinters, dirt, or unstable paint.
· Choose one clear new purpose before adding decoration so the finished object remains easy to use.
Cover a Used Canvas to Make a Fabric Memo Board
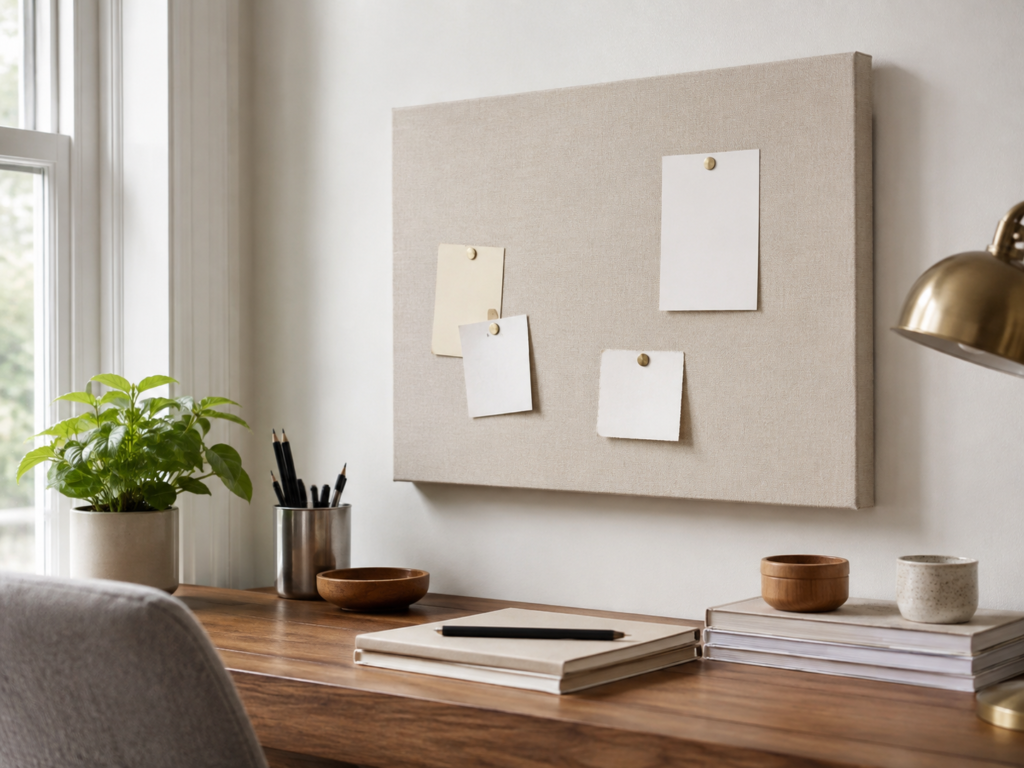
A fabric-covered memo board keeps almost the entire canvas intact, making it a sensible first project when the frame is strong and the surface is still tight. The neutral covering softens old paint texture and gives push pins a neat background. It works above a desk, beside a family calendar, or near the front door where short reminders tend to gather.
The clean finish depends more on even fabric tension than complicated construction. A plain linen-look fabric keeps the board useful after several notes are added, while a very busy print can compete with the papers pinned to it.
Materials and Tools
· Used stretched canvas
· Cotton, linen-look fabric, or another medium-weight woven fabric
· Optional thin batting for a softly padded surface
· Fabric scissors
· Staple gun and suitable staples, or strong fabric adhesive
· Push pins or decorative tacks
· Wall hanging hardware if the original fitting is weak
Steps to Make a Fabric Memo Board
1. Prepare the surface and decide whether padding is needed. Clean the frame, remove loose paint, and trim any thread or damaged canvas at the back. If the old artwork has raised brush marks, place a thin batting layer over the front so the texture does not show through the new fabric.
2. Cut and position the covering. Lay the fabric face down, place the canvas centrally on top, and leave enough material to wrap around every side. Check the fabric grain or pattern before attaching anything. I know it can feel tempting to begin stapling immediately, but an uneven pattern becomes much more obvious once the board is on the wall.
3. Attach the fabric in a balanced order. Secure the centre of one long side, then the opposite side, followed by the centres of the shorter sides. Continue working outward while pulling the fabric firm but not so tightly that the frame bends. Fold the corners neatly and keep the back free from bulky overlapping layers.
4. Finish and test the board. Trim excess fabric, cover sharp staple ends if necessary, and confirm that the hanging hardware remains accessible. Add a few notes with push pins and check that the front does not sag. Use lighter paper items rather than thick objects that may pull against the fabric.
A smaller canvas can become a bedside reminder board, while a larger one can hold family schedules. For a no-staple version, wrap the front in removable fabric and secure it at the back with strong clips, although the finish will be less permanent.
Turn a Deep Canvas Into a Lightweight Decorative Tray
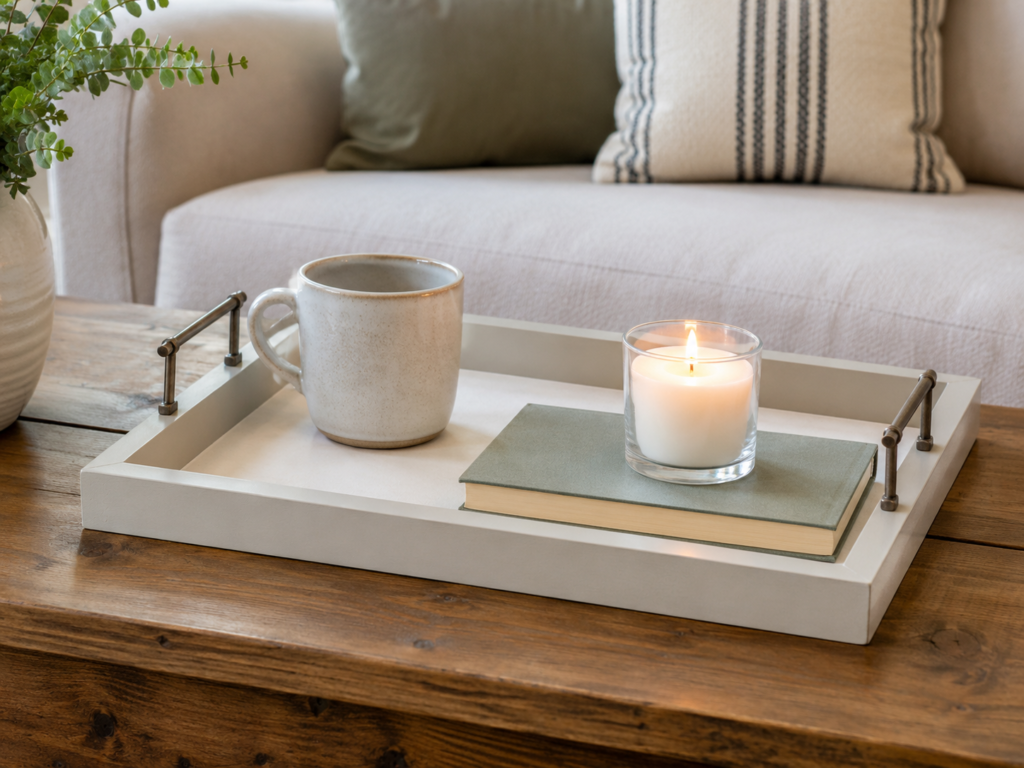
A deep-edge canvas already resembles a shallow tray once it is placed face up or reversed, but the original fabric usually needs extra support before the piece can carry anything. The finished version works best for styling a coffee table, collecting remote controls, or holding a mug and book in one place.
This is not a heavy serving tray unless the structure has been reinforced properly. The wooden stretcher frame was designed to hold fabric, not a stack of dishes, so the project should remain realistic about weight.
Materials and Tools
· Deep used canvas with a rigid wooden frame
· Thin plywood, hardboard, or another firm panel for the tray base
· Primer and durable paint
· Two lightweight handles
· Short screws suited to the frame thickness
· Drill, screwdriver, ruler, and pencil
· Sandpaper and wood filler
· Optional felt pads for the underside
Steps to Create a Decorative Canvas Tray
1. Choose the tray orientation and strengthen the base. Decide whether the original canvas front will sit inside the tray or underneath it. For a firmer result, cut a thin panel to fit within or across the frame and secure it to solid wood. Do not rely on stretched fabric alone to support cups or decorative objects.
2. Repair and prepare the frame. Tighten loose corners, fill unnecessary holes, and sand rough edges. Prime the frame and the added base so the paint covers evenly. If old paint texture remains visible beneath the new panel, smooth it before assembly rather than hoping a final coat will hide it.
3. Paint the tray and add the handles. Apply thin coats to the frame and base, then mark matching handle positions on the two shorter sides. Drill pilot holes before inserting the screws so the narrow frame does not split. Use hardware that feels comfortable but does not overpower the lightweight construction.
4. Protect the surfaces and test the load. Add a suitable clear finish when the tray will be wiped regularly, and place felt pads underneath to protect the table. Begin with a book, remote controls, or an empty mug, then check for flexing. I’d keep one thing in mind here: decorative usefulness matters more than pretending the frame can carry a full meal.
A beginner can skip the handles and use the finished piece as a stationary coffee-table corral. Another easy variation is to line the base with wallpaper or fabric instead of painting it.
Reuse the Canvas Frame as a Wire Jewelry Organizer
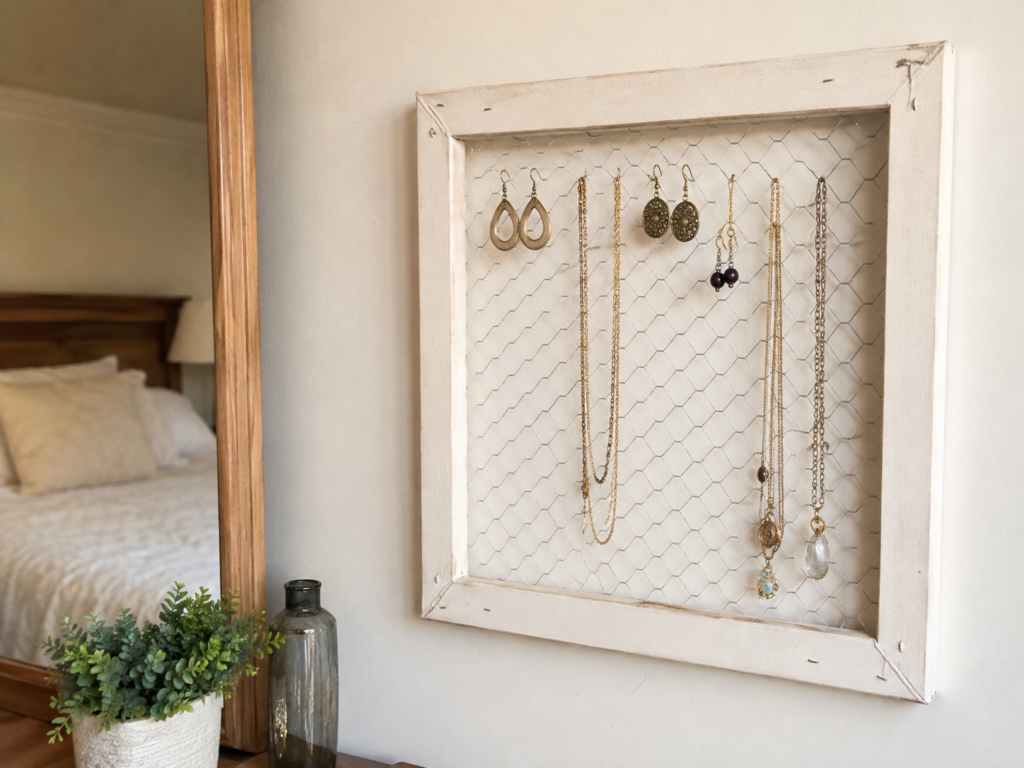
Once the fabric is removed, the wooden stretcher frame can become an open jewelry display. Wire mesh gives earrings many hanging points, while small hooks or clips can support necklaces. The result keeps delicate pieces visible and reduces the tangling that often happens inside a drawer.
The most important part is finishing the cut wire safely. Mesh edges can remain sharp even when they look tidy, so they need to sit fully behind the frame and be covered or folded away from hands and jewelry.
Materials and Tools
· Used canvas with a solid wooden stretcher frame
· Light wire mesh, hardware cloth, or another suitable metal screen
· Staple remover, pliers, and wire cutters
· Staple gun and staples
· Small screw hooks for necklaces if desired
· Paint, wax, or clear finish for the frame
· Gloves and eye protection
· Wall hanging hardware
Steps to Build a Wire Jewelry Organizer
1. Remove the old canvas carefully. Work from the back with a staple remover or flat tool, lifting one fastener at a time rather than tearing the fabric away. Pull out or flatten every remaining staple, then inspect the wooden frame for splinters, cracks, and weak corner joints.
2. Prepare and finish the frame before adding mesh. Sand the edges and apply paint or a clear finish while the centre remains open. A slightly worn finish can suit this project, but loose paint should be removed. Let the frame settle fully before handling the wire so metal marks do not spoil the surface.
3. Cut and attach the mesh. Wear gloves and cut the screen slightly larger than the opening, leaving enough overlap for staples. Place it across the back, pull it evenly, and fasten opposite sides in stages. Fold or cover the cut perimeter so no sharp points project beyond the wood.
4. Add hanging options and test the display. Screw small hooks into strong parts of the lower or upper frame for necklaces, then attach secure wall hardware. Hang a few lightweight pieces first and check that the mesh does not loosen. Keep heavier jewelry on hooks fixed directly into wood rather than relying on fine mesh.
Plastic garden mesh offers an easier-to-cut alternative for very light earrings, although it will not have the same rigid look. A narrow frame can also hold only earrings, keeping the project simpler.
Paint the Old Canvas as a Kitchen Chalkboard

A chalkboard is one of the least disruptive ways to reuse used canvas because the existing fabric and frame stay together. The project suits a canvas with a firm surface and only light paint texture. It can hold a grocery list, weekly menu, short reminders, or a simple seasonal drawing.
A deeply textured painting needs more preparation than a blank or lightly painted surface. Chalk catches on ridges, so the board will be much easier to write on when the front feels reasonably smooth.
Materials and Tools
· Used stretched canvas with a firm surface
· Fine and medium sandpaper
· Suitable primer
· Chalkboard paint
· Small foam roller or smooth paintbrush
· Chalk and soft cleaning cloth
· Optional paint for the side edges or frame
· Reliable wall hanging hardware
Steps to Make a Kitchen Chalkboard
1. Clean and smooth the canvas. Remove dust and gently sand raised paint ridges without damaging the stretched fabric. If the surface has heavy modelling paste or thick decoration, cover it with a new smooth fabric layer or choose another project rather than applying endless coats.
2. Prime the front and side edges. Use a thin, even application that suits the existing surface, then check for dents or missed texture once it is dry. Lightly smooth any rough areas before the dark paint goes on, because black finishes tend to reveal rather than hide uneven patches.
3. Apply the chalkboard finish in thin layers. Roll or brush in one direction, then change direction on the following coat for even coverage. Keep paint from building heavily along the canvas edges. Follow the product instructions before writing; impatience is very talented at leaving permanent first-day marks.
4. Condition and hang the board. Once the surface is ready, rub the side of a chalk stick lightly across it and wipe it with a soft cloth. This reduces ghosting from the first message. Hang the canvas securely and use ordinary chalk rather than sharp tools that could puncture the fabric.
A small canvas can become a weekly menu board, while a larger one suits family reminders. If chalk dust is unwelcome, the same prepared canvas could become a matte message board for removable paper notes instead.
Build an Entryway Key Holder From the Canvas Frame

The entryway organizer changes the canvas more than the other projects. A firm backing replaces or reinforces the original fabric, a narrow shelf holds sunglasses or mail, and hooks keep keys visible near the door. The surrounding frame gives all the added parts a finished boundary.
This project needs a stronger structure than a memo board because keys, small bags, and objects on the shelf create repeated pulling forces. Hardware should attach to solid wood or a rigid backing, not only to stretched canvas.
Materials and Tools
· Used canvas with a strong wooden frame
· Thin plywood or another rigid backing panel
· Narrow timber strip for the shelf
· Three or more small hooks
· Wood screws, brackets, and optional construction adhesive
· Paint and protective finish
· Drill, screwdriver, saw, level, and measuring tools
· Wall anchors or a cleat suited to the finished weight
Steps to Build an Entryway Key Holder
1. Decide whether the canvas fabric can remain. If it is tight and the organizer will hold only very light items, a rigid panel may sit behind it. For a stronger version, remove the fabric and cut a backing board to fit the frame. Secure the panel into the stretcher bars rather than gluing it only along a thin edge.
2. Prepare the frame, backing, and shelf. Sand everything, repair loose corners, and paint the parts before final assembly. Cut a shallow shelf that fits across the inner width, then check that sunglasses, letters, or a small wallet can sit on it without projecting too far into the room.
3. Attach the shelf and hooks. Fix the shelf into solid side rails or reinforced backing with small brackets or screws. Mark the hook positions evenly below it and drill pilot holes. I would not attach working hooks to fabric alone; repeated key use will loosen the surface surprisingly quickly.
4. Mount and test the organizer. Add strong hanging hardware, locate suitable wall fixings, and check the unit with a level. Load the hooks gradually, place only lightweight items on the shelf, and watch for movement. Keep heavy handbags and coats on a separate wall fitting designed for greater weight.
A simpler version can omit the shelf and use only three key hooks on a painted backing. Another variation is to add a small label strip above each hook so household keys return to the same place.
Used Canvas Makeover Problems That Can Waste a Good Frame
Ignoring the back of the canvas is a common mistake. Loose staples, weak corner joints, and warped stretcher bars may not be obvious from the front. Inspect and repair the structure before adding fabric, paint, mesh, or hardware.
Painting over heavy texture without smoothing it can leave a chalkboard difficult to write on and a fabric board visibly lumpy. Sand only when the material allows it, or add a new covering layer instead of building up more paint.
Using stretched canvas as a load-bearing shelf or tray base creates unnecessary risk. Fabric can sag or tear under concentrated weight. Add a rigid panel whenever the new purpose involves cups, hardware, hooks, or stored objects.
Leaving cut wire edges exposed can scratch hands, snag necklaces, and damage walls. Fold, trim, or cover the mesh perimeter and keep it fully behind the wooden frame.
Overtightening twine or new fabric may pull a lightweight frame out of square. Work from opposite sides, check the corners often, and stop increasing tension once the surface or cord is firm.
Choosing screws that are too long can pierce the front or split narrow stretcher bars. Measure the wood depth and drill small pilot holes before attaching handles, hooks, or shelf brackets.
Finally, adding too much decoration can make a useful project harder to use. Notes need open space, jewelry needs clear hanging points, and keys need accessible hooks. The original canvas has already had one life as artwork; its next life can be practical.
Frequently Asked Questions
Can I reuse a canvas that already has a painting on it?
Yes, when the artwork has no sentimental, historical, or resale value and the canvas remains clean and structurally sound. You can cover the surface, paint over a prepared layer, or remove the fabric and reuse the wooden frame.
Do I need to remove the old canvas fabric?
Not for every project. Memo boards and chalkboards can keep the stretched surface, while jewelry organizers, photo displays, and stronger entryway pieces usually work better with the fabric removed or reinforced.
What should I do with a torn canvas?
A small tear may disappear beneath fabric or a rigid insert. When the damage is extensive, remove the fabric and use the frame for mesh, twine, hooks, or another open-centre project.
Can I sand an old painted canvas?
Light sanding may reduce small ridges, but heavy sanding can weaken or puncture the fabric. Wear suitable protection, avoid unknown flaky coatings, and choose a covering method when the texture is too thick to smooth safely.
Which used canvas project is easiest for a beginner?
The fabric memo board and chalkboard require the least structural alteration. Both keep the canvas assembled, although the surface still needs careful cleaning and preparation.
How can I make the finished project more durable?
Repair loose frame joints, use a rigid backing where weight is involved, and attach hardware to wood rather than fabric. A suitable protective finish also helps painted surfaces withstand regular handling.
Can children help with these projects?
Children can choose fabric, arrange photos, or help with simple painting under supervision. Adults should handle staple removal, craft knives, wire cutting, drills, screws, and wall mounting.
Let the Frame Decide the Canvas’s Next Purpose
The most practical way to learn how to reuse used canvas is to stop seeing it only as an old picture. The stretched surface can hold fabric, notes, or chalkboard paint, while the wooden frame can support mesh, twine, a shelf, or small hooks once the original fabric is removed.
Begin with the part that remains strongest. A tight surface may become a memo board, a deep frame may form a light tray, and an empty stretcher frame may work better as visible storage. There is no need to force every canvas into the same kind of makeover.
Which used canvas would you repurpose first: one with a smooth surface ready for covering, or an old textured piece whose frame deserves a completely different job?