If you’re into card making, you know the importance of precision and cleanliness in your cuts. A small deviation in a cut can throw off the balance of your design, leading to frustration or, worse, ruined projects. That’s where a good paper trimmer comes in.
Whether you’re a beginner just diving into card crafting or a seasoned pro, selecting the right paper trimmer can make a huge difference in both your process and the quality of your final product. But with so many options out there, how do you know which one will best serve your needs?
| Product Image | Product Name | Features | Price |
|---|---|---|---|
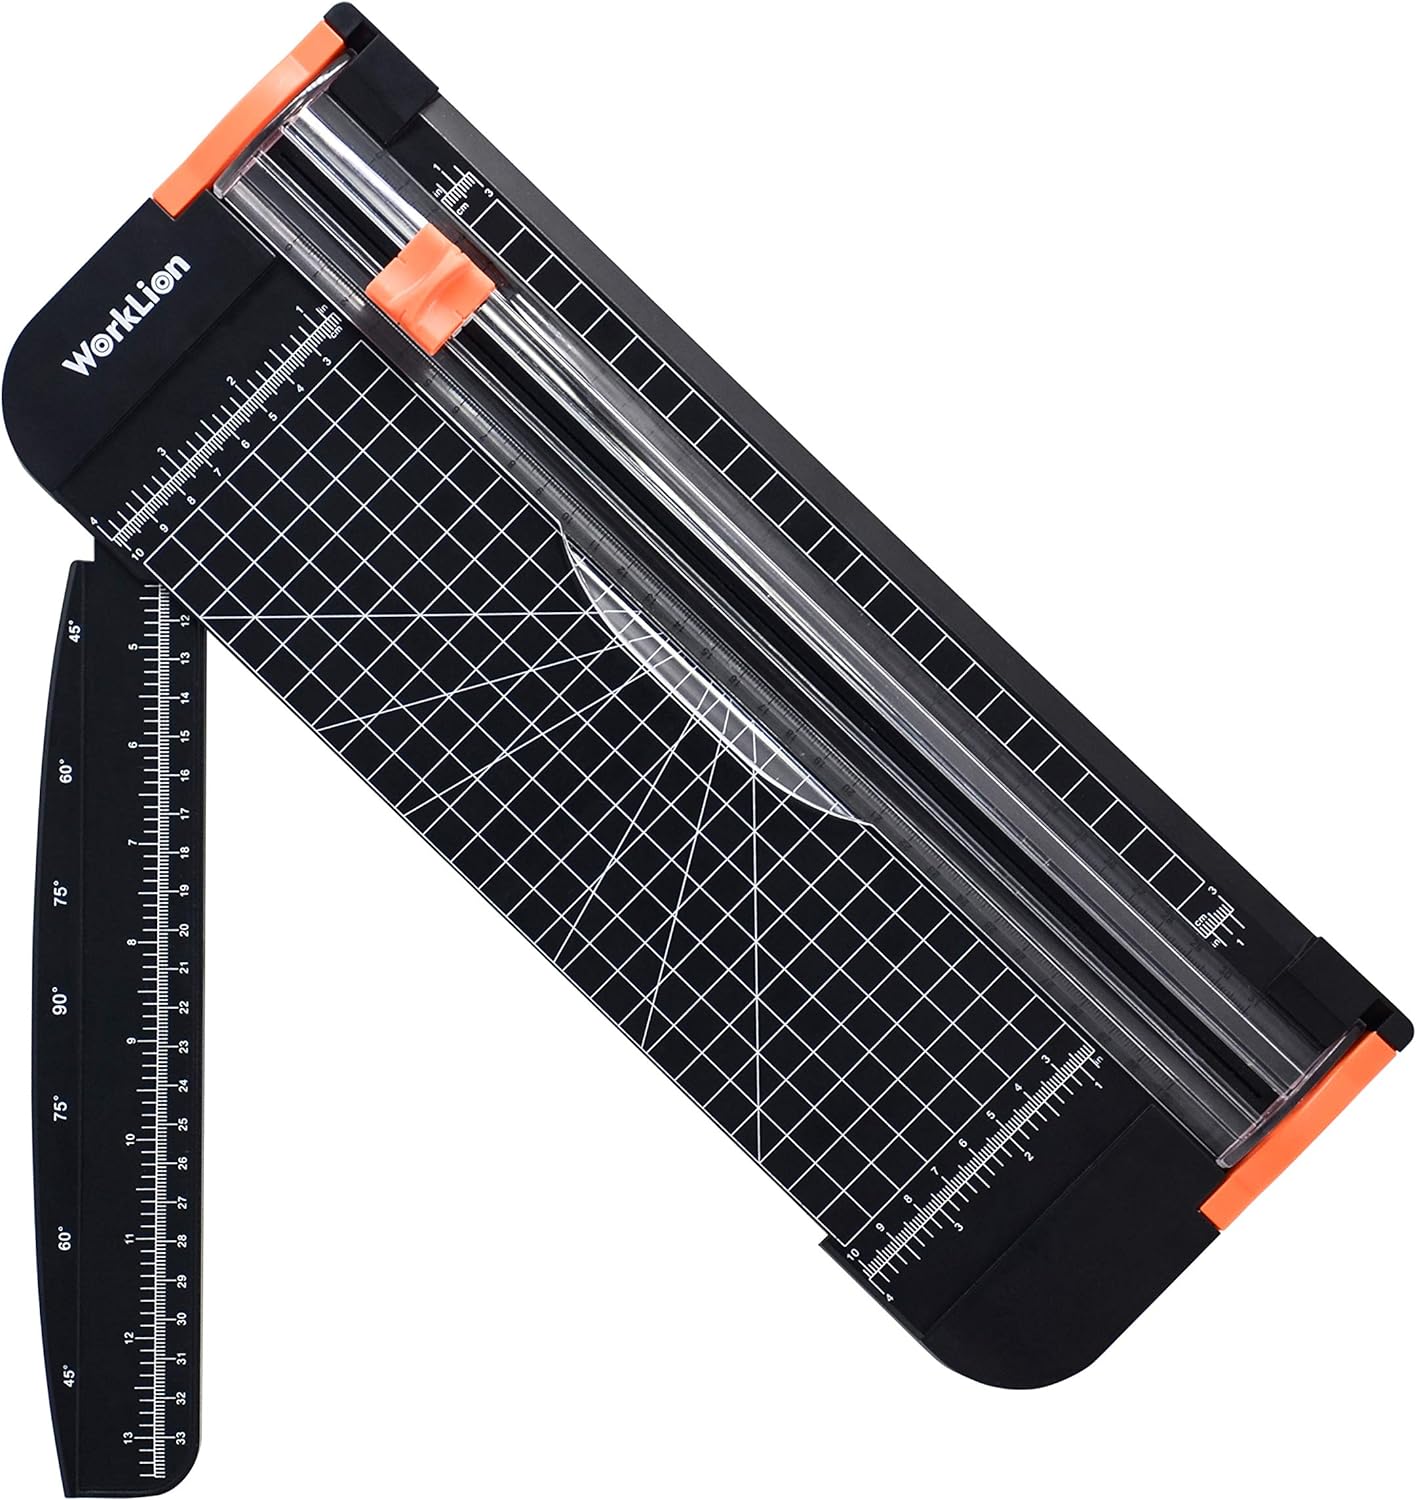 |
WORKLION Paper Cutter | Transparent guide ruler for clean, straight-line cutting. No-drag cutting action ensures smooth, accurate results. Sharp, hardened blade designed for long-lasting performance. Hidden blade mechanism activates only when pressed. |
Check Price |
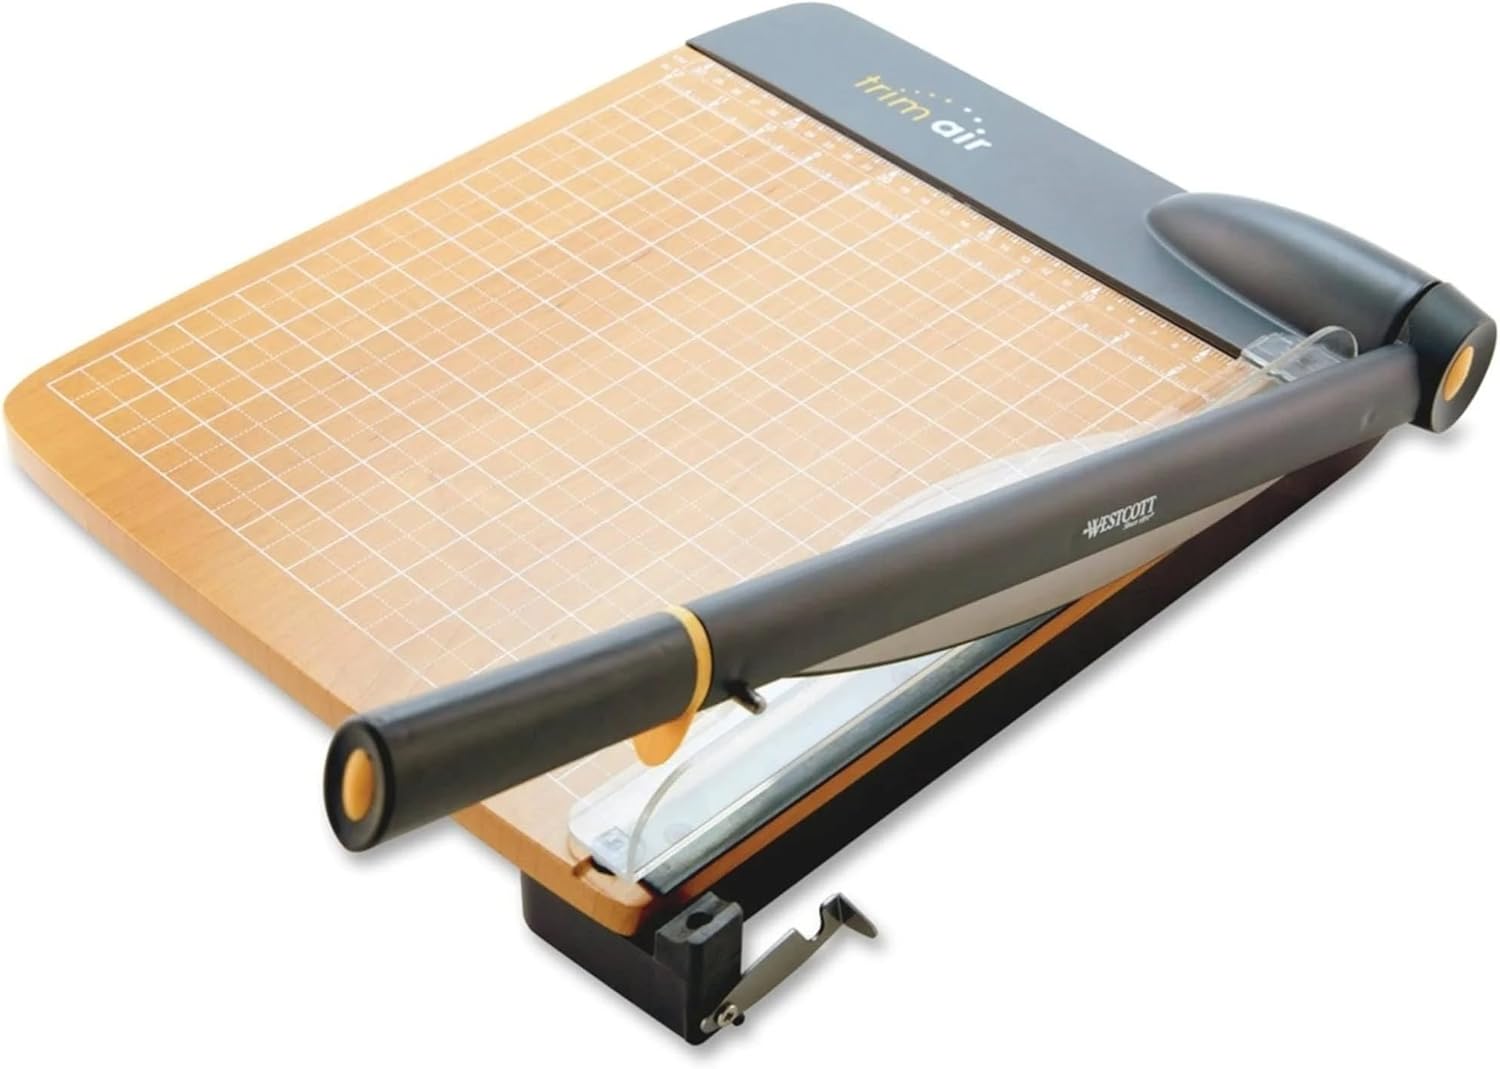 |
Westcott TrimAir Guillotine Paper Cutter | Titanium-bonded blade for premium cutting experience. Blade is 3× stronger than stainless steel for long-lasting sharpness. Soft ergonomic handle for comfortable grip. Designed for safe, fatigue-free cutting sessions. |
Check Price |
 |
Ecraft 12 x 12inch Paper Trimmer Cutter Score Board | Dual measurement system: Inches for trimming, centimeters for folding. Precision scoring and cutting for clean, accurate results. Guides every 1/16 inch for detailed alignment and spacing. Foldable design for compact, space-saving storage. Titanium blade included for durable, sharp cutting |
Check Price |
 |
CARL Professional Rotary Paper Trimmer 18 inch |
18-inch cutting length accommodates large formats. Cuts a variety of materials: mat board, cardstock, plastic sheets, paperboards. Premium carbide blade for precise, accurate cuts. Blade and rail system ensures clean, professional trimming. Calibrated metal base for enhanced stability and accuracy |
Check Price |
 |
Tim Holtz Mini Paper Cutter | Swing-style handle for smooth, controlled cutting. Extra-sharp stainless steel precision blade for clean edges. Cuts paper with straight, crisp edges every time. 3.5″ ruler with both inch and metric markings. Designed for 6.25″ cutting length and 3.5″ cut width |
Check Price |
 |
Swingline Guillotine Paper Cutter Heavy Duty | Effortless slicing through thick paper with minimal resistance. Precise alignment grid ensures straight cuts in one motion. Handles up to 10 sheets of paper at once for efficient trimming. 12″ cutting length suitable for large-format documents. Dual scale ruler with inch and centimeter markings |
Check Price |
 |
Ecraft 12″ Guillotine Paper Cutter | Laser-printed scale won’t fade over time. Magnetic paper guide ensures accurate alignment. Ergonomic handle design for smooth, effortless cutting. Blade-side finger guard protects hands during use. Sturdy steel base supports heavy use and long-term durability. |
Check Price |
Types of Paper Trimmers for Card Making
Before diving into the nitty-gritty of what to look for in a paper trimmer, it’s essential to know the different types available.
There are mainly three types of paper trimmers used for card making: guillotine trimmers, rotary trimmers, and sliding arm trimmers. Understanding these types will help you decide which one suits your needs best.
1. Guillotine Trimmers:
Guillotine trimmers are heavy-duty and often used in professional environments because of their sheer cutting power and durability.
These trimmers feature a large blade that’s swung down onto the paper, much like a guillotine. They’re ideal for cutting through thicker cardstock or multiple sheets of paper at once.
Pros:
- Clean, straight cuts
- Can handle thicker or multiple layers of cardstock
- Often has a solid base with measurement guides for accuracy
Cons:
- Bulky and less portable
- Requires more force to cut through thicker materials
2. Rotary Trimmers:
Rotary trimmers use a rotating blade to cut paper. The blade rolls along a rail, slicing through the material. These trimmers are often quieter and provide precise, clean cuts, especially for intricate designs.
Pros:
- Smooth and quiet cutting
- Precision cuts with little effort
- Ideal for intricate designs and smaller projects
Cons:
- Not ideal for thicker cardstock
- Can wear out over time with frequent use
3. Sliding Arm Trimmers:
Sliding arm trimmers feature a horizontal arm that slides along a rail to cut paper. These are great for cutting longer sheets of paper, which is a huge plus when you’re working on large card bases or scrapbook pages.
Pros:
- Excellent for longer cuts
- Less effort required when cutting through paper
- Precise and accurate
Cons:
- Can be bulky
- May not be as ideal for cutting smaller, intricate pieces
Key Features to Look for in a Paper Trimmer for Card Making
Now that you’re familiar with the types of paper trimmers, it’s time to get into the specifics. Here are the key features you should consider when choosing the right trimmer for your card-making needs:
1. Cutting Capacity:
How much paper are you planning to cut at once? If you often work with heavy cardstock or need to cut multiple sheets, you’ll want a trimmer with a high cutting capacity. Guillotine and rotary trimmers tend to excel in this area, but there are also sliding arm trimmers with larger cutting capacities.
2. Blade Quality:
The quality of the blade is crucial for clean cuts. You’ll want a blade that stays sharp and doesn’t dull too quickly. Stainless steel or carbon blades are often recommended for their durability. Some trimmers allow you to change out the blade, which is a handy feature if you’re into different cutting techniques like perforating or scoring.
3. Measurement Guides and Alignment:
Accuracy is everything when it comes to card making, so make sure the trimmer you choose has a well-marked measurement guide. Many trimmers come with measurements in both inches and centimeters, and some even feature additional guides for special cuts like diagonal lines or scoring.
4. Safety Features:
Safety should never be overlooked, especially if you have children around. Look for trimmers that have safety features like retractable blades or blade guards. Many modern trimmers come with built-in safety locks, which is a nice bonus.
5. Size and Portability:
If you’re planning to take your trimmer to craft workshops or move it around frequently, portability will be important. You might want a compact, lightweight trimmer that can easily be stored away. If you only work in one space, you might be able to go for something larger.
Step-by-Step Guide to Using Your Paper Trimmer for Card Making
Once you’ve found the perfect paper trimmer, it’s time to put it to use! Here’s a step-by-step guide on how to use your paper trimmer effectively for card making:
Step 1: Measure Your Paper
Before you start cutting, measure your paper carefully to ensure you’re cutting it to the correct size. Most trimmers come with clear measurement guides on the cutting mat, but it’s always a good idea to double-check the dimensions.
Tip: If you’re making cards, the typical card size is 5” x 7” or 4.25” x 5.5” for A2 cards, so make sure you measure twice before cutting.
Step 2: Align the Paper
Place your paper on the trimmer’s base, ensuring it’s aligned with the measurement guides. Make sure the paper is straight and secure, as any misalignment can result in uneven cuts.
Tip: For extra precision, use a small amount of double-sided tape to hold the paper in place temporarily.
Step 3: Set the Blade
Ensure the blade is properly set before making any cuts. For rotary trimmers, check that the blade is securely attached to the rail. For guillotine trimmers, ensure the blade mechanism is properly locked into place.
Step 4: Cut Your Paper
Once everything is aligned, gently pull the blade or swing the guillotine down onto the paper. If you’re using a sliding arm trimmer, guide the arm along the rail to make your cut.
Tip: Always apply a consistent amount of pressure to avoid jagged cuts, especially when working with thicker cardstock.
Step 5: Check Your Cut
After making the cut, check the edges of your paper for smoothness. If you notice any unevenness, make sure your trimmer blade is sharp or properly aligned.
Table: Key Features of Different Paper Trimmer Types
| Feature | Guillotine Trimmers | Rotary Trimmers | Sliding Arm Trimmers |
| Cutting Capacity | High (can cut multiple sheets at once) | Medium (single sheets or thin stacks) | High (great for longer cuts) |
| Blade Type | Swinging blade | Rotary blade | Sliding blade |
| Precision | Very precise, especially for straight cuts | High precision, ideal for intricate designs | High precision, great for longer cuts |
| Portability | Bulky, not very portable | Moderate portability | Large, not as portable |
| Safety Features | Blade guard or safety lock | Safety features on some models | Blade lock for safety |
Common Mistakes to Avoid When Choosing a Paper Trimmer
While choosing a paper trimmer seems straightforward, there are some common mistakes you should watch out for:
Not Considering Cutting Capacity:
If you frequently work with thicker cardstock or multiple layers, choosing a trimmer with a low cutting capacity can lead to frustration. Make sure your trimmer can handle the type of materials you plan to cut.
Ignoring Blade Quality:
A dull blade can cause ragged cuts and frustration. Be sure to select a trimmer with high-quality, durable blades that will stay sharp after multiple uses.
Overlooking Safety Features:
While paper trimmers are generally safe, you don’t want to risk accidents, especially if you’re working in a busy crafting area. Ensure that your trimmer has the appropriate safety features like blade guards or safety locks.
Choosing the Wrong Size:
If you’re crafting at home, choosing a compact trimmer may seem appealing. But if you frequently make larger cards or scrapbook pages, you’ll want a trimmer with a longer cutting base. Make sure the size of the trimmer aligns with the type of projects you usually work on.
Conclusion:
Choosing the best paper trimmer for card making can feel overwhelming at first, but it doesn’t have to be.
By considering your crafting needs, the materials you work with, and the features you require, you can easily find a paper trimmer that’s perfect for your card-making projects.
Remember, precision is key in card making, and a good paper trimmer will help you achieve those clean, crisp cuts every time.
Whether you go for a guillotine, rotary, or sliding arm trimmer, you’ll be well on your way to creating beautiful, professional-quality cards.
- There are three main types of paper trimmers: guillotine, rotary, and sliding arm.
- Always consider the cutting capacity, blade quality, and safety features before purchasing.
- Take your time to measure, align, and cut to ensure precision in your card-making projects.
If you found this guide helpful, I’d love to hear your thoughts! What paper trimmer do you use for your card-making projects? Drop a comment below or share this post with fellow crafters! Happy card making!